Honey Bran Muffins

Week Eighteen: 100% Whole Grain Breads

honey-bran-muffins

Over the course of this blog, I have eaten a lot of bread.  I mean a lot of bread.  And this from someone who has insisted for years that it isn’t dinner if there isn’t bread.  I’m not saying that this is a bad thing exactly; but I don’t necessarily feel like eating white bread all the time.  I not only try to, but enjoy eating as healthily as I can, which for me includes plenty of whole grains (one of my favorite foods is plain brown rice).  So in light of the glut of white breads around my house lately, I’m dedicating this week to whole grain breads.

If I had to pick one major issue with whole grain breads, it’s that they’re generally thought of as kind of awful – dry, dense, and (dare I say) cardboardy.  But they don’t have to be that way!  In fact, for much of human history, nearly all bread was whole grain bread.  Refined-flour (white) bread was either not invented yet, or was prohibitively expensive for all but the wealthy.  And I could be wrong, but I’m not entirely convinced that humans would develop such an intimate relationship with a food that tasted like a cardboard box.  Surely there are ways of making a whole grain bread that can rival the tastiness of a white bread.

So this is my challenge for the week: to make truly good whole grain breads.  I’m not suggesting that a whole grain bread can produce the same sort of airy crumb as a white bread (why that is exactly, I’ll get into later in the week); but that’s a bit like comparing apples to oranges.  I am suggesting – nay, insisting – that you can make whole grain breads that are just as delicious as any white bread, maybe even more flavorful in some cases.

The bread for today re-vamps a typically horrible food: the bran muffin.  When I think of a bran muffin, I imagine a pretty brown muffin that disintegrates into a mouthful of awful, powdery crumbs the instant you take a bite.  But because it’s supposed to be good for you, you choke it down anyway, possibly with some coffee just so you can swallow the mess.  It’s a crying shame, too, since bran is almost ridiculously good for you, with plenty of fiber and vitamins from here to next week.  And not only that, but bran has quite a good flavor to boot, nutty and rich.

Unfortunately, the problem with most bran muffins is actually the bran itself (I’m assuming we’re all using wheat bran here).  Unlike, say, a blueberry muffin, you can’t just add bran to a standard muffin base, and have it turn out well.  This is because bran can absorb more water than wheat flour.  By simply adding bran to a typical muffin batter, all of the liquid is soaked up, leaving the bread dry and ready to crumble at the first hint of a bite.  So in order to fix this problem, the recipe here moistens the bran before it’s added to the batter.  In addition, there’s a large amount of honey in the batter, which not only tastes delicious, but adds moisture as well as the hygroscopic (moisture-retaining) qualities of sugar.  Also boosting the moistness-factor, a healthy handful of currants is added, which absorb moisture from the batter, then slowly release it back into the bread as it sits after baking.

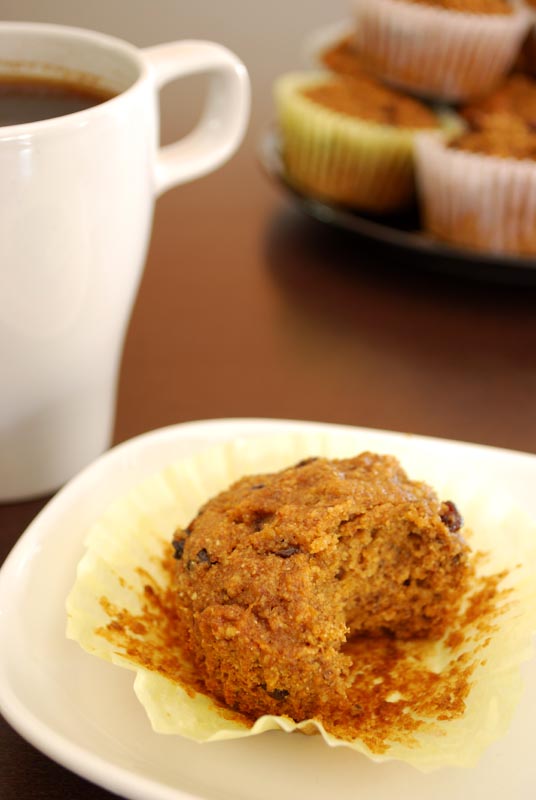
Okay, so technically speaking, this recipe should produce a better bran muffin.  But does it really?  Oh my, yes!  A day and a half after baking, they were still just as tender as when I pulled them from the oven.  The deep and nutty flavor of bran was absolutely there, but with not a hint of the sawdust that characterizes so many bran muffins.  Just sweet enough from the honey (and molasses), but, almost surprisingly, not over-sweet at all.  So before you give up completely on this much-maligned and often-abused muffin, give this recipe a try.  You might enjoy a cup of coffee along with them, (I did, as you can see) but it’ll be because it’s such a lovely breakfast pairing, not because you’ll need help washing it down!


Honey Bran Muffins
Adapted from The Joy of Cooking
Makes 24 muffins

3/4 cup old-fashioned (rolled) oats
3 ounces (about 1 2/3 cups) wheat bran
1 1/4 cup boiling water
1 cup white whole wheat flour
1 cup whole wheat flour
1/4 cup ground flaxseed
2 1/2 teaspoons baking soda
1/2 teaspoon salt
1/2 teaspoon ground cinnamon
1/4 teaspoon ground allspice
1 pinch ground cloves
3/4 cup honey
1/4 cup unsulphured molasses
6 tablespoons vegetable oil
2 tablespoons brown sugar
2 large eggs
1 1/3 cups dried currants

1.  Chop the oats finely in a food processor.  Mix with the wheat bran in a large, heatproof bowl.  Pour the boiling water over, stir to make a thick paste, and let rest for 15 minutes.  Preheat the oven to 375º F.  Grease (or line with paper cups) two 12-cup muffin tins.

2.  Whisk together the flours, flaxseed, baking soda, salt, and spices.

3.  Add the honey, molasses, oil, and sugar to the bran mixture.  Whisk in the eggs until thoroughly combined.  Stir in the currants.

4.  Add the flour mixture and fold together quickly and gently just until the dry ingredients are moistened.  The batter will be a bit thick.

5.  Divide the batter among the muffin cups.  Bake at 375º F for 16 to 18 minutes, or until done (the muffins will feel a bit firm when pressed on top).  Let cool in the pan for 2 to 3 minutes.  Remove to a rack to cool completely if not serving immediately.


Notes:
1.  If you can’t find white whole wheat flour, you can substitute all-purpose flour instead.

Posted in Quick Breads, Savory, Sweet | Leave a comment

Walnut Sage Bread


Week Seventeen: Bread with Mix-Ins

walnut-sage-bread

I absolutely love the taste of walnuts with sage.  They’re both so earthy and robust, and the combination of flavors is simply fabulous.  I know it’s more of a Fall taste, but I couldn’t pass up the opportunity to include a walnut-sage bread this week.

And not only are the walnuts and sage good enough on their own, they’re downright delicious mixed generously into a whole wheat dough.  The nuttiness of the whole wheat of course matches excellently with the walnuts; and if you chop them finely enough, it’s hard to tell where bread ends and walnut begins.

Speaking of such things, let’s talk chopping of nuts for a minute.  Normally, I prefer to chop nuts by hand; but in this case, a food processor will do the job just as well, if not better.  Nuts chopped in a food processor tend to  end up a little less evenly sized, with some left in big chunks and the rest pulverized to powder.  This is actually preferable here, since the walnut powder will sort of dissolve into the dough, while the big chunks provide a lovely contrast of texture.

Having said that, though, I did chop these by hand, because I couldn’t bring myself to wash my little food processor, and the cutting board was sitting right there.  I tried to mimic the “half chunky, half powdery” result, by really going at half of the walnuts.  Result: my hand is still a bit sore, and I wish I had just washed the silly thing instead.  But I guess it worked pretty well.

One change I might make to this bread next time is to add a little honey or brown sugar to the dough.  See, walnut skins are a little bitter, and are nearly impossible to remove.  When in such large quantities as the walnuts are here, you will taste that bitterness, though it’s not an unpleasant taste.  A little sweetness would balance it out, however; but I didn’t think of it until too late.  Caveat baker.

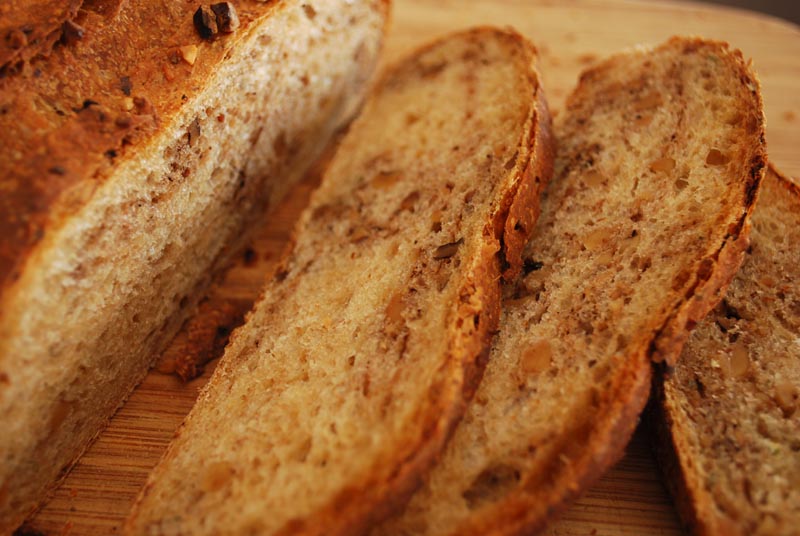
This bread comes out with a lovely, flaky crust, and a lovely, rustic crumb.  It was good to eat on its own, but I think it would be better matched with something; like in a turkey and blue cheese sandwich, or even to make a bread pudding out of (lemon-walnut-sage bread pudding, anyone?).  Or you can do what I did: simply have a slice toasted with your morning coffee.  Simple and tasty, somehow honest, it’s what these flavors are all about.


Walnut Sage Bread
Makes 1 big loaf or 2 small loaves

6 ounces whole wheat flour
10 ounces unbleached bread flour, divided
1 1/2 teaspoons instant or rapid rise yeast
1 1/2 teaspoons salt
1/2 cup hot milk (120º to 130º F)
3/4 cup hot water (120º to 130º F)
3 tablespoons olive oil
1 cup walnuts, toasted, chopped finely
2 tablespoons fresh sage, minced

1.  In the bowl of a stand mixer, whisk together all the whole wheat flour and 6 ounces of the bread flour, yeast, and salt.  Add the olive oil to the water and milk.  Add to the flour mixture in the mixer bowl.  Using the dough hook, mix at low speed until the dough comes together, scraping the bowl if necessary.  Increase the speed to medium-low and knead until smooth and elastic, about 7 to 8 minutes, adding the reserved bread flour as needed to achieve the proper consistency.  The dough should be a little slack, but not too wet.

2.  Turn the dough out onto a lightly floured surface.  Knead a few times, until a skin forms around the outside of the dough.   Pull the skin taught around the dough, forming a round ball.  Transfer the dough to a lightly oiled bowl, turning to coat all sides with the oil.  Cover tightly with plastic wrap, and let rise in a warm place until doubled in size, about 1 hour.

3.  Punch the dough down and turn out onto a lightly floured surface.  Roll the dough out flat, about 12 to 15 inches across, or as big as the dough will allow.  Sprinkle the dough evenly with the walnuts and sage.

4.  Fold the edges of the dough over the nuts, so that they meet in the middle.  Press to seal.  Knead until the nuts are evenly incorporated throughout the dough, sprinkling with additional flour as needed to keep from sticking (see note 2 below).  Form the dough into an oval-shaped loaf, and transfer to a greased or parchment-lined baking sheet.  Dust with additional flour, cover loosely with plastic wrap, and let rest in a warm place until nearly doubled in size, about 45 minutes.

5.  Preheat the oven to 425º F.  Uncover the dough, and quickly slash 3 times with a sharp serrated knife.  If the dough deflates, let it rest another 15 to 20 minutes before baking.  Spray or sprinkle the dough with water, then bake at 425º F for 30 minutes, or until golden brown and baked through.  Transfer to a rack to cool thoroughly.


Notes:
1.  If using active-dry yeast, mix the water and milk together, at a temperature of 105º to 115º F.  Sprinkle one packet (2 1/4 teaspoons) of active-dry yeast over, stirring to dissolve.  Let stand until foamy, about 5 minutes.  Proceed as directed.

2.  Kneading the walnuts into the dough (step 4) can get a little messy, as the nuts break through the dough and scatter across the counter.  It does provide a more even distribution of nuts throughout the dough, but if you prefer a quicker and neater method, try rolling the nuts into the dough instead.  Starting at one edge, roll the dough up jelly-roll fashion, pressing the seam to seal.  Transfer to the prepared baking sheet, tucking the ends under.  Proceed as directed.

Posted in Savory, Yeast Breads | Leave a comment

Chocolate Chip Zucchini Bread

Week Seventeen: Bread with Mix-Ins

chocolate-zucchini-bread

I don’t know if this bread sounds strange to anyone, but the internet knows that zucchini and chocolate are best friends.  At least, when you introduce them properly, they are.  (Please don’t start dipping your zucchini in chocolate.)

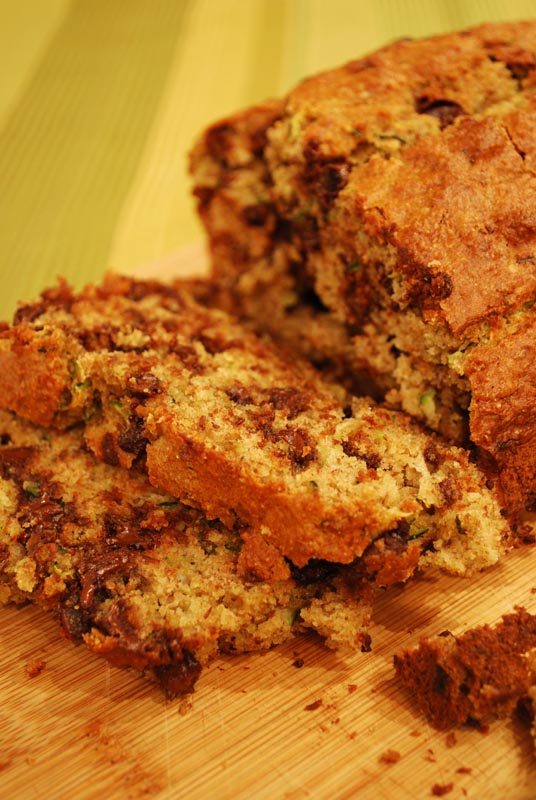
No, I’m talking about pairing them with olive oil and cinnamon to break the ice, and folding them gently into the most tender quick bread this side of a pancake.  I’m not joking about the tenderness here; it was actually difficult to cut, since the bread just kept crumbling into bits under the knife.  I had to cut slices at least a half-inch thick just to keep them intact!  But I guess I was fine with all that; everyone knows that crumbs on the cutting board are fair game and don’t count (even though they may be as big as a cookie).

So maybe these would have been better baked in muffin tins, which I’ll have to remember for next time.  Either way, though, you’ve never had a better-tasting way to eat your vegetables.  I know, the sugar pretty much cancels it out; but I’ve tried to healthy it up as much as possible otherwise.

First, I’ve limited the sugar as much as is palatable (for me).  You could limit it further; but come on, it’s a quick bread!  Live a little.  Olive oil, the only added fat, is quite good for you, and is also in limited quantities here.  The applesauce is there to replace what would otherwise be added oil, or milk, and provides extra moisture.  I’ve substituted half the flour with whole wheat flour, and added wheat germ and ground flaxseed for an extra nutritional boost.  Cinnamon also brings some strong health benefits to the party; and the allspice just tastes really good.  And, of course, the nutritional powers of dark chocolate have been touted for years now.

Don’t think I’m saying this quick bread is a health food, per se.  But if you’re craving a sweet, or want to serve a little something special, you can hardly find a treat as packed with nutrients and as incredibly delicious as this.  I still like my plain yogurt for breakfast every morning, but I just might have to have a piece of this on the side.  Until it disappears, that is!


Chocolate Chip Zucchini Bread
Makes one 10×5 inch loaf

2 small (or 1 large) zucchini, grated
3/4 cup applesauce
1/4 cup olive oil
2 eggs
1/2 cup sugar
1/4 cup brown sugar, packed
1 cup whole wheat flour (about 4 ounces)
1 cup unbleached all-purpose flour (about 4 1/2 ounces)
1/2 cup wheat germ
1/4 cup ground flaxseed
3/4 teaspoon baking soda
1/2 teaspoon baking powder
1/2 teaspoon salt
1/2 teaspoon ground cinnamon
1/4 teaspoon allspice
1 cup semisweet chocolate chips (about 6 ounces)

1.  Preheat the oven to 350º F.  Coarsely grate the zucchini, with the peel still on, into a medium bowl.  Mix in the applesauce, olive oil, eggs, and sugars, stirring with a fork to blend until well combined.

2.  Whisk together the flours, wheat germ, flaxseed, baking soda, baking powder, salt, cinnamon, and allspice.  Add the zucchini mixture, and stir until the dry ingredients are just moistened.  Fold in the chocolate chips, taking care not to overmix the batter.

3.  Scrape batter into an oiled or buttered 10 x 5 inch loaf pan.  Bake at 350º F for 1 hour, or until fully baked (a wooden skewer or toothpick comes out almost clean, or the top feels slightly firm when pressed).  Cool in pan 10 minutes, then turn out onto a wire rack to cool completely.


Notes:
1.  This bread makes really excellent muffins.  Bake for 35 to 40 minutes instead, and check to make sure they don’t get overdone.

2.  If you have white whole wheat flour, you can use that to replace both flours (2 cups, or 8 1/2 ounces).  You’ll get the lightness of an all white flour bread, but the added nutrition of a whole wheat bread.

Posted in Quick Breads, Sweet | Leave a comment

Ground Corn and Pine Nut Bread

Week Seventeen: Breads with Mix-Ins

corn-and-pine-nut-bread

Some of you eagle-eyed readers may have noticed the name of this recipe: “Ground Corn Bread”.  I know, it’s a little awkward, but there’s no other way to put it, really; it’s not cornbread.  But what it is exactly depends on where you’re from.  This bread is made from coarsely ground corn, not cornmeal, which (though it is also ground-up corn) has a finer texture.  Now what do you know that’s made of corn, but is coarser than cornmeal?

That’s right, I’m talking about grits.  Or polenta.  Whatever, it’s the same thing.  No, really!  I’m serious!  It’s all ground-up corn of various levels of coarseness; it’s just that grits are usually white, and polenta is usually yellow.  For a really in-depth discussion, I’ll direct your attention to the transcript of the “True Grits” episode of Good Eats (please do note the “hominy” discussion by Mr. Alton Brown himself at the bottom of the page).

(Oh, and for those of you out there who shun grits as homely and tasteless, but find polenta to be a cosmopolitan delight, I’d like to remind you that corn didn’t even show up in Italy until the mid 1600’s.  Before that, “polenta” was made from barley or buckwheat.  The corn, of course, came from the New World.  Where we eat grits.  So there.)

But whatever you call it, most ground corn doesn’t make a terribly good bread on its own; this is why you mix in flour for the best cornbread.  Cornmeal takes longer to absorb water than wheat flour does, mainly because of the larger size of the particles (when you look really, really closely at it).  This bread solves that problem by cooking the grits/polenta first, resulting in a smoother, less (ahem) gritty texture.

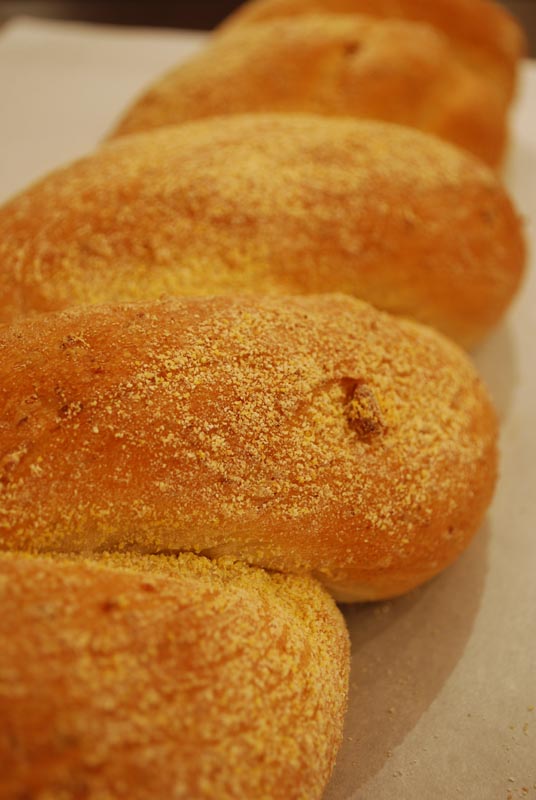
There’s no denying that corn and pine nuts are together a thing of beauty; but when you cook the pine nuts to a roasty brown in a little butter before mixing into a grits/polenta-rich dough, the two become elevated to extraordinary.  This bread twists them together in a nutty, browned-butter singularity, which bakes into a delightfully toothsome loaf.

Pine nuts and ground corn
Rolled into one single loaf
The bread tastes so nice


Ground Corn and Pine Nut Bread
Makes 1 large loaf

1/2 cup ground corn (grits or polenta)
1 1/4 cups water, divided
1 1/2 teaspoons instant yeast (or 1 package active-dry yeast, see note 1 below)
1 teaspoon honey
16 ounces unbleached bread flour, divided
2 tablespoons butter
1/4 cup pine nuts
1 1/2 teaspoons salt
Cornmeal, for dusting 

1.  Mix the grits or polenta with 1 cup of the water in a small saucepan.  Bring to a boil, stirring continuously.  Reduce the heat to a simmer and cook for 2 to 3 minutes more, stirring occasionally to prevent scorching.  Set aside to cool for 10 minutes, or until no longer steaming (120º to 130º F if using instant yeast, see note 1 below).

2.  In the bowl of a stand mixer, whisk the yeast with 8 ounces of the flour (about 2 cups).  Add the warm grits/polenta, the remaining 1/4 cup water, and the honey.  Using the dough hook, mix at low speed until a rough dough forms, about 2 minutes or so, scraping the bowl as needed.  Increase the speed to medium and knead for about 5 minutes, or until smooth and elastic.  (Dough may look lumpy, depending on the consistency of your grits or polenta.)

3.  Cover the bowl tightly with plastic wrap, and let rise in a warm place for about 2 to 3 hours, or until it has doubled in size.

4.  Melt the butter over medium heat in a small saucepan.  Add the pine nuts and cook for a minute or two, or until just beginning to turn golden.  Remove from heat, and let sit until cooled.  If they begin to turn dark brown, remove to a bowl immediately to cool.

5.  Reserving 3 or so ounces (about 3/4 cup) of flour, add the reminder and the salt to the grits/polenta dough.  Mix with the dough hook on low speed until a rough dough forms.  Slowly add the pine nuts and melted butter, scraping the bowl if necessary.  Increase the speed to medium-low and knead until smooth and elastic, about 10 minutes.  Add the reserved flour as needed to achieve a dough that clears the sides of the bowl, but is not too firm.

6.  Remove to a lightly-oiled bowl, cover, and let rise in a warm place until doubled in size, about 50 to 60 minutes.  Grease or line a baking sheet with parchment paper.  Dust the pan with cornmeal.

7.  Punch down the dough and turn it out onto a surface lightly dusted with flour.  Divide the dough into two equal pieces.  Roll each out to a rope about 16 inches long.  Twist the two ropes together to form one long loaf, pinching the ends to seal.  Transfer gently to the prepared baking sheet, and sprinkle more cornmeal over the top.  Cover loosely with plastic wrap, and let rise again for 45 minutes.

8.  Preheat the oven to 400º F.  When heated, bake the loaf for about 30 to 35 minutes, or until golden brown.  Cool on a wire rack before serving.


Notes:
1.  If using active-dry yeast, let the grits/polenta mixture cool to 105º to 115º F.  Mix the remaining water, honey, and yeast together before mixing in with the flour.

2.  Whatever you decide to call it, please use stone-ground grits or polenta.  It’s not difficult to find, and the flavor is incomparable (long story short, the flavorful hull and germ of the corn are left intact by stone-grinding; this is not the case with metal grinders).

Posted in Savory, Yeast Breads | Leave a comment

Olive and Red Onion Bread (Elioti)

Week Seventeen: Bread with Mix-Ins

olive-onion-bread-2

Surely there’s no more classically Greek combination than the pairing of black olives and red onions.  Add feta (now with its own PDO!) and mint, and you might as well start shouting, “Opa!”

Okay, there’s no feta in this bread.  But there is plenty of black olive, red onion, and mint.  And man, would it ever be delicious served with a tangy block of feta!  Or, for a truly decadent treat, you could form the loaf into a baguette shape, and broil slices topped with feta until it goes all melty and golden-brown.  Opa!

This bread, called Elioti in Greek, is a Cypriot bread once served primarily at Lent, but now is made year-round.  It’s traditionally filled with onion (usually red), olives of any sort, and an herb, either cilantro, mint, or a combination.  Parsley is sometimes used, and would be a perfect substitute if you cannot abide cilantro.  Personally, I like the depth of flavor that a mixture of herbs provides, so I’ve written the recipe here with mint and cilantro.  But if you’re a purist and insist on keeping your herbs solo, I assure you, it will be just as delicious.  Any kind of olive will do, but Kalamata are ideal for this purpose.  I’ve chosen to go with cured olives, mainly because I had them in the fridge, but also because I absolutely love their massive pop of flavor.  Just be sure to chop them finely, so they distribute more evenly throughout the dough.

I’ve found that in breadmaking, the less flour you can add to a dough, the better, since moisture in the dough means more steam (and rising) in the oven heat.  It also makes for a more tender, moister bread, generally speaking.  But with this bread, you don’t have to worry too much about that.  See, in baking, the raw red onion breaks down within the bread, releasing additional moisture.  That doesn’t exactly mean you can turn an overly-stiff dough into a work of culinary genius, but it does go a long way towards rescuing a not-quite-perfect dough.  And if you can get the balance just right (it’s not too hard), you end up with a chewy, crusty bread that’s as tender inside as any coffee cake.

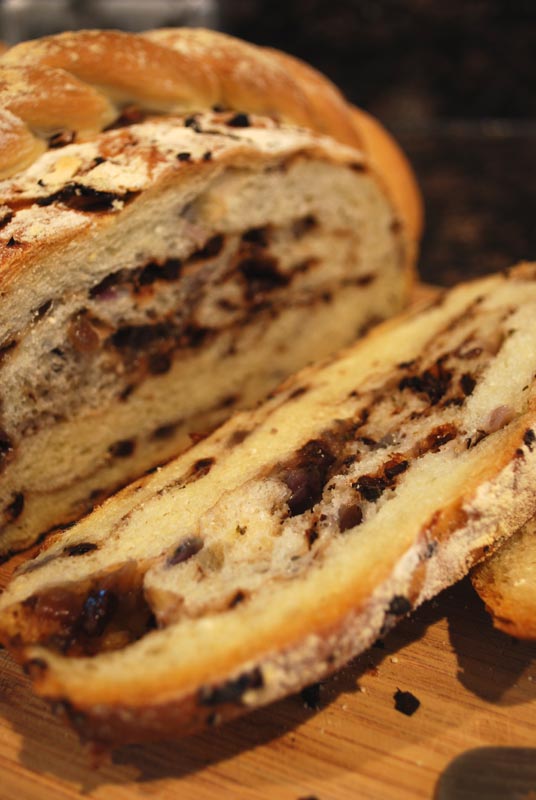
Speaking of coffee cake, slices of this bread actually do look a bit like a piece of cinnamon-swirled coffee cake, because of all the color from the red onion and black olive.  But one bite will have your palate in a heaven of savory flavors, salty with the bits of olive, and almost sweet from the onions just about to caramelize.  The herbs lend a fragrant, earthy tone that sets off the other ingredients wonderfully, not to mention the fruity olive oil flavor from the dough itself.  Tender, crusty, olive-y, minty… there’s just one word for it all: Opa!

olive-onion-bread 


Olive and Red Onion Bread (Elioti)
Makes 1 large loaf or 2 small loaves

22 ounces unbleached bread flour (a scant 5 cups), divided
1 1/2 teaspoons salt
1 heaped tablespoon instant or rapid-rise yeast (or 2 packages active-dry, see note 2 below)
1 1/2 cups hot water (120º to 130º F)
5 tablespoons olive oil
3 ounces oil-cured olives (about 1/2 cup), finely minced
1 small (or 1/2 large) red onion, finely diced
2 tablespoons chopped fresh mint (or 1 tablespoon dry)
2 tablespoons chopped fresh cilantro

1.  Reserve 2 to 3 ounces (about 1/2 cup) of the flour; set aside.  In the bowl of a stand mixer, whisk together the remaining flour, salt, and yeast.  Add the hot water and olive oil.  Using the dough hook, mix at low speed until a shaggy dough forms.  Increase the speed to medium and knead until smooth and elastic, about 8 minutes.  Add the reserved flour as needed to achieve the proper consistency; the dough should clear the sides of the bowl.

2.  Transfer the dough to a lightly-oiled bowl, turning to coat all sides.  Cover with plastic wrap and let rise in a warm place until doubled in size, about 1 hour.

3.  Turn the dough out onto a lightly-floured surface and punch down.  Cut off a corner of the dough (about 1/8 of the volume), pat into an elongated shape, cover, and set aside.

4.  Lightly roll the remainder of the dough into a large round, as big as the dough will easily stretch.  Sprinkle the onion, olives, and herbs evenly over the surface.  Bring the sides of the round into the middle, and knead until the ingredients are evenly incorporated.  (The dough may tear, spilling the mix-ins.  Just keep kneading until it’s all mostly in the dough, adding a little extra flour as needed to keep the dough from sticking.)  Shape the dough into an oval loaf, and transfer to a baking sheet lined with parchment paper.

5.  Divide the reserved dough lengthwise into two equal pieces.  Roll each out into a long rope, about 16 inches long, or as long as the dough will easily stretch.  Twist the two together into a single rope.  Cut the twisted rope in half, and pinch the ends to seal.  Drape each piece decoratively over the loaf on the baking sheet, tucking the ends under the loaf to keep in place.  Cover with lightly oiled plastic wrap and let rise in a warm place for 45 minutes, or until almost doubled in size.

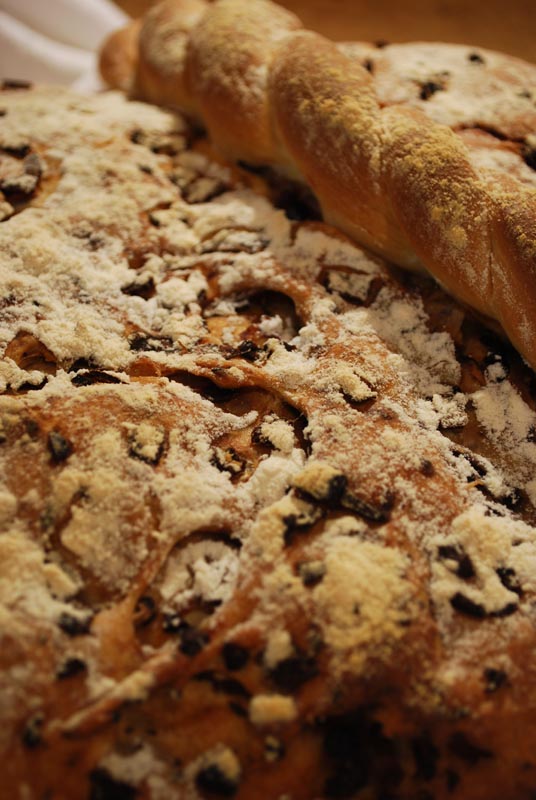
6.  Preheat the oven to 400º F.  Dust flour over the loaf, and bake for 40 to 45 minutes, or until golden brown, and baked through.  Transfer to a wire rack to cool.


Notes:
1.  Be sure to use oil-cured olives, as their robust flavor makes the bread.  If you simply can’t find them, plain black olives will work instead; just increase the amount to 1 cup.  If you absolutely must use jarred or canned, a 4 ounce container should do it.

2.  If using active-dry yeast, heat the water to 105º to 115º F.  Stir the yeast into half of the water, and let sit until foamy, about 5 to 10 minutes.  Add the remaining water and olive oil, and mix with the flour and salt as directed.

3.  The decorative twists (step 5) certainly aren’t mandatory, but they do lend a certain celebratory air to the loaf.  Plus, I think they’re kind of cute.

Posted in Savory, Yeast Breads | Leave a comment

Balthazar Chocolate Bread

Week Seventeen: Bread With Mix-Ins

chocolate-bread

Here’s my quandary with this bread: the recipe is from Balthazar Bakery in NYC, and I have really been trying to avoid any sort of copyright infringement with the recipes.  I usually adapt them somehow, and always credit my source.  If a recipe is changed significantly, I call it my own.

But you see, this bread is so good as written that I just can’t bring myself to change anything about it.  Besides, this recipe has appeared in myriad other sources, from Martha Stewart (on TV and in print) to Scharffen Berger’s website, and can be found on about 1000 blogs out there.  I know, I know, 1000 wrongs don’t make a right; but I hope the gods will turn a blind eye on my humble infraction.  It’s only done in the spirit of sharing a wonderful and widely-available thing with those who happen to stumble across my blog.  (And I did tweak one or two things; is okay maybe?)

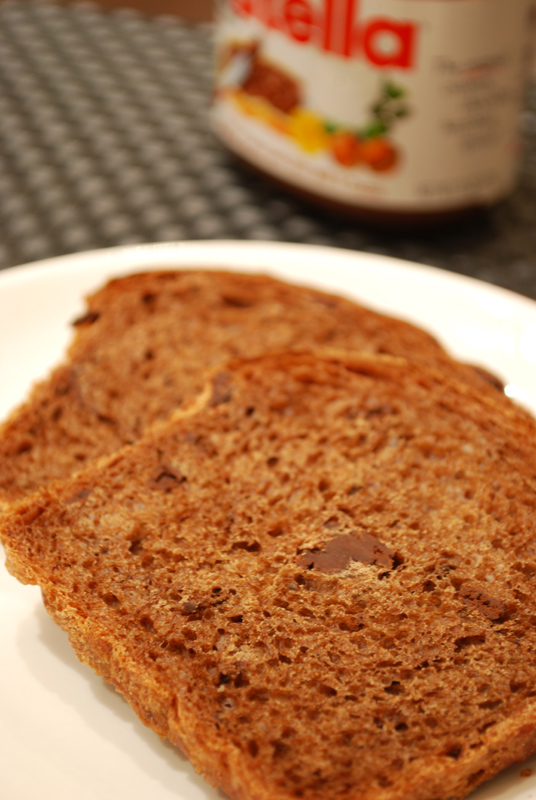
I’m sure most of you have had a chocolate-filled croissant, a chocolate-chip muffin, bread with Nutella, or any other variation on the “chocolate + bread = delicious” equation.  But this bread absolutely takes the cake (no pun intended).  There’s just a bit of cocoa powder mixed in with the flour to highlight and deepen the chocolate flavor, most of which comes from the kneaded-in bits of good dark chocolate.

It’s the best of all possible worlds: yeast bread with good chocolate mixed in.  But technically speaking, it’s a complex and carefully constructed bread.  First, there’s a sourdough starter used, which lends depth of flavor and long-keeping qualities (aided also by the sugar used).  Second, there’s an autolyse period; which, if you recall from an earlier discussion, is one of the easiest ways to improve the texture of any bread.  It also has a long, slow rise, giving the yeast plenty of time to create all those lovely acids that bring such depth of flavor to the dough.  And on top of all that, you knead chocolate into the dough!  Heaven!

The flavor of the chocolate you use is fairly prominent, so be sure to use a good one – that means no Hershey’s Bars, please.  And the darker the chocolate (or, the higher the cocoa percentage on the label), the more bitter and rich it will taste.  I used a 72% chocolate (my usual baking chocolate; I love dark!), but in retrospect, I think a 65% or 60% (or semisweet) might have been a little better.  Unlike in cookies or cakes or some mousses, there isn’t much sugar here to temper the bitterness of a dark chocolate.  And after baking for 45 minutes, the chocolate will take on a deeper, more “roasted” flavor.  Of course, if you prefer milk chocolate, that would work just as well.  There’s no wrong answer when it comes to good chocolate.

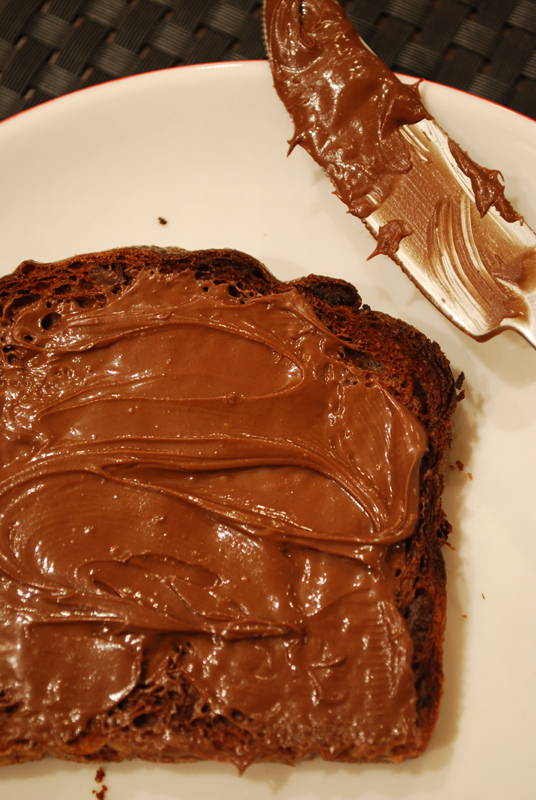
One last note: as decandent and over-the-top it was to eat a slice of this bread with Nutella, it was fantastically delicious dipped into a good olive oil.  And if you’ve never tried quality olive oil and chocolate together, my friend, you just haven’t lived.  I could eat a bucket of that stuff.

chocolate-bread-wiv-nutella


Balthazar Chocolate Bread
From Balthazar Bakery
Makes 2 loaves

For starter:
1/4 teaspoon active-dry yeast
1 cup warm water
5 ounces (about 1 cup + 2 tablespoons) all-purpose flour

For dough:
12 ounces (about 2 1/2 cups) bread flour
1 cup warm water
1/4 cup cocoa powder
1/3 cup sugar, plus extra for coating pans
1 1/2 teaspoons instant or rapid-rise yeast (or 2 teaspoons active-dry yeast)
1/4 cup bread starter
1 1/4 teaspoons salt
2 tablespoons unsalted butter, at room temperature
3 ounces bittersweet chocolate, in 1/4″ pieces (about 3/4 cup)
1 egg yolk
1 tablespoon cream
2 tablespoons demerara or turbinado sugar

1.  To make starter, dissolve the yeast in the warm water.  Stir in the flour until completely incorporated.  Lover loosely and let sit 4 to 6 hours at room temperature.  After this time, store in an airtight container in the refrigerator.

2.  To make the dough, combine the yeast, flour, cocoa, sugar, water, and starter in the bowl of a stand mixer.  Using the dough hook, mix on low speed until a rough dough forms.  Cover the bowl, leaving it on the mixer, and let rest for 15 minutes.

3.  Uncover the bowl.  Add the salt and butter in pieces, mixing at medium-low speed, until the dough develops a sheen, about 10 minutes.

4.  Add the chocolate, and continue mixing on medium speed until incorporated, about 2 minutes.

5.  Transfer the dough to a lightly-oiled bowl, turning to coat all sides.  Cover with plastic wrap and let rise until doubled in size, about 2 1/2 to 3 hours.

6.  Turn out the dough onto a lightly-floured surface, and fold in thirds, like a letter.  Cover with plastic wrap and let rest 20 minutes.  Meanwhile, butter two 7x3x2-inch loaf pans, and dust with additional sugar, knocking out extra.

7.  Divide dough in half, and divide each half into 4 equal sections.  Round each portion into a smooth ball, and place 4 into each prepared loaf pan, smooth side up.  Cover with plastic wrap, and let rise until doubled again, about 1 1/2 to 2 hours.

8.  Preheat oven to 350º F.  Position rack in the center of the oven.  Beat the egg yolk with the cream to make an egg wash.  When the loaves have fully risen, gently brush them with the egg wash, taking care not to deflate them.  Sprinkle the demerara sugar over the top.

9.  Bake loaves at 350º F for 40 to 45 minutes, or until fully baked.  Turn out onto a wire rack to cool completely.  Chocolate bread will keep, in an airtight container, up to 3 days, and will freeze well for about 1 month.


Notes:
1.  If you’re lucky enough to have one, you of course can feel free to use any bread starter you may have on hand, instead of making a new one.  If you make the starter listed here, and would like to keep it going, feed it once a week with 1/4 cup flour and 1/4 cup water.  Whisk it all together until smooth, let stand at room temperature until bubbly, and refrigerate again.

2.  I highly recommend using a quality chocolate in this recipe, as the flavor is very evident.  The chocolate should melt into the bread a little, which will not happen with chocolate chips.

3.  Demerara or turbinado sugar can be often found in the baking aisle, where it can also be called “Sugar in the Raw”.  Brown sugar is not a good substitute, as it will simply melt away in the heat of the oven.

Posted in Sweet, Yeast Breads | 1 Comment

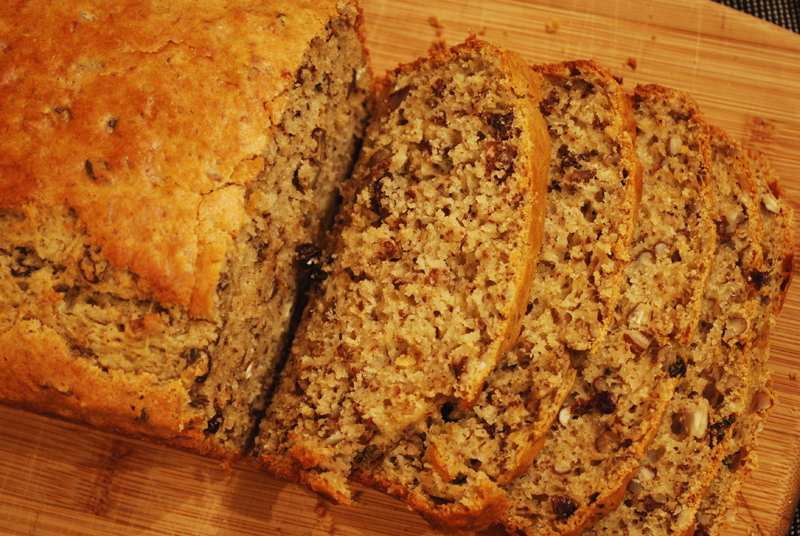
Pecan Currant Bread

Week Seventeen: Bread With Mix-Ins

pecan-currant-bread

About a month ago, I featured a week of filled breads; that is, breads that have a clear distinction between “bread” and “what-have-you” (e.g., a calzone).  This week, as a sort of complementary theme to that one, I’ll be making bread with things mixed in; that is, breads that have the “what-have-you” added to the dough in such a way that it’s hard to draw a clear boundary between the two.

Quick breads (like banana bread and similar tea breads) are classic examples of this idea.  Plus or minus a few ingredients, and they’re all basically the same base, just flavored with whatever.  Take the banana out of the banana bread, and what exactly do you have left?  I don’t know either, but I know I like it better with the banana left in.

I certainly can’t ignore quick breads, since they fit so perfectly into the theme, but I’m actually going to focus more on yeasted breads this week.  I think people tend to shy away from anything that could possibly complicate a yeast bread (isn’t it already hard enough?); but hopefully, I’ll prove that wrong by the end of the week.  Adding a little extra note of flavor is not only easy, but it can take any mundane loaf from boring to brilliant with just a few extra minutes time.

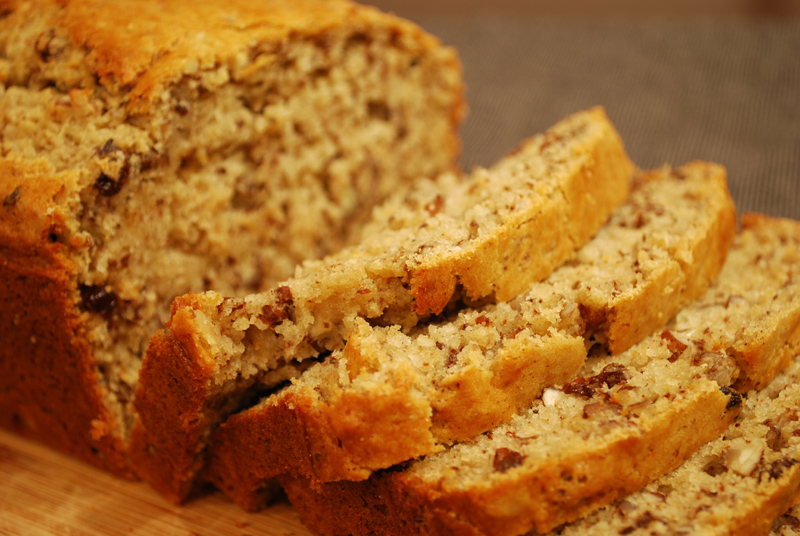
The bread for today isn’t really anything groundbreaking, but it’s such a great combination of flavors that I had to include it.  I’ve made it many times to great success ever since I ripped it out of Gourmet Magazine (by the way, the pecan deviled ham salad on the same page is fabulous), and have finally nailed down my modifications, as seen below.  Pecans and currants aren’t generally seen running in the same circles, which is a shame, since they complement each other so well.  I enhance the jamminess of the currants with a nice, long bath in a bit of brandy, which takes on a currant-y flavor itself, infusing it more fully into the batter.

I was going to say something here about the flavor of the pecans, but words fail me.  I am reminded of a time when I was working at Commander’s Palace, one of the finer restaurants in New Orleans, when a Canadian guest (unfamiliar with the pecan) asked me what the difference between pecans and walnuts was.  And I was thoroughly stumped!  I mean, I know the difference, and can pick out which is which in a blind taste test; but to describe the difference?  I found it absolutely impossible.  Maybe walnuts taste earthier?  Pecans are a bit brighter?  Neither sounds exactly right.  So I am useless to describe it, but take that pecan flavor that you know, and pair it with a slight richness of fruit.  Now wrap it all up in a lightly-spiced, fluffy, moist bread, and you’re halfway there.

The other half is the smell.  As the pecans toast in the oven, you can smell the oils beginning to come out a bit, mingling with the aroma of the brandy and currants sitting on the counter.  And when you combine it all with the peppery-spice smell of ginger and allspice, and catch wafts of the milk and sugar caramelizing from inside the hot oven….  Well, it just doesn’t get better than that! 

pecan-currant-bread-2 


Pecan Currant Bread
Adapted from Gourmet Magazine
Makes 1 loaf

1/2 cup dried currants
2 tablespoons brandy
2 cups + 2 tablespoons unbleached all-purpose flour
1/2 cup packed light brown sugar
2 tablespoons granulated sugar
2 teaspoons baking powder
1/2 teaspoon baking soda
1/2 teaspoon salt
1/2 teaspoon ground allspice
1/4 teaspoon ground ginger
2 cups pecans, toasted, chopped (see note 2 below)
1 cup milk
1/4 cup vegetable oil
1/4 cup applesauce
2 large eggs
1 teaspoon pure vanilla extract

 1.  Pour the brandy over the currants.  Let stand, covered, for at least 30 minutes, and up to 48 hours.

2.  Preheat oven to 325° F.  Butter a 9 x 5 inch loaf pan, and set aside.

3.  Whisk together dry ingredients (flour through ginger) and pecans in a large bowl. In a measuring cup, whisk together remaining wet ingredients until combined well.

4.  Add wet ingredients and currants with brandy to the dry ingredients.  Stir quickly until just combined (some lumps are okay).  Transfer batter to the prepared loaf pan, and bake until golden brown and baked through, about 1 to 1 1/4 hours.

5.  Cool in the pan on a rack for about 10 minutes, then turn out onto a rack and cool thoroughly before slicing and serving.


Notes:
1.  This bread is delicious warm, but will keep in an airtight container at room temperature for a few days.  If not eating within that time frame, freeze and thaw later in a warm oven.

2.  To toast the pecans, spread on a baking sheet and bake at 350° F for about 8 minutes, stirring occasionally so the ones on the outside don’t burn.  Let cool, then chop.  I prefer to chop nuts by hand, since I like the more even and chunky texture, but a food processor will do the job just as well.

Posted in Quick Breads, Sweet | 2 Comments

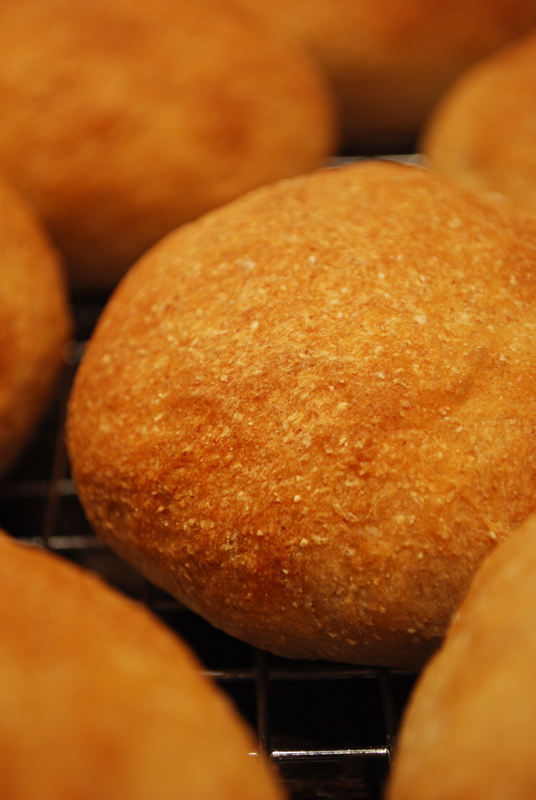
Whole Wheat Sandwich Rolls

Week Sixteen: Sandwich Rolls

whole-wheat-rolls

We all know we’re supposed to eat more whole grains.  It’s so much better for you, and I don’t think you’ll find any nutritional expert anywhere advising people to not eat more whole grains.  So if you’re like me, you’ll go up to the deli counter, and dutifully order your sandwich on the “wheat” option.  But seriously?  What does that even mean?  Isn’t all the bread “wheat” bread?

Obviously, the deli vernacular refers to bread made from whole wheat flour as “wheat bread”.  But the dirty little secret of whole wheat bread is that it’s rarely made completely of whole wheat flour.  See, whole wheat flour alone won’t make a very good bread.  For various technical reasons, a 100% whole wheat bread is often dense, dry, and not very good.  But if you mix whole wheat flour with white flour, though, you will get the best of both worlds: the fluffiness of white flour with the healthiness of whole wheat flour.  Complicating the issue, FDA regulations state that any bread made with at least 51% whole wheat flour may be labeled as “whole wheat bread”.

Apparently, what this all means is that bread manufacturers can churn out any old sub-par loaf, made with at least 51% whole wheat flour, slap a “whole grain” label on it, and the health-conscious will eat it up.  Literally.  But does it taste good?  Rarely.  I have to admit, I often regret getting a whole wheat bread on my deli sandwich.  Crumbly and tasteless, I appease my tastebuds with the knowledge that I’m eating a bit more healthily.  I think most people in America operate under these assumptions: that you must either eat healthily, or eat food with flavor.

But I am here to assert that these two options are not mutually exclusive.  Healthy can equal delicious!  This bread below is such a chimera of good nutrition and tastiness.  I served sandwiches using this bread to a couple of white-bread-devotees, and to great success.  And oh yes, I quizzed them thoroughly about the quality of the bread.  Was it good?  Would you have ordered that bread at a deli?  Did it overpower the sandwich fillings?  Would you enjoy it again?  (Yes, yes, no, and yes.  Win.)

So here is a darn good recipe for a (mostly) whole wheat sandwich roll, one that provides a better nutritional profile than a standard white roll, but tastes much better than the typical wheat roll.  The next time you need to please a crowd of diverse tastes, consider giving this a try – it’s the best of both worlds!


 Whole Wheat Sandwich Rolls
Makes 18

1 cup hot water (125º to 130º F)
1 cup hot milk (125º to 130º F)
4 1/2 teaspoons instant yeast (2 packets)
1/4 cup light brown sugar
2 tablespoons granulated sugar
1 tablespoon salt
12 ounces (about 3 cups) unbleached all-purpose flour
14 ounces (about 3 cups) whole wheat flour

1.  In the bowl of a stand mixer, whisk together the flours, and set aside a handful (about 1 or 2 ounces).  Add the salt, sugars, and yeast to the flour in the mixer bowl, and whisk to combine.  Add the hot water and milk.  Using the dough hook, mix at low speed until combined. Increase the speed to medium and knead until smooth and elastic, and the dough has pulled away from the sides of the bowl, about 8 minutes.

2.  Turn the dough out onto a lightly floured surface and knead two or three times, until the dough forms a skin around the outside. Place the dough in a lightly oiled bowl, smooth side up, and cover with plastic wrap. Place the bowl in a warm spot and let rise until doubled in size, 1 1/2 to 2 hours.

3.  Punch the dough down and turn it out onto a floured surface. Divide the dough into two equal pieces and roll each into a rope 24 inches long. Cut each rope into 12 even pieces. Roll each piece into a round ball and place seam-side down on a greased or parchment-lined baking sheet, about two inches apart.  Let rest for 5 to 10 minutes.

4.  Press each roll into a flat disc, about 4 inches across.  Spray the rolls with water and let rise again for about 40 minutes, or until nearly doubled in size.

5.  Preheat the oven to 400° F.   When the oven is fully heated, bake the rolls for 18 to 20 minutes, or until well-browned and baked through. Transfer to a rack to cool completely.  Slice horizontally and fill as desired.


Notes:
1.   If you like, you can replace both kinds of flour with white whole wheat flour, for a completely 100% whole-grain bread, with the necessary lightness.

Posted in Savory, Yeast Breads | Leave a comment

Pretzel Rolls

Week Sixteen: Sandwich Rolls

pretzel-rolls

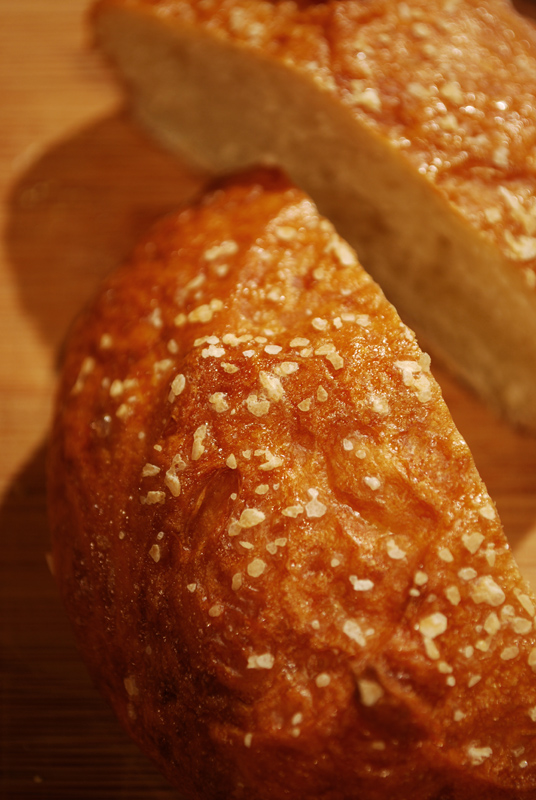
Pretzels are nothing new to Americans; legend has it that pretzels were brought over on the Mayflower.  Nor are pretzels new to Europe; the oft-repeated tale says that a Northern Italian monk created them as gifts for hard-praying children in 610 A.D. (though sources for that one are dubious).  Though I can’t very well speak for Europeans, there is a new development in the American world of pretzels: the pretzel roll.  I have a hunch that they’ve been doing this in Germany for ages, but the pretzel roll is only recently starting to pop up on deli and bar menus all across the U.S.A.  And not a moment too soon, I say!

Have you ever had a pretzel roll sandwich?  They’re so good!  The rolls have that characteristic chewy pretzel crust, that lovely coarse salt on top, but are bready enough to stand in for the ubiquitous and often boring white roll.  There’s really not much that can beat a black forest ham and gruyère sandwich when it’s on a pretzel roll, slathered with a good spicy brown mustard.  Unless, of course, it’s the same roll, cradling instead some lovely Parma ham, with smoked gouda and caramelized onions.  I could eat those all day long.

While the pretzel roll is becoming more common, it isn’t quite yet what I’d call “readily available”.  This, of course, means that if you’re jonesing for that singular, somehow almost metallic (in a good way) flavor, with the hearty breadiness underneath, you’re going to have to make your own.  But luckily, I’ve found this recipe for your enjoyment (and mine).  It’s remarkably fast, considering how well they turn out.  So, okay, it’s not exactly a quick bread per se; but, only 1 hour rising time, seriously?  That’s awesome!  And they’re so good!  Try these for your next [insert sporting event here] party, set out a bar of sandwich fixings, and wait for the compliments to roll in.

(No pun intended.)


Pretzel Rolls
Adapted from Bon Appétit Magazine
Makes 8

For dough:
14 ounces bread flour, divided (about 3 cups plus 2 tablespoons)
2 1/4 teaspoons instant or quick-rising yeast (1 envelope)
1 teaspoon salt
1 teaspoon sugar
1 cup hot water (125°F to 130°F)
2 tablespoons hot milk
(125°F to 130°F)

For boiling solution:
8 cups water
1/4 cup baking soda
2 tablespoons sugar

For finishing:
1 egg white, beaten with 1 tablespoon water to make an egg wash
Cornmeal
Coarse salt (e.g. pretzel or kosher salt)

1.  In the bowl of a stand mixer, whisk together 12 ounces of the bread flour (about 2 3/4 cups), yeast, salt, and sugar.  Add the hot liquids.   Using the dough hook, mix at low speed until a dough forms, about 1 to 2 minutes.  Increase the speed to medium-low and knead until dough is smooth and elastic, about 8 minutes.  Add the reserved flour as needed to achieve a slightly-firm consistency (the dough should clear the sides of the bowl, but still be a little loose).

2.  Transfer the dough to a lightly-floured surface, knead two or three times to form a skin around the outside, and form into a round ball, tightening the skin around the dough.  Place the dough seam-side down in a lightly-oiled bowl, turning to coat all sides.  Cover tightly with plastic wrap, and let rise in a warm place for 35 minutes.

3.  Flour a baking sheet, or line with parchment paper.  Transfer the dough to a lightly-floured surface.  Punch down, and knead briefly until smooth.  Divide the dough into 8 equal pieces.  Covering the ones not being used, form each piece into a round ball, and place seam-side down on the prepared tray.  Using a sharp serrated knife, cut a shallow “X” into the top of each roll.  Cover with a damp kitchen towel (not terry cloth), and let rise until nearly doubled in size, about 20 minutes.

4.  Preheat the oven to 375°F.  Lightly oil a second baking sheet, or line with parchment.  Dust liberally with cornmeal, and set aside.  Bring the 8 cups of water to boil in a large pot.  Add the baking soda and sugar slowly (the water will bubble up massively when you do this).

5.  Add each roll to the boiling mixture.  Cook for 30 seconds, then gently flip over.  Cook the second side for 30 seconds.  Remove the dough with a strainer or slotted spoon, draining a bit before transferring to the cornmeal-covered baking sheet, “X” side facing up.  Repeat with remaining dough.

6.  Let dough cool slightly before brushing each piece with the egg wash.  Dust with coarse or kosher salt liberally, or to taste.  Bake at 375°F for 25 minutes, or until well-browned.  Remove to a rack to cool.  Pretzel rolls are best served warm and fresh.  If not serving within some hours, wrap well and freeze after they have cooled completely.  Reheat in a 350°F oven until thawed.  They do not keep well in plastic at room temperature.


Notes:
1.  If using active-dry yeast instead, increase amount to 2 3/4 teaspoons.  Bring the water and milk to 105° to 115° F.  Dissolve the sugar in the water, add the yeast, and let stand until foamy, about 5 minutes.  Proceed as directed.

2.  You can, of course, add any flavorings you like to the dough.  A little ground mustard would be nice, as would dill, caraway, or fennel.

3.  In step 5, you can certainly cook as many pieces of dough as can fit in your pan; but I found it easiest to time properly by just cooking one or two at a time.

4.  These rolls can be shaped either as described here, or by rolling into ropes instead.  With the ropes, you can form traditional loose pretzel knots, or tie a tighter granny knot, which will form a pretty and more decorative roll.  Other than shaping, the recipe is followed exactly as written (though loose pretzels will be baked sooner, in about 18 minutes).

Posted in Savory, Yeast Breads | 1 Comment

Kaiser Rolls

Week Sixteen: Sandwich Rolls

kaiser-sammich

I don’t think you can find a deli in this country that doesn’t have a kaiser roll in it somewhere (unless they’ve just run out).  Kaiser rolls and sandwiches go together like milk and cookies.  And, thinking about it, I don’t know that I’ve ever seen a kaiser roll that wasn’t destined to become a sandwich, or already part of one.  Have you ever seen kaiser rolls served as dinner rolls?  Me neither; that’s what I’m saying!

Named for Kaiser Franz Joseph I, emperor of Austria from 1848 to 1916, the kaiser roll is a crisp-crusted bread with just enough butter or shortening to prevent toughness while shaping, and just enough sweetness to be noticeable.  It’s a pretty lean dough for such a good roll, as opposed to a rich dough that has eggs, milk, and/or extra butter, like many other kinds of rolls.  This lean characteristic contributes to its somewhat unique flavor (for a sandwich roll, anyway), as does the poppy seed topping, and the use of a starter.

The yeast in the starter (if you remember from this discussion) gives off lactic and acetic acid, both of which are important dough conditioners and contribute greatly to flavor improvement.  The more of these acids there are, the better your bread will be.  So if you have time to let the starter sit overnight, you should; but if you don’t, the bread can be made in less time.  Or, if you have a sourdough starter, you can probably use that instead.  Me, I let the starter ferment for about 2 hours, at which time it hadn’t fully risen, so I added a half-cup of my (miraculously still alive!) sourdough starter to the dough, just to give everything a little boost.

As for shaping these, you can form them by hand, by rolling the dough into flat discs, and folding the edge into the middle, like this guy did.  Or you can simply cut an “X” into the top with a knife, or press an “X” into the dough with your bench scraper.  (Just don’t press too hard, like I did.  Then you will have lovely flower-shaped rolls that have little in common with the shape you were going for, but are still very tasty.)  There are companies that make kaiser roll cutters, but seriously?  Who needs that?

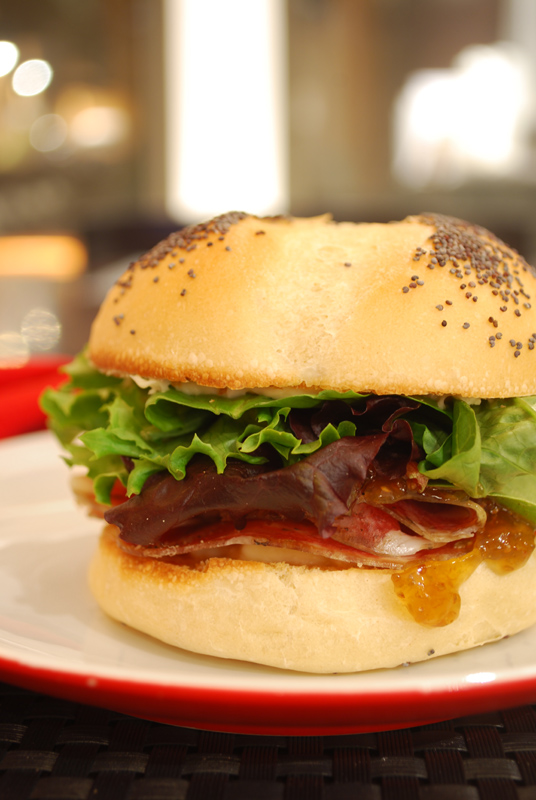
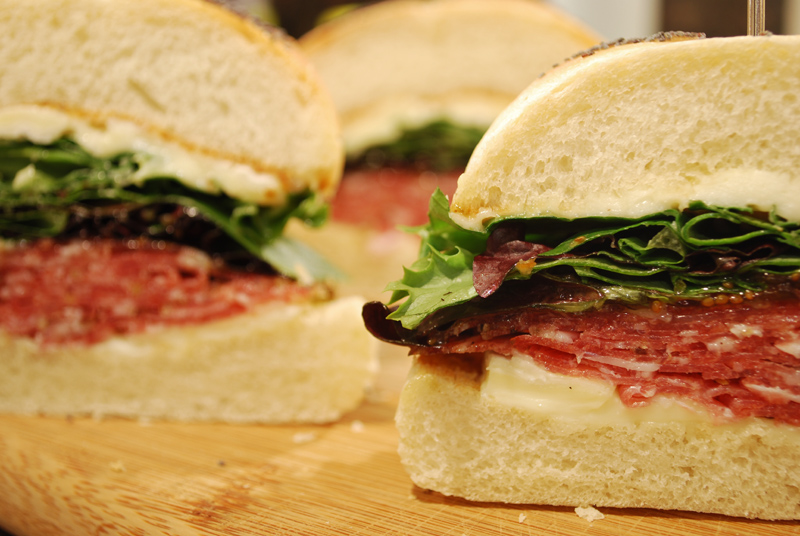
For serving, you can’t really beat a corned beef on kaiser roll; but in Austria and Germany, they’re often seen at breakfast, served with sliced cold meat, various cheeses, and marmalade.  And now, all I can think about is serving up a dinner of prosciutto and sopressata spicy fennel salami sandwiches, with thick slices of runny brie, and a good fig jam, all capped off with that lovely poppy-seed crust on top.  Delicious!

kaiser-sammich-3

it tasted even better than it looks


Kaiser Rolls
Adapted from Bo Friberg
Makes 20

For starter:
1 1/2 teaspoons active-dry yeast
1/2 teaspoon sugar
3/4 cup warm water (105º to 115º F)
8 ounces bread flour

For dough:
1 1/2 cups warm water (105º to 115º F)
1 tablespoon active-dry yeast
2 tablespoons honey
2 tablespoons unsalted butter, at room temperature, cut into pieces
1/2 cup sourdough starter (optional)
20 ounces bread flour (about 4 1/2 cups)
Poppy seeds

1.  To make the starter, dissolve the sugar in the water, in the bowl of a stand mixer.  Sprinkle the yeast over and stir to combine.  Add all the bread flour, and mix with the dough hook at low speed for about 10 minutes, or until the dough has developed a smooth consistency.  Cover and let rise in a warm place until it begins to bubble and fall, about 3 hours (see note 1 below).  You can leave it in the mixer bowl if you like.

2.  To make the dough, add the honey to the warm water and stir until dissolved.  Add the yeast, and stir to combine.  Add this mixture to the starter in the mixer bowl, along with the salt, sourdough starter, and pieces of butter.  Reserve a handful or two of the bread flour, and add the remainder to the mixture.

3.  Knead at low speed for 1 or 2 minutes with the dough hook, or until combined.  Increase the speed to medium-low, adding the reserved flour as needed to make a dough that is smooth and elastic, about 10 to 15 minutes.  Scrape the dough hook down if the dough starts to climb up.


4.  Transfer the dough to a lightly-oiled bowl, turning to coat all sides with oil.  Cover with plastic wrap and let rise in a warm place for 30 minutes.

5.  Punch the dough down to remove all air, cover, and let rise again for 30 minutes.

6.  Turn the dough out onto a work surface (you may or may not need to flour it).  Divide the dough into two equal pieces, and form the pieces into even ropes.  Cut each rope into 10 equal pieces.

7.  Form the pieces into round rolls on an unfloured surface, trying to have only one seam or wrinkle in the skin of the dough.  Place the dough seam-side down on a baking sheet lined with baking paper, about 2 to 3 inches apart.  Spray or brush the tops gently with water, then dust with poppy seeds.

8.  If you have a kaiser roll cutter, now’s the time to use it; but if you don’t, a knife or bench scraper will do just as well.  Press the kaiser roll cutter into the tops of the rolls firmly enough to mark and flatten the dough, but not far enough to cut into the dough.  If you have a bench scraper, you can press an “X” into the top.  If using a knife, cut an “X” into the top surface.  Cover loosely with plastic wrap, and set in a warm place to rise until nearly doubled in size, about 45 minutes.

8.  Preheat the oven to 425º F.  Spray or sprinkle the rolls with water, and immediately place into the hot oven.  Bake for 10 minutes, opening the door every 2 minutes or so to spray again with water.  Reduce the temperature to 400º F, spray one last time, and bake for another 10 minutes, or until golden brown on top and baked through.  Remove to a rack to cool.  Slice horizontally and fill as desired.


Notes:
1. If you have time to let the starter sit overnight, decrease the amount of yeast to 1 teaspoon, and use cool or room temperature water (instead of warm).  Mix as directed, and let it sit about 8 hours at room temperature.

Posted in Savory, Yeast Breads | 1 Comment