Week Thirteen: Filled Breads
What is it about bread that makes us want to wrap it around things, to cut and fill it, to stuff it with any and everything imaginable? Why do we serve bread as a side, and not as the main dish? Certainly, nutrition plays a part; man cannot live on bread alone, and all that. But personally, I think we mostly do it because it just tastes so darn good. A thoughtfully-crafted sandwich is a thing of beauty, and is far more than the sum of its parts (BLT, anyone?).
But this week, I’m offering up some filled breads. These are breads that can stand alone on a dinner plate, no longer relegated to the wicker confines of a bread basket. Add a quick salad on the side, and you can call it a day. I’ve taken care to choose recipes that are legitimately filled and baked, not just recipes that have things kneaded or stirred into the dough, or baked before slicing and filling. And it wasn’t terribly easy, I have to say! What I’ve ended up with are breads that run the gamut, as far as types of filling, flavor combinations, cooking methods, and origins. These breads will take you from appetizer to dessert, focusing mostly on entrée-able recipes.
I’m kicking things off this week with a classic: the calzone. In order to make a good calzone (or pizza), you need to start with a good crust. You can use the prettiest mushrooms, the spiciest pepperoni, or the creamiest mozzarella in the world, and it’ll still taste like cardboard if you put it on one of those pre-made crusts you see at the grocery store, hanging in their plastic cells like so many condemned men. (Or, god forbid, the crust that comes in a refrigerated vacuum-packed cardboard tube. Have you seen the ingredient list on those things?)
No, for a proper calzone, you need a good dough. You can buy some very nice doughs from many gourmet groceries, or even from your favorite pizza joint if you ask nicely. (I have heard a rumor that Domino’s dough makes a darn good pizza, when treated properly; but I am unable to verify or deny such a rumor.) But if you have the time, you should definitely make your own dough. I think it’s more fun, and it certainly tastes better than most anything you can have delivered.
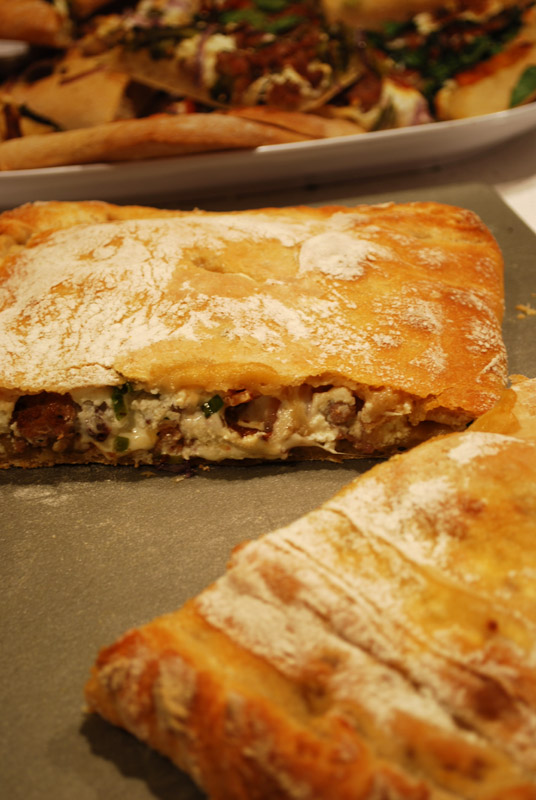
This dough does take a while to make, but it could hardly be easier. It’s one of those wet-dough, very hands-off recipes (assuming you have a mixer) that needs time and love, more than handling. Easily, the most time-consuming part of this recipe is preparing any filings. And speaking of fillings, we did this one up right. We filled our calzone with turkey sausage, crumbled bacon, scallions, red onions, mozzarella, ricotta, and goat cheese. So delicious!
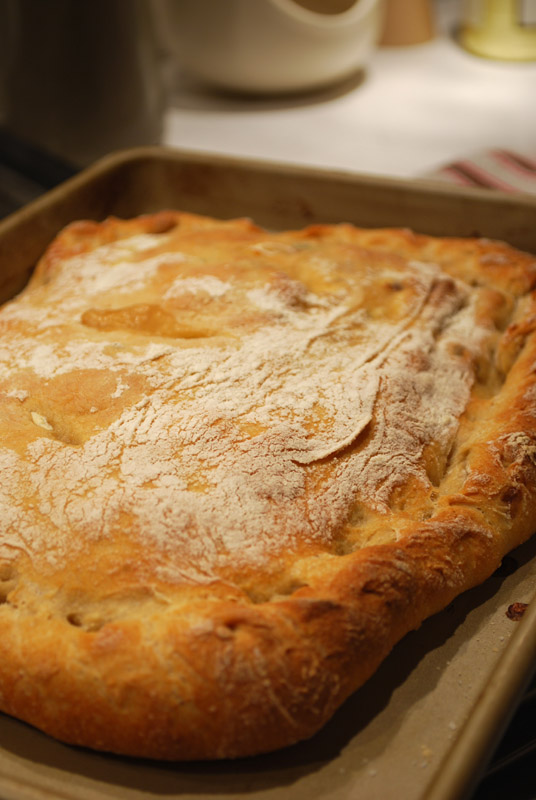
If you prefer, you can of course make pizza with this dough instead; but this dough will easily stretch thin, which I like a little better in such an application. Thick crust is one thing on a pizza, but when you’re essentially eating two pieces in one go, I like mine a little thinner. This bread cooks up crusty and chewy, brown on the outside, but still soft and moist in the middle of the calzone (or pizza), like a proper crust should. And the flavor from the sourdough starter just sets everything off perfectly, with a hint of tanginess.
One interesting thing I’ve learned about homemade pizza crust lately is that you should always use all-purpose flour. True, pizza restaurants often use the higher-protein bread flour, but their ovens are far hotter (up to 1200° F!) than a typical home oven. Without getting too technical on you, our home ovens just aren’t hot enough to cook the thin bread before the gluten becomes tough, when bread flour is used. All-purpose flour, with its lower protein level, makes for a properly chewy texture, while not toughening too much. Interesting!
Sourdough Calzones
Makes 4
1 1/2 cups warm water (105°F to 115°F)
1 envelope instant (rapid-rise) yeast (2 1/4 teaspoons)
2 tablespoons olive oil
1 1/2 teaspoons salt
8 ounces (about 2 cups) white whole wheat flour
9 ounces (about 2 cups + 2 tablespoons) all purpose flour, divided, plus extra for rolling out dough
1 cup sourdough starter (see note 1 below)
1. Pour 1 1/2 cups warm water into bowl of a stand mixer. Mix the flours together. Add 14 ounces (3 3/4 cups) of the flour mixture, and combine with the dough hook until all the flour is moistened and you have a shaggy dough. Turn the mixer off, and without removing the dough hook, cover the bowl loosely with plastic wrap. Let the dough rest for 15 to 20 minutes.
2. Remove the plastic wrap, and add the yeast, oil, salt, remaining 3 ounces flour, and starter. Mix on the lowest speed until all ingredients are combined. If the dough looks very wet, add more flour by tablespoons only as needed. Once desired consistency has been reached, continue mixing until dough has been kneaded for a total of 5 to 6 minutes. Increase mixer speed to medium-low speed, and knead for 1 minute. Turn dough out into a large lightly-oiled bowl. Cover with plastic wrap. Let rise in a warm place for 1 hour.
3. After 1 hour, remove plastic wrap. Slide a large spatula under one side of the dough, and gently fold it over the center. Do the same for the opposite side (imagine you’re folding a letter into thirds). Then, turn the bowl 90º, and fold the dough in half over itself (as though you’re folding the letter in half). Cover bowl with plastic wrap, and let rise until doubled, about another 45 minutes or so.
4. Position 1 rack in top third and 1 rack in bottom third of oven and preheat to 500°F. Dust 2 large baking sheets with flour.
5. Scrape dough out of bowl onto a well-floured surface. Divide dough into 4 sections, covering the pieces not being used. Depending on the consistency of your dough, you may or may not be able to roll these crusts out. If you can, form dough into balls, and roll each out on lightly floured surface to a 9 inch circle. If your dough is too loose and sticky to roll, simply press and stretch each piece into a rough 9 inch circle. Either way is fine. Carefully transfer dough rounds onto prepared baking sheets.
6. Spread desired toppings over half of each round, leaving 3/4-inch border. Fold plain dough halves over filling, forming half circles. Fold and pinch edges of dough firmly together to seal. Pierce tops in a few places with a small knife, to release steam.
7. Bake calzones 15 minutes, or until well-browned. Let cool slightly before cutting and serving.
Notes:
1. For the sourdough starter, I used this recipe. But if you have one of your own already, absolutely use that. Just be sure to adjust the amount of flour you add, depending on the moisture level of your starter (mine was very liquidy).
2. You can obviously use whatever toppings you like, but just make sure things such as bacon, sausage, etc. are fully cooked.


