Po-Boy Bread

Week Sixteen: Sandwich Rolls

 po-boy-bread

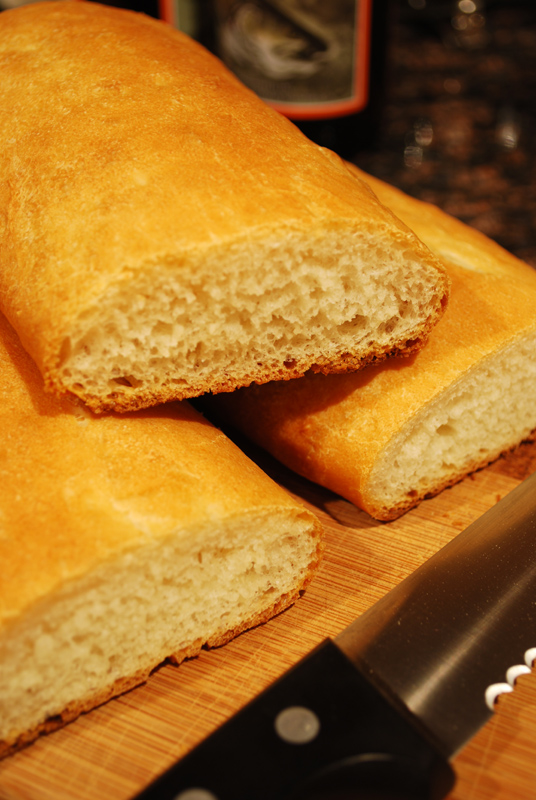
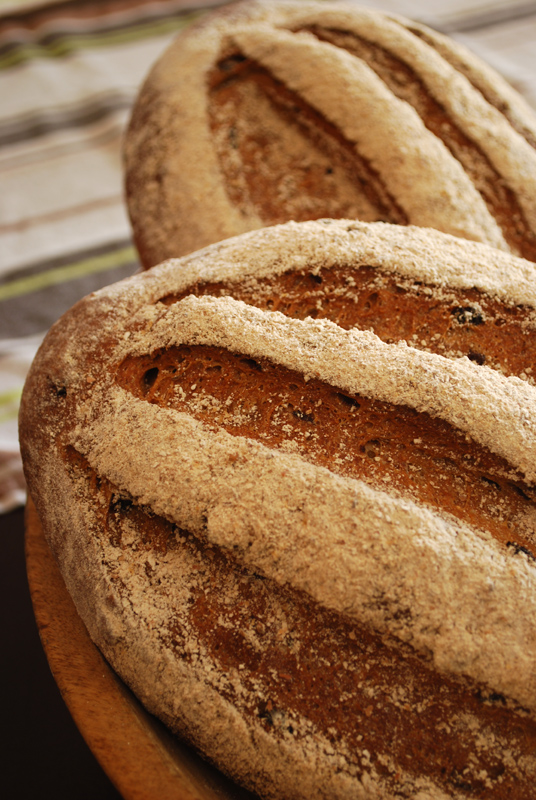
I thought there would be no more appropriate bread for today, April 15.  But, just so we’re all on the same page here, this recipe does not produce authentic New Orleans style po-boy French bread.  It does, however, produce a totally decent loaf of bread with a similar flavor.  So if you’re having a po-boy party, and your guests have never even heard of a po-boy, you can safely use this recipe.  However, if you’re like me, and have been searching in vain for that elusive and ethereal texture that is both crumbly and chewy, I’m afraid you’ll have to keep looking.  I know I will be, and I promise I’ll let you know as soon as I find the secret!  (Maybe I should do a week of attempts at this, hmmm.)

Getting on with it: I know po-boy bread isn’t exactly a “sandwich roll” as such.  But it is a very specific type of bread for a very specific type of sandwich; in fact, the po-boy sandwich is characterized mainly by the bread, rather than any filling.  If you’re not familiar with a po-boy, you may be familiar with its cousins: the sub, the hoagie, the grinder, and so on.  But among all these sandwiches, the po-boy is unique, because of the bread.

Oh, you can make a fried shrimp sandwich on any old French bread; but don’t you dare call it a po-boy unless your bread has that crackling, crumbling crust, that gossamer interior, that just-so flavor.  The loaves are generally about 3 feet long, and bigger in diameter than a baguette.  Did I mention that the crust gorgeously disintegrates into sawdust the instant you pick your sandwich up?  But somehow, even through roast beef gravy soaking into every pore, the bread remains chewy.  How does it do that?!

And, of course, she sighs heavily, you simply cannot find that kind of bread outside of Southeast Louisiana.  The internet is full of displaced New Orleanians desperate to find the secret, some claiming success (or nearly so), most coming close, but always slightly off.  You see, in New Orleans, there’s no reason to make such bread yourself.  You just grab you a loaf while you’re making groceries, and never give it a second thought.  It’s as ubiquitous and as natural as drinking water.  It’s only after you move away that you come to the sudden and horrifying realization that no one else eats bread like that.  Not anywhere.  Ever.  So not only are you left high and dry, not even your momma and ‘dem know how to make the stuff when you call for help.

Breadless, we are left to our own devices and recipes.  Leidenheimer and Gambino’s (local purveyors of such bread) aren’t about to share their secrets, the stubborn things; but some details have emerged through the murkiness of the internet, and “I heard it from a guy who had a friend who worked there” stories.  Word is Leidenheimer uses a sponge.  Many swear that it’s the water in the area.  Some point to the constant and sauna-like humidity.  But whatever it is, it’s darn near impossible to find the exact secret.  This is usually the point where the discouraged cook throws up his hands, says, “You just can’t make it like they do back home,” and plans his next trip to New Orleans to gorge himself at Parasol’s, Liuzza’s, or Short Stop.

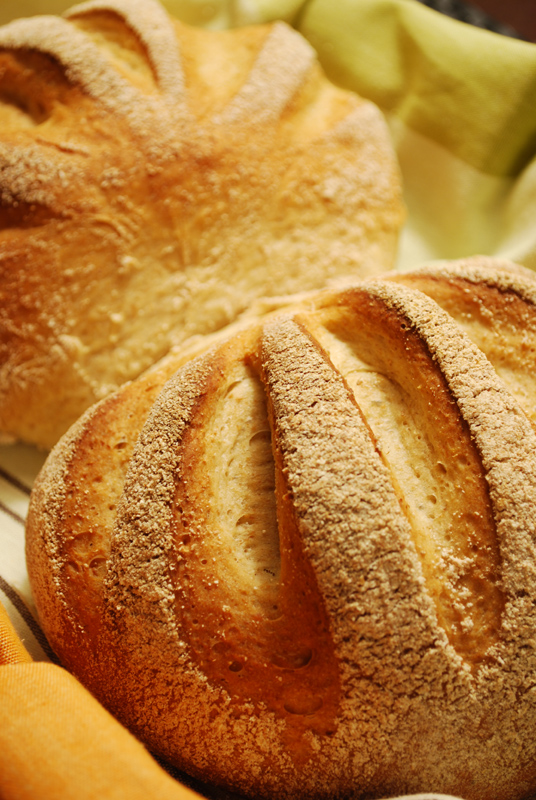
I made this recipe with high hopes.  I had made it once before, a couple of years ago, and remembered it coming out pretty well.  The flavor, I remembered, had been spot on, but the texture just wasn’t quite right.  Many on the internet have had pretty good success with this recipe; not to mention that it’s got the seal of approval from the Queen of Creole Cuisine herself, the venerable Ella Brennan.  So with the confidence instilled by three months of constant breadmaking, I set to work.  And at the end of it all, I had four loaves of pretty good French bread, but I still didn’t have my perfect po-boy bread.

As I shook my fist at the heavens, I wondered if there really was something to that whole “humidity” angle.  Here I was, making this bread in the tail end of the notoriously dry Chicago winter (it sucks the moisture right out of my skin, for crying out loud), using a recipe developed in 90º heat, with 100% humidity.  The point is, this recipe may in fact produce a reasonable facsimile of po-boy bread.  But it sure didn’t do so in 40º temperatures, and less percentage humidity.

Oh, and if you’re wondering about the name “po-boy”, you’ll find a very lovely explanation on the Leidenheimer Bakery’s website.  The veracity of details may be questionable, but a similar story is often told about the origins of the po-boy, so it’s probably pretty close to the truth.  Cum grano salis.


Po-Boy Bread
From Lee Bailey’s New Orleans, by Lee Bailey with Ella Brennan
Makes 4 loaves


2 cups warm water (105º to 115º F)
2 tablespoons sugar, divided
2 tablespoons active-dry yeast
2 tablespoons un-hydrogenated vegetable shortening
6 1/2 cups bread flour (about 1 pound, 13 ounces) divided
1 tablespoon salt


1.  Place the 2 cups water in the bowl of a stationary mixer fitted with a dough hook. Add 1 tablespoon sugar and sprinkle with the yeast. Allow to sit for about 15 minutes, until the mixture is bubbling.


2.  Add the remaining 1 tablespoon sugar, the shortening, and 5 cups of flour. Mix until a dough starts to form. Add the salt and the remaining flour as needed until the dough forms a ball and pulls away from the sides of the bowl. Continue to knead with the dough hook for 10 minutes.


3.  Turn the dough out onto a lightly floured board and knead by hand for a minute or two, until dough is smooth and elastic. Return it to the mixing bowl, cover with plastic wrap, and set in a warm, draft-free corner to rise for 1 1/2 hours, or until doubled in size.


4.  Punch the dough down, then divide it into four balls. Cover these with a clean dishtowel and let them rest for 15 minutes. Form each ball into a 16 x 3 inch loaf. Place the loaves on baking sheets, cover them with a damp cloth, and set aside to rise for 1 1/2 hours.


5.  Preheat oven to 375º F. Gently place the fully risen loaves in the preheated oven and bake for about 30 minutes, until just golden brown. Cool on racks.


Notes:
1.  If you have a good recipe for bread used in bahn mi, those wonderful and addictive Vietnamese sandwiches, that bread is somewhat similar to the texture of po-boy bread.  Oh, and send it my way please!

Posted in Savory, Yeast Breads | Leave a comment

Burger Buns

Week Sixteen: Sandwich Rolls

burger-buns

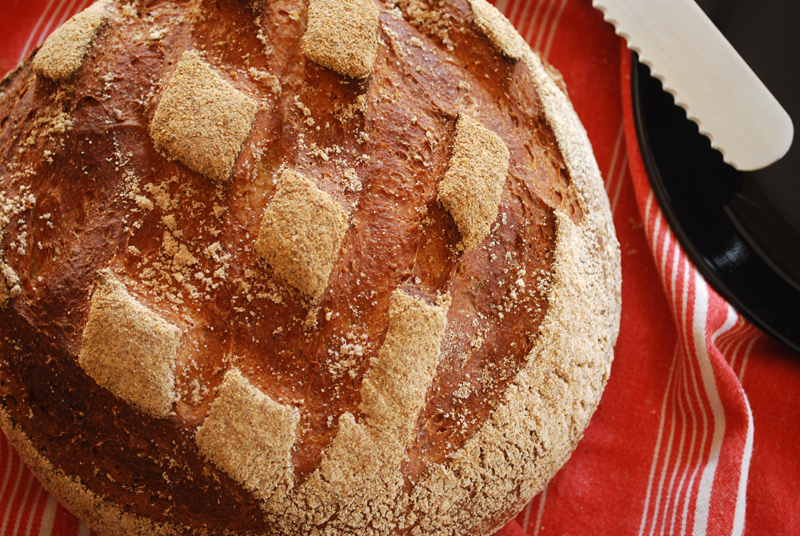
Ah, the hamburger.  As American as the proverbial “Mom”, and probably twice as American as apple pie.  Leaving any moral, ethical, environmental, or nutritional arguments out of it, the hamburger is undeniably popular in these United States, and Americans just keep eating more of them every year (even these days, seriously!).  And when it’s made well, there’s no denying why: the crisp, seared crust on the meat, the juciness encased within, the medley of your chosen toppings blending with the rich beef flavor, all made so easy to eat by simply putting it on a bun.

Why must it always be a bun?  Well, if you’ve ever tried eating a juicy hamburger on two slices of sandwich bread, you’ll know the answer.  You need the whole crust of a bun to contain those juices.  The airiness of a slice of bread is simply no match for them; you’ll end up with meat-liquid running down your chin and dripping off your elbows, and your poor bread will be reduced to mush.  (This same juice issue is why Alton Brown insists mayonnaise always be put on a burger bun, even if you don’t like it.  The fat provides a moisture barrier, keeping the jus in the meat where it belongs, not in the bun.  However, you can also use butter for this, which is over-the-top good if you use a flavored butter.)

Please bear in mind that I’m talking only about quality hamburgers here.  I’m not referring to any of that flash-frozen, mass-produced, cardboard-flavor trash they sell at McWherever.  (Not including In-N-Out Burgers; they are a different story.)  I’m talking real beef, preferably ground up yourself if you have a food processor (pre-ground meat is nearly always dodgy), seared to perfection, crowned with quality toppings (bacon-onion compote with blue cheese aioli, anyone?), and the best bun you can get your hands on.  Yes, a properly-crafted hamburger is a thing of beauty, and there’s no two ways about it.

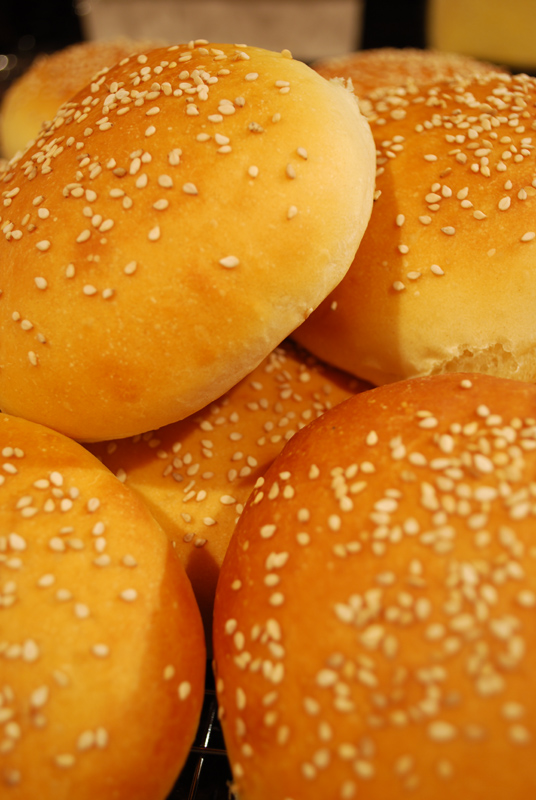
That’s where I come in.  You think you’ll be able to find a decent hamburger bun wrapped in cellophane on your grocer’s shelf?  You think you’re going to grind up your own meat and everything, and then ruin it all by ingloriously squishing it between two flavorless bits of an anemic roll?  Not on my watch, you’re not!  A proper hamburger deserves a proper bun, one with complex and slightly sweet flavors; one with a pillow-soft crumb and a slight crispiness on the bottom crust; one that any burger (ham, turkey, veggie, or otherwise) would be happy – nay, proud – to nestle into.

This recipe uses a sponge, which brings all sorts of wonderful complex flavors to the party.  By letting the yeast ferment for an hour or two with plenty of food (from sugar, honey, and milk), an every-so-slightly sour flavor develops.  This is not a sourdough bun, but the wonderful flavor compounds given off by the yeast in this time just make the finished buns so much more delicious.  Yes, I know, it takes a little more time than simply running down to the store.  But if you can find a better bun in any store but the finest bakeries, I will eat my hat.  I don’t even have a hat.*  I will go out, buy a hat, then actually consume it.  They’re that good.

I’m calling these “Burger Buns” as opposed to “Hamburger Buns” because I don’t like to discriminate amongst burgers.  I love a good salmon burger as much as I love a good black bean burger as much as I love a good beef burger.  They all need a good bun.  Can’t we all just get along?


Burger Buns
Adapted from Bo Friberg
Makes 12

For sponge:
2 1/4 teaspoons active-dry yeast (1 packet) 
2 cups warm milk (105º to 115º F)
2 tablespoons sugar
1 ounce honey (about 4 1/2 teaspoons)
13 ounces all-purpose flour (a scant 3 cups)

For dough:
10 ounces bread flour (about 2 1/4 cups), divided
1 tablespoon salt
3 tablespoons vegetable oil
Sesame seeds, for topping

1.  Make sponge: in the bowl of a stand mixer, stir together the milk, sugar, and honey, until dissolved.  Sprinkle the yeast over, stir to combine, and let stand until foamy, about 2 to 3 minutes.

2.  Add the all-purpose flour.  Using the dough hook, mix at low speed until a smooth, thick batter forms, about 2 to 3 minutes.  Some lumps are okay.  Cover and let stand in a warm place for 1 to 2 hours, or until has risen completely and starts to look fallen in the center.

3.  To make the dough: reserve a handful or two of the bread flour.  Add the remainder and the salt to the sponge.  Knead for 1 or 2 minutes with the dough hook, or until combined.  Add the oil gradually and continue kneading for 8 to 10 minutes, adding the reserved flour as needed to make a medium-stiff dough that is smooth and elastic.  You may need to add a bit of flour to help the oil absorb into the dough.

4.  Transfer to a lightly-oiled bowl, cover with plastic wrap, and let rise in a warm place until doubled in size, about 1 hour.

5.  Punch the dough down, cover, and let rise a second time until doubled in size again, about 45 minutes.

6.  Turn the dough out onto a work surface (you may or may not need to flour it), trying to punch it down as little as possible.  Divide the dough into two equal pieces, and form the pieces into even ropes.

7.  Cut each rope in half, then cut each half into thirds.  Form the pieces into round rolls on an unfloured surface, trying to have only one seam or wrinkle in the skin of the dough.  Place the dough seam-side down on a baking sheet lined with baking paper, about 2 to 3 inches apart.  Cover loosely with plastic wrap, and set in a warm place to rest for 10 minutes.

8.  Flatten the rolls with a flat object until they’re about 4 to 5 inches across.  Spray or brush the tops gently with water, then dust with sesame seeds.  Cover loosely again, and let rise until slightly less than doubled in size, about 45 to 50 minutes.

9.  Preheat the oven to 400º F.  When the oven is hot, bake for about 15 minutes, or until golden brown on top and baked through.  Remove to a rack to cool.  Slice horizontally and fill as desired.


Notes:
1.  You don’t have to be very dogmatic about the length of time you let the sponge rest (step 2); you’re just trying to develop some flavor.  In fact, you could probably refrigerate it overnight.


* – I do have a hat.  That was a lie for rhetorical emphasis.

Posted in Savory, Yeast Breads | Leave a comment

Chicago-Style Hot Dog Buns

Week Sixteen: Sandwich Rolls

chicago-dog-buns

Well, Easter has passed us by, we’re well into April, and it looks like we’re done with the snow for another year.  Yes, Spring is here, and nice weather is well and truly on its way.  Perhaps you’re already enjoying it where you are, but here in Chicago, Winter is just a little more stubborn.  We suffer through months of bitter cold and piles of snow because, when the summer weather finally comes around, you just can’t beat it.  Clear blue skies, low humidity, a gentle breeze off the lake, gorgeous sunshine, and enough public parks to enjoy it all stretching from Evanston down to Indiana… is it any wonder we cast off our heavy coats and run outside at the first inkling of warmth?

In honor of the lovely temperatures expected (finally up to 60° for a few days in a row!), this week I give you sandwich rolls.  Personally, I think the best way to enjoy fine weather is to call your friends, get some food together, and meet up in the park for a picnic – and I think most Chicagoans would agree!  Other than fried chicken and Champagne (and if you know me, you know I’m not joking), what better picnic food could there be than a sandwich?  Easy to make, transport, and eat while holding your plate down in case of a breeze, sandwiches are endlessly versatile, and can be customized to meet anyone’s preference.  This week, I’ll be talking about rolls for any kind of sandwich filling, rolls that will certainly make your picnic the envy of anyone within smelling distance.

Aside from a deep-dish stuffed pizza, one iconic Chicago food is a type of sandwich you might not even consider when thinking of a sandwich: the Chicago-style hot dog.  After all, what is a sandwich, but some filling in between two pieces of bread?  And in Chicago, hot dogs are far more than simply a frankfurter on a sad, squished bun.  Like that surfeit of a pizza, the Chicago deep-dish, the Chicago-style hot dog is an overabundance of ingredients; it is the hot dog turned up to 11.

It goes a little something like this: a steamed or boiled (never broiled!) all-beef hot dog (preferably Vienna Beef brand) is put into a steamed poppy seed bun.  If the hot dog is grilled, it’s called a “char-dog”.  The condiments are applied strictly in the following order: yellow mustard, neon-green sweet pickle relish, diced raw onions, two tomato wedges or slices, a pickle spear, pickled sport peppers, and celery salt.  And absolutely no ketchup.  God help you if you even mention the word “ketchup”.  In fact, you probably shouldn’t even have a bottle of ketchup in the same room.  (Unless you have fries, of course.)

You will find any number of Chicagoans more than willing to debate any one of these toppings, and the merits thereof.  I’m sure there are people who would sooner cut a finger off than eat a hot dog with tomato slices, instead of wedges (and vice versa).  Personally, I’m not a fan of sweet pickle relish (or anything else dyed that neon hue, for that matter), so I’d leave it off mine; but I’d probably get someone sadly shaking their head at me in pity.  What I’m trying to get at is that people in Chicago take their hot dogs very seriously.

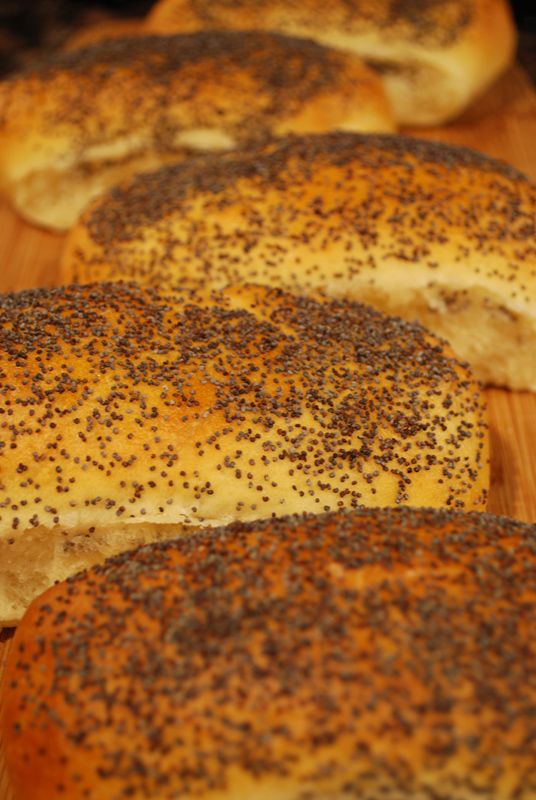
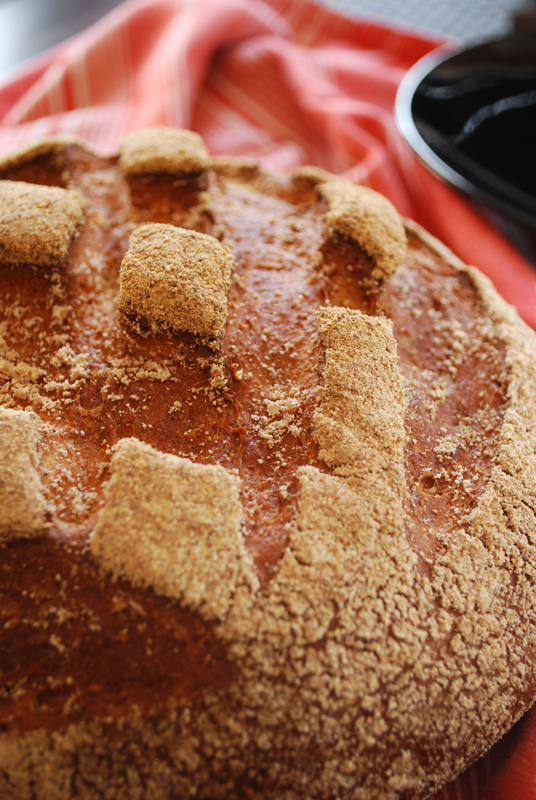
The base of the whole “dragged through the garden” mess is that poppy seed bun.  However, if you live anywhere outside of the Greater Chicagoland Area, they can be hard to find, if not downright impossible.  And those poor little naked hot dog buns you find in their place just don’t have the strength to defend themselves agains such an onslaught of topping.  If you find yourself longing for a proper Chicago Dog, you’re going to need a proper poppy seed bun.  These buns are soft and slightly sweet, but have the necessary fortitude to hold up their end of the deal.

So for all you dispaced Chicagoans who haven’t seen a proper hot dog in ages, this one’s for you.  Make up a batch of these rolls, boil a batch of the best beef hot dogs you can find, call all your friends over, and laugh at anyone who dares ask for the ketchup you threw out just before everyone got there.  One bite, and they’ll be eating crow along with all those other toppings.


Chicago-Style Hot Dog Buns
Makes about 18 buns

3 tablespoons granulated sugar
2 1/2 cups warm milk (105° to 115° F)
2 tablespoons active-dry yeast
4 tablespoons unsalted butter, room temperature
2 teaspoons salt
13 ounces cake flour (a scant 3 cups), sifted
16 to 18 ounces bread flour (about 3 1/2 to 4 cups)
1 egg beaten with 1 tablespoon water to make an egg wash
Poppy seeds for topping the buns

1.  In the bowl of a stand mixer, stir the sugar and warm milk together until the sugar dissolves.  Sprinkle the yeast over, stir, and let stand until foamy, about 3 to 4 minutes.

2.  Reserve a handful (about 2 to 3 ounces) of the bread flour.  Add the remainder, the cake flour, and salt to the yeast mixture.  Using the dough hook, mix at low speed until a dough forms.  Add the butter in pieces, until incorporated.  Scraping the bowl down as needed, increase the speed to medium-low, and knead for 6 to 8 minutes.  Add the reserved bread flour by tablespoons if necessary to form a smooth dough.  The consistency should be soft and relaxed, but not too sticky and wet.

3.  Transfer the dough to a lightly-oiled bowl, turning to coat all sides with oil.  Cover with plastic wrap, and let rise in a warm place until doubled in size, about 1 hour.

4.  Punch the dough down, and let rise a second time until doubled again, about 1 hour.

5.  Line a large baking sheet with parchment paper.  Turn the dough out onto a clean, unfloured work surface.  Divide the dough into 18 equal pieces.  Shape each piece into a small ball.  Covering the dough not being used, roll each into an even rope 4 1/2 inches long.  Do not taper the ends, to make sure the buns are shaped properly (the dough will rise higher in the middle than on the ends).  Place each rope on the prepared baking sheet, flatten the top slightly by pressing down on it, and cover loosely with plastic wrap to prevent a skin forming on the dough.  For crisp-sided buns, place 2 to 3 inches apart.  For softer buns with soft sides, place them 1/2 inch apart.  Cover loosely with plastic wrap and let rise until almost doubled, about 45 minutes.

6.  Preheat the oven to 400° F.  Brush the tops of the buns gently with the egg wash, taking care not to deflate them, and sprinkle with poppy seeds.  Bake for 20 minutes, or until golden brown on top.  Remove to a wire rack to cool.  Slice horizontally, and fill with a beef hot dog, yellow mustard, sweet pickle relish, diced raw onions, two tomato slices or wedges, a pickle spear, pickled sport peppers, and celery salt.  And no ketchup, ever!


Notes:
1.  You can, obviously, leave the poppy seeds off if you like; but then, it wouldn’t be a Chicago-style hot dog bun, would it?

2.  In placing the shaped dough on the baking sheet in step 5, there are a few benefits to spacing them closely: the buns will stay softer and moister, and you can fit more onto a single baking sheet.  (This also means that in step 6, sprinkling the poppy seeds is an easier job, and you lose fewer seeds in the process.)

Posted in Savory, Yeast Breads | Leave a comment

Hot Cross Buns

Week Fifteen: Scandinavian Breads Easter Bread!

hot-cross-buns

I just couldn’t pass up the opportunity to make hot cross buns for Easter, so here we are.  Unfortunately, I am doing some fairly major renovation/redecorating this weekend, so I don’t have a whole lot of time to devote to blogging.  But I did look up a little history of these wonderful, soft, spicy delights!

Hot cross buns are a decidedly British treat, though there are legends of their “true” origins that absolutely run the gamut, from Ancient Romans to Pagan Celts, and everything in between.  But the custom of serving them on Good Friday was actually a law set in place by Queen Elizabeth I – the Protestant monarch found them too Catholic in nature, but they were too popular to ban totally, so they were relegated to Good Friday and Christmas only.

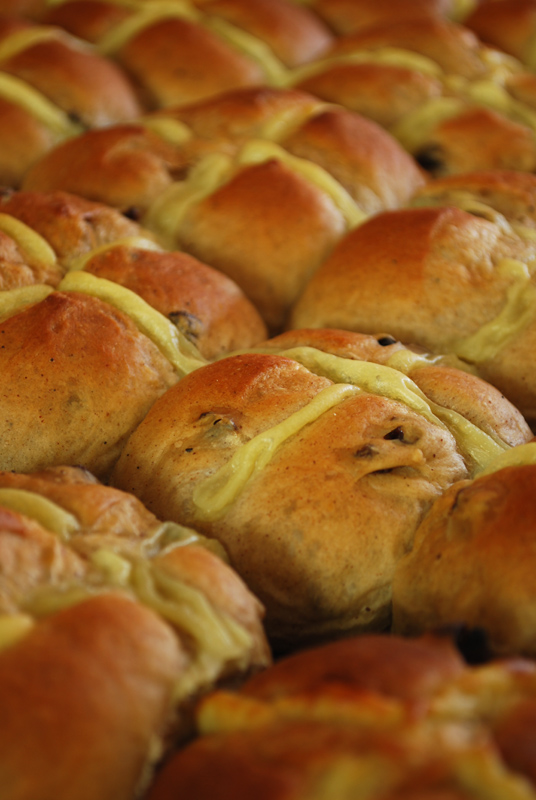
These breads, full of currants and spices, are so rich and delicious that you probably don’t need any butter melting all over them, but I can’t resist gilding the lily.  It’s just so good!  You absolutely can’t beat it, warm from the oven, marshmallow-soft on the inside, caramel-brown on the outside, with a pat of butter soaking its flavor into everything… There’s just nothing better to set off your Easter basket!


Hot Cross Buns
Adapted from Bo Friberg
Makes 36 buns

For dough:
2 tablespoons + 2 teaspoons active-dry yeast
2 cups warm milk (105º to 115º F)
1 tablespoon salt
5 ounces honey (a scant 1/2 cup)
2 eggs, beaten lightly
28 ounces to 32 ounces bread flour (about 6 1/4 to 7 cups)
2 teaspoons ground cinnamon
2 teaspoons ground allspice
1/2 teaspoon ground cloves
11 tablespoons butter (1 stick plus 3 tablespoons), room temperature
8 ounces currants (about 1 1/2 cups)
Zest of 2 lemons

For pastry-cream crosses:
1 pint milk
1 ounce cornstarch (about 1/4 cup)
4 ounces sugar, divided
1/4 teaspoon salt
2 eggs
2 ounces (4 tablespoons) unsalted butter
1/2 teaspoon vanilla extract

1.  Make pastry cream for crosses: place the milk and half the sugar in a heavy-bottomed saucepan.  Heat over medium until just bubbling at the edges and steaming.  This should not take too long; keep an eye on it.  Meanwhile, whisk the cornstarch, salt, and remaining sugar together, in a heat-safe bowl.  Add the eggs and mix until smooth.

2.  Slowly add about 1/2 cup of the hot milk in drips to the egg mixture while whisking rapidly.  Add another 1/2 cup gradually, whisking.  Add the tempered egg mixture back into the remaining milk in the saucepan.

3.  Place over medium heat and cook, stirring constantly, until the mixture comes to a boil and thickens.  Boil for a few seconds longer to make sure the raw starch taste completely cooks out.  Remove from heat, and add in the butter and vanilla, stirring until the butter incorporates totally.

4.  Pour the pastry cream into a bowl, and place a piece of plastic wrap directly onto the surface.  Let cool before storing in the refrigerator.  (Pastry cream will keep for about 4 days if properly stored.)

5.  Make dough: in the bowl of a stand mixer, stir the warm milk and honey together until the honey dissolves.  Stir in the yeast, and let stand until bubbling, about 3 to 4 minutes.  Add the eggs.

6.  Reserving a handful of the flour, add the remainder (about 28 ounces), cinnamon, allspice, cloves, and salt.  Using the dough hook, mix at low speed until a rough dough forms.  Add the softened butter in pieces, until incorporated, scraping the bowl down if necessary.

7.  Knead at medium speed, adding additional flour if necessary, for 8 to 10 minutes.  The dough should be soft and smooth, not liquidy, or too firm.  Transfer the dough to large bowl, cover with plastic wrap, and let rise in a warm place until doubled in size, about 1 hour.

8.  Turn the dough out onto a lightly-floured surface.  Knead in the currants and lemon zest by hand, until the dough is soft and smooth and the currants are well-distributed.  Cover loosely and let the dough rest for 10 minutes.

9.  Divide the dough into 2 equal pieces.  Roll the pieces out into a rope, about 18 inches long.  Cut each rope into 18 equal pieces.  Loosely covering the pieces not being used, round each piece under your hand into a little bun.  Place on a large baking sheet lined with parchment, about 1/2 inch apart.  Using a sharp knife, cut a cross on top of each bun, just deeply enough to penetrate the skin.  Cover loosely and let the buns rise until just less than doubled in size, about 45 to 55 minutes.

10.  Preheat the oven to 400º F.  If you have a piping bag with a 5mm tip, use it now; otherwise, place the reserved pastry cream in a large plastic zip-top bag, and cut a tiny bit of the corner off.  Pipe the pastry cream along the crosses cut into the buns.  Bake at 400º F for about 20 minutes, or until done.  Remove to a rack to cool.  Serve warm.


Notes:
1.  The crosses on this recipe are made from pastry cream (something every foodie should know how to make well; it’s so useful and versatile!); but they’re often made from a flour-water mixture, marzipan, icing, or simply by slashing into the dough.  Whatever you like will work just as well as anything else.

2.  If you don’t have active-dry yeast, use 2 tablespoons instant yeast instead (from 3 packets).

3.  If you like, you can ice the baked buns with a simple powdered-sugar/milk icing.  Drizzle over before serving the warm buns.

Posted in Sweet, Yeast Breads | Leave a comment

Limpa Rye

Week Fifteen: Scandinavian Breads

limpa-rye

Well, it’s Good Friday, which means that Easter is just days away, so I thought this bread was appropriate for today.  You see, Scandinavians are generally big fans of Easter.  Can you guess why?  Maybe it’s the same reason I’m so excited about it – and no, it isn’t the chocolate bunnies (though that doesn’t hurt, either).  No, Easter is wonderful because it means that Winter is just about over!  For me, this means goodbye hats and gloves, hello tank tops!  For Scandinavians, though, this means goodbye Arctic winds, hello midnight sun!  It’s generallly a big holiday, with many having a holiday from Maundy Thursday to the Tuesday after.

So Scandinavians like Easter.  But over there, it’s just a little different from the Easter we Americans know.  For example, in Sweden and Finland, children dress up like witches, swat at people with branches of pussy willow, and go door to door for treats.  In Norway, they’re fond of crime around Easter, whether in novel, tv show, or movie form.  They call it Paaskekrim.  Easter Crime, literally!  In Denmark, people send out anonymous “teaser” letters, sort of ransom-note style.  In Iceland, it’s a little more family-oriented, and more like what Americans are used to.  But in all these nations, one common thread prevails: the food.

As with all important holidays, people like to celebrate Easter with food.  The Swedish smörgåsbord and the Norwegian koltbord are filled with fish (pickled, raw, cured, and everything in between), potatoes, eggs, cheeses, ham, Paskelbrygg (Easter beer), schnapps, and (of course) breads of every shape, size, and texture.  Limpa rye, the bread for today, is a special celebration bread, with orange, molasses, and spice flavorings.

In Sweden, “limpa” simply refers to the traditional makeup of the bread.  A limpa loaf is oblong, tapered at the ends, and is baked free form with no bread pan.  Usually, limpa is made with rye flour and various spices.  “Vortlimpa” is a style of limpa made traditionally with brewer’s yeast (wort), a tradition that survives today in the form of recipes that include beer.  Molasses is a traditional flavoring, as is golden syrup, and you can use either one you like.  If you can’t find golden syrup, but don’t like the robust flavor of molasses, you can certainly substitute light corn syrup with a touch of honey for flavoring.

This bread turned out very pretty, with a nice rye flavor.  The spices might have been more assertive, and the orange flavor got a bit lost.  Perhaps I should’ve included some of the orange juice instead of just the zest, but I didn’t think of it.  The port-soaked currants were just wonderful, though; they were lovely little bursts of flavor dotting each slice.  They will help the bread to keep longer too, because they retain moisture.  The crust was thick but soft, and turned a lovely brown.  With a soft, even crumb, this bread would enhance any Easter table.

Limpa Rye
Makes 2 loaves

1/2 cup warm water (105º to 115º F)
1/2 cup warm milk (105º to 115º F), divided
1 tablespoon active-dry yeast
1/2 cup sourdough starter (optional)
4 ounces rye flour, plus additional for dusting loaves
3 ounces currants (about 3/4 cup)
3 tablespoons port
1 1/2 teaspoons fennel seed
1 1/2 teaspoons caraway seed
2 teaspoons anise seed
1/2 cup light beer, at room temperature
3 tablespoons molasses
1/4 cup + 2 tablespoons vegetable oil
1 1/2 teaspoons salt
Zest of 1 large or 2 small oranges
8 ounces white whole wheat flour
12 ounces unbleached bread flour, divided
Water in a spray bottle

1.  In a medium bowl, combine the warm water and 1/4 cup of the warm milk.  Sprinkle the yeast over, stir to combine, and let sit until bubbly, about 2 to 3 minutes.  Stir in the rye flour and the sourdough starter (if using), until smooth and well combined.  Cover and let the sponge stand in a warm place for 1 hour, or until doubled in size.

2.  Pour the port over the currants and let stand, stirring occasionally, while the sponge rests.  Crush the fennel, coriander, and caraway in a mortar and pestle, or crush with a rolling pin if you lack a mortar and pestle.  Reserving 4 ounces of the bread flour (about 1 cup), combine the remaining 8 ounces with the white whole wheat flour and the salt.

3.  When the sponge has doubled in volume, transfer it to the bowl of a stand mixer fitted with the dough hook.  Add the remaining milk, the beer, molasses, oil, orange zest, crushed seeds, and currants with all the port.  Mixing at low speed, add the flour and salt mixture.  Increase the speed to medium.  Adjusting the consistency as needed with the reserved bread flour, knead until the dough is smooth and elastic, yet fairly stiff, about 8 minutes.  The dough should not stick much to the sides of the bowl.  Depending on the moisture level in your dough, you may need all or hardly any of the reserved flour.

4.  Transfer the dough to a lightly-oiled bowl, turning to coat all sides.  Cover with plastic wrap, and let rise in a warm place until doubled in size, about 1 hour.

5.  Without punching down the dough, turn it out onto a work surface.  Divide it into two equal pieces.  Press and shape the pieces into oval loaves, about 10 inches long.  Rolling the loaves under your hands, taper the ends slightly.  Transfer the loaves to a large baking sheet lined with parchment paper.  Cover loosely with plastic wrap, and let rise until almost doubled in volume, about 40 minutes.

6.  Preheat the oven to 375º F.  Spray or gently brush the dough with water, and dust with enough rye flour to coat.  Using a sharp serrated knife, make three quick slashes lengthwise down each loaf, being sure not to press into and deflate the dough.  Let sit 10 minutes, or until the oven is hot.

7.  Bake the loaves at 375º F for about 35 minutes, or until baked through.  Remove to a wire rack to cool.


Notes:
1.  The seeds in this bread are certainly open to whatever interpretation you prefer; fennel, anise, and caraway are simply the most traditional for this bread.  Other good options are coriander, ginger, a pinch of ground clove or cinnamon, nutmeg, or even black pepper.

2.  The loaves are fully cooked when they sound hollow when tapped on the bottom.  When in doubt, you can always use an instant-read thermometer: they are done when they hit about 200º F, though insertion into a hot currant may skew the reading a bit.

3.  For the vegetable oil, I used olive oil (since that’s all I keep on hand), and it worked just fine, with no olive-y flavors overwhelming things.

4.  I specify white whole wheat here, rather than regular whole wheat, for its relative lightness.  If you can’t find it, use instead 4 more ounces bread flour and 4 ounces whole wheat.

5.  If you don’t have a sourdough starter, feel free to omit it.  In this case, you will very likely not use much of the reserved flour in step 3.

Posted in Savory, Sweet, Yeast Breads | 1 Comment

Joggar Bröd

Week Fifteen: Scandinavian Breads

joggar-brod

Yes, it’s called joggar bröd.  Yes, it translates to “jogger bread”.  Yes, it’s Swedish.  Feel free to let out a joyful “Bork! Bork! Bork!” as you make this bread, if you like.  (What?  You thought I’d make it through a week of Scandinavian bread, and not make that reference at least once?  Come on, now.  Also, I’m fairly sure he’s actually making joggar bröd there.  That’s what it looked like when I made it, anyway.)

Ahem.  It’s called “jogger bread” simply because it’s full of whole-grain, good-for-you carbohydrates, the human body’s main source of energy.  Joggers (or any other athlete) need a larger supply of carbs to fuel themselves; hence, joggar bröd.  From that description, you might think this bread would be one of those dense, heavy bricks you often see from Eastern Europe, like this Westphalian Pumpernickel I made a few months ago.

But this is not the case!  No, this joggar bröd bakes into a fluffy, light bread that belies the variety of hearty grains added to the dough.  The crust, though a little thicker than the typical artisan bread, softens as it stands, due to the honey, molasses, and maple syrup included, and their moisture-retaining properties.  These same liquid sweeteners bring a complex range of flavors to the bread, flavors that complement the myriad grains wonderfully.

You may be concerned, while baking, that the crust is darkening too much.  Don’t worry about that one bit; the sweeteners and the milk will cause more browning than you’d normally see in a simpler water-flour-only bread.  Just don’t remove the bread from the oven before it’s cooked all the way through, despite any percieved over-browning.

But you know, if I’m honest, this wasn’t my favorite bread of the week.  It was good, certainly; but not my favorite (that Peasant Bread was so good, anything else hardly had a chance).  It’s very grainy and hearty, and I’m sure the dough could take any number of various flours and grains added or substituted in.  Maybe my palate was a bit “breaded-out” when I tried it; because the flavors were lovely, and the texture was nice as well, but for some reason, it just wasn’t ringing any bells for me.  It’s very pretty, though!

joggar-brod-2 

Joggar Bröd
Adapted from Bo Friberg
Makes 2 loaves

1/2 cup warm water (105º to 115º F)
1 cup warm milk (105º to 115º F)
2 tablespoons honey
1 tablespoon molasses
1 tablespoon maple syrup
4 1/4 teaspoons active-dry yeast
1 egg
1 tablespoon salt
1 1/2 ounces wheat bran (about 1/2 cup)
3 ounces cornmeal (about 1/2 cup)
2 ounces rolled oats (about 2/3 cup)
2 ounces flaxseed meal (about 1/3 cup)
8 ounces whole wheat flour (about 1 3/4 cups plus 1 tablespoon), plus extra for dusting
3 tablespoons unsalted butter, at room temperature
12 ounces unbleached bread flour (about 2 2/3 cups)
Water in a spray bottle

1.  Combine the water, milk, honey, molasses, and maple syrup in the bowl of a stand mixer, and whisk until dissolved together.  Sprinkle the yeast over, stir to combine, and let sit until bubbly, about 3 minutes.  In another bowl, whisk together the salt, wheat bran, cornmeal, oats, flaxseed, and whole wheat flour.

2.  Add the flour mixture and the egg to the yeast mixture.  Using the dough hook, mix at medium-low speed. Add the butter in pieces, and the bread flour, reserving a handful of flour to the side.  Continue to knead until the dough is smooth and elastic, about 8 minutes, adjusting the consistency of the dough with the reserved flour until fairly stiff and no longer sticking to the sides of the bowl.

3.  Transfer the dough to a large lightly-oiled bowl, turning to coat all sides with the oil.  Cover with lightly-oiled plastic wrap, and let sit at room temperature until doubled in size, about 1 hour.

4.  Punch the dough down, then cover and let rise a second time until doubled in size, about 1 hour.

5.  Punch the dough down again, turn out onto a lightly-floured surface, and divide into two equal pieces.  Knead lightly a few times, and form the dough into round loaves by pulling the outer layer of dough tightly around the ball, forming a skin that meets together in one seam.  Flatten the rounds slightly, spray or brush with water, and dust liberally with whole wheat flour.

6.  Transfer the loaves, seam side down, to a baking sheet lined with parchment paper.  Slash the tops of the rounds, cutting just deep enough to penetrate the skin, in a diamond-pattern grid.  Cover loosely with plastic wrap and let rise until doubled in size, about 45 minutes to 1 hour.  Preheat the oven to 425º F.

7.  Put the loaves in the oven, spraying the oven well with water.  Bake for 10 minutes at 425º F, opening the door to spray with water every 2 minutes or so.  Reduce the temperature to 400º F, and continue to bake for an additional 30 minutes, or until the loaves are well browned and baked through.  Remove to a rack to cool.


Notes:
1.  I used semolina flour instead of cornmeal (who knew I had run out?), and I experienced no adverse effects; though it may have come out more tender had I used cornmeal, as it produces no gluten, whereas semolina does.

2.  For slashing this dough (step 6 above), I suggest a small, sharp knife, or even a razor blade.  My standard tool, a long serrated knife, was just not agile enough to curve over the tops of the rolls, and cut a bit too deeply.  This didn’t affect the flavor at all, but it gave the rolls more of a coronal nubbiness after baking, as opposed to a light pattern on top.  Whatever you prefer is fine, of course.

Posted in Savory, Yeast Breads | Leave a comment

Rye Rings

Week Fifteen: Scandinavian Breads

rye-ring

The bread for today is a very typical Scandinavian bread.  Recall that most Scandinavian fare was historically made with long-term storage in mind, rather than created for immediate consumption, which would have been considered wasteful in many cases.  (The concept of “first in, first out” wasn’t just a handy tip, it was a way of life.)

Rye flour is an important ingredient for such a lifestyle, in such a seasonably brutal climate.  As peasant farmers across Eastern Europe quickly discovered, rye grows well in poorer-quality soil that simply won’t support a healthy wheat crop.  Not only that, but rye flour retains moisture better than wheat flour, which means that rye bread will keep longer than will wheat bread.

Unfortunately, the proteins in rye produce a much weaker gluten structure than wheat.  Bread made exclusively with rye flour is therefore generally dense and tough, which is why you often see recipes for rye bread (such as the one below) that call for a significant amount of wheat flour mixed in with the rye flour.  In fact, for the best “rye” bread, you should use no more than about 33% of the total weight of flour as rye.  (I suppose if you want to be very historically accurate, you could make it with all rye flour; just be prepared for the brick you are about to receive.  These are the benefits of living in modern times: that we can get wheat flour easily and cheaply.)

As a side note, you can make a very good all-rye-flour bread if you make a sourdough starter with it, or use a wheat sourdough starter.  Long, technical story short, the acidic environment that method provides helps the rye proteins act more like wheat proteins, resulting in a more solid gluten structure, and therefore a fluffier, more palatable bread.  The vinegar in this recipe performs a slightly similar function: it provides an acidity that helps the rye flour out a bit.

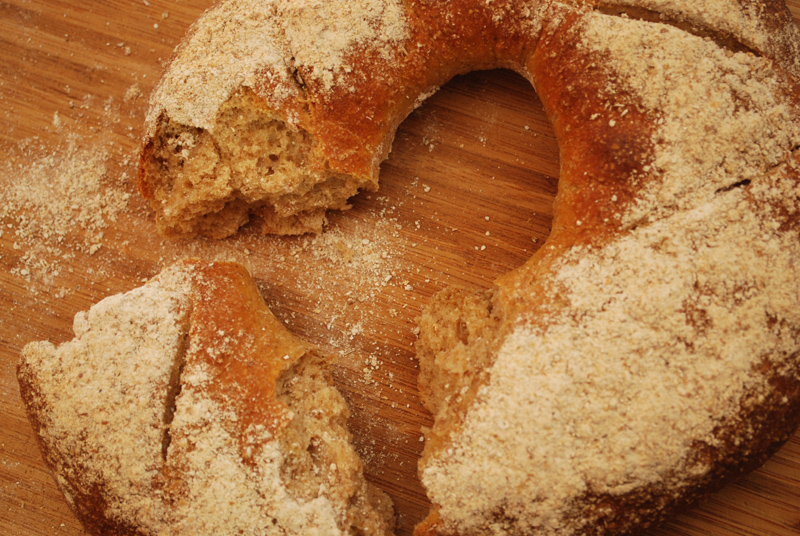
Getting on with it: these loaves are shaped into rings, which, in the past, wasn’t an aesthetic choice like it is today; the shape allowed the bread to be hung on dowels, or threaded on ropes and hung between rafters.  Air would circulate more freely around the loaves, helping them stay fresh longer; not to mention that the height kept the bread away from many pests that would have otherwise made short work of such a feast.

While making this bread, during the “slashing” step right before baking, I deflated the bread a bit, perhaps with overzealous knife work, or perhaps I just popped the bread like a balloon.  If this happens to you, I suggest letting the bread rise again, for maybe 20 minutes or so.  I say this because my bread didn’t really have much oven spring (the amount it embiggens in the oven), and ended up a bit flat and dense.

I think it would have turned out much better if it hadn’t deflated, since the flavor was quite good.  It was nicely balanced, not too rye-tronic, or too sweet, or too sour.  It tasted hearty and nutty, and a healthy pinch of dill would not have been out of place.  They did turn out lovely, though, and were very easy to tear apart with the hands; so if you’re looking for an interesting and slightly unusual centerpiece bread (unless you or your guests happen to be Scandinavian), this would be a fine recipe to turn to.


Rye Rings
Adapted from Bo Friberg
Makes 2 loaves

2 cups warm milk (105º to 115º F)
2 tablespoons honey
1 tablespoon white vinegar
4 1/4 teaspoons active-dry yeast
1 tablespoon salt
7 ounces rye flour (about 2 cups), plus extra for dusting on loaves
5 ounces whole wheat flour (about 1 cup plus 1 tablespoon)
13 ounces unbleached bread flour (about 3 cups minus 1 tablespoon)
Water, in a spray bottle (see note 1 below)

1.  In the bowl of a stand mixer, whisk together the milk, honey, and vinegar until the honey is dissolved.  Sprinkle the yeast over, stir to combine, and let sit until puffy, about 3 to 5 minutes.

2.  Add the salt, rye, and whole wheat flour.  Mix at low speed using the dough hook.  Reserving a handful of the bread flour, add the remainder and knead for 4 to 5 minutes, or until you have a smooth, elastic dough.  Adjust the consistency of the dough if needed by adding the reserved flour a little at a time.

3.  Transfer the dough to a lightly-oiled bowl, turning to coat the dough.  Cover with plastic wrap, and let rise in a warm place until doubled in size, about 1 hour.

4. Punch down the dough, and turn out onto a lightly-floured surface.  Divide into two equal pieces, and form each into a round ball.  Flatten slightly.  Using the handle of a wooden spoon, a thick dowel, or even your (clean) elbow, make a hole in the center of each round, going all the way through the dough, to make a doughnut shape.   Cover and let the dough rest for 5 to 10 minutes.

5.  Line a large baking sheet with parchment paper.  Widen the holes in the loaves by stretching the dough with your fingers, or lifting and letting gravity help, until the holes are about 6 inches across.  Gently transfer the loaves to the prepared baking sheets, and spray or brush the tops with water.  Dust with enough rye flour to coat completely.  Cover loosely with plastic wrap, and let rise until doubled in volume, about 1 hour.

6.  Preheat the oven to 450º F.  Using a sharp serrated knife, or a clean razor blade, make at least 3 even slashes in the tops of the loaves.

7.  Quickly transfer the loaves to the oven, and spray the oven liberally with water.  Bake at 450º F for 10 minutes, opening the door to spray the oven with water every 2 minutes or so.  Reduce the heat to 425º F, spray one last time, and let bake an additional 20 minutes, or until brown and cooked through.  Remove to a rack to cool.


Notes:
1.   If you don’t have a spray bottle, you can achieve the same sort of oven steam by heating a cast iron (or other sturdy) pan in the bottom of the oven.  When you put the loaves in, add a few ice cubes to the pan.  Every few minutes, or whenever they have totally melted away, toss a few more in.  Remove the pan after the initial 10 minutes of baking.

Posted in Savory, Yeast Breads | Leave a comment

Skorpor

Week Fifteen: Scandinavian Breads

skorpor-2

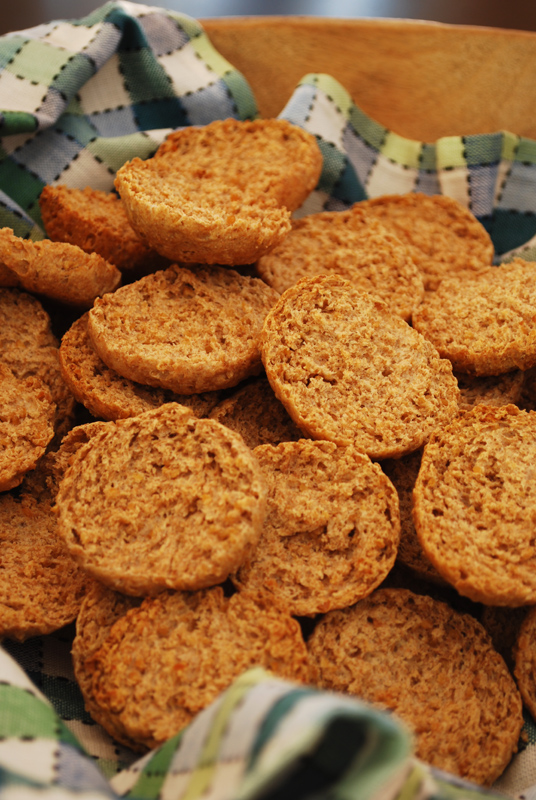
 You may be familiar with today’s bread, though you may not realize it from the name.  Ever had Melba toast, or zwieback?  How about biscotti, or perhaps a Holland rusk?  If you have, then you know skorpor.  All these breads share the common trait of being baked, cut into pieces, and baked again to completely dry out.  Items like this will keep for ages if stored properly, which was of course critical in bygone, sans-refrigerator days.

For most parts of the world, these twice-baked, dry breads were either the fare of sailors or other long-distance voyagers, or have come to be a food for invalids or children.  But in wintery Sweden, where culinary history is a history of food preservation, skorpor (and similar breads) made up a significant part of the everyday diet.  Unlike other traditional Swedish breads, which tend to be a bit more dense and heavy, skorpor are an airy, cracker-type bread.  Though they feel quite hard at first, they crumble easily and pleasantly when bitten into.  Like biscotti, they are often served these days with coffee or tea; although, unlike biscotti, they are usually eaten with butter and jam or marmalade, or with a good cheese.

Traditionally made with the abundant rye flour, skorpor today are generally made with wheat flour, and can be either sweet or savory, and flavored with any number of things, such as herbs, spices, dried fruit, or nuts.  Spices from seeds are most traditional, like aniseed, fennel, or cardamom.  They can be made as shown here (shaped into small rolls, split, and toasted) or they can be baked biscotti-style (baked in one large loaf, then cut into slices and toasted).  Either way is equally authentic, but I think these look more homemade and charming.

Okay, these aren’t the fastest bread in the world, and they are just a wee bit fussy (what with all the soaking, the tripe-rising, the shaping, and the splitting).  But I challenge you to find a better whole-grain cracker recipe.  Challenge!  I was a little afraid that I was adding too much flour (more than the original recipe called for), therefore ruining the promised lighter-than-air texture with a leaden dough.  But, feeling that what I was looking at was just too wet and sticky, I went with my instinct, and added more flour.  I was so pleased with the result!

These skorpor end up as a fluffy, crumbly cracker, despite their rustic heartiness from the whole grain flour and the coarse bulgur wheat.  The texture really is singular; I’ve never made such an ethereal yet robust bread.  Since I left them plain, without any herb or spice addition for flavor, they would be ideal for matching with any cheese imaginable; but they would be just lovely with any various flavorings (add a little sugar, almond flour, and cinnamon to the dough!).  I can easily see a bowl of vegetable stew, garnished with a couple of plain skorpor floating on top; or maybe top a few with a layer of grated cheese, broiled to a melty golden brown, served as the lid for your favorite French onion soup.  The possibilities are simply endless, so it’s a good thing this recipe makes a lot, and – even better – skorpor last for ages!  Skorpor ftw!

skorpor


Skorpor
Adapted from Bo Friberg
Makes 48 crackers

1/2 cup boiling water
4 ounces bulgur (or cracked) wheat
1 tablespoon active-dry yeast
1 cup warm milk (105º to 115º F)
1 tablespoon honey
1 1/2 teaspoons salt
2 ounces (about 1/2 cup) bread flour
11 ounces (about 2 1/2 cups) whole wheat flour
3 tablespoons shortening

1.  Pour the boiling water over the bulgur wheat and stir to combine.  Cover and set aside until soft, about 2 to 3 hours, or preferably overnight.

2.  In the bowl of a stand mixer, whisk the warm milk and honey together until the honey dissolves.  Sprinkle the yeast over, and stir to dissolve.  Let sit until foamy, about 3 to 4 minutes.

3.  Add the softened bulgur wheat, salt, bread flour, and half of the whole wheat flour.  Mix with the dough hook at low or medium-low speed, adding the shortening in bits to incorporate.  Add the remaining whole wheat flour while kneading the dough for about 6 to 8 minutes, until you have a fairly firm and elastic dough.  You may not need all of the remaining flour.  The dough should still look just a little wet, but not be sticky.  (See note 5 below.)

4.  Transfer the dough to a lightly-oiled bowl, and turn to coat all sides with the oil.  Cover, and let rise in a warm place until doubled in size, about 45 to 60 minutes.

5.  Punch down the dough, cover, and let rise again until doubled in size, another 45 to 60 minutes.

6.  Punch the dough down again, cover, and let rise a third time until doubled in size.

7.  After the third rise, punch down the dough again, and turn out onto a work surface.  Unless your dough is sticky, you shouldn’t need any flour on the surface.  Knead the dough gently two or three times, to make sure it is fully deflated.  Roll the dough into a long rope, about 24 inches long.  Divide the rope evenly into 24 pieces.  Roll each piece under your hand into a round roll, then form into ovals by rolling them back and forth a few times.  Place each oval onto a large baking sheet lined with parchment paper.  Cover loosely with plastic wrap and let rise in a warm place until doubled in size, about 1 hour.

8.  Preheat the oven to 400º F.  Bake the rolls for 15 minutes, or until light brown and baked through.  Remove to a rack to cool, about 30 to 45 minutes.

9.  Using a fork, split the rolls in half horizontally.  Do not use a knife, as they won’t crisp properly.  Return the halves to the baking sheet (they don’t need to be spaced far apart), and toast at 400º F until they have browned lightly, about 10 to 15 minutes.  Reduce the heat to 300º F and continue to bake until they are completely dried through, at least another 20 minutes.  Remove to a rack to cool.


Notes:
1.  In step 9, I baked mine at 400º for 10 minutes, reduced the heat to 300º and baked another 20 minutes, then turned the oven off and left them there overnight.  In the morning, they were just perfect.

2.  I neglected to do so, but a touch of ground cardamom is not only very authentic in these crackers, but would also be quite delicious.  Depending on your tolerance for it, you can use anywhere from a pinch to about 1/4 teaspoon.  Other good options include fennel, cumin, cinnamon, thyme, or dill.

3.  Stored in an airtight container, skorpor should last for several weeks, but are best within a week or two.

4.  Though it might seem like overkill, the triple-rising procedure is necessary to achieve the proper light and crumbly texture.  Sorry about all this.

5.  Depending on what type of bulgur wheat you use (fine, coarse, etc.), and how much water it absorbs, you may end up using only a little or nearly all of the whole wheat flour in step 3.  Either way is fine; just make sure your dough is at the proper hydration level (not too firm and dry, not too sticky and wet).

Posted in Savory, Yeast Breads | 2 Comments

Swedish Peasant Bread

Week Fifteen: Scandinavian Breads

swedish-peasant-bread

When I made knackebrod again last week, I did a little research into Scandinavian breads.  And quite honestly, I was surprised at the variations!  I mean, this is an area of the world that is made up in large part by alpine tundra; it’s not exactly renowned for its agriculture.  For centuries, the most predominately-grown grains were rye and barley, as the climate was simply too cold for most wheat.  Some wheat was imported (at great cost), and hardier strains were eventually developed; but until then, breads were generally made with the cheaper and more widely-available rye and barley.

Neither of these two grains really makes a very good standard loaf of bread on its own, which is why crackers and other flatbreads were more prevalent.  (Side note: rye will make a pretty good sourdough loaf on its own, for various very technical reasons; but that’s a bit different from the typical straight-dough method of breadmaking.)  And that’s where I expected the Breads of Scandinavia to leave off, with some hard and dry rye crackers that would last for endless months of winter.

Man, was I wrong!  Apparently, given nothing else to do in the cold and dark of that long winter, the people of Scandinavia just went to town (metaphorically speaking) with their bread recipes.  And not only were they widely varied in style and shape, but the grains and flavors looked so interesting and unusual (to my more continental palate, that is), that I just had to try them.  So this week, I give you breads from Norway, Sweden, and Finland, with maybe a little Denmark or Iceland thrown in for good measure.

This first bread (like most of these breads) is totally new to me.  It utilizes an uncommon but centuries-old “scalding method”, which means that boiling water is poured over some of the flour and is left to ferment before mixing the final dough.  Basically speaking, highly complex flavors develop when you do this, as peasant farmers all over Europe have known for ages.  This method improves not only the flavor, but also the texture of non-wheat breads, particularly rye. 

Breads made with the scalding method are generally hearty and robust, and can last a long time without refrigeration – up to several weeks – which was of course crucial in less technologically-advanced times.  Despite any similarites, scalded-flour breads vary widely in texture, taste, and shape between countries, even between communities, making each very representative of a particular region.  This bread hails from Sweden, but beyond that, I can’t pinpoint a more precise location.

All I know is, wherever exactly this bread is from, they can just keep on turning out things like this.  It’s really, really amazing!  It’s grainy, but soft and light, with a fabulously complex set of flavors.  By turns tangy and sweet in perfect mild balance, with a wonderful hit of cumin and fennel, the taste of the rye flour (yes, despite the very small amount used!) really shines.   The soft crust yields easily to hand, knife, or tooth, and the unusual shape is a treat for the eyes.  I think this dough would make some really excellent dinner rolls; but I just love the shape so much, I would have to have a really good reason to deviate from it.  Besides, I’m finding that dough cooked into larger loaves just plain tastes better.  And who am I to mess with (near) perfection?  No one, that’s who. 

Make this bread.  Make it, make it, make it.  If you regret it, call me up, and I will personally apologize.  (You won’t regret it.)


Swedish Peasant Bread
Adapted from Bo Friberg
Makes 2 loaves

For scalding mixture:
1 cup boiling water
2 teaspoons salt
3 ounces whole wheat flour
3 ounces rye flour

For dough:
3/4 cup warm water (105º to 115º F)
2 teaspoons white vinegar
1/3 cup (4 ounces) light corn syrup
4 1/4 teaspoons active-dry yeast
2 tablespoons honey
4 tablespoons butter, room temperature
2 teaspoons ground cumin
2 teaspoons ground fennel
4 ounces whole wheat flour (about 1 cup), plus extra for dusting loaves
1 pound unbleached bread flour (about 3 1/2 cups)
1 egg, lightly beaten for an egg wash

1.  To make the scalding mixture, whisk together the salt and the two flours in a heat-safe bowl.  Pour the boiling water over and mix until smooth.  Cover and let stand for 1 hour.

2.  To make the dough, combine the warm water, vinegar, and corn syrup in the bowl of a stand mixer, until the corn syrup has dissolved.  Add the yeast, stir to combine, and let stand until bubbly, about 5 minutes.  Stir in the scalding mixture, honey, butter, cumin, and fennel.

3.  Reserving a few ounces of the bread flour, add the remainder and the whole wheat flour, and mix with the dough hook for about 2 minutes at medium speed, scraping the bowl if necessary.  Adjust the consistency with the reserved bread flour as needed; the dough should be just barely sticky, but should clear the sides of the bowl.  Knead until smooth, about 2 to 4 minutes more.  Turn the dough out onto a floured surface, cover, and let rest for 10 minutes.

4.  Divide the dough in half.  Gently knead and roll each half into a round ball.  Using the side of your hand (like a karate chop), press down into the center of one ball.  With a sawing back-and-forth motion, roll the loaf under your hand until you have almost divided the two halves.  You should end up with two smaller rounds, connected with a little strand of dough.  Repeat with the other round.

5.  Brush the loaves with egg wash and dust liberally with whole wheat flour.  Place on a baking sheet lined with parchment paper.  Using a sharp serrated knife, decoratively slash each loaf.  Cover loosely and let rise in a warm place until doubled in volume, about 1 hour.  Preheat the oven to 375ºF.

6.  Bake at 375º F for about 35 minutes, or until golden brown.  Remove to a rack and let cool.


Notes:
1.  I can’t vouch for it, but I imagine the scalding mixture (after it’s cooled to room temperature) could be left to sit overnight, refrigerated.  All that could happen is the flavors become more complex, right?  Maybe?

2.  If possible, grind your own fennel and cumin seeds, rather than using the pre-ground stuff.  The oils and flavor compounds are much fresher that way; I find pre-ground spices a bit dull and flat.  (Whole seeds are usually cheaper, too, if you can buy them in bulk.  Whole Foods, anyone?)

3.  When shaping the loaves in step 4, don’t be afraid to really almost divide the dough in half.  The strand of dough connecting the two round halves can be as thick as just a couple of fingers; remember, it will puff up as it rises.

4.  I’m not joking.  This bread is really, really good.  And at this point, I think I know from good bread.  It’s just delicious.

Posted in Savory, Yeast Breads | Leave a comment

Whole-Wheat English Muffins, Take Two!

Week Fourteen: Take Two!

I do love a good English muffin.  Fluffy and full of air holes in the crumb, tangy and a bit sour, crunchy and hearty, they have a unique set of characteristics that makes them stand apart from most any other bread out there.  You just can’t beat a breakfast of a scrambled egg with pesto and cream havarti on a golden-toasted English muffin.  But the first time I made them this year, they were… just okay.  Not bad at all; but honestly, the ones from the store were better.  And I hate saying that.

Those muffins were a little too dense, not quite sour enough, just not exactly right.  Maybe it was because of the lack of any sort of starter, or sponge; the flavor relied solely on the quality of the ingredients, rather than any lovely and complex flavors developing slowly, over time.  Also, the method of making them was a little unusual: English muffins are generally rolled and cut out, whereas those were divided into pieces, then rounded and flattened.  This resulted in some rather puffy muffins, rather than the properly cylindrical ones you usually see.

So round two: did it turn out better?  It absolutely did, and I’m rather shocked that it did so.  You see, here was another instance of me abusing a dough, to within an inch of its life.  The dough is meant to proof for at least 1 1/2 hours, but up to 24 hours “in a cool place”, whatever that means.  I left it at room temperature overnight (about 12 hours).  By the time I got to it, it was looking rather deflated, as though it had fully risen, and was starting to fall.  So I punched it down a little, stuck it in the fridge, and left it there for another 12 hours or so.  And when I finally did roll out and cut the muffins, I did so without letting it come to room temperature first (relaxing the dough, and making it easier to work with).

This recipe uses a sourdough starter, which helps the flavor and texture immensely.  I used this starter, which I amazingly still have going strong (I’ve had plants die in less time than that).  If you have your own preferred starter, absolutely use that.  If you don’t have a starter, it only takes about a day or so to get something similar going (see note 1 below).  You can leave it out, but the flavor and texture are so much better and authentically English-muffiny, that I hesitate to suggest it.

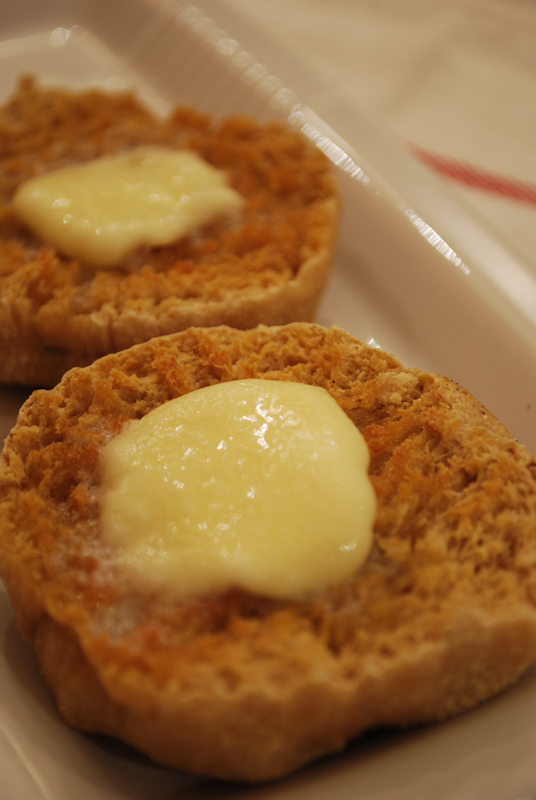
And so, when I bit into the first muffin, crunchy and tangy, I knew it was good.  Despite my insensitive handling, those muffins came out just right.  The complex, sour flavors I was looking for were there, the fluffy yet hearty crumb was spot-on, and slathered with butter, it couldn’t have been better.  (Although it did come pretty close when I enjoyed a lunch of English muffin, crunchy peanut butter, honey, and cinnamon, with an apple on the side.  So good!)  I’m sure that I could do even better with this recipe, given another few tries; and I’m sure I’ll have plenty of opportunities at another shot in the future – this recipe is going in the permanent file for sure!


Whole Wheat English Muffins
Adapted from King Arthur Flour
Makes 16 to 24 muffins

2 tablespoons honey
2 cups warm water (105º to 115º F)
1 tablespoon active-dry yeast
1 cup sourdough starter
1 pound white whole-wheat flour (about 3 3/4 cups)
14 to 18 ounces unbleached all-purpose flour (about 3 1/3 to 4 cups) whole wheat flour
1/2 cup dry nonfat milk
1/4 cup butter, melted and cooled
Semolina or cornmeal for dusting

1.  In the bowl of a stand mixer, mix the honey and water together until the honey dissolves.  Add the yeast, stir to dissolve, and add the sourdough starter and 1 cup of whole-wheat flour.  Mix to form a thin batter, and let sit until it begins to bubble, about 5 minutes.

2.  Add the dry milk, butter, salt, and the remaining whole-wheat flour.  Mix using the dough hook.  Add the all-purpose flour 1 cup at a time, allowing each cup to integrate into the mixture before adding the next.  You will probably not need the full amount of flour given.  The dough should hold together well, and pull away from the sides of the bowl, but should not be too stiff.  Knead until smooth and elastic, about 6 minutes.

3.  Transfer the dough to a large, lightly-oiled bowl, and turn to coat.  Cover with plastic wrap and let stand at least 1 1/2 hours, or until doubled.  If you want a more pronounced sour flavor, let it sit up to 24 hours in a cool place.

4.  Liberally dust a large baking sheet (or two smaller ones) with semolina or cornmeal.  When the dough has risen the desired amount, punch it down, and turn onto a lightly-floured surface.  Divide the dough into two pieces, and roll each out to 1/2-inch thickness.  Using a round biscuit cutter, cut out muffins about 3 inches across, and place on prepared baking sheet, leaving 1 to 2 inches between muffins.  Sprinkle the tops with additional semolina or cornmeal, cover loosely with plastic wrap, and let rise until puffy, about 1 hour.

5.  Heat a large nonstick pan or griddle over medium heat until hot.  Carefully transfer muffins to the hot skillet.  Cook for 2 minutes, then flip, being careful to not deflate the dough.  Cook another two minutes, then flip again.  Cook about 5 minutes more on each side, turning if they begin to brown too much, or until an instant-read thermometer registers 190º F at the center of the muffin.  Remove to a wire rack to cool.  Split horizontally with a fork, toast, and serve warm.


Notes:
1.  If you don’t have a sourdough starter sitting around, whisk together 1/2 cup all-purpose flour, 3/4 cup warm water, and 1/4 teaspoon active-dry or instant yeast.  Cover loosely with plastic wrap.  Let sit at room temperature until bubbly, at least a few hours, but preferably about 24 hours.  If not using at that point, it will keep refrigerated for some days.

2.  If you can’t find while whole-wheat flour, use regular whole-wheat instead.

3.  I don’t own any proper round biscuit cutters, but I find that a tuna can (or something similar) opened at both ends, and cleaned, works pretty well instead.

4.  I tried this at first with two pans: one nonstick, one not.  The (darker, and far less expensive) nonstick pan worked beautifully, cooking the bread gently and without sticking.  The other (supposedly higher-quality) pan quickly burnt the dough, and generally refused to cooperate.  This may have been due to many factors, but I still stick with my recommendation of a nonstick pan.  Cast iron would also certainly be a good choice, but my pan is pretty small for something like this.

5.  If you have semolina on hand, it is preferable for this application, since cornmeal will burn more quickly.

Posted in Savory, Yeast Breads | Leave a comment