The Sourdough Method

Week Twenty-Seven: Try It Again; This Time With Feeling.

sourdough-starter-variation

You may recall last week’s variations on a theme, entitled “Same Dough, Different Methods”.  Well, there was one variation I didn’t try: the sourdough starter method.  I didn’t try it because I decided it was too far out of the realm of “same dough”-ness to really count.  I tried to keep the ingredients as identical as possible, and this variation seemed a bit too fussy for all that.

This is not to say that this is a fussy bread, exactly; quite the opposite, in fact, assuming you have a sourdough starter on hand.  I’ve used the recipe for the starter that I originally made back in March (the original one finally bit the dust, but I’ve got Number Two going strong).  If you make bread with any frequency, you may like to keep a starter on hand in the refrigerator.  They’re very low-maintenance, and it’s a quick and simple way to add extra flavor and keeping ability to any bread!

The starter I used has a 100% hydration level, which means there’s an equal amount by weight of flour and water.  If you have another starter, you may need to adjust the levels of flour and water in the final dough for this bread.  But I highly recommend you try it; there’s hardly a better and easier way to get maximum flavor with little time involved!

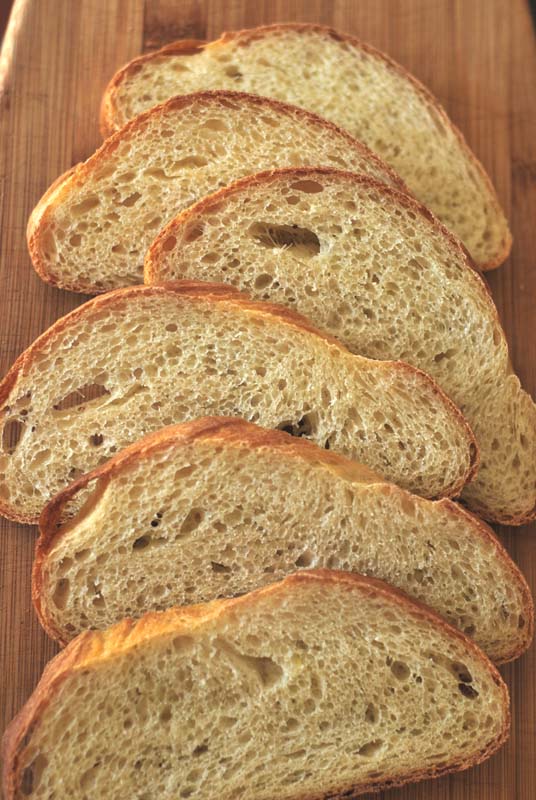
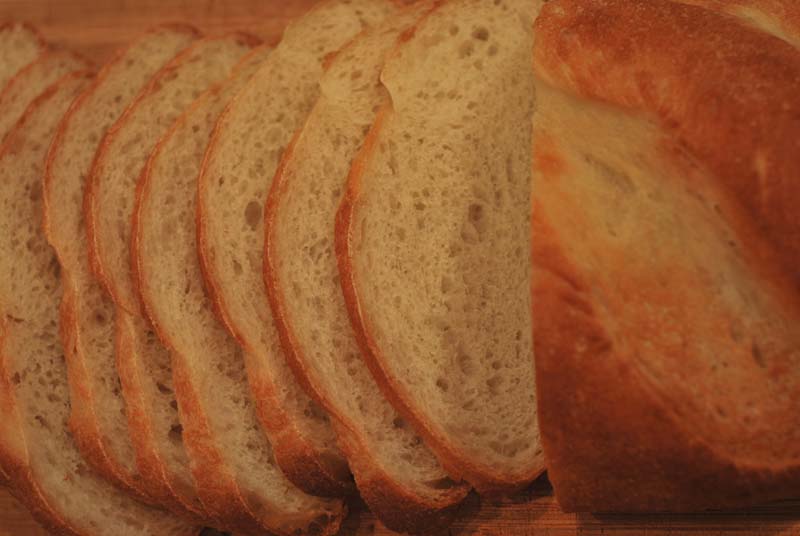
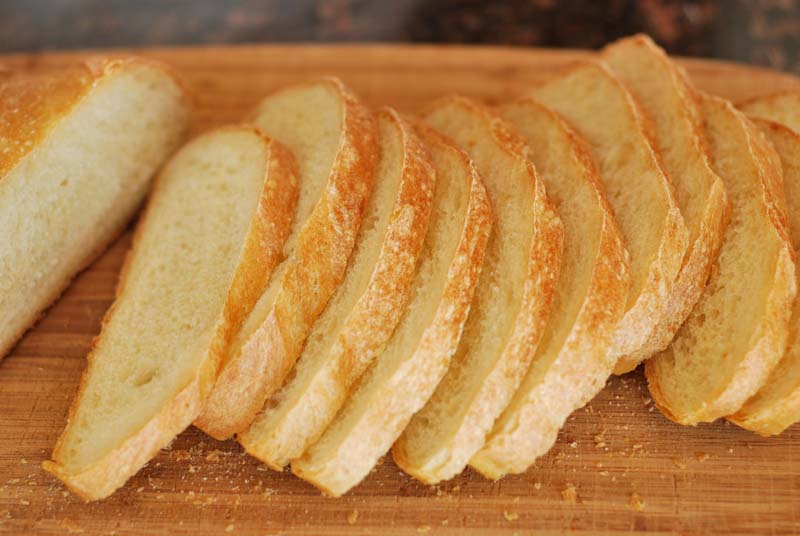
Like many of the breads from last week, this loaf baked into a beautifully golden-brown loaf, with plenty of oven spring, making for a very pretty bread.  The texture was lovely and properly chewy, with an even arrangement of gorgeously big air holes in the crumb, more so than many of the other variations.  There was a slight sourdough tang to the flavor, but only barely.  The complex flavors of a long-fermenting dough were there in spades, and combined into a well-balanced overall flavor with the notes of sourdough.

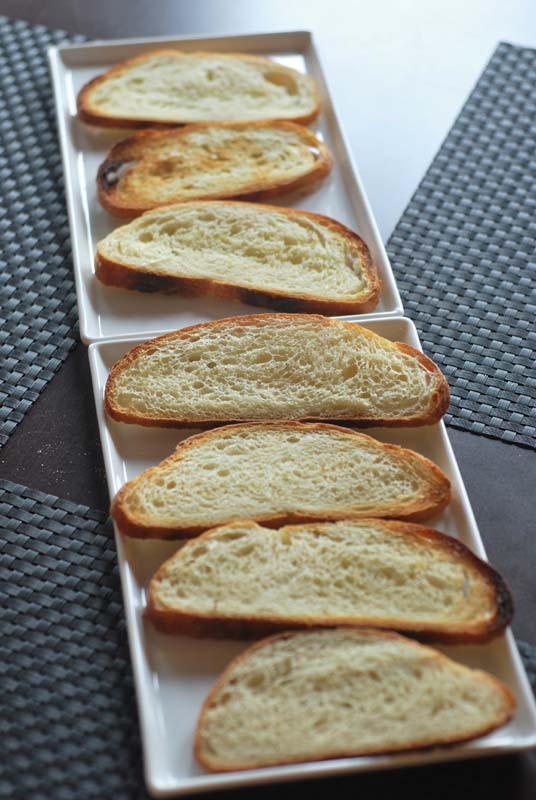
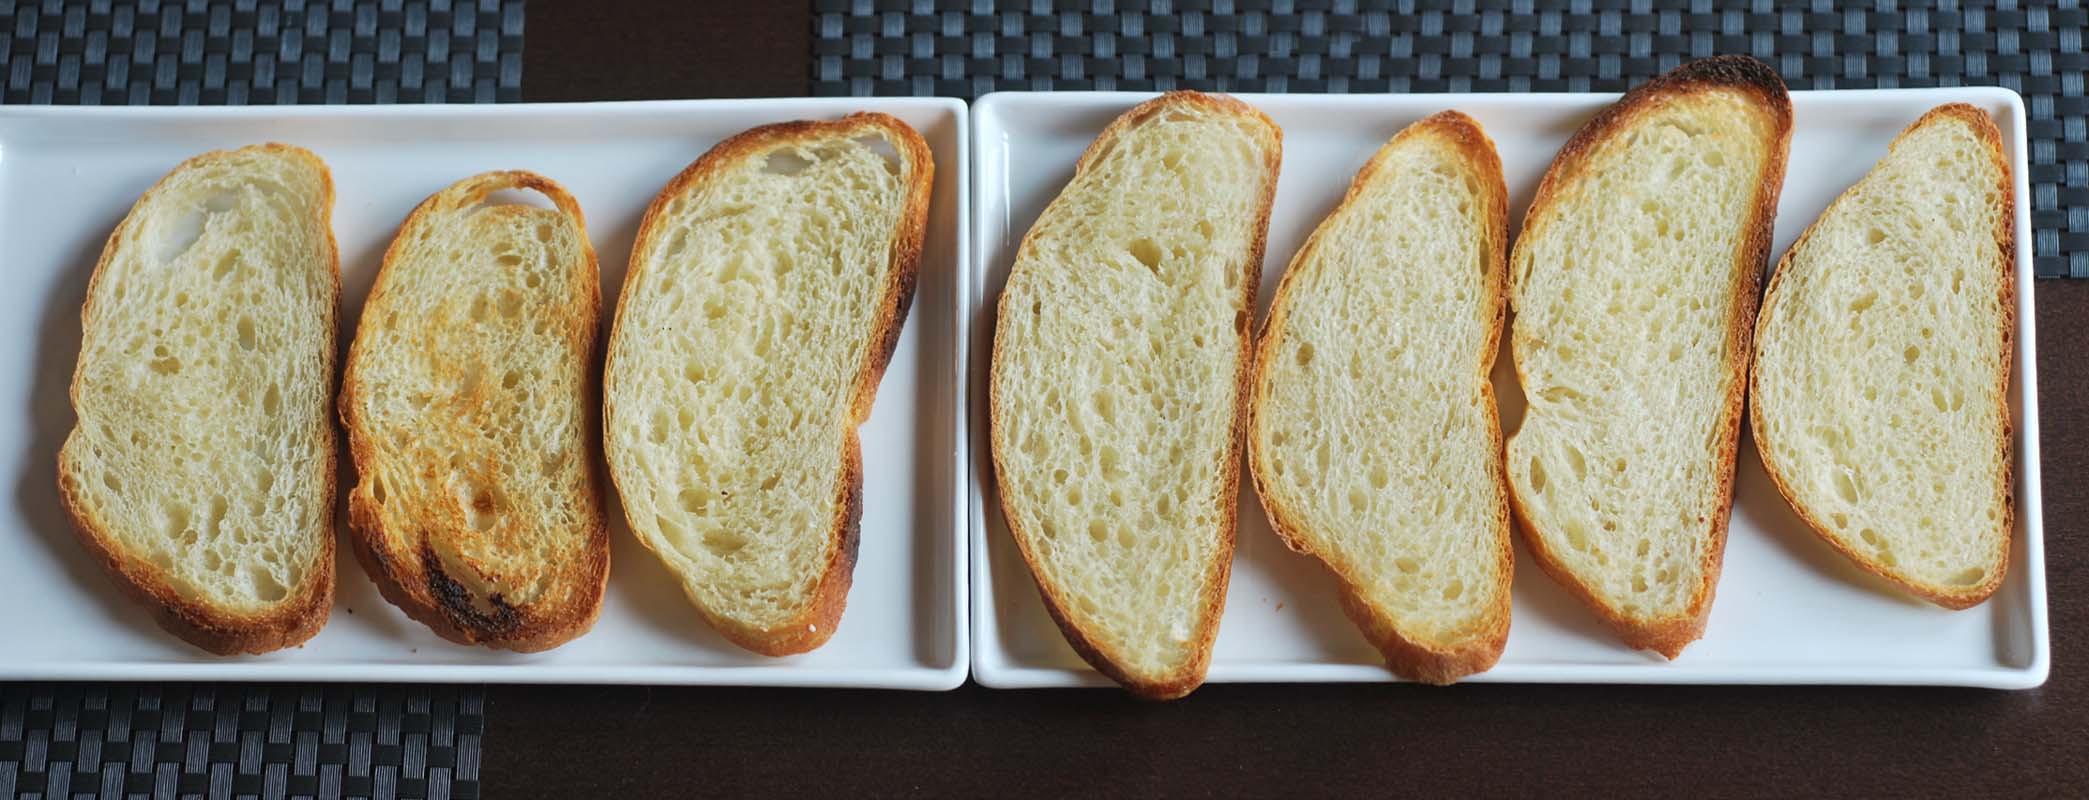
But the most fun part, after I made this bread, was tasting.  Yes, I saved one slice from every variation loaf that I baked, choosing randomly from the middle of the loaf every time.  Labeled and frozen, I’d been looking forward to comparing each to each for almost two weeks.  We mixed up a batch of tuna salad, and set out a plate of dipping oil, while waiting for the slices to toast under the broiler.  (You may notice that a couple got a little overdone.)
all-seven-large

from left to right: straight dough, autolyse, overnight ferment, overnight proof, pre-ferment, long rise, and sourdough.

All of the breads were what I’d call acceptable.  There wasn’t a bad one in the lot, but the two “losers” of the bunch were the Overnight Proof bread and the Straight Dough bread.  But there was one clear winner: the Long Rise bread.  Hands down, no question.  The flavor was so amazingly complex, especially compared to the others!  It had such a perfectly chewy texture, not too tough, but with a pleasing resistance to being bitten and pulled apart.  Great job, bread!

The second place winners, if I had to choose, would be a three-way tie between the Autolyse bread, the Overnight Ferment bread, and the Sourdough bread.  All had similar levels of complexity in the flavor, similarly nice textures and crisp crusts, but shared the distinct advantage of not taking seven hours to make.  You won’t go wrong with any of those, and all passed muster with my (now) very discriminating bread-palate.  The Pre-Ferment bread was also very good, and is a good substitute if you just can’t be bothered with a sourdough starter; but I’m not convinced that the time involved was worth the wait.  I think the flavor of the Autolyse bread was just as good, and took less time.  The sourdough starter bread, though, had that fabulous tang to it that you just can’t get in less time, which is why it edged out the win.

I really enjoyed getting to experiment with all these different methods!  It was quite cool to finally see and taste for myself all those things that I had previously only learned on paper.  And so, in the end, if you have literally all day to devote to breadmaking, I highly recommend cutting the yeast in your favorite recipes, and letting time do most of the work for you.  If not, there’s still no better trick to have up your sleeve than an autolyse.  Fast, easy, and it works wonders with any recipe.  Try it for yourself, and happy baking!

all-seven

The Sourdough Method
Makes 1 big loaf

19 ounces (about 4 cups) unbleached bread flour, divided
3/4 teaspoons instant yeast (see note 1 below)
7 1/2 ounces (1 cup minus 2 tablespoons) room temperature water
3/4 cup sourdough starter, from this recipe
1 teaspoon kosher salt

1.  In the bowl of a stand mixer, whisk together all but a handful of the flour and all the yeast.  Add the water and starter, and mix with the dough hook at low speed until a rough dough forms, about 1 minute.  Turn the mixer off, and without removing the bowl or the hook, cover the bowl loosely with plastic wrap.  Let stand for at least 15 to 20 minutes, or up to 45 minutes.

2.  Remove the plastic wrap, and add the salt.  Continue kneading the dough, at medium-low speed.  Knead for 6 to 8 minutes, or until the dough forms a cohesive ball that clears the sides of the bowl, and becomes elastic.  If the dough does not clear the sides of the bowl, add the reserved flour until the proper consistency is achieved.  The dough should not be stiff.

3.  Turn the dough out onto a lightly floured surface, and knead a few times, forming the dough into a round ball with a skin stretching over the outside.  Transfer to a lightly oiled bowl, smooth side up.  Cover with plastic wrap and let rise until doubled in size, about 1 hour.

4.  Line a large baking sheet with parchment paper.  Gently deflate the dough, and turn out onto a lightly floured surface.  Flatten the dough into a slight rectangle or oval shape.  Fold the two corners furthest away from you into the center of the dough, as though you were beginning to fold a paper airplane.  Starting with that point, roll the dough up into a cylinder, pressing gently to seal as you roll.  Press the final seam to seal.  Transfer the dough to the prepared baking sheet, seam-side down.  Tuck the ends under if desired, to make a more attractive loaf.  Cover loosely with lightly-oiled plastic wrap, and let rise until doubled in size, about 1 hour.  Thirty minutes before baking, preheat the oven to 425º F, and place another baking sheet or oven-safe pan in the bottom of the oven.  If you have a baking stone, heat it with the oven.  If not, your baking sheet is fine.

5.  When fully risen, and using a sharp serrated knife or clean razor blade, make three decisive slashes in the top of the loaf at a 45º angle, evenly spaced.  Transfer the bread to the oven (or baking stone, if using).  Immediately throw 4 or 5 ice cubes into the hot pan on the oven floor.  Bake for 10 minutes, adding additional ice cubes as they melt.

6.  After 10 minutes, remove the ice-cube-pan from the oven, and bake the loaf for an additional 15 to 25 minutes, or until deeply golden brown.  Remove the bread to a wire rack to cool before slicing.

Notes:
1.  If using active-dry yeast, your water should be a bit cooler, around 105º F to 115º F.  Instead of mixing the active-dry yeast into the flour, you should dissolve all of it in a little of the warm water, in the mixing bowl.  Let stand for about 5 minutes, or until foamy.  Add the remaining ingredients, and proceed as directed.

Posted in Savory, Yeast Breads | Leave a comment

Curried Cauliflower Flatbread – Again!

Week Twenty-Seven: Try It Again, This Time With Feeling.

 cauliflower-curry-again

Okay, I am apparently denied the great virtue of impeccably turning out one of these breads.  Perhaps you remember, but I crucially neglected to use a nonstick pan the first time around.  Oh yes, it stuck.  With a vengeance. 

This time, there would be none of that!  No siree, I got out my lovely little cast iron skillet, made sure it was nicely oiled, and made gosh darn sure it was hot before pouring the batter in.  I waited until the sides of the bread pulled away from the pan, and the top was well-browned, ran a knife around the edge (just to make certain!), and inverted the pan onto the cutting board.  Result?

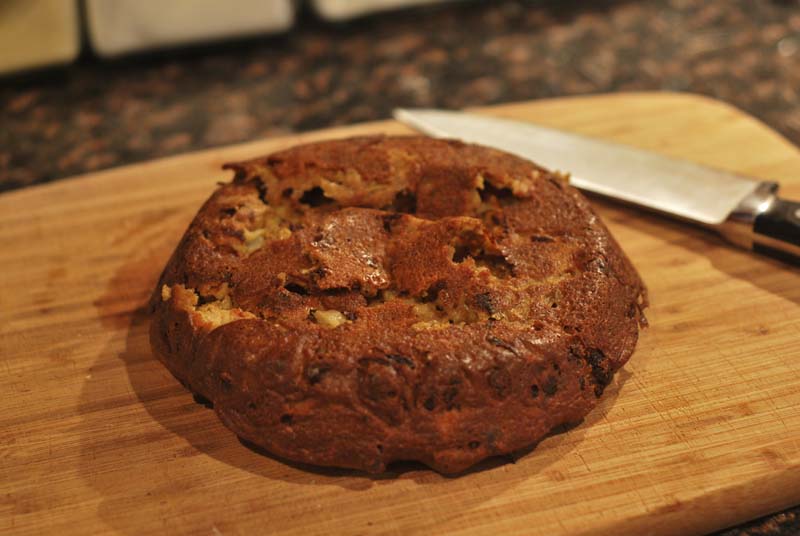
A minute or so of pan-scraping and teeth-grinding later, this is what I got:

cauliflower-curry-again-2

look ma, no bottom!

Argh!  It stuck!  But why?  How?  Didn’t I do everything right?

And then I cut into it, because I was too hungry to put it back in the oven; besides, the bottom was already ruined.  And, well, there was my mistake right there: it was not totally cooked in the middle.

*forehead smack*

The original recipe for this bread said that it would release easily from the pan when fully cooked.  When I turned it upside down and nothing happened, I should’ve known better.  I should’ve put it right back in the oven, and waited another 10 minutes.  But noooooo, I had to go ahead and cut it right then.  Ah, folly.

But the flavor of this bread was just as good as the time before, if a little, uh, runnier.  The heavenly scent of freshly-ground cumin, coriander, pepper, and cardamom hung all around, and the sweetness of roasted cauliflower pervaded through each bite.  I just love curry with cauliflower, and this bread delivers it in spades.  The edges (crust?) of the bread were wonderfully crisp, but they concealed a soft surprise underneath.

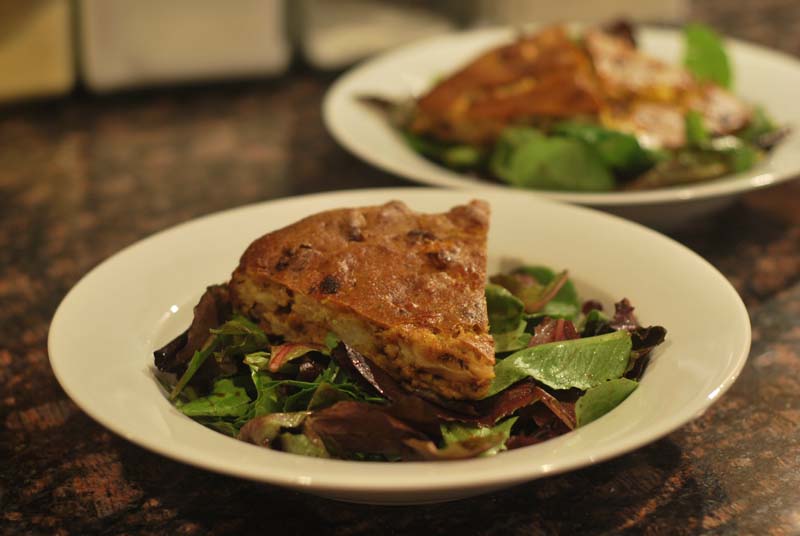
I said this bread was underdone in the middle, which it most certainly was.  But it was actually rather nice!  It came across like more of a quiche-type thing, encased in a bready shell.  It was almost custardy, in the best possible way.  So as a bread, it was a decided failure (again, I know!), but as dinner, it was superb, especially with a dab of homemade yogurt on top.

One problem in this case is my cast iron pan.  Oh, it’s lovely, and gets the job done, but it’s a touch on the small side.  It’s barely nine inches across; perfect for cornbread, but makes a too-thick “flatbread” in this case.  By the time the outside edges were cooked, the middle still hadn’t had a chance to fully bake.  If you have a bigger cast iron pan, and it’s well-seasoned, use it!  If not, I highly suggest dividing the batter into halves, and baking in batches, for a flatter bread.  Or you could even use a couple of oiled and parchment-lined cake pans – that might work even better!  In any case, if it starts to over-brown on the outside before the middle is baked, cover with aluminum foil and keep baking until the middle is done.

The moral of the story is this: calling this a bread is somewhat suspect, if it’s not very thin.  Curry and cauliflower are best friends.  Sometimes, undercooked bread is quite lovely.  Use a nonstick pan.


Curried Cauliflower Flatbread
Adapted from Mark Bittman
Makes 1 round

1 medium cauliflower (1 1/2 pounds), cut into very small florets
4 tablespoons vegetable oil of any sort
Salt, to taste
Black pepper, to taste
4 1/2 ounces (about 1 cup) white whole wheat flour (see note 1 below)
1 teaspoon salt
1 tablespoon curry powder (see note 2 below)
1/2 cup milk
1 cup unsweetened coconut milk (regular or light)

1.  Preheat oven to 400º F.  Prepare cauliflower and place in a baking pan or shallow roasting dish.    Toss with 1 to 2 tablespoons of the oil to coat, and sprinkle with salt and pepper to taste.  Toss again, and roast for 15 to 25 minutes, or until quite soft and well-browned, stirring occasionally to cook all florets evenly.

2.  Meanwhile, whisk the flour, salt, and curry powder together.  Add the milk and coconut milk, and whisk until smooth.  The batter should resemble pancake batter.  Set aside.

3.  When the cauliflower is done, let cool for around 5 minutes.  While cauliflower cools, pour the remaining oil into a nonstick, ovenproof pan or skillet, and place in the oven to heat.  While the pan heats, stir the cauliflower into the batter until just incorporated.

4.  When the pan and oil are hot, but before the oil smokes, remove from the oven.  Carefully pour the batter into the hot pan and smooth the top into an even layer with a heatproof spatula.  Return the skillet to the oven.  Bake at 400º F for about 1 hour, or until well-browned and firm when pressed lightly in the center.  The bread should release easily when done.  Let the bread cool in the pan for about 5 minutes before removing.  Cut into wedges and serve warm.


Notes:
1.  If you don’t have white whole wheat flour, you can substitute a mixture of 3 ounces (about 3/4 cup) regular whole wheat flour with 1 ounce (about 1/4 cup) bread or all-purpose flour.

2.  Instead of a pre-mixed curry powder, you can use the following combination to grind your own: 1/2 teaspoon coriander seeds, 1/2 teaspoon cumin seed, 1/4 teaspoon red pepper flakes, 3 or 4 cardamom pods, 1/2 teaspoon mustard seeds.  In a small pan over medium heat, toast the above ingredients for about 3 minutes, or until fragrant, shaking the pan often.  Do not let get over-brown.  Cool slightly, and grind with a mortar and pestle, or in a coffee grinder.  In the same pan over medium heat, toast 2 teaspoons ground turmeric and 1/4 teaspoon paprika for about 2 minutes or until a bit darker in color and very fragrant, shaking the pan often.  Combine with the other ground spices, and use as directed.

3.  Did I mention that it’s important to use a nonstick pan?  Use a nonstick pan.  Cast iron is best.

Posted in Quick Breads, Savory | Leave a comment

Peanut Butter Bread – Again!

Week Twenty-Seven: Try It Again; This Time With Feeling.

peanut-butter-bread-again

When I first made peanut butter bread, lo these many weeks ago, I was more disappointed in the result than I have been by many other of my kitchen failures.  I mean, that recipe was based on a Paula Deen recipe.  Paula Deen!  That doyenne of Southern cooking, that mistress of all things buttery, Paula friggin’ Deen.  And it was kind of gross!    She must’ve handed that one off to an intern, or something.  Dry and rather tasteless, I didn’t even ponder hanging on to that recipe for a minute.

So for a re-do, I had to start at the drawing (cutting?) board.  The ingredients are basically the same, but I increased the moisture as much as possible, by using honey instead of brown sugar, two eggs instead of one, increasing the amount of peanut butter, and adding a touch of oil for good measure.  And, mainly because I felt like it, I opted to make it a wee bit healthier, using some whole wheat flour and adding in some flax seed and wheat germ.

The extra moisture did help quite a bit, and the flavor was very nice, but the texture was still grainier and drier than I’d prefer.  Now, I’m a big fan of whole grains; I love biting into a well-made 100% whole wheat loaf, I love brown rice, I love wheatberries, I love grainy.  I am Grain Fan #1.  But this was more sawdust than grain, and was therefore mildly unpleasant.  I think if the bread were moister still (!), it would have turned out better.

But see, the batter was already so liquid, I’m a bit stumped as to how to further increase the moisture.  More sugar?  Add applesauce, or a mashed banana?  More oil?  Those things surely would make for a moister end product; but eventually one crosses over into cake territory, and this sure isn’t A Cake A Day.  Besides, the nature of bread (even quick breads, in my book) is that it is a daily food.  Carb-cutting is anathema to me; it’s not unusual for me to eat bread at every meal.  I simply cannot fathom including a cake-like “bread” in my everyday diet.  Hence, I am loath to make a more moist quickbread by adding a stick of butter to a lackluster batter.  Not to mention, I think that’s taking the easy way out.

So, in the end, I think I might have to put this back on the shelf for a while.  I don’t intend to experiment with it any more for the present time, but I’m still intrigued enough by the idea of peanut butter bread (and it’s lack of appearance in cookbooks!) that I’m not done with it quite yet.  This particular recipe isn’t the answer, but as soon as I’ve got it, I’ll be sure to let you know!


Peanut Butter Bread
Makes one 9 x 5 inch loaf

1 1/2 cups unbleached all-purpose flour
1 cup whole wheat flour
2 tablespoons ground flaxseed
2 tablespoons toasted wheat germ
1/2 teaspoon kosher salt
1 teaspoon baking powder
1 teaspoon baking soda
1 teaspoon cinnamon
2 large eggs
1/4 cup honey
3/4 cup peanut butter
1 cup buttermilk
2 tablespoons vegetable oil
2 teaspoons vanilla extract

1.  Preheat oven to 375° F.  Grease one 9 x 5 inch loaf pan.  In a bowl, whisk or sift dry ingredients (flour through cinnamon) together.  Set aside.

2.  In another large bowl, whisk the eggs until blended.  Add honey and peanut butter, and whisk until smooth.  Slowly add buttermilk, whisking to incorporate before adding more.  Add the oil and vanilla.  Add the dry ingredients and gently combine until just moistened (some lumps and flour streaks are okay).

3.  Pour the mixture into the prepared pan.  Smooth the top, and bake at 375° F for about 40 minutes, or until browned and fully baked.  When done, the top will feel firm when pressed lightly.  Let cool briefly in pans before turning out onto a wire rack to cool fully.  Serve warm.


Notes:
1.  Be sure to use regular store-bought peanut butter, not organic, natural, or freshly-ground.  Skippy is a preferred brand for baking.

2.  By the way, I used crunchy peanut butter, because that’s what we buy and have around.  Normally, I love the little bits of peanut, but maybe that had some effect on the texture of the bread?  I can’t really imagine that it did, but who knows?

Posted in Quick Breads, Sweet | Leave a comment

Eek!

Oh my gosh, you guys!  I forgot to publish one of my recent posts!  Here it is, and I’m so sorry to anyone who noticed the omission!

To help make amends, here is a picture of a special kitty with a heart on him.

sand-kitteh-2

All better?  Yay!

Posted in Everything Else | Leave a comment

Basil-Lime Popovers – Again!

Week Twenty-Seven: Try It Again; This Time With Feeling.

basil-lime-again

This was one recipe that I absolutely had to have another attempt at.  The first time I tried it, I was so disappointed!  Those poor, flat little popovers, they never really had a chance.  I’m still not sure what the major problem was, since I’ve made popovers before with no problems at all.

One possible culprit was the over-zealous buttering of the muffin tins, which created a surface too slick for the batter to cling to as it rose (or didn’t).  Another problem was that I hadn’t pre-heated the muffin tin; popovers rise their tallest when the pan is quite hot, creating steam instantly, which is important as steam is the only leavening popovers have.  In retrospect, though, I think the most likely offender was the use of lime juice in the batter.

When you add an acid (such as vinegar or citrus juice) to milk, it curdles, turning into an ersatz buttermilk.  The reasons behind this phenomenon are quite technical, and it’s a nice trick to have up your sleeve in case you never have buttermilk on hand (like me), but what it means in this case is that my batter became riddled with clumpy bits of coagulated milk protein.  I tried to avoid that foreseen result by adding the lime juice at the last minute, thinking the batter would rise and set before it became a problem, but it just did not.  The clumps formed, and even the power of steam wasn’t enough to lift them.  I think.

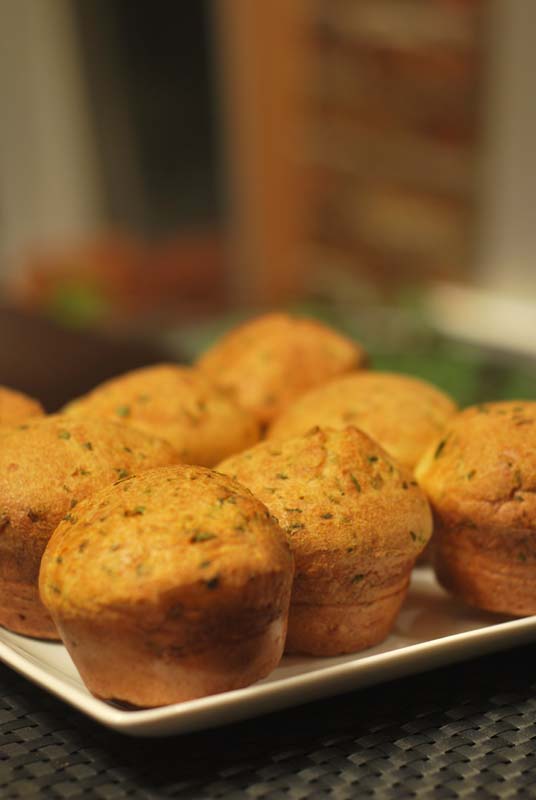
Or perhaps my problem was a combination of all these, so I decided to address all three: I buttered the tins lightly, I pre-heated the pan for a good, long time, and I nixed the lime juice, using only lime zest instead.  The result?  Success!  As you can see, these little guys puffed up happily and beautifully.  They were properly crispy outside and soft and eggy inside, with just a hint of basily-limey flavor.  Whatever the problem was, I fixed it.

I was a bit worried that leaving out the lime juice would make them less tangy, but I needn’t have worried; they were lovely.  The combination of the lime and basil resulted in a pleasant freshness, both herbal and zippy.  These would pair perfectly with any sort of fish or seafood dish, even a humble tuna salad.  I like to serve popovers filled with my favorite tuna salad recipe (not a recipe exactly, I’ve never written it down, but I use capers, a chopped pickle, and a splash of buttermilk), as it’s a slightly unusual presentation, almost a new take on a tuna salad sandwich.  These would be just right for that!


Basil-Lime Popovers – Again!
Makes 6 or 9 popovers

4 1/2 ounces (about 1 cup) all-purpose flour
3/4 teaspoon kosher salt
2 eggs
3/4 cup milk, at room temperature
1/4 cup plus 2 tablespoons water, at room temperature
1 tablespoon olive oil
2 tablespoons chopped fresh basil leaves
Zest of 1 lime

1.  Preheat oven to 425° F at least 20 minutes before baking.  Position an oven rack in the lower third of the oven, and place muffin tin or popover pan on the rack to heat with the oven.

2.  Whisk together the flour and salt in a small bowl.  In a medium bowl, whisk together the eggs, milk, water, and olive oil.  Add the lime zest and basil, and whisk to combine.  Add the flour mixture and whisk until smooth and fully combined; a few lumps may remain.

3.  Remove heated pan from oven, and carefully butter or grease 9 cups if using a standard muffin tin, or six cups if using a popover pan.  Divide batter evenly among cups.  Immediately lower temperature to 375° F, and bake in lower third of oven 30 to 45 minutes (see note 1 below), or until well-puffed and golden brown.

4.  Remove popovers from the oven.  Using a sharp knife, cut a small slit in the side of each popover, and bake 5 minutes more.  Remove to a wire rack to cool.  Popovers are best served warm.


Notes:
1.  Popovers made in standard (1/2-cup) muffin cups should bake about 30 minutes before cutting slits; bake closer to 40 or 45 minutes if using a popover tin.

2.  For the highest-rising popovers, make sure all your ingredients are at room temperature, and heat your (ungreased) pan in the oven.  Grease quickly before filling tins with the batter.

Posted in Savory, Unleavened Breads | Leave a comment

Chocolate Stout Beer Bread – Again!

Week Twenty-Seven: Try It Again; This Time With Feeling.

chocolate-stout-again

Okay, I think this time I’ve finally made enough beer bread.  I’ve probably made enough to choke a horse at this point, but I think I’m actually done now.  For the year, anyway; beer bread will always have a cherished spot in my recipe book!

You may remember the beer bread variations I did a few weeks ago.  One of those variations, the chocolate stout one, didn’t exactly turn out as I’d hoped.  The result was very much like an undersweet chocolate cake – not exactly a bad thing, but not what I was going for.  Of course I had to have another crack at it!

Previously, I had added the chocolate into the batter by sifting cocoa powder in with the flour.  The idea was to get a more even distribution of chocolate flavor, which is exactly what happened.  Unfortunately, the crumbly, moist nature of beer bread, reminiscent of a savory cake, rendered that approach a little too dessert-y.  Not to mention, the stout flavor was totally obscured by the pervasive cocoa.

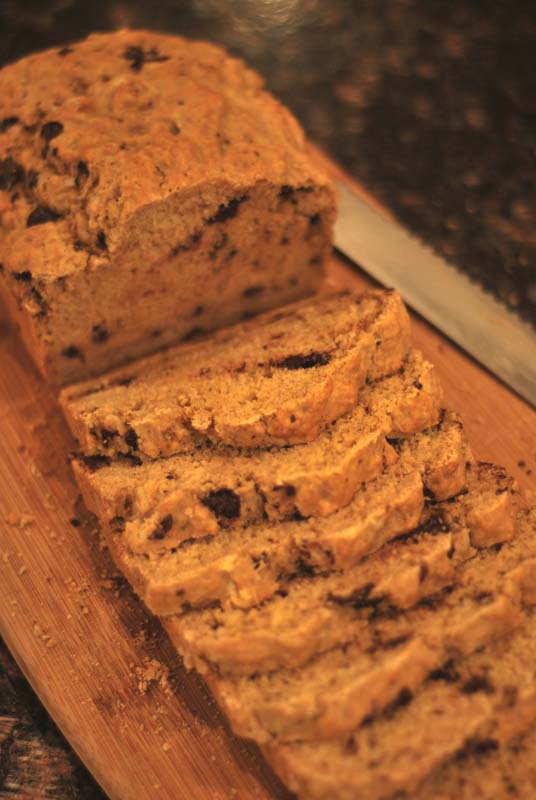
This time around, I opted to simply mix chopped chocolate into the batter instead.  This turned out to be a far better solution, as the bits of chocolate flavor the bread while not obscuring the stout flavor.  Speaking of which, the stout flavor was significantly mellowed.  To be fair, I didn’t use the darkest of beers (and technically, it wasn’t even a stout, but hey hey), but the bread itself took on a quite pleasant caramel, brown-sugar flavor and color.

I imagine a Guinness or any other proper stout would lend a welcome bitter note that would pair nicely with any type of chocolate, even a quality milk chocolate.  You could always use my almost-bought-it second choice, Young’s Double Chocolate Stout, which comes in pleasing over-12-ounces sizes (what will I ever do with those extra ounces?), but which possibly maybe crosses over into too-good-to-cook-with territory.  It’s a fine line, that.

[Side note: I’d just like to draw your attention to this brew, discovered while browsing the Wells & Young’s site.  If ever there was a beer crying out to have beer bread made with it, I don’t think I’ve seen a more likely candidate.  Perhaps my beer bread days are not done, assuming I can find that somewhere?  Suspenseful!]

Other than the chocolate formatting change, everything else remains the same as in the first attempt at chocolate stout beer bread, most notably the use of olive oil instead of butter (as in the original, plain beer bread).  To my slight dismay, the olive oil flavor doesn’t really come through; but I will say that this bread tastes just fantastic when toasted and dipped in olive oil.  Maybe not as supremely amazing as this chocolate bread dipped in olive oil, but still pretty great.  Crumbly, crusty, chocolate-y, this bread covers most of the bases.  Hope you enjoy it – this one’s a keeper for me!


Chocolate Stout Beer Bread
Makes one 9 x 5 inch loaf

3 cups + 2 teaspoons all-purpose flour
4 1/2 teaspoons baking powder
1/2 teaspoon salt
3 tablespoons sugar
3 tablespoons olive oil, melted and cooled slightly
12 ounces stout or other dark beer, at room temperature
1 1/2 ounces (1/3 cup) good quality chocolate, chopped (or chocolate chips)

1.  Preheat oven to 350º F.  Lightly grease a 9 x 5 inch loaf pan, and sprinkle with 2 teaspoons all-purpose flour.  Shake the flour around until the whole interior is coated, then knock out the excess.

2.  In a medium bowl, whisk together the flour, baking powder, salt, and sugar.  Add the olive oil and beer, and stir with a spoon or spatula until mostly combined.  Add the chocolate, and fold together until  just combined, and all dry ingredients are moist.  Pour into prepared loaf pan.

3.  Bake at 350º F for 40 to 45 minutes, or until golden brown on top.  Remove from pan.  Cool at least 10 minutes on a rack before slicing.


Notes:
1.  After the bread is baked, loosen the edges with a knife if needed, and gently knock the edge of the pan on the counter to release the loaf.

2.  This recipe can easily be made into muffins instead of a whole loaf.  Grease and flour a muffin tin as directed, and fill each cup about halfway full.  Bake for about 30 minutes, or until golden brown.  Remove from tin and cool on a rack.

Posted in Quick Breads, Sweet | Leave a comment

Fougasse – Again!

Week Twenty-Seven: Try It Again; This Time With Feeling.

fougasse-1

Well, it’s that time again: I’ve gotten through another three months.  That’s right, Faithful Readers, it’s the halfway point!  Woo!  Six months down, six months to go!

*confetti*

So this means that this week, like the final week of the first quarter of the year, I’m devoting my time to re-doing all those breads that didn’t quite turn out right the first time around.  For those of you just joining in, I’ll explain.  You may have noticed that one of my rules for this year was to make a different recipe of bread each day.  That  is all well and good; except that it doesn’t give me the chance to address or correct any mistakes.  It also means, unfortunately, that if there was a particularly enjoyable bread, I have to wait until at least January 1st to taste it again!  (And I think we all know how much cooking anyone does that day, assuming the night before goes according to plan, am I right?)

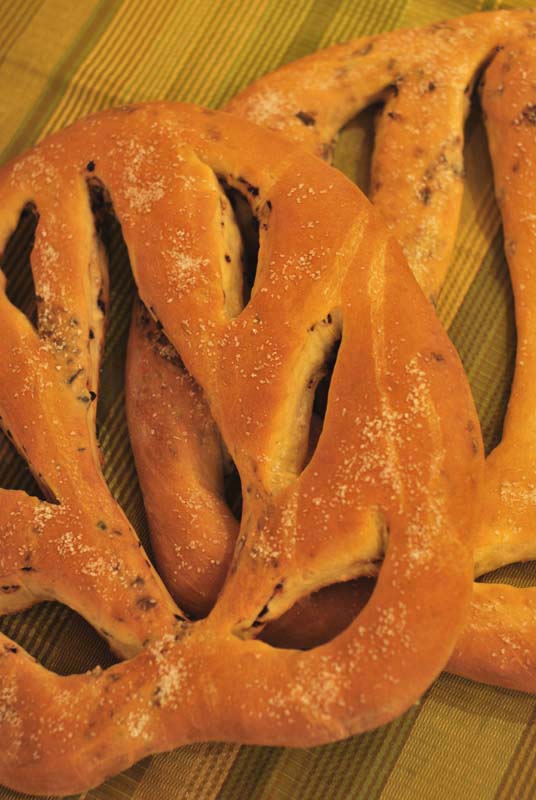
So, to kick things off this week, I’m giving fougasse another try.  You may have noticed a dirty little trick I used in that post; writing mainly about the history of the bread, and not a whole lot about the flavor of that particular end product.  Yes, I’m afraid that was because it didn’t turn out terribly well.  It was rather dry and crumbly, not at all what I had such high hopes for.

Of course, that may also have been the result of me not getting to taste it until the morning after it was baked, generally a big faux pas for fougasse.  Fougasse, originally, were created as a way of checking the temperature of an oven.  They were essentially the smallest bits of dough you could bake while not wasting any, and still ending up with something to serve at dinner.  Being by nature so quick to bake, they also dry out quickly; you will most always find, somewhere in the recipe, an admonition to eat fougasse the same day it’s made.

So I confess, I didn’t taste my fougasse until 12 to 16 hours after it was baked, during which time it certainly dried out.  But even still, I think it was probably on the dry side from the minute it came out of the oven.  What a waste of delicious cheese, pistachios, and orange flower water!  This time around, I decided to use a more humble, but still quite authentically Provençal, flavoring: oil-cured olives.

I don’t know if you’re familiar with oil-cured olives, but I just love them.  They look a bit like giant raisins, all shriveled up.  But oh, man! do they pack a punch!  I find them much to strong to eat out of hand; but chopped up, I can find a million uses for them.  If you like some giant flavors (think caramelized onions, crushed red pepper, anchovies, etc.), you’re sure to love these.  Here, though, I’ve used a restrained hand with them, using just enough to get little punches of concentrated olive flavor throughout the bread, but not enough to overwhelm.

And this time, I did well.  I’m quite proud of these fougasse (fougasses?)! 

Like the first time around, this dough uses a starter, which lends a greater complexity of flavor, but also makes the dough easier to work with while shaping.  The shaping is deceptively simple to achieve – just flatten, cut, and pull, how easy is that!? – but every little bit helps.  And remember, if the dough starts to resist being shaped, just cover it and give it a 10 minute nap!

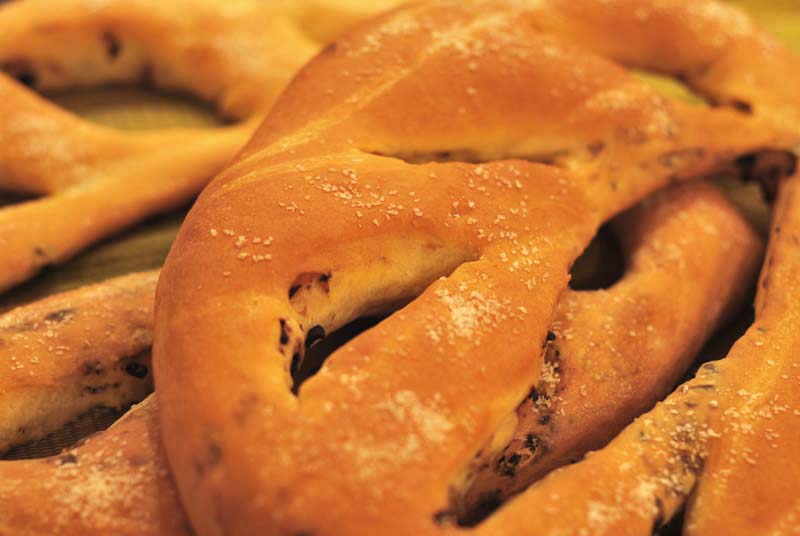
The crumb this time is a bit short, from the olive oil, meaning that you won’t find a chewy, artisinal bread (with long gluten, get it?) here; it’s more akin to certain pizza crusts in texture.  The hits of salty olive in the dough is nicely enhanced with a light dusting of salt on top, and gives everything just enough flavor.  And so pretty, too!  Could you even imagine a prettier centerpiece for a special meal?  I’m calling this one a firm success.  And I think this version might just go in my permanent recipe file!

fougasse-3

the streaks on the dough are from lazily drizzling on the olive oil; it's best to brush it on gently!


Cured-Olive Fougasse
Adapted from Gourmet Magazine
Makes 2 loaves

For starter:
1 1/2 teaspoons instant yeast (see note 1 below)
2 1/4 ounces (1/2 cup) unbleached all-purpose flour
1/2 cup moderately hot water (120º to 130° F)

For dough:
1 tablespoon honey
2/3 cup warm water (100º to 110º F)
2 teaspoons orange-flower water (optional)
1/3 cup olive oil, plus extra for brushing on shaped dough
1 1/2 teaspoons kosher salt, plus extra for finishing
15 ounces (about 3 1/4 cups) unbleached all-purpose flour, divided
1/2 cup oil-cured black olives, pitted and chopped finely

1.  To make starter, whisk together flour and yeast in bowl of mixer.  Add water, and whisk until mixture is smooth.  Cover with plastic wrap, and let rise 30 minutes, or refrigerate for up to 8 hours.  If refrigerated, let come to room temperature 20 minutes before proceeding.

2.  To make dough, stir the honey into the warm water until dissolved.   Add that mixture, the orange-flower water, olive oil, and half of the flour to the starter in the mixer bowl.  Using the dough hook at low speed, mix until smooth, about 1 minute.  Add all but 1 ounce (1/4 cup) of the remaining flour, and knead at low speed until a soft dough forms.  Increase the speed to medium-low, and knead until smooth and elastic, and the dough forms a cohesive ball that pulls away from the sides of the bowl, about 5 minutes.  Add the remaining flour as needed to achieve the proper consistency.

3.  Turn the dough out onto a lightly floured surface.  Knead a few times, sprinkling the work surface lightly with flour if dough is very sticky, forming dough into a ball with a skin stretched around the outside.  Transfer the dough, smooth side up, to a large, lightly oiled bowl, turning dough to coat all sides with oil.  Cover with plastic wrap and let dough rise in a warm place until doubled in size, 1 to 1 1/2 hours.

4.  Turn the dough out onto a lightly floured work surface.  Gently deflate, and press the dough into a round about 10 inches across, or as big as the dough will allow.  Don’t force it; stop if the dough starts to resist.  Sprinkle the olives across the surface of the dough, and fold the sides in to cover the olives.  Knead gently until the olives are evenly integrated throughout the dough (some may fall out, just press them back in).  Cover the dough loosely with plastic wrap, and let rest 15 minutes.

5.  Lightly oil two baking sheets, or line with parchment paper.  Divide the dough into two equal pieces.  Press or roll each half out to an oval about 12 inches long and 1/4 to 1/2 inch thick.  If the dough starts to resist, cover loosely, and let rest for 5 to 10 minutes before trying again.  Carefully transfer the dough to the prepared baking sheets, one loaf per sheet.

6.  Using a sharp knife or a bench scraper, make a cut down center of each oval, being sure to cut all the way through, and leaving a 1 inch border on each end of the cut.  Make 3 shorter diagonal cuts on each side of the first cut, leaving a 1-inch border on each end of the cuts.  The result is meant to look like the veins of a leaf; do not connect the cuts.  Using your fingers, gently stretch the dough and pull the cuts apart to form holes about 1 1/2 inches across.  Let the shaped loaves rest, uncovered, until slightly risen, about 30 minutes.  Preheat the oven to 375° F.

7.  Gently brush the loaves with olive oil, being careful not to deflate, and sprinkle lightly with additional kosher salt.  Bake at 375º F for 20 minutes, then switch the positions of the baking sheets and rotate 180º, to ensure even baking.  Continue baking for another 15 to 20 minutes, or until loaves are golden brown and sound hollow when tapped on bottom.  Transfer to a wire rack to cool slightly before serving.

Notes:
1.  If using active-dry yeast, increase the amount to 2 teaspoons.  Additionally, your water should be a bit cooler, at 105º to 115º F.

2.  Fougasse are best served the day they’re made; but that’s not an option, or if you can’t finish it all, you can freeze them, wrapped tightly.  Thaw in a 350º oven for 5 to 10 minutes, or until warmed through.

3.  The orange flower water is optional, but it lends a nice note if you have some around.  If you don’t, you could substitute orange juice or additional water instead.

Posted in Savory, Yeast Breads | Leave a comment

The Long Rise Method

Week Twenty-Six: Same Dough, Different Method

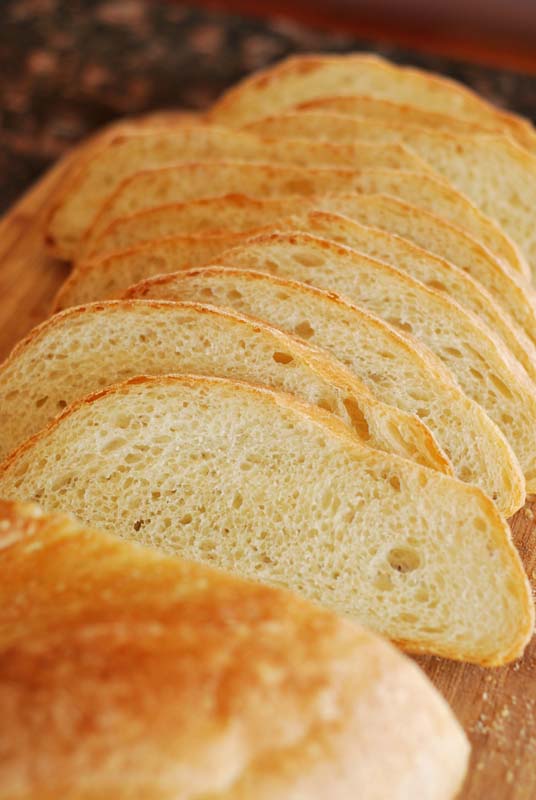
low-yeast

[Oh my gosh, you guys!  I forgot to post this!  It was all written, and I totally forgot to hit the “publish” button!  Sorry sorry sorry!]

The last variation of the week draws inspiration from that wonder of the baking world, Jim Lahey’s No-Knead Bread.  The principle there is that time does practically all of the work for you, stretching the gluten out slowly instead of having to knead it at all.  It also gives the yeast time to produce as much lactic and acetic acid as possible, which vastly improves the flavor and keeping qualities of the bread.

Knowing that time is one of the most important ingredients in the best breads, I decided to give my dough as much time as I could manage in a day.  In order to do that, I needed to reduce the amount of yeast I used.

A quick word about yeast: those little guys will keep on growing and multiplying as long as the temperature stays within a certain range (not too cold or too hot), and as long as they have food.  That means that even a few grains of yeast will leaven all the dough in the world, given enough time.

Thinking logically, if x amount of yeast leavens the dough in 1 hour, then to leaven the same dough in twice as much time, 2 hours, you would need to halve the amount of yeast.  Less yeast, more time.  So to leaven my dough in 4 hours would require x/4 amount of yeast, or 3/8 teaspoon in this case.  But would it really be that simple?  There was only one way to find out!

Yes, it was really that simple, she said, doing away with any suspense.  In fact, it was spot-on.  In four hours, my dough was perfectly risen, and actually smelling quite delicious.  But unlike a typical straight-dough method, where the first and second rises take the same length of time, this time the second rise took less time than the first, as the yeast had multiplied by then, and needed less time to produce the same leavening.

But the real test came in the tasting.  And boy, was it worth the wait!  This was definitely the winning variation!  The texture was just perfect, soft and supple, while still being appropriately chewy.  The crust was thin and crisp, and was a beautiful golden color.  And the flavor!  So delicious!  The autolyse method had produced the most complex flavors so far, but this blew that away.  It wasn’t more sourdough-y, as I thought it might be, nor was it more robust, it was simply better.  It was really, really excellent!

You can absolutely use this method to adapt any bread recipe, which will surely improve the flavor and texture of your favorite loaf.  One caveat with trying it, though, is that your dough should not be fully kneaded, as the gluten continues to develop throughout the long rise.  If you knead what might otherwise be a proper amount, the gluten will eventually stretch out too much, and snap like a rubber band, resulting in a dense and tough bread.  Also, reduce the amount of flour slightly, as a wetter dough will produce a much better result.

So ends an exciting week in bread!  I’ve really enjoyed getting to know my methods better, and seeing exactly what they all do in my dough.  For me, I can read pontifications on the subject from now until doomsday, but it doesn’t really hit home until I can actually taste the difference for myself.  In the end, the best way to get as much flavor as possible from your four simple ingredients is to just give them time, either through a short autolyse, or with a long rise, if you can.  A combination of the two would probably work miracles, healing the lame, turning water into wine, and all that.  Here’s hoping you’ve learned as much as I have this week, and can start utilizing some of these methods to improve your own bread!  Happy baking!


The Long Rise Method
Makes 1 big loaf

18 ounces (a scant 4 cups) unbleached bread flour
3/8 teaspoon instant yeast, divided (see note 1 below)
1 teaspoon kosher salt
1 1/2 cups hot water (115º to 130º F)

1.  In the bowl of a stand mixer, whisk together all but a handful of the flour and all of the yeast.  Whisk in the salt.  Add the water and mix with the dough hook at low speed until a rough dough forms.  Scrape the bowl if needed, and increase the speed to medium-low and knead for 3 to 4 minutes, or until the dough forms a cohesive ball, and becomes slightly elastic.  This dough should be a bit under-kneaded.  If the dough does not form a ball, add the reserved flour until the proper consistency is achieved.  The dough should be rather slack.

2.  Turn the dough out onto a lightly floured surface, and knead a few times, forming the dough into a round ball with a skin stretching over the outside.  Transfer to a lightly oiled bowl, smooth side up.  Cover and let rise in a warm place until doubled in size, about 3 to 4 hours.

3.  Line a large baking sheet with parchment paper.  Gently deflate the dough, and turn out onto a lightly floured surface.  Flatten the dough into a slight rectangle or oval shape.  Fold the two corners furthest away from you into the center of the dough, as though you were beginning to fold a paper airplane.  Starting with that point, roll the dough up into a cylinder, pressing gently to seal as you roll.  Press the final seam to seal.  Transfer the dough to the prepared baking sheet, seam-side down.  Tuck the ends under if desired, to make a more attractive loaf.  Cover loosely with lightly-oiled plastic wrap, and let rise until doubled in size, about 1 1/2 to 2 hours.  Thirty minutes before baking, preheat the oven to 425º F, and place another baking sheet or oven-safe pan in the bottom of the oven.  If you have a baking stone, heat it with the oven.  If not, your baking sheet is fine.

4.  When fully risen, and using a sharp serrated knife or clean razor blade, make three decisive slashes in the top of the loaf at a 45º angle, evenly spaced.  Transfer the bread to the oven (or baking stone, if using).  Immediately throw 4 or 5 ice cubes into the hot pan on the oven floor.  Bake for 10 minutes, adding additional ice cubes as they melt.

5.  After 10 minutes, remove the ice-cube-pan from the oven, and bake the loaf for an additional 15 to 25 minutes, or until deeply golden brown.  Remove the bread to a wire rack to cool before slicing. 


Notes:
1.  If using active-dry yeast, you should increase the amount to 1/2 teaspoon, and your water should be a bit cooler, around 105º F to 115º F.  Instead of mixing the active-dry yeast into the flour, you should dissolve all of it in a little of the warm water, in the mixing bowl.  Let stand for about 5 minutes, or until foamy.  Add the flour and salt, and proceed as directed.
Posted in Savory, Yeast Breads | 5 Comments

The Pre-Ferment Method

Week Twenty-Six: Same Dough, Different Method

preferment-2

You all remember what a pre-ferment is, right?  Well, for those of you who can’t be bothered  to click on links, a pre-ferment is what you get when you ferment some of your ingredients for a long time before mixing all the ingredients into the final dough.  Yes, it’s just that easy; but, of course, being so easy, there’s nearly infinite variations.  Here goes.

A pre-ferment, also known in the vernacular as a “starter”, can vary wildly in hydration level, from as low as around 50% (twice as much flour as water, by weight), to well over 100% (equal amounts of flour and water, by weight); but generally, a pre-ferment is wetter than the final dough will be.  Oh, and that little “by weight” bit is important; remember that a cup of flour and a cup of water do not weigh the same!

So although the hydration level of your starter can vary, that level isn’t really important to the success or failure of your finished dough.  What is important in the finished dough is how much flour and water you add to that pre-ferment.  This is why it’s important to have either a good recipe, or a good eye for dough consistency, or best of all, both.

You can use this method with practically any bread recipe (take some of the flour, mix with some of the water, add a pinch of the yeast, let sit, etc.); but often, you won’t be able to add all of the flour that the original recipe called for.  This is because the portion of the flour used for the pre-ferment has soaked up much more liquid, sitting so long, than it would have if you just made a straight dough with the ingredients.  In turn, this means that there is less moisture available to hydrate the remaining flour.  Are you still with me?

Also, a pre-ferment is not an autolyse.  Remember, an autolyse (ideally, anyway) uses no yeast; a pre-ferment does.  The actual chemical changes taking place are similar, as a type of fermentation is actually taking place in both; but in a pre-ferment, the yeast begin to act, creating lactic and acetic acids, those crucial dough conditioners that strengthen your gluten and improve the flavor of your bread.  In an autolyse, the carbohydrates begin to break down into sugars, and the proteins begin the process of forming gluten.

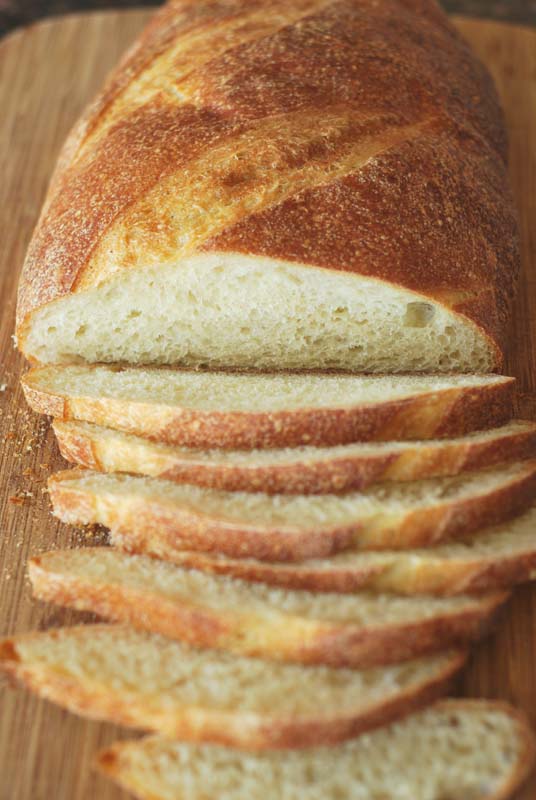
But technicalities aside, how does it taste?  Well, if I’m honest, I’m a bit on the fence with this one.  So far, the winner this week has been the bread that used the autolyse method: that dough was soft and supple, it rose gorgeously, had a delightful oven-spring (how much it rises in the oven), the crust was a picture-perfect golden brown, and those air holes in the crumb were ideal.  And the taste was pretty spot on, nicely complex and tasting like bread ought.

This bread, however, the bread for today, was even more complex in flavor than that.  It had the faintest hint of a sourdough flavor, but only so slightly; otherwise, it was deep and – dare I use this word again? – complex.  Apologies, but there’s no other way I can think to say it!  It doesn’t taste of anything but bread, except it just tastes better.  So this bread edges out the autolyse in the “flavor” category.  Win!

As for texture, though, I was rather disappointed by the way the shaped and unbaked loaf deflated when I slashed it.  There was a reassuring amount of oven-spring; but the slight density of the crumb after baking remained as a finger-pointing reminder.  Perhaps I over-kneaded the dough, over-developing the gluten at first, causing the structure to collapse at the end?  That, to me, seems the most likely culprit; I’m sure I didn’t let it over-rise, or any other of the usual suspects involved in a dense bread.

The crust ended up perhaps a touch paler than I’d like to see ideally, but it was so beautifully crisp and thin that I’m willing to overlook that.  The interior was wonderfully chewy, and neither the crumb nor the crust was at all tough.  All in all, it didn’t turn out badly by any stretch of the imagination, pretty well, in fact; but I was expecting something a bit more airy, a bit more swiss-cheese, if you will.  With proper dough handling, I think this variation could be the winner.

So, to sum up, a pre-ferment is a great way to get as much flavor as possible out of your humble ingredients.  Just be careful not to over-knead when mixing the final dough (long and technical story short; though I can certainly explain if anyone really has a burning desire to know), lest your dough turn into a flat tire at the last second.  (There’s very little that’s quite as disappointing as watching all your time and effort literally dissipate into thin air!)  Yes, a pre-ferment takes a load of time; but that’s what the best breads are made of, and there’s just no replacing it!

preferment


The Pre-Ferment Method
Makes 1 big loaf

19 ounces (about 4 cups) unbleached bread flour, divided
1 1/2 teaspoons instant yeast (see note 1 below), divided
1 1/2 cups room temperature water, divided
1 teaspoon kosher salt

1.  In the bowl of a stand mixer, whisk together 6 ounces (about 1 1/4 cups) of the flour and 1/8 teaspoon of the yeast.  Add 6 ounces of the water and whisk until smooth.  Cover the bowl with plastic wrap, and let sit at room temperature for at least 6 and up to 10 hours.

2.  Remove the plastic wrap.  Add the remaining yeast, water, and all but a handful (about 1/2 cup) of the remaining flour.  Add the salt.  Using the dough hook, mix at low speed until a rough dough forms, about 1 minute.  Increase the speed to medium-low, and continue kneading for 5 to 7 minutes, or until the dough forms a cohesive ball that clears the sides of the bowl, and becomes elastic.  If the dough does not clear the sides of the bowl, add the reserved flour until the proper consistency is achieved.  The dough should not be stiff.  Take care not to over-knead.

3.  Turn the dough out onto a lightly floured surface, and knead a few times, forming the dough into a round ball with a skin stretching over the outside.  Transfer to a lightly oiled bowl, smooth side up.  Cover and let rise in a warm place until doubled in size, about 1 hour.

4.  Let the dough stand at room temperature for 45 minutes to 1 hour before proceeding.  Line a large baking sheet with parchment paper.  Gently deflate the dough, and turn out onto a lightly floured surface.  Flatten the dough into a slight rectangle or oval shape.  Fold the two corners furthest away from you into the center of the dough, as though you were beginning to fold a paper airplane.  Starting with that point, roll the dough up into a cylinder, pressing gently to seal as you roll.  Press the final seam to seal.  Transfer the dough to the prepared baking sheet, seam-side down.  Tuck the ends under if desired, to make a more attractive loaf.  Cover loosely with lightly-oiled plastic wrap, and let rise until doubled in size, about 1 hour.  Thirty minutes before baking, preheat the oven to 425º F, and place another baking sheet or oven-safe pan in the bottom of the oven.  If you have a baking stone, heat it with the oven.  If not, your baking sheet is fine.

5.  When fully risen, and using a sharp serrated knife or clean razor blade, make three decisive slashes in the top of the loaf at a 45º angle, evenly spaced.  Transfer the bread to the oven (or baking stone, if using).  Immediately throw 4 or 5 ice cubes into the hot pan on the oven floor.  Bake for 10 minutes, adding additional ice cubes as they melt.

6.  After 10 minutes, remove the ice-cube-pan from the oven, and bake the loaf for an additional 15 to 25 minutes, or until deeply golden brown.  Remove the bread to a wire rack to cool before slicing.


Notes:
1.  If using active-dry yeast, your water should be a bit cooler, around 105º F to 115º F.  Instead of mixing the active-dry yeast into the flour, you should dissolve all of it in a little of the warm water, in the mixing bowl.  Let stand for about 5 minutes, or until foamy.  Add the flour and salt, and proceed as directed.
2.  If you would like the starter to be ready a little sooner, increase the amount of yeast to 1/4 teaspoon.  Let rest as directed, but it should be ready to use after about 3 or 4 hours.

3.  On the other hand, if you’d like a little more time out of your pre-ferment, make it as directed, then refrigerate it, covered, after letting it sit for 2 to 3 hours at room temperature (giving the yeast time to activate).  It can be refrigerated for up to 2 days; let stand at room temperature for 30 to 60 minutes before proceeding as directed in the recipe.

Posted in Savory, Yeast Breads | Leave a comment

The Overnight Proof Method

Week Twenty-Six: Same Dough, Different Method

overnight-proof

Now this bread right here, the one pictured right above this line, this is why I’m doing all these variations.  Yesterday, I experimented with fermenting (aka: the first rise) the dough overnight in the refrigerator.  Today, I tried proofing the dough overnight in the refrigerator.  What’s the difference, you ask?

Well, the same chemical processes are taking place in both fermentation and proofing: yeast multiplies, converting carbohydrates into alcohol, carbon dioxide, and acids.  The network of gluten holds in gases, and the bread becomes leavened, or risen, in both stages.  But fermentation takes place before the bread is shaped, and proofing takes place afterwards.  Yes, that’s the only difference.  So what’s the point of this experiment?  How much difference could there possibly be? 

Plenty!  Yesterday’s bread, with an autolyse and a refrigerated overnight ferment, came out pretty much exactly like the bread from the day before, the one with an autolyse and a 1 hour room-temperature ferment.  Today’s bread, however, which used an autolyse and a refrigerated overnight proof, waaaaaas rubbish!

Okay, maybe “rubbish” is a bit harsh.  But this bread was definitely sub-par!  Perhaps the gluten became overdeveloped by sitting so long, because the oven-spring (how much the loaf rises in the oven) was minimal, as you can tell from the above picture.  The slashes are flat and even with the rest of the crust, see?  Now look at the picture of the bread from yesterday.  That’s a big difference!  And can you tell how squat and flat this bread is?

As you might have guessed from the lack of oven-spring, the crumb was a bit dense.  There were a few big air pockets, but overall, it was much less airy than the previous three variations.  The flavor was basically good, if a little sour (as all long-rising breads tend to be; it’s not necessarily a bad thing); but the texture was overly chewy, and the crust was somehow crisp and tough.

Not to mention that while the bread sat at room temperature after its chilly proof, just before baking, it developed a monster air bubble on one side, like a giant tumor.  It deflated like a flat tire when I slashed the bread, making the loaf lopsided, and looking a bit sad.  This particular part of the crust also bears the distinct and dubious honor of marking the first time I’ve ever cut myself on bread crust.  This was not a little puncture (which I’ve done before, tearing apart a slightly stale and particularly crusty bread), but a legitimate cut.  What the heck, bread?  What’d I ever do to you?

Oh, right – I let you proof in the fridge overnight.  I’m sorry, bread.  I promise never to do it again.  Unless, that is, explicitly instructed to by Nancy Silverton, or those of her ilk.  Otherwise, I pledge to autolyse as often as possible, ferment in the fridge if necessary, but never proof in the fridge!  Friends?  Okay!


The Overnight Proof Method
Makes 1 big loaf

19 ounces (about 4 cups) unbleached bread flour
1 1/2 teaspoons instant yeast (see note 1 below)
1 1/2 cups hot water (115º to 130º F)
1 teaspoon kosher salt

1.  In the bowl of a stand mixer, whisk together all but a handful of the flour and all the yeast.  Add the water and mix with the dough hook at low speed until a rough dough forms, about 1 minute.  Turn the mixer off, and without removing the bowl or the hook, cover the bowl loosely with plastic wrap.  Let stand for at least 15 to 20 minutes, or up to 45 minutes.

2.  Remove the plastic wrap, and add the salt.  Continue kneading the dough, at medium-low speed.  Knead for 6 to 8 minutes, or until the dough forms a cohesive ball that clears the sides of the bowl, and becomes elastic.  If the dough does not clear the sides of the bowl, add the reserved flour until the proper consistency is achieved.  The dough should not be stiff.

3.  Turn the dough out onto a lightly floured surface, and knead a few times, forming the dough into a round ball with a skin stretching over the outside.  Transfer to a lightly oiled bowl, smooth side up.  Cover and let rise in a warm place until doubled in size, about 1 hour.

4.  Let the dough stand at room temperature for 45 minutes to 1 hour before proceeding.  Line a large baking sheet with parchment paper.  Gently deflate the dough, and turn out onto a lightly floured surface.  Flatten the dough into a slight rectangle or oval shape.  Fold the two corners furthest away from you into the center of the dough, as though you were beginning to fold a paper airplane.  Starting with that point, roll the dough up into a cylinder, pressing gently to seal as you roll.  Press the final seam to seal.  Transfer the dough to the prepared baking sheet, seam-side down.  Tuck the ends under if desired, to make a more attractive loaf.  Cover loosely but thoroughly with lightly-oiled plastic wrap, and refrigerate overnight, or for 8 hours.

5.  Remove dough from refrigerator, loosen plastic wrap if needed, and let stand at room temperature for 30 to 45 minutes.  Preheat the oven to 425º F, and place another baking sheet or oven-safe pan in the bottom of the oven.  If you have a baking stone, heat it with the oven.  If not, your baking sheet is fine.

6.  Using a sharp serrated knife or clean razor blade, make three decisive slashes in the top of the loaf at a 45º angle, evenly spaced.  Transfer the bread to the oven (or baking stone, if using).  Immediately throw 4 or 5 ice cubes into the hot pan on the oven floor.  Bake for 10 minutes, adding additional ice cubes as they melt.

7.  After 10 minutes, remove the ice-cube-pan from the oven, and bake the loaf for an additional 15 to 25 minutes, or until deeply golden brown.  Remove the bread to a wire rack to cool before slicing. 


Notes:
1.  If using active-dry yeast, your water should be a bit cooler, around 105º F to 115º F.  Instead of mixing the active-dry yeast into the flour, you should dissolve all of it in a little of the warm water, in the mixing bowl.  Let stand for about 5 minutes, or until foamy.  Add the flour and salt, and proceed as directed.

2.  In case it wasn’t made clear, I do not reccommend this method; unless you have a very good reason for doing so.

Posted in Savory, Yeast Breads | 4 Comments