Week Twenty-Six: Same Dough, Different Method
You all remember what a pre-ferment is, right? Well, for those of you who can’t be bothered to click on links, a pre-ferment is what you get when you ferment some of your ingredients for a long time before mixing all the ingredients into the final dough. Yes, it’s just that easy; but, of course, being so easy, there’s nearly infinite variations. Here goes.
A pre-ferment, also known in the vernacular as a “starter”, can vary wildly in hydration level, from as low as around 50% (twice as much flour as water, by weight), to well over 100% (equal amounts of flour and water, by weight); but generally, a pre-ferment is wetter than the final dough will be. Oh, and that little “by weight” bit is important; remember that a cup of flour and a cup of water do not weigh the same!
So although the hydration level of your starter can vary, that level isn’t really important to the success or failure of your finished dough. What is important in the finished dough is how much flour and water you add to that pre-ferment. This is why it’s important to have either a good recipe, or a good eye for dough consistency, or best of all, both.
You can use this method with practically any bread recipe (take some of the flour, mix with some of the water, add a pinch of the yeast, let sit, etc.); but often, you won’t be able to add all of the flour that the original recipe called for. This is because the portion of the flour used for the pre-ferment has soaked up much more liquid, sitting so long, than it would have if you just made a straight dough with the ingredients. In turn, this means that there is less moisture available to hydrate the remaining flour. Are you still with me?
Also, a pre-ferment is not an autolyse. Remember, an autolyse (ideally, anyway) uses no yeast; a pre-ferment does. The actual chemical changes taking place are similar, as a type of fermentation is actually taking place in both; but in a pre-ferment, the yeast begin to act, creating lactic and acetic acids, those crucial dough conditioners that strengthen your gluten and improve the flavor of your bread. In an autolyse, the carbohydrates begin to break down into sugars, and the proteins begin the process of forming gluten.
But technicalities aside, how does it taste? Well, if I’m honest, I’m a bit on the fence with this one. So far, the winner this week has been the bread that used the autolyse method: that dough was soft and supple, it rose gorgeously, had a delightful oven-spring (how much it rises in the oven), the crust was a picture-perfect golden brown, and those air holes in the crumb were ideal. And the taste was pretty spot on, nicely complex and tasting like bread ought.
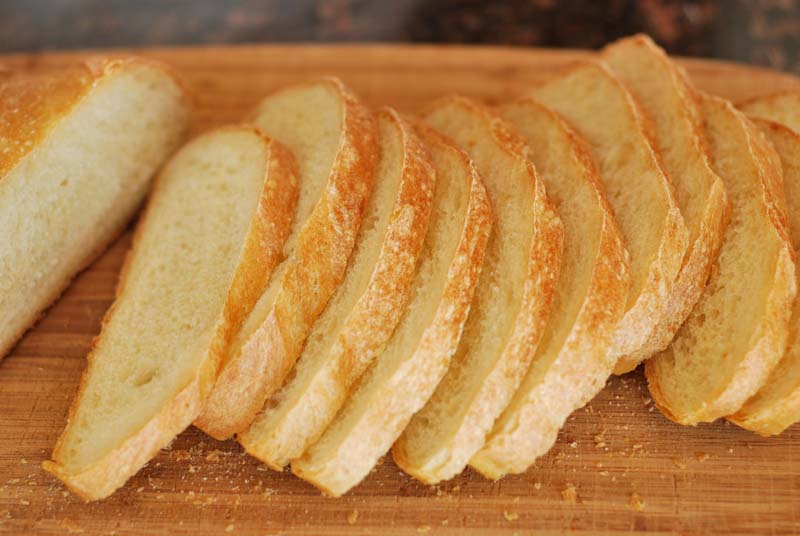
This bread, however, the bread for today, was even more complex in flavor than that. It had the faintest hint of a sourdough flavor, but only so slightly; otherwise, it was deep and – dare I use this word again? – complex. Apologies, but there’s no other way I can think to say it! It doesn’t taste of anything but bread, except it just tastes better. So this bread edges out the autolyse in the “flavor” category. Win!
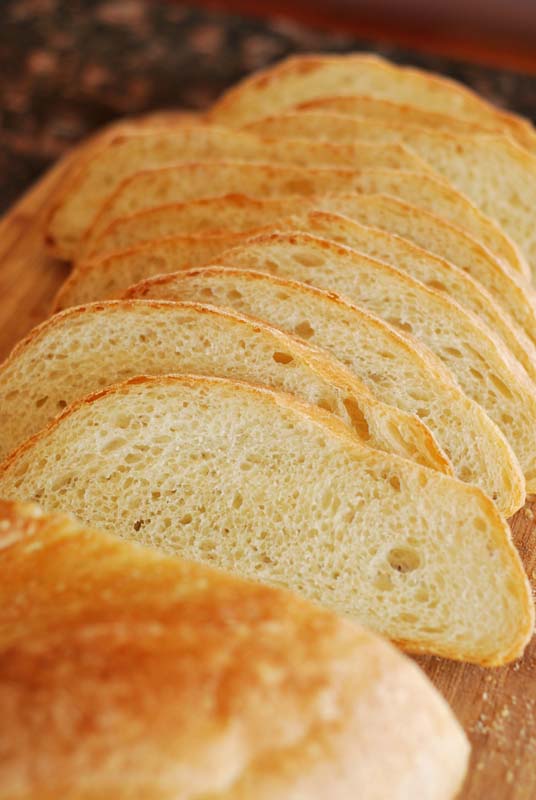
As for texture, though, I was rather disappointed by the way the shaped and unbaked loaf deflated when I slashed it. There was a reassuring amount of oven-spring; but the slight density of the crumb after baking remained as a finger-pointing reminder. Perhaps I over-kneaded the dough, over-developing the gluten at first, causing the structure to collapse at the end? That, to me, seems the most likely culprit; I’m sure I didn’t let it over-rise, or any other of the usual suspects involved in a dense bread.
The crust ended up perhaps a touch paler than I’d like to see ideally, but it was so beautifully crisp and thin that I’m willing to overlook that. The interior was wonderfully chewy, and neither the crumb nor the crust was at all tough. All in all, it didn’t turn out badly by any stretch of the imagination, pretty well, in fact; but I was expecting something a bit more airy, a bit more swiss-cheese, if you will. With proper dough handling, I think this variation could be the winner.
So, to sum up, a pre-ferment is a great way to get as much flavor as possible out of your humble ingredients. Just be careful not to over-knead when mixing the final dough (long and technical story short; though I can certainly explain if anyone really has a burning desire to know), lest your dough turn into a flat tire at the last second. (There’s very little that’s quite as disappointing as watching all your time and effort literally dissipate into thin air!) Yes, a pre-ferment takes a load of time; but that’s what the best breads are made of, and there’s just no replacing it!
The Pre-Ferment Method
Makes 1 big loaf
19 ounces (about 4 cups) unbleached bread flour, divided
1 1/2 teaspoons instant yeast (see note 1 below), divided
1 1/2 cups room temperature water, divided
1 teaspoon kosher salt
1. In the bowl of a stand mixer, whisk together 6 ounces (about 1 1/4 cups) of the flour and 1/8 teaspoon of the yeast. Add 6 ounces of the water and whisk until smooth. Cover the bowl with plastic wrap, and let sit at room temperature for at least 6 and up to 10 hours.
2. Remove the plastic wrap. Add the remaining yeast, water, and all but a handful (about 1/2 cup) of the remaining flour. Add the salt. Using the dough hook, mix at low speed until a rough dough forms, about 1 minute. Increase the speed to medium-low, and continue kneading for 5 to 7 minutes, or until the dough forms a cohesive ball that clears the sides of the bowl, and becomes elastic. If the dough does not clear the sides of the bowl, add the reserved flour until the proper consistency is achieved. The dough should not be stiff. Take care not to over-knead.
3. Turn the dough out onto a lightly floured surface, and knead a few times, forming the dough into a round ball with a skin stretching over the outside. Transfer to a lightly oiled bowl, smooth side up. Cover and let rise in a warm place until doubled in size, about 1 hour.
4. Let the dough stand at room temperature for 45 minutes to 1 hour before proceeding. Line a large baking sheet with parchment paper. Gently deflate the dough, and turn out onto a lightly floured surface. Flatten the dough into a slight rectangle or oval shape. Fold the two corners furthest away from you into the center of the dough, as though you were beginning to fold a paper airplane. Starting with that point, roll the dough up into a cylinder, pressing gently to seal as you roll. Press the final seam to seal. Transfer the dough to the prepared baking sheet, seam-side down. Tuck the ends under if desired, to make a more attractive loaf. Cover loosely with lightly-oiled plastic wrap, and let rise until doubled in size, about 1 hour. Thirty minutes before baking, preheat the oven to 425º F, and place another baking sheet or oven-safe pan in the bottom of the oven. If you have a baking stone, heat it with the oven. If not, your baking sheet is fine.
5. When fully risen, and using a sharp serrated knife or clean razor blade, make three decisive slashes in the top of the loaf at a 45º angle, evenly spaced. Transfer the bread to the oven (or baking stone, if using). Immediately throw 4 or 5 ice cubes into the hot pan on the oven floor. Bake for 10 minutes, adding additional ice cubes as they melt.
6. After 10 minutes, remove the ice-cube-pan from the oven, and bake the loaf for an additional 15 to 25 minutes, or until deeply golden brown. Remove the bread to a wire rack to cool before slicing.
Notes:
1. If using active-dry yeast, your water should be a bit cooler, around 105º F to 115º F. Instead of mixing the active-dry yeast into the flour, you should dissolve all of it in a little of the warm water, in the mixing bowl. Let stand for about 5 minutes, or until foamy. Add the flour and salt, and proceed as directed.
2. If you would like the starter to be ready a little sooner, increase the amount of yeast to 1/4 teaspoon. Let rest as directed, but it should be ready to use after about 3 or 4 hours.
3. On the other hand, if you’d like a little more time out of your pre-ferment, make it as directed, then refrigerate it, covered, after letting it sit for 2 to 3 hours at room temperature (giving the yeast time to activate). It can be refrigerated for up to 2 days; let stand at room temperature for 30 to 60 minutes before proceeding as directed in the recipe.


