Six Grain Bread

Week Thirty-Two: Sandwich Breads

6-grain

To this day, one of the best breads I’ve made this year was one from way back in the beginning of April, Swedish Peasant Bread.  If you haven’t seen that recipe, and you only want to bake one bread, I strongly suggest trying that one.  It was so, so, so good!  It remains a sweet and cherished thought in the memories of many.  I’m actually kind of excited for this year to end so I can make it again!

But enough reminiscing; the reason I bring it up now is because I’ve borrowed the method for today’s bread.  I thought for sure that using that incredibly successful scalding method for the non-wheat flours, and a long autolyse for the wheat flour, would produce a bread nothing short of amazing.

And I wasn’t half wrong, but I wasn’t exactly half right, either.  Apparently, the scalding method, so incredibly good when used with rye flour, doesn’t contain the same magic for other grains – or at least, not the way I did it here.  This bread was very good, don’t get me wrong, but it wasn’t nearly as transcendant as I was hoping.

This bread is fairly dense, and doesn’t have much oven spring, so be sure to let it fully rise before baking (I’m sure I baked mine off a little too soon).  Additionally, it may take your bread longer than the full length of time given to bake; I think it took mine about 55 minutes to fully cook through.

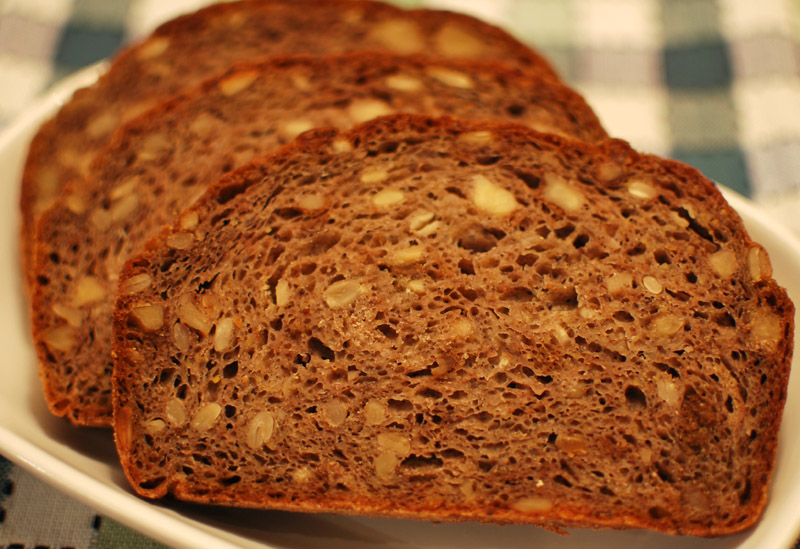
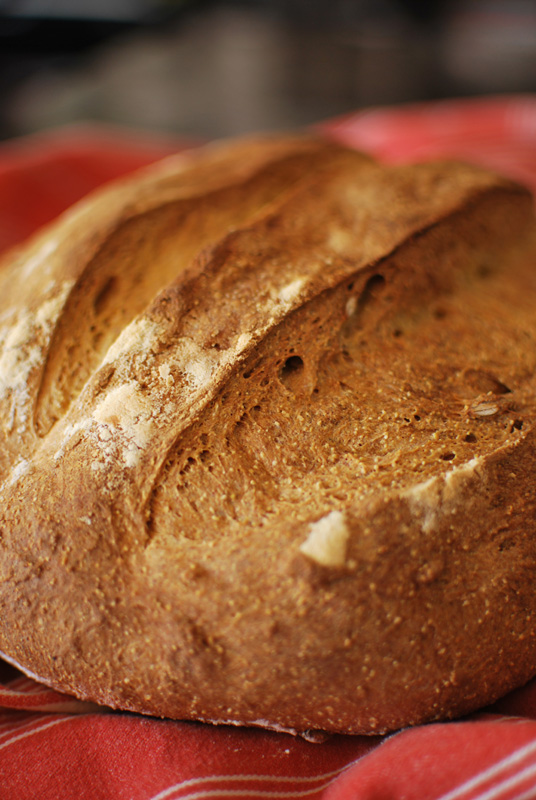
Otherwise, this bread ended up with a moderately soft crust after standing – a bit surprising, given the extremely long baking time – and a richly complex flavor.  It’s absolutely filled with walnuts and sunflower seeds, which make for delightful little crunchy bits when sliced and toasted.  You can certainly leave those out if you like, or switch them for another type of nut or seed that you prefer.  Additionally, you can switch any or all of the various grains for any others you like or have on hand.  You can even use all one kind, if you want; just make sure the total weight equals the total weight of the all-purpose flour.  Overall, this bread is a winner.  It’s a reasonably healthy, cleanly-slicing bread, with a lovely grainy flavor that would go well with any number of sandwich fillings.


Six Grain Bread
Adapted from Apple Pie, Patis, & Pâté
Makes two 9 x 5 inch loaves

For the scalding mixture:
4 ounces (1 cup) buckwheat flour
4 ounces (1 cup) rye flour
4 ounces (1 cup minus 2 tablespoons) whole wheat flour
2 ounces (1/3 cup) cornmeal
2 ounces (1/2 cup minus 2 tablespoons) chickpea (a.k.a. gram) flour
2 tablespoons ground flaxseed
2 1/2 cups boiling water

For the dough:
16 ounces (about 3 1/2 cups) unbleached all-purpose flour, plus extra for dusting
1 1/4 cups room temperature water
1 tablespoon kosher salt
1 scant tablespoon instant yeast
4 ounces (1 cup) walnuts, toasted, cooled, and chopped (see note 1 below)
4 ounces (1 cup) sunflower seeds, toasted and cooled (see note 1 below)
1 tablespoon poppy seeds, plus extra for topping (optional)

1.  To make the scalding mixture, whisk together all the flours in a medium to large heat-safe bowl.  Pour the boiling water over and mix until all flour is moistened.  The mixture will be stiff.  Cover and let stand for 1 to 1 1/2 hours.

2.  Meanwhile, start the dough.  In the bowl of a stand mixer, combine the all-purpose flour and water.  Mix with the dough hook on low speed until all the flour is moistened.  Stop the mixer, cover the bowl with plastic wrap, and let sit until the scalding mixture is ready.

3.  When ready, add the scalding mixture to the flour mixture in the mixer bowl.  Add the salt and yeast, and mix with the dough hook at low speed until fully combined, scraping the bowl as needed.  You may find this step easier to do by hand, since there is a large amount of dough, and the two are rather dissimilar in texture.

4.  Increase the speed to medium, and knead until smooth and elastic, about 8 to 10 minutes.  The dough will be quite slack; you can add additional all-purpose flour by spoonfuls to stiffen the dough a bit, but use a restrained hand.  Add the walnuts, sunflower seeds, and poppy seeds.  Mix on low speed until incorporated; it’s okay if they’re not perfectly distributed throughout the dough.

5.  Scrape the dough into a large bowl.  Cover tightly with plastic wrap, and let sit at room temperature for 30 minutes.

6.  Uncover the dough and, using a nonstick spatula, fold the dough over itself in a tri-fold, as though you were folding a letter.  Cover again, and let rise an additional 45 to 60 minutes, or until doubled in size.

7.  Butter two 9 x 5 inch loaf pans, and set aside.  Turn the dough out onto a floured surface.  Divide the dough in half.  Gently deflate and form each half into a loaf shape 9 inches long.  Transfer each piece to a loaf pan, seam side down.  Cover loosely with plastic wrap, and let rise at room temperature for about 1 hour, or until doubled in size.  The dough is ready when an indentation remains after pressing gently with a fingertip.  Preheat the oven thirty minutes before baking to 400º F, and position a rack in the lower third of the oven.

8.  Bake at 400º F for 20 minutes, then rotate the pans and switch positions in the oven.  Bake an additional 30 to 40 minutes, or until golden brown and fully baked.  An instant-read thermometer will register 205º F when done.  Let cool slightly in pans before removing to a rack to fully cool before slicing.


Notes:
1.  To toast nuts, spread evenly in a sheet pan and bake at 325ºF until just golden brown and fragrant, about 10 minutes for walnuts and 5 minutes for sunflower seeds, stirring occasionally.  Cool to room temperature before using.

Posted in Savory, Yeast Breads | Leave a comment

Oatmeal Bread

Week Thirty-Two: Sandwich Breads

oatmeal

You know how sometimes you get so far behind on things, that everything seems overwhelming, even brushing your teeth?  You know those times where there’s too much to accomplish, so you panic and freeze and end up not really accomplishing anything?  That’s what happened to me last week.

I did make all my breads, but I just could not find the time to write about them!  And since I really try to put my best effort in with every post, it seemed too daunting to write so darn much, and it pained me to have to do a slapdash job.  Of course, that meant in the end that nothing got written.  So I hate to do it, and please forgive me, but here are the last few breads of the week, in condensed versions.  Few words are better than no words, right?  *sigh*

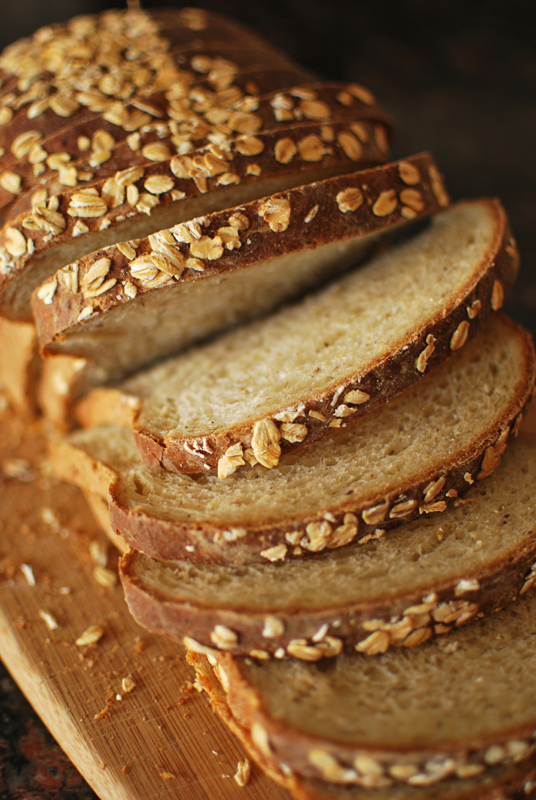
On the brighter side, this oatmeal bread is extremely good, you guys!  The flavor is lightly sweetened with brown sugar, and tastes a bit nutty from the oatmeal and flaxseed.  The crust is properly soft for a sandwich bread, and the interior is close-crumbed and soft.  It slices easily, and because of the sugar, it toasts beautifully.

Don’t be worried if it looks like its getting too dark while baking; the sugar and butter are helping it brown into an almost caramel-flavored crust.  This is one outstanding sandwich bread, so thanks to Foodie Farm Girl for the original recipe!  It’s going in my permanent recipe file for sure; it’s going to be a long wait for the year to end, so I can make it again!

oatmeal-toad-in-hole

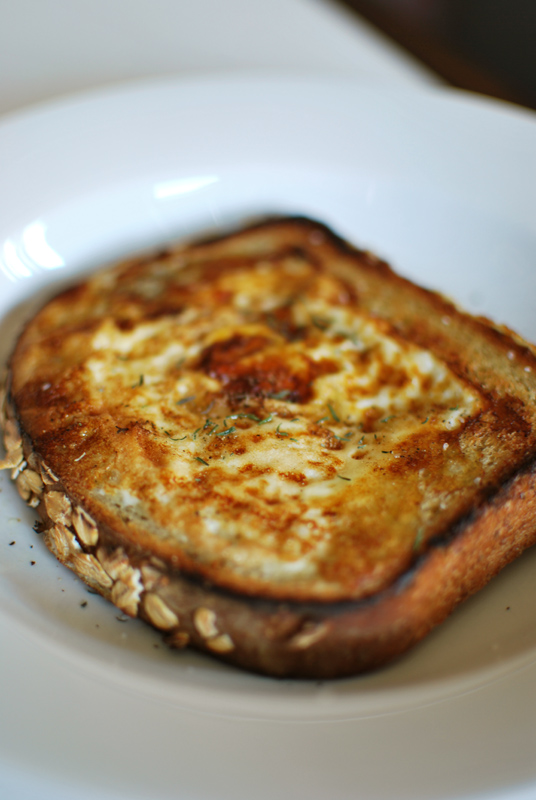
we've been eating a lot of these toads in a hole lately: cut a hole in a slice of bread and fry an egg in the middle; so good!


Oatmeal Bread
Adapted from Foodie Farm Girl
Makes one 9 x 5 loaf

For soaking mixture:
6 ounces (1 1/4 cups) old-fashioned rolled oats
1 ounce (1/4 cup) wheat germ
2 tablespoons ground flaxseed
2 ounces (1/4 cup packed) brown sugar
2 tablespoons unsalted butter
2 cups boiling water

For final dough:
17 ounces (about 3 1/2 cups) unbleached bread flour
1 1/2 teaspoons instant yeast
1 1/2 teaspoons salt

1.  To make the soaking mixture, combine the oats, wheat germ, flaxseed, brown sugar, and butter in a very large bowl.  Add the boiling water and stir until combined.  Let sit until the mixture registers 80º F, about 45 to 60 minutes.

2.  To make the final dough, in the bowl of a stand mixer, whisk together half of the flour with the yeast.  Add the soaking mixture, and mix with the dough hook on low speed.  Add remaining flour a little at a time until a rough dough forms.  Turn the mixer off, and loosely cover the bowl with plastic wrap.  Let rest for 15 to 20 minutes.

3.  Remove the plastic wrap, add the salt, and continue kneading at medium-low speed until smooth and elastic, about 7 to 8 minutes.  Add any additional flour as needed to achieve the proper consistency; the dough should be slightly sticky, but should clear the sides of the bowl.

4.  Transfer the dough to a lightly oiled bowl, and cover tightly with plastic wrap.  Let sit at room temperature until doubled in size, about 1 1/2 hours.

5.  Butter a 9 x 5 loaf pan; set aside.  Turn the dough out onto a lightly floured surface.  Gently press and flatten it slightly with floured hands, shaping it into a rectangle.  Be careful not to deflate it too much.  Fold and roll the dough into a 9 inch loaf, pressing the seam to seal.  Transfer, seam side down, to the prepared loaf pan.  Brush tops of loaves with water and sprinkle with additional rolled oats, if desired (see note 1 below).  Cover with plastic wrap and let rise at room temperature for about 1 hour, or until fully doubled in size.  Preheat the oven to 375º F.

6.  Bake at 375º F for about 35 minutes, or until golden brown.  An instant-read thermometer should register about 205º F when fully cooked.  Let cool in pans briefly before removing to a wire rack to cool thoroughly before slicing.


Notes:
1.  It’s not necessary to top with the oats, but I sometimes like to know what’s in the bread just by looking at it!  If you want a heavier, more even coating of oats on your bread, you can brush the shaped loaf with water and roll gently in a plate of oats.  Continue as directed.

Posted in Savory, Yeast Breads | Leave a comment

Italian Sandwich Rolls

Week Thirty-Two: Sandwich Breads

italian-roll

I’ll be honest.  I’m running awfully behind this week, and haven’t had a minute to catch up on the writing, so this will be brief.

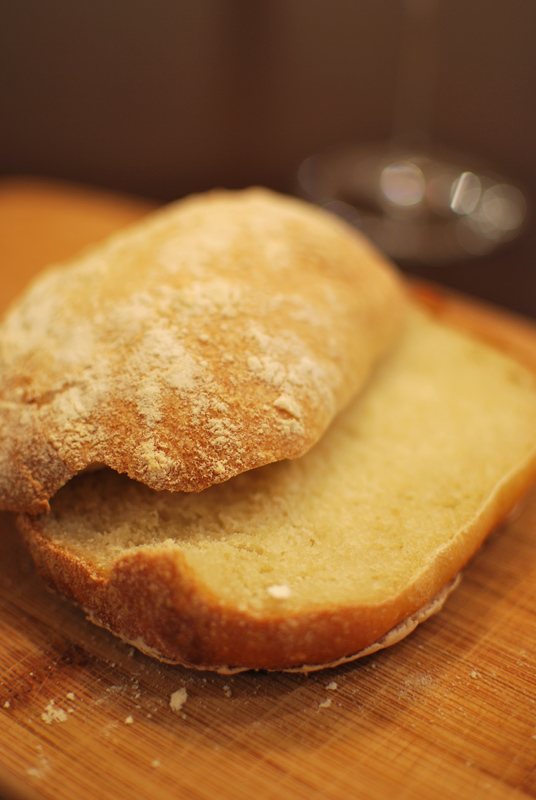
I was originally going for a ciabatta-type roll, considering how popular they are in sandwich shops.  This bread, while quite good, didn’t exactly produce what I was going for.  Instead of somewhat flat, airy, and square rolls, I ended up with close-crumbed and rather puffy rolls.  The crust has a pleasant crispness, not too soft and not too hard, just right for any sandwich filling, even something requiring a more hardy casing (such as roast beef au jus).  It’s still soft enough, however, to be used in a panini, if you happen to have one of those machines.

There’s a good chew to the texture, but not too much for a sandwich, meaning that you won’t throw half your sandwich across the room in the effort of taking a bite.  Due to the use of a biga starter, the flavor has a delightful depth, and the use of honey lends just a touch of sweetness.  This is a nice, all-purpose crusty roll, one that would be just at home in a bread basket as it is on a sandwich.

Italian Sandwich Rolls
Adapted from Wild Yeast
Makes 8 large rolls

For the biga:
8 ounces water, room temperature
8 ounces (1 2/3 cups) unbleached bread flour
1/8 teaspoon instant yeast

For the final dough:
15 ounces (3 1/4 cups) unbleached bread flour
2 teaspoons salt
1 teaspoon instant yeast
1 tablespoon honey
1 tablespoon olive oil
5 ounces (1/2 cup plus 2 tablespoons) water, room temperature

1.  To make the biga, mix all ingredients together in a medium bowl until smooth.  Cover tightly with plastic wrap, and let ferment at room temperature overnight, or at least 8 and up to 24 hours.

2.  To make the final dough, in the bowl of a stand mixer, whisk together all but a handful (1 ounce) of the flour, and all of the salt and yeast.  Add the olive oil, honey, water, and all of the biga.  Using the dough at low speed, mix until all the flour is moistened.  Turn the mixer off, and cover the bowl loosely with plastic wrap.  Let rest in place for 15 to 20 minutes.

3.  Remove the plastic wrap, and continue kneading with the dough hook at medium-low speed.  Adjust the consistency by adding small amounts of flour as needed.  The dough should be very slack, but should clear the sides of the bowl.

4.  Transfer the dough to a large, lightly-oiled bowl.  Cover tightly with plastic wrap, and let stand at room temperature until doubled in size, about 1 hour.

5.  Lightly oil a large baking sheet, or line with parchment paper.  Turn the dough out onto a lightly floured work surface.  Divide it into 8 even pieces, and shape each piece into a round.  Cover loosely with plastic wrap, and let rest for 20 minutes.

6.  Working with one piece at a time and keeping the others covered, form each round into a long torpedo shape.  Transfer to the prepared baking sheet, dust well with additional flour, and cover loosely with plastic wrap.  Let sit at room temperature until doubled in size, about 50 to 60 minutes.  Preheat the oven to 500º F.  Position a rack in the lowest part of the oven, with a baking stone, if using.

7.  Spray or sprinkle the dough with water.  Transfer the loaves to the baking stone, if using, or place the baking sheet on the oven rack.  Immediately turn the temperature down to 450º F and bake for 15 minutes, or until browned.  An instant-read thermometer should register about 205º F when inserted into the center of a roll.  Remove to a rack to cool thoroughly before serving.

Posted in Savory, Yeast Breads | 2 Comments

Pita Bread

Week Thirty-Two: Sandwich Breads

pita-in-situ

I have a confession to make.  More of an admission, actually, since there’s no real shame involved, but up until yesterday, I’ve been operating with only one bread-centric cookbook.  That’s right, I don’t own anything by Rose Levy Berenbaum, Dan Lepard, Michael Suas, or even Nancy Silverton.  I still don’t know the supposed glory of artisinal bread with only 5 minutes work each day.  But what I do now have is Maggie Glezer’s much vaunted book, and Peter Reinhart’s magnum opus.

You guys, how did I go so long without them?!  I stayed up far too late last night reading those books, getting excited about bread all over again, itching to try out new recipes, being frustrated at my mortal limitations (can’t I bake everything at once?), and remembering why I started this project in the first place.

One of the most exciting things I read was from Peter Reinhart, in his discussion of the Pain à l’Ancienne technique pioneered by Philippe Gosselin (no relation).  Not so much recipe as method, it involves making the dough with ice cold water, rather than warm or hot.  Now, this sounds like it might kill the yeast, but I know those little guys can survive in my freezer at 0° F, so 40° F is just fine.

One word of advice, though: Chef Reinhart and I both use instant yeast, which is a bit more hardy than active-dry, and much more resiliant than fresh yeast.  It also takes more time to activate and start growing than does active-dry, but is faster to grow once it does start, both of which attributes are extremely desirable in this application.  I think active-dry would work well enough, but the best results would be from instant;  for this recipe, I highly recommend picking up some instant yeast.

What this technique accomplishes is that it retards the yeast activity (they basically stay dormant in such cold temperatures), allowing the water to activate production of enzymes in the flour.  These enzymes act as powerful and natural dough conditioners, making your dough easier to work with, and making the final bread taste much better and have much better texture than it would otherwise.  Essentially, it’s a very long autolyse, without having to worry about the dough over-fermenting.  It’s genius.

And while I can’t yet speak for its effect on baguettes or other such artisanal bread, I can tell you that it worked amazingly well on these pitas.  This pita recipe is one I’ve been dying to try since I saw it featured on Smitten Kitchen, originally from Rose Levy Berenbaum’s The Bread Bible.  Having already made whole wheat pitas, I wanted to try my hand at something a little softer and less hearty.

Yes, this is a lot of effort.  But it’s absolutely worth it.  The difference between these homemade pitas and store-bought ones is like the difference between a real French butter croissant and a cardboard box.  There’s simply no comparison.  Not having tried the original recipe as written, I can’t very well vouch for that quality, but with this pain à l’ancienne technique, they were stunning.

pita-in-situ-2

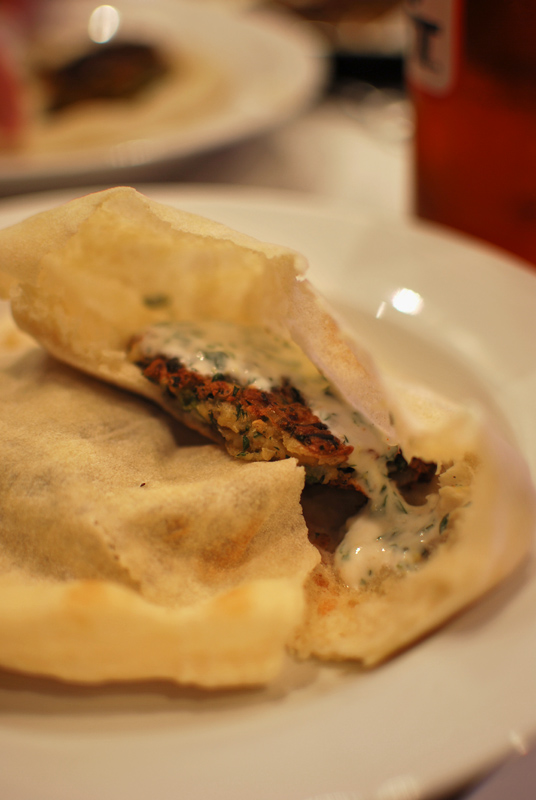
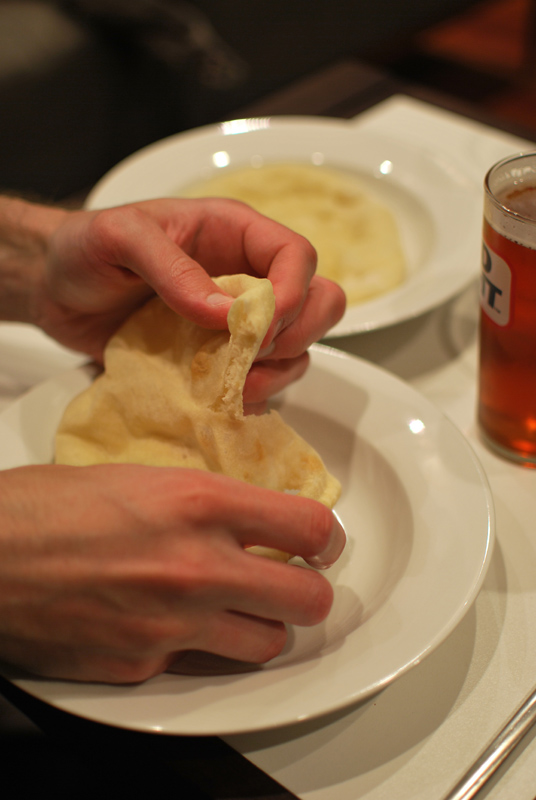
Beautiful pale cream in color, soft, but with enough of a pull to let you know the gluten is there, these breads will happily cradle or be rolled around any sandwich filling you like.  Be careful not to roll these too thinly (as I did), as the thinnest parts won’t puff properly, but will instead simply crisp in the high heat.  Many of mine remained firmly flat in the middle because of this.  Despite this, they were absolutely some of the best pitas I’ve ever had, certainly good enough to rival those of many Middle Eastern restaurants I’ve eaten in.

To accompany these pitas, I made that delicious classic, falafel, but have used a somewhat non-traditional baked version here.  They were just wonderful, stuffed inside those tender pockets, topped with a generous spoonful of cold yogurt-mint sauce.  I hope you enjoy them as much as I did!

pita-falafel

Pita Bread
Adapted from The Bread Bible, by Rose Levy Berenbaum, via Smitten Kitchen
Makes 8 to 12 pitas

16 ounces (3 cups plus a scant 1/4 cup) unbleached all-purpose flour
2 teaspoons salt
2 teaspoons instant yeast
2 tablespoons olive oil
1 1/4 cups water, ice cold (40° F, see note 1 below)

1.  In the bowl of a stand mixer, whisk together the flour, salt, and yeast.  Add the remaining ingredients.  Using the dough hook, mix on low speed until all the flour is moistened, about 1 minute.  Increase the speed to medium, and knead for 7 to 8 minutes.  The dough should clear the sides of the bowl, and should be very soft, smooth, and just a little sticky to the touch.  Add a little extra flour or water if necessary, during the kneading process.

2.  Using an oiled or nonstick spatula, scrape the dough into a large bowl, lightly greased with cooking spray or oil.  Press the dough down and lightly spray or oil the top of it.  Cover tightly with plastic wrap, and refrigerate immediately.  Chill the dough overnight (or up to 3 days), checking periodically and pressing it down if it starts to rise.  Two hours before shaping, take the bowl out of the refrigerator, and let come to room temperature before proceeding.  If the dough starts to rise more than double its original size, punch down and proceed.

3.  Preheat the oven to 475° F one hour before baking.  Position an oven rack at the lowest level, and place a baking stone, cast-iron skillet, or baking sheet on it before preheating.

4.  Turn the dough out onto a lightly floured surface.  Divide the dough into 8 to 12 even pieces.  Working with one piece at a time, keeping the rest covered, shape each piece with lightly floured hands into a ball, and then flatten slightly into a disk.  Cover the dough with oiled plastic and allow to rest 20 minutes at room temperature.

5.  After the dough has reseted, roll each disk into a circle just under 1/4 inch thick.  Allow them to rest again, uncovered, for 10 minutes before baking.

6.  Quickly place 1 piece of dough directly on the preheated baking stone, skillet, or baking sheet, and bake for 3 minutes.  The pita should be completely puffed, but not beginning to brown.  The dough will not puff well if it is not moist enough.  See how the pita puffs, then, if necessary, spray each remaining piece with water and allow to rest 2 to 3 minutes before baking.  If the pitas still don’t puff, spritz each piece again and knead until smooth and moist.  Flatten each piece into a disk, and allow to rest 10 minutes before re-rolling and resting again, as in Step 5.

7.  Proceed with the remaining dough, baking 3 or 4 pieces at a time if using a stone or baking sheet.  Transfer the baked pita breads to a clean towel, and wrap loosely to help them stay soft and warm.  Between batches, allow the oven to reheat for 5 minutes.  The pitas can be reheated for about 30 seconds in a hot oven before serving.

Bonus recipe!

Baked Falafel
Makes 10 large or 20 small falafel
Adapted from Chow Vegan

For falafel:
1 (15 ounce) can chick peas
1/2 medium yellow onion, finely chopped
3 green onions, chopped
3 garlic cloves, minced
3 tablespoons fresh parsley, minced
3 tablespoon fresh mint, minced
3 to 4 tablespoons olive oil
1 teaspoon lemon juice
1 teaspoon coriander seeds, crushed or ground
1 teaspoon cumin seeds, crushed or ground
1/2 teaspoon cayenne pepper, or to taste
2 tablespoons all-purpose flour
1 teaspoon baking powder
Salt and pepper to taste

For yogurt sauce:
1 cup plain yogurt
Zest from 1 lemon
1 tablespoon fresh mint, minced
Salt and pepper to taste

1.  Preheat oven to 375º F.  Drain and rinse the chick peas.  Put in a large bowl and smash with a fork.  Add the remaining falafel ingredients and mix well.  The mixture will be loose.  Form into balls, packing tightly, and flatten slightly.  Place on an oiled or parchment-lined sheet pan.

2.  Bake at 375º F for 10 to 15 minutes on each side, until nicely browned.  Alternatively, the falafel can be cooked in a nonstick pan on the stovetop, over medium-high heat.  Use a little extra olive oil to promote crisp, brown edges.  Drain on paper towels before serving.  This method is a bit faster, and can be done while the pitas bake.

3.  For the yogurt sauce, mix all ingredients together and chill until ready to serve with falafel and pitas.

Notes:
1.  To chill the water for the dough, add 5 or 6 ice cubes to the water, and let stand for at least 2 minutes.  Remove the ice cubes, and make sure the measurement is still accurate.

2.  For a whole wheat version, it’s recommended to use white whole wheat flour in place of all the all-purpose flour.  In this case, you should add an extra 1/4 cup water (1 1/2 cups total).  If you can’t find white whole wheat, you can use regular whole wheat, but only substituting for half of the all-purpose flour.  The best results in this case will come from finely grinding the whole wheat flour for abour 5 minutes in a food processor before using.

3.  The pitas can be cooked on a stove top, though it’s faster in the oven.  To cook the pitas on the stove, preheat a griddle or cast-iron skillet over medium-high heat.  Lightly grease the surface and cook the pitas one at a time.  Cook for about 20 seconds, then turn the dough over and cook for 1 minute, or until big bubbles appear.  Turn the dough again and cook until the dough puffs up.  If the dough begins to brown, lower the heat.  The entire cooking process for each pita should be about 3 minutes.

Posted in Savory, Yeast Breads | Leave a comment

Marble Rye

Week Thirty-Two: Sandwich Breads

maba-rye-3

I do apologize again for the interruption this weekend, but sometimes there are more important things than bread.  Honest!  And after spending so much (dare I say) quality time with my family this weekend, I needed something homey to bake.  Nothing too outrageous, nothing nouveau cuisine, something simple and straightforward that spoke of hearth and home and comfort.

Sandwiches came immediately to mind.  I’m not sure if that’s strange to anyone, but I find sandwiches a prime “comfort food”, as opposed to macaroni and cheese, mashed potatoes, or any other of the typical choices.  One of my all-time favorite foods is a peanut butter sandwich, though it has changed its clothes quite a bit throughout my life.  I have distinct memories of being very young, swinging my feet underneath the kitchen table, my white bread peanut butter sandwich in hand, made with my grandmother’s beloved and much-prized grape jelly.  On the side was the requisite pile of Fritos and a cold glass of milk.

In later years, I discovered the joy of wheat bread with peanut butter and orange marmalade, followed by a brief and torrid affair with whole grain bread, crunchy peanut butter, honey, and bananas; at this point, the Fritos had tapered off.  These days, you’ll find me packing a lunch at least once a week of multi-grain bread, crunchy organic peanut butter, honey, and more cinnamon than anyone should probably ever consume at one time, with a Fuji or Gala apple chaser.

The fact that I recall so vividly each of my peanut butter sandwich preferences is a little surprising, considering that I’m not what I would exactly call a peanut butter “lover”.  It’s good, but I didn’t inherit a certain familial trait of eating it surreptitiously from the jar.  The reason behind such memory, then, must lie outside of the filling, not in the bread itself, but in the combination.  It must lie in the merging of the two: the sandwich.

Sandwiches are by nature quick to create, for the most part, which holds an appeal outside of the very obvious, and which lends to their homey nature.  Yes, cooking with family and friends is fun; but more often than not, I find myself chasing them out of my kitchen.  With a fast and delicious sandwich, however, you’re afforded more time to spend with them, lingering over crumbs.  And what could be more welcoming than the ability to customize a sandwich for each and every guest, tailored just to their particular specifications?

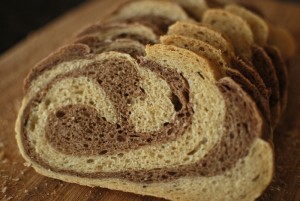
So this week, in honor of family near and far, I’m bringing you breads for all your friendly sandwiches, starting with today’s quite American marble rye.  A standard on deli menus from coast to coast, this bread can be tricky to make, as two different doughs – rye and pumpernickel – are spiraled or swirled together, doughs that may not rise or bake at the same rate.

The key is to use two nearly-identical doughs, rather than risk a half-baked or half-poorly-risen loaf.  Here, the only major difference is that a coloring agent (cocoa) is used in the “pumpernickel” dough.  Each of these doughs may not be the ideal example of its type, but the overall flavor is really quite good, and the spiral design is just lovely.  I’ve included caraway seeds in both doughs, as I love the complex flavor they lend; feel free to leave them out if you choose.

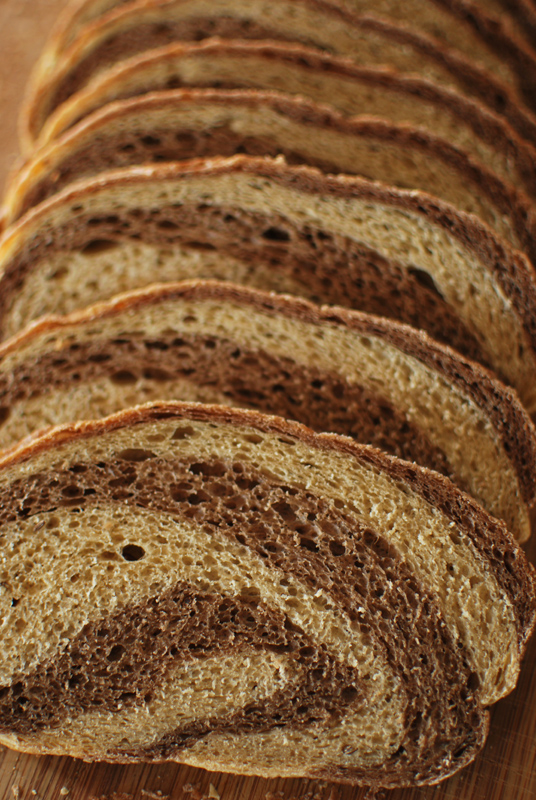
Inside, the bread is soft and relatively close-crumbed.  Outside, the crust is on par with most sandwich breads, not too soft and not too hard.  The flavor of rye is definitely there, but doesn’t smack you in the face, due to the relatively low percentage of rye flour.  Nor is the flavor very sour either, as there is no pre-ferment used here.  The two doughs come together very quickly, especially if you measure out the ingredients for both doughs at the same time.

Oh, and after you’ve made the dough into loaves, no matter how pretty that striped seam-side looks, and no matter how hard you seal it, put that side down on the baking sheet!  No, it won’t affect the taste, and the spiral will still look pretty, but it will unravel during baking, and your slices won’t be as structurally sound for sandwiches.   See?

maba-rye-2

unraveled!

maba-rye

slices still pretty, though

 The end result is a beautifully-patterned bread, ideal for slicing, toasting, and using in nearly any type of sandwich, though pastrami or corned beef is the obvious and most traditional choice.  Fair warning, though: I make no guarantees for peanut butter.


Marble Rye
Adapted from The Bread Baker’s Apprentice, by Peter Reinhart
Makes 2 loaves

For light rye:
6 ounces (1 1/2 cups) white rye flour
13 1/2 (3 cups) unbleached bread flour
1 1/2 teaspoons salt
1 3/4 teaspoons instant yeast
1 1/2 teaspoons caraway seeds
1 1/4 cups plus 2 tablespoons water, room temperature
1 tablespoon molasses
2 tablespoons olive oil

For dark rye:
6 ounces (1 1/2 cups) white rye flour
13 1/2 (3 cups) unbleached bread flour
1 1/2 teaspoons salt
1 3/4 teaspoons instant yeast
1 1/2 teaspoons caraway seeds
1 1/4 cups plus 2 tablespoons water, room temperature
1 tablespoon molasses
2 tablespoons olive oil
2 tablespoons unsweetened cocoa powder, dissolved in 2 tablespoons water

1.  To make the light rye, in the bowl of a stand mixer, whisk together the flours, salt, yeast, and caraway seeds.  Add the water, molasses, and olive oil.  Using the dough hook, mix at low speed until a rough dough forms.  Scrape the bowl, turning the dough in the bowl if needed to help the dry ingredients incorporate.  When fully incorporated, increase the speed to medium-low and knead for 6 to 8 minutes, or until the dough forms a cohesive ball that clears the sides of the bowl and becomes elastic.

2.  Turn the dough out onto a work surface and knead a few times, forming the dough into a round ball with a skin stretching over the outside.  Transfer to a lightly oiled bowl, smooth side up.  Cover tightly with plastic wrap.

3.  Repeat the mixing and rounding procedure with the dark rye, adding the dissolved cocoa powder with the other wet ingredients.  Transfer to a second lightly oiled bowl, smooth side up, and cover tightly with plastic wrap.  Let both doughs rise at room temperature until doubled in size, about 90 minutes.

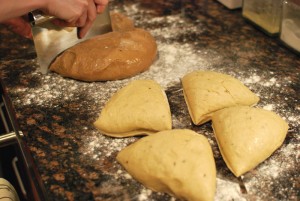
4.  Line a large baking sheet with parchment paper.  Turn out each of the doughs out onto a lightly floured surface, and deflate gently.  Divide each dough into four equal pieces.

progress-1

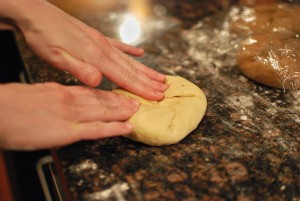
Lightly shape each piece into a round ball, and flatten slightly.

progress-2

Cover loosely with plastic wrap, and let rest for 15 to 20 minutes.

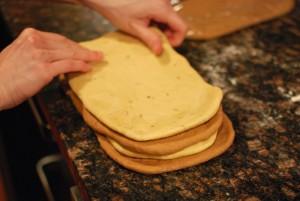
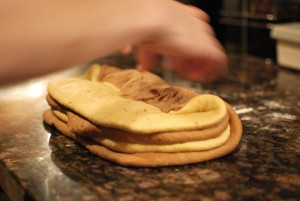
5.  Working with one piece at a time, keeping the others covered, roll each out with a rolling pin into a flat oval about 5 by 8 inches.  Alternating colors (i.e., first the light dough, then the dark), stack the ovals of dough on top of one another, in two stacks of four pieces each.

progress-3

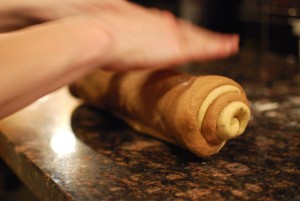
6.  Roll each stack up, jelly-roll fashion, into a cylinder, pressing the dough together to seal as you roll it up.

progress-4

Make sure to seal the final seam well.

progress-5

7.  Transfer the dough to the prepared baking sheet, seam side down, and cover loosely with lightly oiled plastic wrap.  Let rise until nearly doubled in size, about 60 to 90 minutes.  Preheat the oven to 350º F, and place a rack in the middle of the oven.

8.  Bake at 350º F for 40 to 45 minutes, or until golden brown and baked through.  An instant-read thermometer should register 190º F when fully cooked.  Remove the bread to a wire rack to cool thoroughly before slicing, at least 1 to 2 hours.


Notes:
1. Feel free to bake this bread in loaf pans; I chose to make mine a little more rustic, and shape them freehand.

2.  If you can’t find white rye flour, sift regular (not dark rye!) rye flour twice to get a similar flour.  The results are not guaranteed, but it’s the best course of action if you simply cannot find white rye.

3.  Feel free to cut this recipe in half, as it produces two very large loaves.  Alternatively, you could split the dough into more pieces before combining and marbling, making 4 small loaves, or even marble rye rolls.

Posted in Savory, Yeast Breads | Leave a comment

Apologies…

… but A Bread A Day is on hiatus today, as I’ve had a funeral to attend unexpectedly.  I will be back tomorrow, though, and promise to make it up to you this weekend with an extra-special Sunday edition!  In the meantime, to help make up for my absence, here is a picture of a kitty with a heart-shaped patch of fur.

sand-kitteh-2

Posted in Everything Else | Leave a comment

Roasted Bell Pepper Bread

Week Thirty-One: Breads With… Foods

roasted-bell-pepper

The last bread for this week features bell peppers, which don’t easily fall into either the “fruit” or “vegetable” categories.  Bell peppers, in fact, are a member of the nightshade family, which also includes eggplants, potatoes, tomatoes, and tobacco.  This, of course, means that tomacco isn’t such a crazy dream after all.

It has actually taken me a considerable amount of time to warm up to roasted peppers.  Maybe they’re just a little too sweet and savory for my tastes, or perhaps I never had properly made ones until recently, but they never really did it for me.  Still, I’m not a huge fan of bottled roasted bell peppers, but I’ve taken quite a shining to the homemade sort.  With this recipe, I highly recommend roasting your own.  It’s incredibly easy, and the flavor is worlds better than anything you could ever buy.

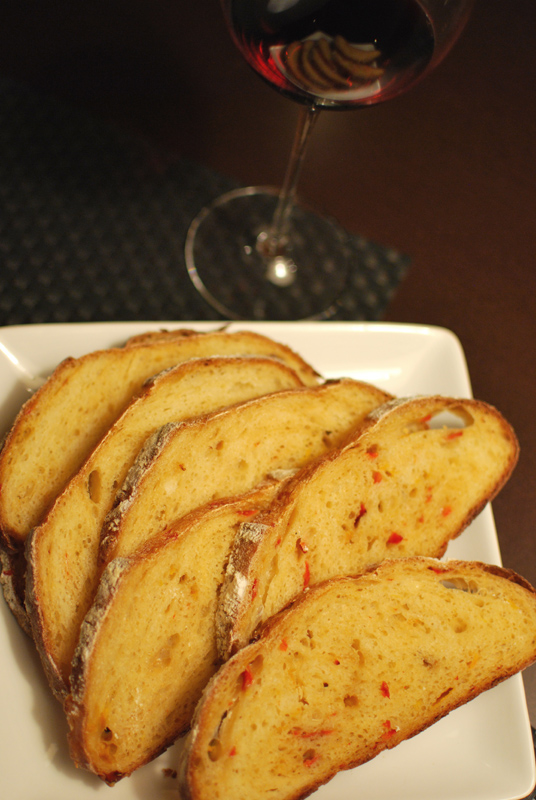
This recipe makes a fairly standard loaf of artisanal white bread, one with a chewy texture and moderately hard crust, but the sweetness of roasted peppers really shines in every bite, though it doesn’t overwhelm.  The overall flavor is quite good, and well-balanced.  You can certainly use any color pepper you like, but I love the pretty orange color that red peppers lend to the dough.  I highly recommend trying it toasted with a generous spread of good hummus on top.  It’s outstanding!


Roasted Bell Pepper Bread
Makes 1 loaf

16 ounces (about 3 1/3 cups) unbleached bread flour
3 tablespoons nonfat powdered milk
1 teaspoon instant yeast
1 1/4 cups water, room temperature
1 1/2 teaspoons salt
2 teaspoons sugar
1 medium yellow bell pepper, roasted and chopped (see note 1 below)
1 medium red bell pepper, roasted and chopped (see note 1 below)

1.  In the bowl of a stand mixer, whisk together the flour, powdered milk, and yeast.  Add the milk mixture, and mix at low speed with the dough hook until the dough comes together, scraping the bowl if necessary.  Increase the speed to medium-low and knead until smooth and elastic, about 6 to 8 minutes.  You may need to add a spoonful or so of additional flour to achieve the proper consistency.  The dough should be a little slack, but not wet, and should clear the sides of the bowl.

2.  Turn the dough out onto a lightly floured surface.  Knead a few times, until a skin forms around the outside of the dough.   Pull the skin taught around the dough, forming a round ball.  Transfer the dough to a lightly oiled bowl, turning to coat all sides with the oil.  Cover tightly with plastic wrap, and let rise in a warm place until doubled in size, about 1 hour.  Or, alternatively, you can refrigerate the covered dough for 8 to 24 hours.  Let come to room temperature for at least 45 minutes before proceeding.

3.  Turn the dough out onto a lightly floured surface.  Press the dough out to a flat round.  Spread the chopped bell peppers evenly over the surface of the dough, and fold the edges of the dough over the peppers.  Press to seal.  Knead until the peppers are evenly incorporated throughout the dough, sprinkling with additional flour as needed to keep from sticking.

4.  Form the dough into an oblong loaf, and transfer to a greased or parchment-lined baking sheet.  Cover loosely with lightly-oiled plastic wrap, and let rest in a warm place until doubled in size, about 1 hour.  Thirty minutes before baking, preheat the oven to 400º F.

5.  Using a sharp serrated knife, make one quick, decisive slash lengthwise down the bread.  Bake at 400º F for about 30 minutes, or until well browned and baked through.  An instant-read thermometer should register around 200º F when inserted into the center.  Transfer to a rack to cool thoroughly before slicing.


Notes:
1.  To roast bell peppers, place the peppers on an aluminum foil-lined baking sheet 2 to 3 inches under a broiler preheated to high.  Turning as needed, broil until charred and blackened all over.  Wrap well in the aluminum foil and let stand at least 10 minutes. When cool enough, slip the blackened skins off and discard, along with the seeds and stems.  Do not rinse with water, as this will wash away much of the delicious smoky flavor.  Cut into strips lengthwise, then into small pieces; use as directed.

Posted in Savory, Yeast Breads | 2 Comments

Pumpkin Yeast Bread

Week Thirty-One: Breads With… Foods

punkin

When you see the words “pumpkin bread”, about 90% of the time they’re referring to a soft quick bread.  Chocolate may or may not be included.  And with good reason, too: vegetable or fruit purées are an excellent addition to quick breads, bringing loads of moisture and flavor to the finished loaf.  Cooked pumpkin, with its complex sweetness and pretty orange color to boot, is a natural for this role.

But because I’m a contrarian (what fun is it if everyone else is doing it?), I threw that idea right out the window.  Pumpkin muffins are all well and good, but I wanted to explore its more savory side.  I wanted a rustic and hearty bread with a crisp crust, something to acknowledge the humble gourd’s depth of flavor, rather than simply cover it up with sugar and butter, delicious as that may be.

For a slightly coarse, grainy texture, I added a bit of cornmeal and whole wheat flour, but didn’t quite add as much as I would have for a plain bread.  I thought the inclusion of the fibrous pumpkin would weigh the bread down a little, and didn’t want to end up with a brick.  To add softness and a little tang, I used a little plain yogurt, simply because I had no buttermilk (or milk, for that matter) at the time.  I did, however, have a bit of cream hanging around, so that went in in lieu of adding butter or olive oil.

As a nod to all edible parts of the pumpkin, I added some toasted pumpkin seeds, also known as pepitas.  I just love the way those pancake-flat pumpkin seeds puff up when toasted, and take on such a delightful crunch and robust flavor.  In the finished loaf, they can be cut through cleanly, leaving pretty ovals of color in each close-crumbed slice.  The overall texture is soft, but with a little crunch from the cornmeal and the pepitas.

All in all, this bread was just what I was looking for.  It’s not a very full-flavored bread; in fact, it’s probably best if eaten with other foods, or as the bookends of a sandwich.  I can definitely see this bread turning into one heck of a stuffing, or a savory bread pudding.  It won’t knock your socks off with pumpkin flavor, but there’s just enough to let you know it’s there.  It’s subtle, but somehow honest.  It’s simple and straightforward, an overall apt nod to the bucolic pumpkin.


Pumpkin Yeast Bread
Makes 1 loaf

12 ounces (about 2 1/2 cups) unbleached bread flour
5 ounces (about 1 1/4 cups) whole wheat flour
3 ounces (about 3/4 cup) yellow cornmeal
1 teaspoon instant yeast
1 cup water, room temperature
2 tablespoons heavy cream
2 tablespoons plain yogurt
1 tablespoon light honey
1 1/2 teaspoons kosher salt
1/2 cup cooked pumpkin purée, approximately
1/4 cup pumpkin seeds, toasted (see note 1 below)

1.  In the bowl of a stand mixer, whisk together the flours, cornmeal, and yeast.  In a liquid measuring cup, combine the water, cream, yogurt, honey, and pumpkin until thoroughly blended.

2.  Add the liquid mixture to the dry mixture in the bowl.  Using the dough hook, mix at low speed until a rough dough forms, 1 to 2 minutes.  Turn the mixer off, and without removing the bowl or the dough hook, cover loosely with plastic wrap.  Let stand at room temperature for 15 to 30 minutes.  While the dough rests, prepare the pumpkin seeds as directed (see note 1 below).  Set aside.

3.  After the resting period, add the salt to the dough.  Continue to mix at low speed until incorporated, about 1 to 2 minutes.  Increase the speed to medium-low, and continue kneading until the dough clears the sides and bottom of the bowl, about 5 to 6 minutes.  The dough should form a cohesive ball that clears the sides of the bowl, but should not be stiff; add additional flour or water if necessary to achieve the proper consistency.

4.  Turn the dough out onto a lightly floured surface.  Knead a few times, until a skin forms around the outside of the dough.   Pull the skin taught around the dough, forming a round ball.  Transfer the dough to a lightly oiled bowl, turning to coat all sides with the oil.  Cover with plastic wrap and let sit at room temperature until doubled in size, about 1 hour.

5.  Uncover the dough and, using a nonstick spatula, fold the dough over itself in a tri-fold, as though you were folding a letter.  Cover again, and let rise an additional 45 to 60 minutes.

6. Turn the dough out onto a lightly floured surface.  Gently deflate, and flatten the dough into a round.  Scatter the toasted pumpkin seeds on the surface of the dough, and fold the dough over the top of the seeds.  Knead until the seeds are evenly dispersed, 2 to 3 minutes.  Cover with plastic wrap and let rest 10 to 15 minutes.  Lightly grease a baking sheet, or line with parchment paper; set aside.

7.  Uncover the dough, and shape into an oblong loaf shape.  Transfer to the prepared baking sheet, cover loosely with plastic wrap, and let rise until doubled in size, about 45 to 60 minutes.  Thirty minutes before baking, preheat the oven to 425º F, along with a baking stone (if using).

8.  Using a sharp serrated knife, make three decisive slashes quickly lengthwise down the bread.  Bake the loaves (on the baking sheet, or on a baking stone if using) at 425º F for 35 to 40 minutes, or until cooked through and golden brown on top.  An instant read thermometer should register about 200º F when inserted into the center.  Remove to a wire rack, and allow the bread to cool thoroughly before slicing.


Notes:
1.  To toast pumpkin seeds, spread seeds on a baking sheet in an even layer.  Bake at 350º F for 5 to 7 minutes, or until fragrant and browned.  Cool before using in recipe.

Posted in Savory, Yeast Breads | Leave a comment

Fava Bean Flatbread

Week Thirty-One: Breads With… Foods

fava-paratha

I’m not sure why my corner grocery store had fava beans this week, but have them they did.  Perhaps it’s the unseasonably cool Summer we’ve had (not one day above 90º! not one!), tricking the plants into growing their Spring produce now, or maybe someone was just hiding them in a closet somewhere; but there they were, those fat green pods, wedged in between the cucumbers and the tomatillos.

Of course, I snapped them up, unseasonable or not.  I had originally intended to make this recipe with always-in-season frozen edamame, but had based the idea off of an incredibly good smashed fava bean spread I invented last Spring.  And, randomly, here were favas!  The circle was complete.

This recipe makes more fava bean filling than you’ll need for the bread, but the leftovers are well worth having around, especially if you’ve got a mild soft cheese and a baguette on hand.  The filling can of course be varied to suit your taste (add a few slices of crumbled bacon for a real treat), but I’ve purposefully made it very full-flavored, to make it shine a bit more in the bread.  I found the level of intensity just perfect for the bread, but perhaps a bit much for eating plain.  If you find it too intense, just add some extra favas to desaturate it a little.

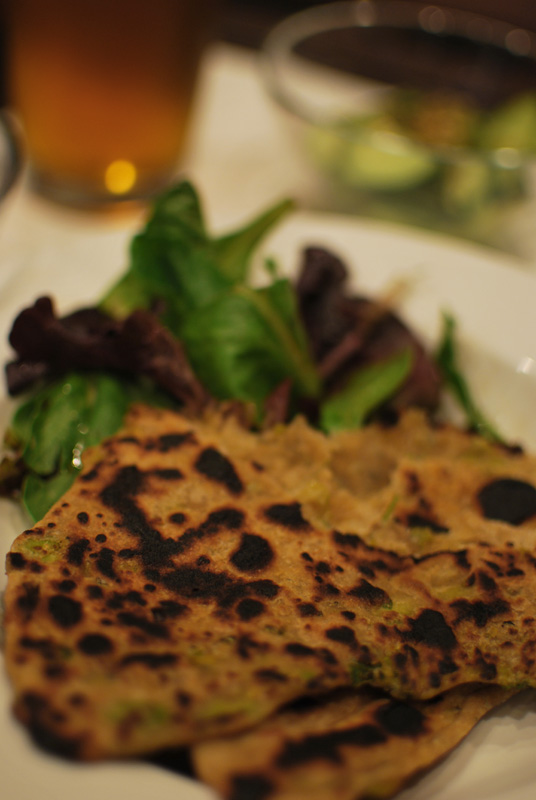
For the bread, I felt a rustic flatbread was the best way to incorporate such a filling, and drew inspiration from whole-grain Indian flatbreads, namely the filled paratha.  These flatbreads cook very quickly, and end up soft, satisfyingly chewy, and slightly crunchy around the very edges.  The process of brushing the dough with olive oil and folding produces a few beautiful layers of dough, almost rather like puff pastry, but not nearly as airy, and far simpler.  They’re best just out of the pan, but can be frozen and thawed quickly to relative success.

The end result, lightly charred and studded with bright green bits of fava and fresh herbs, was delightful served with a salad simply dressed with oil and vinegar, and topped with a bit of plain yogurt.  For a heartier, more traditionally Indian take, however, serve with your favorite dal or curry recipe.  Enjoy!


Fava Bean Flatbread
Makes 8 flatbreads

For bread:
2 cups white whole-wheat flour, plus additional for rolling out dough
1/2 teaspoon salt
3 tablespoons olive oil, plus an additional 3 or 4 tablespoons for brushing
1/2 cup plus 1 to 2 tablespoons water, room temperature

For fava bean filling:
2 pounds fava beans in pods, or 2/3 pound shelled (see note 2 below)
2 tablespoons olive oil, plus extra as needed
2 large or 3 small scallions, chopped, white and green parts kept separate
2 to 3 cloves garlic, minced
2 teaspoons minced green chile with seeds, or to taste
3 tablespoons chopped mint, leaves only
3 tablespoons chopped basil
1/4 cup buttermilk or yogurt
1/2 tablespoon fresh lemon juice
1/2 teaspoon kosher salt, or to taste
1/4 teaspoon ground black pepper, or to taste

1.  To make the dough, whisk the flour and salt together in a bowl.  Add 3 tablespoons of olive oil and 1/2 cup water.  Mix together until incorporated. Add just enough additional water (1 to 2 tablespoons) to form a dough, if necessary.

2.  Knead on a work surface until smooth and elastic, about 8 to 10 minutes. Wrap dough in plastic wrap, and let stand at room temperature 1 to 3 hours, or refrigerate for up to 24 hours.  Let come to room temperature 30 to 60 minutes before proceeding.

3.  To prepare the fava bean filling, simmer the shelled fava beans in unsalted water for 25 to 30 minutes, or until very tender.  Drain, and place in a large bowl.  Set aside.

4.  In a nonstick skillet, heat 2 tablespoons olive oil over medium-high heat.  Sauté the white parts of the scallions, the garlic, and chile for 1 to 2 minutes, or until fragrant and starting to soften.  Add the cooked favas and cook an additional 3 to 4 minutes, or until beginning to color.  Return mixture to bowl.

5.  Mash fava mixture with a fork or potato masher.  Stir in remaining ingredients, tasting to correct seasoning.  If the mixture looks dry and crumbly, add additional olive oil or dairy (buttermilk or yogurt) as needed.  Set aside.

6.  Divide the dough into 8 equal portions and roll each into a ball.  Keeping the remaining balls covered, push your thumb into the center of each ball to make a deep depression.  Fill with 1 tablespoon bean filling, closing dough around it, and pinching to seal.  Set aside, and repeat with remaining dough.

7.  Flatten each ball, seam side down, into a disk and roll out to a 6 inch round on a lightly floured surface with a lightly floured rolling pin, or as large as the dough will allow.  Brush with olive oil and fold in half to form a semi-circle.  Brush again with olive oil and fold in half again to form a quarter-circle.  Set aside, cover, and repeat with remaining balls of dough.

8.  Brush each piece again with olive oil, and fold in half again to form a triangle.  Roll out into a triangle with roughly 6-inch sides on a lightly floured surface with a lightly floured rolling pin.  Set aside, keeping dough covered.  Repeat with remaining dough.  Do not overlap pieces, or they will stick together.

9.  Heat an un-greased 10 to 12 inch nonstick pan, cast-iron skillet, or griddle over medium-high heat until hot.  Cook each piece of dough until bubbles form and undersides are browned darkly in spots, about 30 to 60 seconds.  Brush top with additional olive oil, and flip over.  Brush cooked side with olive oil and cook until dough is cooked through and underside is browned in spots, 30 to 60 seconds more.  Remove to a plate, and repeat with remaining dough.  Finished breads are okay to stack.  Serve warm.


Notes:
1.  I found it necessary to firmly pinch the dough together, so that the filling didn’t come through the dough while rolling out.  Even so, it wasn’t always successful.  Once the filling starts poking through, start the folding procedure.  Remember, it’s better to roll the dough a little bit many times, than it is to roll it all at once.  Just do what you can with each piece, set it aside, and move on to the next piece.

2.  To prepare favas in the pod, split open the pods and remove the beans.  Meanwhile, bring a saucepan filled with unsalted water to a boil over high heat.  Prepare a bowl filled with ice water to shock the beans.  Drop the unshelled beans into the boiling water and cook for 1 minute.  Drain the beans and quickly plunge them into the ice water.  With your fingernail, pierce the skin of each bean near one end and squeeze the bean gently to pop free of the skin.  Don’t worry if the beans separate into halves.  Proceed as directed.

3.  Any leftover fava bean filling is delicious spread on a baguette with a good soft cheese, or even tossed with pasta.

4.  Perhaps it goes without saying, but if you can’t find favas, you can certainly substitute frozen shelled edamame.  Just make sure to cook them until they’re very soft before mashing.

Posted in Savory, Unleavened Breads | 1 Comment

Eggplant Buckwheat Bread

Week Thirty-One: Breads With… Foods

eggplant-buckwheat

When I decided to make eggplant bread, I knew I wanted something earthy.  See, I decided the best way to incorporate eggplant into bread was to roast it, turning it into a soft and caramelized sort of tapenade, then roll that into the dough.  Eggplant can often be bitter if sautéed or steamed, but roasting never seems to have that effect.  Roasting a meaty eggplant produces, as it does in many vegetables, rich, deep, earthy flavors.  So in order to properly complement the fullness of the eggplant, I needed a bread robust enough to stand up to it, without taking center stage.

Thinking it a bit boring to simply use whole wheat flour, I decided buckwheat flour would be a nice complement to the eggplant.  Buckwheat, while not technically a true grain, has a very characteristic flavor, one that is grainy and earthy and grassy all at the same time.  Never having had the two together, I nevertheless thought that it would be a delightful match for the eggplant.

Looking around for ways to incorporate buckwheat flour intelligently – as it’s not a true flour, one can’t merely substitute it for bread flour – I came across a recipe from the esteemed Rose Levy Berenbaum, entitled Velvet Buckwheat Bread.  It of course had the requisite buckwheat flavor, but it was called “Velvet”, for cripes sake, which to me meant that it wouldn’t have too hard a crust or too airy a crumb for the squishy eggplant filling.  And from Ms. Berenbaum herself, to boot!  It sounded perfect!

After a few middling adjustments, I had my bread.  As for the eggplant filling, I kept the extraneous ingredients to a minimum, to emphasize the essence of the eggplant, using only eggplant, onion, garlic, and a sprinkling of Herbes de Provence.  Taking a cue from the incredibly good pomodori al forno used in yesterday’s bread, I roasted the eggplant at a low temperature with a generous amount of olive oil (not in the least because it soaked it up like a sponge).

The roasted eggplant and onions were good enough to eat on their own, but became far, far better when all the flavors were melded with a quick spin in the food processor.  The resultant tapenade was absolutely delicious, and I did re-appropriate a significant amount of it for a simple dinner, making sure there would be enough for its intended use.

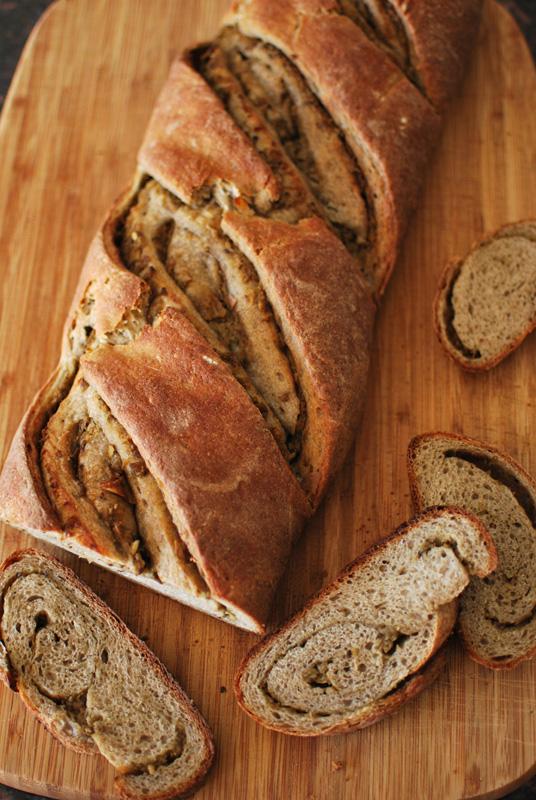
The buckwheat dough was supple and gorgeous to work with (though I’d expect nothing less from Ms. Berenbaum), and its brownish French gray color seemed to match the color of the eggplant so impeccably that an interior decorator could have done no better.  It rose nicely, and smelled amazing while baking in the oven.

Fresh from the oven, the finished loaf tantalized.  It was pretty as the proverbial picture, the deep slashes revealing the layers of eggplant and bread, and it exuded that fabulous aroma.  After it had fully cooled, which took just forever, the slices displayed an attractive spiral of tapenade, and were, truly, velvety.  The crust was soft, but supported the interior well, despite the tendency of the slices to un-spiral a bit, especially after biting into.

The combination of eggplant and buckwheat proved to be a great success, each flavor a lovely complement to the other, each holding up its own end of the flavor bargain, while not outshining.  It was soft, it was full-flavored, it was robust, eggplant-y, and buckwheat-y; but most of all, it was just what I’d been imagining: it was earthy.

Eggplant Buckwheat Bread
Makes 1 big loaf

For dough:
12 ounces (2 1/2 cups) unbleached bread flour, divided
1/2 teaspoon instant yeast
1/2 cup sourdough starter, from this recipe
5 ounces water, at room temperature
2/3 cup plain yogurt, at room temperature
1 1/2 teaspoons light honey
3 ounces (3/4 cup) buckwheat flour
1 1/2 teaspoon kosher salt

For eggplant filling:
1 eggplant (about 1 pound)
1/2 medium yellow onion
4 cloves garlic, peeled and left whole
1 tablespoon dried Herbes de Provence (see note 1 below)
1 teaspoon kosher salt
1/2 teaspoon ground black pepper
1/4 to 1/3 cup extra virgin olive oil

1.  To make the dough, whisk together 6 1/2 ounces (1 1/4 cups) of the bread flour and the yeast, in the bowl of a stand mixer.  Add the starter, water, yogurt, and honey.  Whisk until smooth.

2.  Top this sponge with the buckwheat flour and the remaining bread flour, forming a cover of flour over the sponge.  Cover with plastic wrap and let stand at room temperature for 1 hour.  After 1 hour, either let stand an additional 2 to 3 hours, or refrigerate for 8 to 24 hours.  Let come to room temperature for 1 hour before proceeding.

3.  To make the eggplant filling, preheat the oven to 350° F.  Peel the eggplant, and cut into 1/2 inch cubes.  Place in a large roasting dish or on a rimmed baking sheet.  Chop the onion, and combine with the eggplant.  Add the garlic, Herbes de Provence, salt, and pepper.  Drizzle with enough olive oil to coat, and toss together.  Bake for 45 to 60 minutes, stirring occasionally, until lightly browned and soft.  Remove from the oven and cool slightly.

4.  Using a food processor, pulse the roasted eggplant mixture a few times until blended, but still a bit chunky.  Adjust seasoning as needed with additional salt and pepper.  Set aside.

5.  After the dough has rested, place the bowl on the mixer.  Using the dough hook, mix at low speed until all the flour is incorporated, and a rough dough forms, about 2 minutes.  Stop the mixer, and without removing the bowl or the hook, cover the bowl with plastic wrap and let rest for 20 minutes.

6.  After 20 minutes, remove the plastic wrap.  Add the salt, and knead at low speed until incorporated, about 1 minute.  Increase the speed to medium-low, and knead for an additional 5 to 6 minutes, or until the dough is smooth and supple.

7.  Transfer the dough to a lightly oiled bowl, cover tightly with plastic wrap, and let stand at room temperature for 1 hour.

8.  Uncover the dough and, using a nonstick spatula, fold the dough over itself in a tri-fold, as though you were folding a letter.  Cover again, and let rise an additional 45 to 60 minutes.

9.  Lightly oil a large baking sheet, or line with parchment paper.  Turn the dough out onto a lightly floured surface.  Using a rolling pin to roll and using your hands to lift and stretch when necessary, shape the dough into a rectangle measuring 15 x 10 inches.  If the dough begins to resist, cover and let rest for 5 minutes before trying again.

10.  Spread the eggplant filling over the dough gently and evenly, leaving about a 1/2 inch border on all sides.  Fold the dough edge on the short sides over the filling, stretching the dough and pressing down into the filling, so that the edge of the rectangle has an even thickness.  Starting with a long edge of the rectangle, roll the dough up jelly-roll-style, into a tight spiral, keeping the short edges lined up evenly.  When you get to the end, pinch the seam firmly to seal it well, to prevent the filling from leaking out during baking.

11.  Dust the work surface lightly with flour, and roll the baguette under your palms to make sure the thickness is even, and to elongate slightly.  Transfer the baguette to the prepared baking sheet, laying it diagonally if necessary.

12.  Cover with lightly oiled plastic wrap, or a damp towel, and let rise until 1 1/2 times bigger in volume, about 1 hour.  Thirty minutes before baking, preheat the oven to 450º F, and place another baking sheet or oven-safe pan in the bottom of the oven.  If you have a baking stone, heat it with the oven.  If not, your baking sheet is fine.

13.  Using a sharp serrated knife or clean razor blade, make 3 or 4 decisive slashes in the top of the loaf at a 45º angle, evenly spaced.  Spray or sprinkle the bread with water, and transfer the bread to the oven (or baking stone, if using).  Immediately throw 4 or 5 ice cubes into the hot pan on the oven floor.  Bake for 5 minutes, adding additional ice cubes as they melt.

14.  After 5 minutes, remove the ice-cube-pan from the oven, and bake the baguette for an additional 25 minutes, or until deeply golden brown and fully cooked.  Be sure not to under-bake the bread, as the filling needs to be fully heated through.  Remove the bread to a wire rack to cool for a minimum of 1 hour before slicing, to allow the steam from the filling to dissipate.  If sliced too early, the filling will not have set, and the bread will end up gummy and the attractive spiral pattern ruined.

Notes:
1.  Herbes de Provence is a blend of thyme, basil, rosemary, savory, sage, marjoram, fennel seed, and often lavender.  If you don’t have any on hand, just use your favorite herb, or a mixture of similar herbs.

2.  Instead of yogurt, you can use sour cream instead.

Posted in Savory, Yeast Breads | Leave a comment