Week Forty-Six: Professional Recipes
Today’s bread comes from local restaurant L20, one of the places on my short list of Restaurants To Visit Before Moving Away From Chicago In The Unforseeable Future. Chef Laurent Gras has handily garnered lauds and honors at previous restaurants, but it’s his own recently-opened restaurant that brings lucky diners the rare taste of these tiny pains au lait.
At L20, bread isn’t flown in, trucked in, or even purchased from a local artisanal bakery. No, it’s made in-house. Seven times a day. All different, all reasonably bite-sized, and all fantasically good, reliable sources say. If this pain au lait is any indication, they’re more than right.
“Pain au lait” literally translates to “milk bread”, but such a humble name hardly describes the elegant things. As might be expected, the only liquid used in the dough is milk. Butter too is added, in a moderate amount that tends toward generosity but stops well short of extravagance. The resultant texture is not nearly as rich as one would think; in fact, I’d say the word “rich” would be inappropriate here.
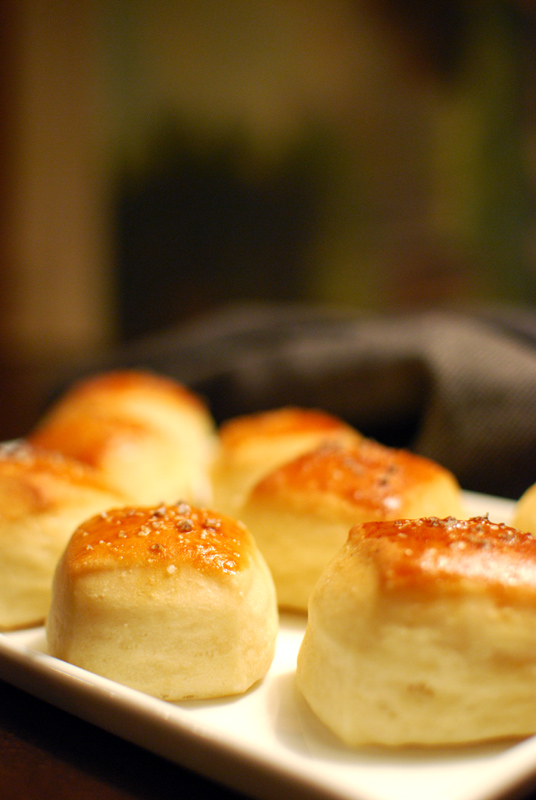
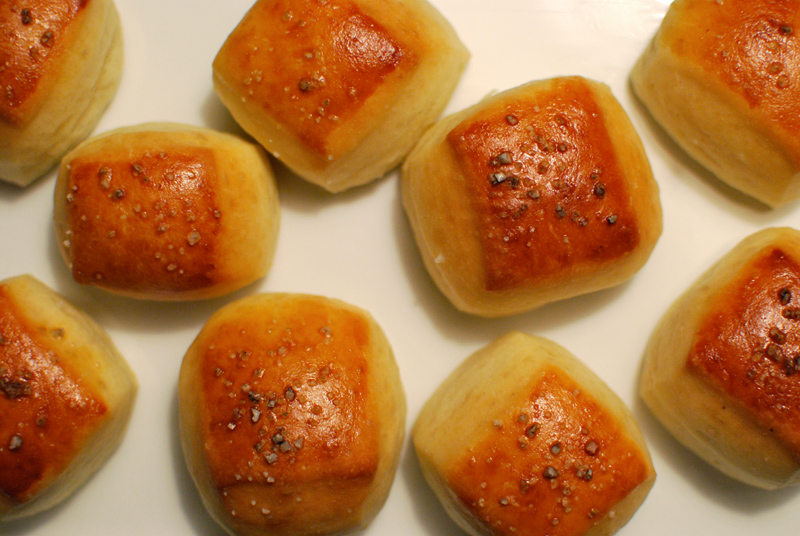
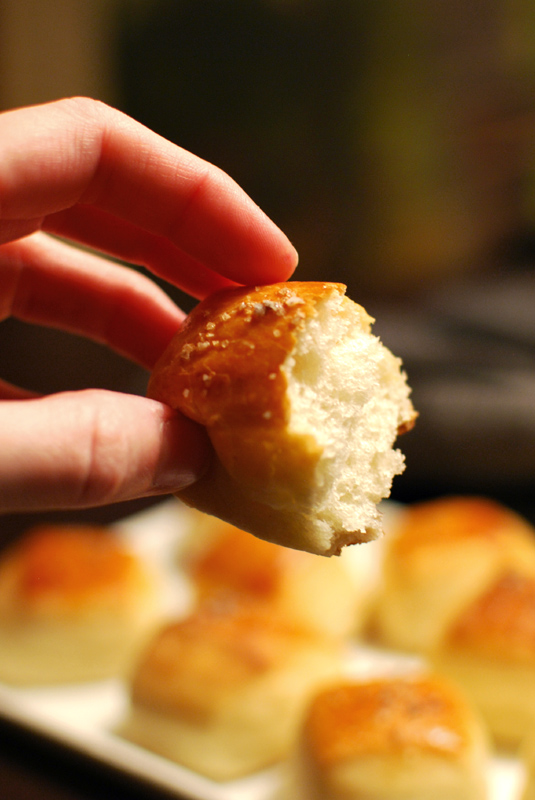
The word “light” is more to the point, but it scarcely does them justice either. These little treasures are indeed extremely light, but not quite airy; they have a soignée gravity to them. The firmly crisp crusts, both top and bottom, conceal a pure white interior, its tenderness made complex with the familiar tug of a well-crafted gluten structure. Coarse salt sparkles on the golden tops, shining with a thin coat of egg wash.
Inside, they are soft and very nearly flaky (due to the slightly unusual rolling and folding technique used), while outside, they are almost crackery; the combination of textures is delightful. As for flavor, I think the dough would go from merely excellent to absolute perfection were a biga or starter used. At the restaurant, they may in fact use such a method, judging by the discussion of levain naturale and yeast terroir in the L20 blog. For the purposes of most home bakers, though, this instant yeast method produces a superb result, one that I am thrilled to have pulled from my own oven.
I cannot imagine a finer roll to serve at any meal. I am not exaggerating or using hyperbole. The obvious suggestion this time of year is to serve it with Thanksgiving dinner, nor is that really as insane as it sounds. Yes, the recipe looks complex, but it’s actually very simple; the mixing method is minimal (and hands-free if you have a mixer), the rolling and folding procedure is completed rapidly and with little thought, they bake in nearly no time, and hardly require cooling.
Okay, so you have to stick around the kitchen every 30 minutes for 2 hours; but if you’re working on a Thanksgiving menu, that’s not out of the ordinary. I assure you, the result for your efforts will be more than worth it. If you’re anything like me, the brussels sprouts might be cold, the turkey might take far longer than anticipated, the dressing might burn, but set a basket of pain au lait out, and all else will be forgiven and forgotten. Just remember to hide a few for yourself, dear cook; believe me, once they’re on the table, they’ll absolutely disappear.
Pain au Lait
Adapted from L20, Chicago
Makes 45 to 50 small rolls
17 ounces (about 3½ cups) unbleached bread flour, plus extra for dusting
4 teaspoons sugar
1 teaspoon instant yeast
1 teaspoon kosher salt
1½ cups milk, at room temperature
6½ tablespoons unsalted butter, cut into pieces and softened
1 egg yolk beaten with 1/2 teaspoon sugar to make an egg wash
Coarse salt, for finishing
1. In the bowl of a stand mixer, whisk together the flour, sugar, yeast, and salt. Add the milk. Using the dough hook, mix at low speed until a rough dough forms. Add the butter by pieces. Increase the speed to medium-low, and continue kneading for 6 minutes, or until smooth and elastic. The dough should be very slack, and will not clear the sides of the bowl. If the dough looks too wet, add a spoonful or two of additional flour.
2. Scrape any dough down from the sides of the bowl. Leaving dough in the mixing bowl, cover tightly with plastic wrap and let sit at room temperature for 30 minutes.
3. Turn the dough out onto a lightly floured work surface, gently pressing flat. Using only enough flour to prevent sticking, roll the dough to a rectangle less than 1/2 inch thick, about 8 x 15 inches in size or as big as the dough will allow. Lift and stretch the corners to keep the dough square.
4. Fold the dough in thirds, as you would fold a letter, bringing a short end into the middle of the dough. Wrap the dough well with plastic wrap, and transfer to the freezer (ideally on a flat surface like a baking sheet or plate). Let sit in the freezer for 30 minutes.
5. After the first rest, unwrap the dough. Roll out again on a lightly floured surface to a rectangle about 8 x 15 inches in size, or as big as the dough will allow. Tri-fold again as above, re-wrap, and freeze again for 30 minutes.
6. After the second rest, repeat the rolling and folding a third time. Re-wrap, and freeze again for 30 minutes more.
7. After the third rest in the freezer, unwrap the dough and roll out again to a rectangle about 8 x 15 inches in size, using only enough flour to prevent sticking. If the dough resists, cover loosely and let rest on the counter for about 10 minutes before rolling again. While the dough rests, lightly grease a large baking sheet, or line with parchment paper.
8. Using a rolling cutter, bench scraper, or knife, cut the dough lengthwise into 4 long strips. Cut each strip crosswise into 11 or 12 even squares. Transfer each piece to the prepared baking sheet, and cover loosely with a slightly damp kitchen towel (not terry cloth).
9. Let rise at room temperature for about 1 hour, or until slightly less than doubled in size. Thirty minutes before baking, preheat the oven to 400º F, and position a rack near the middle of the oven.
10. When fully risen, gently brush the tops of the rolls with the egg wash, and sprinkle with a little coarse salt. Bake at 400º F until well-browned on top, checking after 10 minutes, and every 2 minutes thereafter if not done yet. Remove to a wire rack to cool slightly before serving.
Notes:
1. Any coarse salt will do for finishing the rolls; please don’t use table salt, as it will make them overly salty.
2. If you find the egg wash a bit thick for brushing, you can thin it with a bit of water.
3. These breads are best the day they’re made, but leftovers may be wrapped well, frozen, and reheated as needed in a 350º F oven for about 5 minutes.
4. I’m not entirely sure why, but the salt I used on the tops turned an almost purple color after baking. The flavor was unaffected.


so cute, so nice, and i am sure they tasted delicious, i must bake this! wll done! cheers from london
Those look lovely. I’m aching to go to L2O as well.
Hey, I just found your blog! This looks really good. Do you think you could bake the whole thing in one or two loaves, or would it be too heavy to cook all the way through?
Charlie: Any dough can (theoretically) be baked into loaves, or into rolls, as you prefer. This dough was so excellent that you would certainly end up with a delicious bread, but the light and unique texture of these rolls would be a bit lost if it was baked in one big loaf. Cutting the dough into small pieces allows the subtle layers to become more obvious, as there isn’t any physical leavening (i.e. steam from melting butter) to create them, as there is in puff pastry or croissants. Baked in one loaf, the dough might not rise so high in the oven (and would therefore be less airy), as the yeast has to work harder to raise the whole mass of a loaf, rather than each tiny little roll.
Hope I haven’t been confusing! Moral of the story: yes, you can bake it in one loaf, but I suggest cutting it into rolls. They don’t have to be super-tiny like these are, though, if that’s any help. Happy baking!