Pumpernickel

Week Forty-One: German Breads

This week, I’ll be exploring the wide, wide world of German breads.  You may not think of Germany as a particularly bread-loving country, as much attention as is justly directed towards their beer and sausages, but this is a country that boasts over 1200 specific varieties of bread.

Situated directly on the line between Eastern and Western Europe, German breads draw inspiration from both directions, though they more generally resemble those of Eastern Europe.  They tend to be a very grainy lot, high in fiber, and hearty enough to match up to the two aforementioned superstars of German cuisine.  Lest you think the bread is simply there in a supporting role, let me remind you that a German word for “dinner” – abendbrot – literally translates to “evening bread”.  Now who’s supporting who?

Like much of Eastern Europe, rye is a major ingredient in bread in Germany, which brings us to today’s bread.  Arguably, there can hardly be a more famous or beloved example of rye bread than pumpernickel.  Before you cry foul and shriek, “But what about rye bread?!”, let me remind you that pumpernickel is rye.  The difference is that so-called “rye bread” is made with what is essentially white rye flour, and is therefore lighter in texture and taste.

Pumpernickel, on the other hand, is made with a coarsely-ground whole-grain rye flour (coaser even than standard whole wheat flour), which results in a heartier, far more robust bread.  The bread is so popular that the flour has taken its name from the bread, rather than the other way around, as is more typical of panary nomenclature.

There seems to be very little middle ground where pumpernickel is concerned; you either love it or hate it.  Devotées of pumpernickel tend to be a die-hard lot, and are further split into two camps: the fans of the fluffier yeast-leavened stuff, often found in delis, or the zealots who crave the more traditional Westphalian pumpernickel, that dense and chewy brick found on the dustier shelves of the “International Foods” aisle at the grocery store.  Having already made the latter, today I’m focusing on the former.

A major characteristic of the average pumpernickel bread is its dark, nearly black color.  Historically, this coloring comes from very long, slow baking that caramelizes the sugars in the flour, as in Westphalian pumpernickel.  To replicate that dusky bitterness in a yeast-leavened, faster-cooking bread, bakers often use caramel coloring (made from burnt-black sugar), cocoa, instant coffee, or a combination.  This does, of course, affect the flavor of the loaf, obscuring the flavor of the grain used.

As a side note, rye breads taste their best (for various technical reasons) when a long and slow sourdough process is used.  A faster loaf may be produced, but the flavor is never nearly as good.  And so, in the case of most commercially-produced (read: fast) pumpernickels, the obfuscation of flavor is not necessarily a bad thing.  But if you’ve taken the time to nurture your dough, giving it the time it needs to produce all those complex and gorgeous flavors, why on Earth would you subject it to the indignity of scorched caramel?

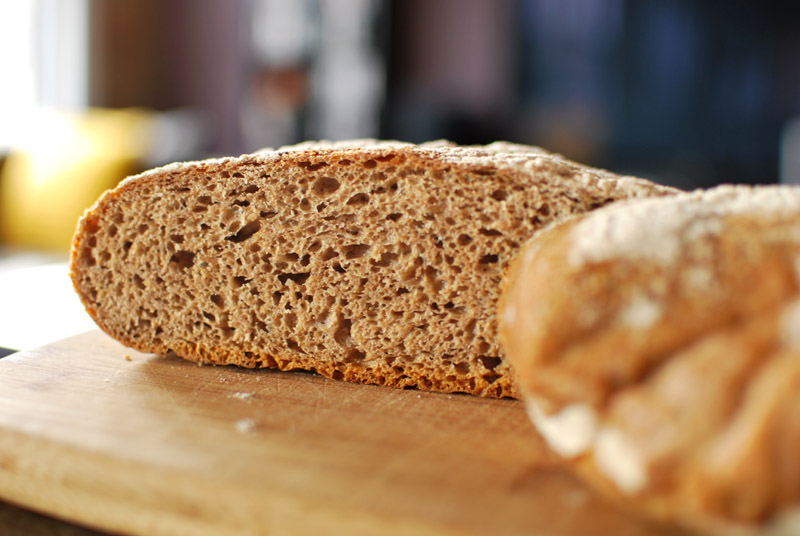
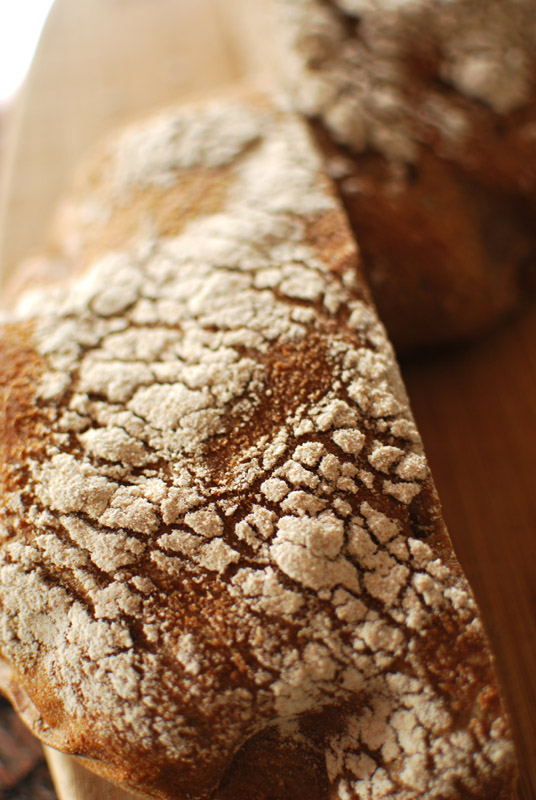
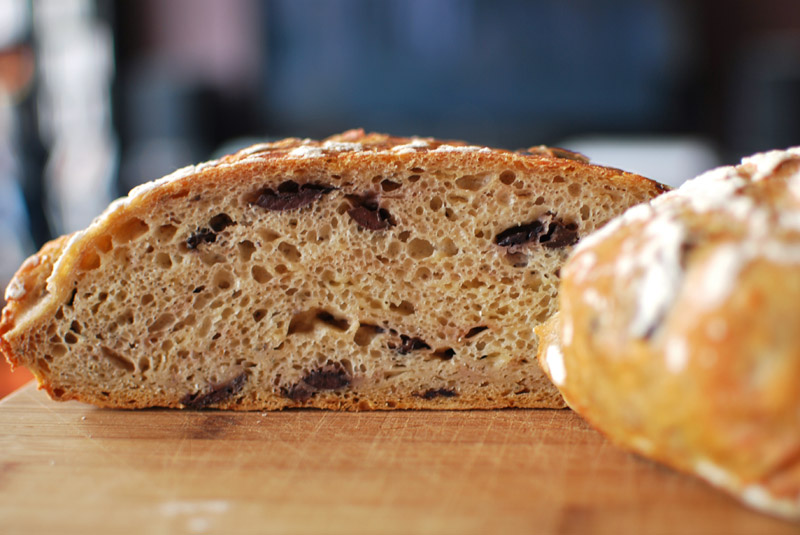
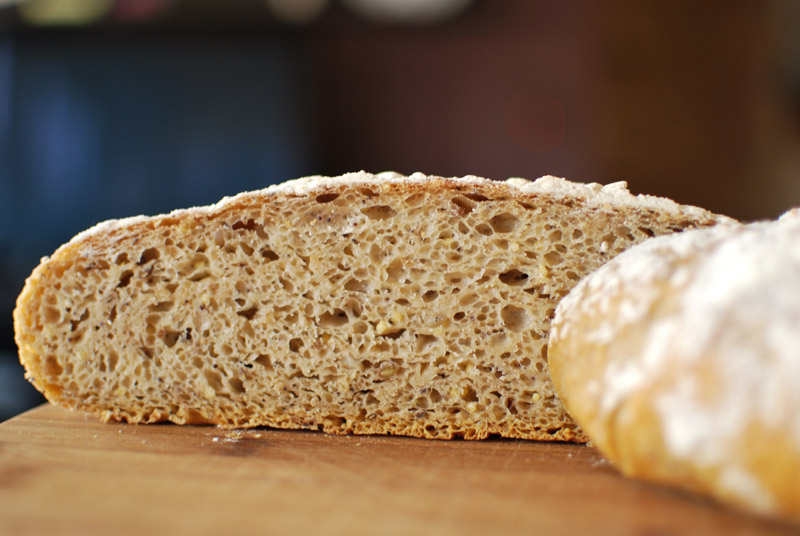
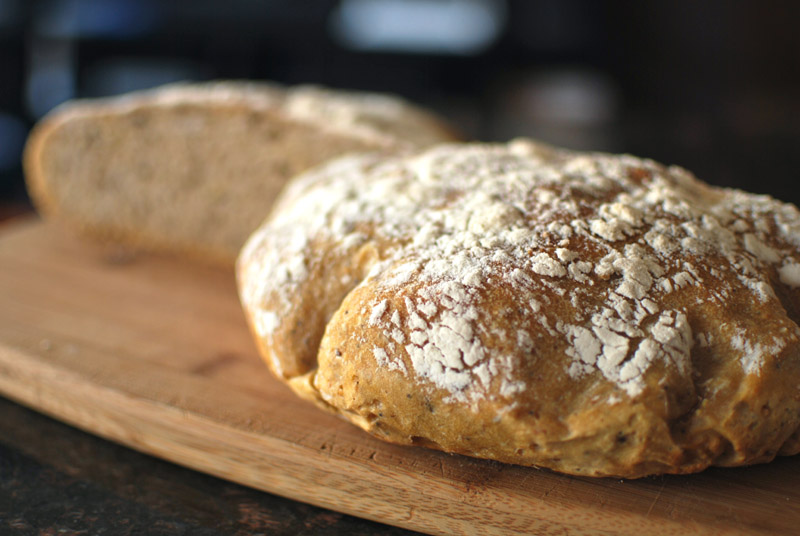
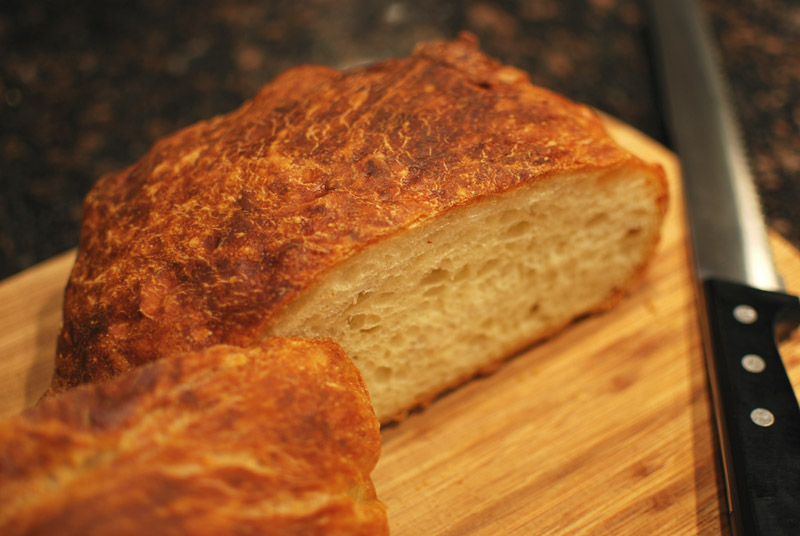
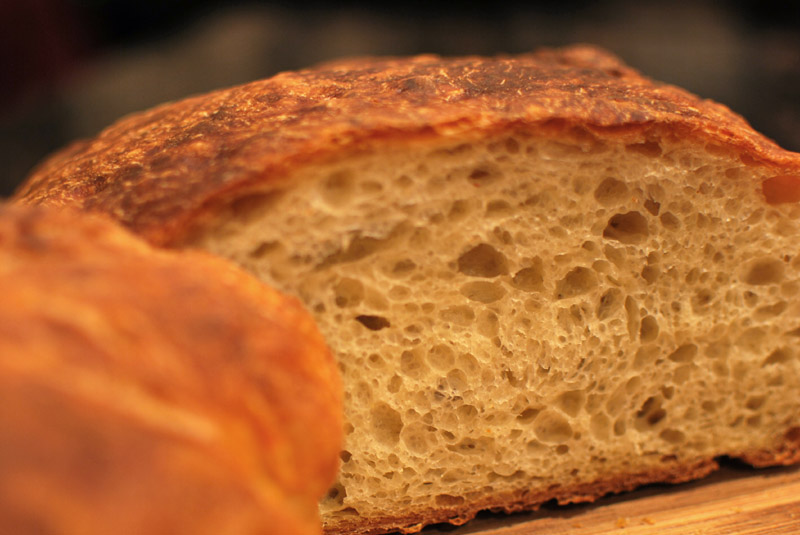
You see now why my pumpernickel is quite light in color, compared to store-bought types.  The flavors produced by the overnight starter would be done a disservice if the color were darker (though there is a touch of cocoa powder added to help deepen the color and add a little bitterness).  The overall result is quite delicious, deeper and earthier than regular rye bread, with a fantastically complex range of flavors.  It slices easily, has an even crumb, and the crust is not too hard nor too soft, making it ideal for sandwiches (as God intended).

This bread has a really excellent flavor, though I did take shortcuts with the original recipe (which took 6 days!; I don’t have that long).  I’m sure the original, as written, produces truly amazing and life-changing bread; but I dare suggest that if you’re treating your pumpernickel right, piling it with corned beef and sauerkraut from here to next week, that subtlety would be a bit lost.  This loaf has a sophisticated enough flavor to please the discriminating epicure, but remains rustic and simple enough to pair beautifully with a Beck’s.  If that’s not Deutsch, then I don’t know what is.

Pumpernickel
Adapted from The Bread Baker’s Apprentice, by Peter Reinhart
Makes 2 loaves

For starter:
5 1/4 ounces (1 cup plus 2 tablespoons) unbleached bread flour
4 1/2 ounces (1 cup) pumpernickel (dark rye) flour
1/4 teaspoon instant yeast
1 cup water, at room temperature

For final dough:
9 ounces (2 scant cups) unbleached bread flour
2 tablespoons brown sugar
1 tablespoon unsweetened cocoa powder (see note 1 below)
1 1/2 teaspoons salt
1 1 /4 teaspoons instant yeast
2 tablespoons vegetable oil
1/2 cup water, at room temperature

1.  To make starter, whisk all ingredients together in a medium bowl.  Cover with plastic wrap, and let stand at room temperature 4 to 5 hours, or until bubbly.  Refrigerate, for up to 3 days.

2.  To make the final dough, let the starter come to room temperature for at least 1 hour before proceeding.  In the bowl of a stand mixer, whisk together the flour, sugar, cocoa, salt, and yeast.  Add all the starter, the oil, and water.  Mix at low speed for 4 to 5 minutes, or until well-combined and smooth.  The dough should be tacky, but not sticky.  If needed, add additional flour or water to achieve the proper consistency.

3.  Transfer the dough to a large lightly-oiled bowl. Cover tightly with plastic wrap and let sit at room temperature for 2 hours, or until doubled in size.

4.  Line a large baking sheet with parchment paper.  Turn the dough out onto a lightly-floured surface, deflating gently.  Divide into two equal halves, and shape into oblong loaves.  Transfer to the prepared baking sheet, seam-side down, and cover loosely with lightly-oiled plastic wrap.  Let sit at room temperature for 90 minutes, or until 1 1/2 times larger in size.  Thirty minutes before baking, preheat the oven to 450º F.  If you have a baking stone, heat it along with the oven.

5.  Using a razor blade or sharp serrated knife, slash the loaves gently but decisively, in whatever pattern you like.  Do not press into the dough; let the weight and sharpness of the blade cut through the dough.  Spray or sprinkle the loaves with water, and transfer to the oven (on the baking stone, if using).  Bake for 2 minutes at 450º F, opening the door to quickly spray the loaves again with water every 30 seconds.  After 2 minutes, lower the temperature to 400º F.  Continue baking for 15 to 25 minutes, or until well-browned and fully baked through.  An instant-read thermometer should register about 200º F when done.  Remove to a wire rack to cool thoroughly (at least 2 to 3 hours) before slicing.

Notes:
1.  Instead of cocoa, you can use instant coffee if you prefer.

2.  This bread tastes best if you can refrain from slicing it until it has thoroughly cooled; overnight is even better.  This bread will freeze beautifully.

Posted in Savory, Yeast Breads | Leave a comment

Banh Mi Bread, One More Time

Week Forty: One More Time

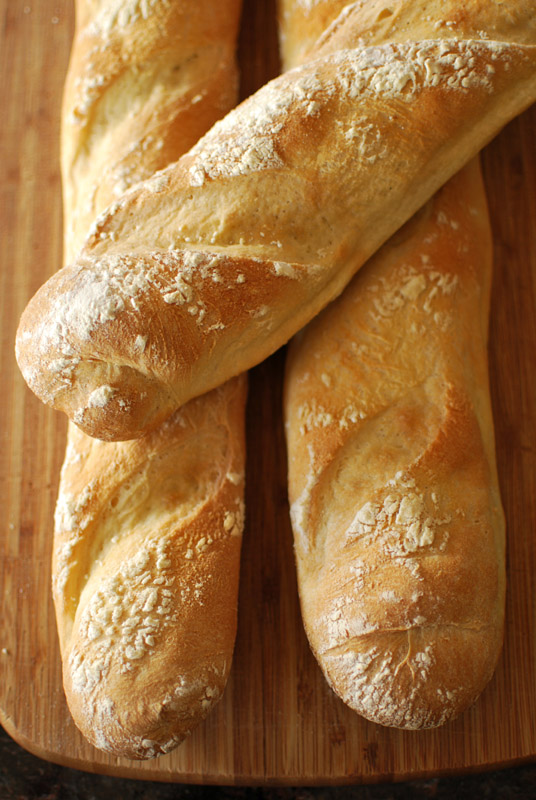
banh-mi-omt

The first time I made banh mi bread, I must have been some kind of busy.  I don’t remember exactly what I was doing, but whatever it was, it was enough to make me forget about my rising dough not once, but twice.  This is especially surprising, given my long and deeply abiding love for this particular sandwich. I must have been crazy busy.

The resultant over-fermented and over-proofed loaves were flat, dense, and generally made me cry a little.  I still made sandwiches with the bread, though, which were nevertheless quite good.  It was this sandwichy glory that my boyfriend referenced when he asked me, “Wait, you’re making banh mi again?  I thought you were only remaking failures.”  (Some men just know how to make a girl smile.)  Yes, the sandwiches were a success, but I was unsatisfied with the bread; besides, any excuse I have to make banh mi again is good enough for me.

I reduced the percentage of rice flour this time, making for a less sticky bread, and also helping increase the gluten structure for an airier crumb.  This batch also makes three baguettes, instead of the previous attempt’s two.  You won’t complain about having extra bread to make more of these sandwiches, I can assure you.

bm-omt-2

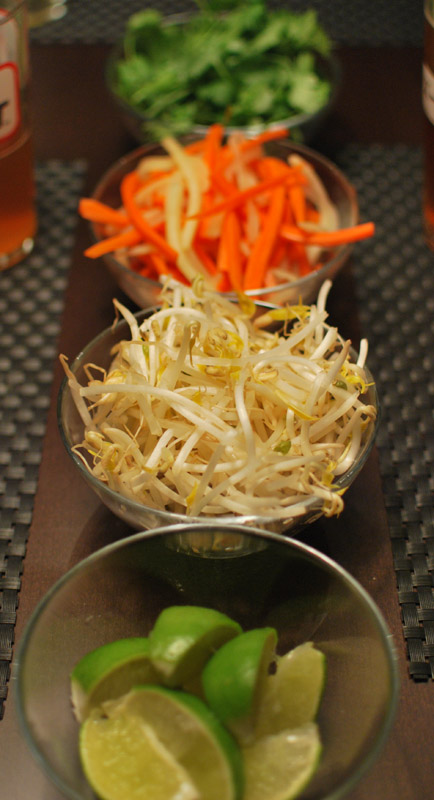
from back to front: cilantro, pickled daikon and carrot, bean sprouts, lime wedges

This second try produced loaves that browned more attractively, had a more crisp crust, and rose far better (though I made darn sure to pay attention this time around while the dough was rising).  This try was unmistakably better than the first time, and the overall taste was excellent, but I found the rice flavor a bit muted.  If you prefer a more rice-y taste, feel free to increase the proportion of rice flour to wheat flour.  I advise you not to go over one-third, though (i.e., 1 part rice flour to 2 parts wheat flour), as the gluten-free nature of rice flour will negatively affect the texture of your bread otherwise.

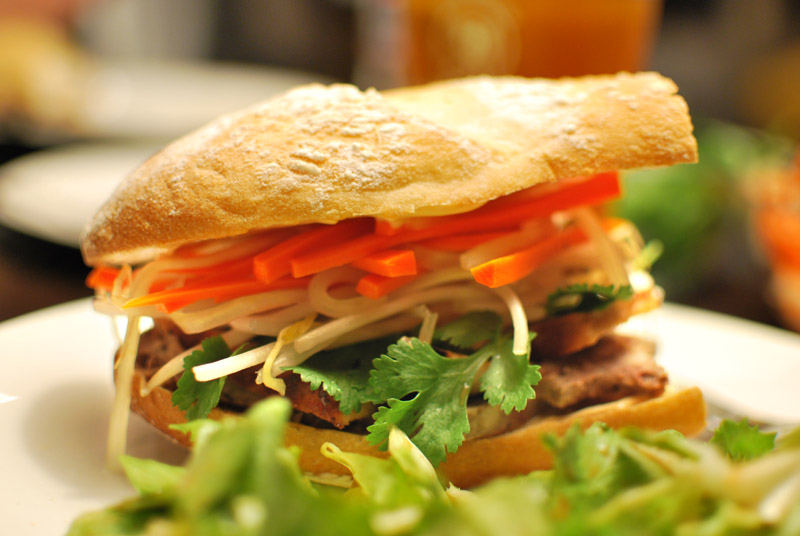
So, if the banh mi was so good on sub-par bread, how good was it on much-improved bread?  Though I can’t recall the exact quotes of my dinner guests (last-minute dinner guests, even!) who joined me at the banh mi table, I do recall the words “ridiculous”, “awesome”, and “oh my God” being bandied about.

Some men just know how to make a girl smile.

bm-omt-3

Banh Mi Bread, One More Time
Adapted from The Foppish Baker and Rice and Wheat
Makes 3 baguettes

18 ounces (4 cups) unbleached all-purpose flour, divided, plus extra as needed
5 ounces (1 cup) very fine rice flour
1 tablespoon instant yeast
1 tablespoon sugar
2 1/2 teaspoons salt (1 tablespoon kosher salt)
1 3/4 cups water, at room temperature
2 tablespoons unsalted butter, melted and cooled slightly

1.  In the bowl of a stand mixer, whisk together 2 cups of the all-purpose flour, all of the rice flour, yeast, sugar, and salt.  Add the water and butter.  Using the paddle attachment, mix at low speed until thoroughly blended, about 1 to 2 minutes.

2.  Switch to the dough hook, and continue mixing at low speed.  Add enough of the remaining all-purpose flour until a moderately stiff dough forms; you may need more or less than the reserved 2 cup.  The dough should clear the sides of the bowl, but not be too stiff.  Increase the speed to medium-low, and continue kneading for 7 to 8 minutes, or until the dough is smooth and elastic.

3.  Transfer the dough to a large, lightly-oiled bowl.  Cover tightly with plastic wrap, and let sit at room temperature until doubled in size, about 45 to 60 minutes.

4.  Turn the dough out onto a lightly floured surface, and divide into three equal pieces.  Shape each into an round ball, then into an oblong loaf shape.  Cover again, and let rest for about 10 minutes.  Lightly grease a large baking sheet, or line with parchment paper.

5.  Working with one piece at a time, and keeping the other covered, gently press each piece into a flat oval.  Starting with a long side, roll up into a long cylinder.  Set aside, covered, while shaping the other piece.

6.  Rolling underneath flat palms, or pulling gently as needed, lengthen each piece into a long, thin rope, about 18 to 20 inches long.  Transfer carefully to the prepared baking sheet.  Cover loosely with lightly oiled plastic wrap, and let rise for 45 to 60 minutes, or until doubled in size.  Thirty minutes before baking, preheat the oven to 450º F, and place another baking sheet or oven-safe pan on a rack in the bottom third of the oven.  Or, if you have a baking stone, use it instead, heating it with the oven.

7.  Using a sharp serrated knife or clean razor blade, make 3 or 4 gentle but decisive slashes in the top of each loaf at a 45º angle, evenly spaced.  Don’t press into the dough, just let the weight and sharpness of the blade cut into the dough as you pull it across the surface.  If the dough deflates, let it recover for an additional 10 to 15 minutes.  Spray or sprinkle the bread with water, and transfer the bread to the oven (or baking stone, if using).  Bake for 5 minutes, spraying the dough with water every minute or two.

8.  After 5 minutes, reduce the temperature to 400º F, and continue baking for an additional 10 to 15 minutes, or until deeply golden brown and fully baked.  An instant-read thermometer should register about 205º to 210º F when inserted into the center.  Remove the bread to a wire rack to cool fully before slicing.

Banh Mi (Vietnamese Pork Sandwiches)
Makes 3 to 4 sandwiches

1 loaf banh mi bread, recipe above
Banh mi-onnaise, recipe below
Pickled carrots and daikon radish, recipe below
8 ounces pork loin, cooked and sliced
4 to 6 ounces pork liver pâté, sliced
Bean sprouts, about 1 cup
1 jalapeño, sliced thinly
Cilantro leaves, to taste
Salt and black pepper, to taste
Extra fish sauce and Sriracha, to taste
Lime wedges, for squeezing

1.  Slice the loaf of bread in half horizontally.  Toast briefly under a hot broiler until lightly crispy.

2.  Spread both cut sides of the bread with banh mi-onnaise.  Top bottom half with (in order) slices of pork loin, slices of pâté, pickled carrot and daikon, bean sprouts, jalapeño, and cilantro.  Add salt, pepper, sriracha, fish sauce, and lime juice to taste.  Top with other half of bread, cut into 3 or 4 pieces, and serve.

Banh Mi-onnaise
Makes about 1/4 cup

4 tablespoons mayonnaise
1/2 teaspoon fish sauce
1/2 teaspoon Sriracha
1/4 teaspoon soy sauce

1.  Mix all ingredients together until smooth.  Refrigerate until needed.

Pickled Carrots and Daikon Radish
Adapted from Viet World Kitchen
Makes about 2 cups

For the brine:
1/2 cup sugar
1 1/4 cups distilled white vinegar
1 cup water
1/2 teaspoon whole black peppercorns
1 bay leaf

For the vegetables:
1 large carrot, peeled and cut into thin matchsticks
1/2 pound daikon radish, each no larger than 2 inches in diameter, peeled and cut into thin matchsticks
2 teaspoons sugar
1 teaspoon salt

1.  Combine all the brine ingredients in a pan over medium-high heat.  Heat, stirring, until all the sugar is dissolved.  Remove from heat, and let steep while preparing the vegetables.

2.  Place the cut carrot and daikon in a non-reactive bowl, and sprinkle with the salt and sugar.  Using your hands, squeeze and knead the vegetables for about 3 minutes.  They will release liquid and begin to soften.  Stop kneading when you can bend a piece of daikon so that the ends touch, but does not break.  Drain and rinse the vegetables with cold water in a colander.  Gently squeeze excess liquid off.

3.  Return the vegetables to the bowl, or place in a clean jar for longer storage.  Pour the brine over the vegetables.  The brine should totally cover the vegetables; if not, add extra water until covered.  Place a piece of parchment paper on the surface of the brine to keep the vegetables moistened, and cover with plastic wrap, or a lid.

4.  Let the vegetables sit for at least 1 hour before eating.  If eating immediately, the curing action will happen faster at room temperature.  If eating within a day or two, they should be refrigerated.  They will keep, refrigerated, for up to 4 weeks.

Notes:
1.  For the bread dough, be sure to use the finest-milled rice flour you can find.  Bob’s Red Mill is a good and widely-avaliable choice; Arrowhead Mills is a bit coarser.  Any Asian market should have at least one option.

2.  It’s not necessary to use the pickled vegetables, and the banh mi-onnaise can just as well be switched for regular mayonnaise.  But they do lend a bit of authenticity to the flavor; proceed at your discretion.

Posted in Savory, Yeast Breads | Leave a comment

Angel Biscuits, One More Time

Week Forty: One More Time

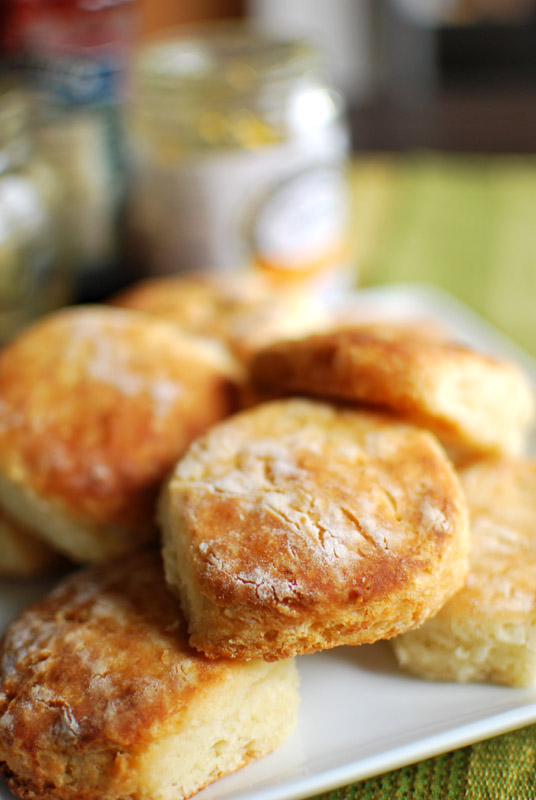
angel-biscuits-omt

When I embarked on my biscuit adventure some weeks ago, I neglected to remember one important detail: I didn’t own any round biscuit cutters.  Bunny shape, check.  Bone shape, check.  Halloween cat and ghost shapes, check.  But round?  It had never seemed a crucial item to purchase; after all, I had plenty of drinking glasses and a couple of tin cans opened at both ends.  I had better things to spend my money on than proper round cutters.

And normally, I would agree with myself.  In many cases, a tin can or drinking glass will amply suffice in place of a  round cutter.  But for biscuits, my tin cans were, at over 3 inches across, just too big.  I was going for biscuits, not tiny loaves of biscuity bread.  And the problem with drinking glasses is their bluntness.

You see, biscuits are a sort of laminated dough, that is, layers of fat and dough.  Use too blunt a cutting instrument, and you pinch the edges flat.  This prevents the sides of your dough from rising properly, and prohibits the entire thing from becoming as tall and fluffy as it potentially could.

By using drinking glasses to cut out my biscuits, I was shooting myself in the foot.  After all the care and effort put into crafting the dough so that it would be the flakiest thing possible and create biscuits so fluffy you have to nail them down lest they float away, I hamfistedly smushed the edges flat, making domed and slightly dense things instead.  They tasted just fine, but I was a little displeased with the texture, if this perfectionist may be honest.

It was then that I decided to pull the trigger on a set of round cutters.  I couldn’t seriously expect to continue with my head held high otherwise, now could I?  Proper cutting utensils in hand, I turned my attention to angel biscuits.  The other biscuits made that week were either not harmed much by the inferior shaping, or too much trouble to fool with this week, quite frankly.  Also, that was the first time I’d ever made these yeast-risen biscuits, and I was intrigued enough to try them again.

This time around, the cutters made a noticable difference.  The cut edges definitely rose taller than previously.  My usual trick of placing biscuits on the baking pan so that they touch, rising taller by climbing up each other, also helped loads.  But this time, I gave the biscuits a rise before baking, until they were puffy, but not doubled like a typical yeast bread.  This meant that the butter in the dough softened, and therefore didn’t provide much lift in the oven.  The finished biscuits weren’t much taller than when they went risen into the oven, but the effect was quite acceptable.

In retrospect, I understand why the vast majority of angel biscuit recipes use shortening as the only fat — I had made the executive decision to use half butter for better flavor — it is because of this softening due to the rising time.  Most shortening will stay m ore solid at room temperature, unlike butter, which sinks into a slightly soupy mess.

And so, in final judgement, angel biscuits made entirely with shortening are truly excellent for a biscuit beginner, justly earning their nickname, “Bride’s Biscuits”.  But if you’ve got a dozen or so batches under your belt, and have gotten the hang of the whole “cutting in the fat” bit, you may want to graduate, and give regular all-butter, non-yeasted biscuits a go.  In my humble opinion, they’re worth all the effort (and worth all the calories).


Angel Biscuits, One More Time
Makes about 15

1/4 cup chilled vegetable shortening
4 tablespoons (1/2 stick) cold unsalted butter
10 ounces (2 1/2 cups) cake flour
1 1/2 teaspoons instant yeast
2 tablespoons sugar
1 1/2 teaspoons baking powder
1/2 teaspoon baking soda
1 teaspoon salt
3/4 cup cold buttermilk, plus extra for brushing biscuits
All-purpose or bread flour, for dusting and rolling out

1.  Cut the butter and shortening into as small pieces as possible.  Pile loosely on a small plate and freeze while preparing remaining ingredients.

2.  In a large bowl, sift together the flour, yeast, sugar, baking powder, baking soda, and salt.  Add partly-frozen butter and shortening.  Moving quickly, toss and pinch butter and shortening into flour with fingertips, until the mixture resembles coarse meal.  Large flakes or pea-sized lumps are just fine.

3.  Add the buttermilk to the flour mixture, and fold quickly but gently with a fork or nonstick spatula until all dry ingredients are moistened and a rough dough forms.

4.  Turn the dough out onto a floured work surface.  With floured hands, press the dough together into a cohesive mass.  Liberally dust the top with flour, and fold the dough in half (you may need to use a bench scraper to help with this).  At this point, the dough may be refrigerated, wrapped in plastic wrap, at least 8 hours and up to 2 days.  Let come to room temperature for 20 to 30 minutes before proceeding.

5.  Grease a large baking sheet, or line with parchment paper.Using a rolling pin, and dusting with flour as needed to prevent sticking, gently roll the dough out to about 1/2 inch thick.  Using a round cutter, and cutting decisively, cut as many biscuits as you can, cutting each out as closely as possible to the next one.  Do not twist the cutter.  Transfer the biscuits to the prepared baking sheet, placing them so they just touch.

6.  Gather scraps together by gathering in from the sides, pressing the cut sides together.  Do not re-knead or re-roll for the best results.  Form biscuits from scraps either by hand-shaping or by cutting.  Transfer scrap biscuits to the prepared baking sheet, placing them so they just touch.  (Cut-out biscuits can be frozen at this point, for up to a few weeks.  Do not thaw before baking.)  Cover loosely with plastic wrap, and let sit at room temperature for 1 to 1½ hours, or until puffy and lightly risen.  Thirty minutes before baking, preheat the oven to 425° F.

7.  Bake biscuits at 425° F for 10 to 15 minutes (15 to 20 minutes if frozen), or until lightly browned on top.  Let cool on the pan for a minute or so, then transfer biscuits to a wire rack to finish cooling.  Serve warm.


Notes:
1.  Cooked biscuits can be stored at room temperature, wrapped tightly in aluminum foil, for 6 to 8 hours.  Before serving, rewarm in a 350° F oven for 5 minutes.  If not eating within that time, freeze, wrapped in foil.  To serve, bake unthawed and unwrapped, for 10 minutes at 350° F.

Posted in Quick Breads, Savory, Yeast Breads | Leave a comment

Almond Chickpea Flatbread, One More Time

Week Forty: One More Time

chickpea-omt

One of my favorite breads I’ve made this year is farinata.  This Northern Italian speciality, made basically of chickpea flour and luxuriously copious amounts of olive oil and black pepper, results in such a delectable bread that it is worth every minute spent tracking down the crucial main ingredient: chickpea (or, gram) flour.

And, like most very simple breads, I couldn’t help but meddle with the formula.  The item that resulted from adding almond flour and my stubborn ignoring of the proper cooking method was, shall we say, not as good as the original.  Perhaps if I had been more careful and thought it all through, things might have gone differently, and I would’ve had a new recipe to add to the permanent file.  As it was, the bread stuck badly to the not-hot-enough pan, the flavors were muddy and unbalanced, and the result was simply not that great.

So, rather than risk a repeat performance (or lack thereof), I elected to leave the farinata method to the farinata, and create a different bread altogether, with the same and unadorned flavors of chickpea and almond.  Knowing that such gluten-free flours would never produce a decent yeast-risen loaf, it had to be some sort of flatbread.  Crackers, I though, would take particularly good advantage of the natural coarse textures, so that’s the route I took.

I mixed in a bit of all-purpose flour to help hold everything together, instead of just crumbling into oblivion when bitten.  Taking a single flavoring cue from the original farinata, I added a generous helping of black pepper, intensified with a pinch of cayenne pepper.

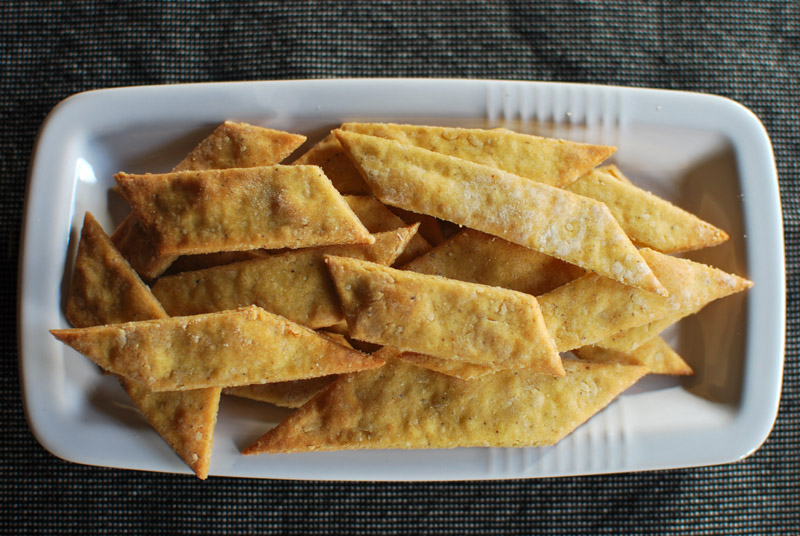
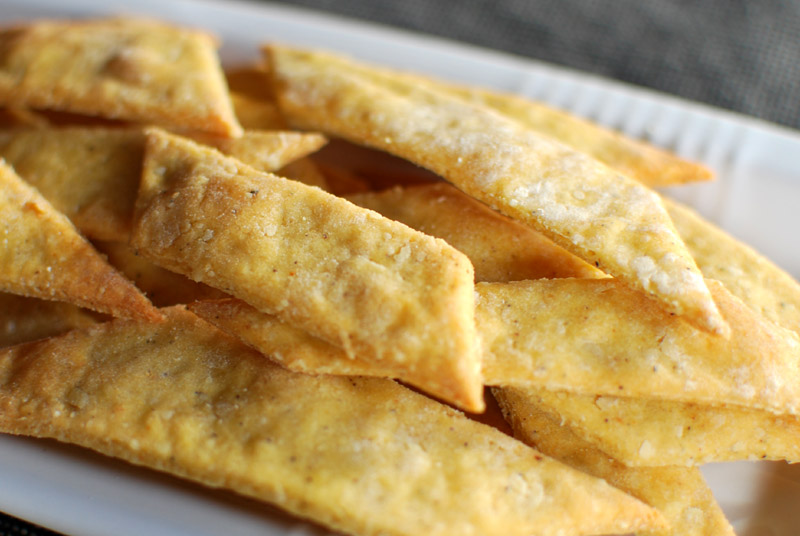
The golden crackers I pulled from my oven filled the kitchen with a nutty, spicy aroma.  They weren’t the most crisp things I’d ever tasted, but I had rolled them fairly thick, so it wasn’t a surprising state of affairs.  (If you prefer a crisper cracker, roll them very thin, and dock the surface with a fork before baking; otherwise, they’ll just puff up.)  The bite of pepper was certainly present, but it built gently and pleasingly on the back of the tongue, rather than brashly announcing its presence at first taste. 

The chickpea flour did bring a slightly dry characteristic to the crackers, a state that might be ameliorated by letting the dough rest overnight (and fully hydrate), as opposed to the 30-minute cat nap I gave it.  But dip these full-flavored guys in some hummus, and you’d never notice the difference.  (Take it from one who knows.)  These crackers, though not exactly like the original attempt at mixing chickpea and almond, were a far better way of blending the two flavors.  Finally, I’ve got a recipe worth hanging on to.

chickpea-omt-2


Almond Chickpea Flatbread Crackers
Makes about 50 crackers

5 ounces (about 1 cup) chickpea (gram) flour
2¼ ounces (1/2 cup) unbleached all-purpose flour
2 ounces (1/2 cup) almond flour
1/2 teaspoon salt
1/4 teaspoon freshly ground black pepper
1/8 to 1/4 teaspoon cayenne pepper, to taste
3 tablespoons olive oil
1/4 cup plus 1 to 2 tablespoons water

1.  In a bowl, whisk together the flours, salt, and peppers.  Add the olive oil and 1/4 cup of water.  Mix together until a shaggy dough forms.  Add the extra water by tablespoons as needed until all dry ingredients are moistened.  Knead together, in the bowl or on a work surface, until smooth.  Cover with plastic wrap, and let rest at least 30 minutes.  Preheat the oven to 400º F.

2.  On a lightly floured surface, roll out the dough to a rectangle, about 15 x 10 inches in size, or about 1/4 inch thick.  Using a pizza cutter, knife, bench scraper, or cookie cutter, cut out crackers of desired size and shape.  Gather any scraps together, knead quickly until combined, and let rest 10 minutes before re-rolling.

3.  Transfer cut-out crackers to a large parchment-lined baking sheet, and bake at 400º F for 7 to 12 minutes, depending on size, until barely golden brown.  Transfer to a wire rack to cool.


Notes:
1.  After mixing the dough, it can be wrapped tightly in plastic wrap and refrigerated overnight.  Let come to room temperature for 30 minutes before rolling out.

2.  Dough should not be re-rolled more than once, as the crackers will toughen with every re-rolling.  Cutting out square or diamond shaped crackers will obviously eliminate the need to re-roll scraps, though I fully understand the appeal of, say, bunny or flower shaped crackers.

Posted in Savory, Unleavened Breads | 2 Comments

100% Whole Wheat No-Knead Bread, One More Time

Week Forty: One More Time

ww-nkb-omt

Jim Lahey’s no-knead method is so amazingly simple that it’s quite tempting to fiddle with it, making substitutions here and there, pushing the limits.  One of the more obvious changes is to swap the white flour for whole wheat.  It’s more nutritious, just as easy, and surely there can’t be that much difference, can there?   How hard could it be?

Plenty hard, as I found out.  Merely changing the flour to whole wheat resulted in a gray, flat loaf, with a gummy texture that tasted vaguely like despair.  So, to remedy that failure, I borrowed a few tricks from the best no-knead variation I made, Cook’s Illustrated’s almost no-knead bread, plus one from King Arthur Flour’s whole wheat sandwich bread.  I was unwilling to add any white flour back in, as I still wanted a 100% whole wheat bread, though that certainly would’ve helped things quite a lot.

For this attempt, I used half beer and half water for the liquid, similar to almost no-knead bread.  As suggested by the King Arthur recipe, I added a splash of orange juice, not for flavor, but to offset the bitterness that some whole wheat flours have.  This also provided a little acid, so I didn’t feel it necessary to add any vinegar, as the Cook’s Illustrated recipe does to improve the flavor.  I kept the method the same as the original no-knead bread, for consistency.

The result was absolutely improved.  That unappealing gray color was gone, replaced by a proper autumn-leaf brown.  The crumb was beautifully open, and the domed top spoke volumes about the far better oven-spring.  Flavor-wise, this bread was the clear winner between it and its predecessor.  The crust was appropriately thick, and the interior was tender.

However, this still isn’t the ultimate 100% whole wheat no-knead bread.  While the flavor was good, the texture was a bit coarse, lending a dryness to each bite.  The modifications I made to the recipe made worlds of difference, but it’s not quite there yet.  This whole wheat bread is good, and will certainly fit the bill if you must have a whole wheat no-knead bread, but there are finer whole-grain examples that take a shorter amount of time.

ww-nkb-omt-2


100% Whole Wheat No-Knead Bread, One More Time
Adapted from Jim Lahey, via The New York Times
Makes 1 round loaf

13½ ounces (3 cups) whole wheat flour, plus extra for dusting
1/4 teaspoon instant yeast
1½ teaspoons salt
3/4 cup water
3/4 cup light-flavored beer
2 tablespoons orange juice

1.  In a large bowl, whisk together the flour, yeast, and salt.  Add the water, beer, and orange juice, and stir until blended; the dough will be shaggy and sticky.  Cover tightly with plastic wrap, and let dough sit at room temperature for at least 12 and up to 24 hours (but preferably about 18).

2.  The dough is ready when its surface is dotted with bubbles.  Line a 10 inch skillet or any wide, shallow bowl with a large square of parchment paper.  Turn the dough out onto a well-floured work surface; sprinkle it with a little more flour and fold it over on itself a few times, until it forms a roughly round shape.  A bench scraper helps greatly with this step.

3.  Transfer the dough to the parchment-lined skillet, and dust heavily with wheat bran or additional flour.  Cover loosely with plastic wrap and let rise until doubled in size, about 2 hours.  When it is ready, the dough will not readily spring back when poked gently with a fingertip.

4.  At least 30 minutes before baking, preheat the oven to 500º F.  Put a 6- to 8-quart heavy covered pot (see note 1 below) in oven as it heats.  When the dough is ready, carefully remove the pot from the oven.  Transfer the dough to the pot by lifting the parchment by the edges, and carefully and quickly lowering the dough into the pot.  Shake the pan once or twice if dough is unevenly distributed, but don’t worry about it too much; it will straighten out as it bakes.

5.  Cover the pot with the lid and transfer the pot to the oven.  Reduce the oven temperature to 425º F, and bake for 30 minutes.  Remove the lid and bake uncovered for an additional 15 to 30 minutes, or until the loaf is well-browned.  An instant-read thermometer should register around 205º to 210º F when fully baked.  Transfer to a wire rack to cool thoroughly, discarding the parchment.


Notes:
1.  Any heavy covered pot will do, be it cast iron, enamel, Pyrex, stainless steel, or ceramic.  As long as it’s oven-safe, it seems anything will do the trick.  If your chosen vessel has no lid, or if you’re concerned about the oven-safety of it, simply use aluminum foil instead, pressing it tightly (and carefully) around the preheated pot.

2.  My liquids (water, beer, and orange juice) were cold when I added them.  I’m not sure if that makes a whole lot of difference or not; proceed at your own discretion.

Posted in Savory, Yeast Breads | Leave a comment

Ensaïmadas, One More Time

Week Forty: One More Time

ensaimadas-2-omt

Generally speaking, I fall into the “Cook’s Illustrated” school of thought, which is to say that I prefer to produce the ideal example of whatever item I happen to be cooking.  (Though who wouldn’t?)  But the difference between me and most home cooks is that I feel this preference as a keen need, rather than a simple want.  I am rarely satisfied to cook from a single recipe, especially for this blog.  I research voraciously, comparing descriptions, ingredients, methods, photos, and any other information I can get my hands on, in order to turn out a more perfect what-have-you.

You see, in my mind, I only have one shot at it, and I’d really rather not have to try a second time, or even think about the stupid thing again if I really dislike it.  The research phase is crucial to me, no matter if I’m making croissants or pimiento cheese sandwiches.  I need to know, before I get into it, if what I’m doing is okay, and I like to have some assurance of success for my efforts.

This is where I went wrong with ensaïmadas the first time around.  They came up in the middle of a busy week, I had unearthed what seemed like a nice enough recipe, and so I neglected the research part before baking them.  Imagine my chagrin when a minute’s search, whilst writing the post, revealed that what I had made were surely fine little pastries, but were certainly not ensaïmadas.

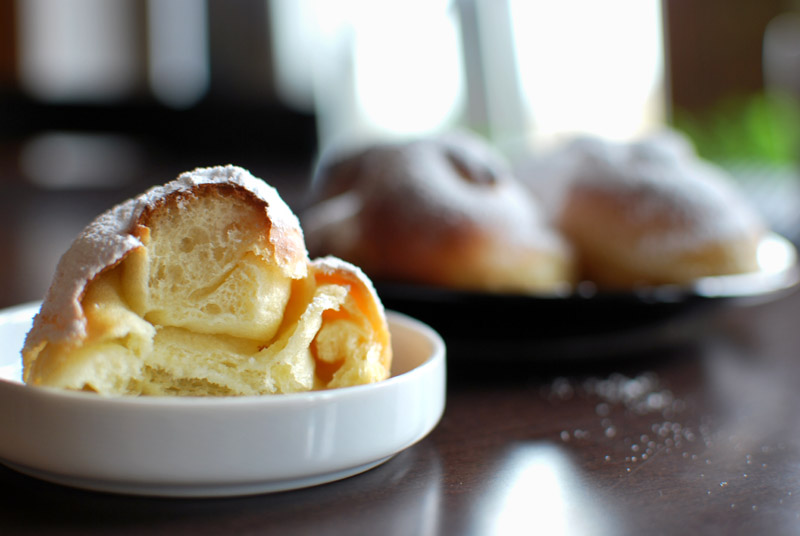
Real ensaïmadas, as made in Mallorca, are thinly-rolled rounds of dough, coated with lard (oh, yes), rolled up, spiralled, and baked into a laid-back version of a croissant.  Flaky is a key word here, and my original attempt hadn’t a flaky bone in its body.  Writing fancy prose about them soothed my wounded pride, but it couldn’t erase those silly rolls that had been thrust, aghast, out of sight into the recesses of the freezer.

This time around, I was determined to correct my hasty oversight.  I learned what they were, inside and out, and I was resolved to making a decent ensaïmada, come hell or high water.  The only deviation from a truly authentic recipe was the substitution of butter for lard, which was purely out of necessity.  I’ve no clue where to buy properly rendered lard, and I wasn’t about to render my own, as much as I devote myself to this project.  And forget those tubs of hydrogenated lard in the “International Foods” aisle; you might as well use Crisco.  I understand that many Mallorcan bakeries are now making them with butter, much to the dismay of purists, so I felt secure with this substitution.

As it turned out, the dough I had was nearly spot-on, it was the method alone that needed tweaking.  Rolling the dough out as thinly as possible is key to getting the flakiest ensaïmadas; these are made individually, no larger than a biscuit, and are quite flaky, but for the absolutely flakiest version, you can roll the dough out into one giant round, spread with all the butter, and make one huge ensaïmada instead.

These gorgeous little pastries end up with a fantastic flavor, buttery and lightly sweet.  The honey-colored crust is just barely crisp, and flakes away to reveal an incredibly tender interior.  Need I tell you that the center is the softest and most delicious bite of all?  I didn’t think so.  Served with a cup of good and strong coffee, the only worries you’ll have are keeping the powdered sugar from snowing all over your clothes.

Success?  I should say so.

ensaimadas-omt
 

Ensaïmadas, One More Time
Adapted from Bread, by Christine Ingram and Jennie Shapter
Makes 16

1 large egg, at room temperature
1/2 cup milk, at room temperature
1 tablespoon olive oil
9½ ounces (2 cups) unbleached bread flour, plus extra for rolling
1/4 cup sugar
1/2 teaspoon salt
1½ teaspoons instant yeast
1/2 cup (1 stick) unsalted butter, softened
Powdered sugar, for dusting

1.  In the bowl of a stand mixer, whisk the egg until well blended.  Add the milk and olive oil, and whisk until combined.  Add the flour, sugar, salt, and yeast.  Using the dough hook, mix at low speed until all the flour is moistened and a rough dough forms.  Increase the speed to medium-low and knead for about 5 minutes, or until smooth and elastic.

2.  Transfer the dough to a lightly-oiled bowl, cover tightly with plastic wrap, and let sit at room temperature until nearly doubled in size, about 1 to 1½ hours.

3.  Turn the dough out onto an un-floured work surface.  Knead a few times to deflate, dusting lightly with flour as needed to prevent sticking.  Divide the dough into 16 even pieces, form each into a round ball, cover loosely with plastic wrap, and let rest for 5 minutes.  Line a large baking sheet with parchment paper.

4.  Keeping unused pieces of dough covered, roll each piece of dough out into a flat circle, as thinly as possible, and dusting with only enough flour to prevent sticking.  If the dough resists, cover and let rest while working on remaining pieces.  The dough should be very thin.

5.  After you roll each piece out to its maximum thinness, spread 1/2 tablespoon of the softened butter onto the surface.  Roll up fairly tightly into a rope, and set aside, covered loosely with plastic wrap, as you work on the remaining pieces.  When finished with all pieces, let all rest for 5 to 10 minutes.

6.  Pick up each rope and gently pull to lengthen the rope slightly.  Coil each rope into a spiral, on the prepared baking sheet.  Tuck the tail end underneath.  Repeat with remaining ropes.  Cover loosely with plastic wrap, and let sit at room temperature until doubled in size, about 1 hour.  Preheat the oven to 375º F.

7.  Bake the spirals at 375º F for 10 to 15 minutes, or until golden brown.  Remove from the oven and immediately dust with powdered sugar, ideally by sifting the sugar over the hot bread.  Transfer to a wire rack to cool.  Serve warm.


Notes:
1.  Ensaïmadas will keep at room temperature for about a day.  They may also be frozen and reheated in a 350º F oven for about 5 minutes, or until heated through.

Posted in Sweet, Yeast Breads | 1 Comment

Tortas de Aceite, One More Time

Week Forty: One More Time

tortas-redone-3

Can you believe it?  It’s already the end of the third quarter!  The year is mostly done, and soon this project will be over.  Not to spoil the surprise, but I do plan to continue blogging next year, but with a less bread-centric theme.  Details of that will come as soon as I iron them out.

But for now, the fact that it’s the last week of the tri-monthly period means one thing: it’s the week I get to re-do all of my failures over the past eleven weeks.  The problem with strictly making one different recipe every day is that I don’t get a second chance if anything goes wrong.  Therefore, I’ve set this week aside to go back, fix what went wrong, or perfect things that were just a little bit off.  Today, I’m revisiting tortas de aceite, those exquisite Spanish flatbreads.

The first time I made these, I rolled them too thinly, and they puffed up like crazy, making hard cracker balloons.  They were tasty, but they sure weren’t what I was envisioning.  You couldn’t take one bite without losing half of the bread in a shower of flaky crumbs.  This was, of course, unacceptable.  Additionally, that recipe only made six breads, not nearly enough for how flavorful the dough was.

tortas-redone-2

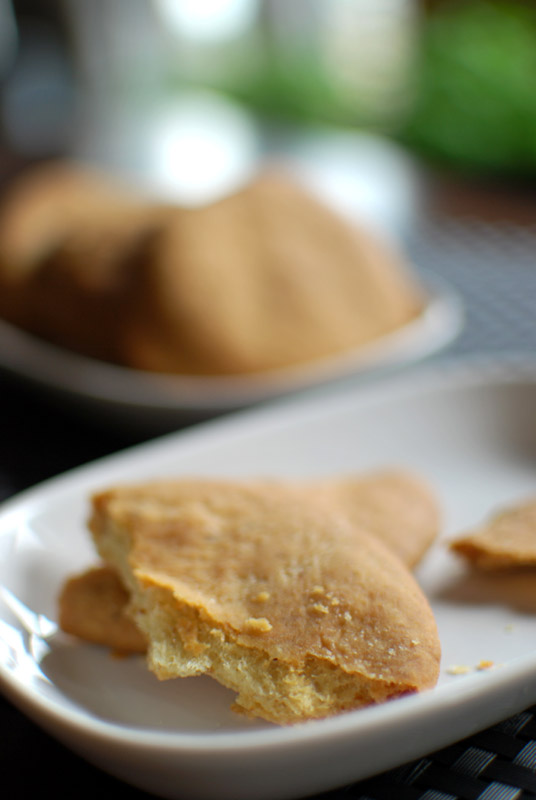
without sugar

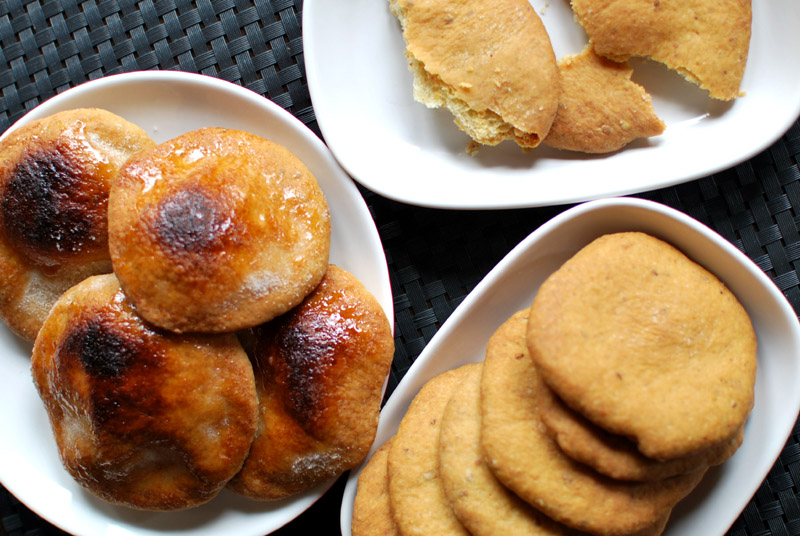
This time around, I increased the amount of dough, to make a respectable amount of tortas (about sixteen), and I rolled the dough more thickly.  The thicker dough made for a more substantial cracker, not so much the easily-failing wafer I had previously created.  The same seductive balance of olive oil, sesame, anise, and a touch of lemon for brightness was there, but was bolstered this time around with the complexity of an overnight-risen starter.

As a side note, I’m not really big on the whole “sweet and savory” combination of flavors, and I tend firmly towards the savory in general; so the first time I made these tortas, I decided against a sugar topping.  Sugared or not, either way is just as traditional as the other.  This time around, I decided to sugar just a few of them, mainly to see what it would taste like, not expecting to think much of it.

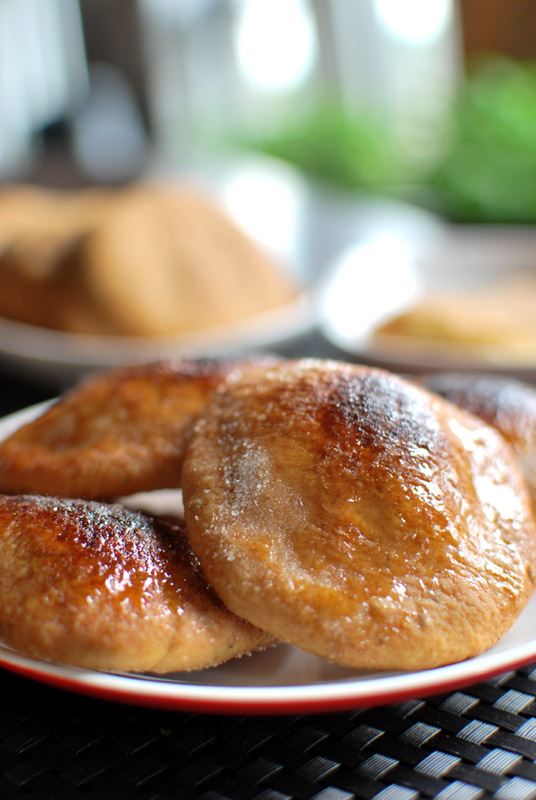
Um, you should use the sugar.  Without, they were good.  With, they were fantasically amazing.  The breads get baked with the sugar dusted over the raw dough, which cooks before the sugar has a chance to melt.  So, to melt the sugar into the bread, they are quickly passed under a hot broiler, which caramelizes the sugar, and turns the bread into something really extraordinary.

And the smell!  The heavenly smell of fruity olive oil, with hits of tart anise and nutty sesame, all under a blanket of the honey of bubbling sugar, was tantalizing, plain and simple.  Of all the improvements I made to this recipe, none of them frivolous, the sugar topping was the one that sent the tortas right over the top.  Yes, you can make these without the sugar, and they are delicious and worth every little effort; but take it from this savory-palated cook, you should use the sugar.

tortas-redone

with sugar

Tortas de Aceite
Adapted from La Cocina de Mama: The Great Home Cooking of Spain, by Penelope Casas, via Wild Yeast
Makes sixteen 4 inch rounds

For the starter:
5 ounces (1 cup plus 2 tablespoons) unbleached all-purpose flour
1/2 teaspoon kosher salt
1/4 teaspoon instant yeast
1/2 cup water, at room temperature

For the final dough:
1 1/2 tablespoons sesame seeds, toasted and cooled
1/2 cup olive oil
1 whole star anise
Zest of 1/2 lemon, in wide strips
1 tablespoon anise liqueur (such as Pernod, Anisette, or Herbsaint)
5 ounces (1 cup plus 2 tablespoons) unbleached all-purpose flour, plus extra for dusting
1/3 cup granulated sugar, approximately, for finishing

1.  For the starter, whisk together the flour, salt, and yeast.  Add the water and using a spatula, mix in the bowl for 1 to 2 minutes, to develop the gluten slightly.  The dough should not be soupy, nor should it be too stiff.  Cover with plastic wrap, and let stand at room temperature for about 8 hours, or overnight.  If you need more time, let rise at room temperature for 1 hour, then refrigerate for up to 3 days.

2.  If your starter has been chilled, remove it from the refrigerator and let it sit at room temperature.  In a small skillet over medium-high heat, toast the sesame seeds until they are fragrant and begin to pop, about 3 minutes.  Remove from the heat, and let cool.  If you like, you can grind up them a bit in a mortar and pestle, or a small food processor, though it’s not necessary.

3.  Meanwhile, heat the olive oil, star anise, and lemon zest in a small pan over medium-high heat, until the peel curls up and just begins to color.  Remove from the heat, and let steep until cool.  Strain out and discard the zest and star anise.

4.  In the bowl of a food processor, combine the starter, the cooled sesame seeds, the cooled oil, the anise liqueur, and the flour.  Using the dough hook, mix on low speed until well-incorporated.  Add additional flour by spoonfuls if needed; the dough should be very soft, oily, and shiny, but not soupy or slack.  It should clear the sides of the bowl, and be evenly-colored throughout.

5.  Cover the bowl with plastic wrap, and let sit at room temperature for 45 to 60 minutes, or until slightly risen.  Preheat the oven to 375º F, and position two racks evenly towards the middle of the oven, one in the top third and one in the bottom third.  Line two baking sheet with parchment paper.

6.  Turn the dough onto an unflouredwork surface, deflating it, and divide it into 16 even pieces.  Roll each piece into a round ball, keeping the unused pieces covered.  Dusting with just enough flour to prevent sticking, roll each ball out with a rolling pin into a 4 inch round.  Transfer each round to a prepared baking sheet, and sprinkle lightly with sugar.  Cover loosely with parchment paper, and let sit for 10 minutes, or until slightly puffy.

7.  Bake at 375º F for 15 to 17 minutes, switching positions of the baking sheets halfway through.  The wafers should be lightly browned.  Remove the wafers from the oven and turn the broiler on high.  When the broiler is hot, broil the wafers about 5 inches from the heat, until the sugar begins to melt and caramelize, about 45 seconds.  Watch to make sure that they do not burn, which can happen in a flash.  Transfer to a wire rack to cool thoroughly.

Notes:
1.  In lieu of the starter, you can use any 8 ounce piece of raw yeasted dough, such as pizza dough or leftover bread dough.  Adjust the amount of flour used in the final dough accordingly.

Posted in Savory, Sweet, Yeast Breads | 1 Comment

Olive Parmesan No-Knead Bread

Week Thirty-Nine: No-Knead Bread Week

olive-parmesan-1

This last no-knead variation takes yesterday’s adaptation one step further: instead of simply adding different grains to subtly change the flavor, this version adds such generous amounts of parmesan and kalamata olives that the word “subtle” becomes truly ludicrous.

The one caveat here, of course, is to make sure you use both cheese and olive of good quality; if you do, you will be rewarded with a loaf vibrant with rich flavors.  Scrimp here, using that cardboard powder in the green-topped shaker or those poor black rings that emerge limp and pathetic from their can, and you’ll have insulted the very flour by suggesting it associate with such riff-raff.

Lest you hear this description and think you’ll be spending more to make this one loaf of bread than you might on a reasonably-priced bottle of wine, let me reassure you that there are some very fine and inexpensive options here.  While true Parmigiano-Reggiano would be exquisite in this application, the nuances of its delicate flavor would be a bit lost in baking; and besides, it often runs near $18 to $20 per pound.  I suggest reserving this for  grating over pasta, and seeking out something more like the nutty and buttery Argentine parmesan that my cheesemonger proffered, which cost less than half as much.

Keep in mind also that this bread, while quite delicious when made as the recipe is written, tends toward the indulgent, and no real harm could come from reducing the measure of cheese to fit the budget.  Better that than opting for an inferior cheese, I say.  And, of course, good-quality olives may be bought in bulk at many grocery stores these days, at a reasonable price.  You might even prefer the more concentrated taste of oil-cured olives, which taste like good olives turned up to eleven (meaning you can use fewer for just as much flavor punch).

This loaf ends up with a delightfully open crumb, especially considering the heft of the olives and cheese that could both weigh the bread down and make it more leaden.  The no-knead method, namely that long and gentle rise, gives the dough enough muscle to lift the added bulk with nonchalance.  The crust is not too thick and leathery, nor too thin and unable to stand up to the olives.  You’ll know that the parmesan is there not by sight, as the cheese melts invisibly into the structure of the bread, but by its unmistakable smell and taste.  A hint of whole wheat flour adds a little rustic texture to the crumb, which helps the texture better match the additions of cheese and olive.  Overall, this is a potent bread, and a great example of the no-knead method.

I hope you all have enjoyed this no-knead week as much as I have; it’s been nice to not have to clean my mixer every day.

olive-parmesan-2

Olive Parmesan No-Knead Bread
Adapted from Breadtopia
Makes 1 round loaf

13 ounces (2 3/4 cups) unbleached bread flour
3 ounces (2/3 cup) whole wheat flour
1 teaspoon salt
1/4 tsp. instant yeast
7 ounces grated fresh parmesan cheese
4 ounces (about 2/3 cup) pitted kalamata olives, cut lengthwise into quarters
1 3/4 cup water, at room temperature

1.  In a large bowl, whisk together the flours, yeast, and salt.  Grate in the cheese, and toss to combine.  Add the olives and water, and stir until blended; the dough will be shaggy and sticky.  Cover tightly with plastic wrap, and let dough sit at room temperature for at least 12 and up to 24 hours (but preferably about 18).

2.  The dough is ready when its surface is dotted with bubbles.  Line a 10 inch skillet or any wide, shallow bowl with a large square of parchment paper.  Turn the dough out onto a well-floured work surface; sprinkle it with a little more flour and fold it over on itself a few times, until it forms a roughly round shape.  A bench scraper helps greatly with this step.

3.  Transfer the dough to the parchment-lined skillet, and dust heavily with additional flour (or wheat bran, if you like).  Cover loosely with plastic wrap and let rise until doubled in size, about 2 hours.  When it is ready, the dough will not readily spring back when poked gently with a fingertip.

4.  At least 30 minutes before baking, preheat the oven to 500º F.  Put a 6- to 8-quart heavy covered pot (see note 1 below) in oven as it heats, on a rack set to the lowest position.  When the dough is ready, carefully remove the pot from the oven.  Transfer the dough to the pot by lifting the parchment by the edges, and carefully and quickly lowering the dough into the pot.  Shake the pan once or twice if dough is unevenly distributed, but don’t worry about it too much; it will straighten out as it bakes.

5.  Cover the pot with the lid, and bake at 500º F for 30 minutes.  Reduce the temperature to 425º F, remove the lid, and bake uncovered for an additional 15 to 30 minutes, or until the loaf is well-browned.  An instant-read thermometer should register around 205º to 210º F when fully baked.  Transfer to a wire rack to cool thoroughly, discarding the parchment.

Notes:
1.  Any heavy covered pot will do, be it cast iron, enamel, Pyrex, stainless steel, or ceramic.  As long as it’s oven-safe, it seems anything will do the trick.  If your chosen vessel has no lid, or if you’re concerned about the oven-safety of it, simply use aluminum foil instead, pressing it tightly (and carefully) around the preheated pot.

2.  Be sure to use a good-quality parmesan cheese, as the flavor really shines here.

Posted in Savory, Yeast Breads | Leave a comment

Multigrain No-Knead Bread

Week Thirty-Nine: No-Knead Bread Week

multigrain-nkb-2

The next logical variation on this week’s theme is to see how this bread reacts to some additions.  I fully understand I’m not blazing any new territory here; but it’s something I’ve never tried for myself before.  Exciting!

The simplest addition you can make to any bread is to add different grains and seeds to the dough, so that’s the route I’m taking today.  This version remains a fairly light multigrain bread, mostly composed of white bread flour, but there’s a decent amount of whole wheat flour, with a handful of rye thrown in for complexity.  For me, though, the interesting part comes from the other additions, which can be whatever combination of grains or seeds you like best, or happen to have lying around.  Here, I’ve used a mixture of yellow millet, to pop between your teeth, hearty steel-cut oats (old-fashioned rolled oats would do just as well, but I prefer the more rustic texture of steel-cut), ground flaxseed for a nutty flavor throughout, and poppy seeds, with their sultry, dusky purple flavor.

To add some tang, there’s a touch of plain yogurt in the dough, which, like the use of white vinegar, helps replicate the acidic notes of a real wild-yeast sourdough.  Yogurt, being a dairy product, does help soften the crumb a little, though the effect here is slight.  More noticeable is the quite welcome sour flavor it lends, which is lovely in conjunction with the hint of rye flour.

The overall taste is nicely balanced between the pleasant coarseness of whole grains and the softness of a typical white bread, punctuated with the complementing flavors of poppy, flax, and oat.  The crust is perhaps thinner than the original no-knead bread, but not greatly.  A bite lands on your tongue with none of the dryness that plagues so many multigrain breads, leaving an almost creamy sweetness instead.  Though it wasn’t the tallest riser, that’s to be expected from such heavy additions as grains and seeds; it absolutely had a more open crumb than many other multigrain breads I’ve made.

Yes, this is one of the more successful no-knead variations I’ve yet seen, one that was well thought out in inception and actually follows through in execution.  Here, the no-knead method really shines, not interfering with the potential success of well-proportioned ingredients (and vice-versa), doing just what the method is intended to do: create a great loaf of bread with the minimum possible effort.  Thanks much to Breadtopia for the original recipe!

multigrain-nkb-1

yes, these pictures are all starting to look the same; I decided it'd be easiest to compare the different loaves this way

Multigrain No-Knead Bread
Adapted from Breadtopia
Makes 1 round loaf

12 ounces (2½ cups) unbleached bread flour, plus extra for dusting
3 ounces (2/3 cup) whole wheat flour
1 ounce (1/4 cup) rye flour
2 tablespoons ground flaxseed
2 tablespoons millet
1 tablespoon steel-cut oats
2 teaspoons poppy seeds
1½ teaspoons salt
1/4 teaspoon instant yeast
1½ cups water
2 tablespoons plain yogurt

1.  In a large bowl, whisk together the flours, flaxseed, millet, oats, poppy seeds, salt, and yeast.  Add the water and yogurt, and stir until blended; the dough will be shaggy and sticky.  Cover tightly with plastic wrap, and let dough sit at room temperature for at least 12 and up to 24 hours (but preferably about 18).

2.  The dough is ready when its surface is dotted with bubbles.  Line a 10 inch skillet or any wide, shallow bowl with a large square of parchment paper.  Turn the dough out onto a well-floured work surface; sprinkle it with a little more flour and fold it over on itself a few times, until it forms a roughly round shape.  A bench scraper helps greatly with this step.

3.  Transfer the dough to the parchment-lined skillet, and dust heavily with additional flour (or wheat bran, if you like).  Cover loosely with plastic wrap and let rise until doubled in size, about 2 hours.  When it is ready, the dough will not readily spring back when poked gently with a fingertip.

4.  At least 30 minutes before baking, preheat the oven to 500º F.  Put a 6- to 8-quart heavy covered pot (see note 1 below) in oven as it heats, on a rack set to the lowest position.  When the dough is ready, carefully remove the pot from the oven.  Transfer the dough to the pot by lifting the parchment by the edges, and carefully and quickly lowering the dough into the pot.  Shake the pan once or twice if dough is unevenly distributed, but don’t worry about it too much; it will straighten out as it bakes.

5.  Cover the pot with the lid, and bake at 500º F for 30 minutes.  Reduce the temperature to 425º F, remove the lid, and bake uncovered for an additional 15 to 30 minutes, or until the loaf is well-browned.  An instant-read thermometer should register around 205º to 210º F when fully baked.  Transfer to a wire rack to cool thoroughly, discarding the parchment.

Notes:
1.  Any heavy covered pot will do, be it cast iron, enamel, Pyrex, stainless steel, or ceramic.  As long as it’s oven-safe, it seems anything will do the trick.  If your chosen vessel has no lid, or if you’re concerned about the oven-safety of it, simply use aluminum foil instead, pressing it tightly (and carefully) around the preheated pot.

Posted in Everything Else | Leave a comment

Almost No-Knead Bread

Week Thirty-Nine: No-Knead Bread Week

almost-nkb-2

I do attract an astute crowd, don’t I?  A couple of sharp-minded readers totally predicted today’s recipe without even knowing it, in helpful response to the whole wheat no-knead bread fiasco.  For anyone who hasn’t tried it, this no-knead variation from Cook’s Illustrated is perhaps one of the most successful versions floating around; no wonder it came to their minds!

As someone who implicitly trusts Cook’s Illustrated (well, the old Cook’s Illustrated, anyway), I had to try this when I first saw it lo these many moons ago.  I remember being impressed then, and it did not disappoint this time either.  Addressing the two main complaints with the original no-knead bread, the too-thick crust and the mysterious lack of flavor, the wizards at Cook’s Illustrated tweaked the recipe a few ways.

First, they increased the oven preheating temperature, then reduce it as the loaf is put in the oven.  This initial blast of heat makes the crust set faster, and it therefore becomes thinner and more crisp than thick and chewy.  Second, to improve the flavor, they added a touch of vinegar and swapped some of the water for beer.  The vinegar, as you may recall from yesterday’s post, helps mimic the taste of a properly long-risen sourdough.  As for the beer, I previously deducedin a week of beer bread experiments that the malt in beer is extremely useful for flavor improvement.  (And it doesn’t hurt things that you’re now faced with the dilemma of disposing with the remaining 8 ounces of beer, either.)

Lastly, to improve upon the original no-knead bread, Cook’s Illustrated does the unthinkable: they knead the dough.  A bit!  Only just a bit!  (Hence the name.)  The kneading — obviously to anyone familiar with bread-making — develops the gluten.  In this particular case, it’s kneaded just barely enough to develop the gluten a tiny bit, and then time and natural fermentation processes take over.  This creates a more stable gluten network than is achieved without kneading; it isn’t kneaded to the point that the gluten becomes over-developed over the long rise, which would result in a tough and/or dense loaf.

The flavor of this almost no-knead bread is top notch, much improved over the original no-knead bread.  Though it’s not the most mind-blowing bread to ever grace my oven, it’s certainly quite good, and one I’d be proud to serve to guests.  (And at this point, I have a [bready] reputation to uphold.)  But then, Cook’s Illustrated didn’t set out to make the be-all, end-all of breads; they set out to enhance no-knead bread, and enhance it they have.

It’s hardly any more effort (is opening a beer effort?) than the original, and the results speak for themselves: complex, airy, crisp-crusted, gorgeously browned, crackling happily at you from the cooling rack….  This one has it all.  Give this variation a shot; I doubt you’ll look back.

almost-nkb


Almost No-Knead Bread
Adapted from Cook’s Illustrated
Makes 1 large round

14 ounces (3 cups) unbleached bread flour
1/4 teaspoon instant yeast
1½ teaspoons table salt
3/4 cup (6 ounces) water, at room temperature
1/2 cup (4 ounces) mild-flavored beer
1 tablespoon white vinegar

1.  In a large bowl, whisk together the flour, yeast, and salt.  Add the water, beer, and vinegar, and stir until blended; the dough will be shaggy and sticky.  Cover tightly with plastic wrap, and let dough sit at room temperature for at least 8 and up to 18 hours, or until very risen and bubbly.

2.  Line a 10 inch skillet or any wide, shallow bowl with a large square of parchment paper.  Turn the dough out onto a floured work surface; sprinkle it with a little more flour and knead or fold it over on itself about 10 to 15 times, until it forms a roughly round shape.  A bench scraper may help with this step.

3.  Transfer the dough to the parchment-lined skillet, and dust heavily with wheat bran or additional flour.  Cover loosely with plastic wrap and let rise until doubled in size, about 2 hours.  When it is ready, the dough will not readily spring back when poked gently with a fingertip.

4.  At least 30 minutes before baking, preheat the oven to 500º F.  Put a 6- to 8-quart heavy covered pot (see note 1 below) in oven as it heats, on a rack set to the lowest position.  When the dough is ready, carefully remove the pot from the oven.  Transfer the dough to the pot by lifting the parchment by the edges, and carefully and quickly lowering the dough into the pot.  Shake the pan once or twice if dough is unevenly distributed, but don’t worry about it too much; it will straighten out as it bakes.

5.  Cover the pot with the lid, place in the oven, and reduce the temperature to 425º F.  Bake covered for 30 minutes.  Remove the lid and bake uncovered for an additional 15 to 30 minutes, or until the loaf is well-browned.  An instant-read thermometer should register around 205º to 210º F when fully baked.  Transfer to a wire rack to cool thoroughly, discarding the parchment.


Notes:
1.  Any heavy covered pot will do, be it cast iron, enamel, Pyrex, stainless steel, or ceramic.  As long as it’s oven-safe, it seems anything will do the trick.  If your chosen vessel has no lid, or if you’re concerned about the oven-safety of it, simply use aluminum foil instead, pressing it tightly (and carefully) around the preheated pot.


PS – Happy National Punctuation Day to all my favorite punctuation marks!  I used as many as I could get away with today.  In honor of the day, here is an “appropriate” blog to “read”.

Posted in Savory, Yeast Breads | 3 Comments