Week Forty: One More Time
Can you believe it? It’s already the end of the third quarter! The year is mostly done, and soon this project will be over. Not to spoil the surprise, but I do plan to continue blogging next year, but with a less bread-centric theme. Details of that will come as soon as I iron them out.
But for now, the fact that it’s the last week of the tri-monthly period means one thing: it’s the week I get to re-do all of my failures over the past eleven weeks. The problem with strictly making one different recipe every day is that I don’t get a second chance if anything goes wrong. Therefore, I’ve set this week aside to go back, fix what went wrong, or perfect things that were just a little bit off. Today, I’m revisiting tortas de aceite, those exquisite Spanish flatbreads.
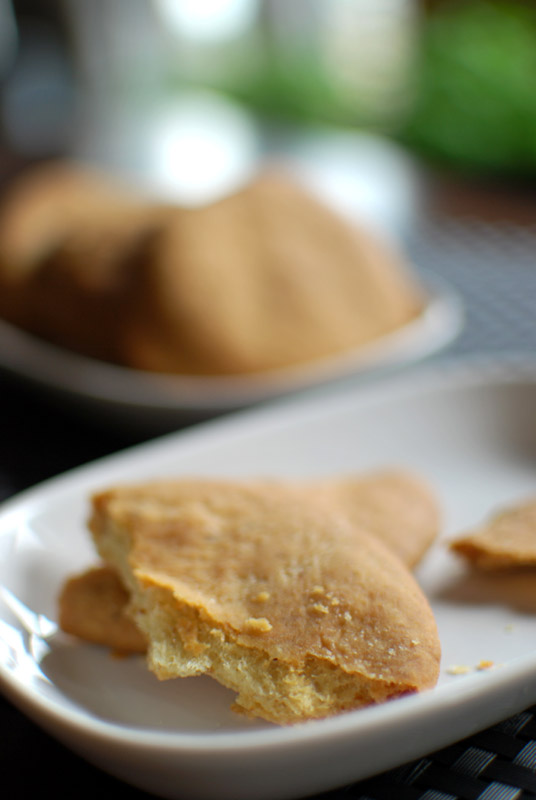
The first time I made these, I rolled them too thinly, and they puffed up like crazy, making hard cracker balloons. They were tasty, but they sure weren’t what I was envisioning. You couldn’t take one bite without losing half of the bread in a shower of flaky crumbs. This was, of course, unacceptable. Additionally, that recipe only made six breads, not nearly enough for how flavorful the dough was.
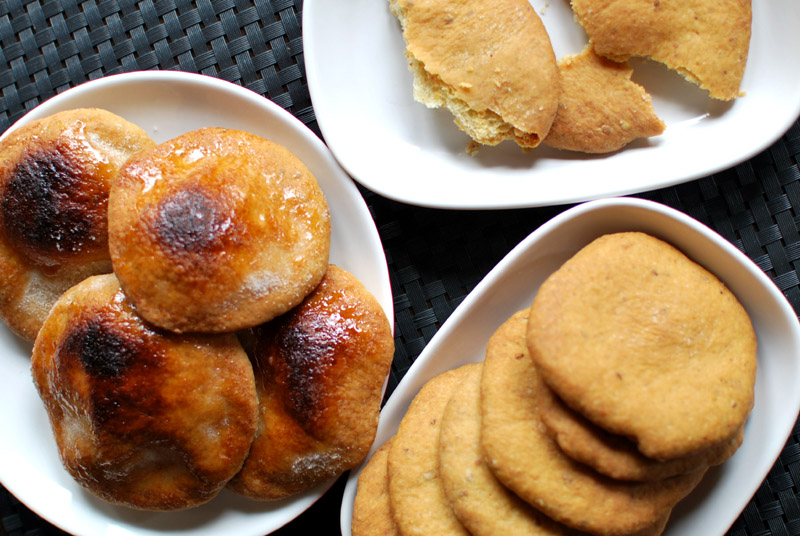
This time around, I increased the amount of dough, to make a respectable amount of tortas (about sixteen), and I rolled the dough more thickly. The thicker dough made for a more substantial cracker, not so much the easily-failing wafer I had previously created. The same seductive balance of olive oil, sesame, anise, and a touch of lemon for brightness was there, but was bolstered this time around with the complexity of an overnight-risen starter.
As a side note, I’m not really big on the whole “sweet and savory” combination of flavors, and I tend firmly towards the savory in general; so the first time I made these tortas, I decided against a sugar topping. Sugared or not, either way is just as traditional as the other. This time around, I decided to sugar just a few of them, mainly to see what it would taste like, not expecting to think much of it.
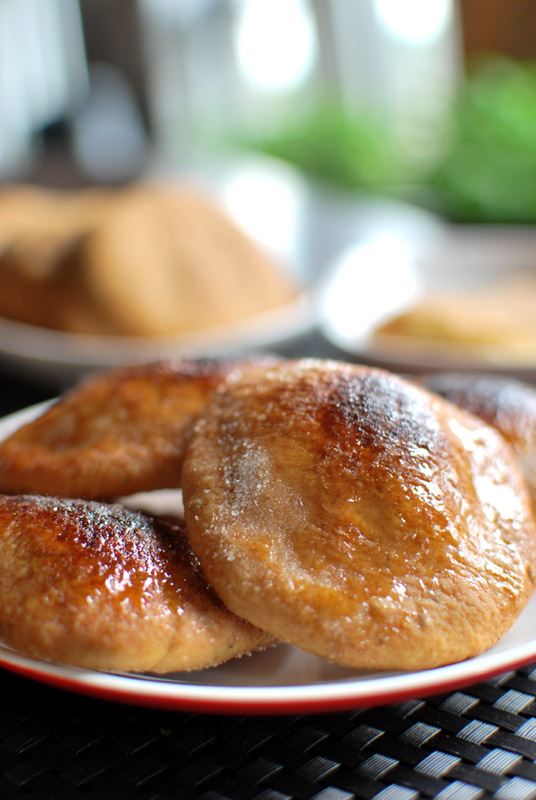
Um, you should use the sugar. Without, they were good. With, they were fantasically amazing. The breads get baked with the sugar dusted over the raw dough, which cooks before the sugar has a chance to melt. So, to melt the sugar into the bread, they are quickly passed under a hot broiler, which caramelizes the sugar, and turns the bread into something really extraordinary.
And the smell! The heavenly smell of fruity olive oil, with hits of tart anise and nutty sesame, all under a blanket of the honey of bubbling sugar, was tantalizing, plain and simple. Of all the improvements I made to this recipe, none of them frivolous, the sugar topping was the one that sent the tortas right over the top. Yes, you can make these without the sugar, and they are delicious and worth every little effort; but take it from this savory-palated cook, you should use the sugar.
Tortas de Aceite
Adapted from La Cocina de Mama: The Great Home Cooking of Spain, by Penelope Casas, via Wild Yeast
Makes sixteen 4 inch rounds
For the starter:
5 ounces (1 cup plus 2 tablespoons) unbleached all-purpose flour
1/2 teaspoon kosher salt
1/4 teaspoon instant yeast
1/2 cup water, at room temperature
For the final dough:
1 1/2 tablespoons sesame seeds, toasted and cooled
1/2 cup olive oil
1 whole star anise
Zest of 1/2 lemon, in wide strips
1 tablespoon anise liqueur (such as Pernod, Anisette, or Herbsaint)
5 ounces (1 cup plus 2 tablespoons) unbleached all-purpose flour, plus extra for dusting
1/3 cup granulated sugar, approximately, for finishing
1. For the starter, whisk together the flour, salt, and yeast. Add the water and using a spatula, mix in the bowl for 1 to 2 minutes, to develop the gluten slightly. The dough should not be soupy, nor should it be too stiff. Cover with plastic wrap, and let stand at room temperature for about 8 hours, or overnight. If you need more time, let rise at room temperature for 1 hour, then refrigerate for up to 3 days.
2. If your starter has been chilled, remove it from the refrigerator and let it sit at room temperature. In a small skillet over medium-high heat, toast the sesame seeds until they are fragrant and begin to pop, about 3 minutes. Remove from the heat, and let cool. If you like, you can grind up them a bit in a mortar and pestle, or a small food processor, though it’s not necessary.
3. Meanwhile, heat the olive oil, star anise, and lemon zest in a small pan over medium-high heat, until the peel curls up and just begins to color. Remove from the heat, and let steep until cool. Strain out and discard the zest and star anise.
4. In the bowl of a food processor, combine the starter, the cooled sesame seeds, the cooled oil, the anise liqueur, and the flour. Using the dough hook, mix on low speed until well-incorporated. Add additional flour by spoonfuls if needed; the dough should be very soft, oily, and shiny, but not soupy or slack. It should clear the sides of the bowl, and be evenly-colored throughout.
5. Cover the bowl with plastic wrap, and let sit at room temperature for 45 to 60 minutes, or until slightly risen. Preheat the oven to 375º F, and position two racks evenly towards the middle of the oven, one in the top third and one in the bottom third. Line two baking sheet with parchment paper.
6. Turn the dough onto an unflouredwork surface, deflating it, and divide it into 16 even pieces. Roll each piece into a round ball, keeping the unused pieces covered. Dusting with just enough flour to prevent sticking, roll each ball out with a rolling pin into a 4 inch round. Transfer each round to a prepared baking sheet, and sprinkle lightly with sugar. Cover loosely with parchment paper, and let sit for 10 minutes, or until slightly puffy.
7. Bake at 375º F for 15 to 17 minutes, switching positions of the baking sheets halfway through. The wafers should be lightly browned. Remove the wafers from the oven and turn the broiler on high. When the broiler is hot, broil the wafers about 5 inches from the heat, until the sugar begins to melt and caramelize, about 45 seconds. Watch to make sure that they do not burn, which can happen in a flash. Transfer to a wire rack to cool thoroughly.
Notes:
1. In lieu of the starter, you can use any 8 ounce piece of raw yeasted dough, such as pizza dough or leftover bread dough. Adjust the amount of flour used in the final dough accordingly.


These are pretty special. Like a cookie, and I am rather fond of cookies. Nice texture, too!