Week Thirty-Nine: No-Knead Bread Week
I do attract an astute crowd, don’t I? A couple of sharp-minded readers totally predicted today’s recipe without even knowing it, in helpful response to the whole wheat no-knead bread fiasco. For anyone who hasn’t tried it, this no-knead variation from Cook’s Illustrated is perhaps one of the most successful versions floating around; no wonder it came to their minds!
As someone who implicitly trusts Cook’s Illustrated (well, the old Cook’s Illustrated, anyway), I had to try this when I first saw it lo these many moons ago. I remember being impressed then, and it did not disappoint this time either. Addressing the two main complaints with the original no-knead bread, the too-thick crust and the mysterious lack of flavor, the wizards at Cook’s Illustrated tweaked the recipe a few ways.
First, they increased the oven preheating temperature, then reduce it as the loaf is put in the oven. This initial blast of heat makes the crust set faster, and it therefore becomes thinner and more crisp than thick and chewy. Second, to improve the flavor, they added a touch of vinegar and swapped some of the water for beer. The vinegar, as you may recall from yesterday’s post, helps mimic the taste of a properly long-risen sourdough. As for the beer, I previously deducedin a week of beer bread experiments that the malt in beer is extremely useful for flavor improvement. (And it doesn’t hurt things that you’re now faced with the dilemma of disposing with the remaining 8 ounces of beer, either.)
Lastly, to improve upon the original no-knead bread, Cook’s Illustrated does the unthinkable: they knead the dough. A bit! Only just a bit! (Hence the name.) The kneading — obviously to anyone familiar with bread-making — develops the gluten. In this particular case, it’s kneaded just barely enough to develop the gluten a tiny bit, and then time and natural fermentation processes take over. This creates a more stable gluten network than is achieved without kneading; it isn’t kneaded to the point that the gluten becomes over-developed over the long rise, which would result in a tough and/or dense loaf.
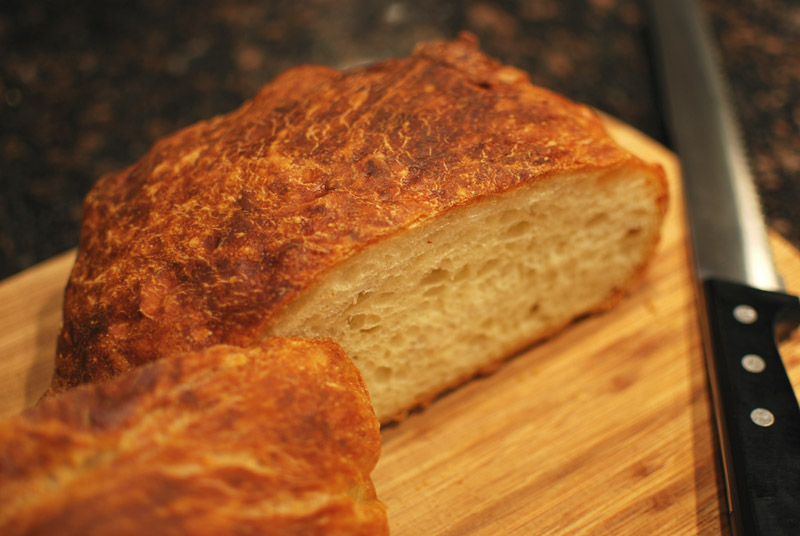
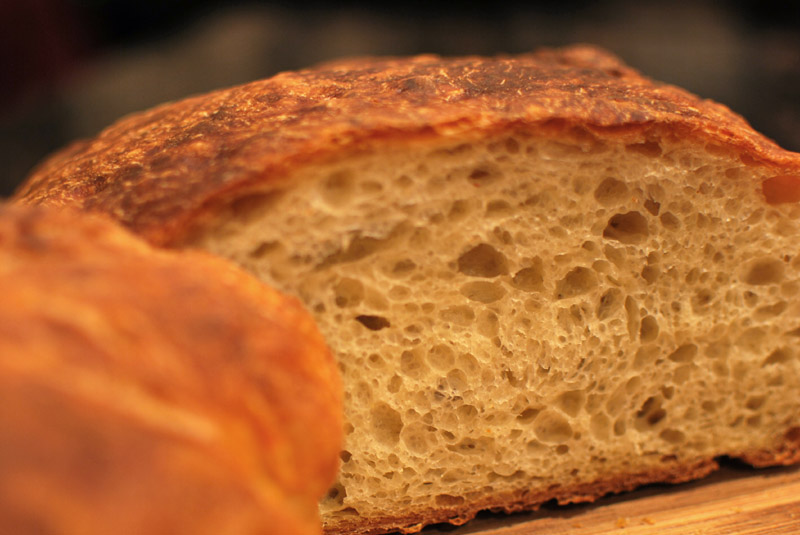
The flavor of this almost no-knead bread is top notch, much improved over the original no-knead bread. Though it’s not the most mind-blowing bread to ever grace my oven, it’s certainly quite good, and one I’d be proud to serve to guests. (And at this point, I have a [bready] reputation to uphold.) But then, Cook’s Illustrated didn’t set out to make the be-all, end-all of breads; they set out to enhance no-knead bread, and enhance it they have.
It’s hardly any more effort (is opening a beer effort?) than the original, and the results speak for themselves: complex, airy, crisp-crusted, gorgeously browned, crackling happily at you from the cooling rack…. This one has it all. Give this variation a shot; I doubt you’ll look back.
Almost No-Knead Bread
Adapted from Cook’s Illustrated
Makes 1 large round
14 ounces (3 cups) unbleached bread flour
1/4 teaspoon instant yeast
1½ teaspoons table salt
3/4 cup (6 ounces) water, at room temperature
1/2 cup (4 ounces) mild-flavored beer
1 tablespoon white vinegar
1. In a large bowl, whisk together the flour, yeast, and salt. Add the water, beer, and vinegar, and stir until blended; the dough will be shaggy and sticky. Cover tightly with plastic wrap, and let dough sit at room temperature for at least 8 and up to 18 hours, or until very risen and bubbly.
2. Line a 10 inch skillet or any wide, shallow bowl with a large square of parchment paper. Turn the dough out onto a floured work surface; sprinkle it with a little more flour and knead or fold it over on itself about 10 to 15 times, until it forms a roughly round shape. A bench scraper may help with this step.
3. Transfer the dough to the parchment-lined skillet, and dust heavily with wheat bran or additional flour. Cover loosely with plastic wrap and let rise until doubled in size, about 2 hours. When it is ready, the dough will not readily spring back when poked gently with a fingertip.
4. At least 30 minutes before baking, preheat the oven to 500º F. Put a 6- to 8-quart heavy covered pot (see note 1 below) in oven as it heats, on a rack set to the lowest position. When the dough is ready, carefully remove the pot from the oven. Transfer the dough to the pot by lifting the parchment by the edges, and carefully and quickly lowering the dough into the pot. Shake the pan once or twice if dough is unevenly distributed, but don’t worry about it too much; it will straighten out as it bakes.
5. Cover the pot with the lid, place in the oven, and reduce the temperature to 425º F. Bake covered for 30 minutes. Remove the lid and bake uncovered for an additional 15 to 30 minutes, or until the loaf is well-browned. An instant-read thermometer should register around 205º to 210º F when fully baked. Transfer to a wire rack to cool thoroughly, discarding the parchment.
Notes:
1. Any heavy covered pot will do, be it cast iron, enamel, Pyrex, stainless steel, or ceramic. As long as it’s oven-safe, it seems anything will do the trick. If your chosen vessel has no lid, or if you’re concerned about the oven-safety of it, simply use aluminum foil instead, pressing it tightly (and carefully) around the preheated pot.
PS – Happy National Punctuation Day to all my favorite punctuation marks! I used as many as I could get away with today. In honor of the day, here is an “appropriate” blog to “read”.


This is the most ridiculous amazing fantastic mouthwatering blog ever. I’ve been subscribing to the RSS feed for a while now (is there a way you can have the pictures show up in the feed?), but I thought it might be nice to actually comment and let you know that I am amazed by all of your beautiful breads. I have the smallest excuse for a kitchen ever with barely any counter space, but if ever I attempt to make bread this will be my go-to site. Keep up the great great great work.
You are so right – this no knead version beats other no knead versions. The flavor was much more complex and the crust was perfect! Thanks for doing this review!
Joyce: I’m blushing! And what compliments from someone with such amazing photography under her own belt; your site is just gorgeous! I’m a little embarrassed to admit that I have no clue how to make photos show up in the RSS feed; just setting this site up was challenge enough for me. I’ve been planning a redesign since Day One, and haven’t mustered up the ability quite yet. Terrible, I know. But if you ever need any advice at all making bread, you can always ask me here; I’m thrilled to help anyone bring homemade bread into their homes. Happy baking!