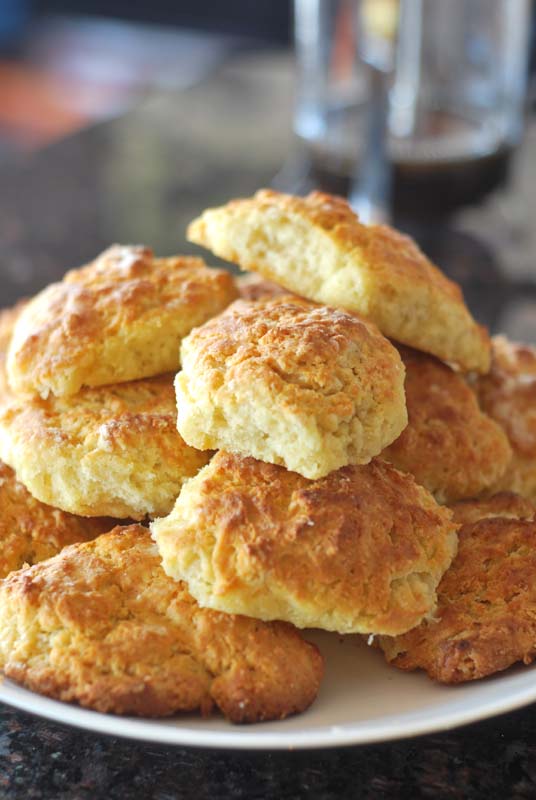
Week Thirty: Biscuits
Okay, yes. I’ve already made biscuits. Twice. But I’ll be honest: I’ve got houseguests in town. And since they’re quite lovely people, I don’t want to spend every waking moment making bread, or waiting on bread, or even thinking about bread, really. I needed a theme for this week that would get me out of the kitchen, one that would let me enjoy their company. But what?
While pondering this theme-tastic problem over dinner recently, a dear friend of mine proposed “Biscuit Week”. Sure, I thought, biscuits absolutely fit the bill: they’re quite fast to make, cook in the little time it takes to do the washing up, and hey hey, we get breakfast out of it too! Perfect! And yet, how many kinds of biscuits can there be? I’ve already made fluffy and flaky, what else is there?
Plenty, as it turns out. A quick search for “biscuit” on Epicurious returns 161 results. On one website! Google “biscuit recipe“, and you get about 478,000 results! Obviously, there’s an awful lot of biscuit out there. Of course, just by changing one small ingredient, or by varying amounts, you technically create a new recipe, so there aren’t exactly 478,000 different biscuits running around. But there are at least 6 different kinds (other than simply fluffy and flaky), and that’s all I need. So thanks to my friend Rion, it’s all biscuit, all the time this week! (Good thing my houseguests like biscuits, right?)
The first biscuit this week is called a “drop biscuit”, and it does what it says on the tin. You know, like drop cookies? The ones you scoop and just drop onto the baking sheet? Exactly. With drop biscuits, there’s no rolling, there’s no need for round cutters, there’s no flour all over your counter. This is precisely why they’re sometimes known as “lazy biscuits”.
Basically, these are made the same way as regular biscuits; that is, cold butter is cut into the flour, and liquid is then added. (For a more in-depth discussion of that method, see this post about fluffy biscuits.) But one main difference with drop biscuits is that the dough needs to be wetter, so it will actually drop. The dough shouldn’t be soupy, but it should be too sticky to knead.
Because of the way drop biscuits are made, they’re not exactly the prettiest biscuits, often squat and unevenly-shaped. But I’ve often found that the most homely dishes are often the most delicious, and that’s certainly the case here. Pretty biscuits, ones that have been rolled and carefully cut out, have been handled quite a bit. This handling can over-produce gluten, which makes your biscuits tough. Drop biscuits are handled very little – just to mix and scoop – and are therefore generally very tender. Just take care not to overwork the butter (move quickly!), or overmix the dough, and you’re almost guaranteed success.
You can get more height out of your biscuits by placing the dough so it touches on the baking sheet, which lets the biscuits grab onto each other as they rise in the oven, and makes them taller, as well as moister. But if you must have those beautiful, deliciously crisp edges on your biscuits, you can space the dough apart; just be prepared for shorter biscuits.
These biscuits are just barely sweet, and go just as well with a plate of beans and rice for dinner as they do with coffee and scrambled eggs for breakfast. These are everday biscuits, quite easy to throw together, and able to pair with a wide variety of foods. You can of course vary the flavor by adding herbs or spices – dill or black pepper are classic – but they’re just as good eaten plain, or with a little butter or jam. They might look a little unkempt and rustic, but they could hardly taste more elegant!
Drop Biscuits
Makes about 15 biscuits
6 to 8 tablespoons cold unsalted butter
9 ounces (2 cups) unbleached all-purpose flour
2 tablespoons sugar
2 1/4 teaspoons baking powder
1/2 teaspoon kosher salt
1 cup cold buttermilk
1/2 teaspoon baking soda
1. Preheat oven to 425° F. Grease a rimmed baking sheet, or line with parchment paper. Cut the butter into as small pieces as possible. Pile loosely on a small plate and freeze while preparing remaining ingredients.
2. In a large bowl, whisk together the flour, sugar, baking powder, and salt. Add partly-frozen butter and very quickly pinch and rub in with fingertips, tossing the mixture around to be sure to reach all pieces of butter, until the mixture resembles coarse meal. Pea-sized lumps are just fine.
3. Mix the buttermilk and the baking soda together. Add buttermilk mixture to the flour mixture, and fold quickly but gently with a fork or nonstick spatula until all dry ingredients are moistened.
4. Using a large spoon or a portion scoop, drop 1/4 cupfuls of dough onto the prepared baking sheet. The biscuits will rise taller and be moister if they are dropped touching each other. If you prefer a crisp-edged biscuit, drop them apart from each other, not touching. Either way is fine.
5. Bake biscuits at 425° F for 15 to 20 minutes, or until lightly golden brown on top. Let cool on the pan for a minute or so, then transfer biscuits to a wire rack to finish cooling. Serve warm.
Notes:
1. Biscuits can be stored at room temperature, wrapped tightly in aluminum foil, for 6 to 8 hours. Before serving, rewarm in a 350° F oven for 5 minutes. If not eating within that time, freeze, wrapped in foil. To serve, bake unthawed and unwrapped, for 10 minutes at 350° F.

