Spicy Ham and Goat Cheese Muffins

Week Forty-Two: Muffin Week

jambon-2

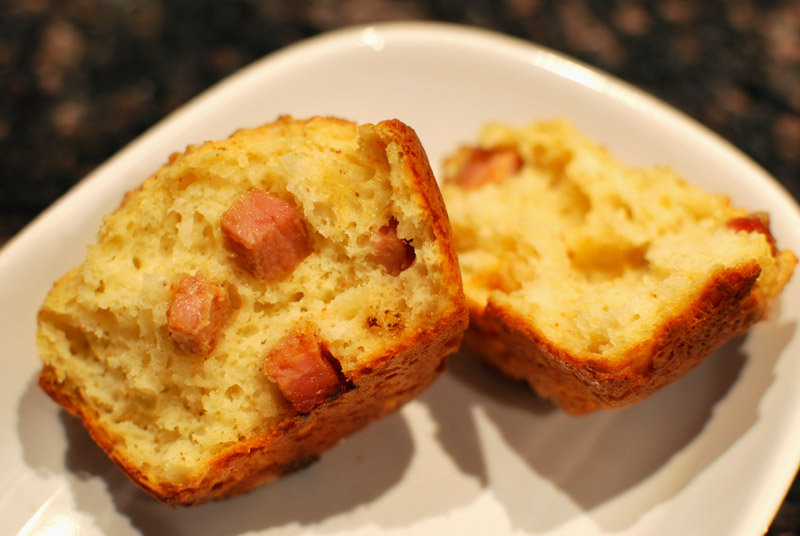
Today’s muffin recipe comes to us from one of the more respected voices on the New Orleans food scene, Tom Fitzmorris.  It’s a decidedly savory muffin, made with soft goat cheese and one very special ingredient: tasso.  If you’ve ever lived and cooked in New Orleans (the two are nearly synonymous), you know the grand possibilities encapsulated in that one small word.

But if the term is new to you, allow me to introduce a new culinary secret weapon.  Tasso is a cured and smoked bit of pork shoulder, firm and thoroughly encrusted with pure deliciousity in the form of a cayenne- and paprika-based spice blend.  The particular blend depends, of course, on the whim of the creator.  Unlike most other cured pork items out there, such as pancetta, prosciutto, bacon, or speck, tasso is rarely eaten on its own; rather, it is a meat to be used for seasoning, and with a fairly restrained hand.

To the chagrin of thousands of cooks, tasso is rarely seen in stores outside of South Louisiana, but luckily, it’s not at all difficult to make.  Sadly, as much as I love tasso, and would love having a stash of it right now, I simply didn’t have the time or foresight to cure my own.

Enter ersatz tasso, made by tossing cubes of smoked deli ham with a sneeze-inducing amount of pepper and spices.  I’m giving the blend that I used in the recipe below, but feel free to vary it according to your personal tastes.  There’s really no wrong answer here; just don’t be shy with the spices, that’s what tasso is all about.  (Obviously, if you have access to real tasso, by all means use it.)

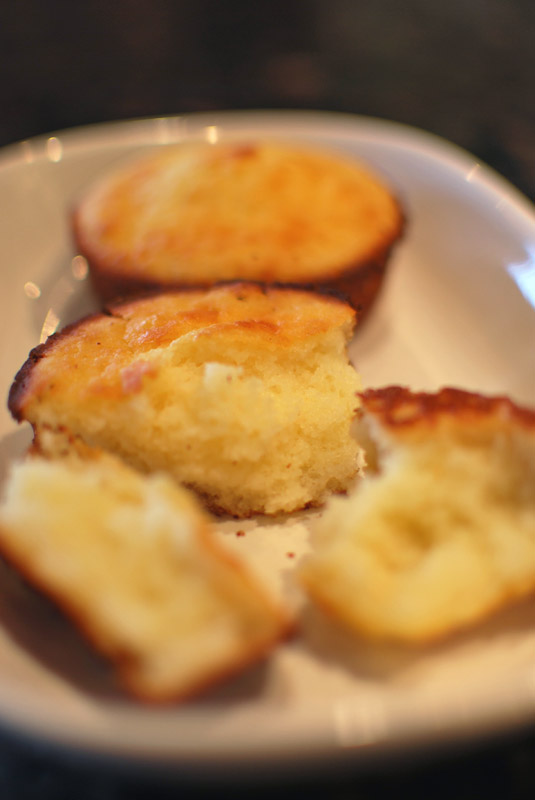
So, tasso explained, I direct attention back to the muffins.  The end result is definitely tasso-centric, spicy and meaty, but the goat cheese is no slouch here either.  It’s flavor is in the background, no doubt (read: don’t use the finest cheese money can buy), but it brings an almost sourdough tang to the finish.  Without it, the muffins would certainly be lesser.

Almost biscuit-like in texture, I would most likely serve these at brunch for a slightly unusual and savory bread option, or perhaps with a steamy bowl of tomato soup for a light dinner.  Either way, you do run the risk of having these brazen little guys stealing the spotlight; but when muffins are this good, I don’t think you’ll much mind.

jambon


Spicy Ham and Goat Cheese Muffins
Adapted from Tom Fitzmorris’ “Pain au Jambon et Chevre”
Makes about 16 muffins

1 teaspoon paprika
1/2 to 3/4 teaspoon cayenne pepper, or to taste
1/4 teaspoon ground black pepper
1/8 teaspoon ground coriander
1/8 teaspoon ground cumin
1/8 teaspoon garlic powder
1/8 teaspoon ground allspice
1/2 pound smoked ham, cut into small cubes (see note 1 below)
4 ounces cream cheese, at room temperature
8 ounces goat cheese, at room temperature (see note 2 below)
3 large eggs
1¼ cup buttermilk, well-shaken
1 teaspoon Creole mustard (or any other grainy, spicy mustard)
13½ ounces (3 cups) unbleached all-purpose flour
4½ teaspoons baking powder
1/2 teaspoon salt

1.  Preheat the oven to 400º F.  Grease 16 standard muffin cups.

2.  In a medium bowl, blend all spices (from paprika through allspice) together.  Add cubed ham, and toss well.  Set aside.

3.  In the bowl of a stand mixer, beat the cream cheese until smooth, 1 to 2 minutes.  Crumble in the goat cheese, and beat until fluffy.  Add the eggs, one at a time, blending well after each addition, and stopping the mixer to scrape the bowl after adding each egg.

4.  Gradually add the buttermilk and mustard, and mix until completely blended.  Remove the bowl from the mixer, and stir in the ham with a spatula.

5.  Whisk together the flour, baking powder, and salt, and add to the wet ingredients.  Fold it in gently, just until all the dry ingredients are moistened.

6.  Divide the dough evenly between the muffin cups.  Bake at 400º F for about 30 minutes, or until golden brown and cooked through.  Remove the muffins from the pan, and transfer to a wire rack to cool slightly before serving.


Notes:
1.  If you have access to 1/2 pound of tasso, you should absolutely use it in place of the spice blend and the ham, as directed here.  If you don’t, feel free to adjust the spice mixture to suit your taste and your pantry’s contents.

2.  Any tangy, full-flavored goat cheese will work well here, but don’t use feta, which is far too salty for this application.

Posted in Quick Breads, Savory | 1 Comment

Rice Flour Muffins

Week Forty-Two: Muffin Week

rice-flour-1

The culinary scene of the 1960s in America was, shall we say, nothing to write home about.  A dazzling array of modern conveniences had sucked most of the flavor and soul from dinner plates nationwide, but there were glimmers of hope on the horizon.  Julia Child was on the air, changing lives and palates; Alice Waters would open Chez Panisse in less than a decade, shifting the collective culinary consciousness; and The Joy of Cooking was in its 5th edition, the one that firmly cemented its well-earned reputation as an absolute necessity in the home library.

It is this edition of the book, and this era, that brings us today’s recipe.  When searching for appropriate muffin recipes, I hardly expected to find a gluten-free one, let alone a good one.  Let (further) alone one from the 60s.  But when I opened my oldest copy of The Joy of Cooking, there it was, with the laconic and unhelpful title, “Rice Flour Muffins”.  No description was given, no hint as to the result, other than to say that they would be “less crumbly” if marmalade was added.

Okay.

Because they sounded so interesting — made with little more than rice flour, milk, and leavening — I had to try it.  But I didn’t have high hopes, not especially after my recent foray into the world of gluten-free baking, which produced considerably more duds than successes.  But I was bolstered partly by the thought of fodder for my quarterly redo-themed week, and partly by the thought that if a gluten-free recipe had made it into The Joy of Cooking in the 60s, it at least had to be half decent.

So I mixed the modest ingredients together, more curious than anticipatory, and pushed them into the oven.  What came out 12 minutes later were unassuming little things, blushing a pretty brown around their edges and up to their tops.  The squat things probably weren’t going to win any beauty contests, but they had their own distinct charm.

They turned out a bit flat, most likely due to the absence of a gluten structure to trap any leavening gases, but they were not at all dense inside.  Rather, they were fluffy and light, and were a gorgeous pale ivory color.  One of my main concerns when mixing was the relative lack of flavor-producing ingredients, such as sugar and fat.  They were there, but in such small amounts (compared to other muffin recipes) that I wondered what good they might do.

But after one bite, I realized that I had no reason to worry.  The overall taste was intriguing and sweet, far more so than I had imagined they would be.  But rice flour itself has a notably sweet flavor, unlike wheat flour, which tastes bland.  That sweetness was immediately apparent; it was the complex sweetness of grain, not the simple one-note taste of refined sugar.  The tiny bit of orange marmalade, though mild, recalled a citrusy rice pudding; however, it added no noticable sweetness itself.

The rice flour I used (Bob’s Red Mill) has a relatively fine grain, and the resulting texture was somewhere between cornbread and a typical muffin: not grainy, but not perfectly smooth either.  Arrowhead Mill makes a slightly coarser rice flour; I imagine the texture would vary accordingly.

Overall, the muffins were tender and soft, and the edges were as crisp as if they’d been fried.  The characteristic slight chew of the rice flour were one of the few cues that they weren’t standard wheat-flour muffins; if I hadn’t made them myself, I’d never have thought so.  These muffins surprised and pleased with their ease, their gentle flavor, and their uniqueness.  I would definitely make them again, and keep people guessing as to their secret: they’re from the 60s!


Rice Flour Muffins
Adapted from The Joy of Cooking, Fifth Edition
Makes 12 muffins

1 cup rice flour
1/2 teaspoon salt
2 teaspoons baking powder
2 tablespoons butter, melted and cooled slightly
2 tablespoons orange marmalade, warmed slightly until no longer firm
1 large egg, at room temperature
1 cup milk, at room temperature

1.  Preheat oven to 450º F.  Grease 12 standard-sized cups of a muffin tin.

2.  In a bowl, whisk together the rice flour, salt, and baking powder.  Blend together the butter and marmalade until smooth.  Beat in the egg.  Add the egg mixture and the milk to the dry ingredients, and whisk until just blended, using as few strokes as possible.

3.  Divide the batter evenly among the prepared muffin cups.  Bake at 450º F for 12 to 15 minutes, or until golden brown on top.  Remove from the pan, and transfer to a wire rack to cool slightly before serving.


Notes:
1.  Instead of using marmalade, you can use 2 tablespoons of sugar, or 1/8 cup of raisins.

Posted in Quick Breads, Savory, Sweet | Leave a comment

Zucchini Muffins

Week Forty-Two: Muffin Week

zucchini-2

My sister and I stumbled upon this recipe one Saturday afternoon when, empty hours stretching out ahead, the baking bug took hold of us.  We found it in one of the identical copies of a cookbook full of Bluegrass State specialties, gifted to each of us by our Old Kentucky Grandparents.  (Incidentally, it’s an excellent book if you have some personal connection to that region; otherwise, you might just wonder what all the fuss is over a Hot Brown.)

Perhaps it was a remnant of Summer’s glut of zucchini that spurred us on, or maybe it was one of those gleefully fortuitous circumstances when all the necessary ingredients magially coalesce in the pantry, but we both deemed it worth our efforts to try out.

One of the things that caught our eyes was the use, in a grandmother-approved cookbook, of whole wheat flour, wheat germ, and orange zest.  Now, I’m not sure how your grandmothers cook; but let’s just say that if those items exist in either of my grandmother’s kitchens, they’re very well hidden.

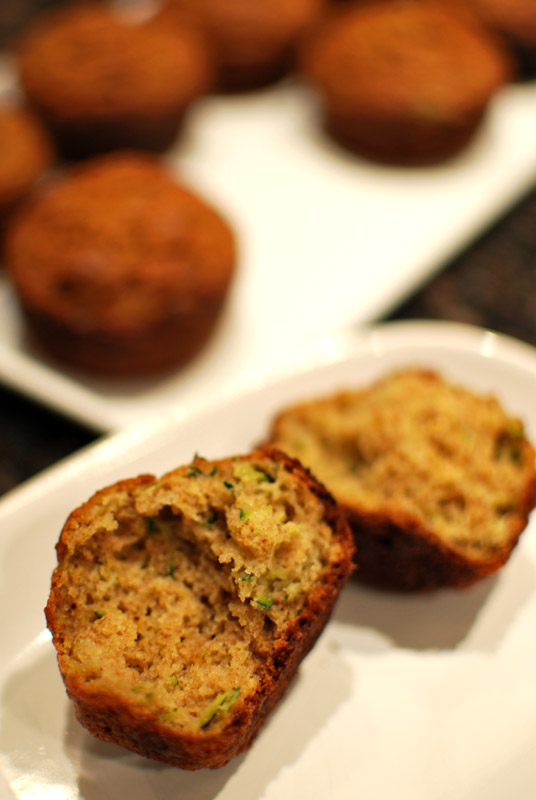
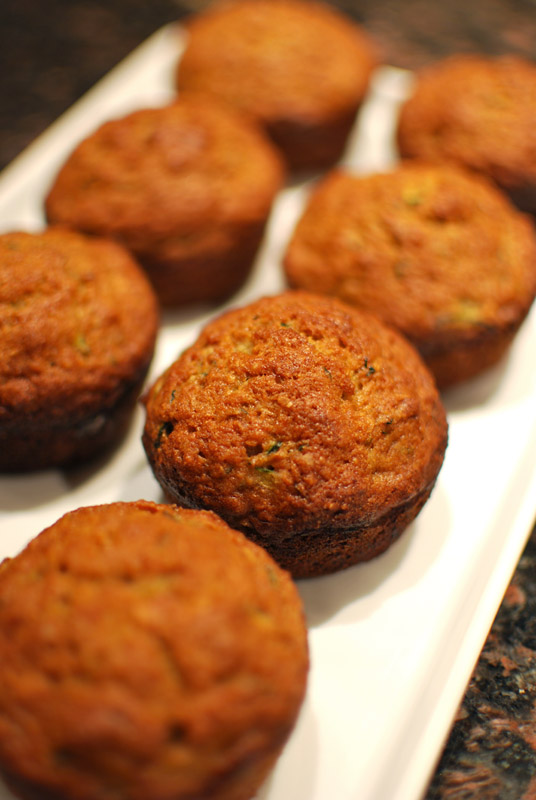
Since that lucky afternoon, this recipe has since become a beloved part of both my sister’s and my culinary repertoires, referred to reverently and obscurely with the name “That Zucchini Bread”.  Between the two of us, further description is rarely necessary.  These muffins are a bit more virtuous than the typically rich variety, but they certainly don’t taste it.  They turn out tender and incredibly moist, scented tantalizingly with nutmeg and orange.

The flavor is so well-balanced, neither over- nor under-sugared, not oily or dry, not overwhelmed by spices or bland; it’s the proverbial just right.  I imagine this recipe would work just as well with any sort of summer squash, or even carrot, but I think it would take an earth-shattering turn of events to make me forsake the specified zucchini.  The mild flavor is rather obscured, if I’m honest; and it may be only my mind inserting flavor where I can only see lively green flecks of the skin in the bread, but I swear I can tell it’s there, vibrant and fresh.

zucchini


Zucchini Muffins
Adapted from Pride Of Kentucky: Great Recipes With Food, Farm, and Family Traditions
Makes 21 muffins (or two 8 x 4 inch loaves)

6 ounces (1 1/3 cups) unbleached all-purpose flour
4½ ounces (1 cup) whole wheat flour
1/2 cup wheat germ
1 teaspoon salt
1 teaspoon baking soda
1/2 teaspoon baking powder
2 teaspoons pre-ground nutmeg (or 3/4 teaspoon if freshly ground)
1/4 teaspoon ground cloves
2 tablespoons finely grated orange zest (from 1 orange)
3 large eggs
1 cup sugar
1/2 cup applesauce
1/2 cup vegetable oil
1 teaspoon vanilla extract
2 cups finely shredded zucchini (about 2 medium)

1.  Preheat oven to 400º F.  Grease 21 standard-sized muffin cups.  (See note 1 below if baking in loaves.)

2.  Whisk together the flours, wheat germ, salt, baking powder, baking soda, nutmeg, cloves, and orange zest.  Set aside.

3.  In a large bowl, whisk the eggs together with the sugar until smooth.  Add the applesauce, oil, and vanilla, and whisk until blended together.  Stir in the zucchini.  Add the dry ingredients, and gently stir together until just blended.

4.  Divide the batter evenly between the prepared muffin cups (or divide evenly between two greased loaf pans).  To any empty cups in your muffin tin, add a tablespoon or two of water, to prevent the pans from overheating, and to provide additional moisture while baking.

5.  Bake for 20 to 25 minutes, or until lightly browned and fully cooked (a skewer should come out clean when inserted into the center of a muffin).  Remove from the pan, and transfer to a wire rack to cool slightly before serving.


Notes:
1.  If baking in loaves, preheat oven to 350º F.  Bake for approximately 1 hour, or until done.

Posted in Quick Breads, Sweet | Leave a comment

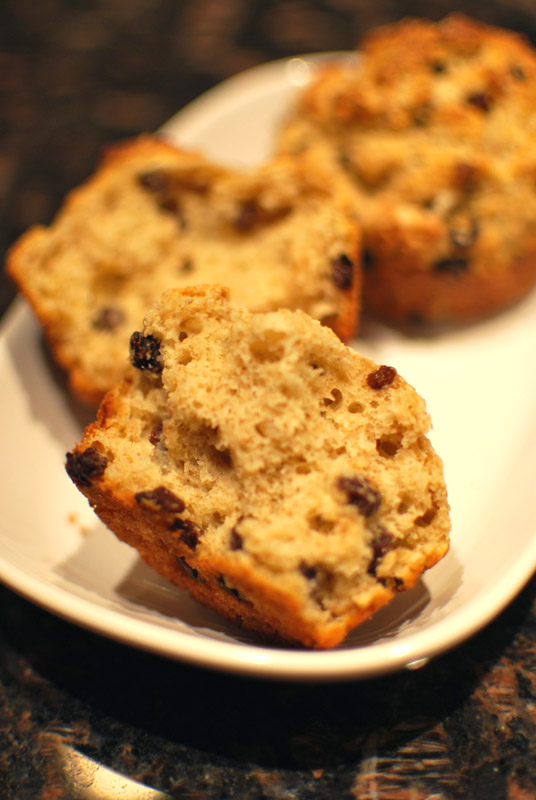
Soda Bread Muffins

Week Forty-Two: Muffin Week

soda-bread

I am a huge fan of soda bread.  Personally, I tend to prefer the traditional Irish type; Americans seem to have this notion that soda bread should be sugary and contain raisins, caraway seeds, spices, or orange zest.  This is well and good if you have a sweet tooth and have an extreme longing for cake, but my salty palate and I prefer the unadorned, more bready sort.

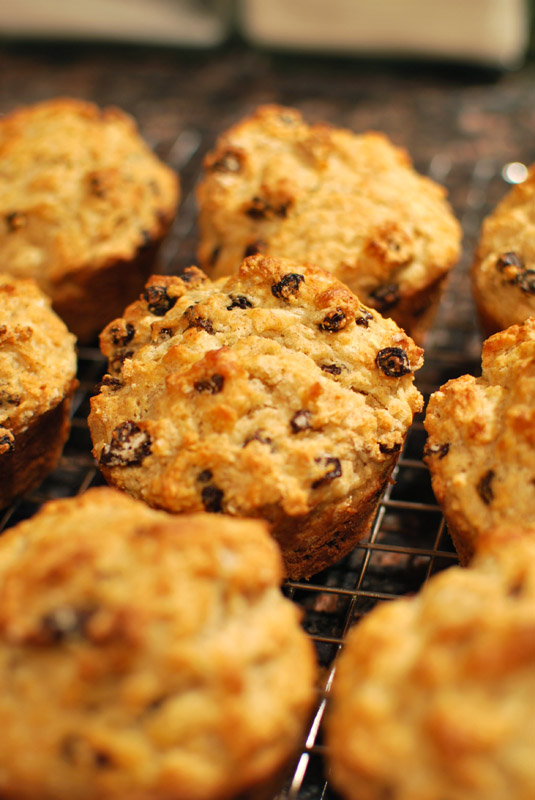
Today’s bread is a compromise between the two varieties: the dough itself is under-sweet, biscuity, and has a fair amount of whole wheat flour, but is also spotted generously with dried currants.  Were I just making these muffins for my own immediate gratification, I would have left the currants out, but there’s no way I could eat all twelve in one sitting; currants were really a necessity.

See, the one problem with Irish-style soda bread is its tendency to dry out quickly, within a day or even a few hours.  If even a whole great loaf of soda bread can’t stand up against the ravages of staleness, what chance would a poor little muffin have?  None, is what.  You see now why I had no choice but to include currants, with their moisture-giving and -retaining abilities.

But despite the obligatory nature of the addition, and my usual steadfast aversion to sweet things in my soda bread, I found the currants were in fact quite welcome in the bread.  The jammy flavor eliminated any real need for preserves or jelly on top, though a pat of butter was not out of order, especially when eaten at breakfast.

Sans currants, these muffins would be right at home on the dinner table, especially served with a warm soup to dunk them into (and removing any unpalatability that might result from staleness).  The flavor of the dough itself is mild enough that it won’t overwhelm anything you might pair it with, but the texture, though light, is hearty enough to hold its own with even a thick and robust stew.  These individual soda breads are fast, crunchy, tender, grainy, and delightfully rustic.  Their craggy tops, with their freckles of currants, will certainly brighten any chilly weather that might come your way.

soda-bread-2


Soda Bread Muffins
Adapted from The Overlook Inn, Georgia, via Bon Appétit Magazine
Makes 12 muffins

6 3/4 ounces (1½ cups) unbleached all-purpose flour, plus extra for coating pan
4½ ounces (1 cup) whole wheat flour
2 tablespoons sugar
2 teaspoons baking powder
1/2 teaspoon baking soda
2 tablespoons cold unsalted butter, cut into small pieces
1 cup dried currants
1¼ cups well-shaken buttermilk
1 large egg, well beaten

1.  Preheat the oven to 400º F.  Grease 12 muffin tins thoroughly, and dust with flour, knocking on the pan to remove any excess.

2.  In a large bowl, whisk together the flours, sugar, baking powder, and baking soda.  Add the butter, and quickly cut into the flour, either with a pastry blender or by quickly pinching and tossing with fingertips.  Stir in the currants.

3.  Whisk the buttermilk and egg together, and add to the dry ingredients.  Using a spatula, gently and quickly stir until just blended together.  Divide the batter evenly among the muffin tins.

4.  Bake at 400º F for 20 to 25 minutes, or until golden brown.  Remove muffins from the pan, transfer to a wire rack, and cool slightly before serving.


Notes:
1.  Soda bread muffins can be made 8 hours ahead.  Cool completely on a wire rack, and store in an airtight container at room temperature.  If not eating within a day or so, wrap muffins well and freeze.  Reheat in a 350º F oven for 5 to 7 minutes, or until heated through.

Posted in Quick Breads, Savory, Sweet | Leave a comment

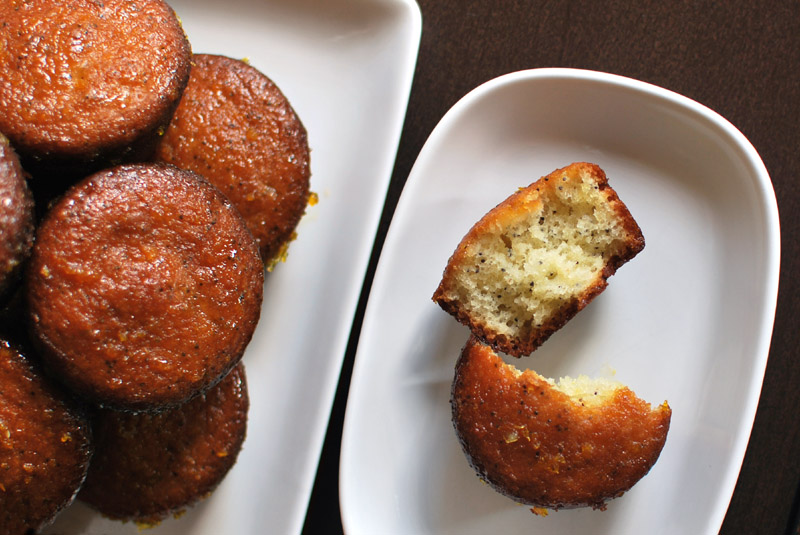
Poppy Seed Muffins With Orange Glaze

Week Forty-Two: Muffin Week

poppy-seed-1

The minute the calendar declared it was officially Autumn (and I do mean the very minute), the weather up here ended the charade and stopped pretending like Summer had ever arrived.  Me, I was never fooled; a mere four days above 90º F does not a Summer make.  But when September 22 rolled up, the air heaved a sigh of relief, decided to stop living a lie, and promptly dropped twenty degrees.  I think we’re all happier to have it all out in the open, really.

This last week has been particularly chilly, which has turned my mind to thoughts of warming foods, things that taste of slow-cooking, but that you only have to scurry briefly out from under a cozy blanket to make.  Which brings us, naturally, to muffins.  When the weather turns cool, what better to warm your home than a plate full of cheerful and quickly-baked muffins, wafting their just-baked smell through the air?

First up this week is a poppy seed bread recipe that I’ve been dying to make ever since I ripped it from the pages of Bon Appétit.  Until now, I never could bring myself to make any other poppy seed bread than my mom’s, as any other recipe would surely not match up; or even worse, one might actually usurp the place of glory it holds.  So it takes an intriguing recipe to turn my head, and turn it this recipe did.

Most often, the only variation you see in poppy seed bread is the inclusion or exclusion of a lemon flavor.  No disrespect, lemon and poppy seeds are an excellent pair.  But really?  Can’t we be a little adventurous?  And so, when I saw the orange glaze used in this version, I sat up a little straighter and gave an involuntary “hmmm”, eyebrows raised.  (Let’s not get crazy here; we need to take baby steps away from the lemon.)  I tore it out, and it had languished ever since in my file of Recipes To Make Someday.

poppy-seed-3

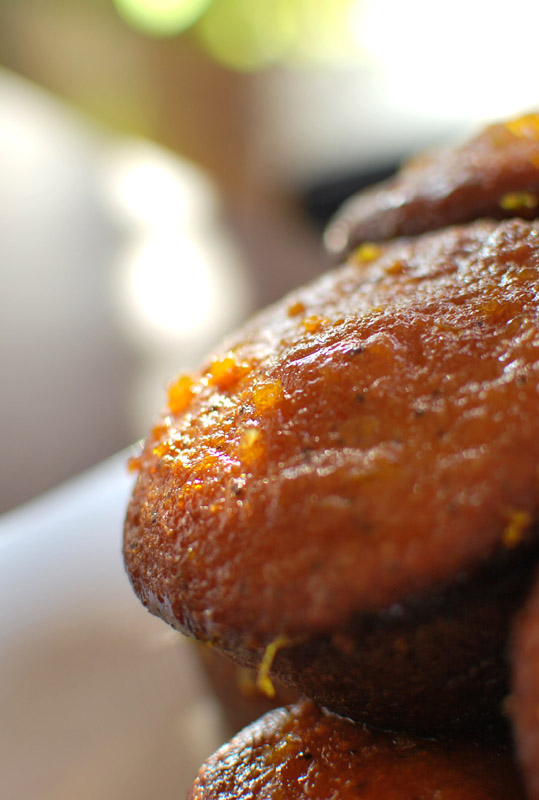
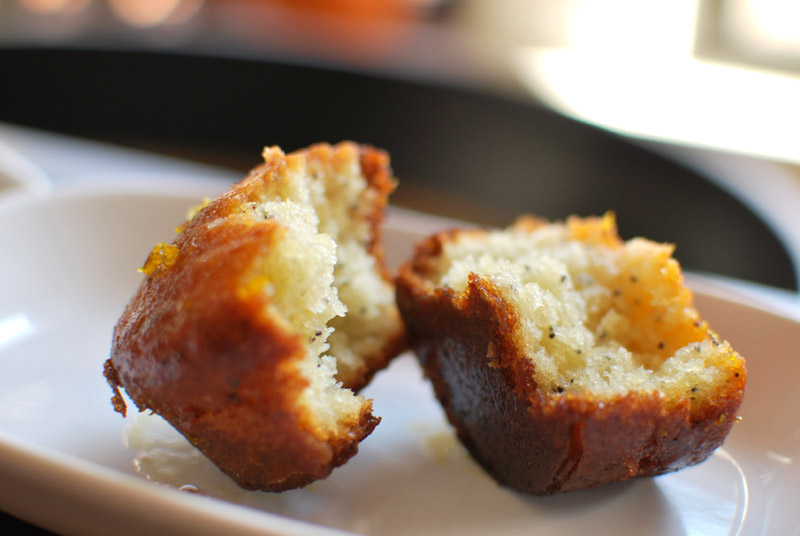
Today, I’m kicking myself for not having made it sooner.  This is one incredible recipe, you guys.  The bread itself is flavorful, moist, fluffy, loaded with poppy seeds, and all in all a rather fine example of the poppy seed set.  But the orange glaze is the crowning glory here (no pun intended).  Immediately after baking, the glaze is spooned over the hot bread, which soaks it up like a sponge.  The tiny bits of orange zest in the glaze become candied, and sparkle on top of the muffins like citrine gems.

Made with fresh orange juice, the flavor of the glaze is like the best orange candy you’ve ever had.  The acidic citrus brings a familiarity, similar as it is to lemon, but the bright sunshiny orange sparkles with newness on the palate.  Freshly baked, the crust of the muffins is both crunchy and sticky at the same time, a combination that is almost irresistable.

Yes, this recipe is extremely good.  (It also makes an absolute ton of bread, never a bad thing with a result so laudable.)  Is it better than my mother’s recipe?  Well, color me biased, steeped as I am in childhood memories of munching on that particular bread, but I can’t honestly say that it’s any better.  But man, if today’s recipe can’t beat it, then nothing else ever will.

poppy-seed-2


Poppy Seed Muffins With Orange Glaze
Adapted from Normandy Farm Bakery, via Bon Appétit Magazine
Makes 24 muffins + one 8 x 4 inch loaf (or two 9 x 5 inch loaves)

For glaze:
1 cup sugar
1/2 cup orange juice (from 1 large orange)
2 teaspoons finely grated orange zest (from 1 large orange)

For batter:
15 ounces (3 1/3 cups) unbleached all-purpose flour
4 teaspoons baking powder
1 1/4 teaspoons salt
1 cup vegetable oil
2/3 cup applesauce
2 cups sugar
3 large eggs
2 teaspoons almond extract
1 teaspoon vanilla extract
1 2/3 cups milk
2 tablespoons poppy seeds

1.  Preheat oven to 350º F.  Butter and flour 24 standard muffin tin cups, and one 8 x 4 inch loaf pan (or two 9 x 5 inch loaf pans), knocking out the excess flour.

2.  In a small saucepan, bring all three glaze ingredients to a boil over medium-high heat, stirring until sugar dissolves.  Set aside to cool.

3.  Whisk together the flour, baking powder and salt.  Using an electric mixer with the whisk attachment, beat together the oil, applesauce, sugar, eggs, almond extract, and vanilla extract, until pale yellow and thick, about 5 minutes.

4.  Switch to the paddle attachment, and add the flour mixture to the sugar mixture in 4 additions, alternating with the milk in 3 additions.  Stir in the poppy seeds by hand.  Divide the batter amongst the prepared pans, muffin tins first, filling each up three-quarters full.  Scrape the rest into the 8 x 3 inch loaf pan.  (If using 9 x 5 inch pans, divide the batter equally between the two.)

5.  Bake the muffins at 350º F for 35 to 40 minutes, switching positions of the pans halfway through the baking process.  Bake the 8 x 3 inch loaf for 45 to 55 minutes, and the 9 x 5 inch loaves for about 1 hour, or until a skewer inserted in the center comes out clean.

6.  Immediately after removing the breads from the oven, pierce each muffin or loaf repeatedly with a skewer.  Gradually spoon the glaze over the breads, dividing equally and allowing glaze to absorb after each addition.  Cool breads completely in pans, preferably on a rack.

Notes:
1.  Breads can be prepared 1 day in advance.  Wrap well with plastic wrap, and let stand at room temperature.  Alternatively, they can be frozen, wrapped tightly, and reheated in a 350º F oven for 5 to 7 minutes, or until heated through.

2.  In zesting the orange for the glaze, don’t worry if you get a little of the bitter white pith included.  The glaze tends to be rather sticky-sweet, and the extra bitterness would cut it nicely.  For an even more bitter-orange flavor (which I just love), you can actually include the whole zested peel in the saucepan while making the glaze.  Discard the peel after the glaze has cooled.

Posted in Quick Breads, Sweet | Leave a comment

Vollkornbrot

Week Forty-One: German Breads

vollkornbrot

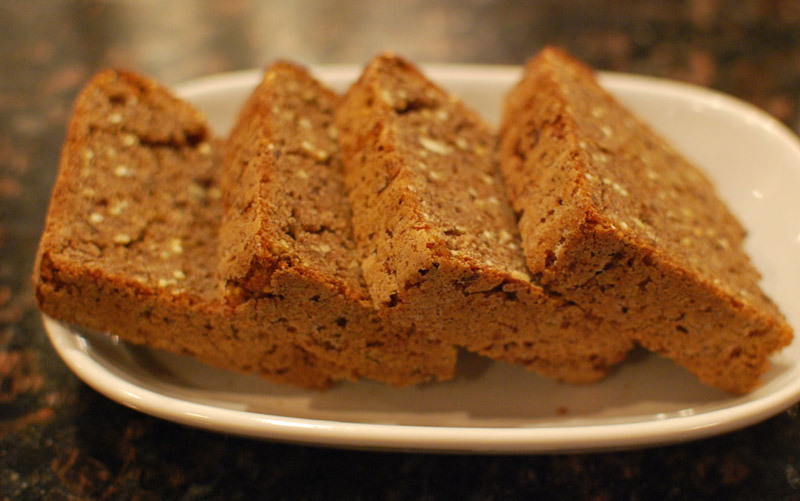
The last bread for this week is one of those very dense, rectangular loaves that, outside of Germany, often comprises the only example on grocery shelves of that country’s wealth of bread.  Yes, Germany has other more familiar breads to offer, but I would be remiss to exclude one of this type, as popular as they are in their homeland.

Generally, this style of bread is made with any number of whole grains, which may or may not be ground into flour. Grains such as rye or buckwheat, more commonly grown in bygone days than wheat, don’t make good bread, due to their inability to produce a stable gluten network.  But when treated a certain way — with a long, hydrating turn as a starter, followed by a low and slow baking process — these grains can produce a loaf that is just as delicious, if very dissimilar, to an airy wheat-flour bread.

Perhaps the most important ingredient here is patience.  These are not breads that are quick to make in the slightest.  The related Westphalian pumpernickel that I made earlier this year took a whole 4 1/2 hours to bake (after a 24 hour rest); today’s vollkornbrot (literally, “whole grain bread”) takes a mere hour and a half, but afterwards you are not allowed to touch it for 2 to 3 days.  Yes, days.  This extremely long rest gives the grains ample time to settle into themselves, the flavors to mature, and the hydration to even out.

As for the result… well, let me first say that I meddled with the original recipe.  Not that the bread turned out badly; actually, I rather liked it.  But I don’t think I can fairly gauge this one, considering the changes I made.  Most crucially, where the original recipe called for cracked rye (which I didn’t have), I used coarse bulgur, whole flax seed, and millet instead.  Hey, it’s all whole grains, right?  Right?

*sigh*

Well, long story short, my hydration levels were off.  My dough was very slack (couldn’t knead it if I tried), and the final dough was, predictably, rather gummy.  Despite the unfortunate texture (which was luckily alleviated by toasting a slice), the flavor was quite good.  It was complex and deep, but with no hint of the burnt flavor that so many of this sort of bread take on.  It’s a rich, grainy, robust, and earthy combination; now I’m rather dying to try the unadulterated original version.

I know some of you are asking the same question that’s been plaguing me: what happens if you cut it early?  Honestly, I haven’t a clue; I didn’t dare risk it.  Curious as I was (and am), I wasn’t about to stake the entire loaf on the impatience of a moment.  But if you simply can’t resist, and slice that bread early, do let me know what happens, okay?

Vollkornbrot
Adapted from Apple Pie, Patis, & Pâté
Makes one 9 x 5 inch loaf

For the starter:
8 ounces (1 1/2 cups plus 1/3 cup) pumpernickel (dark rye) flour
1/8 teaspoon instant yeast
1 cup cold water

For the soaker:
3 ounces (1/2 cup) coarse bulgur wheat
2 ounces (1/3 cup) millet
2 ounces (1/3 cup) whole flaxseed
10 ounces water

For the final dough:
7 ounces (1 3/4 cups) pumpernickel (dark rye) flour
1 3/4 teaspoons salt
1 teaspoon instant yeast
1/4 cup water

1.  To make the starter, whisk the flour and yeast together.  Add the water, and whisk until thoroughly combined.  Cover loosely with plastic wrap, and let stand at room temperature for 14 to 16 hours.

2.  To make the soaker, stir all ingredients together until combined.  Cover tightly with plastic wrap, and let sit at room temperature for 14 to 16 hours.

3.  To make the final dough, whisk the flour, salt, and yeast together in the bowl of a stand mixer.  Add the water and all of the starter.  Using the dough hook, mix at low speed until combined, about 2 minutes.  Add the soaker and continue mixing for 10 minutes.  Meanwhile, grease a 9 x 5 inch loaf pan.  Dust with a spoonful of flour, knocking around to coat thoroughly.  Rap the bottom of the pan, turned upside down, to remove any excess flour.

4.  Scrape the dough into the prepared pan, smoothing the top.  Cover loosely with plastic wrap, and let sit at room temperature for 1 hour, or until slightly risen and puffy.  Preheat the oven to 475º F.

5.  Tent the pan with aluminum foil, sealing it tightly around the edge, to trap steam.  Bake the bread covered for 15 minutes at 475º F.  After 15 minutes, remove the aluminum foil, lower the temperature to 375º F, and continue baking for another 60 minutes.  After 60 minutes, remove the bread from the loaf pan, and immediately place onto a sheet pan.  Return to the oven, and bake for another 15 minutes.

6.  Transfer the bread to a wire rack to cool thoroughly.  After cooling, wrap the loaf in a kitchen towel (not terry cloth) and store at cool room temperature for 48 to 72 hours before slicing.

Notes:
1.  Vollkornbrot will keep for several weeks wrapped in plastic and refrigerated.

Posted in Savory, Yeast Breads | 1 Comment

Kürbiskernbrot (Pumpkin Seed Bread)

Week Forty-One: German Breads

pumpkin-2

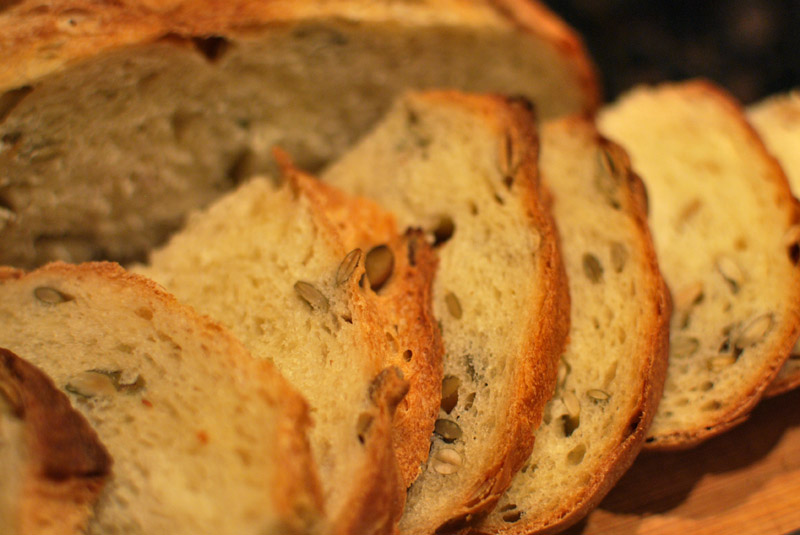
Here we have kürbiskernbrot, or pumpkin seed bread.  When used in bread, pumpkin seeds lend a singular texture.  Raw, they are earthy and more like a nut than a seed; but when toasted, as they are here, they puff up into a multi-layered crispness, airy and extremely satisfying between the teeth.  The flavor becomes somehow more green, with a roasty richness.

I make no claims as to this recipe’s authenticity, but I do know that a so-called bread is relatively common in Germany, and the source recipe comes from Jeffrey Hammelman, who spent a significant amount of time baking in Germany.  All the papers seem to be in order; but wholly authentic or not, this bread is a real treasure.

The crust is a little thick, but not unpleasantly so; it provides a good complement to the crunch of the pumpkin seeds that liberally fleck every slice.  The crumb is a little tight, but there are some decently-open holes.  But the real glory of this loaf is the fantastic flavor.  It’s not quite like any other sort of bread, mainly because of the pumpkin seeds, but the 12 hour starter also brings a fabulous complexity to the party.  There is the faintest tang of a sourdough flavor, though it is decidedly in the background, and a slight sweetness dissipates as soon as you taste it.  It’s extremely good, if I do say so.

This recipe makes enough dough for a smallish loaf, which was actually just at the lower limit of what my stand mixer could manage.  You may prefer to hand-knead, or alternatively, to double the recipe.  Either way, you’ll end up with a cheerful little bread, hearty enough to warm you in these newly-cool fall days.  I can’t wait to enjoy a fat wedge of it with a bowl of squash soup!

pumpkin

Kürbiskernbrot (Pumpkin Seed Bread)
Adapted from Apple Pie, Patis, & Pâté
Makes 1 small loaf

For starter:
2 1/2 ounces (about 1/2 cup) unbleached bread flour
1 three-fingered pinch instant yeast
1/4 cup water

For dough:
9 ounces (2 scant cups) unbleached bread flour
2 teaspoons kosher salt
2 teaspoons instant yeast
1/2 cup plus 1 tablespoon (4 1/2 ounces) water, at room temperature
1 teaspoon honey
1/2 cup pumpkin seeds, toasted and cooled

1.  To make the starter, whisk together the flour and yeast.  Add the water, and mix until a soft dough is formed, about 2 minutes.  Place in a small container, cover with plastic wrap, and let stand at room temperature for 12 to 16 hours, or until bubbly and risen.

2.  To make the final dough, whisk together the flour, salt, and yeast in the bowl of a stand mixer.  Add all of the starter, the water, and the honey.  Using the dough hook, mix at low speed until combined, about 2 minutes, scraping the bowl as needed.  Increase the speed to medium low and continue kneading for 5 to 7 minutes, or until smooth and elastic (see note 1 below).

3. Add the pumpkin seeds and continue kneading until evenly incorporated, either in the mixer or by hand.

4.  Transfer the dough to a lightly-oiled bowl.  Cover tightly with plastic wrap, and let sit at room temperature for 1 hour.

5.  Using a nonstick spatula, fold the dough over itself, as though you were folding a letter: 1/3 over the center, then the opposite 1/3 over that.  Lastly, fold dough in half again, perpendicular to the first folds (like you’re folding the letter in half).  Dough should end up being roughly a square.  Replace the plastic wrap, and let dough rise again for 1 hour.

6.  Lightly oil a large baking sheet, or line with parchment.  Turn the dough out onto a floured work surface, and gently deflate by kneading a few times.  Shape into a round loaf, pulling the outside of the dough into the center, forming a “skin” around the outside of the ball of dough.  Transfer to the prepared baking sheet, seam side down.  Cover loosely with plastic wrap, and let sit at room temperature until nearly doubled in size, about 60 to 90 minutes.  Thirty minutes before baking, preheat the oven to 450º F.

7.  When fully risen, slash the dough decoratively with a sharp serrated knife or razor blade, making a gentle but decisive slash.  Spray or sprinkle the dough with water, and transfer immediately to the oven.  Bake at 450º F for 2 minutes, opening the door to quickly spray with water every 30 seconds.  Bake the bread for an additional 25 to 30 minutes, or until well browned.  An instant read thermometer should register around 200º to 205º F when done.  Transfer to a wire rack to cool completely before slicing.

Notes:
1.  This recipe makes a very small amount of dough, which may not work in a stand mixer. You may find it easier to hand knead this dough, on a lightly-floured work surface.  In this case, the kneading may take around 10 minutes.

Posted in Savory, Yeast Breads | 4 Comments

Bauernbrot (German Farmer’s Rye)

Week Forty-One: German Breads

bauernbrot-1

Oh, I had such high hopes for this bread.  A moderately wet dough, a 48 hour starter, a long and slow rise, a single giant loaf… all the building blocks were there for one fantastic bread.  And yet, it somehow turned out lacking in flavor, dense, and crudely textured.  Quite the disappointment, this one.

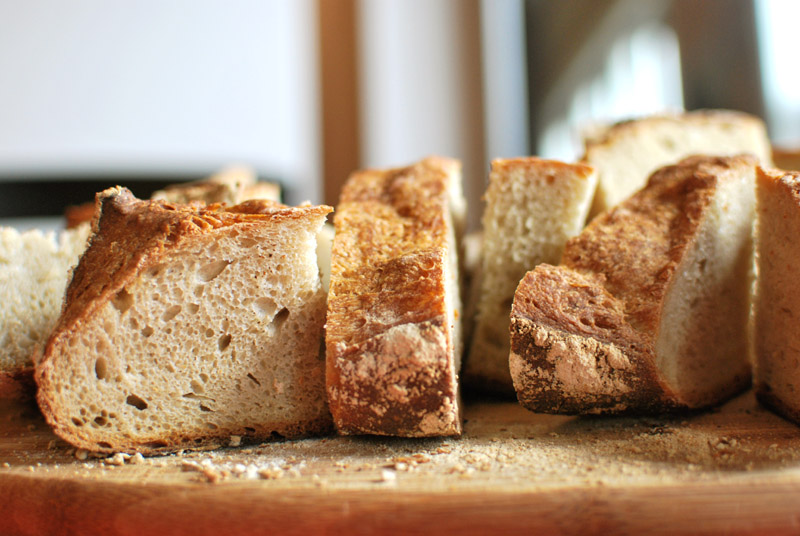
The name “bauernbrot” was the first thing to set up my soon-to-be-dashed hopes; it literally means “farmer’s bread”.  German farmer’s bread.  What came to my mind was an enormous boule, a sturdy vision in rye flour, gaping and irregular crumb, mahogany crust shedding its dusting of flour as you handily slice through it.  I could almost see the good Herr Bauer himself munching on a piece as he overlooked his arcadian fields.

But, alas, though the loaf was indeed massive and the crust a delightfully rich brown, the crumb was extremely tight (though tender, if I’m honest), with hardly a gaping hole in sight, the leathery crust difficult to cut through and harder to chew, and the rye flavor was nonexistent.

Well, that’s not really being fair to the rye flour; all the flavor was nonexistent, mysteriously vanished in the two days that the starter ought to have been sucking it up from every direction.  One possible problem was that the starter should have been refrigerated, as my instinct suggested; but I gamely followed the recipe and let it sit at room temperature.

I’m not convinced that was the problem, however; I’ve let starters sit out far longer than those 48 hours, with far better results.  Was it too much yeast?  Too little yeast?  The hurried mixing and kneading of the dough (we had friends waiting at dinner, you see)?  Not a long enough final rise?  Too long of a first rise?  Oh, so many things that might have gone awry, and impossible to pick just one.

The one thing that got my expectations the highest of all, the thing that in hindsight turned out to be the most baffling and saddest thing of all, was the seductive way the crust crackled and sang (loudly) when pulled from the oven.  Such a hallmark, usually, of great quality, in such a mediocre bread, was nothing short of confounding.  What I did wrong, I may never know, and that bread ain’t talking anymore.

bauernbrot-2


Bauernbrot (German Farmer’s Rye)
Adapted from Petra
Makes 1 huge round

For starter:
9 ounces (2 cups) unbleached all-purpose flour
1 teaspoon sugar
1/2 teaspoon instant yeast
2 cups water, at room temperature

For final dough:
16 ounces (3 3/4 cups) white rye flour
9 ounces (2 cups) unbleached all-purpose flour
1 tablespoon salt
1 tablespoon sugar
1/2 teaspoon instant yeast
1 cup water, at room temperature

1. To make the starter, whisk together the flour, sugar, and yeast.  Add the water, and whisk until smooth.  Cover loosely with plastic wrap, and let sit at room temperature for 24 hours.

2.  After 24 hours, whisk again, re-cover, and let stand another 24 hours at room temperature.  It will be a thin, light-colored starter, which is then ready to use.

3.  In the bowl of a stand mixer, whisk together the flours, salt, sugar, and yeast.  Add all of the starter and the water.  Using the paddle attachment, mix at low speed until combined, about 2 to 3 minutes.  Switch to the dough hook, scrape the bowl carefully, and continue kneading at medium-low speed for 7 to 8 minutes, or until smooth and supple (see note 1 below).  Add extra flour or water as needed to correct the consistency.

4.  Transfer the dough to a large, lightly-oiled bowl.  Cover tightly with plastic wrap, and let sit at room temperature until doubled in size, 1 to 2 hours.

5.  Lightly oil a large baking sheet, or line with parchment.  Turn the dough out onto a floured work surface, and gently deflate by kneading for 2 to 4 minutes.  Shape into 1 or 2 round loaves.  Transfer to the prepared baking sheet, cover loosely with plastic wrap, and let sit at room temperature until nearly doubled in size, about 1 hour.  Thirty minutes before baking, preheat the oven to 425º F.

6.  When fully risen, slash the dough decoratively with a sharp serrated knife or razor blade, making a gentle but decisive slash.  Bake at 425º F for 45 to 55 minutes, or until deeply browned.  An instant read thermometer should register around 200º to 205º F when done.  Transfer to a wire rack to cool completely before slicing.

Notes:
1.  This recipe makes a massive amount of dough, which may or may not fit in a stand mixer. You may find it easier to hand knead this dough, on a lightly-floured work surface.  In this case, the kneading may take 10 to 15 minutes.

Posted in Savory, Yeast Breads | 1 Comment

Franzbrötchen

Week Forty-One: German Breads

franzbrotchen-1

Hailing from Hamburg, these spiralled breads are the German cousins of the French croissant — literally.  The name “franzbrötchen” translates to “little French breads”, and the parallels are obvious.  Both are flaky Viennoiserie, made as they are with dough laminated with butter, and shaped by rolling up the dough into a spiral. However, where the French are perfectly content to let their pastry speak for itself, the Germans prefer to add a bit of spice to theirs, usually cinnamon.  Raisins are not an uncommon addition to franzbrötchen; I think all the buried generations of Frenchmen might collectively roll over in their graves if you even approach a croissant with a raisin.

Franzbrötchen, happily, are rather easier to make than are croissants.  I recently described the Spanish ensaïmada as a sort of “lazy croissant”;  franzbrötchen may be described in the same vein as a “cheater’s croissant”.  This is not to say that they aren’t valid in their own right, it’s just that the method is far simpler than with true croissants, and the results are remarkably similar.

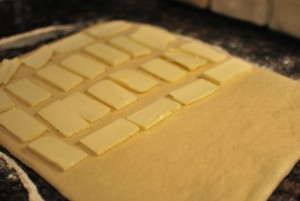
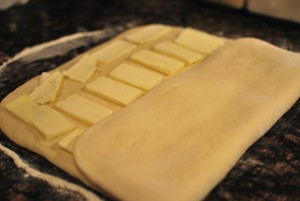
Rather than pounding out a giant block of butter, chilling it, folding into dough, chilling, rolling, chilling, rolling, etc., the butter here is simply cut into thin pieces, placed on the dough, folded in, and rolled out minimally. Total chilling time is about 20 minutes, as opposed to about 3 hours for croissants.  It’s so easy, and so head-slappingly obvious, it’s no wonder the inventive Germans thought it up.

I’ll be the first to admit that this method won’t produce quite the ethereal creature that is a true croissant, but if your goal is to make a very flaky, buttery, croissant-esque pastry in your own kitchen, you can hardly find an easier way.

These franzbrötchen turn out lightly sweet, spicy and aromatic with the cinnamon, tender layers inside cradled by a crust doubly-crisp: the outermost bits of dough form a paper-thin crust of their own accord, while the sugar filling melts into caramel that coats the exterior with a gossamer crunch.

As an amusing side note, franzbrötchen are so-called throughout Germany, except in the city they originate in, Hamburg.  What do you call it there?  A Hamburger, of course.

franzbrotchen-2

Franzbrötchen
Adapted from spamman.de
Makes 16

For dough:
17½ ounces (4 cups minus 2 tablespoons) unbleached all-purpose flour, plus extra for rolling out dough
1 tablespoon instant yeast
3 tablespoons sugar
1/2 teaspoon salt
1 1/4 cups milk, at room temperature
4 tablespoons (1/2 stick) unsalted butter, melted and cooled slightly

For filling:
12 tablespoons (1½ sticks) unsalted butter, cold
1/2 cup sugar
1 teaspoon cinnamon

1.  In the bowl of a stand mixer, whisk together the flour, yeast, sugar, and salt.  Add the milk and melted butter.  Using the dough hook, mix at low speed for 1 to 2 minutes, or until just combined.  Without removing the dough hook, cover the bowl loosely with plastic wrap and let rest for 15 to 20 minutes.

2.  Uncover the bowl.  Turn the speed to medium-low, and knead for about 5 minutes, or until smooth and elastic.  The dough should clear the sides of the bowl and be slightly shiny but not sticky.

3.  Transfer the dough into a large, lightly oiled bowl.  Cover tightly with plastic wrap, and let sit at room temperature for 1 hour, or until doubled in size.

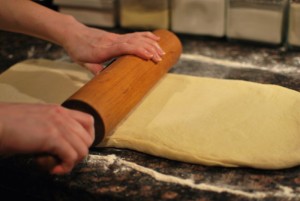
4.  Turn the dough out onto a floured surface, and press to deflate.  Using a floured rolling pin, roll the dough out to a rectangle about 12 x 20 inches in size, lifting and stretching at the corners to keep it square.

fb1

5.  Using a sharp knife, cut the chilled butter into thin slices (see note 1 below), and place evenly over 2/3 of the dough.

fb2

Fold the uncovered dough over 1/3 of the butter.

fb3

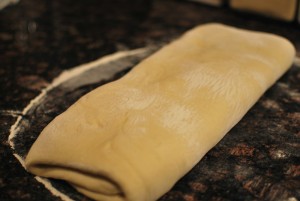
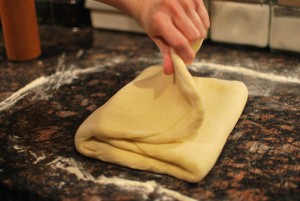
Then fold the remaining 1/3 over the top, making a tri-fold, like folding a letter.

fb4

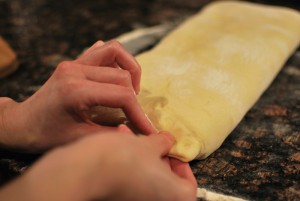
Pinch the edges to seal.

fb5

6.  Roll the dough out again to 12 x 20 inches, or as big as it will allow, dusting with flour as needed to prevent sticking, lifting and stretching the corners to keep it square.

fb6

Tri-fold the dough again.

fb8

Wrap the folded dough in plastic wrap loosely but completely, and refrigerate for at least 15 and up to 25 minutes.  Lightly grease a large baking sheet or two smaller ones, or line with parchment paper.  Preheat the oven to 400º F.

7.  Unwrap the dough.  Roll out the dough to a rectangle 15 x 30 inches in size, dusting with flour as needed to prevent sticking, lifting and stretching the corners to keep it square.  If the dough resists, cover with plastic wrap and let rest 5 to 10 minutes.

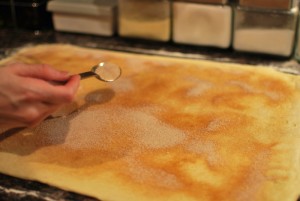
8.  Brush or spray the dough lightly with water.  Mix the sugar and cinnamon together, and sprinkle evenly over the surface of the dough.

fb9

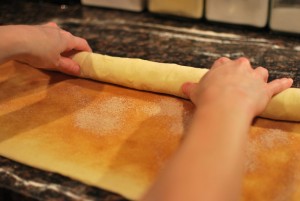
Starting with one long edge, roll the dough up tightly, jelly-roll style, into a log.

fb10

Pinch the seam to seal the edge.

fb11

Turn the log so the seam-side is down.

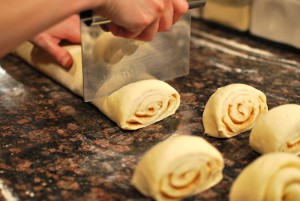
9.  Cut the log into 1 inch wide pieces.

fb12

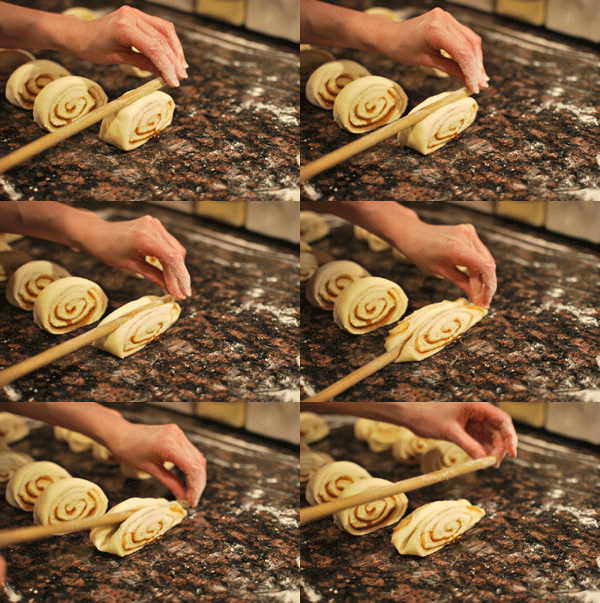
Press the floured handle of a wooden spoon firmly into the top of each piece, all the way down to the counter, so that the spiralled sides flare out on either side of the handle.

franzbroetchen-movie

Transfer each piece to the prepared baking sheet.  Repeat with the remaining pieces.

10.  Cover loosely with plastic wrap, and let sit at room temperature for 20 minutes, or until puffy and slightly risen.

11.  Bake at 400º F, in the middle of the oven, for 20 to 25 minutes, or until well-browned.  Transfer to a wire rack to cool thoroughly.


Notes:
1.  I found it easiest to cut the chilled butter first into half-stick lengths, then slice the sticks lengthwise.

2.  These turn out rather undersweet (for American palates, that is), which I thought just right.  If you prefer a sweeter pastry, feel free to increase the amount of sugar in the dough (to about 1/3 cup) and in the filling (up to 1 cup).  Be aware, though, that the more sugar you use in the filling, the more likely it is to run out in baking (read: use rimmed baking sheets).

Posted in Sweet, Yeast Breads | 6 Comments

Soft Pretzels

Week Forty-One: German Breads

pretzeln-1

If there was ever a bread to exemplify the German state, the pretzel might just be it.  Straightforward, beautiful in its simplicity, rustic and refined, each variation as excellent as the one before… and of course, goes perfectly with beer.

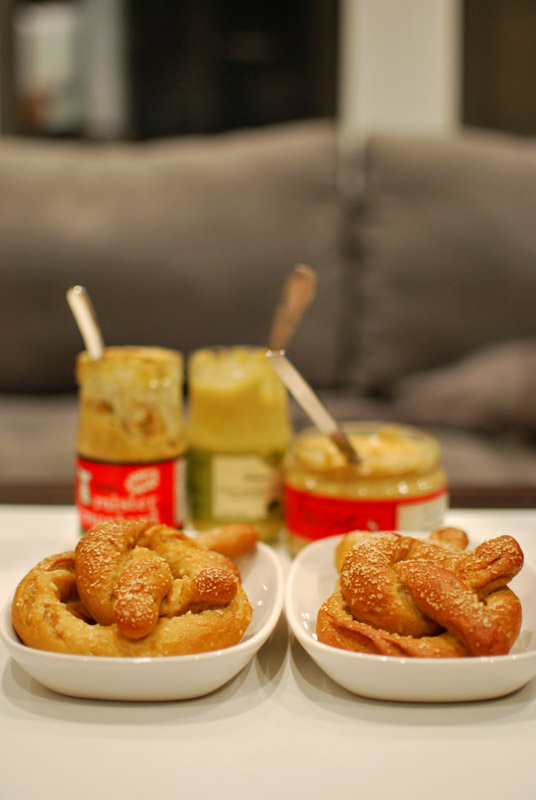
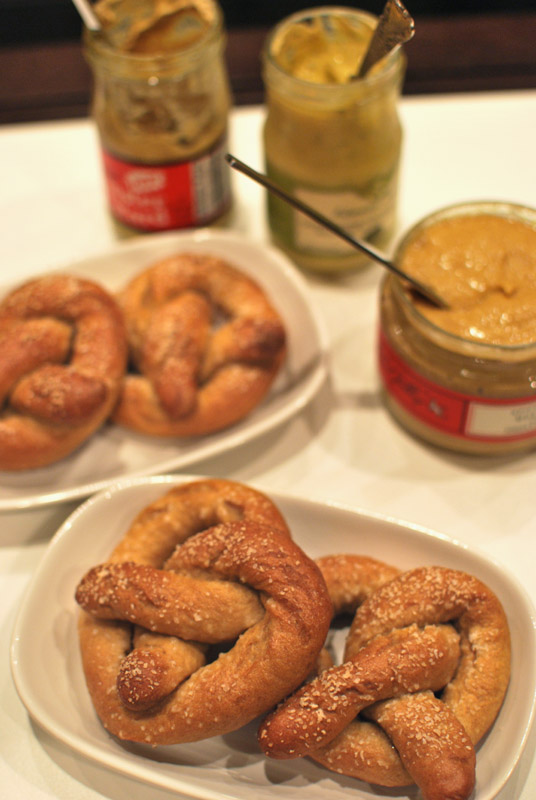
I must confess, I have a particular weakness for soft pretzels such as these.  Topped with an exuberance of salt, the smooth and taut skin entices with its somehow metallic taste, and the dense interior begs to be rolled up into soft dough cannonballs between your fingertips before popping in your mouth.  Dipped or smeared generously with a spicy, coarse mustard (but not too generously, lest it overwhelm the bread’s subtlety), the flavors unfurl crisp as a flag in a stiff wind.

My favorite part, I think, is the bold interplay of tastes, textures, and sensations.  The crunch of salt is gone as soon as you notice it.  The yellow punch of mustard plays against the sweet grain of the pretzel on your tongue, as teeth puncture through the skin.  The cool shock and bitter fizz of the hoppy beer you wash it down with precedes an unapologetic desire to do it all again the very instant you swallow the last bite.

Much like their cousin, the bagel, soft pretzels are at their best when boiled; and, like the bagel, some cry heresy if made otherwise.  Mall pretzels are all well and good, if you happen to find yourself hungry in that culinary wasteland, but I’m certainly never going to seek them out for their own virtues.  Luckily, you don’t have to, as easy as these are to make.

Perhaps it’s the experience of the last nine months speaking here, but I didn’t find these difficult at all to make.  If you can roll ropes of dough and fish things out of hot water (literally), you can surely make this recipe.  The shaping is the hardest part — and it does take a couple of tries to get the hang of it — but if all else fails, simply cut the long ropes in half and tie them into granny knots.  They’ll taste the same, I promise.  One small hint: I found that, in shaping, if you press the two tail ends firmly into the dough underneath, they stayed put in the boiling and baking process.

I do hope you enjoy these pretzels as much as I have (they’ve been the bulk of my dinner for the last two nights, accompanied by a small mustard buffet).  Chewy, salty, bready, lightly grainy, covered in good mustard, and served with beer; what else could one possibly need?

pretzeln-2

Soft Pretzels
Adapted from King Arthur Flour
Makes 16

13½ ounces (3 cups) white whole wheat flour (see note 1 below)
1½ tablespoons sugar
1 tablespoon salt
2 teaspoons instant yeast (see note 2 below)
1 cup water, at room temperature
1 cup light-flavored beer, at room temperature
9½ ounces (2 generous cups) unbleached all-purpose flour, plus extra for dusting
1/4 cup baking soda, for boiling mixture
1 egg, beaten with 1 tablespoon water to make an egg wash
Coarse salt, for sprinkling

1.  In the bowl of a stand mixer, whisk together the white whole wheat flour, sugar, salt, and yeast.  Add the water and beer.  Using the paddle attachment, mix on low speed until well combined.

2.  Switch to the dough hook attachment.  Add 1 cup of the all-purpose flour, and mix at low speed until incorporated.  Add additional all-purpose flour as needed to make a soft, but not sticky, dough.  You may need slightly more or less than the full 2 cups.  Knead at medium-low speed for 4 to 5 minutes, or until supple and smooth.  Transfer to a large lightly-oiled bowl, and let sit at room temperature until doubled in size, about 1 to 1½ hours.

3.  Preheat the oven to 450º F.  Turn the dough out onto a lightly-floured work surface.  Gently deflate, and divide the dough into 16 even pieces.  Keeping the unused pieces covered loosely with plastic wrap, roll each piece into a long rope, about 12 to 15 inches long.  If the dough resists, cover and continue working on the other pieces.  Shape the ropes into pretzels (or into twists, if you like).  Cover loosely while preparing the boiling mixture.

4.  Line a large baking sheet with parchment paper, or lightly-oiled aluminum foil.  In a large stock pot, dissolve the baking soda in 12 cups of water.  Bring to a boil.  Gently lower pretzels into the boiling water, in batches of 4.  Boil pretzels for 30 seconds on one side, gently turn over, and boil for 30 more seconds.  Transfer boiled pretzels with a skimmer or slotted spoon to the prepared baking sheet.

4.  When all the pretzels have been cooked, let cool briefly, about 3 to 5 minutes.  Brush evenly with the egg wash, and sprinkle generously with salt (or seeds, or sugar, if you prefer).  Bake the pretzels at 450º F for 12 to 15 minutes, or until deeply-browned.  Transfer to a wire rack to cool completely.  Serve warm.

Notes:
1.  If you don’t have white whole wheat flour, you can substitute an even mixture of all-purpose flour and regular whole wheat flour.

2.  If using active-dry yeast, increase the amount to 1 tablespoon (from 2 packets).

3.  Don’t store pretzels in an airtight container, as the trapped moisture will make them look shriveled.  Pretzels can be stored at room temperature, uncovered, for about 1 day.  Remaining pretzels should be frozen in an airtight container (such as a zip top bag), and reheated unthawed in a 350º F oven for 5 to 10 minutes, or until heated through.

Posted in Savory, Yeast Breads | 3 Comments