Scottish Oatcakes

Week Nine: Flatbreads

a-bread-a-day-scottish-oatcakes

Note: I am out of the country this week.  I did actually make all these breads, and tried to make the effort to write posts for them all, but I didn’t quite make it.  I hope this will suffice until I get back on Monday!

I know the Scottish aren’t exactly renowned for their flatbreads, but they sure are known for their oats.  Flatbreads are ancient, and known in every culture as an easy way to get grain from plant to table in a most efficient and appetizing way; so it’s not really surprising to see something like this recipe.

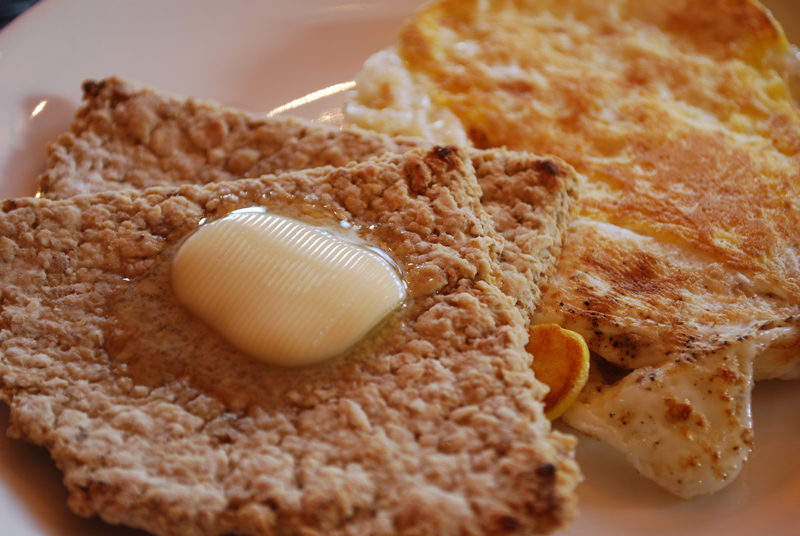
These oatcakes are quite good!  Make sure the oats you use are ground up pretty well; otherwise they’ll never cook, and will just taste a bit raw.  I had to finish mine in the oven, since they were getting too brown, but they cooked up hearty and toothsome, just the perfect breakfast with a little butter and a fried egg on the side.  Fast, tasty, and wholesome, you can hardly find anything better!


Scottish Oatcakes
From Bread by Christine Ingram and Jennie Shapter
Makes 8 oatcake farls (fourths)

 1 cup regular oatmeal, ground fine in a food processor
1/4 teaspoon salt
1 pinch baking soda
1 tablespoon melted butter
3-4 tablespoons hot water

1.  Lightly oil a griddle or heavy frying pan. Mix the oatmeal, salt, and soda together in a bowl.

2.  Add the melted butter and enough hot water to make a dough.  Lightly knead on a surface dusted with oatmeal (or flour) until it is smooth.  Cut the dough in half.

3.  Roll each piece of dough out as thinly as possible into a round about 6 inches across and 1/4 inch thick.

4.  Cut each round into four quarters, or farls.  Heat the griddle or pan over a medium heat until warm.  Transfer four farls using a spatula to the griddle and cook over a low heat for 4 to 5 minutes.  The edges may start to curl.

5.  Carefully turn the farls over with a spatula, and cook for about 1 to 2 minutes more.  If preferred, the second side can be cooked under a preheat broiler until crisp, but not brown.  Transfer to a rack to cool.  Repeat with remaining farls.

Posted in Quick Breads, Savory | Leave a comment

Knackerbrod

Week Nine: Flatbreads

a-bread-a-day-knackerbrod-2

Note: I am out of the country this week.  I did actually make all these breads, and tried to make the effort to write posts for them all, but I didn’t quite make it.  I hope this will suffice until I get back on Monday!

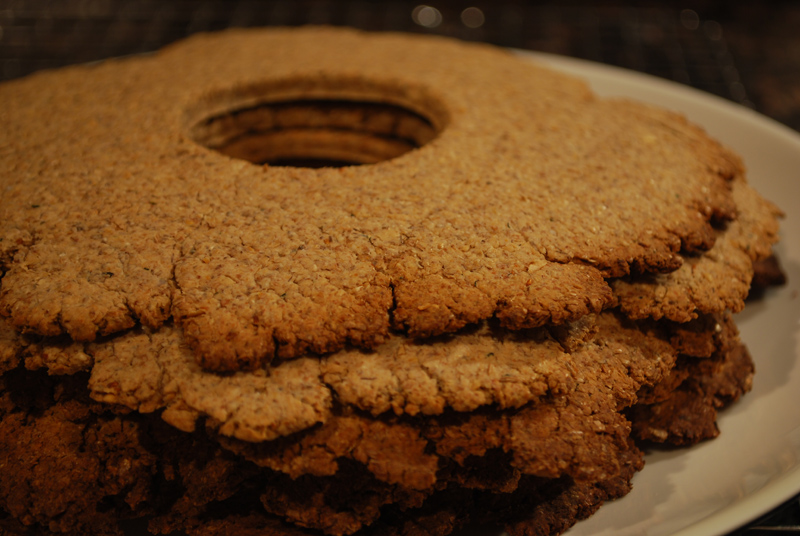
I’m very sorry.  This recipe is no good.  I think this is the first bread (or any food, really) that I’ve made in a very long time that I will not only never make again, but wish I hadn’t made in the first place.  Maybe it was some fault of mine.  I know there are some good Knackerbrod recipes out there; this just isn’t one of them.  Please don’t give up on this bread just because of this.

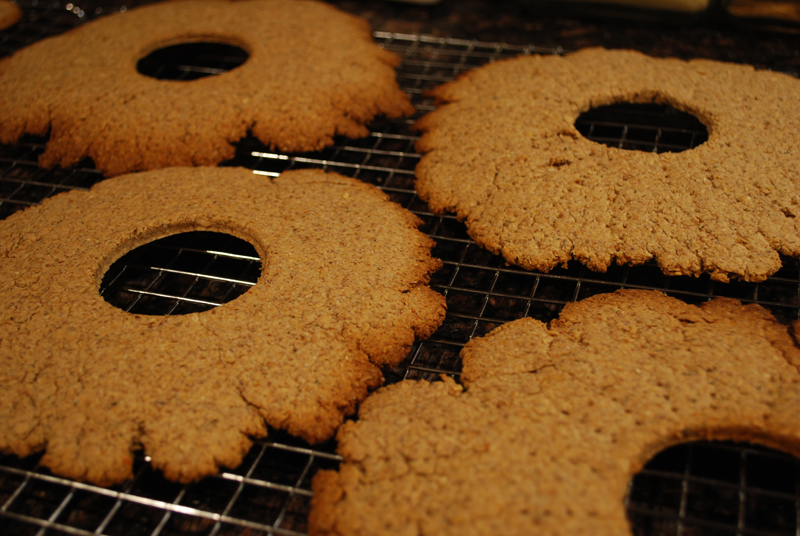
Why was it so bad?  It was very difficult to roll out, as the dough didn’t really hold together at all, and was very tough.  The breads turned out hard and almost impossible to eat, though they did soften a little after sitting on the counter for a couple of days (strange, isn’t it?).  But they did turn out pretty, didn’t they?

a-bread-a-day-knackerbrod

Knackerbrod
From Bread by Christine Ingram and Jennie Shapter

4 cups rye flour
1 teaspoon salt
1/4 cup butter
2 1/4 teaspoon yeast
9 fl. ounces water
2 cups wheat bran

1.  Lightly grease 2 baking sheets.  Preheat the oven to 450º F.  Mix the rye flour and salt in a large bowl. Rub in the butter, then make a well in the center.

2.  Cream the yeast with a little water, then stir in the remainder.  Pour into the center of the flour, mix to a dough, then mix in the bran.  Knead on a lightly floured surface for 5 minutes until smooth and elastic.

3.  Divide the dough into eight equal pieces and roll each one out on a lightly floured surface to an 8-inch round.

4.  Place two rounds on the prepared baking sheets and prick all over with a fork.  Cut a hole in the center of each round using a 1 1/2 inch round cutter.

5.  Bake for 15 to 20 minutes, or until the crispbreads are golden and crisp.  Transfer to a wire rack to cool.  Repeat with the remaining dough.

Posted in Savory, Yeast Breads | 1 Comment

Naan

Week Nine: Flatbreads

naan

I have been on the biggest Indian food kick ever since my cousin married a most charming girl of Indian heritage.  Their wedding was literally spiced with the seductive flavors of that country; it came in the form of lacy cookies and spicy crackery strips in the goodie bag given to us at the hotel, and went all the way to the “morning after brunch”, an eye-popping spread of things I simply could not identify, but that tasted so amazingly good that I gorged myself to the point that I was hardly hungry for days afterwards.  So naturally, when I decided on a week of flatbreads, it was a no-brainer to add some Indian bread to the mix.

The hard part was limiting myself to just one Indian flatbread, however.  Flatbreads are almost exclusively made in India, as opposed to a more Western-style risen loaf.  Various types include chapatti, phulka, roti, parantha, puri, bhakri, and on and on.  Simple in composition, they generally involve one type of milled grain, water, and perhaps (but not necessarily) salt and/or fat.  They are often used in lieu of utensils, for scooping up things like curries and dals.  Like most flatbreads, they are cooked at very high heat, notably in a tandoor oven.

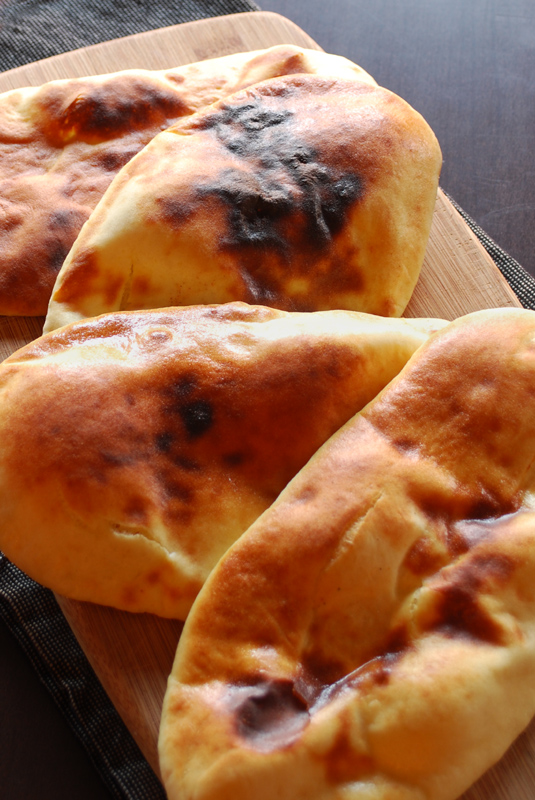
I decided finally on naan, as it’s a little different from many other Indian breads in that it is traditionally yeast-leavened.  The main characteristic of naan is that it’s cooked on the ultra-hot wall of the tandoor oven, alongside your tandoori chicken or lamb.  It’s also one of the most recognized Indian breads in the USA, because of its popularity on restaurant menus.  Naan can also be filled with any number of things, such as in keema naan, stuffed with minced lamb or mutton, or like Peshawari or Kashmiri naan, filled with nuts and raisins.  Occasionally, naan might be topped with meat, vegetables, or cheese, and served at a street food.  Whether it’s served filled or plain, though, naan is nearly always brushed with ghee, or clarified butter, before serving.

Naan often has milk or yogurt added to it, which lends flavor and softeness to the dough, but generally results in a thicker bread.  I have seen naan rolled to a thickness almost like pita bread, or as thin as a cracker.  Which one is better is purely a matter of personal preference, but both will puff up like crazy in the high heat.  But no matter the thickness, naan should be flexible and chewy, maybe crispy only in spots here and there.  You should be able to pick up a bite of kofta or fragrant basmati rice with a torn-off piece, and eat it in one heavenly bite.

To me, naan is one of those foods that is supremely craveable.  It’s simple, rustic, tasty, and has the most amazing texture when done right.  Don’t be afraid to roll it out very thin, as that will help the gluten develop, giving it that perfect chewy structure that calls to me in the night sometimes.  Oh, but you don’t want to make naan unless you have some Indian food to eat it with?  Don’t be so quick to order in!  Try this simple recipe.  It’s quick to throw together with items that can sit in your pantry for a rainy day, and will be done in the time it takes to whip up some naan.  Soaking up an easy and nutritious bowl of chickpeas and coconut milk with some naan hot from your own oven, buttery and soft, I can hardly picture anything better.


Red Pepper Naan
Adapted from Bread by Christine Ingram and Jennie Shapter

8 ounces unbleached bread flour
 1/2 teaspoon salt
1/2 teaspoon ground red pepper, or cayenne
1 1/2 teaspoons active dry yeast
4 tablespoons lukewarm milk
1 tablespoon vegetable or olive oil
2 tablespoons plain yogurt
1 egg
2 to 3 tablespoons melted butter, for brushing

1.   Cream the yeast in the milk.  Set aside for 15 minutes, or until foamy.  

2.  Sift the flour, salt, and pepper together in a large bowl.  Add the yeast mixture, oil, yogurt, and egg, and mix to form a soft dough.

3.  Turn out onto a lightly-floured surface and knead for about 10 minutes, or until smooth and elastic.  Place in a lightly oiled bowl, cover with plastic wrap, and leave in a warm place to rise for about 45 minutes, or until doubled in size.

4.  Preheat the oven to its highest setting, or at least 450º F.  If you have a baking stone, heat it up in the oven.  If not, place a couple of heavy baking sheets in the oven to heat.

5.  Turn the dough out onto a lightly floured surface and punch down.  Divide into four pieces and shape into balls.

6.  Cover three of the balls, and roll the fourth out into a teardrop shape about 10 inches long and five inches across.

7.  Turn the broiler on to its highest setting, in the preheated oven.  If you have a grill, you can absolutely use that instead.  Place the naan on the hot baking stone, or the preheated baking sheets and bake for 3 to 4 minutes, or until puffed up.

8.  Remove the naan from the oven and place under the broiler or on the grill for a few seconds, or until the tops brown slightly.  Wrap the cooked naan in a kitchen towel to keep warm while rolling out and cooking the remaining dough.  Brush with melted butter and serve warm.


Notes:
1.  If you like your naan thicker and more bready, by all means leave it a little thicker when rolling out.  Personally, I like mine thinner; I think it has a better texture.  I didn’t roll mine out quite as thinly as I prefer, but it was still very good!

2.  For whole wheat naan, substitute about half the flour for whole wheat flour.  Any more than that, though, and the bread will be too dense.

3.  The pepper you use here will obviously be a stand-out flavor, so use the best you have!  You can of course omit it for a plain naan.  To make naan with seeds, you can either mix them into the dough, or roll them onto the tops of the unbaked dough.

4.  For the best results, make sure your oven and baking stone or pans are hot for at least 10 minutes before cooking the naan.

5.  I used olive oil to brush instead of using butter.  I just couldn’t be bothered to melt any.

Posted in Savory, Yeast Breads | 2 Comments

Lavash

Week Nine: Flatbreads

lavash

Note: I am out of the country this week.  I did actually make all these breads, and tried to make the effort to write posts for them all, but I didn’t quite make it.  I hope this will suffice until I get back on Monday!

Lavash is a Persian bread, generally made with only flour, water, and salt, rolled thin, and brushed with butter or oil.  Its composition has changed little in the centuries that it has been made.  It can vary between crisp and chewy, rather like naan; and, like naan, is traditionally cooked on the walls of a tandoor oven.  It is the most popular type of bread in Iran, Armenia, Pakistan, and Turkey.


Lavash
Makes 3 large flatbreads

14 1/2 ounces all-purpose flour (about 2 1/2 cups), plus extra for rolling
1 teaspoon salt
2/3 cup water, plus extra if needed
1 whole egg
5 tablespoons melted cooled butter, divided

1.  Place the flour and salt in a medium bowl and whisk to combine.  In a small bowl, whisk together the water, egg, and 2 tablespoon butter.  Add the egg mixture to the dry ingredients and stir until the dough comes together, adding additional water or flour if needed.  Knead the dough in the bowl 5 to 6 times.  Turn the dough out onto the counter, divide into thirds, cover with a tea towel, and allow to rest for 30 minutes.

2.  Preheat the oven to 375º F.

3.  Lightly brush the back of a half sheet pan with some of the remaining butter.  Place the sheet pan, upside down, on a surface that will prevent sliding.  Working with one ball at a time, place the dough ball onto the sheet pan and roll the dough out to an even 1/8 inch thickness.  Gently stretch the edges of the dough so they fall slightly below the edge of the pan and hold the dough in place.  Lightly brush the dough with butter, place on the middle rack of the oven and bake for 10 to 15 minutes or until golden brown.  Remove the lavash to a cooling rack.  Repeat with the remaining dough, on a cooled pan.  Break each sheet into shapes and sizes as desired.  Once completely cooled, store in an airtight container for up to 5 days.


Notes:
1.   This bread cooked up very crisp, rather like a cracker, though the center was still a little soft when I tore it into pieces.  You can cook it at a lower temperature, or roll it out thicker, for a more bread-y bread.

Posted in Quick Breads, Savory | Leave a comment

King Cake

Week Nine: Flatbreads King Cake!
a-bread-a-day-king-cake

Sorry for the interruption, but today is Mardi Gras, y’all!  And since I’m from New Orleans, there was no way I wasn’t going to make a king cake for today!  (Don’t worry, flatbreads are back on schedule for tomorrow.)

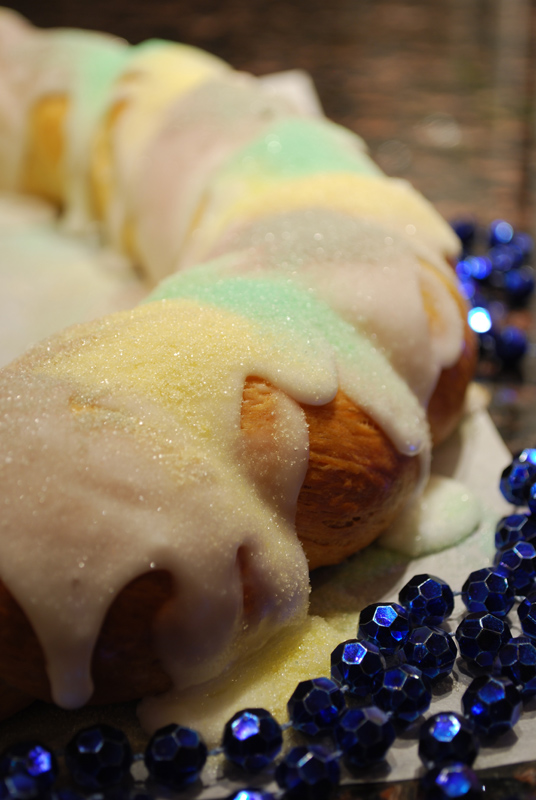
Outside of New Orleans, people may have heard of king cake, but don’t really know what it is.  King cake is, technically speaking, a wreath of rich bread dough, rather like a cross between brioche and a cinnamon roll.  It’s a yeast-risen dough with a healthy dose of butter, eggs, and milk.  It’s shaped into a ring, baked, and glazed with a simple white icing and colored sugars.  They can be plain or filled, with such fillings as a sweet cream cheese, or a praline filling, or a fruit filling.

But oh, king cake is so much more than that!  New Orleans is a Catholic city, and the king cake is full of Catholic tradition, in the form of a gourmet treat for its food-loving citizens.  King cakes traditionally are available beginning on January 6, also known as Twelfth Night, the day the Magi found Christ in the manger.  They stop being made on Mardi Gras, or Fat Tuesday, the day before Ash Wednesday and the beginning of Lent.  Good luck finding a bakery that has one after that (those year-round purveyors notwithstanding).  You’ll either have to make your own or wait for next year.

There’s absolutely nothing like the singular smell of a king cake, and it will instantly transport me back home.  That rich, yeast dough, laden with cinnamon, frosted with that lightly almond-flavored icing… it’s intoxicating, is what.  New Orleanian expats nationwide have their families and friends overnight them these wondrous confections, just so they can recreate that experience every year.  It simply is not Mardi Gras if there isn’t a king cake.  In New Orleans, schools, offices, and everything in between will generally have a series of “King Cake Parties”, where someone brings one in, and whoever gets the slice with the plastic baby has to bring the next one. 

Speaking of which, what’s the deal with that plastic baby?  It simply symbolizes the baby Jesus, and the finding thereof refers to his discovery by the Magi.  Incidentally, we all found it very amusing when they had to start printing the words: “CONTAINS PLASTIC BABY!” on the packages of king cakes shipped around the nation.  Of course it contains a pastic baby!  Why wouldn’t it contain a plastic baby?  What’s the point otherwise?  And no, finding the baby does not mean you are king or queen for the day.  It means you have to bring the next one.

As for the colors of the sugar dusted liberally over the top, they are the colors of Mardi Gras.  The purple refers to justice, the green refers to faith, and the gold (well, yellow, on food) refers to power.  Some bakeries will use colored jimmies instead of colored sugar; I say that’s heresy!  (But I will still eat a piece of the cake if it’s good.)  I’ve heard people exclaim surprisedly that anyone will eat something with those colors on it, especially in such vibrant hues.  To those people, I would like to remind them of the old saying of Cajuns: “If it walks, crawls, swims, or flies, we’ll eat it.”  Forget purple and green sugar, we suck on crawfish heads.  Quite happily, too.

So now you know about king cake.  (Oh, and by the way, king cake is not the same as a galette des rois! Pas du tout!)  And the next time your friend in New Orleans sees fit to bestow the gift of one upon you, remember, that’s someone’s childhood you’re tasting.  You’d better appreciate it – and I’m sure you will! 

King Cake
20 to 22 servings

For Dough:
2 envelopes (4 ½ tsp) active dry yeast
½ cup granulated sugar
12 tablespoons (1 ½ sticks) unsalted butter, melted
1 cup warm milk (about 110 degrees F)
5 large egg yolks, at room temperature
4 ½ cups all-purpose flour (1 pound, 3 ounces)
2 teaspoons salt
1 teaspoon freshly grated nutmeg
1 teaspoon grated lemon zest
1 teaspoon vegetable oil, for oiling bowl
Filling:
1/2 cup sugar
1 to 2 teaspoon cinnamon
1/3 cup unsalted butter, at room temperature
For Finishing:
1 plastic king cake baby or a pecan half
5 tablespoons milk, at room temperature, divided
3 tablespoons fresh lemon juice
1/8 teaspoon almond extract
3 cups powdered sugar, sifted
Purple-, green-, and gold-tinted sugar (recipe below)

1.  Combine the yeast and granulated sugar in the bowl of a stand mixer fitted with a dough hook. Add the melted butter and warm milk. Beat at low speed for 1 minute. With the mixer running, add the egg yolks, then beat for 1 minute at medium-low speed. Add the flour, salt, nutmeg, and lemon zest and beat until everything is incorporated. Increase the speed to high and beat until the dough pulls away from the sides of the bowl, forms a ball, and starts to climb up the dough hook.

2.  Remove the dough from the bowl. Using your hands, form the dough into a smooth ball. Lightly oil a bowl with the vegetable oil. Place the dough in the bowl and turn it to oil all sides. Cover with plastic wrap and set aside in a warm, draft-free place until doubled in size, about 2 hours.

3.  Meanwhile, make the filling by creaming the butter, sugar, and cinnamon together until soft enough to spread easily.

4.  Turn the dough out onto a lightly floured work surface. Using your fingers, pat it out into a rectangle about 30 inches long and 6 inches wide.

5.  Spread the filling lengthwise over the bottom half of the dough, then flip the top half of the dough over the filling. Seal the edges, pinching the dough together. Shape the dough into a cylinder and place it on the prepared baking sheet seam side down. Shape the dough into a ring and pinch the ends together so there isn’t a seam. Insert the king cake baby or pecan half into the ring from the bottom so that it is completely hidden by the dough.

6.  Cover the ring with plastic wrap or a clean kitchen towel and place in a warm, draft-free place. Let the dough rise until doubled in size, about 45 minutes.

7.  Meanwhile, preheat the oven to 350 F.

8.  Brush the top of the risen cake with 2 tablespoons of the milk. Bake until golden brown, 25 to 30 minutes. Remove from the oven and let cool completely on a wire rack.

9.  Make the icing. Combine the remaining 3 tablespoons milk, the lemon juice, the almond extract, and the powdered sugar in medium-size mixing bowl. Stir to blend well. Adjust flavorings as needed.  With a rubber spatula, spread or drizzle the icing evenly over the top of the cake. Sprinkle with the sugar crystals, alternating colors around the cake.

Colored Sugars
1 1/2 cups granulated sugar, divided
1 to 2 drops each of green, yellow, red, and blue liquid food coloring

1.  Place 1/2 cup sugar and drop of green food coloring in a jar or zip-top plastic bag; seal. Shake vigorously to evenly mix color with sugar.
Repeat procedure with 1/2 cup sugar and yellow food coloring.
For purple, combine 1 drop red and 1 drop blue food coloring before adding to remaining 1/2 cup sugar.

Posted in Sweet, Yeast Breads | Leave a comment

No-Knead Pizza Dough

Week Nine: Flatbreads

a-bread-a-day-fennel-lemon-anchovy-pizza

Yes, pizza crust is a flatbread!  What did you think it was?  Technically, a pizza is just a big open-faced sandwich.  So there.

My inspiration for this pizza was stolen, pure and simple, from a post on Apartment Therapy’s culinary sister, The Kitchn.  I just saw that gooey mozzarella melting all over that fennel, and imagined the flavor of that with some flavor-packed anchovies, and I just couldn’t resist making it for some dear friends.  You can, obviously, use whatever toppings you like; but me, I’m a sucker for a pizza that requires no sauce.  

I didn’t even cook the fennel, I just sliced it thinly and threw it on the raw dough with chunks of anchovy and torn mozzarella.  After baking, I drizzled on some olive oil and chopped fennel tops, and finished with a grating of lemon zest.  It was so good!  I never thought I would like anchovies, until I tried them.  They aren’t really fishy; they’re just full-flavored, like cured olives.  So don’t be afraid!  Be sure to get some good-quality anchovies, though – they’re certainly inexpensive enough, and a little goes a long way.  They almost melt in high heat, so you shouldn’t taste any texture, just a punch of briny flavor.  Delicious!


No-Knead Pizza
Makes 4 individual pizzas

3 cups all-purpose or bread flour, more for dusting
¼ teaspoon instant yeast (such as SAF brand)
1½ teaspoons salt
1½ cups water

1. In a large bowl, mix the flour with the yeast and salt. Add the water and stir until blended (the dough will be very sticky). Cover the bowl with plastic wrap and let rest for 12 to 24 hours in a warm spot, about 70 degrees Fahrenheit.

2. Place the dough on a lightly floured work surface and lightly sprinkle the top with flour. Fold the dough over on itself once or twice, cover loosely with plastic wrap and let rest for 15 minutes.

3. Divide the dough into 4 pieces and shape each piece into a ball. Generously sprinkle a clean cotton towel with flour and cover the dough balls with it. Let the dough rise for 2 hours.

4. Stretch or toss the dough into the desired shape, cover with toppings and bake on top of a very hot pizza stone.


Notes:
1.  This dough apparently will freeze very well (after step 3), so you can make it up for a rainy day.  Forget ordering in, this is worlds better! 

2.  I used the active-dry yeast I had on hand, let it rise a full 24 hours, and it worked just beautifully.  If you’re in a warmer climate, or are using instant yeast, you may want to aim for around 12 hours; but I don’t think you have to be a stickler for that.  Keep in mind, though, that I am only speaking in hypothetical terms; I have not tried it any other way.  I’m not sure this is a dough you can really mess up, though.

Posted in Savory, Yeast Breads | Leave a comment

Spelt Crackers

Week Eight: Crackers

spelt-crackers

Note: I am out of the country starting today, and for all of next week.  I did actually make all these breads, and made a valiant effort to write insightful and descriptive posts for them all, but I didn’t quite make it.  I hope this will suffice until I get back!

I had such high hopes for this cracker.  I love unusual grains, which spelt certainly is.  Spelt is a relative of the common wheat we use in baking, which means that it will produce gluten.  I discovered this after making the crackers, and rolling them out to within an inch of their lives in a misguided effort to make them thin and crispy.  I would definitely like to try these again, and would certainly take more care with this aspect next time.

Since spelt has an ever-so-slightly nuttier flavor than regular wheat, which I decided would be nice with some dried mint rolled into the dough.  It certainly turned out pretty, and the flavor was nice; but man, were they tough!  So, lesson learned: they are delicious, but the dough needs to be handled as carefully as any other “normal” wheat dough. There’s very little that’s as disappointing as a food you had high hopes for, turning out not up to par!  So mind those rolling pins!


Spelt Crackers
Adapted from the Hungry Ghost, via the New York Times, via Smitten Kitchen
Makes 1 large cracker sheet

1/4 teaspoon salt
1 1/2 cups white spelt flour, plus more for flouring surface
Coarse sea salt and seeds of your choice

1. Preheat the oven to 350º F. Dissolve the salt in 1/2 cup of cold water. Stir in the spelt flour until combined. Knead the dough a few turns until a ball forms.

2. Flour an overturned 12-by-17-inch cookie sheet and roll out the dough on top of it, using as much flour as needed to prevent sticking, until the dough covers the sheet from edge to edge. Do your best to get them as thin as possible, because the thicker parts become quite hard when baked. Using a spray bottle filled with water, spray the dough to give it a glossy finish. Prick the dough all over with a fork. If you choose, sprinkle with sea salt or seeds. For neat crackers, score the dough into grids.

3. Bake until the dough is crisp and golden and snaps apart, 15 to 25 minutes. (Check after 10 minutes to make sure it does not overcook.) Break into pieces and serve.


Notes:
1.  White spelt flour can be found at Whole Foods, or your favorite local natural foods grocery. 

2.  Don’t roll this dough out too thinly!  It will get tough!

Posted in Savory, Unleavened Breads | Leave a comment

Lemon Pepper Parmesan Crackers

Week Eight: Crackers

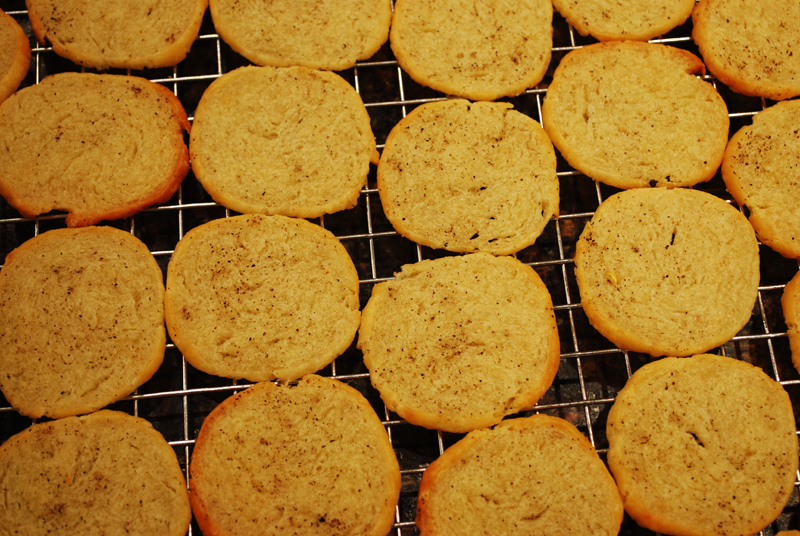
lemon-pepper-parmesan-crackers

 This is another pie-crust-method cracker, like the salt and pepper crackers yesterday.  These, however, are made with butter, so they don’t have the help of shortening, that engineering marvel.  But they are filled with all the wonderful flavor of butter; plus, you do have a little help with the texture, in that there’s a significant amount of cheese in the dough.

In crackers like this, cheese plays a few roles: it adds flavor, texture, and structure.  The first part of that is obvious; the crackers will taste like whatever cheese you put in them.  Additionally, it helps the texture by shortening the strands of gluten that form when you mix and roll out the dough, reducing any toughness that would result.

And as for structure, the type of cheese you use is important.  Your average block of grocery-store mozzarella would just turn them into globs of grease on your baking sheet.  But if you use parmesan, a wonderful thing happens.  See, when you melt a proper Parmigiano by itself, it turns crisp and crunchy.  This is because of the relatively low fat content of such hard cheeses.  There isn’t much fat to melt away and turn into grease, so the milk proteins coagulate (aka “cook”), and basically fry in the remaining fat, turning the cheese light and crispy.  So when you add enough of that sort of cheese into a dough, it just adds a little crispness to the cracker, not to mention the fabulous flavor!

 This is a make-ahead cracker, as it has to chill for some time before you can bake it.  This is not a bad thing, since you can just freeze the dough for as long as you like.  Just thaw a little, slice, and bake – what could be easier?  In my ideal dream freezer, I’ve got a few different flavor variations at the ready, just in case I need to impress someone in a hurry!  This recipe uses the classic lemon and black pepper for flavoring, but why not try lime and paprika?  Orange and rosemary (ground or freshly chopped) would also be spectacular!  Just be sure to use a good quality cheese, since the flavor is very apparent.

Oh, and don’t worry about making them into perfect squares; they’ll taste just the same!  But if you really want to, let the dough firm up in the fridge a bit before shaping the log; it’ll be much easier that way.


Lemon Pepper Crackers
From The Joy of Cooking
Makes about 44 crackers

1 1/2 cups finely grated Parmesan cheese
3/4 cup all-purpose flour
1 teaspoon finely grated lemon zest
3/4 teaspoon coarsely ground black pepper
4 tablespoons cold butter, cut into small pieces
1 1/2 tablespoons water
1 teaspoon fresh lemon juice

1.  In a bowl, whisk together the cheese, flour, lemon zest, and pepper.

2.  Add the cold butter and cut in with a pastry blender, a food processor, or with quick pinches of your fingertips, until the mixture resembles coarse crumbs.

3.  Make a well in the center and add the cold water and lemon juice.  Stir with a fork just until the mixture forms a dough.  Briefly knead the dough just until combined.

4.  Transfer to a sheet of wax paper or parchment paper and, using the paper as an aid, shape it into a squared-off log, about 11 inches long.  Wrap in the paper and refrigerate until firm, about 1 hour.  (The dough can be prepared up to this point 2 days in advance.)

5.  Preheat the oven to 375º F.

6.  Cut the dough into 1/4 inch thick slices and arrange 1 inch apart on baking sheets.  Bake one sheet at a time until the crackers are golden around the edges, about 10 minutes.  Transfer carefully with a spatula to a rack and let cool completely.   Sprinkle with additional ground black pepper, if desired.


Notes:
1.   I used my wonderful Microplane to grate the cheese and lemon zest.  Since a Microplane will grate cheese ultra-finely, it results in a big, fluffy mound of cheese.  I decided therefore to measure on weight, not volume.  As it turns out, I think I measured too much.  I estimate it would take maybe 4 or 5 ounces of cheese to measure 1 1/2 cups; I used 6 ounces.  My dough was very dry and didn’t hold together at all.  I had to add additional water and lemon juice, but the crackers themselves turned out very well.  I’m not convinced, though, that what I produced was what the authors of the recipe intended.  I ended up with a very cheese-y result; not so much a cracker as a pastry.  But it was still very delicious!

Posted in Savory, Unleavened Breads | Leave a comment

Salt & Pepper Crackers

Week Eight: Crackers

salt-pepper-crackers

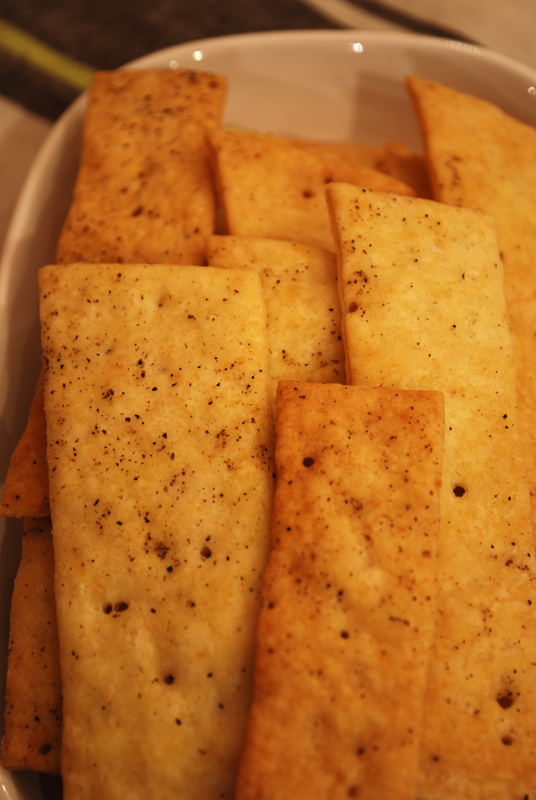
This type of cracker is that other type of cracker I was mentioning the other day: the type that uses a pie crust method to make.  This just means that you cut cold fat into the flour, then add the liquid, and roll out the dough.  Yes, it is a little more difficult to deal with if you use butter, and especially so if you don’t have a big enough food processor (like me).  But there is a secret weapon at your culinary disposal: shortening.

I know, I know.  I hate shortening as much as the next person.  Maybe even more than the next person.  It’s usually hydrogenated and therefore terrible for your health, it takes forever to wash off your hands because of the high melting point, and it tastes like absolutely nothing.  (As a side note, have you ever seen ultra-hydrogenated puff pastry fat?  It’s so, so gross!  And we had to make sculptures out of the stuff in culinary school!  Eugh!  This is what they make your fast-food croissants with, people.)  But…

Shortening does have its advantages.  It allows you to roll out your dough with more abandon than if you’d used butter as your fat.  See, shortening has a higher melting point than butter, which means that you don’t have to keep it cold to keep it from melting into the flour, which makes a gooey, tough, gluten-y mess.  Your dough is far less finicky and high-strung, and it’s much easier to work with.

They do, thankfully, make an organic plant-derived shortening that I’ve been able to find at Whole Foods, and is probably at other natural food grocery stores too (but I haven’t checked that).  It’s perhaps a little worse for you than butter, and certainly worse than olive oil, but it’s a world away from that jar of Crisco.  And it does make one seriously good cracker.  My dough ended up being so wet that I had to load it with flour just to handle it, let alone rolling it out.  (And don’t try using a pasta machine here; it just won’t work.  Take it from one who knows.)  I was sure that all the flour, rolling, and handling would make for a tough cracker, but they surprised me by being perfectly tender, crisp, and flaky.

This recipe bakes up into something almost like a saltine, but so much better.  I found the original recipe a little bland, so I brushed on some olive oil while the crackers were still warm.  They just soaked it up, and were absolutely wonderful because of it.  Of course, feel free to add or omit any spice, herb, or flavoring you like.  Just don’t overload them; these crackers aren’t meant to be packed with seeds and what have you.  So don’t fear the shortening – sometimes it’s just the thing you need!


Salt and Pepper Crackers
Adapted from  Gourmet Magazine

Olive oil for brushing
1 3/4 cups unbleached all-purpose flour
1 1/2 teaspoons baking powder
6 tablespoons cold vegetable shortening (preferably trans-fat-free), cut into bits
1/2 to 2/3 cup very cold water
1 teaspoon flaky salt, such as kosher salt
Freshly ground black pepper 

1.  Preheat oven to 375°F with racks in upper and lower thirds. Brush 2 large baking sheets generously with oil.

2.  Toast 1 teaspoon coarsely ground black pepper in a dry small skillet (not nonstick) over medium heat, shaking skillet occasionally, until fragrant, about 1 minute. Cool pepper.

3.  Whisk together flour, baking powder, and 1/2 teaspoon table salt in a bowl (or pulse in a food processor). Add shortening and blend into flour mixture with a pastry blender or your fingertips (or pulse in processor) until most of mixture resembles coarse meal with some roughly pea-size lumps. Drizzle evenly with 1/2 cup ice water and gently stir with a fork (or pulse) until incorporated.

4.  Squeeze a small handful: If it doesn’t hold together, add more ice water, 1 tablespoon at a time, stirring (or pulsing) until incorporated, then test again.

5.  Divide dough into 2 portions and flatten each into a 3-inch square.

6.  Roll out each square on a lightly floured surface with a lightly floured rolling pin into a 20- by 8-inch rectangle. Trim edges and sprinkle each sheet with teaspoon toasted pepper. Run rolling pin lightly over dough to embed pepper in pastry. Brush each sheet with 1 tablespoon olive oil and sprinkle each with 1/2 teaspoon sea salt.

7.  Cut sheets crosswise with a small sharp knife into 1-inch-wide strips (straight or wavy). Arrange strips evenly spaced in 1 layer on baking sheets and bake, switching position of sheets halfway through baking, until golden, 16 to 20 minutes total. While still hot, brush crackers with additional olive oil.  Transfer to racks to cool.


Notes:
1.   By all means, use flavored oil for brushing if you have it.  It will only make the crackers more delicious.

2.  I used just over 1/2 cup of water, and my dough was very sticky and wet.  I had to add a lot more flour just to handle it, but it turned out just beautifully.  Thanks, shortening!

3.  You can either bake these crackers in big sheets and break them apart later, which makes for easier brushing after they’re removed from the oven; or you can cut them into tidy shapes before baking, which makes for a neater end result.  Whatever you prefer will work just as well as the other.

Posted in Quick Breads, Savory | Leave a comment

Seedy Crisps

Week Eight: Crackers

seedy-crisps

Yesterday, I mentioned that there are some cracker recipes out there that are insanely easy to make.  This is another one of those recipes.  It comes together in a flash, and if you have a pasta machine, takes hardly any time to roll out.  (Plus, I’ve always liked using a pasta roller.  It’s kind of fun!)

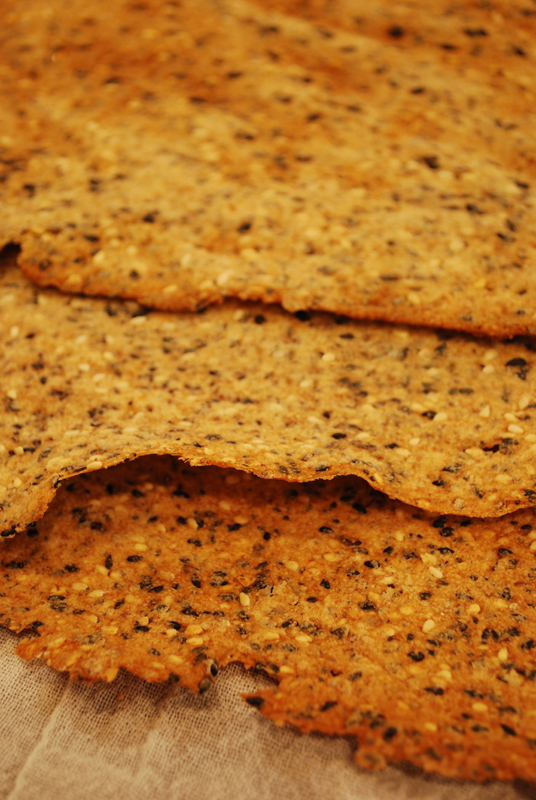
These crackers are redolent with seeds in the best possible way, so you’d better like what you put in them.  I love poppy seeds, so in they went.  And white and black sesame seeds look so pretty together, I just had to use them both.  (You can find black sesame seeds at a natural foods grocery store, or at an Asian market.)  I added a sprinkle of cumin just to give it a little background smokiness, but not so much that it would overwhelm the other flavors – a little cumin goes a long way!  With a little flaxseed for nutiness to complement the whole wheat flour, and give it a little extra nutrition, I had a cracker that was full-flavored and hearty, but that could still be rolled thin enough to be delicate.

The easiest way to roll these out, of course, is with a pasta roller.  But if you don’t have one, it’s no problem.  They’ll still roll out very easily by hand.  And if you don’t have a rolling pin, you know you can always use an empty wine bottle!

I had these crackers for lunch yesterday with some lovely tuna salad, and they were an excellent match.  They would of course also be perfect for a full-flavored cheese platter, featuring such robust examples as Parmigiano Reggiano, a creamy blue cheese, smoked Gouda (anything smoked, actually), or an aged extra-sharp cheddar.  Pair that with some port, or a full-bodied red, and I’d be in heaven!


Seedy Crisps
Adapted from Alton Brown

5 ounces whole-wheat flour (about 1 cup + 2 tablespoons)
4 3/4 ounces all-purpose flour (about 1 cup + 1 tablespoon), plus additional for rolling
1/4 cup poppy seeds 
2 tablespoons white sesame seeds
2 tablespoons black sesame seeds
3 tablespoons ground flaxseed
1 teaspoon whole cumin seeds
1 1/2 teaspoons table salt
1 1/2 teaspoons aluminum-free baking powder
3 tablespoons olive oil
6 1/2 ounces water (3/4 cup + 2 tablespoons)

1.  In a medium bowl whisk together both flours, poppy seeds, sesame seeds, salt, and baking powder. Add the oil and stir until combined. Add the water and stir to combine and create a dough. Turn the dough out onto a floured surface and knead 4 to 5 times. Divide the dough into 8 equal pieces, cover with a tea towel and allow to rest for 15 minutes.

2.  Preheat the oven to 450 degrees F.

3.  For a thin snacking cracker: On a lightly floured surface, roll out 1 piece of dough to 1/16-inch and place on a parchment lined baking sheet. If there is room on the sheet pan, repeat with a second piece of dough. Bake on the middle rack of the oven for 4 minutes then flip and bake for an additional 2 to 3 minutes or until golden brown. Remove from the oven and place on a cooling rack. When cool, break into desired size pieces. Repeat procedure with remaining dough.

3.  For a thicker dipping cracker: On a lightly floured surface, roll out the dough as above but to 1/8-inch thick. Bake for 6 minutes on the first side, then flip and bake another 4 to 6 minutes.

4.  For super even thickness and easy rolling: Roll out using a lightly floured pasta roller. Flatten the dough until it will pass through the first setting and go to the highest number that your pasta roller will allow without tearing the dough. Bake according to the thin cracker instructions.

Notes:
1.  Baking times will vary depending on exact thickness of dough and oven temperature, so watch them closely. Store in an airtight container for up to 2 weeks.

2.  Feel free to cut them into pieces with a pizza cutter before baking, but they will cook more evenly if you can flip them.  This is obviously easier if you leave it in one big piece.

3.  The recipe calls for aluminum-free baking powder, which may be a healthier choice, or maybe not, depending on who you listen to.  I, however, used regular baking powder, and it was just fine.  You’ll certainly want to use double-acting baking powder, though, no matter if there’s aluminum or not; since the dough has to rest before it’s baked.

Posted in Savory, Unleavened Breads | Leave a comment