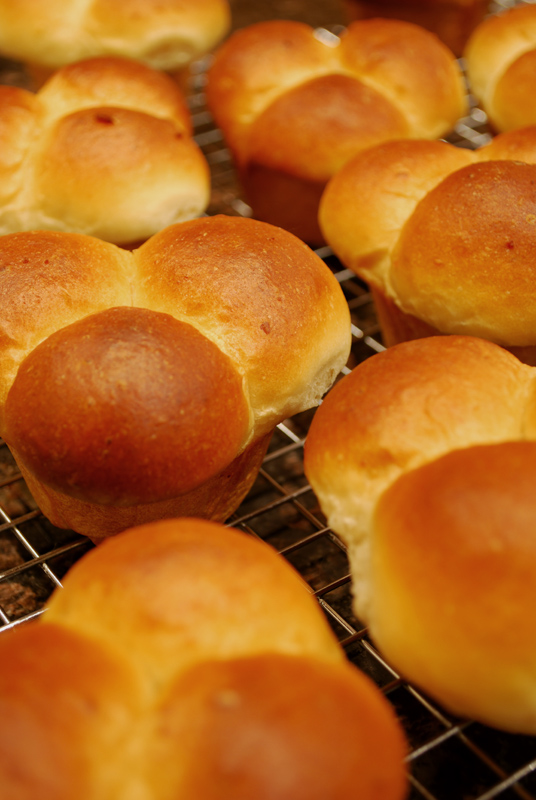
Cornmeal Crêpes

 Week Eleven: Savory Pancakes

cornmeal-crepes

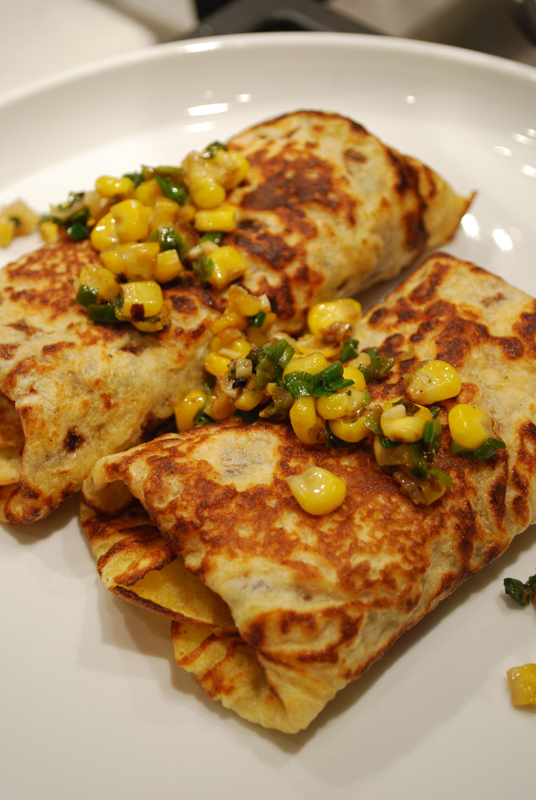
 Ah, the crêpe.  A most unapologetically French food, it is a little fussy, yet quite simple when you get right down to it, and incredibly delicious.  Though there are similar flatbreads (or pancakes) in many cultures throughout the world, nothing is exactly like the French crêpe.  Quickly made on a hot pan or round griddle, the wafer-thin pancake has made quite a famous name for itself.

In America, crêpes are typically seen in sweet applications, as in the famed dessert Crêpes Suzette.  But in France, crêpe stands are about as ubiquitous as fast-food restaurants are in the US, and there they are as often served savory as they are sweet.  They can be (and are) filled with anything imaginable, such as asparagus, ham, ratatouille, cheese of every sort, sausage, mushrooms, peppers, fresh fruit, jam, berries, Nutella, and on and on.

Whether sweet or savory, crêpes are made with a thin batter rich with eggs, milk, and butter.  Sweet crêpes are generally made with white flour, whereas savory crêpes are often made instead with buckwheat flour, making them quite similar to the blini I featured earlier this week.  So, to avoid any confusion between sweet and savory, or between blini and crêpe, I decided to go with a recipe that is a little different.  These decidedly savory crêpes are made with cornmeal, rendering them a little more hearty than a standard white flour version.

I know, you’re thinking that crêpes are just too much effort for a weeknight dinner.  I beg to differ!  The batter couldn’t be easier to make; you just put all the ingredients in a blender, give it a whazz, and you’re ready to go!  You can even leave it sitting in the blender while it takes its 30 minute nap, and it’s all ready to easily pour into the pan when it’s time.  Use that 30 minutes to make a quick filling (now’s the time to use up your leftovers, people), and you’ve got dinner on the table!

And about that little rest: it’s a necessary evil.  The batter needs that 30 minutes to let any blended-in air bubbles subside, so that there aren’t any tiny holes in your crêpes, which would compromise the structure.  Also during this time, the flour soaks up liquid, so that there aren’t any floury lumps in the batter; although that is rendered largely a moot point by the use of a blender.  You can absolutely mix this by hand if you like, but results will be better with a blender.

Oh, and for those of you who dearly miss those sidewalk crêpe stands in France, here is a little rememberance.  Enjoy!


Cornmeal Crêpes
Adapted from Gourmet Magazine
Makes about 12 crepes

1 1/4 cups all-purpose flour
3/4 cup yellow cornmeal
1/2 teaspoon salt
2 cups milk, at room temperature
3 large eggs, at room temperature
2 tablespoons unsalted butter, melted, plus additional for brushing skillet

1.  Blend flour, cornmeal, salt, milk, eggs, and 2 tablespoons butter in a blender until smooth. Let batter stand at room temperature 30 minutes.  If not making crêpes immediately, put batter in refrigerator.

2.  Lightly brush a 10-inch nonstick skillet with butter and heat over moderately high heat until hot but not smoking. Stir batter, then, holding skillet off heat, pour in 1/3 cup batter, immediately tilting and rotating skillet to coat bottom. (If batter sets before skillet is coated, reduce heat slightly for next crêpe.) Return skillet to heat and cook until just set and pale golden around edges, 10 to 15 seconds. Loosen edge of crêpe with a spatula, then flip crêpe over carefully with your fingertips. Cook until underside is set, about 20 seconds more, and transfer crêpe to a plate. Make additional crêpes in same manner, brushing skillet lightly with butter for each and stacking crêpes on plate as cooked.

Posted in Savory, Unleavened Breads | Leave a comment

Cottage Cheese Pancakes

Week Eleven: Savory Pancakes

cottage-cheese-pancakes

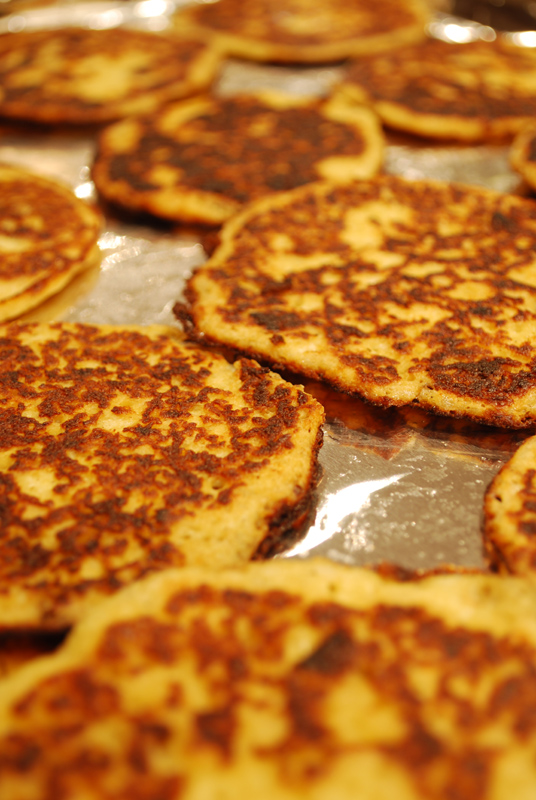
Okay, I’ll admit it; this is sort of a stretch to be included as a bread per se, because of the low percentage of flour.  But cut me some slack… it’s a bit tricky to find recipes for bready “pancakes” that don’t cross firmly over into “flatbread” category.  Besides, these are so good, you probably won’t care after you try them.  I know I didn’t.

There is a large percentage of cottage cheese in this recipe, which might seem a little odd at first.  It takes the place of any milk or other liquid (aside from the eggs and butter), and makes the batter rather lumpy.  But never fear, as any lumps just melt when they’re cooked.  What you end up with is a bready exterior with a soft, creamy inside, almost similar to a cheese-filled blintz.  You can look at it like a filled bread with the filling mixed into the dough, rather than rolled up in it, if you like.

I included nutmeg in this recipe, drawing inspiration from the (very similar) ingredients in a classic béchamel sauce (butter, flour, milk, onion, nutmeg).  And, oh my goodness, was that a good idea!  In savory applications, a pinch of nutmeg provides a pleasant bakground warmth and gentle nuttiness, one that generally isn’t very noticed until it’s accidentally omitted.   It complements dairy beautifully, and in this application it rounds out the flavor of the whole-wheat flour to a T.

These pancakes were delicious as-is, and would make a nice light lunch with a salad alongside.  I could just as easily see these as an entrée topped with some pulled-apart rotisserie chicken, or with some slow-cooked pork.  Or, if you prefer, serve these with some hearty roasted root vegetables, or a thick vegetable stew.  If you’re having a party, make miniature ones and top with shavings of good ham, prosciutto, or crumbled bacon.  Delicious!


Cottage Cheese Pancakes
Makes about twenty 3- or 4-inch pancakes

1/3 cup chopped onion
6 tablespoons unsalted butter, melted, divided
1/4 teaspoon salt
1/4 teaspoon black pepper
1/4 teaspoon grated nutmeg
1 1/2 cups cottage cheese
3 large eggs
6 tablespoons whole-wheat flour

 1.  Preheat oven to 200°F.

2.  Cook onion in 2 tablespoons butter in a small heavy skillet over medium-low heat, stirring occasionally, until golden brown, about 12 minutes. Transfer to a bowl, then add the remaining butter and other ingredients, and whisk until combined.

3.  Brush a 12-inch nonstick skillet with olive oil or melted butter and heat over moderate heat until hot but not smoking. Working in batches, scoop 1/8-cup measures of batter into skillet and cook until undersides are golden brown and tops start to look dry, 1 to 2 minutes. Flip and cook until undersides are golden brown and pancakes are cooked through, 1 to 2 minutes more. Transfer to a baking sheet and keep warm in oven. Brush skillet with butter between batches if necessary.

 
Notes:
1.  You can certainly omit the nutmeg, or substitute any other herb or spice you prefer instead.

2.  Don’t have whole-wheat flour?  All-purpose will work just as well.  In fact, you could probably substitute any other type of flour with no problem: rye, cornmeal, spelt, buckwheat, etc.

3.  If you have a lever-mechanism ice cream scoop, those are perfect for dishing up consistent and properly-sized amounts of batter.  Forget pouring, just scoop the batter directly into the hot buttered pan.

Posted in Quick Breads, Savory | Leave a comment

Buckwheat Blini

Week Eleven: Savory Pancakes

blini-wiv-salmon

This week, I decided to feature a type of bread that many people hardly even consider to be “bread” in the first place: the pancake.  And truthfully, I don’t exactly consider the typical fluffy and sweet American pancake to be bread either (there’s a reason why we call it “pancake” and not “panbread”).  But other types of pancakes (unsweet, mind you) most certainly are bread; there is but a fine line between a flour tortilla and a savory crepe.  The main difference is the amount of liquid used, requiring different methods of cooking.  So this week, I’m featuring savory pancakes from around the world, some familiar, some not, but all basically just flour mixed with liquid and cooked on a hot, flat surface.

First up this week is a textbook savory pancake: the Russian blini.  You’ve perhaps come across miniature blini at a posh cocktail party, hidden under a dollop of crème fraîche and topped with caviar or smoked salmon.  And while those are traditional accompaniments, blini are generally larger and thinner in their native land.  The main defining characteristic of blini are the use of buckwheat flour, and that they are yeast-risen.  Many traditionalists will insist that to make them otherwise renders them squarely in the realm of “crêpe” or “blintz”.

In Russia, blini are closely associated with Maslenitsa, the week-long, pre-Great-Lenten Butter Festival.  Also called “Pancake Week”, Maslenitsa is a kissing cousin to the more familiar Carnival, or Mardi Gras celebration.  The Orthodox Great Lent falls at a different time than the Western Lent, though, so the two don’t generally coincide.  As dairy products and eggs are among the forbidden foods during Lent, blini represent the last chance to enjoy such fare.  Made with milk and eggs, cooked with butter, and served with sour cream and more butter, they are off limits for the next forty days.

During the festival, blini may be served at every meal, with caviar, salmon, herring, and many other toppings, which generally become more humble as the week progresses.  Blini are also said to represent the round Sun, a holdover from an ancient Pagan festival dating back as far at the 2nd Century, A.D.  After the 6-month Russian Winter, it’s understandable why they would be lauding the sunshine!

After the rise of Communism, the religious aspect of Maslenitsa was done away with, but people kept on celebrating “Pancake Week”, mainly to get together for platefuls of blini.  Today, religious tones have crept back in to the celebration, but the blini remains firmly in the realm of the secular, enjoyed by nearly everyone at all times of the year.

As a side note, the word “blini” is a Westernization of the Russian word “blin”, which means “pancake”.  When referring to blini in English, native speakers of Russian will usually translate the word and say “pancake” instead of “blini”.  Interesting!

Though blini and Beluga caviar are as natural and expected a pair as tomatoes and basil, they are often served in Scandinavia with any type of fish roe, from whitefish to trout to salmon to herring.   They are typically accompanied by chives or diced onion, and sour cream and melted butter.

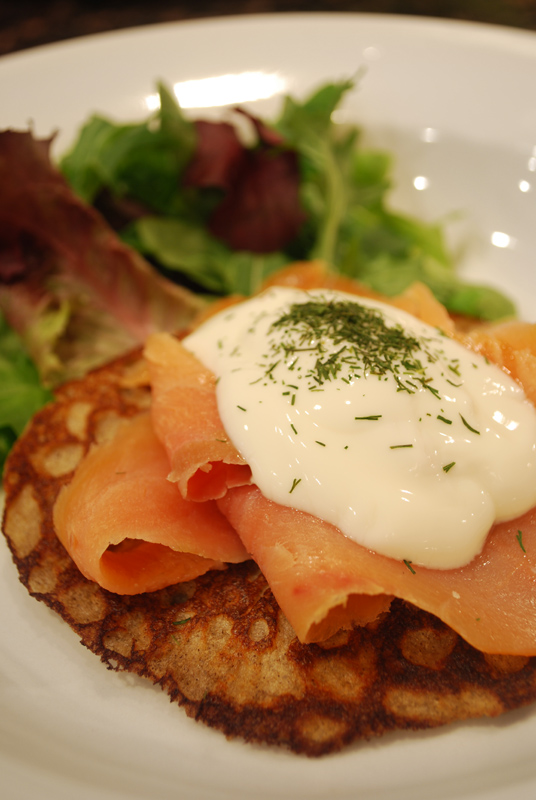
I’m not sure if beer is a traditional ingredient in blini (it is not), but I liked how the malty flavor complemented the buckwheat flour.  I used a Bock (Leinenkugel’s 1888 Bock, to be exact), which is not as heavy as a stout, but has a more robust flavor than your standard lager.  I served these for dinner with smoked salmon topped with plain yogurt and dill, with a little salad on the side.  They were delicious, but the store-bought salmon made me wish I still had some home-cured salmon in the freezer.  If you’re having a party, blini or not, you should absolutely try curing your own salmon sometime.  It’s so, so easy, and far better than anything you can buy.  Cheaper, too!  And since the point of curing is to better a piece of inferior fish, you don’t have to go to much expense.  I’ve seen sides of salmon at Costco for well under $20, and you end up with pounds of cured fish.  Try it sometime!  You can thank me later.

blini


Buckwheat Blini
Adapted from Bo Friberg
Makes about 20 blini, 4 1/2 inches across

2 generous teaspoons active-dry yeast
1 1/2 cups whole milk, at room temperature
5 ounces buckwheat flour (about 1 cup plus 2 tablespoons)
2 ounces bread flour (a scant 1/2 cup)
1/2 cup buttermilk
1/2 cup beer
3 eggs, separated
1 teaspoon salt
1 tablespoon sugar
Butter for greasing the pan

1.  Sprinkle the yeast over the milk.  Whisk in the buckwheat flour and mix to form a smooth paste.  Cover and set aside to rise in a warm place for 1 hour.

2.  Add the bread flour, buttermilk, beer, and egg yolks.  Whisk just until smooth.  Cover and set aside in a warm place to rise again for 1 hour.  After the second rising, the batter may be refrigerated for several hours.

3.  When you are ready to cook the blini, whip the egg whites with the salt and the sugar until stiff but not to the point where dry peaks form.  Fold gently into the batter in three installments.  Preheat the oven to 200º F, and leave a sheet tray on one of the racks.

4.  Generously butter a heavy 10 or 12 inch skillet, or a griddle.  Heat until the surface is hot but not smoking.  Pour 3 or 4 small pools of batter on to the skillet, using slightly less than 1/4 cup batter for each blini.  (They should be 3/8 inch thick; if the batter doesn’t spread properly, thin with a little milk.)

5.  Cook for about 4 minutes on one side, then flip and cook 1 minute on the other side.  You can usually judge when they are ready to turn by watching the bubbles as they form on the surface.  Brush additional butter on the skillet as you turn the blini, if necessary to avoid a dry appearance.  Transfer blini to the sheet pan in the warm oven to keep warm while cooking the remaining ones.

Notes:
1.  As soon as the top of the blini start to look dry, and the bubbles look like they’re setting, they’re ready to flip.  But if they start browning too much, turn your heat down a little, and flip those suckers over!

2.  My blini were cooking properly at a constant medium heat, but depending on your pan and your stove, you may need to adjust the heat.

3.  Oh, and I hope you like blini, because this recipe makes a lot.  I know mine were a little bit smaller than 4 1/2 inches; but good lord, I ended up with nearly 40.  If you’re making miniature ones for a party, this one recipe will provide you with all the blini you’ll ever need.

Posted in Savory, Yeast Breads | Leave a comment

Rustic Dinner Rolls

Week Ten: Dinner Rolls
rustic-rolls

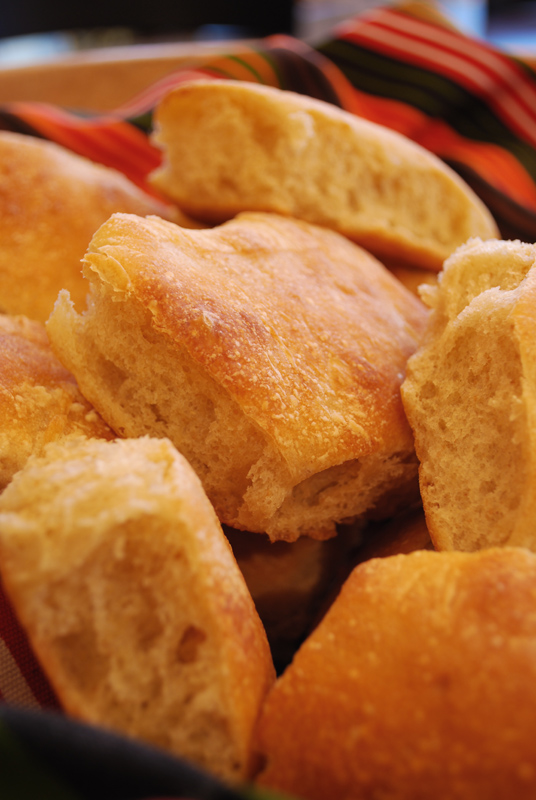
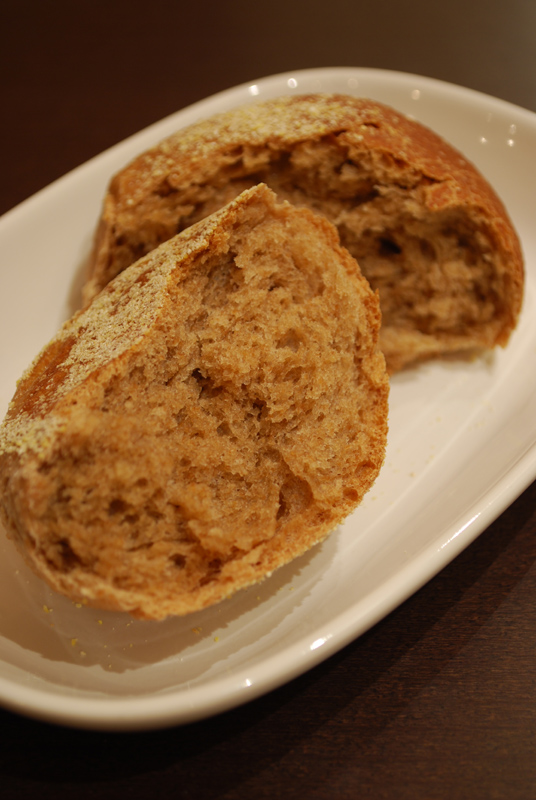
This recipe has the adjective “rustic” in the title, which is basically culinary shorthand for “it doesn’t have to look pretty, and probably won’t, but it will be charming nonetheless”.  These rolls are my favorite type of bread: crusty, chewy, airy, and with a slight and wonderfully sour flavor.  They aren’t the most handsome rolls you’ll ever make, but they taste so good, no one will care.

There is a slightly unusual step here, one that you don’t see very often, but one that can improve the texture and flavor of just about any bread.  It’s called “autolyse”, and it’s basically a cat-nap for your dough.  Right after you mix the ingredients together, except for the salt, you let it rest for 20 or 30 minutes.  This gives the flour time to absorb the liquid, and lets the strands of gluten start to form into a nice, neat, little structure.  It makes the dough much easier to work with, and you don’t have to knead it as much to get a proper chewy texture.

Why don’t you add the salt in?  Long story short, it gets in the way.  You will get the best autolyse without salt, but many’s the time that I’ve mindlessly thrown it in with everything else.  It seems to turn out ok, but it is best done properly.  (Some will also tell you not to add the yeast before an autolyse period, but I don’t know about that one.)

Additionally, there’s a folding procedure in the middle of the rising time.  This is a sort of kneading and punching down all in one, but it’s far gentler.  It helps redistribute the yeast in the dough, deflates some of the gas that might otherwise over-stretch the gluten, and also helps develop the gluten properly.  It might seem trivial, but it’s a very important step.

The best breads I’ve ever made have used both of these techniques, and you can’t really get the same result any other way.  Yes, it takes a little more time to make bread this way than with a standard straight-dough method; but if there’s one thing that breadmaking will teach you, it’s patience.  Good bread takes time; and if it all tastes this good, I for one am very happy to give it all the time it needs.


Rustic Dinner Rolls
Makes 16 rolls

1 1/2 cups plus 1 tablespoon water, room temperature
1 1/2 teaspoons instant yeast, or 2 teaspoons active-dry yeast
2 teaspoons honey
16 1/2 ounces bread flour, plus extra for dusting
3 tablespoons whole wheat flour (about 1 ounce)
1/2 teaspoon salt

1.  Whisk water, yeast, and honey in bowl of stand mixer until well combined, making sure no honey sticks to bottom of bowl.  Add flours and mix on low speed with dough hook until a rough dough is formed, about 3 minutes.  Cover bowl with plastic wrap and let sit at room temperature 30 minutes.

2.  Remove plastic wrap and evenly sprinkle salt over dough.  Knead on low speed for 5 minutes.  If dough creeps up attachment, stop mixer and scrape.  Increase speed to medium and continue to knead until dough is smooth and slightly tacky, about 1 minute.  If dough is very sticky, add 1 to 2 tablespoons flour and continue mixing 1 minute.  Transfer dough to a lightly-oiled large bowl and cover with plastic wrap.  Let rise until doubled in size, about 1 hour.

3.  Fold dough over itself in bowl, rotate bowl one quarter turn, and fold again.  Rotate bowl again, and fold once more.  Re-cover with plastic wrap and let rise 30 minutes.  Repeat folding procedure, replace plastic wrap, and let dough rise until doubled in volume, about 30 minutes more.  Oil two 9-inch round cake pans and set aside.

4.  Transfer dough to floured work surface, sprinkle top with more flour.  Cut dough in half with a bench scraper or knife, and gently stretch each half into 16-inch cylinders.  Divide each cylinder into 8 pieces (you should have 16 pieces total), and dust top of each piece with more flour.  With floured hands, gently pick up each piece and roll in palms to coat with flour, shaking off excess, and place 8 in each prepared pan, cut sides up.  Loosely cover cake pans with plastic wrap and let rolls rise until doubled in size, about 30 minutes (dough is ready when it springs back slowly when pressed lightly with finger).  Adjust oven rack to middle position and preheat oven to 500 degrees F.

5.  Remove plastic wrap from cake pans, spray rolls lightly with water, and place in oven.  Bake 10 minutes until tops of rolls are brown; remove from oven.  Reduce oven temperature to 400 degrees.  Using kitchen towels or oven mitts, invert rolls from both cake pans onto rimmed baking sheet.  When rolls are cool enough to handle, turn right-side up, pull apart, and space evenly on baking sheet.  Continue to bake until rolls develop deep golden brown crust and sound hollow when tapped on bottom, 10 to 15 minutes; rotating baking sheet halfway through baking time.  Transfer rolls to wire rack and cool to room temperature, about 1 hour.

Notes:
1.  Make sure you turn your oven on at least 30 minutes before baking, to make sure it’s properly hot.

Posted in Savory, Yeast Breads | Leave a comment

White Bread Knots

Week Ten: Dinner Rolls

knots 

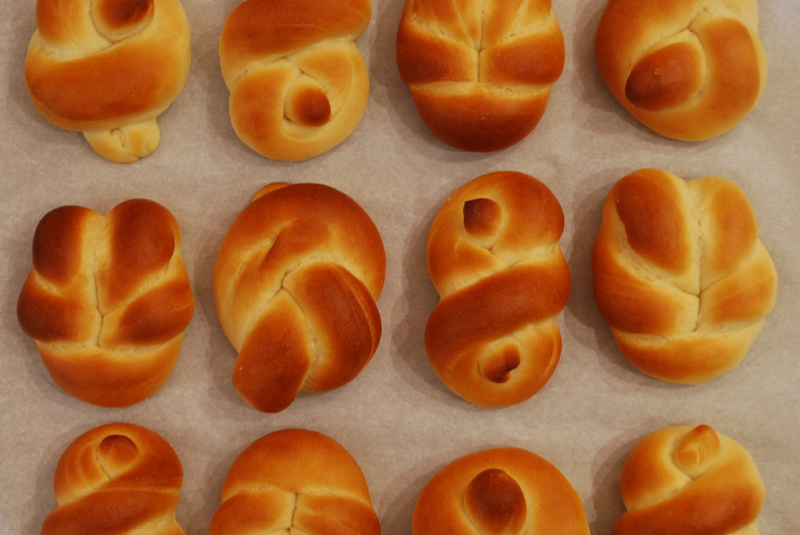
I was pleasantly surprised by this recipe.  Shocked, even.  You see, I dislike your typical white bread knots.  The fancy shape is usually there to cover up lackluster taste, to make you overlook subpar texture with the novelty of a roll tied into a knot.

Well, ok, not exactly.  The knots aren’t really there to mask texture, the poor texture is caused by the knots.  See, the more you work a dough, the more the gluten is developed.  Overdeveloped gluten affects bread two ways: one, by making the bread tough and overly chewy; and two, by failing to trap the gas given off by the yeast, which makes the bread flat and dense.  Letting dough fully rise, rolling it into ropes, and tying those into knots, all help to develop gluten.  In most cases, this results in poorer-quality bread.

This recipe is a bit unusual in that you don’t really need to let the dough have an initial rise.  Also, it’s made with a large percentage of yeast, as well as the use of cool liquid rather than the usual warm liquid.  Why?  Well, it’s all about the gluten.  Basically, we’re making a yeast time bomb here.  When the yeast start producing gases, it stretches the gluten.  You don’t want that sort of uncontrolled gluten activity until the rolls are formed into knots, so we keep everything cold to keep the yeast under wraps until we’re ready for it.  The large amount of yeast means we get the most air produced in the bread in the least amount of time.  Don’t worry, it won’t taste yeasty.

You do knead the dough a fair amount in the initial mixing step, so much that it would be too much kneading in many other bread recipes.  But since you don’t get the help of the yeast to develop the gluten, you’ll need that structure.  I know many of these steps seem counter-intuitive, but you’ll just have to trust me on this one.  It all works out in the end.

Incidentally, this recipe directs you to use a stand mixer.  Making this one by hand is difficult, since your hands will warm the dough too much.  It’s also hard to properly develop the gluten structure needed by hand, especially without adding too much flour.  So don’t let me stop you from trying by hand, but you will achieve the best result with a stand mixer.

The instructions here make a simple single knot, but if you know how to tie more elaborate knots, have at it!  If you like, this dough can also certainly be used to make a braided loaf instead of rolls.  The bread you end up with, however you tie it, is soft, but not aenemic, mild-flavored, but not insipid.  It bakes into cheerful little rolls that are almost a joy to pull apart, and would be a perfect addition to any special bread basket.  Even I would go back for seconds!


White Bread Knots
Adapted from Bo Friberg
Makes about 20 large rolls

4 3/4 teaspoons instant yeast, or 6 1/4 teaspoons active dry yeast
1 1/2 cups cold milk, microwaved on high for about 30 seconds, just to take the chill off
24 ounces all-purpose flour (a scant 5 1/2 cups)
1 1/2 ounces granulated sugar (about 2 tablespoons plus 2 teaspoons)
4 teaspoons salt
6 tablespoons unsalted butter, room temperature
1 egg, beaten with a little water to make an egg wash

1.  If using active-dry yeast, dissolve the yeast in the milk in the bowl of a stand mixer.  Add the flour, sugar, and salt.  If using instant yeast, mix the yeast in with the flour, then add the sugar and salt, then add to the milk.  Mix, using the dough hook, until the dough forms a ball.  Incorporate the butter.

2.  Knead at medium speed until a fine gluten structure develops, 8 to 10 minutes, scraping down the bowl or dough hook as necessary.  Test the gluten by pulling off a small piece of dough and stretching it lightly; if it forms an almost translucent membrane, the dough has been kneaded enough.  Do not overknead.  If the dough is overkneaded, the gluten structure will be permanently damaged, resulting in loose and hard-to-work dough that will not rise properly, if at all, because the damaged gluten cannot trap enough air.

3.  Place the dough in an oiled bowl, turn to coat all sides, cover with plastic wrap and let rise until doubled in volume, about 1 hour.  However, if your kitchen is unusually warm, or if you are inexperienced in forming knots, skip this step.

4.  Punch the dough down.  Place it on a sheet pan lined with parchment paper and flatten it.  Cover and chill for 30 minutes to 1 hour.  If you will not be making the rolls until the following day, you can freeze the dough at this point.  Let thaw before continuing.

5.  Remove the dough from the refrigerator and punch down.  Divide it into four sections, and each fourth into five pieces (about 2 ounces each, you should have twenty pieces total).  Keep the pieces you are not using covered to prevent a skin from forming.

6.  Roll one piece at a time into a 9-inch rope and tie it into a loose granny knot so that the ends protrude just slightly beyond the body of the roll.  Place each formed knot on a sheet pan lined with parchment paper, and cover loosely.  Let the knots rise until slightly less than doubled in volume, about 45 minutes to 1 hour.  Preheat the oven to 400 degrees F.

7.  Brush with egg wash and bake for 15 minutes, or until properly browned.  Remove to a rack and let cool to room temperature.
Notes:
1.   Do not use the milk cold directly from the refrigerator.  It will kill your yeast.  The milk should be slightly cool to the touch, and not warm.

2.  Feel free to add herbs as you like to this dough.  I’m not sure why, but knotted rolls like this are often herbed.  Dill and parmesan are classic and lovely, and chive with garlic powder would be great.

Posted in Savory, Yeast Breads | Leave a comment

Hawaiian Bread

Week Ten: Dinner Rolls

hawaiian-bread-2

This bread is a standard in my grandmother’s kitchen.  My Kentucky-born-and-bred, dairy-farm-living, country-cooking grandmother.  You can find it in the grocery stores, sold as “Hawaiian Bread”, but I’ve also seen it called “Portuguese Sweet Bread”.  Me, I always just recognized it as that yellowish bread in the orange package.  It comes in either a large round loaf, a few large rolls, or a dozen or so small dinner rolls; and this recipe can obviously be made any shape or size you like.

It’s so sweet, it’s almost cake-like.  Fluffy, light, and soft, you can’t beat it when it’s toasted to a golden brown and coated with butter.  And if you’ve ever eaten in my grandmother’s kitchen, you know I’m not kidding when I say “coated”.

I don’t know if anyone has afternoon tea anymore, but this would be an ideal bread to serve with a spot of tea, alongside some clotted cream or crème fraîche, some good butter, and an assortment of good jams and jellies.  I can just see it next to a cup of Earl Grey or Orange Pekoe.  Perfect!

My grandmother, the last time I visited her, served a round loaf of this bread, hollowed out, filled with a spinach dip so good that I had to ask for the recipe (it had water chestnuts in it!).  You were intended to dip toasted cubes of the removed bread into the spinach dip, but we found it far too soft for that use.  I don’t see that as a fault.  Though we ate the dip with pita bread wedges, the bits of the spinach-dip-infused bread bowl that I ripped off tasted just as good!

hawaiian-bread 


Hawaiian Bread

Makes 16 rolls

1 tablespoon instant yeast, or 4 teaspoons active-dry yeast
1/2 cup milk
6 tablespoons unsalted butter, softened
1/4 cup pineapple juice
1 teaspoon salt
3 1/2 cups (15 ounces) all-purpose flour
1/4 cup (1 1/4 ounces) potato flour
2 large eggs
1/2 cup sugar
2 teaspoons vanilla
1/8 teaspoon lemon extract, or 1 1/2 teaspoons lemon zest

In a medium-sized mixing bowl, or in the bowl of an electric mixer, combine all of the ingredients, reserving a handful of the flour, and mixing until the dough starts to leave the sides of the bowl.  You may need a little more or a little less of the indicated amount of flour, add the reserved handful as needed.  If making by hand, transfer the dough to a lightly greased surface, oil your hands, and knead it for 6 to 8 minutes, or until it’s smooth, shiny, and supple. If using a mixer, knead with the dough hook for 5 to 7 minutes, or until smooth, shiny, and supple.  Transfer the dough to a lightly oiled bowl, cover with plastic wrap, and allow the dough to rise till puffy, though not necessarily doubled in bulk, about 90 minutes, depending on the warmth of your kitchen. 

Transfer the dough to a lightly greased work surface, and divide it into 16 pieces. Round each piece into a smooth ball. Place the balls in a lightly oiled 12 x 12-inch pan, or two 9-inch round pans, a 9 x 13-inch pan, 14-inch round pan, etc.  Cover the pan(s), and allow the rolls to rise for about 1 hour; they should double in bulk.  Preheat the oven to 325°F.

Bake the rolls at 325°F for 20 minutes, then tent lightly with aluminum foil, and bake for another 10 minutes. Remove them from the oven when they’re golden brown, and transfer them to a wire rack to cool.

Notes:
1.  Instead of potato flour, you can use instant mashed potato flakes, ground finely in a food processor with a little of the flour.

Posted in Sweet, Yeast Breads | Leave a comment

Honey Wheat Rolls

Week Ten: Dinner Rolls

honey-wheat-rolls

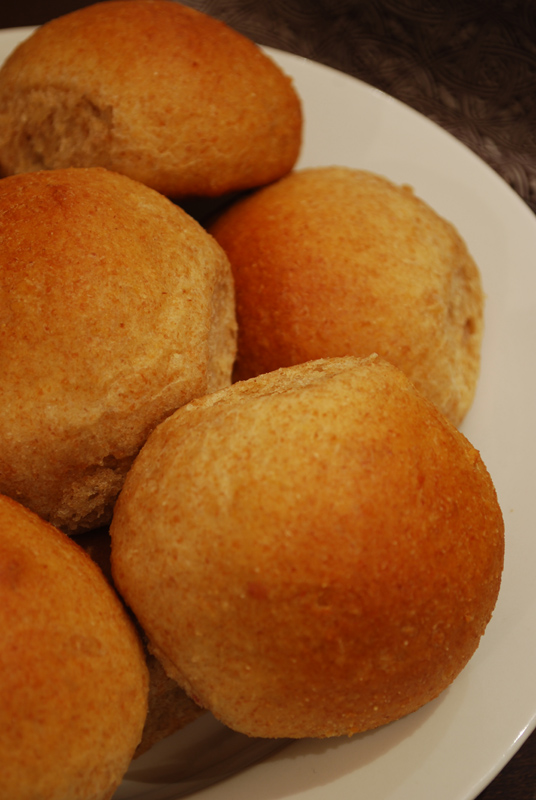
Right then.  I’ll be honest: I have nothing insightful to say about this bread.  It’s a fairly standard, soft-crusted, whole-wheat dinner roll.  I know, I had that lengthy and insightful discussion of yeast yesterday; but I just can’t summon up the brainpower to parlay that into a thoughtful post about this bread today.  I would be sorry, except that this is a fantastic bread.  Man, are these ever tasty!  So I guess I’ll just describe them.

First, I want to explain how good they smell while baking.  About five minutes after they went in the oven, I caught the first hints wafting in the air.  Ten minutes in, and my boyfriend was commenting that they smelled like dessert.  And he was right – they smelled like I was baking a cake.  Notes of honey and sugar, butter and whole grains melted together into a seductive perfume.

Then, when I pulled them out of the oven, I knew at first glance that they would be good.  They were perfectly browned on top, and slightly pale on the sides.  They pulled apart easily, leaving those flappy little bits that are so good to pull off and nibble on.  The flavor was spot on, just sweet enough to complement the grainy whole-wheat flour, and soft enough to be a proper American dinner roll.

Everyone should have a good recipe for something like this; because I assure you, they will receive rave reviews at any dinner party, or especially at Thanksgiving or Christmas dinner.  Like all bread, you can of course make these even a month or so in advance, freeze, and reheat in a 350º F oven, making these a perfect addition to a busy cook’s menu.


Honey Wheat Rolls
From King Arthur Flour

1 packet “highly active” active dry yeast, or 2 1/4 teaspoons active dry yeast, or 2 1/4 teaspoons instant yeast
1 cup lukewarm water
1/4 cup orange juice
1/4 cup (1/2 stick) unsalted butter, cut into 6 pieces
3 tablespoons honey
1 cup unbleached all-purpose flour
2 cups whole-wheat flour
1 1/4 teaspoons salt
2/3 cup instant mashed potato flakes
1/4 cup nonfat dry milk

1.  If you’re using active dry or “highly active” yeast, dissolve it with a pinch of sugar in 2 tablespoons of the lukewarm water. Let the yeast and water sit at room temperature for 15 minutes, until the mixture has bubbled and expanded. If you’re using instant yeast, you can skip this step.

2.  Combine the dissolved yeast with the remainder of the water and the rest of the ingredients. Mix and knead everything together—by hand, mixer or bread machine set on the dough cycle—till you’ve made a smooth dough. If you’re kneading in a stand mixer, it should take about 5 to 7 minutes at second speed. In a bread machine (or by hand), it should form a smooth ball.

3.  Place the dough in a lightly greased bowl. Cover the bowl, and allow the dough to rise, at room temperature, till it’s quite puffy but not necessarily doubled in bulk, about 90 minutes to 2 hours. Rising may take longer, especially if you’ve kneaded by hand. Give it enough time to become quite puffy.

4.  While the dough is rising, lightly grease a 9″ x 13″ pan, or two 9″ round cake pans.

5.  Gently deflate the dough, and transfer it to a lightly greased work surface. Divide it into 16 pieces.

6.  Shape each piece into a rough ball by pulling the dough into a very small knot at the bottom (think of a balloon with its opening knotted), then rolling it under the palm of your hand into a smooth ball.

7.  Place the rolls in the 9″ x 13″ pan, or put eight rolls in each of the round cake pans, spacing them evenly; they won’t touch one another.

8.  Cover the pans with lightly greased plastic wrap, and allow the rolls to rise for 1 1/2 to 2 hours. They’ll become very puffy, and will reach out and touch one another. While the rolls are rising, preheat the oven to 350°F.

9.  Bake the rolls for 15 minutes, and tent them loosely with aluminum foil. Continue to bake until they’re mahogany-brown on top, but lighter colored on the sides, an additional 10 to 13 minutes.

10.  Remove the rolls from the oven, and after 2 or 3 minutes, carefully transfer them to a rack. They’ll be hot and delicate, so be careful. Serve warm, or at room temperature.

 
Notes:
1.  I used pineapple juice instead of orange juice.  It doesn’t really add much flavor one way or another, but the sugar in the juice helps to soften and mellow any harsh flavors in the whole-wheat flour.

Posted in Everything Else | Leave a comment

Dark “Steakhouse” Rolls

 Week Ten: Dinner Rolls

steakhouse-rolls

All right, y’all.  I think it’s high time we had the talk.  You know, the birds and the bees, and all that.  I’m talking about the one living (as in actually alive) part of your bread, the thing that makes so many of you run screaming into the cold night, that’s right, I’m talking about yeast.  (dum dum dummmm!)

Many people I know, who otherwise are daring enough cooks to make their own pasta, or gamely tackle a whole roast pheasant, are scared silly by yeast.*  And believe me, I understand the fear.  Have you seen the selection of yeast out there?  It’s staggering!  There’s Instant, Quick-Rise, Active-Dry, Fast-Acting, Rapid-Rise, yeast for Bread Machines, and fresh yeast, though I probably missed a few.  What does it all mean?  And then you have to be careful about temperatures?  It’s too much!

Lucky for us, though, there are really only two basic types of yeast for the home cook: active-dry and instant.  (Fresh compressed yeast is rather difficult to find, and rarely used by home cooks, so I’ll skip it.)  Any other sort of labeling is really just marketing.  What’s the difference?  

Well, where fresh compressed yeast contains about 70% moisture, active-dry contains only 5% moisture.  This means that the yeast cells are essentially dormant until they get rehydrated.  Note I said “essentially”; they will eventually die without food, hence the expiration date.  Yes, you have to pay attention to that.  It’s literal this time.  Active-dry yeast needs to be rehydrated in warm water, not hot and not cold.  Generally, you want it about 110º F, but as long as it’s lukewarm to the touch, it should be okay.  Hot water will kill the poor little cells, and cold water will make the cell walls rupture (and therefore kills them).  Technically, you don’t have to proof the yeast (that step where you mix it with some water, and wait for it to get foamy), but I always like that extra reassurance that I’m doing it right. 

Instant yeast (or quick-rise, rapid-rise, bread machine yeast, or any other similarly-named product; it’s basically all the same thing) has slightly less moisture than active-dry, but is specially developed to have porous cells that absorb water instantly.  This means that you can mix it directly into the dry ingredients; and, for some very technical reasons that I’m not getting into right now, the water can (and should ideally) be hotter, up to around 130º F.  Now, this so-called “rapid rise” yeast doesn’t actually make your bread rise any faster.  It does, however, give off more gas than any other kind of yeast, so you need less of it to get the same rising.  And since both instant and active-dry yeast is packaged in the same little 1/4 ounce foil packets, you’re actually using more yeast than you need if you use the full amount of instant. 

So now you know the difference between all those types of yeast, and one level of confusion has been swept away.  Now what about temperature?  Ok, it can be a little worrisome, but it’s really not that tricky!  If you have a thermometer (properly calibrated, of course!), all the guesswork is eliminated.  If you don’t, though, a good rule of thumb is to drip a little of the warm water onto the inside of your wrist.  If it feels about skin temperature, then it’s just fine.  If it feels a little warm, that’s fine too; but if it feels hot, then you need to let it cool down, or start again.  That’s all there is to it! 

If your liquid is on the cool side, it may take a little longer to rise, and vice versa for warmer temperatures.  But rise it will, since yeast will continue to multiply and grow for practically forever, as long as there’s still food for them.  This means that even a small pinch of yeast will leaven many loaves of bread, given enough time.  Surely you’re familiar with that No-Knead Bread recipe that’s been all the buzz?  There’s very little yeast in there, but because of the very long rising time, it’s just the right amount.  So the more yeast you use, the faster the bread rises.  Unfortunately, you don’t get the best flavor that way.  That’s why the best-tasting breads often need a day or more to make.

So what exactly does yeast do in bread?  Yeast cells eat sugar (long story short, it comes from the carbohydrates in the flour) and convert it to carbon dioxide (gas to make your bread rise) and alcohol (improves flavor and texture).  The gluten you worked so hard to make holds the carbon dioxide in, and creates little pockets of air.  If you let the dough rise too long, the gas stretches the gluten, which eventually breaks like a rubber band stretched too far, and the texture of the bread is affected for the worse.  If you don’t let it rise enough, there isn’t enough air, and your bread turns out too dense.

Generally speaking, 1/2 ounce of fresh yeast (about one of those foil packets of active-dry or instant) will leaven between 5 and 6 cups of flour in about 1 to 2 hours at room temperature.  Why so inexact?  Well, we’re dealing with living things here.  Many variables will affect your little yeasts: air temperature, humidity, dough temperature, elevation, how much food they’re getting, what sort of flour you use, etc. etc. etc.  But don’t let that scare you off; it’s kind of exciting!  Just think, no matter how many times you make a bread, it’ll turn out a little different every time.  That’s so neat!

Now, if yeast is a living thing, does that mean that vegans can’t eat it?  Technically speaking, I’d have to say yes; but I think that’s a question you have to answer in your own heart.  I am not vegan.  I have no such quandaries.

 This recipe below uses instant yeast, but you can use whatever kind you’ve got on hand.  Just make sure to convert the measurements!  This bread is like the one that’s served at a certain Australian-themed chain steakhouse.  I’ll leave you to figure out which one.  It makes me a little ashamed to admit it, but this bread is absolutely delicious.  I think there’s a special place in hell for the man who invented the typical American Chain Restaurant, you see; but every so often, they do come up with something you just can’t help but love.  I figure it’s much better to avoid the appalling and certain hour-long wait, avoid all the oversized and overpriced plates, and bake the bread yourself in the comfort of your own home.  It’s cheaper, you know what’s in the bread, and it tastes just right.

Oh, and by the way, here’s a general conversion for you:
2 tsp (.22 oz) fresh yeast = 1 tsp (.11 oz) active-dry yeast = 3/4 tsp (.08 oz) instant yeast
Or here is an excellent conversion table that I’ve used before.


Dark “Steakhouse” Rolls
Makes 10 rolls

1 1/3 cups warm water
4 tablespoons butter, softened
1/4 cup honey
1/4 cup molasses
2 3/4 cups (about 12 1/2 ounces) unbleached bread flour
1 3/4 cups (about 7 3/4 ounces) whole-wheat flour
2 teaspoons salt
1 tablespoon unsweetened cocoa powder
2 1/2 teaspoons instant yeast
Yellow cornmeal, for sprinkling on rolls

1.  Combine all of the dough ingredients in the bowl of an electric mixer. Mix until you’ve formed a smooth, slightly sticky dough.

2.  Let the dough rise in the mixer bowl, covered with plastic wrap, for 1 hour. It won’t have doubled in size, but should be just a bit puffy.

3.  Divide the dough into 10 even pieces (about 4 ounces each), and shape the pieces into oval rolls. Coat each roll, top and bottom, with some yellow cornmeal. Place them on a lightly greased or parchment-lined baking sheet, and allow them to rise, covered, in a warm place, for 90 minutes to 2 hours. They won’t have doubled in size, but will appear puffy; when you gently press your finger into the side, the indentation will rebound quite slowly.

4.  Bake the rolls in a preheated 350°F oven for 24 minutes, until the bottoms appear slightly browned (you’ll have to carefully pick one up to look), or until an instant-read thermometer inserted into the center of a roll reads about 200°F. Remove the rolls from the oven, and cool them on a rack. 


* – May not actually be scared completely silly.

Posted in Savory, Sweet, Yeast Breads | 2 Comments

Cloverleaf Rolls

Week Ten: Dinner Rolls

cloverleaf-rolls

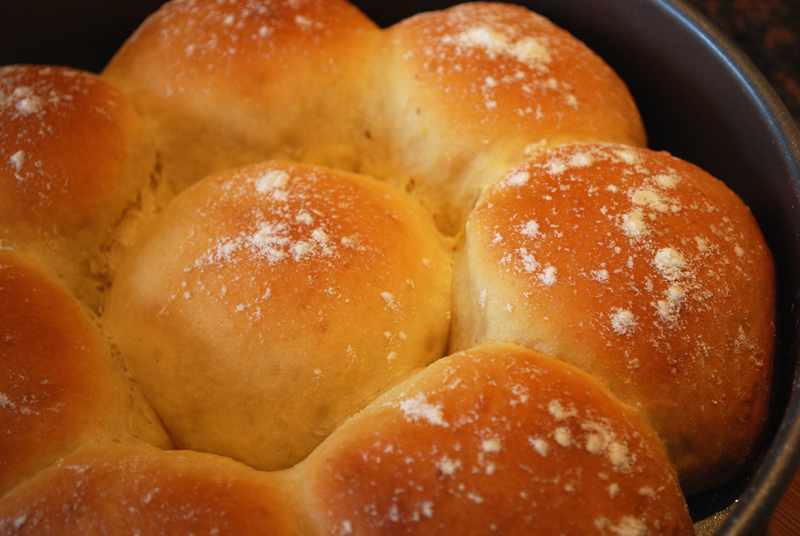
I think everyone in America must have their own memory of cloverleaf rolls.  Maybe you had them every Thanksgiving beside the turkey and cranberry sauce, maybe your grandmother made them for Sunday dinner.  Me, I remember them from any and every cafeteria-style restaurant I ever went to.  When I was little, I happily eschewed every other bread in favor of these lovely, soft rolls.  Forget cornbread and biscuits, those cheerful tri-formed shapes beckoned to me.  The butter liberally and invariably brushed over the tops coated my hands as I pulled them apart.  They always tasted the same, too; soft-crusted, mildly sweet, buttery, and wonderful.  Was there just the one factory somewhere producing them all?  Or did the recipe just get passed around that much?

In recent years, I have acquired a palate for more toothsome breads, ones with a hard crust and airy crumb, or a more nutritious whole-grain bread.  But I suppose I still have a soft spot in my heart for the cloverleaf roll – I don’t remember ever turning one down!  But I have discovered one little secret about cloverleaf rolls: there isn’t exactly a recipe for them.  They fall into a group of about three or four other breads, generally made from the same dough, and simply formed into different shapes.  Other breads like this include fantans, butterflake rolls, Parker House rolls, and a simple milk roll.  This just means that if you have a recipe for any one of these, you can make the others.

This recipe was adapted from a recipe for pull-apart dinner rolls, and includes mashed potato flakes.  Though it’s not standard in these sorts of breads, it contributes texture, a little flavor, and helps hold in moisture, keeping the bread nice and soft.  I figured I’d give it a shot, and I was not disappointed.  These came out beautifully, as cheerful and buttery as in my memory.  Pulling one apart, still warm from the oven, I knew I’d always carry a little love in my heart for these little darlings.


Cloverleaf Rolls
Adapted from King Arthur Flour

2 1/2 teaspoons active dry yeast; or 2 1/2 teaspoons instant yeast
7/8 to 1 1/8 cups lukewarm water*
3 cups all-purpose flour, 1 handful set aside
1 1/4 teaspoons salt
3 tablespoons sugar
6 tablespoons unsalted butter, melted and cooled, plus extra for brushing on rolls
1/4 cup nonfat dry milk
1/2 cup instant mashed potato flakes
*Use the lesser amount in summer (or in a humid environment), the greater amount in winter (or in a dry climate), and somewhere in between the rest of the year, or if your house is climate controlled.

1.  If you’re using active dry yeast, dissolve it with a pinch of sugar in 2 tablespoons of the lukewarm water. Let the yeast and water sit at room temperature for 15 minutes, until the mixture has bubbled and expanded. If you’re using instant yeast, you can skip this step.

2.  Combine the dissolved yeast (or instant yeast) with the remainder of the ingredients, reserving the handful of flour. Mix and knead everything together—by hand, mixer or bread machine set on the dough cycle—till you’ve made a smooth dough. Add the extra handful of flour only if needed.  If you’re kneading in a stand mixer, it should take 5 to 7 minutes at second speed, and the dough should barely clean the sides of the bowl, perhaps sticking a bit at the bottom. In a bread machine (or by hand), it should form a smooth ball.

3.  Place the dough in a lightly greased bowl. Cover the bowl, and allow the dough to rise, at room temperature, until it’s nearly doubled in bulk, about 1 hour. Rising may take longer, especially if you’ve kneaded by hand. Give it enough time to become quite puffy.

4.  While the dough is rising, lightly grease one 12-cup muffin tin.

5.  Gently deflate the dough, and transfer it to a lightly greased work surface. Divide it into 12 pieces.  Divide each piece into three equal-sized pieces.

6.  Covering the remaining pieces, shape each piece into a rough ball by pulling the dough into a very small knot at the bottom, then rolling it under the palm of your hand into a smooth ball.

7.  Place three balls in each of the muffin tin cups.

8.  Cover the pan with lightly greased plastic wrap, and allow the rolls to rise till they’re very puffy, about 1 hour. While the rolls are rising, preheat the oven to 350°F.

9.  Bake the rolls until they’re a deep golden brown on top, about 25 minutes.

10.  Remove the rolls from the oven, and brush with melted butter.  After 2 or 3 minutes, carefully transfer them to a rack. They’ll be hot and delicate, so be careful. Serve warm, or at room temperature.


Notes:
1.  I ran out of all-purpose flour while making this recipe, so I had to make up the remainder with bread flour.  The higher protein content resulted in more gluten, so they ended up being a little tough.  But the taste was still good!

Posted in Savory, Yeast Breads | 2 Comments

Apologies…

…but I have no post for today.  You may have noticed last week that I mentioned I was out of the country; and sometimes flights are delayed, which make you miss connecting flights.  So I have no bread to talk about today, but I promise I will make it up to you on Sunday.  You heard that right: no Monday post this week, but there will be a Super Ultra-Special Mega Sunday post!  Hooray!

And just to make it up to you a little bit, here is a picture of a cat with a heart-shaped patch of fur, sitting on a beach:

 sand-kitteh-2

…that my sister promptly buried in the sand.  My elder sister.  Good times.

sand-kitteh

Posted in Everything Else | 1 Comment