Chocolate Babka

Week Thirty-Seven: Viennoiserie
babka-1

No, I didn’t just make babka.  That was baba.  Totally different.

Well, except for the name: “baba” is Slavic for “grandmother”, and “babka” is the diminutive form, “little grandmother”.  That bit is similar.

Oh, and there’s the fact that there is a Polish creation also called a babka, which is rather like a larger (yes, larger) version of a baba.  But that’s neither here nor there.

Have I thoroughly confused you?  Allow me to elucidate.  Baba, like the ones I made two days ago, are boozy, soused little yeast-leavened cakes.  Polish babka is bigger, shaped more like a kugelhopf, but is iced, not syrup-soaked like a baba.  Jewish babka, the bread I’m making today, isn’t a bit like either of those.

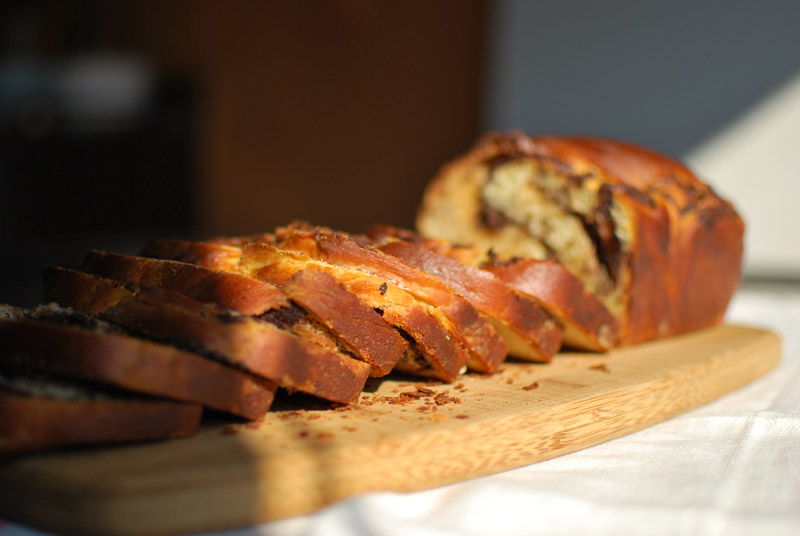
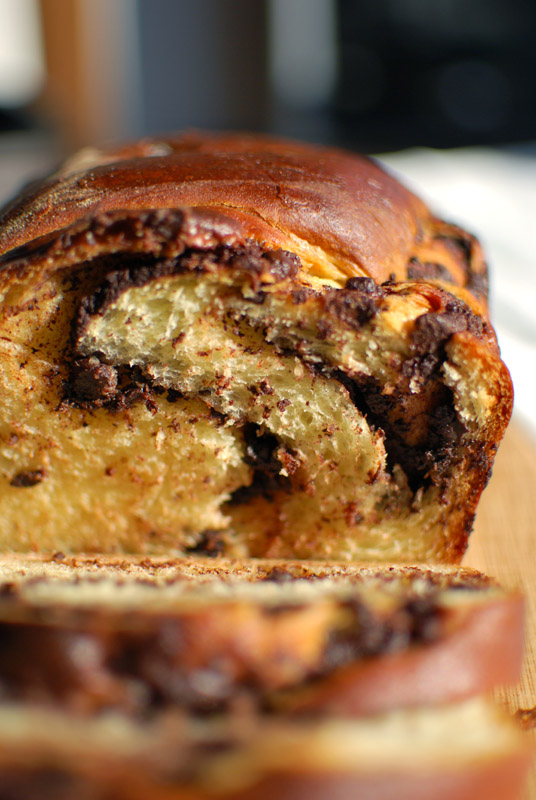
It’s essentially a marbled brioche, which is to say it’s an eggy, buttery bread, rolled up with chocolate or cinnamon inside, then twisted on itself before baking.  It toes that fine line between breakfast and dessert, maybe too sweet for one and not sweet enough for the other… or maybe it’s just right, perfectly suited for both.  (Who says you can’t have chocolate at breakfast?)

Hailing originally from Eastern Europe, babka has become a firm favorite here in the United States.  It is most commonly filled with chocolate or cinnamon, but fruit fillings are also used (and the appropriateness thereof hotly debated).  It can be topped with streusel or left plain.  Like most rich breads, it’s most commonly served at special occasions, but is most common around Hanukkah.

For this version, I’ve used both chocolate and cinnamon in the filling, since I couldn’t decide which I would prefer.  Not to mention, the combination of chocolate and cinnamon is positively enthralling; it’s absolutely one of my favorite pairings.

This bread bakes into an impossibly good loaf, not too eggy or buttery, yet as tender and moist as the finest muffin.  The bright cinnamon spice with the deep bitterness of dark chocolate swirls through each bite, rendering the idea of spreading butter or jam on a slice unthinkable.  And simply because it’s September doesn’t mean you have to wait until December to make it; babka is just as good now as it is at Hanukkah.

babka-2

Chocolate Babka
Adapted from Gourmet Magazine
Makes two 9 x 5 inch loaves

For the dough:
1 pound (about 3 1/2 cups) unbleached all-purpose flour, plus extra for dusting
1/2 cup sugar
2 teaspoons instant yeast
1 teaspoon kosher salt
3/4 cup cold milk
3 large eggs, lightly beaten
1 tablespoon brandy (optional)
1 teaspoon pure vanilla extract
8 tablespoons (1 stick) unsalted butter, at room temperature

For chocolate filling:
1/4 cup sugar
1 teaspoon ground cinnamon
6 tablespoons unsalted butter, very soft, but not melted
7 to 8 ounces good quality bittersweet chocolate (about 60% cacao, if marked), finely chopped

1 large egg yolk beaten with 1 tablespoon milk, for an egg wash

1. In the bowl of a stand mixer, whisk together the flour, sugar, yeast, and salt.  Beat together the milk, eggs, brandy (if using), and vanilla.  Add to the flour mixture.  Using the paddle attachment, mix at low speed until a rough dough forms.

2.  Increase the speed to medium-low, then beat in butter, one tablespoon-sized piece at a time.  Continue to beat until the dough is shiny and forms strands from paddle to bowl, about 4 minutes.  The dough will be very soft and sticky.

3.  Scrape the dough into a large, lightly-oiled bowl.  Cover tightly with plastic wrap and let sit at room temperature until doubled in size, about 1 1/2 to 2 hours.

4.  Line two 9 x 5 inch loaf pans with 2 pieces of parchment paper (1 lengthwise and 1 crosswise).  Mix together the sugar and cinnamon for the filling.  Turn the dough out onto a floured work surface, and gently deflate.  Divide dough into two equal halves.

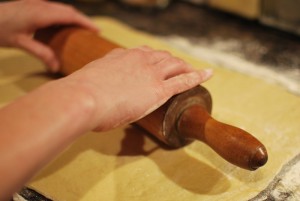
5.  Keeping the unused piece covered with plastic wrap, roll the other out on a well-floured surface to a rectangle about 10 x 18 inches in size.

babka-3

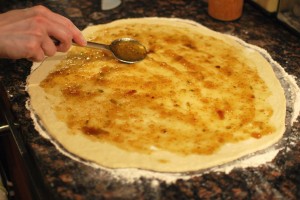
Gently spread 3 tablespoons of the softened butter on the dough, leaving a 1/2 inch border on one long edge.

babka-4

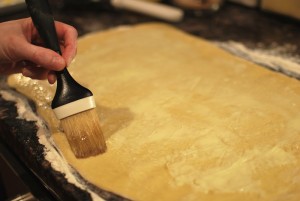
Brush the un-buttered edge with a little of the egg wash.

babka-5

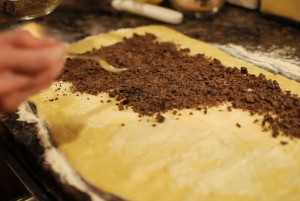
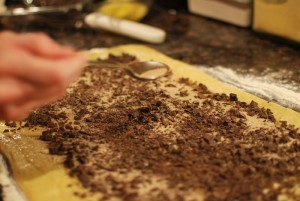
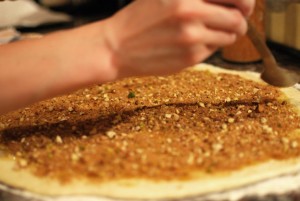
Sprinkle half of chocolate evenly over the buttered dough.

babka-6

Sprinkle half of the cinnamon-sugar over the chocolate.

babka-7

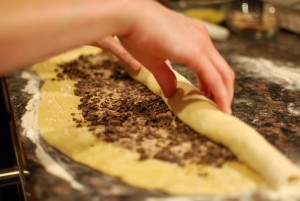
6.  Starting with the long side that isn’t brushed with egg wash, roll the dough jelly-roll style into a long cylinder.

babka-8

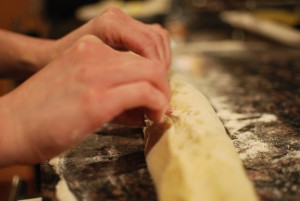
Pinch the egg-washed seam to seal.

babka-9

Bring the ends of the cylinder together, forming a ring.  Pinch the ends to seal.

babka-10

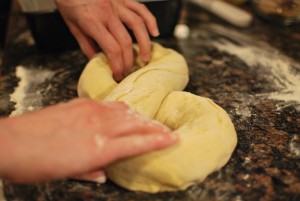
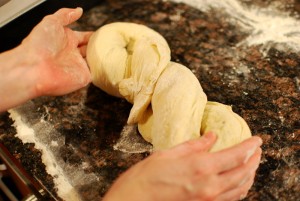
Twist the ring to form a figure 8…

babka-11

…then twist two more times.

babka-12

Place in one of the prepared pans.

babka-13

7.  Repeat shaping and filling procedure with the other piece of dough.  Chill any remaining egg wash, covered, to use later.  Loosely cover pans with lightly-greased plastic wrap, and let rise at room temperature until the dough reaches top of pans, 1 to 2 hours.  Thirty minutes before baking, place an oven rack in the middle position, and preheat the oven to 350° F.

8.  Brush the tops of the dough with some of the remaining egg wash, taking care not to press too hard and deflate them.  Bake at 350º F for 40 to 45 minutes, or until deeply browned.  Transfer loaves to a wire rack to cool completely before cutting.

Notes:
1.  Be sure to let the bread cool totally before cutting; otherwise, the crumb will not have fully set and the marbled pattern will be ruined.

Posted in Sweet, Yeast Breads | Leave a comment

Chouquettes; Or, Pâte à Choux For Dummies

Week Thirty-Seven: Viennoiserie

choux-13

I don’t know if it qualifies as a classic Viennoiserie, but for me, pâte à choux (or, choux paste) has always fallen into that same netherworld, not quite bread and not quite pastry.  Undeniably, most of the items made withpâte à choux are pastries – éclairs, cream puffs, profiteroles, and the like– but the dough itself is quite bready.

Pâte à choux has a reputation for being extremely fussy, finicky, and generally difficult.  And considering the multiple recipes needed for most choux-based items (for éclairs, you need pâte à choux, pastry cream, and ganache?!), it’s certainly easy to understand why the association has been made.

But once you get it down, pâte à choux is actually a simple and straightforward creature.  It’s a pussycat; treat it right, and it’ll all but purr at you.  Don’t get me wrong, my first batches of pâte à choux turned out as flat as pancakes.  Maybe flatter.  But then, I was going off a couple of recipes that offered very little in the way of real instruction, assuming a certain level of expertise that no amount of my headstrong confidence could mimic.  And there certainly weren’t pictures.

I am certain that anyone (yes, even you) can make pâte à choux, if shown how to do it properly.  This is my goal for today, because a freshly made choux pastry is like nothing else in the world, and most bakeries just don’t step up.  Better to eat no choux than bad, stale, flat, or soggy choux.  And really, a choux-less life is hardly worth living.

Once you conquer pâte à choux, you’re just a whipped cream or a ganache away from some truly excellent homemade pastries, ones that suddenly won’t seem quite so out of reach of us mere mortals anymore.  But for starters, I’m giving you a recipe that needs nothing more than a sprinkling of sugar to be complete – but you’ll be shocked at how good that can be.

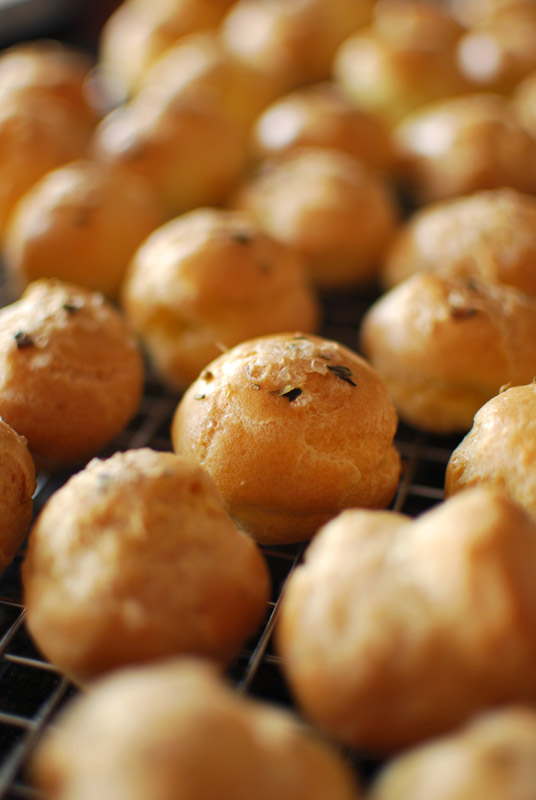
They’re called chouquettes, and are apparently common in French pâtisseries, but sadly are all but unheard of stateside.  Simple and quite addicitive, they’re nothing but bite-sized puffs of pâte à choux, topped with coarse pearl sugar or miniature chocolate chips.  Crunchy on the outside, tender and airy inside, they’re an ideal afternoon snack, as they’re most commonly eaten in France.  If you can resist popping one or two (or ten) in your mouth, you’re a better man than I am.

My savory palate decided that the sweet faction was generally over-represented within this week’s theme, so I topped half of this batch instead with coarse salt and dried herbs, a choice that proved just as good as the pearl sugar, if a little less than authentic.  The only reason chocolate chips don’t make an appearance here is because I was out of them.  Still kicking myself for that one.

I do hope you attempt this recipe.  The only caveat is that a stand mixer is practically required, unless you have bionic arms.  I have attempted pâte à choux by hand, but it’s never quite as good.  This recipe is quite long, but with something like this, the more information, the better; every step I’ve taken the time to write has a purpose, trust me.  I even made a little animated movie for you; that’s how much I care!  As always, I am thrilled to answer any questions anyone might have about the process.

No time like the present, so let’s get on with it!

Chouquettes; Or, Pâte à Choux  (Choux Paste) For Dummies
Adapted from The Professional Pastry Chef, by Bo Friberg
Makes about 100, about 1 inch in diameter

4 ounces (about 1 cup) cake flour
5½ ounces (about 1 cup plus 2 tablespoons) unbleached bread flour
2 cups water, at room temperature
12 tablespoons unsalted butter (1½ sticks)
1/2 teaspoon salt
2 cups eggs (about 8 or 10 large), lightly beaten, preferably at room temperature
Coarse pearl sugar, miniature chocolate chips, or coarse salt, for topping

1.  Preheat the oven to 425º F, and position a rack in the middle.  Have all other ingredients measured out and ready to go.  It is most useful to have the eggs in a measuring cup with a pour spout.  Whisk the flours together, then sift to remove lumps.

2.  In a medium saucepan over high heat, bring the water, butter, and salt to a full rolling boil, so that the fat is not just floating on the top but is dispersed throughout the liquid.

3.  With a sturdy wooden spoon, stir the flour into the liquid, adding it as quickly as it can be absorbed.  However, don’t add all the flour at once, as this can make the paste lumpy.

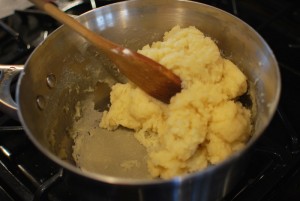
4.  Reduce the heat to medium.  Cook the mixture (now called a “panada”), stirring constantly and breaking up any (usually inevitable) lumps of flour by smashing them against the side of the pan with the spoon.  Be sure to break the mixture up with the spoon, cooking the interior of the panada as well as the outside.  Continue until the mixture forms a mass and pulls away from the sides of the pan, about 2 to 3 minutes.  The goal here is to cook the starch in the flour a little, so it won’t have a floury taste, and will absorb the eggs better in the next steps.  The panada will leave a coating on the inside of the pan (which is easily cleaned off by soaking in hot water for about 10 minutes).  Do not scrape this coating off into the rest of the panada; it will make tough bits in the finished paste.  At this point, it should look like smooth and yellow mashed potatoes.
choux-1

5.  Transfer the paste to the bowl of a stand mixer.  Using the paddle attachment, beat at medium speed until cooled to 140º F, about 1 or 2 minutes.  Try to be as exact as you can about this; you don’t want the eggs to cook when you add them (which they won’t at or under 140º F), but the warmer it is the better they will absorb.  If you don’t have an instant-read thermometer, it should feel warmer than lukewarm, but not yet hot.  It should not be steaming.

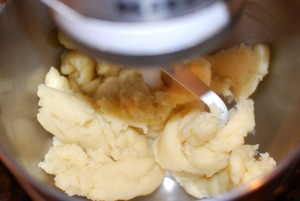
6.  Turn the speed down to low.  As soon the panada has cooled enough, add the eggs, about 2 at a time (or 1/4 cup).  The mixture will look curdled at first, like lumpy scrambled eggs…
choux-2

eggs half worked in

…but will come back together after beating for a few seconds.

choux-3

eggs just worked in

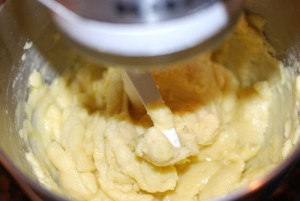
You can increase the speed to help them incorporate more quickly; always decrease to low speed when adding the eggs, though.
choux-4

eggs just added

Keep adding eggs like this, until the paste has absorbed as many eggs as possible and still hold its shape.
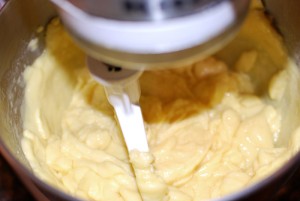
see the lumps?

eggs just added; see the lumps?

It can be a bit runny, but should not be liquid-y.  It will firm up a little after it has cooled more, but not a whole lot.  When in doubt, don’t add that last egg or half-an-egg; as long as you get most of them in there, you’re okay.

7.  After adding the eggs, beat the paste on high speed for a minute or two.  It will cool and become shiny and glossy.
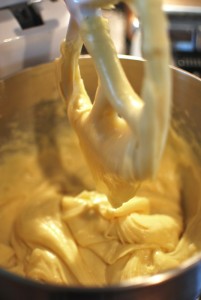
shiny and glossy, a tiny bit runny, but still holds its shape

shiny and glossy, a tiny bit runny, but still holds its shape

At this point, you can relax a little.  The paste will keep with no problems for a bit at room temperature, or up to a day refrigerated.  If you do delay in piping it out, however, make sure to have no part of the paste exposed to air (put it in a plastic zip-top bag, or leave in the bowl and press plastic wrap directly onto the surface), as an unwelcome skin will form on the top.

8.  To shape chouquettes, or any other pâte à choux item, a piping bag is the easiest and cleanest method.  If you don’t have a proper piping bag with tips, you can use a sturdy gallon zip-top bag with the corner cut off, or simply portion and shape with two spoons, or a tiny ice cream scoop.  For the most even portioning, draw an even grid on a sheet of parchment as big as your baking sheet, using permanent marker or heavy pencil.
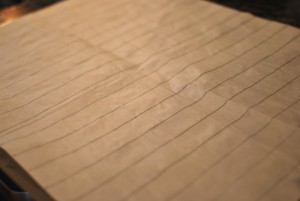
choux-7

Place this your baking sheet, preferably a large one.  Put a second sheet of parchment on top of the gridded one; this is what you will pipe onto.  You should be able to see the grid through the top sheet.
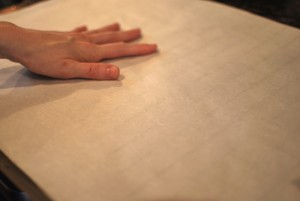
choux-8

9.  Transfer the paste into the piping bag, if using.  Pipe the paste into little rounds, about 1 inch wide.  You should need to use light pressure to make the paste come out of the bag; it shouldn’t run.  When piping, make sure to hold the bag vertically, not at an angle; piping at an angle will make your choux puff unevenly.  Lift the bag straight up as you pipe, to get the tallest mound possible (and therefore the best puff).  Release the pressure with your hands, stopping the flow.  If you’re feeling confident, give the tip a little swirl around the top of the mound, preventing the nearly-inevitable “ice cream cone” tips.  You can see, in this video, the correct piping technique.  The first one came out beautifully (I’m so proud!), while the second one went a little wonky.  This is okay!  You can fix it later.
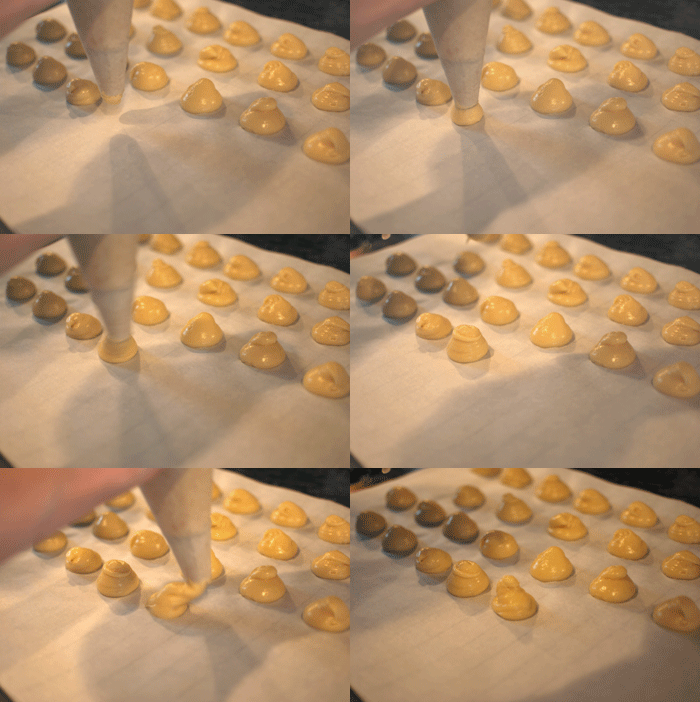
choux-paste

If you have paste left over after piping (you will), just leave it in the piping bag.  Don’t pipe any more out until the first batch is done, as they’ll get a skin while sitting around.

10.  With a moistened fingertip, gently straighten any mounds that may have slumped over, and poke down any points sticking up (as they will burn otherwise).  If you’ve used spoons to portion the paste out, you will have to poke down a fair amount of points.  Do not squish the mounds down; the taller they are, the rounder and less-flat your puffs will be.
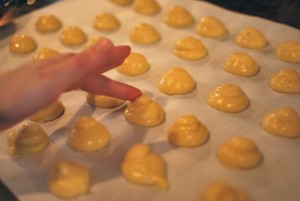
choux-fixin

11.  Slide the lined piece of parchment out from underneath, and reserve for the next batch or batches.
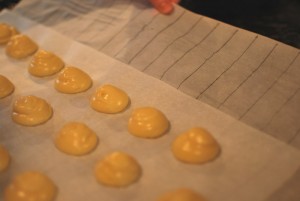
choux-9

Sprinkle the tops of each mound with the pearl sugar, chocolate chips, or salt.  You can press these gently into the paste, but I don’t find it necessary.
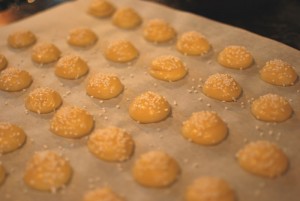
choux-10

pearl sugar

12.  Bake immediately at 425º F for about 10 minutes, or until they puff up a bit, and are just beginning to turn golden.  Without opening the door, reduce the temperature to 375º F, and continue baking for at least 10 to 15 minutes more.  While baking, do not open the oven door at any time, for any reason!  This will make them collapse, and go all flat.  After baking for 20 to 25 minutes total, though, they should be okay to check on.  If they look well golden-brown, they’re probably okay to proceed.
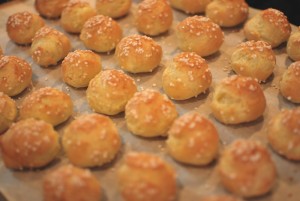
choux-11

If they just look pale golden, bake them for another 5 minutes.  To be sure they’re ready, pull one from the oven, and tear it open.  If it looks shiny and wet, they’re not ready.  If it looks dry or barely moist, it’s fine.
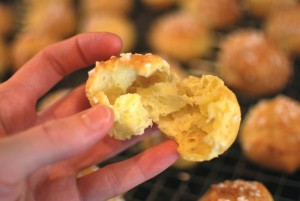
choux-12

13.  Remove the chouquettes from the oven, and quickly pierce the side of each one with a sharp knife, to release steam.  At this point, for security, I usually bake them at 375º F for an additional 5 minutes; but it’s not wholly necessary.  Don’t worry about overbaking pâte à choux, it’s almost impossible to do.  The concern here is underbaking, as the puffs will deflate if not totally set.  When in doubt, you can turn the oven off and leave them for up to an hour.

14.  When done, transfer to a wire rack to cool thoroughly, or as long as you can stand.  Stand back and admire your handiwork; you’ve just made pâte à choux!

Notes:
1.  These will keep for several days at room temperature, in an airtight container.  They will soften when stored like this, but will recrisp beautifully in a 350º F oven for 3 to 4 minutes.  Alternatively, they can also be frozen and reheated for about 5 minutes.

2.  You can use 9½ ounces of all-purpose flour (about 2 cups plus 2 tablespoons), if you don’t have cake and bread flour; I prefer to use the combination.

3.  For a richer pâte à choux, you can use milk instead of water, or an even mixture of the two.

4.  Pearl sugar can be found at some Ikea stores (seriously, I got mine there!), Amazon, King Arthur Flour, or many other gourmet shops.

Posted in Savory, Sweet, Unleavened Breads | Leave a comment

Baba au Rhum

Week Thirty-Seven: Viennoiserie

baba-1

Today’s Viennoiserie offering is a fairly uncommon food, one that you might spot on the occasional dessert menu.  But honestly, there’s no good reason for it.  A baba au rhum (rum baba) is so simple, so accomodating of schedules, and so delicious that there’s simply no excuse for any scarcity.

Babas were supposedly invented by Nicolas Stohrer, pastry chef to exiled Polish King Stanislas Leszczyńska (who arrived in France when his daughter married Louis XV).  Or maybe they were invented by the good King himself.  Or maybe by neither one. The true history is a little fuzzy (but you know how people like stories).  Certainly, Nicolas Stohrer’s Parisian pastry shop, opened in 1730, and the oldest continuously-run pâtisserie in Paris, was the first to sell them, and the first to use the now-classic rum, in 1835.

Whatever the case, it’s fairly certain that the first baba was another bread or cake (possibly kugelhopf) that had dried out too much to be palatable.  To remedy the situation, it was doused in a liquor-based syrup of some sort, and the resulting creation was a smash hit.  The story says it was supposedly dubbed a “baba” after Ali Baba, the famous hero of One Thousand And One Nights, a favorite character of King Stanislas.  But, more likely, it was named after the same Slavic word, meaning “grandmother” or “old woman”.  (It was quite long ago; you really can’t blame people for remembering the more entertaining version.)

A nearly-identical version of baba is called the savarin, named after famed gastronome Jean Anthelme Brillat-Savarin.  They are made with the same dough, but a savarin is usually shaped like a doughnut, and is the larger of the two.  Babas are more often seen in individual sizes, but are always thimble-shaped.  Additionally, babas typically have currants or raisins added, whereas savarins do not.  Here, I’ve made a plain version, so it’s a bit of a cross-breed.

These days, bakers and pastry chefs don’t wait for other items to go stale before making babas; these yeasted pastries are instead baked dry on purpose.  Taste an un-soaked baba, and you’ll be left with a mouthful of cottony crumbs.  But soak those styrofoam-like breads in a liquor-laden syrup, and they happily drink it in, transforming into saturated cakes.  Heavy and nearly dripping with the stuff, one esteemed chef even suggests leaning forward as you bite into one (per his indulgent suggestion of eating one hand-held, on the go), lest you soak your shirt with the runoff syrup.

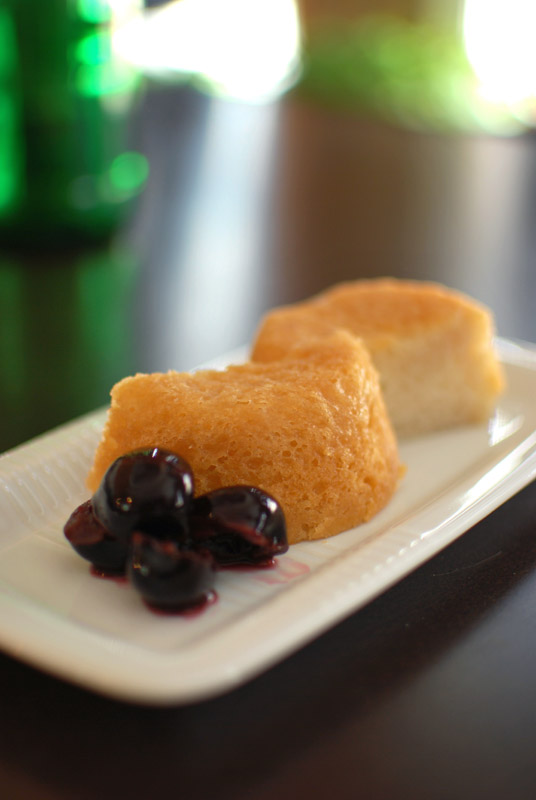
Despite the recommendation, babas are hardly ever eaten by hand, served plated instead, with a traditional cherry garnish.  A bit of whipped cream would not be out of place, but it’s wholly unnecessary, as the pastry itself is so incomparably moist that it’s nearly wet.  I found these a bit on the sweet side, but my sous-chef thought them just right.  If you like, you can reduce the amount of sugar in the syrup recipe, or you can add some lemon juice to bring in some bitterness.

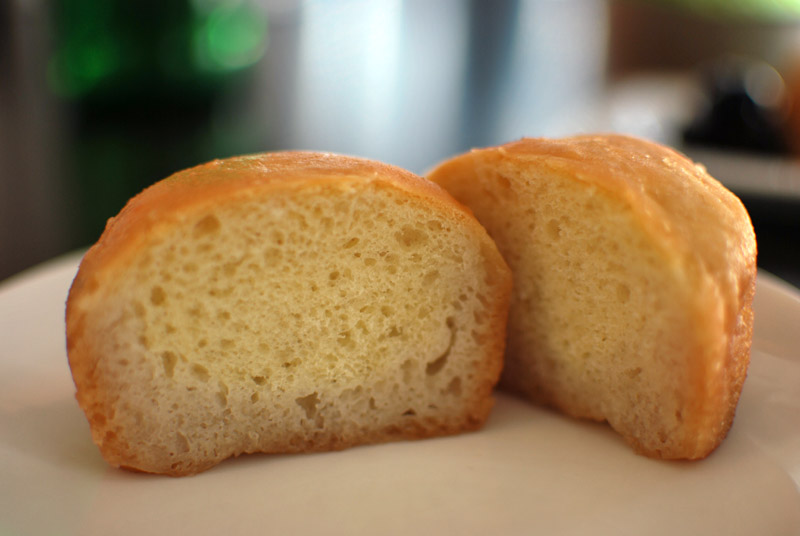
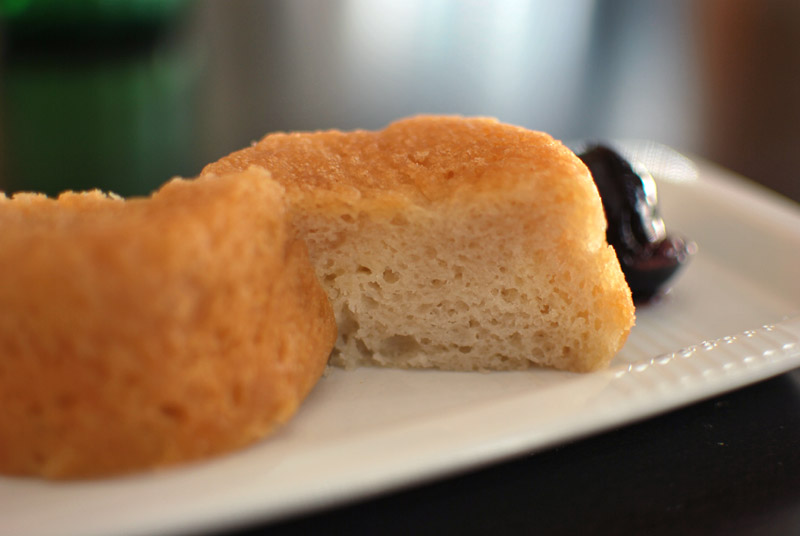
This recipe may look long, but it’s really incredibly simple.  If you can make cookies, you can make babas au rhum.  The method uses a stand mixer for simplicity, but it can just as easily be done by hand if you don’t have one.  Also, I have seen many recipes that soak the babas whole, but I’ve cut the tops off.  I tried to avoid it, but the syrup just didn’t soak through the top crust, leaving most of the interior dry as a bone.  I imagine that if you have properly slender baba molds (or a popover tin), that problem wouldn’t be nearly as bad; my fat babas were baked in muffin tins, and just would not soak properly left whole.

baba-3

not fully soaked

With the tops cut off, however, the syrup had no problems infusing every crumb with its delectable flavor.

baba-2

just right

They may look a little slumped and homely, but one bite will show you that there’s nothing plain about these Janes.  Could this be the perfect dinner party dessert?  It’s soigné, easily made ahead of time, and simple as can be; I’d say it’s certainly in the running.  All I know is I have a fridge full of them, and they’re sure calling my name.


Baba au Rhum
Adapted from The Professional Pastry Chef, by Bo Friberg
Makes 12 individual babas, or 1 large one

For the dough:
3 ounces (about 2/3 cup) unbleached bread flour
2 teaspoons instant yeast
1/2 cup milk
6 tablespoons unsalted butter, melted and cooled slightly
2 large eggs, lightly beaten
1/2 teaspoon salt
6 ounces (about 1½ cups) cake flour

For the soaking syrup:
3 cups cold water
1 pound (2 1/3 cups) granulated sugar
1 orange, cut into quarters (optional)
1/2 cup plus 2 tablespoons rum

1.  In the bowl of a stand mixer, whisk together the flour, yeast, and milk until smooth.  Cover the bowl tightly with plastic wrap and let stand at room temperature until fully risen and beginning to fall, about 1½ to 2 hours.

2.  Oil 12 baba molds, or 12 cups of a nonstick muffin tin, for individual babas.  For a single large one, oil a savarin mold, bundt pan (taking care to get in every crevice), angel food pan, or any other similar pan.  Do not use butter, as this may pit the surface of the baba.

3.  Remove the plastic wrap from the bowl, and whisk in the butter, eggs, and salt until combined.  Add the cake flour.  Using the paddle attachment, beat the mixture at low speed until fully integrated.  Increase the speed to medium-low, and beat for 1 to 2 minutes, or until smooth.

4.  For individual babas, divide the mixture evenly among the 12 prepared tins.  The dough should come about halfway up each tin.  Cover loosely with plastic wrap, and let sit at room temperature until each has risen to the top of the tin, about 30 to 45 minutes.  For a single large baba, spread evenly in the prepared pan.  Cover loosely with plastic wrap, and let rise until doubled in size, about 30 to 45 minutes.  Preheat the oven to 400º F.

5.  Bake the babas at 400º F for 20 minutes, or until golden and cooked through.  Remove from the tins, and let cool thoroughly at room temperature.  These can now be stored at room temperature for a day or so, if necessary (see note 4 below).

6.  While babas cool, make the syrup.  Stir the water and sugar together in a medium pan over medium-high heat until dissolved.  Add the orange, lower the temperature if necessary, and simmer for 5 minutes.  Take the pan off the heat, remove the orange, and add the rum.

7.  To soak the individual babas (see note 2 below for instructions on soaking one large baba), cut the domed tops off each one.  Discard these, or soak separately for baba “cookies”.  Bring the syrup back to a boil, then turn the heat off.  Place one or two babas in the pan of syrup, cut-side up, and press down to submerge.  Each individual baba should take around 30 to 60 seconds to soak thoroughly.  When done, no more bubbles should come out of the pastry.  Make sure the baba is thoroughly soaked by removing from the syrup and cutting a small slit into the center of the baba, to look for any dry spots.  If still dry, be sure to soak the remaining babas for a longer time. 

8.  Remove from the syrup and place, cut-side down, on a wire rack set over a rimmed baking sheet (to catch excess syrup).  Let drain until no more liquid comes out.  When all babas are soaked, if you have syrup remaining, you can re-heat it to boiling, then pour or spoon it over any babas that may need additional liquid (they will feel firm in the center when pressed lightly; thoroughly soaked babas will feel very soft).  Serve as soon as possible, or refrigerate, tightly wrapped, until ready to serve.


Notes:
1.  The syrup will soak into the babas more readily if it is kept hot, just off the boil.  However, you do not want to have the syrup on the heat while soaking the pastries, as the bubbling will disturb the soaking process, and the constant heat will reduce the syrup too thickly.  You can reheat the syrup as necessary between soakings.

2.  The soaking instructions are only given for the individual babas.  For a single baba, cut the domed top off the pastry, and place cut-side up on a wire rack set over a rimmed baking sheet.  Pour or spoon the boiling-hot syrup over, until thoroughly soaked through.  You can re-heat the runoff syrup caught by the baking sheet, if needed.

3.  Though the recipe (and the name itself) calls for rum, any sweeter liquor may be used.  Brandy, bourbon, kirsch, Poire William, or a combination would be good choices.  (Maybe avoid using things like gin or tequila, though.)

4.  Some like to let the unsoaked babas dry out for up to a day, uncovered, so as to better soak up the syrup.  Proceed at your discretion.  They will keep for a few days at room temperature in plastic bags.  The syrup will also keep for several days, refrigerated.

Posted in Sweet, Yeast Breads | 2 Comments

Rugelach

Week Thirty-Seven: Viennoiserie

rugelach-1

Maybe I’m the only person in the world who thinks that a classic rugelach has just as much right to be considered a Viennoiserie as a croissant.  Maybe I’m not.  But I do think that this delightful pastry, too often regarded as a mere cookie, deserves a place in that rarefied world.  It’s bready in texture, yeast-risen (traditionally), and not overly sweet, all characteristics of your work-a-day Viennoiserie.

Rugelach, that most famous sweet from the world of Jewish cuisine, is often regarded as a cookie for good reason: it’s often made just like a cookie, tiny, crisp, and chemically-leavened.  But historically, they were yeast-leavened, and in the best bakeries, they are larger and softer, rendering them more pastry-like.  The dough contains either cream cheese or sour cream, lending a welcome tangy counterpoint to the sugary filling.  They can be made into spirals, but purists might say that the more labor-intensive crescent shape is the only true form for a rugelach.

That crescent shape isn’t the only similarity between a classic rugelach and a croissant; they may also share a common ancestor, the kipfel.  Rugelach are actually known as kipfel in parts of Germany, but the kipfel itself dates back to at least the 13th century.  It’s difficult to ascertain exactly what a kipfel was, but it seems to have been a crescent-shaped, unfilled pastry, made with some sort of sour dairy product.  The deliniation from kipfel into croissant (same shape) and rugelach (similar dough) is easy to see.

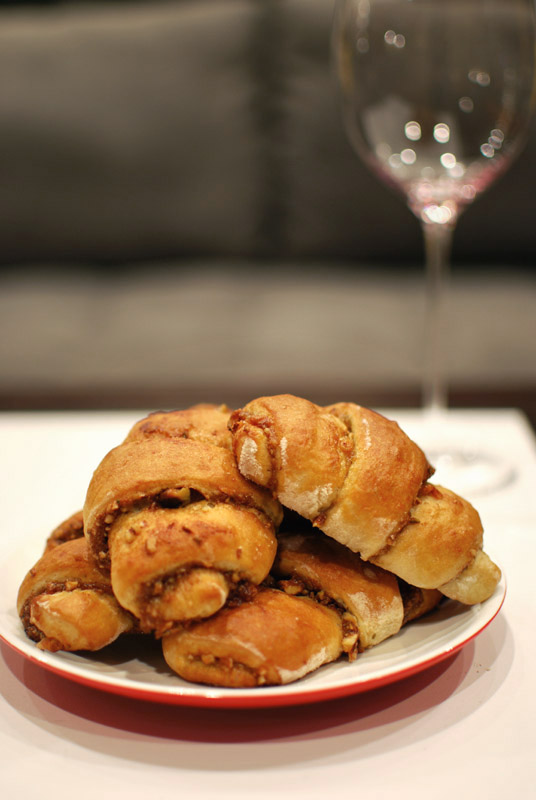
The rugelach that I’ve made for today uses a yeast-leavened dough made with sour cream, as that is apparently the proper match (cream cheese being usually reserved for the chemically-leavened dough).  I filled them with fig jam and an even mixture of pistachios, walnuts, and almonds, purely because I love those flavors together.  You could use instead any number of fillings: any flavor jam or preserves, any type of nut, dried fruit, chocolate, poppy seeds, or a combination of all of the above if you’re feeling indulgent.  You’re only limited by your imagination.

This recipe makes 24 good-sized rugelach, about the size of a small croissant.  You could make them smaller, but once you taste one, you’ll be glad you didn’t.  These rugelach are tender as can be, with very little gluten-y chew to the dough.  The sugar filling is sweet without being cloying, and the finely chopped nuts bring a lovely crunch to the texture.  You could enjoy these just as easily for breakfast, over a cup of tea and a newspaper, as you could for dessert, aside a bitter espresso with a lemon twist (and that glass of wine wasn’t half bad with one, either).


Rugelach
Makes 24 rugelach

For the dough:
13 ½ ounces (3 cups) unbleached all-purpose flour, plus extra for dusting
3 tablespoons sugar
1 tablespoon instant yeast
1/2 teaspoon kosher salt
1/2 cup (1 stick) butter, melted and cooled
1/2 cup sour cream
1 egg
1/2 cup milk, at room temperature
1/4 cup water, at room temperature
1/8 teaspoon almond extract

For the filling:
1/2 cup brown sugar
1 ½ cups nuts, toasted and finely chopped (any kind, or a mixture)
1 ½ tbsp ground cinnamon
1 cup jam or preserves (any flavor)

1 egg beaten well with 1 tablespoon water, to make an egg wash

1.  To make the dough, whisk together the flour, sugar, yeast, and salt.  Set aside.  In the bowl of a stand mixer, whisk the melted butter and sour cream together.  Add the egg, and whisk until well blended.  Mix in the milk, water, and almond extract.

2.  Add the dry ingredients to the wet ingredients.  Using the paddle attachment, combine at low speed until fully incorporated, about 2 minutes.  The dough should look very sticky and wet.

3.  Lay two long sheets of plastic wrap on a work surface.  Scrape half of the dough onto each sheet of plastic wrap, dividing as equally as possible.  Wrap the dough in the plastic wrap, completely but not too tightly.  Refrigerate the dough for 30 minutes.  Preheat the oven to 375º F.

4.  While the dough chills, make the filling.  Whisk the sugar, cinnamon, and nuts together.  Place the jam in a bowl, and break up with a fork.  You may need to heat the jam briefly in the microwave until warm (not bubbling) in order to make it spreadable.  If your jam has large chunks of fruit in it, you can purée it quickly in a food processor until smooth.  Lightly grease two large baking sheets, or line with parchment paper or silicone mats.

5.  Unwrap one piece of chilled dough, leaving the other in the refrigerator, and place on a well-floured surface.  Roll the dough out to a 12 inch circle, or about 1/8 inch thick.  Gently spread half of the jam over the dough.

rugelach-2

Dust liberally with half of the sugar and nut mixture.

rugelach-3

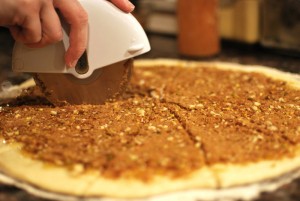
6.  Using a pizza cutter (or any other suitable device), cut the circle into 12 equal wedges, as you would cut a pizza.

rugelach-4

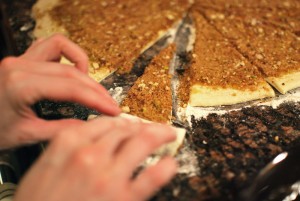
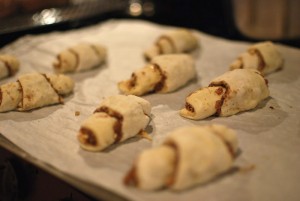
Starting with the wide edge (the “pizza crust” side), roll each wedge up into a tight spiral, ending with the point of the wedge.

rugelach-moohers

Transfer the rugelach to the prepared baking sheet, placing so that the tip of the wedge is on the bottom.

rugelach-moohers-2

Form into a crescent shape, or leave straight.  Repeat with each wedge, and with the second piece of chilled dough.

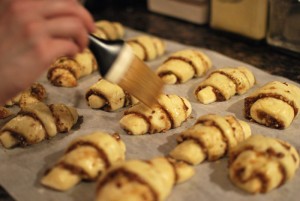
7.  Let the rugelach sit at room temperature until lightly risen and puffy, 20 to 30 minutes.  When ready, lightly brush each with the egg wash, taking care not to press too hard and deflate.

rugelach-5

8.  Transfer the rugelach to the oven, and immediately reduce the temperature to 350º F.  Bake at 350º F for 20 to 25 minutes, or until golden brown.  Let cool on the sheets for 5 minutes, then remove to a wire rack to cool thoroughly.


Notes:
1.  For the filling, I used fig jam and an even mixture of pistachios, walnuts, and almonds.  Any flavor combination you like will certainly be just as good.

2.  To make spiral-style rugelach, instead of these crescents, roll the dough out into a rectangle in step 5, rather than a circle.  Fill as directed with the jam and nut mixture, then roll up into a cylinder, jelly-roll-style.  Cut the cylinder crossways into 1 inch pieces, and place as-is on the prepared baking sheet (do not turn the cut side up).  Bake as directed, checking after 15 minutes, as they may bake more quickly.

Posted in Sweet, Yeast Breads | 4 Comments

Light Brioche Buns

Week Thirty-Seven: Viennoiserie

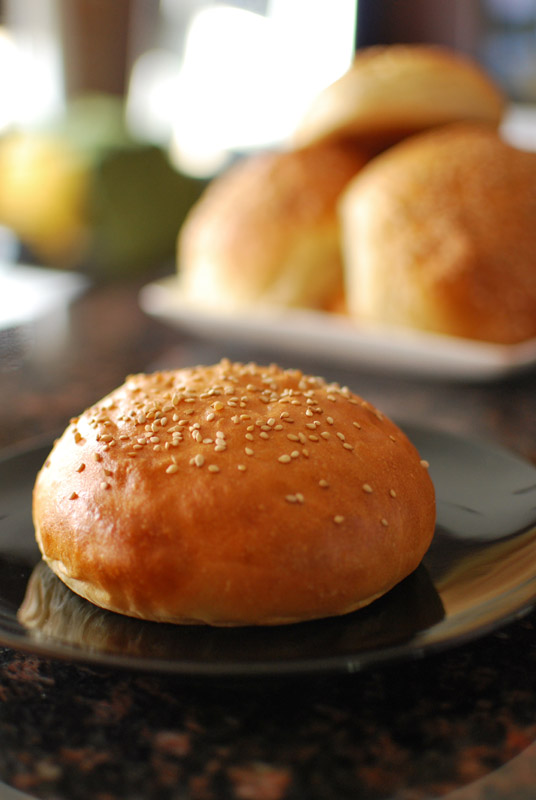
brioche-1

This week, I’ll be discussing a type of bread that many people may not even think of as bread.  The French term for this group is Viennoiserie, and literally translates to “Viennese specialties”.  Though many people mistakenly equate the word with “breakfast pastries”, it refers to any baked good made with leavened dough enriched with ingredients like butter, milk, eggs, and sugar.  Sweeter and richer than most breads, they’re not quite yet pastry; but if that renders them bread no longer, then I’ll eat my hat.

In honor of Labor Day, I’ve made what are quite possibly Plato’s Ideal burger buns.  I know, I know, I’ve already made burger buns.  And they were pretty good, but these are just exquisite.  To be successful, a good burger bun must be mild-flavored, so as not to overwhelm any fillings, but it must not taste insipid either.  It must be soft enough to bite into easily, but must also be sturdy enough to stand up to the juciest burger.  Oh, and it should look pretty, too.  Does this brioche bun cover all those bases?

Yes, and in spades.  Previously, my burger buns were a jacked-up, posh version of the sort of bun you find on any grocer’s shelf – quite tasty, but maybe a little too soft.  It had a good flavor, but still reminded me a bit of those pale imitators, a bit sweet, a bit too doughy.  Today’s buns, however, taste complex but subtle, not overly rich, not too bready.

The dough here is a light version of brioche, that queen of all enriched breads.  Brioche is typically an unsweet, very rich bread, with a flaky texture and sturdy structure.  Made less buttery, then, it is the perfect base for the ultimate burger bun.  Because of the sturdiness, it can easily handle any burger, the crisp-toasted crust providing an adequate barrier for runaway jus.

This recipe originally comes from Comme Ça, a restaurant in Las Angeles that I’ve never been to.  The New York Times, however, has.  They enjoyed themselves so much, in fact, that they dubbed the Comme Ça burger the best in the entire nation.  And since you obviously can’t have a good sandwich without good bread, I figured this bun had something going for it.  After I saw the gushingly blissful review over at Smitten Kitchen, I knew I had to try it.

All the hype is for good reason.  This really is an amazing burger bun.  The flavor is spot on, neither too mild nor too assertive.  That showy, buttery quality of a standard brioche is tamed here, leaving only an accent to pair beautifully with a charred beef burger (think maitre d’hotel butter atop a sizzling filet), yet the “please dunk me in some coffee or something, already!” characteristic remains; these buns beg to be drenched in dripping meat juice.

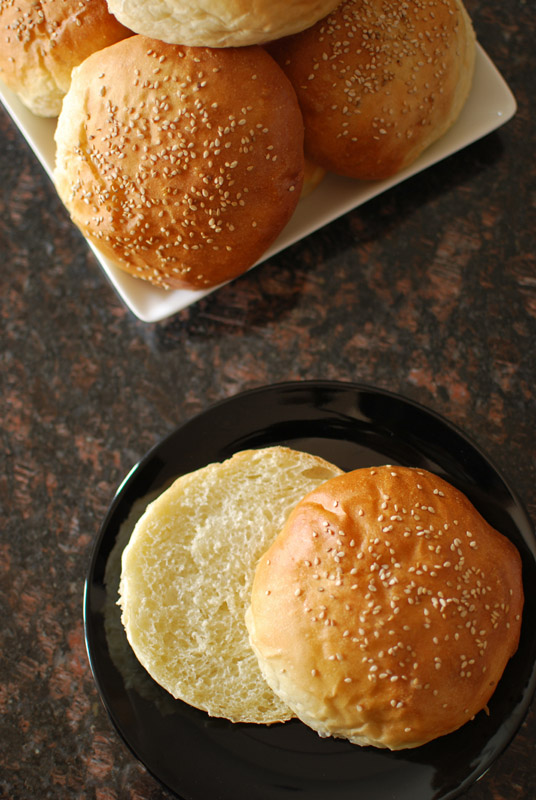
And talk about pretty!  These golden beauties will turn heads, even before you fill them with anything.  Personally, I like sesame seeds on my burger buns, but feel free to omit them if you like.  However, don’t omit the egg wash on top; it’s what gives them their pretty sheen and rich hue.  With their even-textured crumb, excellent flavor, and straightforward mixing method, these buns aren’t just great, they’re a perfect ten, sure to be the ideal accent to any burger.

brioche-2

Light Brioche Buns
Adapted from Comme Ça in Los Angeles, via the New York Times
Makes eight 4 to 5 inch buns

15 1/2 ounces (about 3 1/4 cups) unbleached bread flour
2 ounces (about 1/2 cup) unbleached all-purpose flour
1 1/2 teaspoons instant yeast
1 1/2 teaspoons salt
1 cup water, at room temperature
1/4 cup milk, at room temperature
2 tablespoons honey
1 large egg, lightly beaten
2 1/2 tablespoons unsalted butter, at room temperature
1 egg, beaten with 1 tablespoon water, for egg wash
Sesame seeds, for finishing

1.  In the bowl of a stand mixer, whisk together the flours, salt, and yeast.  Add the water, milk, honey, and egg.  Using the dough hook, mix at low speed for 2 to 3 minutes, or until well-combined and smooth, scraping the bowl down as needed.  Add the softened butter in small pieces, kneading until fully incorporated.

2.  Increase the speed to medium-low, and knead for about 6 or 7 minutes, or until smooth and elastic.  The dough should look very sticky and slack.

3.  Scrape the dough into a large, lightly oiled bowl.  Cover tightly with plastic wrap, and let sit at room temperature for 1 to 2 hours, or until doubled in size.

4.  Lightly grease a large baking sheet or two smaller ones, or line with parchment paper.  Turn the dough out onto a floured surface.  Being careful not to incorporate too much flour (which will make tough rolls), knead the dough a few times with lightly-floured hands, deflating it as you do so.

5.  Divide the dough into 8 equal pieces.  Keeping the unused pieces covered with plastic wrap, form each piece into a round ball with a skin stretching around the outside.  Flatten it slightly, dust off any excess flour, and transfer to the prepared baking sheet, smooth side up.  Cover loosely with lightly-oiled plastic wrap, and repeat with the remaining pieces of dough.

6.  Let rise at room temperature until doubled in size, about 1 to 1 1/2 hours.  Thirty minutes before baking, preheat the oven to 400° F, and position a rack in the lower third of the oven.

7.  When fully risen, remove the plastic wrap.  Gently brush each bun with the egg wash, taking care not to deflate them, and sprinkle each with sesame seeds before the egg wash dries.  Spray or sprinkle the buns with water, then transfer to the oven.

8.  Bake the buns at 400° F for 15 to 20 minutes, or until well-browned on top.  Remove to a wire rack to cool thoroughly before serving.

Notes:
1.  These  buns are best served split horizontally, brushed with a little butter or olive oil, and toasted quickly under a hot broiler.

Posted in Savory, Yeast Breads | 4 Comments

Bara Brith (Welsh Spotted Bread)

Week Thirty-Six: Breads of the United Kingdom

bara-brith-2

In the United Kingdom, people drink a staggering 1,000 cups of tea per person per year.  For contrast, the average American drinks about 550 cups of coffee per year.  It makes perfect sense, then, that many traditional British breads go so well with tea.  No offense to the blueberry muffin, but a blueberry scone is far more appropriate at tea time.

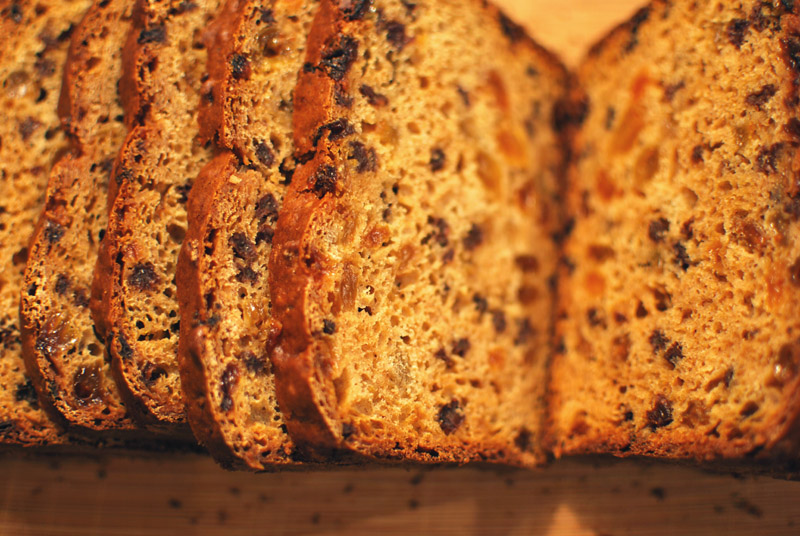
The bread for today, bara brith, takes that tea-esque pairing to a whole new level, using black tea to plump dried currants and golden raisins.  The soaking liquid is then used as the primary source of moisture in the loaf, infusing every last mote with the light smoke and gentle bitterness of the tea, and turning the currants and raisins into saturated bombs of jammy goodness, waiting like land mines to explode onto your tongue.

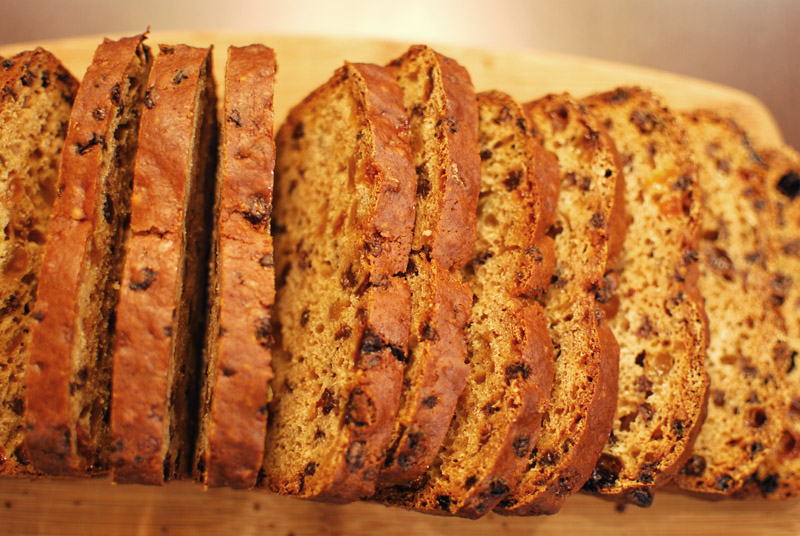
Bara brith is a popular Welsh treat, readily available at most bakeries and tea shops.  It can be either yeast- or chemically-leavened, but both versions are heavily spiced, and dotted throughout – the name translates literally to “speckled bread” – with the aforementioned dried fruit, and often candied citrus peel as well.
I decided to make the quick bread version of bara brith, delicious as the yeasted type sounds, purely because of those tea-soaked fruits.  Very moist objects such as these are difficult to work evenly into a yeast dough, but cause no problem at all in a quick bread.  You could refrain from soaking the fruits, leaving them drier and more easily incorporated; but every Wesh gran from Cardiff to Llandudno will tell you that without the tea soak, it’s simply not a proper bara brith.
Stealing a brilliant trick from one recipe I found, I’ve incorporated candied orange peel in the form of orange marmalade.  Candied peel is often hard to find outside of Christmas time, and I found it too time consuming to make separately, but wanted the hit of citrus all the same.  I used a bitter Seville orange marmalade, in order to cut the sweetness a jam would certainly provide.  The chunky bits of peel brought a fabulous contrast to the sugary currants and raisins, and added a welcome brightness to the loaf.

When mixing this batter together, the generous amount of cinnamon, allspice, and clove smelled exactly like Christmas to me, and made me actually crave a glass of eggnog, despite the sunny, late-summer afternoon waiting outside my window.  In lieu, however, I made a cup of tea, and dreamily took in the smells wafting expectantly from the oven.

After the long, slow baking, when I finally got to sample a slice, it tasted even better than it smelled.  Moist, full-flavored, tender, spiced, it was everything I’d hoped.  Though it would be perfect to serve beside a sparkling Christmas tree, it was surely just as good with my summer mug of Earl Gray.  Those British sure do know how to make a tea pairing, don’t they?

bara-brith-1

Bara Brith (Welsh Spotted Bread)
Makes one 9 x 5 inch loaf

8 ounces water
1 bag black tea (such as English breakfast or Earl Gray)
2/3 cup granulated sugar
3 tablespoons orange marmalade (preferably a bitter orange, such as Seville oranges)
4 ounces (about 3/4 cup) dried currants
6 ounces (about 1 1/4 cups) golden raisins
1 1/2 ounces (1 jigger) brandy (optional)
12 ounces (1 3/4 scant cups) unbleached all-purpose flour
4 teaspoons baking powder
1/2 teaspoons kosher salt
1 teaspoon ground cinnamon
1 teaspoon ground allspice
1/4 teaspoon ground cloves
1 large egg
1/2 cup milk

1.  Bring the water to a boil in a medium saucepan.  Add the tea bag, and steep for 5 minutes, covered.  After 5 minutes, remove the tea bag and discard.  Add the sugar, and stir until dissolved.  Mix in the marmalade.  In a heat-proof bowl, combine the currants and raisins.  Pour the tea mixture over, and add the brandy (if using).  Cover tightly, and let stand at room temperature for at least 1 and up to 24 hours (overnight is typical).

2.  Preheat the oven to 325º F.  Butter a 9 x 5 inch loaf pan, and line with parchment paper.

3.  In a large bowl, whisk together the flour, baking powder, salt, cinnamon, allspice, and cloves.  Whisk the egg and milk together, and add to the flour mixture.  Add the soaked dried fruit, and all the soaking liquid.  Using a spatula, gently mix together until just combined, and all the dry ingredients are moistened.

4.  Scrape the batter into the prepared loaf pan, and bake at 325º F for 2 hours, or until cooked through.  When done, a skewer will come out clean when inserted into the center.  Start checking the bread after it has baked for 90 minutes, and every 15 minutes thereafter.  If it begins to brown too much, loosely cover the loaf with aluminum foil and continue baking.  When fully baked, let cool briefly in the pan, then turn out onto a wire rack to cool thoroughly before slicing.

Notes:
1.  Bara brith will keep several days at room temperature, in an air-tight container.  It may also be frozen and reheated in a 350º F oven until heated through.  Though not traditional, it is delicious toasted.  Serve with butter or clotted cream, and a cup of the same tea used in the recipe.

Posted in Quick Breads, Sweet | Leave a comment

Sally Lunn

Week Thirty-Six: Breads of the United Kingdom 

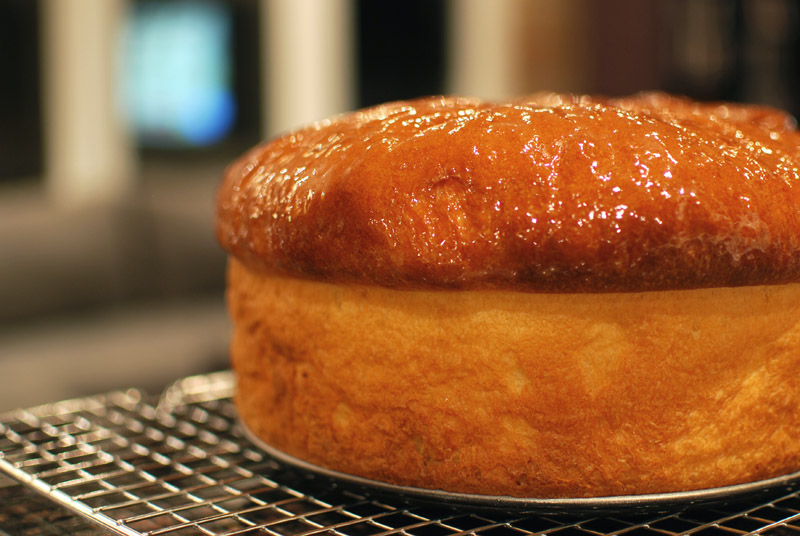
sally-lunn

Move over, brioche.  King cake, step aside.  You too, challah.  There’s a new lass in my life, and her name is Sally Lunn.  She’s a giant fairy of a bread, softer than down, nearly as tall as she is wide, and my heart’s been conquered.

This teatime treasure from Bath, England is ubiquitous there, but relatively rare throughout the rest of the country.  In Bath, you can visit Sally Lunn’s house, which purports to sell the “original Bath Bun”.  This isn’t entirely accurate, however, as a Bath Bun and a small Sally Lunn are two different creatures, despite their similarities.

Both are made with a rich, white dough, both are round and tender buns, and both are almost exclusively served at tea.  But Bath Buns typically have a dried fruit and sugar topping; Sally Lunns are plain or glazed simply with sweetned milk, but may be split horizontally and filled with clotted cream; then, they are generally called Sally Lunn cakes.  Additionally, a Bath Bun is nearly always small, in individual portions; a Sally Lunn is more often as big around as a dinner plate, though they can be made smaller as well.

A French girl with a name anglicized to Sally Lunn, who may or may not have even existed, was supposedly the namesake of these delectable breads.   She is said to have arrived in Bath as part of the Hugenot exodus in the 1600’s, a claim supported by the very brioche-esque quality of the Sally Lunn (brioche, of course, being a thoroughly French bread).  However, I am always skeptical of any foodstuff that claims to trace its lineage back to a single person, especially so over the course of 300-plus years.  Another etymological suggestion is that the name was bastardized from the French “soleil et lune”, meaning “sun and moon”; which is a more reasonable suggestion, but still uncertain.

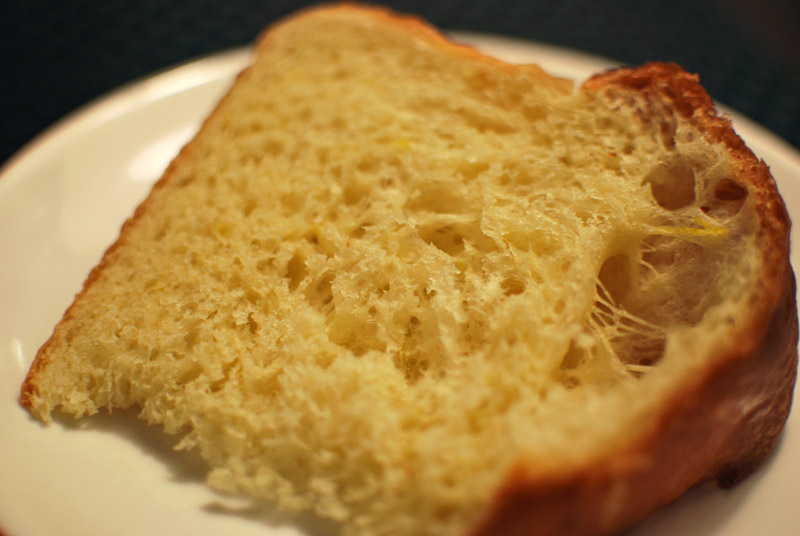
Whatever the origin of the name, I doubt you’ll find a soul capable of resisting the charms of a vrai Sally Lunn.  Are you familiar with the texture of an angel food cake?  If you’ve ever sliced one, you’ll remember the trepidation as you cut into it, fearful of flattening the diaphinous cake with even the weight of the knife, let along the force needed to separate one piece from another.

The same worry will come over you as you slice a Sally Lunn, as the ethereal texture is remarkably similar.  But don’t be too afraid; the texture seems to bounce back miraculously.  Even after storing slices overnight in a crowded plastic bag, they were hardly damaged.  I’m not saying you can sit on it and no harm will come, but cutting won’t hurt it one bit.

Though this may be the largest loaf of bread you’ve ever made – it will surely be the tallest – it seems to weigh hardly anything.  The egg, milk, and butter, spread out so widely through the loaf due to its airiness, don’t render the same heavy and sometimes even cloying attributes that they can in many similarly-enriched and denser breads.  (Brioche, I’m looking at you.)  With the barest suggestion of lemon, and the gentlest gluten-pull in each bite, this may just be the pinnacle of its breed.

Here, I’ve used a 10-inch diameter, 2-inch tall springform pan with no problem whatsoever in baking.  I dare say the springform pan made the airy loaf easier to remove from the pan as well.  The top did “mushroom” a bit, but if you prefer a straighter-sided Sally Lunn, you can use a regular cake pan with a collar (instructions given in note 1 below), or any tall metal pan, such as a bundt pan or angel food cake pan.  Individual Sally Lunns can also be baked in muffin tins, if you prefer, and would be an adorably chic addition to any tea party.

The best thing about this bread – aside from the impeccable texture and flavor – was its ease in creation.  If you have a stand mixer, it’s about as simple as any other yeast bread.  It can be made by hand, but take care not to add too much flour in the kneading process if you do.  The ingredients are common and uncomplicated, and the results are astonishing.  Who knows?  Maybe next year, I’ll have to make a Sally Lunn King Cake.

Apologies to my old king cake recipe, but it really was that good.

sally-lunn-slice


Sally Lunn
Makes one 10 inch round loaf

1 cup milk
4 tablespoons unsalted butter, cut into pieces
2 tablespoons sugar
15 ounces (about 3 1/3 cups) unbleached all-purpose flour, divided
2 1/4 teaspoons (one 1/4 ounce package) instant yeast
1 1/2 teaspoons salt
Zest of 1 lemon, finely grated
2 large eggs, lightly beaten

For glaze:
2 tablespoons milk
1 tablespoon sugar

1.  Scald the milk in a small saucepan over medium heat, heating it until it just begins to steam and small bubbles appear around the edge, or about 180° F.  Remove from the heat, add the butter and sugar, and stir until the sugar is dissolved.  Let the mixture cool to lukewarm, or about 100° F.

2.  In the bowl of a stand mixer, whisk together 10 ounces (or 2 cups) of the flour and all of the salt, yeast, and lemon zest.  Add the milk mixture and the eggs.  Using the paddle attachment, beat the mixture at medium speed for 4 to 5 minutes, or until well-combined and smooth, scraping the bowl down as needed.

3.  Decrease the speed to low, add the remaining 5 ounces (or 1 1/3 cups) flour, and beat until fully incorporated, about 1 minute.  Switch to the dough hook, and mix at medium speed for about 7 or 8 minutes, or until smooth and elastic.  The dough should look very sticky and wet.

4.  Scrape the dough into a large, lightly oiled bowl.  Cover tightly with plastic wrap, and let sit at room temperature for 1 to 1 1/2 hours, or until doubled in size.

5.  Butter a tall-sided, round 10-inch pan, such as a springform pan (see note 1 below), and line the bottom with a round of parchment paper.  Turn the dough out onto a well-floured surface.  With floured hands, kead the dough a few times, deflating it, and forming it into a round ball with a skin stretching around the outside.  Flatten it into a disc, dust off any excess flour, and transfer to the prepared baking sheet, smooth side up.  Cover loosely with plastic wrap, and let rise at room temperature until well risen and crowning above the pan, about 45 to 60 minutes.  Thirty minutes before baking, preheat the oven to 425° F, and position a rack in the lower third of the oven.

6.  Bake the bread at 425° F for 15 to 20 minutes, or until a rich golden-brown on top.  Check the bread after 10 minutes, and tent the top very loosely with aluminum foil if it seems to be over-browning.

7.  While baking, heat the milk and sugar for the glaze together in a small pan, until the sugar has dissolved.  When the bread is fully baked and just removed from the oven, gently brush the glaze over the top of the  bread.  You will probably not need all of it.

8.  Cool the bread in the pan for 15 minutes, then remove to a wire rack to cool thoroughly.  Slice into wedges and serve warm; alternatively, split into three horizontal layers and fill with clotted cream for an authentic British teatime snack.


Notes:
1.  I used a 2-inch tall springform pan with no problems.  If you prefer a straighter-sided Sally Lunn, or are using a short cake pan, you can make a collar out of parchment paper and aluminum foil (as you might for a soufflé).  Cut pieces of parchment and foil as long as the circumference of your pan, plus an inch or two (about 33 inches for a 10 inch pan, about 30 for a 9 inch pan).  Stack the foil on the parchment, and fold into thirds or quarters lengthwise, so that the foil is on the inside.  Wrap the collar around the inside of the greased pan, and secure with tape if necessary.  The foil should make it sturdy enough to hold itself up, and the tape will be unnecessary after the dough has risen enough.  Alternatively, you can wrap it around the outside of a pan, and secure with kitchen twine.  The LA Times has a briefly illustrated how-to about this that you may find helpful.

2.  If using an angel food cake pan or a bundt pan, poke a hole through the center of the dough after shaping it in step 5, making a tire or doughnut shape.  Place in the greased pan around the center stem, and continue with the recipe as directed.

3.  Sally Lunn can be baked into individual portions, using muffin tins; but be aware that this bread is an extremely high-riser.  Use much less dough than you think you’d need in each tin.  I haven’t made them individually, but I’d say you could get a minimum of 12 out of this one recipe.  I make no guarantees, but 16 to 20, of reasonable size, is my educated estimate.

Posted in Savory, Sweet, Yeast Breads | 1 Comment

Bloomer Bread

Week Thirty-Six: Breads of the United Kingdom

bloomer-2

Okay, Mr. Smartypants, you who know so much about British culture.  You sussed me out.  You know that the term “bloomer” is about as precise as the word “loaf”.  You know that today’s bread isn’t so much a specific combination of ingredients as it is a method; so you could argue that I’m not bringing you a totally new recipe today.

I demur, sir, on the grounds that bread is nothing if not method.  Most bread in this world is made up of four basic ingredients – flour, water, salt, and leavener – and results of course vary wildly based on how they’re handled.  I suggest that a bloomer is a much a type of bread as the vaunted baguette itself; just because it’s British doesn’t mean it’s automatically disqualified.

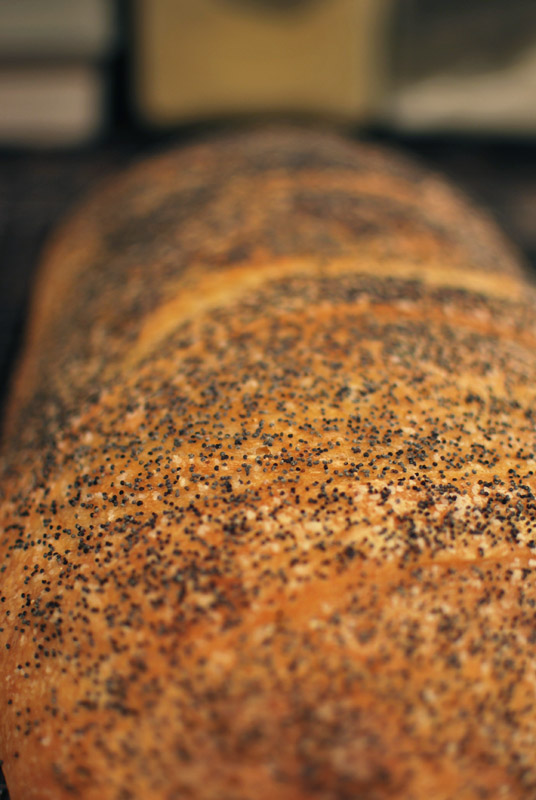
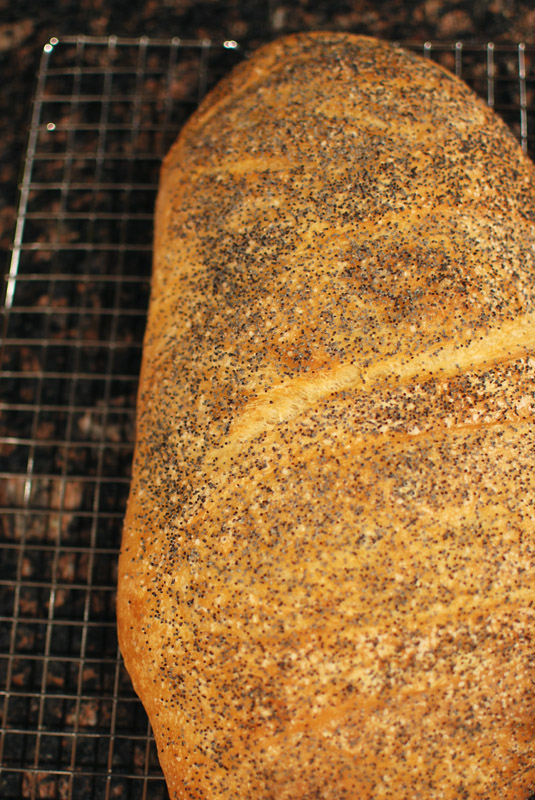
For the Americans in the audience, a bloomer is a common term in England for any oblong, rounded loaf of white bread, decorated with a series of diagonal slashes on top.  (These are hard to see in the pictures, as I topped the bread with poppy seeds after slashing the dough.  Mea culpa.)  Other than those basic attributes, it seems like it’s fair game as far as recipes go: bloomers are typically crusty but can be soft, they can be made with a lean dough or can be enriched with butter and milk, can be topped or left plain, and so on.

The recipe that I’ve adapted to make my own bloomer relies on a long, slow rise – about 10 hours total.  I’ve used very little yeast, and cold water to help limit their initial activity, which means that the first rise (the fermentation) takes as long as 8 hours at room temperature.  The salt is kept to a minimum, rendering the flavor of the crumb a little flat, if you’re unused to such a bread.  Such breads are ideal paired with salty foods, such as cured ham or olives; however, I’ve struck a compromise here by topping the loaf with a sprinkling of salt (along with earthy poppy seeds).  Feel free to omit the salt topping if you like.

All that time spent rising means that this bread has a fabulously complex flavor, as those all-important dough-conditioning acids and enzymes have had plenty of time to develop, resulting in far better taste and texture than you could otherwise achieve.  The slightly wet dough creates lovely big holes throughout the bread, and the massive oven spring is a sight to see. 

The rather flat but fully-risen dough turned into a cheerfully rotund loaf in the oven heat, and when removed to the cooling rack, the crust sang that happy, crackling song that is the rare hallmark of a well-made loaf.  Sliced and dipped in a little olive oil, I could see I had a real winner on my hands.  Yes, even though it’s not a real recipe.

bloomer-1


Bloomer Bread
Adapted from Bread, by Christine Ingram and Jennie Shapter
Makes one large loaf

23 ounces (about 4 3/4 cups) unbleached bread flour, plus extra for dusting
1/2 teaspoon instant yeast
15 ounces (2 cups minus 2 tablespoons) cold water, about 40º F
3/4 teaspoon salt
Kosher or other coarse salt, for topping
Poppy seeds, for topping

1.  In the bowl of a stand mixer, whisk together all but a handful of the flour and all the yeast.  Add the water and mix with the dough hook at low speed until a rough dough forms, 1 to 2 minutes.  Turn the mixer off, and without removing the bowl or the hook, cover the bowl loosely with plastic wrap.  Let stand at least 15 or up to 45 minutes.

2.  Remove the plastic wrap, and add the salt.  Continue kneading the dough, at medium-low speed.  Knead for 6 to 8 minutes, or until the dough forms a cohesive ball that clears the sides of the bowl, and becomes elastic.  If the dough does not clear the sides of the bowl, add the reserved flour until the proper consistency is achieved.  The dough should not be stiff, nor should it be too slack.

3.  Transfer the dough to a large, lightly oiled bowl.  Cover tightly with plastic wrap, and let sit at room temperature until well risen and beginning to collapse, between 6 and 8 hours.

4.  Remove plastic wrap and, using a broad nonstick spatula, fold the dough over itself, as though you were folding a letter: 1/3 over the center, then the opposite 1/3 over that.  Lastly, fold dough in half again, perpendicular to the first folds (like you’re folding the letter in half).  Dough should end up being roughly a square.

5.  Replace plastic wrap, let dough rise 1 hour.  Turn dough again, following above procedure, then replace plastic wrap and let dough rise 1 hour more.  Line a large baking sheet with parchment paper, or lightly grease it.  Forty-five minutes before baking, preheat the oven to 450º F.  If you have a baking stone, heat it along with the oven; if not, position an oven rack at the lowest possible level.

6.  Dust a work surface liberally with flour.  Gently scrape dough out of bowl onto the work surface.  Dust dough and hands liberally with flour, and using minimal pressure, push dough into rough 8 by 10 inch square.  Gently roll up dough, using long edge, and pressing seam to seal as you roll.  Tansfer dough to the prepared baking sheet, tucking sides under to form a fat oval shaped loaf.

7.  Using a sharp serrated knife or clean razor blade, make several decisive slashes in the top of the loaf at a 45º angle, evenly spaced.  Cover loosely with lightly-oiled plastic wrap, and let rise until nearly doubled in size, about 30 to 45 minutes.

8.  Spray or sprinkle the loaf generously with water, and dust the salt and poppy seeds evenly over the top.  Transfer the loaf to the oven, onto the baking stone if using, and bake at 450º F for 15 minutes.  Every 2 to 3 minutes, open the door and quickly spray the bread with additional water, to create steam.

9.  After baking 15 minutes with steam, reduce the temperature to 400º F.  Continue baking for an additional 20 to 25 minutes, or until well-browned and baked through.  An instant-read thermometer should register about 205º F when fully cooked.  Remove to a wire rack to cool thoroughly before slicing.


Notes:
1.  If using active-dry yeast, your water should be a bit cooler, around 105º F to 115º F.  Instead of mixing the active-dry yeast into the flour, you should dissolve all of it in a little of the warm water, in the mixing bowl.  Let stand for about 5 minutes, or until foamy.  Add the flour and salt, and proceed as directed.

Posted in Savory, Yeast Breads | 1 Comment

Oatmeal Bannock

Week Thirty-Six: Breads of the United Kingdom

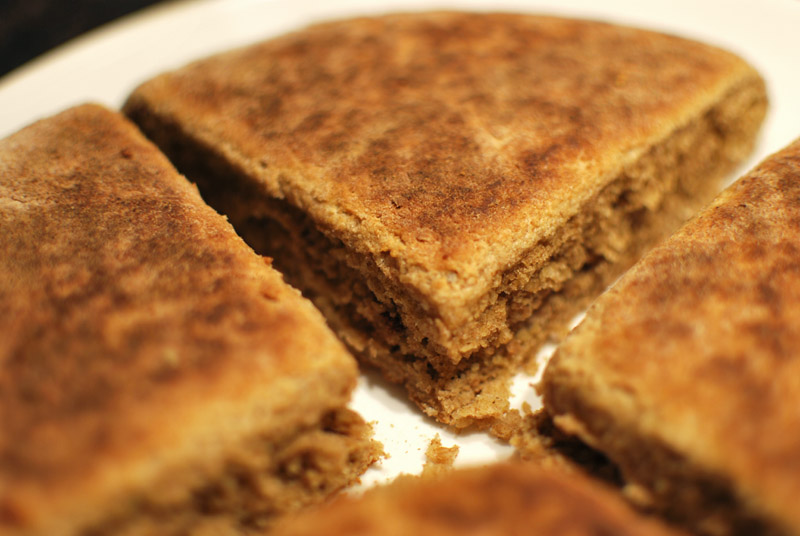
bannock-1

The bread for today, bannock, is one of those delightful breads that has no standard recipe or cooking method, which basically means that you can make it however you want.  If anyone complains, you get to protest, “But that’s how I’ve always seen it!”  Chances are, no one will challenge that.

Bannock is an ancient bread that hails originally from Scotland, and has since spread across the United Kingdom, even finding a foothold in North America via Scottish traders coming to Canada.  It can appear in myriad forms: hard and dry, soft and sweet, or flaky and crunchy, depending on the sort of leavening, fat, or liquid used.

It can be cooked on a dry griddle, pan-fried, deep-fried, oven baked, or even dropped into a stew and cooked like dumplings (though that last one is more rare).  There are certain consistencies from bannock to bannock, however; they are never yeast-leavened, though they may be unleavened, and are usually round, flat breads made with whole grain flours.  They are generally cut into wedges, or farls, which the Scottish also call a “scone”.  Yes, this is where scones come from, no matter what the English say.

Historically, Scots have relied on the girdle (or griddle, as we Americans call it) for the majority of their baking, rather than an oven.  Hence, most of their breads have been round and flat, and were mostly unleavened until chemical leaveners became available in the mid-1800’s.  The term “bannock” originally referred to any of these girdled breads, and would’ve primarily been made from barley flour, which surprisingly pre-dates both oats and wheat in Scotland.

It seems there’s four major types of bannock in this world, which are regional and based upon the sort of grains available.  The Scottish type uses oat flour these days, sometimes exclusively, while the Irish use mostly wheat flour.  Wales today brings us the barley flour variation, and the version that grew up across the pond in Canada relies on corn meal.  Most types blend their particular grain with wheat flour, to produce a chewier bread.

With so many variations in ingredient and method, it’s nearly impossible to pick a recipe that gives you The One True Bannock; therefore, I’ve decided to give a nod to the bread’s native land, and make a modern Scottish-style bannock.  I’m using whole wheat flour mixed with oat flour, made quickly by grinding old-fashioned rolled oats in a food processor.  I ground mine finely, but you can leave them a little coarse, if you prefer a more rugged texture.  The dough is relatively moist, and is made using the biscuit method (wherein butter is cut into flour, then liquid added).

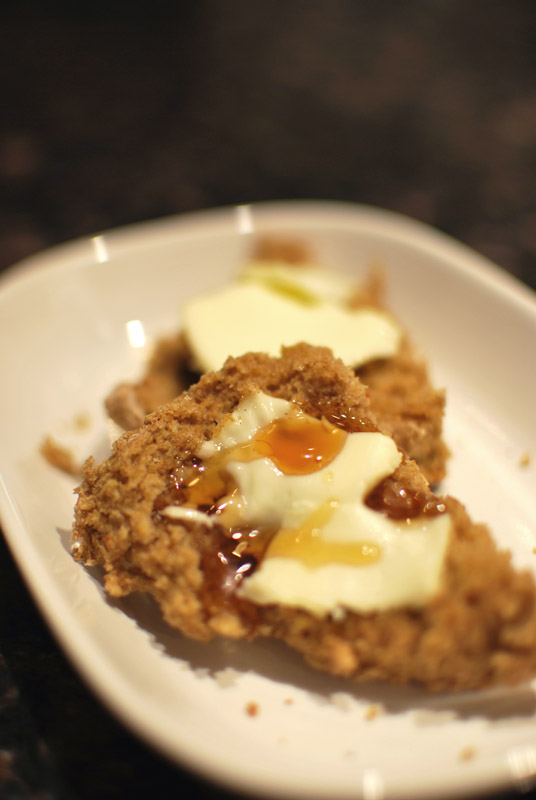
Unsurprisingly, the resulting bread is something like a hearty biscuit or scone, with a rustic and flaky texture.  The crust cooks up crunchy and slightly smoky, if you happen to char it in places.  Inside, each piece has a remarkably light crumb, despite the grainy flours used, and the relatively little amount of fat.  A split-open farl, fluffy and still warm from the pan, was ideal served with a lashing of butter and a swirl of honey on top, the perfect accompaniment for a spot of tea.

And that’s the way I’ve always seen it.

bannock-2


Oatmeal Bannock
Adapted from Bread, by Christine Ingram and Jennie Shapter
Makes 1 round loaf

4 ounces (about 1 cup) rolled oats, ground finely in a food processor
4 1/2 ounces (1 cup) whole wheat flour, plus extra for dusting
1/2 teaspoon salt
3/4 teaspoons baking powder
3 tablespoons cold unsalted butter, cut into very small pieces
3/4 cup cold buttermilk (see note 1 below)
3/4 teaspoon baking soda

1.  In a large bowl, whisk together the ground oats, flour, salt, and baking powder.  Add the butter, and rub or cut in until the mixture resembles coarse meal.  Pea-sized lumps of butter are okay.

2.  Mix the buttermilk and baking soda together.  It should foam a little.  Add to the flour mixture, and mix gently and quickly with a spatula, until a dough forms.  If needed, add a little extra buttermilk or flour to adjust the consistency; it should look very wet, but not soupy.

3.  Turn the dough out onto a work surface, heavily floured with whole wheat flour.  Dust the top of the dough with additional whole wheat flour, and pat into a flat disc, about 3/4 inch thick.  Using a bench scraper, fold the dough in half over itself.  Pat until flat again, dusting with flour if necessary.  Continue folding and patting flat until the dough is firm enough to move.

4.  Heat a large nonstick pan or griddle over medium-low heat.  Transfer the dough carefully into the pan.  Using the bench scraper, score the top of the dough with a cross, taking care not to cut all the way through the dough.

5.  Reduce the heat to low.  Cook over low heat for 7 to 10 minutes, or until the bottom begins to brown in spots.  Carefully flip over (see note 2 below), and cook the top side for 7 to 10 minutes, or until it begins to brown in spots.  Flip the bread over if it begins to brown too much on either side, and cook until the interior has cooked through, about 14 to 20 minutes total.  Do not cook too quickly, lest the outside burn before the interior is fully cooked.

6.  When done, transfer to a wire rack. Cool briefly, and serve warm.


Notes:
1.  If you don’t have buttermilk on hand, you can make an acceptible substitute by adding 2 teaspoons white vinegar to a scant 1 cup milk.  Stir, and let stand 5 to 10 minutes, or until clumpy.  Use as directed in the recipe.

2.  This bread can be tricky to flip over, as the dough is fairly wet, and the bread is larger than most spatulas.  Try sliding the bread out of the pan onto a large plate, then carefully inverting it back into the pan.

Posted in Quick Breads, Savory | 1 Comment

Grant Bread

Week Thirty-Six: Breads of the United Kingdom

grant-loaves

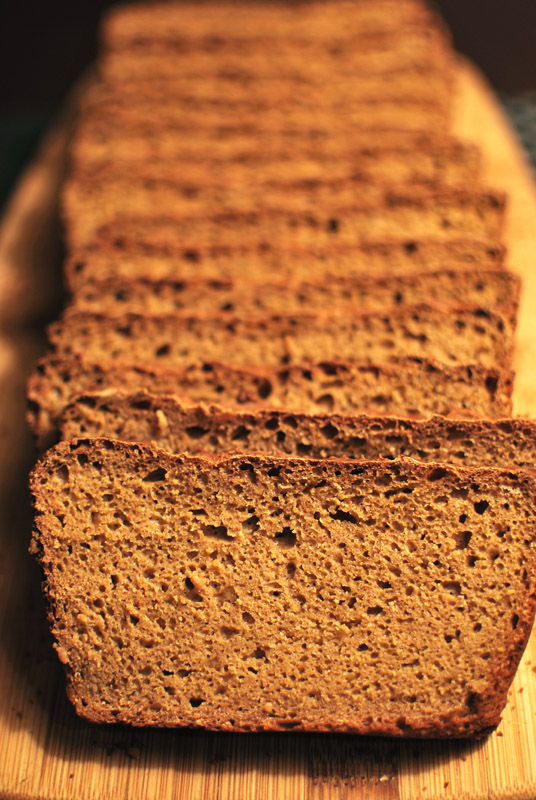
It seemed too good to be true: a 100% whole-wheat, yeast-leavened bread, mixed by hand in about a minute, with hardly any rising time at all.  It was the promise of a yeast bread with a quick bread’s method that convinced me to try it, despite any educated misgivings; but it was the result that convinced me to throw the recipe out in the end.

Like most things that seem too good to be true, this bread was just that.  The text accompanying the recipe assured me that I could expect a moist loaf, one that would stay so for days on end.  And, truthfully, it was indeed moist; but moistness alone does not a good bread make.

The picture in my cookbook showed domed, pretty, golden-brown loaves in a state of bucolic repose on a wooden table, certainly come upon by chance in some British farmhouse.  They looked as much like my loaf as a peacock looks like a chicken.

What I pulled from my oven was a morose brick, so flat on top you could serve drinks on it.  In fairness, it did slice easily, and it was quite moist.  But this creature between two bready worlds – the yeast-risen one, and the chemically-leavened one – possessed none of the best qualities from either.

True, it had mixed together in as little time as any other quick bread, but it lacked the delicate and fluffy texture that marks even a mediocre example of the breed.  And though there was no need to worry about overmixing, as the gluten formed by mixing is always desirable in yeasted breads, there simply was not enough formed to capture the gases given off by the yeast, resulting in practically no oven spring at all, and the aforementioned flatness.

Additionally, the dough simply hadn’t had time to properly ferment, the step that produces all the complex flavors found in the best yeast breads.  Yes, I did end up with a yeast-leavened bread in about one hour; but what’s the point if no one cares to eat it?

This bread, created by the eponymous Mrs. Doris Grant, was originally a mistake.  Mrs. Grant, the story goes, had been baking her yeast bread for quite some time before she realized she was supposed to knead the stuff.  When she realized her error, she conducted a taste test among her kith and kin, the result of which crowned her unkneaded bread the favorite.  Despite Mrs. Grant’s other lifelong achievements, literary and otherwise, I would chalk that preference up to the notoriously bland British palate.  (No offense intended; it’s just that they do seem to boil a significant amount of their food.)

Generally, whenever a food I make turns out so very different from what was promised, pictured, or expected, I assume the fault must be mine.  And perhaps the extra ten minutes I accidentally let the bread rise did, in fact, make all the difference; but somehow, I’m not convinced.  I would like to try this one again, being sure to follow the recipe with more exacting precision, though I’m not sure that attempt will be successful either.  No matter the outcome, though, I’ll be sure to keep you updated.


Grant Bread
Adapted from Bread, by Christine Ingram and Jennie Shapter
Makes one 9 x 5 inch loaf

1 pound (about 3 1/2 cups) whole wheat flour
1 teaspoon salt
1 teaspoon instant yeast
1 1/2 cups water, slightly warmer than room temperature
2 tablespoons molasses

1.  Preheat the oven to 400° F.  Butter a 9 x 5 inch loaf pan; set aside.

2.  In a large bowl, whisk together the flour, salt, and yeast.  Mix together the water and molasses, stirring to dissolve.  Add the water to the flour mixture, and stir together until well combined, and a sticky, wet dough forms.

3.  Transfer the dough to the prepared loaf pan.  Cover loosely with plastic wrap, and let rise in a warm spot until the dough has grown by one-third,  about 30 minutes.

4.  Bake at 400º F for 40 minutes, or until well-browned on top.  Cover loosely with aluminum foil, then continue to bake for about 10 to 15 minutes longer, until an instant-read thermometer registers about 200º F when inserted into the middle.

5.  Let the bread cool in the pan briefly, then turn out onto a rack to cool thoroughly.

Posted in Savory, Yeast Breads | 3 Comments