Week Twenty-Three: Breads With Fruits
I know, this is not a braided bread. Therefore, some might say it’s not “real” challah. But in the parlance of our times, challah refers to any fairly standard egg-rich, sweet bread made with water only, so I say shaping is less important. Yes, okay, they’re usually braided. But this dough is so full of giant chunks of apple, it would be almost impossible to braid. (Note I said “almost”; if there’s any eager and ambitious bakers out there who want to try, I say go for it. I want pictures.)
Challah, if you’re unfamiliar, is similar to brioche or other rich European breads, but differs from them in that it’s made with no milk or butter, which would render it non-Kosher. (Technically, the term for a food like this is “parve”. Neat!) It’s served at special occasions and holidays (unlike lechem, the daily bread), and it makes the best French toast you’ll ever have. (Is French toast kosher? I don’t even know. Maybe only if you don’t eat meat with it?)
Interestingly, the word “challah” refers to a specific Jewish dietary custom. In this case, a challah is a specifically-sized piece of solid dough from any baked item (cookies, breads, cake) that is removed and burnt or otherwise destroyed, as a sort of holy offering. It dates back to the idea of the community offering sustenance to the high priests (kohanim), who were busy with their work at the Temple, and had no income of their own. As non-kohen are not allowed to eat the challah, today the challah is burnt, as no one can truly verify the lineage of a kohanim without a doubt; and the “taking of challah” has become a symbolic gesture. Interesting!
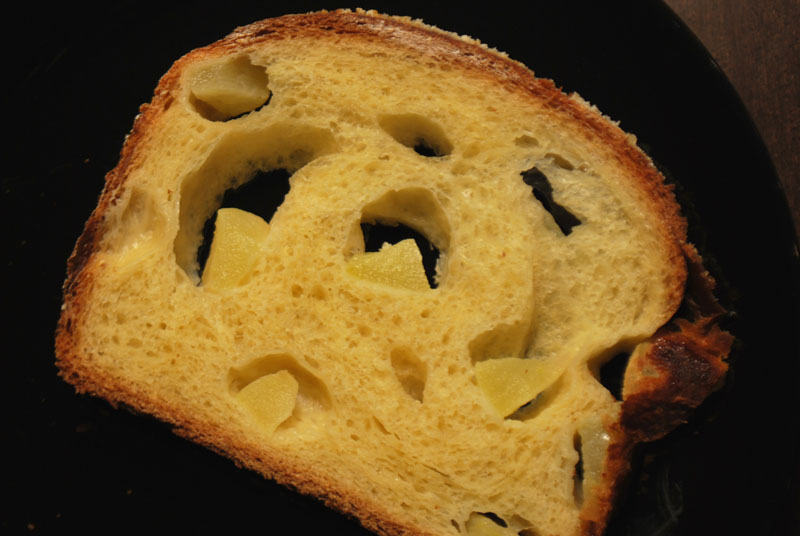
But 3000 years of tradition, from Moses to Sandy Koufax aside, this bread is really incredible! I don’t think I’ve seen a bread disappear quite as quickly as this one did, after I set the basket out in the kitchen at work. The crust, crispy and dark with the sugar crust, belies the ivory interior, punched through with gaping holes filled with stained-glass bits of tender apple. And so soft inside, it was almost difficult to cut. This bread forces you to cut thick slices; and I assure you, no one will mind.
The flavor is full of apple, but not overwhelmingly so. The brown sugar complements and supports the apples wonderfully, but there is no cinnamon or any other spice to overwhelm. You certainly could add some if you like, but it really doesn’t need it – and this from a confirmed cinnamon addict. (Seriously, I eat about 1 million cinnamon every day in my yogurt.) The bread ends up beautifully balanced: not too sweet, not undersweet, not too apple-y, not too rich. Just amazingly soft, and amazingly good.
This recipe originally comes from Maggie Glezer’s fabulous book, A Blessing of Bread, and these loaves truly live up to that title. You will be thanked for bringing these generous loaves anywhere, and the recipe definitely makes too much for you to keep all to yourself. Make this bread, and you’re practically obligated to call friends, family, anyone, and share the work of your hands with those around you. And if that isn’t a blessing, I don’t know what is.
Apple Challah
Adapted from Maggie Glezer
Makes two 9 x 5 loaves
2 tablespoons instant yeast
23 1/2 ounces (about 5 cups) unbleached bread flour
1 cup warm water
3 large eggs
3 ounces (1/3 cup) vegetable oil, plus extra for oiling the pan and for topping
1 tablespoon kosher salt
1/2 cup brown sugar, plus extra for sprinkling
3 large or 4 medium baking apples (about 2 1/2 pounds), such as Granny Smith or Braeburn (see note 1 below)
Lemon juice, to keep apples from browning
1. In a large bowl, whisk together the yeast and 4 ounces (about 1 cup) of the flour. Add the warm water and whisk until smooth. Let the mixture stand uncovered for 10 to 20 minutes, or until it begins to bubble and foam up a bit.
2. Whisk the eggs, oil, salt, and sugar into the yeast mixture until well incorporated and the salt and sugar have dissolved. With a spatula or wooden spoon, stir in the remaining flour all at once. When the mixture forms a shaggy dough, scrape it out onto a work surface and knead it until it is smooth and firm, no more than 10 minutes. As you’re kneading, if the dough is too firm to knead easily, add a tablespoon or two of water to it; if it is too wet, add a light sprinkling of flour. The dough should feel smooth, soft, and only slightly sticky. Place the dough in a clean bowl, and cover tightly with plastic wrap. Let ferment in a warm place for 1 hour, or until just slightly risen.
3. While the dough is rising, peel, quarter, and core the apples. Cut each quarter lengthwise in half if using medium apples, or in thirds if using large apples. Next, cut each slice crossways in half if using medium apples, or into three pieces if using large apples. You should end up with large squarish chunks. Measure out 4 1/2 heaping cups (about 23 ounces), toss with a few drops of lemon juice, and transfer them to a covered container.
4. Turn the dough out onto a lightly floured work surface. Cut the dough into two equal pieces, keeping one piece covered while you work on the other. Roll out the dough into a 16 inch square about 1/8 inch thick. If the dough resists, cover and let rest for 5 minutes before trying again.
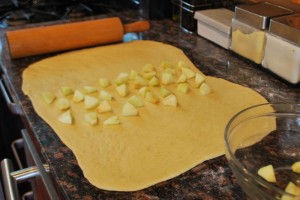
5. Scatter 1 heaping cup of the apples over the center third of the dough.
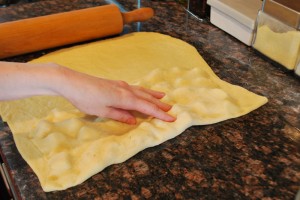
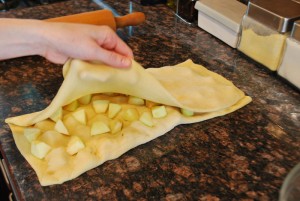
Fold up the bottom third of the dough to cover them, and press the dough between the apples to try to seal it around them, and squeeze out any big air pockets.
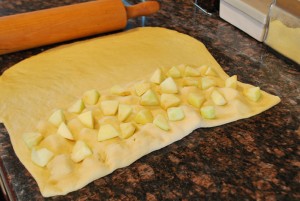
Scatter another heaping cup over the folded-over apple-filled portion of the dough.
Fold the top of the dough over it to create a very stuffed letter fold.
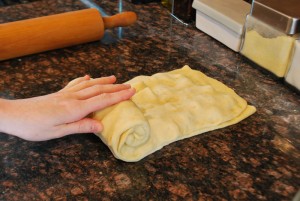
Press down on the dough to push out any air pockets and to seal it around the apples.
6. Starting from one short side, roll up the dough into a chunky cylinder.
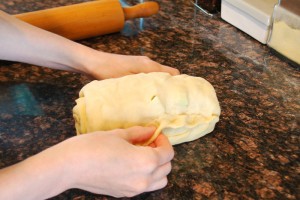
Pinch the seam shut.
Transfer the cylinder to a bowl, smooth side up, and cover with lightly-oiled plastic wrap.
7. Repeat the filling and rolling process with the other piece of dough, and put it in a second covered bowl or other container. Let the dough sit at room temperature for about another hour, or until slightly risen and very soft. Or, you may refrigerate the bread at this point, for anywhere up to 24 hours. This will give the bread a slower fermentation, resulting in better texture and a more intensified apple flavor.
8. Oil two 9 x 5 inch loaf pans. Using as much dusting flour as you need, pat each cylinder of dough as best as you can into a rough log shape, trying to keep the dough’s smooth skin intact over the top. The dough will not be able to deflate much at this point because of the large pieces of apple. Transfer the dough into the pans, smooth side up, and cover with lightly-oiled plastic wrap. Let the dough proof in a warm place until risen over the edges of the pans, about 30 minutes, or up to 1 1/2 hours if the loaves have been refrigerated.
9. Thirty minutes before baking, arrange an oven rack in the lower third of the oven, remove any racks above it, and preheat the oven to 350° F.
10. When the loaves have risen fully (the dough will remain indented when gently pressed on the side with a fingertip), brush each one with a generous tablespoon of oil, taking care not to deflate the dough. Sprinkle each with a very generous dusting of sugar to form a sugary-oily crust.
11. Bake at 350° F for 45 to 55 minutes, until very well browned. After the first 35 to 40 minutes of baking, turn the pans around and switch their positions so that the breads brown evenly. When the loaves are done, remove them from the oven, unmold them, and transfer them to a wire rack to cool thoroughly before slicing.
Notes:
1. You can use whatever kind of baking apple you like, but I suggest Granny Smith or Braeburn, as they won’t brown very readily, and will stay relatively whole while baking. Other good breeds include Cortland, Golden Delicious, Jonagold, Honeycrisp, or Pink Lady. You should avoid using Red Delicious, Fuji, McIntosh, or Gala, as they will just turn to mush in the bread.

