Week Nineteen: French Breads
You’ve had a croissant; I know you have. Why on earth would you ever want to make your own croissants? You can buy them at any old grocery store. They even come in a tube, for heaven’s sake.
Puff pastry fat, is why. And to understand why that’s important, you have to understand what a croissant is. Croissants fall into a family of dough called “laminated doughs”, which also includes danish dough and puff pastry. These are all made up of thin layers of dough laminated or layered with fat. In the oven, the fat melts and produces steam, which raises the layers of dough, creating a tall and flaky end product.
You have to use fat (instead of water or another liquid) for this so you can keep the liquid in it, and not mixed into the flour (creating gluten, and therefore toughness, and less rising of layers). This means also that you need to keep your fat solid while making the dough. Butter turns soft at room temperature, so in order to keep the butter from leaching into the flour (creating gluten as you roll it out, and making it tough), you have to keep the dough cold. In most hot kitchens, this means only taking it out long enough to give it one or two rolls and folds (which creates the layers of dough and fat).
But then technology reared its fearsome head, and hydrogenated fats were born. (For those of you who enjoy a commercially-produced croissant, you may want to look away for a couple of paragraphs.) Hydrogenated fats have much higher melting points than butter, which means that they will stay solid at room or even warm temperatures. And the more hydrogenated, the higher the melting point. Hydrogenated fats also have much less moisture content than butter, and are even engineered to be resistant to gluten formation, meaning the the fat is far more workable before it starts to negatively affect the dough.
Puff pastry fat is the most hydrogenated of all. It is basically plastic. You can roll out dough from here to next week with the stuff, and still produce a decent dough. Something like that, I don’t consider to be “food”. I consider it a “food-like product”. It won’t kill you if you eat it, but neither will a penny. Neither are food, though. Additionally, because of its high melting temperature (above body temperature), that’s why you get a strange film in your mouth when you eat a commercially-produced croissant. The fat sticks to your mouth, and isn’t melted away, like butter. The starch from the flour sticks to that in turn, and voila, you’re tasting plastic cotton for hours.
But if you’ve ever been to France, and tasted even one ethereal croissant, I know that flavor is haunting you. You can almost taste it, right? That’s butter. Any self-respecting pâtissière would sooner close shop than use puff pastry fat rather than butter in his croissants. Yes, it’s a bit harder to work with, but there’s absolutely no comparison when it comes to flavor.
If you can find a good butter croissant at some wonderful local bakery, then by all means, go ahead and buy them. But if you’re handy with a rolling pin, and don’t mind getting a little floury, then I highly recommend trying to make your own. The recipe is long, but it’s mostly descriptive; the actual turning and rolling isn’t horribly difficult. I would, however, say this is a moderately advanced recipe. On a scale of 1 to 10, I’d say it’s a 7 or 8, considering time involvement and all. But is it worth it?
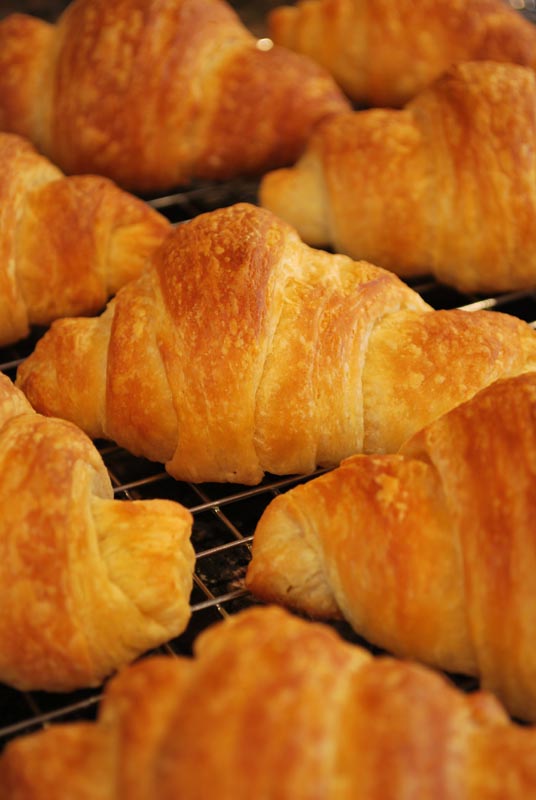
Um, yes. Yes, yes, yes. I tend to be a bit critical of my own cooking, but these croissants literally rendered me speechless. Perfectly (and I do mean perfectly) flaky on the outside, chewy and slightly doughy on the inside, they melted on the tongue, leaving only an exquisite flavor of butter and the ideal balance between sweet and savory. They were so feather-light, I was almost afraid of crushing each one as I lifted it from the baking sheet to the cooling rack. Here was no rustic, hard-crusted loaf to be rapped on the bottom to see if it was done; no, these required as soft a touch as if you were cradling a captured butterfly in a cage of fingers.
So if you ever feel up to a challenge with a guaranteed reward, or if you want to treat a special (and extremely lucky) person in your life, try this recipe. The effort is not insignificant, but rarely will I say that it is so completely worth it. If that’s not enough evidence for you, though, take my boyfriend’s word for it. This is a man who has certainly tasted his fair share of bread over the course of the year; but upon trying these croissants, he said, “I think that’s the best bread I’ve ever eaten. Ever.” All I could do was smile back over a plateful of crumbs.
Croissants
Adapted from Nancy Silverton
Makes 24
1 1/2 cups warm milk (105º to 115º F)
2 tablespoons brown sugar
1 tablespoon honey
2 1/2 teaspoons instant yeast (see note 1 if using active dry)
17 to 20 ounces all-purpose flour (about 3 3/4 to 4 1/2 cups)
1 tablespoon kosher salt
3 sticks unsalted butter, cold
Necessary equipment: stand mixer, kitchen towel (not terry cloth), ruler, pastry brush, bench scraper, unscented garbage bags.
1. In the bowl of a standing mixer, whisk together 17 ounces (3 3/4 cups) of the flour and the yeast. Add the salt. Stir together the warm milk, brown sugar, and honey, and add to the flour mixture in the mixer bowl. Using the dough hook, mix at low speed until dough is smooth and very soft, about 7 minutes.
2. Transfer the dough to a floured work surface. Knead by hand for about 2 minutes, adding more flour as necessary, a little at a time, to make a soft, slightly sticky dough. Form the dough into a roughly 1 1/2 inch thick rectangle, and wrap in plastic wrap. Chill until cold, about 1 hour.
3. After dough has chilled, arrange the sticks of butter horizontally, their sides touching, on a work surface. Using a rolling pin, pound the butter to soften slightly (butter should be malleable but still cold). Scrape the butter into a block, using a bench scraper, and place on a kitchen towel (not terry cloth), folding the towel over once to cover the butter. Pound and roll out on both sides until the butter forms an 8 x 5 inch rectangle. Try to make it as square as possible. Chill, still wrapped in the towel, while rolling out the dough.
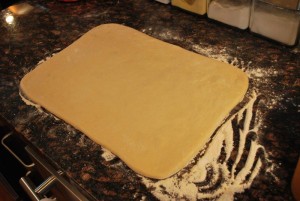
4. Unwrap the dough and place on a lightly floured surface. Roll the dough out to a 16 x 10 inch rectangle, dusting with flour as necessary, and lifting and stretching (especially in corners) until it’s the proper size. Turn (spin) the dough occasionally to make sure it isn’t sticking. If the dough resists, chill on a baking sheet, covered with plastic wrap, for 5 minutes, then try again.
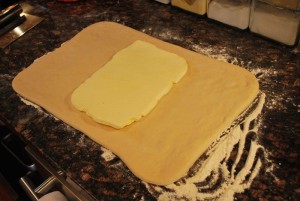
Put the butter rectangle in the center of dough, so that long sides of butter are parallel to short sides of dough.
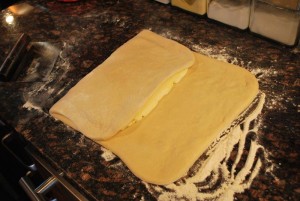
Fold the dough over the butter as you would fold a letter: one third of the dough over the butter,
then the other third over the dough. Brush any excess flour off with a pastry brush.
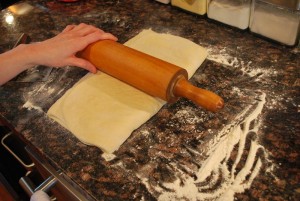
5. Turn the dough so that a short side is nearest you, then flatten dough slightly by pressing down horizontally with rolling pin across dough at regular intervals.
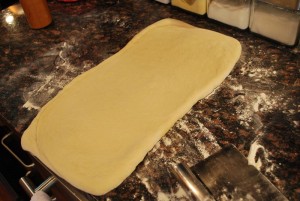
Roll out the dough into a 15 x 10 inch rectangle, rolling just to but not over the ends, trying to keep it as square as possible.
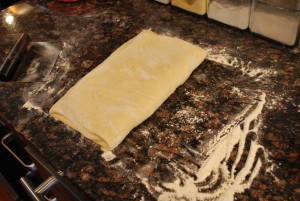
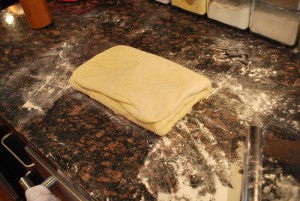
6. Brush off any excess flour with a pastry brush. Fold the dough in thirds like a letter, as before,
lifting and stretching the corners to square off dough, forming a 10 x 5 inch rectangle.
This is the first fold. Chill the dough, wrapped in plastic wrap, for 1 hour.
7. Make 3 more folds in same manner as in steps 5 and 6, chilling the dough (wrapped) for 1 hour after each fold, for a total of 4 folds (see note 2 below). If any butter oozes out while rolling, sprinkle with flour to prevent sticking. Wrap the dough tightly in plastic wrap and chill for at least 8 hours but no more than 18 (after 18 hours, dough may not rise sufficiently when baked).
8. Cut the dough in half and chill one piece, wrapped in plastic wrap. Roll out the other half on a lightly floured surface, dusting with flour as necessary and stretching the corners to maintain its shape, into a 16 x 12 inch rectangle. Brush off any excess flour with a pastry brush and trim edges with a pizza wheel, or a sharp knife (taking care to cut straight down, not dragging the knife, which will prevent the dough from rising properly along the edges).
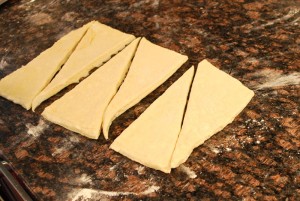
9. Arrange the dough with a short side nearest you. Cut in half horizontally and chill one half, covered with plastic wrap. Cut the remaining half vertically into thirds, forming 3 rectangles. Cut each rectangle diagonally in half to make 2 triangles, for a total of 6 triangles.
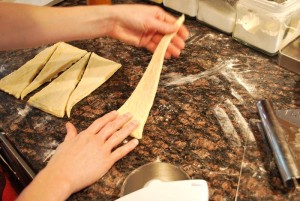
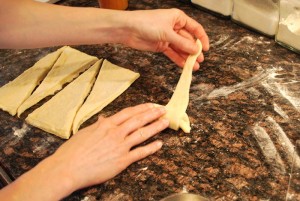
10. Holding the short side (side opposite tip) of a triangle in one hand, stretch the dough, tugging and sliding with other hand toward tip to elongate by about 50 percent.
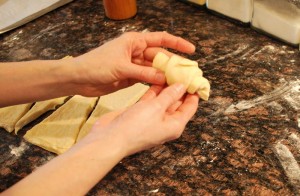
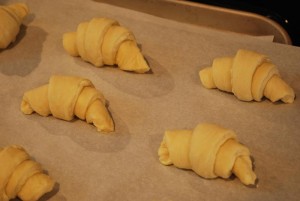
11. Return the dough to the work surface with tip of triangle pointing away from you. Beginning with the side closest to you, roll up the triangle towards the tip.
The dough should overlap 3 times, with the tip sticking out from underneath; you may need to stretch the dough while rolling.
12. Place the croissant, tip side down, onto a large baking sheet lined with parchment paper. Curve ends inward to make a crescent shape if desired.
13. Make more croissants with remaining 5 triangles, then with remaining dough, arranging them 2 inches apart on the baking sheet. Repeat rolling, cutting, and shaping procedures with the other chilled piece of dough.
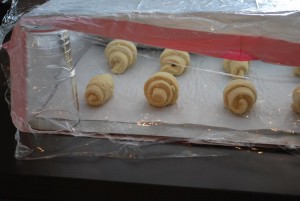
14. Slide each baking sheet into a garbage bag, propping up top of bag with inverted glasses to keep it from touching croissants, and tuck open end under baking sheet, or cover open end with plastic wrap.
Let croissants rise until slightly puffy and spongy to the touch, 2 to 2 1/2 hours.
15. Adjust the oven racks to upper and lower thirds of oven and preheat to 425° F. Carefully remove the baking sheets from bags. Using a spray bottle, or your fingers, spritz water generously inside the hot oven and close the door. Place croissants in the oven, then spritz again before closing door. Reduce the temperature to 400° F and bake for 10 minutes without opening door.
16. Switch positions of the baking sheets in the oven and rotate sheets 180°. Reduce the temperature to 375° F and bake until croissants are deep golden, about 10 minutes more. Remove to a wire rack to cool slightly before serving.
Notes:
1. If using active-dry yeast, increase the amount to 1 tablespoon + 1/4 teaspoon. Dissolve the yeast in the mixer bowl with the mixture of milk, sugar, and honey, and let stand until foamy, about 5 minutes. Add the salt and 17 ounces flour, and proceed as directed.
2. In step 7, I find that I easily lose track of the number of folds I’ve made. To make it easy, write the number of folds you’ve made in permanent marker on the outside of the plastic wrap covering the dough.
3. If the dough resists during any rolling-out step, chill the dough for 5 to 10 minutes, covered with plastic wrap. Do not let it rest on the counter, as the butter will get too warm at room temperature.
4. During any rolling-out step, try to roll the dough equally in both directions. This will stretch the gluten more evenly, resulting in a dough that will be evenly malleable.
5. Do not halve this recipe. If you don’t want to make all the croissants at once, wrap well and freeze half of the dough instead of chilling, in step 8. Let thaw in the refrigerator before proceeding.
6. Baked and cooled, croissants will keep 1 month frozen. Freeze uncovered on baking sheets until firm, then wrap snugly in foil before returning to freezer, taking care not to crush them. When ready to serve, remove foil and bake (not thawed) on a baking sheet in a 325° F oven for 5 to 10 minutes.
7. If you like, you can roll up a bit of nice bittersweet chocolate into the croissant (step 11). If you insist, chocolate chips will do the trick, but a good-quality chocolate will do the croissants the most justice.
8. I’d like to give a quick shout-out to Nancy Silverton, the absolute genius behind this recipe. She’s an amazing, wonderful, extremely talented baker, who has brought the most delicious bread into my life for years. (No, I’ve never met her, but I have eaten more than my share of her La Brea bread.)



She’s not joking. These are amazing. This is best-of stuff, for sure. DELICIOUS.
Considering I thought that baguette was PERFECT bread, and you both think this blows it out of the water, I might have to give this recipe a go one day. The look GREAT!
I’m confused about step 7. Are you supposed to keep making the 10 x 5 rectangle smaller with each fold?
Sonya, you’re meant to fully repeat steps 5 and 6 with each fold; that is, roll the 10 x 5 rectangle out again, to make a 15 x 10 rectangle. Give it a tri-fold, wrap in plastic wrap, and refrigerate. Repeat, repeat, repeat.
Sorry for any confusion! It’s much easier to show someone how to do it than to write it all out – hope that helps!
It really does, thanks!!
This was the first time I decided to make croissants, and only because your instruction and photos are really helpful. Even though it was a looong process -which, to be honest, I enjoyed- I am going to do it again and again, because after tasting these Croissants, it is IMPOSSIBLE to eat any other ready-bought from my bakers shop again (and I used to love them). Thank you!
Elisabeth,
Thank you so much for your sweet comment! I’m absolutely thrilled that I’ve helped someone else try making their own croissants! Yes, it’s a long process, but I’m glad you also know the reward at the end of it all. Store-bought just aren’t the same anymore, right? Happy Baking!
Just wondering if you could add almond paste to the croissants before baking. Have you tried? I found this recipe searching for Silverton’s almond croissants but she may not have published one.
Thanks!