Ciabatta

Week Six: Italian Breads

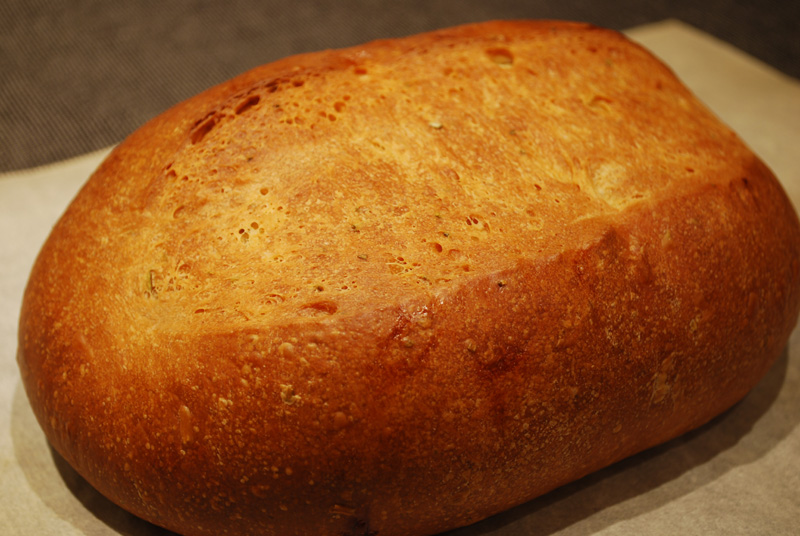
ciabatta

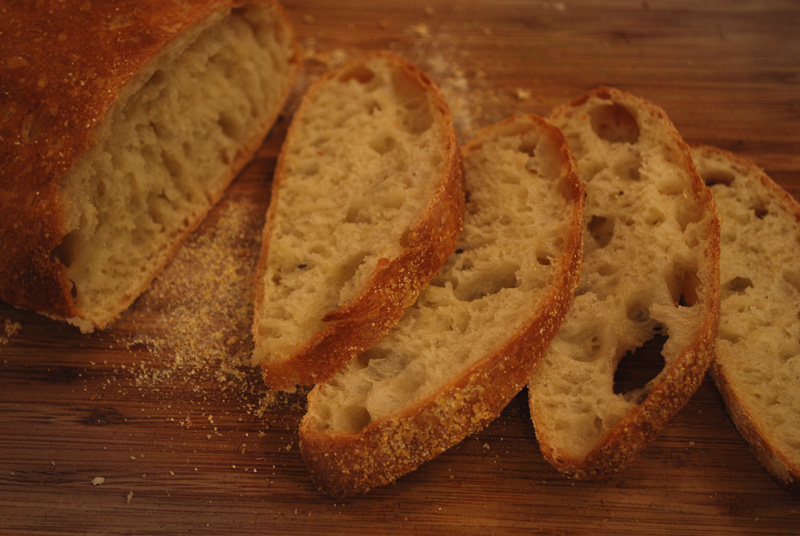
This, my friends, is it.  This is one of those bread recipes you wait your whole life for.  This is a bread recipe to take home to meet your parents.  I’m not even joking.  This bread is crisp-crusted, and achingly soft inside.  It has air pockets that will laugh at you if you try to top a slice with anything not completely solid.  It has a flavor so well-balanced that other breads cringe in its presence.  There is very little hyperbole here.

Ciabatta originated in the Lake Como area of Italy, a supremely gorgeous bit of the world, known as well for its topographical beauty as its leisurely pace of life.  Here, one doesn’t stop and smell the roses, so much as talk to the man who grew the roses, and then taste something his cousin made with the edible rose petals, all over a glass of his father-in-law’s wine (didn’t you know they plant roses in the vineyards?).  No wonder, then, that such an incredibly delicious and easy bread came from this region.  It takes time, yes; but is almost ridiculously easy to make, and rewards your minimal efforts with top-quality flavor.  Who out there has seen the New York Times’ No-Knead Bread?  Well, this is its first cousin: the no-knead, but-you-still-have-to-fold-it-a-few-times-and-then-shape-it-a-little, but-omg-it’s-so-easy bread.

Ciabatta has become very well known in the USA in the last several years, and for good reason – it is not only extremely tasty, but also surprisingly simple to make.  Personally, I think its ease in creating is a major reason so many restaurants have begun serving it.  It can technically be classified as a flatbread, not only due to its shape, but also to its simple ingredients and method of preparation.  Sliced in half horizontally, you can load it with any number of ingredients, brush it with olive oil, and press it in a hot grill to get a thoroughly authentic panino.  Don’t have a panini press?  Use your waffle iron; or just use a hot cast iron pan, and smush it down with a spatula.  Close enough!

Alternatively, if you don’t want to make a loaf of proper ciabatta (though why you’d want that, I’ll never know), you can use the dough to make a fabulous pizza, by stretching it into a thin round, and topping as desired.  Or you could even bake it in a cake pan to make a sort of focaccia; just be sure to give it the characteristic finger-pokes, and topping of olive oil and any other flavorings.

But honestly, this recipe produces such a stunning loaf of bread that I can’t really see mucking about with the method, or the ingredients.  I love that you don’t need any specialty equipment, other than a large bowl, and a couple of baking sheets.  A baking stone is ideal, yes, but please don’t let a lack thereof stop you from making this.  Even if the texture is a little off, your bread will still be extremely tasty.  Yes, you’ll have to plan ahead a bit.  But trust me, it’s absolutely worth it.  Try making this one bread, and you’ll wonder just exactly why you’ve never done it before.


Ciabatta
Adapted from The Professional Pastry Chef by Bo Friberg
Makes 1 large loaf or 2 small loaves

For the poolish:
1/8 teaspoon active dry yeast
3/4 cup water, at room temperature
6 ounces bread flour (about 1 1/3 cups)

For the dough:
1/4 teaspoon active dry yeast
1 cup water, at room temperature
2 1/2 teaspoons salt (or 1 generous tablespoon kosher salt)
4 ounces cake flour (about 1 cup)
8 ounces bread flour (about 1 2/3 cups)
Coarsely ground cornmeal

1.  To make the poolish, in a bowl large enough to hold both the poolish and the bread dough mixture once it expands, dissolve the yeast in the water.  Stir in the flour by hand.  Cover with plastic wrap and let stand at room temperature for 15 to 24 hours.

2.  To make the dough, dissolve the yeast in the water.  Add the dissolved yeast to the poolish in the bowl.  Mix by hand until combined.  Mix in the salt.  Gradually add the cake flour and bread flour and continue mixing by hand until the flour is well incorporated.  The dough will be very wet and sticky.  Do not work the dough, just mix until blended.

3.  Let the dough proof in the bowl at room temperature for approximately 1 hour; it should double in size.

4.  With the dough still in the bowl, flour a spatula (preferably silicone, or other nonstick material) and gently scraping up the dough from the outside, fold the 2 opposite sides in toward the center.  Repeat, this time folding from the other 2 sides toward the center.  Cover and proof for 30 mintues.

5.  Fold all four sides in again, as in the previous step.  Cover and proof for 30 minutes.

6.  Prepare a baking sheet by lining with parchment paper and sprinkling the paper heavily with cornmeal.  Preheat the oven to 425º F.  If you have a baking stone, make sure it’s in the oven.  If not, then if it is possible for you to bake on the floor of your oven, move the racks accordingly.  If none of these is the case, then your baking sheet will do just fine, but you will need to preheat it with the oven (see note #2 below).

7.  Turn the dough out onto a heavily floured surface.  Be sure to use enough flour to keep the dough from sticking.  Using your hands, carefully stretch the dough into a rectangle.  The dough will be very sticky and full of air bubbles; be careful not to release the air as you shape the dough.

8.  If only making one loaf, flour your hands, and gently move the dough to the prepared baking sheet, taking care to shape the dough into an oblong shape.  If making two loaves, dip a pastry wheel or a knife into water and cut the dough rectangle crosswise into equal pieces.  Gently pull the pieces apart and flour all of the sides, including the cut ends.  Flour your hands and lift the pieces, one at a time, stretching them lengthwise, and place them on the prepared baking sheet.

9.  Cover the ciabatta with floured kitchen towels (not terry cloth), or dust the loaves liberally with flour and cover with plastic wrap.  Let proof in a warm location until doubled in size, approximately 30 minutes.

10.  Uncover and spray the dough liberally with water.  Make sure the parchment paper will move easily off the baking sheet.  Transfer the loaves directly to the baking stone, the oven floor, or a preheated sheet pan, by sliding the parchment off the baking sheet in one quick motion.

11.  Bake for 15 minutes, quickly spraying the loaves every 4 or 5 minutes.  Bake for an additional 20 minutes, or until the ciabatta are golden brown and baked through.  Cool on a rack before slicing.


Notes:
1.  Ciabatta tastes best if it is eaten within the first 3 or 4 hours after baking (and absolutely should be enjoyed the first day it is baked).  Freeze any bread that will not be eaten within 24 hours.  The texture will still be acceptable, though not as good.

2.  The oven should be preheated for at least 1 hour (especially if you are using a baking stone).  If you do not have a baking stone, or are unable to use the oven floor for baking, heat the baking pans while preheating the oven before placing the loaves on them.  Move quickly when transferring the dough – immediate direct heat is needed for the best results.

3.  Only have rimmed baking sheets?  Just turn one over, and slide the dough off the backside of that one, onto the waiting preheated baking sheet in the oven.  Only have one baking sheet?  Use a couple of large, flat plates; or better yet, use that pizza box languishing away in your fridge (or by the trash; just cover it with aluminum foil first).

4.  I think this recipe works best for making 2 loaves of bread.  They’re easier to move around than one big loaf would be; plus, you can serve one to company, and keep the other sliced in the freezer for yourself!  Trust me, you’ll want it!

5.  If you don’t have cake and bread flour, you can use all-purpose flour; although you will get the best results from using the combination.  Use 2 2/3 cups all-purpose flour, or just under 12 ounces.

6.  I always recommend weighing your flour out if possible; if that’s not possible, add the flour a little bit at a time, until enough is absorbed by the water.

Posted in Savory, Yeast Breads | 2 Comments

Rosemary Bread

Week Six: Italian Breads

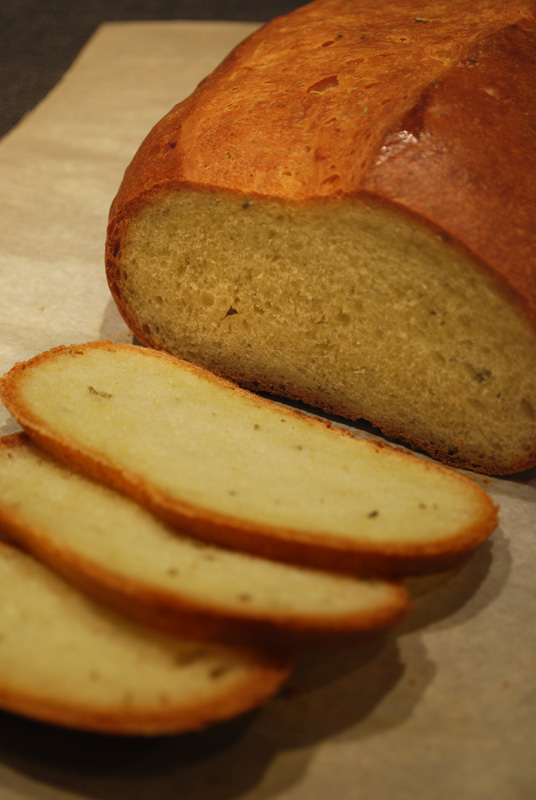
rosemary-bread

Okay, so this bread isn’t exactly 100% traditionally Italian, at least in the way that pugliese, ciabatta, and focaccia are.  But there can hardly be a more Italian herb than rosemary, so who’s to say this isn’t an authentic bread?  No one, that’s who.  Rosemary, with its seductive and potent flavors of pine and lemon, is native to and grows wild all around the Mediterranean, and is as usual a seasoning there as salt and pepper.  It’s actually a member of the mint family, and is extraordinarily good when paired with peppermint or spearmint; but the flavor goes very well with any number of different spices, herbs, and flavors.  The name comes from the Latin “rosmarinus”, meaning “dew of the sea”, most likely for its supposed propensity to grow near the ocean.  If you happen to have a rosemary plant, rub your hands gently on the leaves, and the scent will linger on your skin for an energizing pick-me-up that will last for hours.

But enough with the plant trivia; what about the bread?  Ah, the bread.  Well, I have to say that this is probably one of the best straight-dough-method breads I’ve ever made.  What exactly does that mean?  The straight dough method is when you take all the ingredients, mix them up together at once, and proceed with the 12-step yeast bread process.  If you make a starter of any sort (be it a sponge, pre-ferment, biga, poolish, etc.), then you’ve crossed over into the sponge method, where some of the ingredients are combined well in advance of the addition of any other ingredients.  Typically, you get better taste and texture from using the sponge method, but the straight dough method has the advantage of being much faster.  

This bread somehow manages to be as flavorful as a bread that might have taken far longer to make, while at the same time being very easy and relatively quick.  The crust is not shatteringly crisp, but neither is it doughy and soft.  The crumb, though the air pockets are tiny and close, is tender and appropriately chewy.  As you raise a slice to your mouth, you are immediately struck with the sweet smell of rosemary.  One taste sends the singular and familiar flavor across your palate, and you wonder if it’s the rosemary itself making the bread so good.  But then you take another bite, and realize that the soft texture is just as spot-on as you first thought.  This bread is awesomely good, in every possible aspect.  And if tasting that, fresh from your own oven, doesn’t exemplify la dolce vita, then I just don’t know what does. What could possibly be more Italian than that?

rosemary-bread-slices


Rosemary Bread
From The Professional Pastry Chef by Bo Friberg
Makes 1 small loaf

1 generous teaspoon active dry yeast
3/4 cup warm water (105º to 115º F)
2 1/4 teaspoons granulated sugar
3 tablespoons olive oil
1 tablespoon fresh rosemary, finely chopped
1 1/2 teaspoons salt
10 ounces bread flour, approximately
1 egg, beaten for an egg wash

1.  Dissolve the yeast in the warm water.  Stir in the sugar, oil, rosemary, salt, and enough of the flour to make a smooth, nonsticky dough.

2.  Knead the dough on a lightly-floured surface until smooth and elastic, and to develop the gluten structure, about 6-10 minutes.

3.  Place the dough in an oiled bowl and turn to coat with oil.  Cover and let rise for 30 minutes.  Punch down the dough, then let it rise 30 minutes longer.

4.  Punch the dough down again.  Shape the dough into a tight oval loaf that springs back when lightly pressed, but not so taut that the skin on the dough breaks.  Place the loaf on a sheet pan lined with parchment paper.

5.  Brush egg wash over the loaf.  Let rise until slightly less than doubled in volume.

6.  Using a serrated knife and starting in the center, cut halfway into each loaf at a 45 degree angle.

7.  Bake at 400º F until the loaf sounds hollow when tapped on the bottom, about 35 minutes.  Place on a rack to cool.


Notes:
1.  I let my bread rise for about 30 minutes (step 5), then turned the oven on, and baked it when the oven had heated fully.

2.  You could use 1 1/2 teaspoons of dried rosemary instead of fresh; but the flavor of fresh rosemary is so complex and wonderful, that I would recommend using fresh if at all possible.

3.  You could of course substitute any other fresh herb, but probably in greater quantities.  Rosemary is very strong, and a little goes a long way.  I highly recommend trying it with rosemary, though – it’s so good!

Posted in Savory, Yeast Breads | Leave a comment

Pugliese

Week Six: Italian Breads

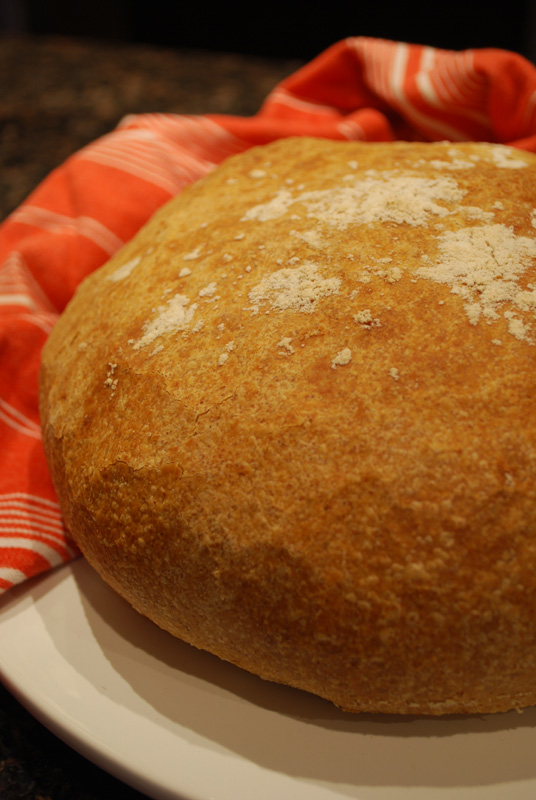
pugliese

Pugliese is Italy’s answer to France’s Pain Rustique.  I’m sure that doesn’t mean much to most of you, but they are rather similar.  Both use a pre-ferment, both contain whole-grain flour (of any various type), both are fairly wet doughs, and both are amazingly good.  First, a pre-ferment is made, also known as a starter.  Some of the flour is mixed with some of the water and yeast, and left to get bubbly and flavorful overnight.  The next day, that dough is mixed with the remaining ingredients, given a couple of long slow rises, and baked into a gorgeous loaf that is more than the sum of its parts.  One important life lesson that bread will teach you  is the virtue of patience: the best bread takes time, it simply won’t be rushed.  This is one of those breads, one that takes its sweet time, and rewards you at the end with a remarkable flavor, and a toothsome bite, chewy and fragrant with the whole-wheat flour.

Originally from the Puglia region of Italy, in the Southeastern “heel” of the country, one distinguishing characteristic of pugliese is its shape, usually formed into a large round.  Pain rustique, on the other hand, is generally formed in a squat baguette shape, called a bâtard.  Pugliese is also similar in composition to another bread, the beloved Italian ciabatta.  There are two important differences there, though.  Pugliese has the addition of whole-grain flour, whereas ciabatta is made with purely white flour.  In addition, ciabatta is also shaped differently, into the familiar slipper shape (“ciabatta” means “slipper”).  

This recipe for pugliese is actually a rather Americanized version, since in Italy, pugliese contains finely ground durum wheat flour (semolina), rather than our more familiar whole-wheat flour.  Some bakeries in Italy even make the bread entirely with durum flour.  So if you want true pugliese, this actually isn’t it.  But it sure is tasty, and I doubt even the most thoroughly authentic tipo Italiano would turn this down.  The crust is rather soft for artisan bread standards, due to the larger-than-usual amount of olive oil, but that makes it easy and wonderful to tear into big, rustic chunks, just right for dipping into a brothy soup, or mopping up the last bits of delicious sauce from your plate of pasta.  It also gives a light, fruity note behind the heartiness of the whole grains.  If you happen to be hosting a dinner party while the weather is still so cold, this would be an ideal accompaniment to a large pot of vegetable soup.  Serve everyone a steamy bowl, put the pugliese in the middle of the table, and break bread with your friends – it will warm them inside and out!


Pugliese
From Bread by Christine Ingram and Jennie Shapter

For the biga:
6 ounces unbleached bread flour (about 1 1/2 cups)
3/4 teaspoon active dry yeast
6 tablespoons lukewarm water

For the dough:
8 ounces unbleached bread flour (about 2 cups), plus extra for dusting
8 ounces whole-wheat bread flour (about 2 cups)
1 teaspoon sugar
2 teaspoons salt
1 1/2 teaspoons active dry yeast
9 fluid ounces lukewarm water (1 cup + 2 tablespoons)
5 tablespoons extra virgin olive oil

1.  Sift the flour for the biga into a large bowl.  Make a well in the center.  In a small bowl, cream the yeast with the water.  Pour the liquid into the centre of the flour and gradually mix in the surrounding flour to form a firm dough.

2.  Turn the dough out onto a lightly floured surface and knead for 5 minutes until smooth and elastic.  Return to the bowl, cover with plastic wrap, and leave to rise in a warm place for 8-10 hours, or until the dough has risen well and is starting to collapse.

3.  Sprinkle the yeast over half of the water, and combine.  Let sit for 5-10 minutes, or until foamy.  If it doesn’t foam, throw it out and start with new yeast.  Mix the flours, sugar, and salt for the dough together in a large bowl.  Add the biga to the yeast mixture, add the remaining water, and mix together.

4.  Stir in the flour mixture a little at a time, then add the olive oil slowly, and mix to a soft dough.  Turn out onto a lightly floured surface and knead the dough for 8-10 minutes until smooth and elastic.

5.  Place in a lightly oiled bowl, cover with plastic wrap, and leave to rise in a warm place for 1 to 1 1/2 hours, or until doubled in size.

6.  Turn out onto a lightly floured surface and punch down.  Gently pull out the edges and fold under to make a round.  Transfer to a lightly-floured or parchment-lined baking sheet, cover with lightly oiled plastic wrap, and let rise in a warm place for 1 to 1 1/2 hours, or until doubled in bulk.

7.  Meanwhile, preheat the oven to 450º F.  Lightly dust the loaf with flour and bake for 15 minutes.  Reduce the oven temperature to 400º F and bake for a further 20 minutes, or until the loaf sounds hollow when tapped on the bottom.  Transfer to a rack to cool completely before cutting.


Notes:
1.  I didn’t have whole-wheat bread flour, so I just used regular whole-wheat flour with no problem.

2.  I let my dough ferment for about 7 hours, obviously well over the recommended time.  The texture was affected by that, certainly (it didn’t rise as much as it should’ve in the oven, and it wasn’t as airy as it should’ve been); but it still came out pretty well, and definitely had a good flavor.

Posted in Savory, Yeast Breads | Leave a comment

Sicilian Scroll

Week Six: Italian Breads
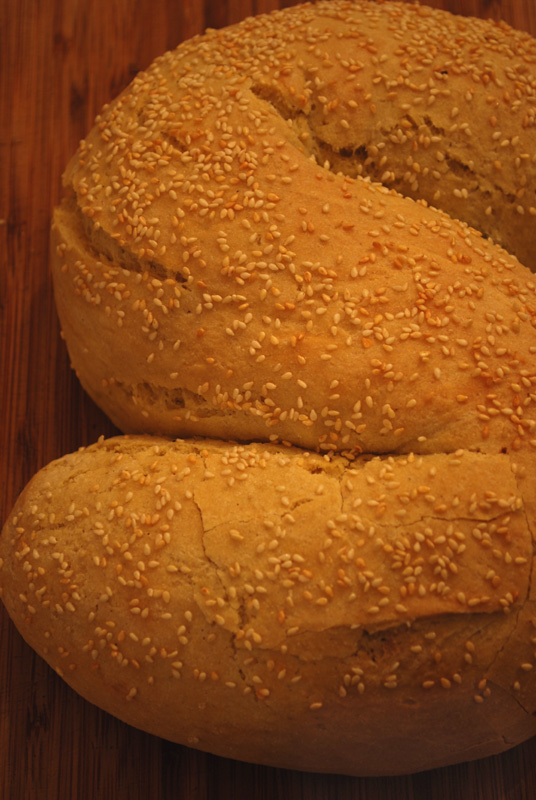
 sicilian-scroll

Oh, the breads of Italy.  Somehow, not quite as famous as their French cousins, yet every bit as delicious – and sometimes, I’d even give an Italian bread the edge.  (Mind you, I’m not referring to American-grocery-store “Italian Bread”.  Generally, in grocery stores, you’ll find a generic, insipid French Bread and a generic, insipid Italian bread, and the only difference between the two is that the Italian Bread is softer.  Neither bears any resemblance to its namesake.)  However, Italian breads have name recognition on their side: many people can easily name focaccia, ciabatta, panettone, or pizza (it’s a bread!); but how many different French breads can you name?  I know you’re saying “baguette” right now, and not much else.  Why is this?

Well, like so many other facets of life, politics got involved.  Italians, of course, have that long history of political divisions.  The land was full of warring factions, fighting over far more insignificant things than bread.  So different regions developed different breads, and each party clung fiercely to their own kind, perfecting it over time.  Of course, the bread outlasted the wars, and thank god for that.  A baguette is all well and good, but sometimes you just need a good Italian pugliese instead.

This first bread is new to me.  And I’ll be honest – I decided to make it because I didn’t have time to wait for an overnight starter, like many great Italian breads require.  Mostly composed of semolina flour, it has a more grainy texture than the typical loaf of bread, but that also gives it a fabulous pasta-like flavor.  It has a very dense crumb, but is not crumbly.  Like pasta, this is more of an “ingredient”, a bread best served with something else, as opposed to just eating on its own.  The almost nutty flavor of the semolina makes it a perfect pair for a plateful of various cheeses.  Formed into a pretty and unusual scroll, it would be a lovely centerpiece on any table.  Alternatively, it would be great for bruschetta, sliced and toasted, topped with a flavorful tomato-basil-garlic mixture.  Or, if you find it’s gone a bit stale on you after a day, try tearing it into bite-sized pieces for panzanella (a.k.a. bread salad) which is a perfect and delicious picnic food (if you happen to live where it’s warm now!).  I really can’t think of any better use for leftovers of this bread than to mix up a big bowl of mozzarella, tomatoes, cucumbers, and onion, all drizzled with a bright vinaigrette.  Summery and fresh, it’d be just the thing to take my mind off all the snow still piled on the ground.  So what if I can’t go outside?  Maybe I’ll just have myself a living room picnic instead!


Sicilian Scroll
From Bread by Christine Ingram and Jennie Shapter

1 Lb finely ground semolina (about 4 cups)
4 ounces unbleached bread flour (about 1 cup)
2 teaspoons salt
2 1/4 teaspoons active dry yeast
1 1/2 cups lukewarm water
2 tablespoons extra virgin olive oil
Sesame seeds, for sprinkling

1.  Mix the yeast with half of the water until dissolved.  Let stand 5 or 10 minutes, or until foamy.

2.  Mix the semolina, white bread flour, and salt together in a large bowl and make a well in the center.

3.  Pour yeast mixture, remaining water, and olive oil into center of the flour mixture, and gradually incorporate the semolina and flour to form a firm dough.

4.  Turn out onto a lightly floured surface and knead for 8-10 minutes or until smooth and elastic.  Place in a lightly oiled bowl, cover with lightly oiled plastic wrap, and leave to rise in a warm place for about 1 1/2 hours, or until doubled in bulk.

5.  Turn the dough out onto a lightly floured surface and punch down.  Knead gently, then shape into a fat roll about 20 inches long.  Form into an “S” shape.

6.  Carefully transfer the dough to a greased or parchment-lined baking sheet, cover with lightly oiled plastic wrap, and leave to rise in a warm place for 30-45 minutes, or until doubled in size.

7.  Meanwhile, preheat the oven to 425º F.  Brush or spray the top of the scroll with water and sprinkle with sesame seeds.  Bake for 10 minutes.  Spray the inside of the oven with water twice during this time.  Reduce the oven temperature to 400º F and bake for a further 25-30 minutes, or until golden.  Transfer to a wire rack to cool.


Notes:
1.  You could certainly form this bread into a long baguette shape, to make it easier to cut.  But the “S” shape is so unusual and pretty, and I just love it.

2.  Sesame seeds are the traditional topping for this bread, and give it a wonderful crunch and flavor; but poppy seeds, flaky salt, wheat bran, or any other topping you like would not be out of place.

3.  I’m not sure my semolina was what I’d call “finely ground”.  It was rather coarse, actually, making for a somewhat dense and grainy loaf.  It was certainly not unpleasant, though; I rather liked it.  Just use whatever semolina you can find!

Posted in Savory, Yeast Breads | 1 Comment

Westphalian Pumpernickel

Week Five: Breads for Parties

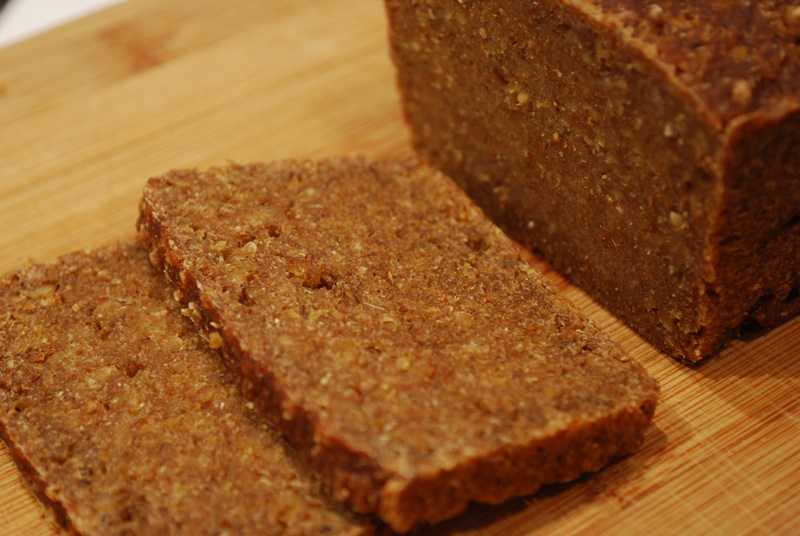
pumpernickel

There are two main types of pumpernickel in this world: the one most Americans recognize, that deep-flavored, dark, and fluffy yeast-bread often associated with and substituted for rye bread, like in a Reuben sandwich; and then there’s the traditional German-style pumpernickel, usually found deep in the dusty and catch-all “International” section of some grocery stores, that dense brick that seems to look more a block of seasoning paste than bread.  I’m going to talk about the latter, for a few reasons.  First, for parties, there’s something so pleasing about a perfectly rectangular loaf of bread, to cut into perfect squares for canapés.  You end up wasting a lot of bread if you try that with a normal loaf.  Second, the flavor of this German-style pumpernickel is unmatchable; the result of long, slow baking, its depth and complexity just can’t be mimicked in any standard yeast-bread.  Third, I just love unusual and overlooked foods.  If you can serve a slightly offbeat food, one that makes your guests ask, “What is that?”, you generally don’t have to gussy it up much.  This results in less effort overall, and you look like a genius.  Win!

Also known as Westphalian Pumpernickel, this bread is supposed to be rather polarizing – people either love it or hate it.  Personally, I can’t see anyone not liking it, especially this recipe.  But I think maybe those that dislike it are thinking of a far more true-to-its-roots item; pumpernickel traditionally was baked at a low temperature for 16 to 24 hours, turning it into a far more bitter and tough product.  Think Guinness stout, in bread form (or maybe brick form).  That, I can see not liking.  This recipe, though, is only baked for 4 hours, giving it a fabulous depth of flavor while not crossing over into burnt-black-flavor territory.  It is made without yeast or other leaveners, and must sit for anywhere from 1 to 24 hours before baking, to allow a sort of fermentation.  Technically, what’s happening here is called “malting”, which means that the grains are being soaked in liquid, and then are dried out slowly.  This converts starch into sugar, and gives the bread a sweeter flavor, while still maintaining its very hearty and rustic consistency – there’s not a mote of white flour in sight.

In the cooking process, though, it’s actually steamed more than baked.  Covered tightly, in a steamy oven, the bread takes on considerable flavor from that insane combination of molecular happenings, the Maillard reaction.  Yes, the same process that gives your steak its delicious brown outside is turning our doughy mess into rich and luscious Westphalian pumpernickel.  And when that’s done, you can cool the bread and slice it, but it’s still going to be a bit sticky.  But let it sit, tightly wrapped, for a day or two, and it should be just about perfect.  You heard me right – this bread is best started about a week before your party.  What other food can you think of, aside from pickles, where that’s the case?  Ok, it takes a little advance planning, to make the dough, let it rest for a whole day, then bake for 4 1/2 hours.  But most organized parties require some sort of advance scheduling, so there you go.

In the end, we have a bread that’s very nearly perfect for a cocktail party: easy to cut into perfect shapes with no waste, a highly nutritious alternative to uses where white bread is standard, an item you have no choice but to make in advance, and a slightly off-the-radar food.  But what on earth do you pair it with?  Part of its charm is its unusual flavor, which can clash with many things.  But I’ll tell you, when you do get a good match, it is unbelievably good.  This bread is a too crumbly to use for dipping, so you’re stuck with canapés.  This is not a hardship.  Slice the whole loaf thinly (surprisingly easy to do), cut stacks of the slices into halves or thirds, and toast on a sheet tray in a 350º oven until crispy.  One amazing combination is to spread the toasts with grainy brown mustard, layer with thin shavings of good ham, and top with an assertive hard cheese.  Simple, and you really won’t believe how good it is.  (Full disclosure: that’s what I ate for breakfast this morning, but with a fried egg thrown in to round it out.  It was so good, I’m seriously planning on cooking it again tomorrow.  No joke.)  Bon Appétit once featured a Shrimp Remoulade on Molasses-Buttered Pumpernickel that I have served to rave reviews for a Mardi Gras party.  It’s very Nouveau Creole, and I for one couldn’t stop eating them.  Try spreading them with a creamy Camembert, top with a slice of tart apple or pear, and dust with ground caraway seeds.  You can butter the toasts, and serve with a slice of cured or smoked salmon with a sliver of fresh fennel.  Or for the easiest route, just pick up a variety of sliced cured meats and sausages, and simply serve on a platter with the pumpernickel, with maybe some cornichons and mustard on the side.  Think hearty, robust flavors, that can handle a bit of sweetness, and you’re all set.  And if you have any leftover, take the advice of the only remaining Westphalian baker of traditional bake-for-a-day pumpernickel, Hubert Schulze-Hillert: “Butter it thickly, cover it with a wedge of ham, and wash it down with a good cold beer.”  Don’t mind if I do.

Westphalian Pumpernickel
From Bread by Christine Ingram and Jennie Shapter
Makes 2 loaves

1 pound rye flour (about 4 cups)
8 ounces whole-wheat flour (about 2 cups)
4 ounces bulgur wheat (about 2/3 cup)
2 teaspoons salt
2 tablespoons molasses
3 1/2 cups warm water
1 tablespoon vegetable oil

1.  Lightly grease two 7×3 inch loaf pans.  Mix the rye flour, whole-wheat flour, bulgur wheat, and salt together in a large bowl.

2.  Mix the molasses with the warm water and add to the flours with the vegetable oil.  Mix together to form a dense mass.

3.  Place in the prepared tins, pressing well into the corners.  Cover with lightly oiled plastic wrap and leave in a warm place for 18-24 hours.

4.  Preheat the oven to 225º F.  Cover the tins tightly with foil.  Fill a roasting pan with boiling water and place a rack on top.

5.  Place the tins on top of the rack and transfer very carefully to the oven.  Bake the loaves for 4 hours.  Increase the oven temperature to 325º F.  Top up the water in the roasting pan if necessary, uncover the loaves and bake for a further 30-45 minutes, or until the loaves feel firm and the tops are crusty.

6.  Leave to cool in the tins for 5 minutes, then turn out onto a wire rack to cool completely.  Serve cold, very thinly sliced, with cold meats.


Notes:
1.  I used olive oil instead of vegetable oil.  There’s so little, you’d never notice any flavor difference, so use what you’ve got.

2.  I’m not really sure what you’re intended to do exactly with the rack in step 4, so I just filled a large ceramic pan with hot (not boiling, to avoid breaking the pan) water, heated it up with the oven, and set my oven rack as close to the top of it as I could.  It seemed to work just fine.

3.  This bread can be eaten after it cools, but it will improve if left wrapped tightly in plastic wrap and aluminum foil for a couple of days.  This gives it time to dry out a little, and let the stickiness dissipate.  Any longer than that, and you may want to just stick it in the freezer.

4.  I didn’t mention it before, but this bread is unleavened.  Just in case you were wondering where the yeast, or baking powder is in the recipe – there isn’t any.

Posted in Savory, Unleavened Breads | Leave a comment

Gougères

Week Five: Breads for Parties

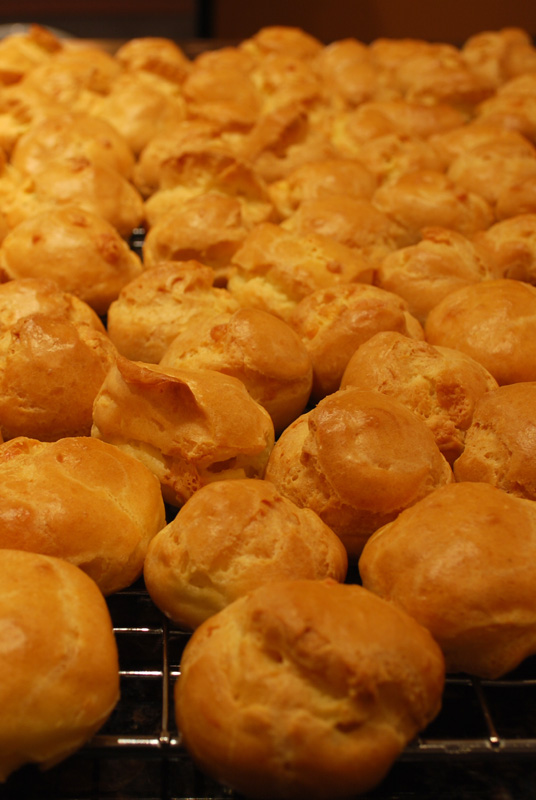
The bread I’ve picked for today takes a bit of a liberty with the term, but it is most certainly a flour-water mixture that then gets cooked, so I say it’s fair game.  This recipe is for gougères, and there really is no other way to say it.  I’ve seen them called “cheese puffs”, but that term always brought to my mind images of fluorescent orange, sodium-packed, styrofoam-y snack foods.  Gougères are as far away from those as a Lamborghini is from a Hot Wheel, so I stubbornly and deliberately avoid that phrasing.  Technically, they’re pâte à choux with cheese added to the dough, but who ever knows what pâte à choux is?  As laborious as it is, you’ll probably have to explain exactly what they are every time; but once you get this recipe down pat, your guests will start asking for these by name.

What’s pâte à choux, you ask?  Well, it’s the dough that éclairs are made out of, as well as profiterôles, cream puffs, those adorable little pastry swans, and countless other items in the bakeshop.  Pâte à choux (or, choux paste) is one of the best tricks up a pastry chef’s sleeve, because of its speed to make, its ease (once you know how), and its simple ingredients that can adapt to endless variations of flavoring and shaping.  The name literally translates to “cabbage paste” (paste as in pastry), because the original recipes, baked into little balls, rather looked like cabbages.  Originally created in the mid 1500s, pâte à choux has gone through a few changes to the recipe, but it was perfected by Antonin Carème around the turn of the 19th century into the smoother item we know today.

Probably most well-known as the pastry-cream-filled, chocolate-ganache-topped confection called the éclair, pâte à choux can be piped into mounds, strips, rings, spirals, and everything in between, using a plain or a star tip in your piping bag.  Because the dough contains no sugar, they can be filled with anything from salmon mousse to chocolate mousse (but not at the same time!), and all are equally delicious.  They can stand alone, as in a cream puff, or be combined with other items to produce something more than the sum of its parts, like a Gateau St. Honoré.  There’s one rare iteration (called a “polka”, as in “dot”) where a ring of choux paste is piped onto a circle of puff pastry, baked, then filled with a mixture of pastry cream and buttercream, and dusted with powdered sugar.  It’s just as delicious as it sounds!  To make gougères, you simply take pâte à choux dough, and add cheese, preferably one with a low moisture content, as that can affect the way they puff (or don’t puff, as the case may be).

Ok, fair warning: this is what you might call an “advanced” recipe.  But!  It’s really not that hard, once you know how to do it!  If you know someone who knows how to make choux paste, they can show you what to look for; but in lieu of a pastry chef BFF, the amazing Alton Brown has done an episode about pâte à choux, and can explain it far better than I can.  I almost consider it required watching if you want your choux to puff properly.  The recipe below is from Bo Friberg’s The Professional Pastry Chef, one of the textbooks I used in culinary school, and one of the best cookbooks on my shelf.  I have yet to find a recipe in it that didn’t succeed with flying colors, and this one is no exception.  The only requirement is a stand mixer with a paddle attachment (see note #2 below), and maybe something to pipe the dough with (a Ziploc bag is fine).  You can just portion out the dough with a spoon, but all those little peaks will need to be patted down before baking, otherwise they’ll burn.  It is rather a lot of information, but the more you know before getting into it, the more success you’ll have.  And you know what?  Even if your puffs don’t exactly puff, they’ll still taste delicious.  So don’t be afraid!  Give it a go!  You’ll never regret at least trying, right?

If you can master pâte à choux, you’ll never be at a loss for a fairly quick and supremely impressive item in your culinary arsenal.  The dough will accept any number of different flavors, in all sorts of different formats: dried herbs, ground spices, flavored sugars, flavored salts, cheeses, ground nuts, etc. etc. etc.  Or you could just leave them plain, and press spices, cheese, or coarse sugar or salt into the tops before baking.  Gougères are perfect little bites for a wine party, and can easily be paired with specific wines based on the cheese used.  You could even split the dough into three or four portions and mix a different cheese in with each one.  Have your friends each bring a different bottle of wine, and have fun seeing which pairing goes best together!  (Just make sure not to mix up the batches of gougères – they’re impossible to tell apart once they’re made!)

all the gougeres

Gougères
From The Professional Pastry Chef by Bo Friberg
Makes enough for about 35-50 puffs, 1 1/2 to 2 inches in diameter

4 ounces cake flour (about 3/4 cup plus 2 tablespoons)
5 1/2 ounces bread flour (about 1 1/4 cups)
1 pint water
6 ounces unsalted butter (1 1/2 stick)
1/2 teaspoon salt
1 pint eggs (about 8 large, see note #8 below)
10 ounces cheese (preferably Gruyère or Emmenthaler) finely diced or grated

1.  Preheat oven to 400º F.  Sift the flours together on a sheet of baking paper and reserve.

2.  Heat the water, butter, and salt to a full rolling boil, so that the fat is not just floating on the top but is dispersed throughout the liquid.

3.  Form the ends of the baking paper into a pouring spout.  Then, using a heavy wooden spoon, stir the flour into the liquid, adding it as fast as it can be absorbed.  Avoid adding all of the flour at once, as this can make the paste lumpy.

4.  Cook, stirring constantly and breaking up the inevitable lumps by pressing them against the side of the pan with the back of the spoon, until the mixture forms a mass and pulls away from the sides of the pan, about 2 to 3 minutes.

5.  Transfer the paste to a mixer bowl.  Let the paste cool slightly so the eggs will not cook when they are added.

6.  Mix in the eggs, 2 at a time, using the paddle attachment on low or medium speed.  Add as many eggs as the paste can absorb and still hold its shape when piped.  Beat on high speed for a minute or two, until paste cools and becomes shiny.  Beat in the cheese.

7.  Pipe the paste into the desired shape, about 1 to 1 1/2 inches in diameter (they will puff up to be a little bigger than they are when piped out), onto a parchment-lined sheet pan.  Bake immediately at 400º F for approximately 25 minutes or until fully baked and golden brown.  When done, poke slits in the sides to release steam and ensure they stay puffy and don’t fall flat.


Notes:
1.  Instead of the full amount of water, I used 1 1/4 cups of water and 3/4 cup of dry white wine, for a little extra flavor.  For the cheese, I used 8 oz blue cheese, crumbled into as small bits as possible.  It was not top quality, but it did the job.  I figure I’ll save my Maytag Blue for eating plain.

2.  Bo Friberg suggests that it is “quite easy” to add the eggs by hand, just in the saucepan where the flour mixture was cooked.  Personally, I’ve tried it; it only works if you have a bionic arm.  It takes a lot of effort, so if you have a very strong arm (or one at your disposal), then give it a go.  Me, I’ll just stick with my mixer.  See, if the eggs aren’t added fast enough, they won’t all absorb into the dough, making it runny, which means they’ll be flat.  I went through several batches of pancaked profiterôles before I learned what I was doing wrong.

3.  Gougères should be eaten the same day they are baked, or frozen and reheated later in a 350º F oven for about 4-5 minutes.

4.  As long as you do not let it become too brown, you cannot overbake pâte à choux, so make sure the shells have been baked long enough to hold their shape and not fall.  The baked shells can be stored covered for a day or two, but once filled, they should be served the same day.

5.  It is unnecessary to glaze pâte à choux with egg wash before baking.  The egg cooks before the pastries have finished expanding in the oven, which gives them an ugly cracked appearance. (Some recipes direct you to do this.  It is a mistake.  Don’t listen.)

6.  Cook the pastries quickly, before a skin forms on the dough.  This means that if you have too much dough than will fit on your tray, don’t pipe any more out until the first batch is done.

7.  Do not open the oven door fully when baking.  The sudden drop in temperature will cause the shells to collapse.

8.  Yes, you do have to measure out the eggs.  You can beat them lightly in order to measure exactly (you may end up needing half an egg, or some such).  It is best if they are about room temperature, but you don’t have to be adamant about that.

9.  When piping out, use a well-moistened finger to pat down any “soft-serve-ice-cream” peaks that form.  They will burn otherwise.

10.  Any additional flavorings should be added in small amounts, and “like to like” (i.e., powdered spices like cinnamon in with the flour, liquid flavors like vanilla in with the eggs).  The idea, most of the time, is for the dough to taste neutral, and be more like an ingredient than a finished product.  Gougères are a bit of an exception.

11.  You can use 9 1/2 ounces of all-purpose (about 2 cups plus 2 tablespoons), if you don’t have cake and bread flour, although it is best to use the combination.

12.  By the way, I figure it goes without saying, but thought I’m mention that if you want plain pâte à choux, just leave the cheese out.

Posted in Quick Breads, Savory | Leave a comment

Whole-Wheat Pita Bread

Week Five: Breads for Parties

a pita cut into wedges, served with black bean dip

a pita cut into wedges, served with black bean dip

As much undying love as I hold in my heart for a good baguette, I’ll be the first to admit that there are times when that type of bread just won’t do.  Crazy, I know; but I’ve got one word for you: hummus.  Can you really enjoy hummus without something like pita bread?  And what kind of life is it that doesn’t include hummus?  Not one I’d like to live, I’ll tell you right now.

Pita bread is another of those fabulously indispensable party foods.  There are simply some things for which a cracker or chip is just too crispy, and for which any other bread just isn’t quite right.  But cut a pita into wedges and toast them, and you’ll find no better match for a caramelized onion dip, a roasted eggplant purée, a spicy black bean dip, or that creamy wonder, hummus.  They have lately become de rigueur on menus for cocktail parties, and for good reason.  Pita wedges, soft and warm, provide a welcome change in texture and flavor from the standard box of crackers, and they are hearty enough to help soak up any excesses that may be indulged in!

Originally from the Middle East, pitas have a natural affinity for flavors from that area of the world, and are served there with just about every dish, often in lieu of utensils.  There’s a reason you’ll find one tucked inside your Greek or Lebanese takeaway; it’s practically a requirement, aside from being delicious.  I think it might just be illegal in some jurisdictions to serve a gyro without a pita; and I might raise some cain if I were served falafel without one.

Of course, pitas aren’t just for parties or for when you order food in; they’re an incredibly versatile bread to have around.  Even if they’re frozen, they can thaw quickly in a toaster, and you’ll have bread to eat with dinner.  If you often make a “kitchen sink stir-fry”, like I do (you know, where you take various leftovers, mix with fresh or frozen vegetables, maybe add an egg, and serve over rice, or just plain), there’s no better partner than a good flatbread.  Pitas also make excellent crusts for individual pizzas – no arguments over toppings!  Ever served a veggie burger inside a pita?  Easy, fast, nutritious, and tasty – you can’t beat it.  Even with plain old deli meat and lettuce, pitas make wonderful sandwiches, easy to wrap in foil and throw in your bag to bring for lunch.  They’ve become immensely popular in recent years.  And bread manufacturers have noticed – you’ll even find pitas in grocery stores where you’re lucky to find extra-virgin olive oil, or a decent piece of produce.

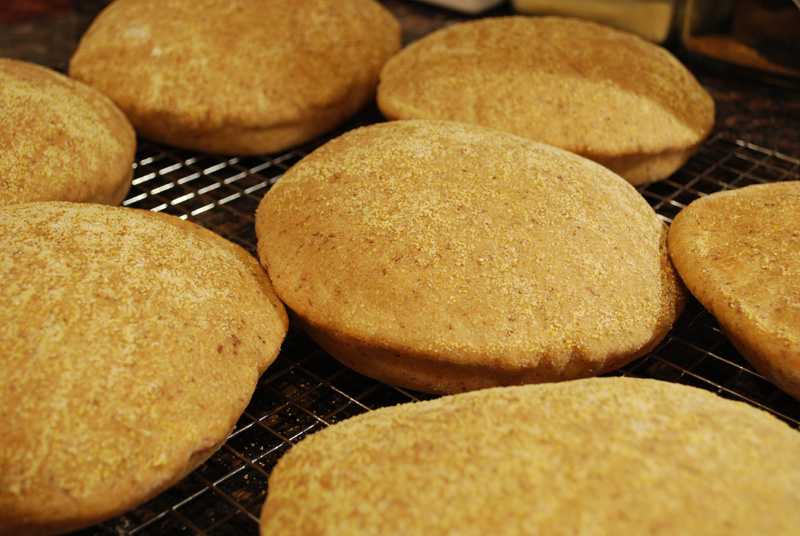
So with the widespread availability of packaged, ready-to-go pita bread, why on earth would you make your own?  Well, have you ever tried pita bread fresh from your oven, steamy and warm?  You’d understand why, if you had.  It’s worlds away from the stuff you find in the bags, slumped in front of the deli counter.  This recipe produces a bread with an ever-so-slightly sour tang from the long fermentation, a perfectly tender interior with a subtle crunch on the outside, and more pocket inside than you know what to do with.  It’s so good, it’s almost enlightening: you finally understand what all those impostor pitas were trying to taste like!  This version is especially good, as it’s a whole-wheat recipe.  Many whole-wheat pitas in the store end up tasting rather like cardboard (especially when stale), but these are nutty and delicious.

So the next time you have everyone over for Margaritas (all the time, right?), why not try your hand at these?  They are a bit more work than simply running out to the store, I won’t lie; but they really are simple, and I promise you they’re definitely worth it.  The rolling out is the hardest part, though, so if you can handle that, you can handle these pitas!  When you’ve made them, cut them into 12-16 wedges per round, then toast again in a 350º oven.  If you like, brush them with olive oil, then sprinkle with any number of spices, like cumin, celery seed, curry powder, paprika, or just salt and pepper.  To accompany, find some good hummus that can match up to your bready efforts, either at a restaurant, or a better grocery store (hey, I never said everything has to be homemade!).  Or simply stick a couple cans of rinsed black beans in your food processor (or mash by hand) with some chopped red onion, cilantro, cumin, and a bit of olive oil to make it creamy, top with sour cream or thick yogurt and lime wedges, and you’ve got yourself a party!

all the puffy pitas

all the puffy pitas


Whole-Wheat Pita Bread
From Gourmet Magazine
Makes eight 7-inch rounds

1 (1/4-ounce) package active dry yeast (2 1/2 teaspoons)
1 teaspoon honey
1 1/4 cups warm water (105–115°F)
2 cups bread flour or high-gluten flour, plus additional for kneading
1 cup whole-wheat flour
1/4 cup extra-virgin olive oil
1 teaspoon salt
Cornmeal for sprinkling baking sheets

1.  Stir together yeast, honey, and 1/2 cup warm water in a large bowl, then let stand until foamy, about 5 minutes. (If mixture doesn’t foam, discard and start over with new yeast.)

2.  While yeast mixture stands, stir together flours in another bowl. Whisk 1/2 cup flour mixture into yeast mixture until smooth, then cover with plastic wrap and let stand in a draft-free place at warm room temperature until doubled in bulk and bubbly, about 45 minutes. Stir in oil, salt, remaining 3/4 cup warm water, and remaining 2 1/2 cups flour mixture until a dough forms.

3.  Turn out dough onto a floured surface and knead, working in just enough additional flour to keep dough from sticking, until dough is smooth and elastic, 8 to 10 minutes. Form dough into a ball and put in an oiled large bowl, turning to coat. Cover bowl with plastic wrap and let dough rise in draft-free place at warm room temperature until doubled in bulk, about 1 hour.

4.  Punch down dough and cut into 8 pieces. Form each piece into a ball. Flatten 1 ball, then roll out into a 6 1/2- to 7-inch round on floured surface with a floured rolling pin. Transfer round to 1 of 2 baking sheets lightly sprinkled with cornmeal. Make 7 more rounds in same manner, arranging them on baking sheets. Loosely cover pitas with 2 clean kitchen towels (not terry cloth) and let stand at room temperature 30 minutes.

5.  Set oven rack in lower third of oven and remove other racks. Preheat oven to 500°F.

6.  Transfer 4 pitas, 1 at a time, directly onto oven rack. Bake until just puffed and pale golden, about 2 minutes. Turn over with tongs and bake 1 minute more. Cool pitas on a cooling rack 2 minutes, then stack and wrap loosely in a kitchen towel to keep pitas warm. Bake remaining 4 pitas in same manner. Serve warm.


Notes:
1.  Pitas, like most breads, freeze beautifully, wrapped in foil in a sealed plastic bag. To reheat, keep wrapped in foil and bake for 10-15 minutes in a 350°F oven.

2.  The pocket in this bread comes from cooking at such a high heat.  If your oven doesn’t go to 500º, just turn it as high as it goes.  Your bread may not develop as much of a pocket, but it’ll still be delicious!

3.  Be careful not to puncture the breads when you’re turning them.  The steam will give you a nasty burn, and they won’t really have as much of a pocket when they cool.

4.  I added about 3 tablespoons of ground flaxseed to my dough (added at the same time as the salt and oil, etc.).  I love the nutty flavor it gives and the grainy chew of it, not to mention that it’s ridiculously good for you.  You could also add some wheat or oat bran or germ, or rolled oats, or any other random grain you’ve got sitting around.  I also misread the recipe and used 1 tablespoon of honey (instead of 1 teaspoon), but they tasted fabulous, not sweet at all.

5.  I baked mine four at a time, on parchment paper on a baking stone.  They puffed up like crazy, and took maybe 1 minute longer to cook.  Use your judgement!

6.  The cornmeal isn’t really necessary to use, but it certainly gives the crust a lovely crunchiness; but more importantly, it absolutely helps move the dough around.  Think of it as tiny edible ball bearings under your dough, letting it slide around easily.

Posted in Savory, Yeast Breads | 1 Comment

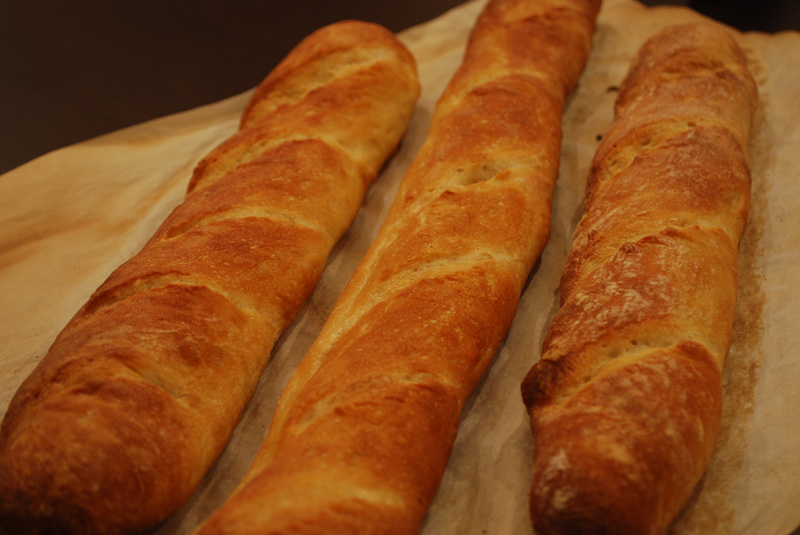
Baguettes

Week Five: Breads for Parties

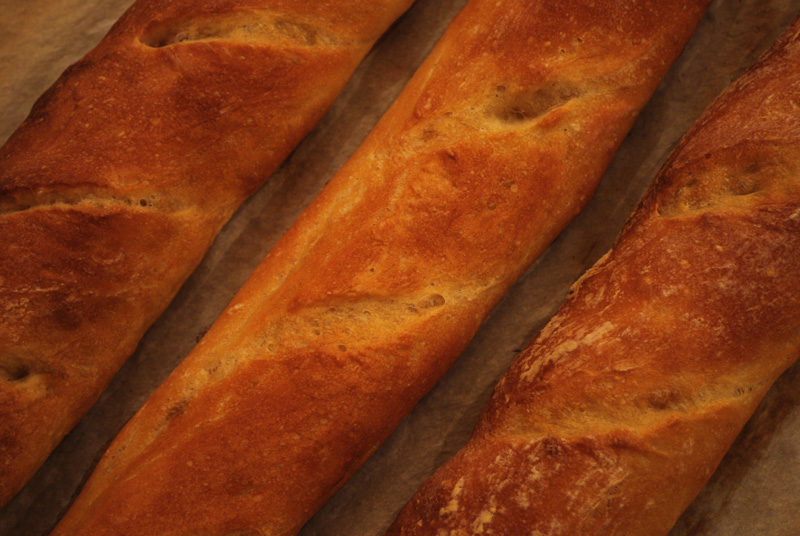
I think there is no more versatile or indispensable food you can have for a party than a trusty baguette.  Whether you’re toasting slivers for elegant canapés or bruschetta, serving slices alongside a rustic cheese platter, or simply tearing into pieces to soak up that last delicious bit of sauce on your dinner plate, a baguette can do it all.  It’s basically the Little Black Dress of the bread world: timeless, soigné, and goes with absolutely everything.

And, like the Little Black Dress, it’s darn near impossible to find the perfect one.  Bakers have spent lifetimes searching for the method for a flawless baguette – there’s always just that one tiny aspect that could be improved upon.  To the layman, however, those lofty ambitions can seem like tilting at windmills; I mean, didn’t that last loaf taste just fine?  What’s the point in striving for perfection in bread where, because of differences in taste, there arguably can be none?  But I take one look around the bakery section of any typical American grocery store, and I not only see their point, but I champion their cause!  Have you seen the state of bread in this great nation of ours?  The sad, dull-flavored, soft-crusted, dense-crumbed, anemic things that pass for a baguette would make Poilâne cry.  They more resemble the dough they’re made from than a proper finished baguette, with its brown crust ready to shatter at the touch of a knife, its silky-soft interior that has an even distribution of little air pockets, and its gently sour, but somehow still sweet, flavor that haunts your palate.  Once you’ve tried an expertly-made baguette, you’ll never be satisfied with those pale imitators again.

That’s all well and good, you might be saying, but I just can’t be bothered to research and sample every bakery in town.  Or maybe you don’t even have a bakery in your town.  That’s where this recipe comes in.  I’m not saying it will win an International Baking Contest, but it might get you into the semi-finals.  I know, it takes a while to make.  But trust me, it is most certainly worth the effort.  Start it the afternoon or night before, and finish it the day of your party.  Yes, I’m serious.  Most of it is hands-off, leaving you plenty of time to prepare other foods, or clean up a bit.

So what makes this bread so much better than another, less time-consuming bread?  The main difference is the starter, or “poolish”, in this recipe.  A poolish is a type of pre-ferment, usually a very wet one.  It was first used by Polish bakers, hence the name.  By letting some of the ingredients sit overnight, you develop far more complex flavors than you would by just mixing everything together at once.  Kneading is reduced by letting time do the work for you instead; the gluten forms continuously and slowly, rather than quickly under your hand, making for a more tender and pleasantly chewy texture.  With bread so simple (did you know that under French law, baguettes must contain only flour, water, salt, and yeast?), flavor is crucial, and is not only comprised of the actual taste, but of the texture as well.  When one of those goes out of whack, the bread goes off.  This recipe produces a highly excellent flavor, which can go far in forgiving a less-than-ideal texture.  Since the best texture for a baguette is best accomplished in a professional-grade, steam-injected oven (and if you have one in your home, I’m coming over immediately), the extra help is definitely welcome.

Speaking of baking situations, if you’re lucky enough to have a baking stone, now’s the time to use it.  If you want one, but don’t want to shell out the cash, try making your own with an unglazed tile or quarry stone.  If you can’t be bothered, your baking sheet is just fine too.  They’ll be equally tasty, if just a little less crunchy.  I’m giving you this recipe in all the detail I have it in, because more information is better here.  Apologies for information overload!

Even if you decide that you’ve got too much on your proverbial plate to make baguettes for your next party, I urge you to try these another time.  They will certainly make any meal special, even leftovers.  (And really, don’t leftovers need all the love they can get?)  They are stunningly good.  You’ll certainly amaze any guests, and you’ll probably amaze yourself too!

Baguettes
Makes 3 loaves
From King Arthur Flour

Poolish (Starter)
1 1/4 cups (5 1/4 ounces) unbleached bread or all-purpose flour
2/3 cup (5 1/4 ounces) cool water (approximately 60°F)
1/8 teaspoon instant yeast

Dough
2 1/2 cups (10 1/2 ounces) unbleached bread or all-purpose flour
1 1/2 teaspoons instant yeast
2 teaspoons salt
All of the poolish
2/3 cup (5 1/4 ounces) cool water (approximately 60°F)

For Poolish:
1.  Combine the flour, water and yeast and mix until just blended in a medium-sized mixing bowl. Let the poolish rise covered at cool room temperature for 12 hours or so (overnight is usually just fine).  It should dome slightly on top, and look aerated and just plain goopy. Try to catch it before it starts to fall, as it will be at its optimum flavor and vigor when it’s at its highest point.  On the other hand, don’t make yourself crazy about this; I’ve used plenty of starters that were either pre- or post-prime, and they’ve worked just fine.

For the Dough:
1.  Place the flour, yeast, and salt in a mixing bowl, the work bowl of a food processor, or the bottom of an electric mixer.  Add the poolish and water, and mix until everything is more or less combined (it’s ok if there’s still flour in the bottom of the bowl).  Let the dough rest, covered, for 20 minutes.  This resting period allows the flour to absorb the liquid, which will make kneading much easier.  Knead the dough, by whatever method you like, till it’s cohesive and elastic, but not perfectly smooth; the surface should still exhibit some roughness.  You’ll want to knead this dough less than you think you should; while it’ll shape itself into a ball, it won’t have the characteristic “baby’s bottom” smoothness of fully-kneaded dough.  So, why aren’t we kneading this dough “all the way”?  Because we’ll give it a nice, long rise (fermentation), and during that rising time the gluten continues to develop.  If you were to knead this dough fully before rising, the gluten would become unpleasantly stiff during the long fermentation.

2.  Transfer the dough to a lightly oiled bowl (or oil your mixer bowl, and leave it there).  Cover it, and let it rise for 2 hours, folding it over after the first hour.  To fold dough, lift it out of the bowl, gently deflate it, fold it in half, and place it back in the bowl; this expels excess carbon dioxide, and also redistributes the yeast’s food.

3.  When it has finished its 2-hour rise, divide the dough into three pieces and gently pre-form it into rough logs. Let them rest for 20 minutes, and then shape it into long (13- to 14-inch), thin baguettes. Proof the baguettes, covered with lightly-oiled plastic wrap, on a baguette pan, or a greased or parchment-lined baking sheet until they’re puffy looking, and about 85% risen, 30 to 40 minutes.

4.  Preheat your oven (and your baking stone, if you have one) to 500°F. Just before putting the loaves into the oven, use a sharp serrated knife to gently make four diagonal cuts in each loaf. Hold your knife at a 45° angle to the dough’s surface, and slash quickly and decisively, about 1/2-inch deep.  Be gentle, but quick; if you hesitate and drag your knife through the dough, it’ll stick rather than cut.

5.  Spray the loaves with warm water; this will vaguely replicate the professional baker’s steam-injected oven.  Reduce the oven heat to 475°F and bake the loaves for 18 to 24 minutes. Remove the loaves from the oven when they’re a deep, golden brown, and transfer them to a rack to cool.  Listen closely just as you take the loaves out of the oven; you’ll hear them “sing”, crackling as they hit the cool air of your kitchen.  Let the loaves cool completely before slicing, if you can wait; if you can’t wait, understand that the texture of the loaves where you cut them may be gummy, as they still contain moisture, which will be emitted as they cool.


Notes:
1.  If you have a squirt bottle for water, that’s ideal, but you can just sprinkle the loaves with water flicked from your fingertips.  Just don’t skip that step; it’s surprisingly important!  You can just squirt them once, as you’re putting them in the oven, and then hit them again, after about five minutes baking; but I hardly ever remember to do the second time.  They turn out pretty nicely just spraying them the once.

2.  The twenty minute cat-nap you give the dough is called “autolyse”, a word you’ll probably never run across again.  It helps the gluten relax, and makes for a better end product.  But!  Salt interferes with the action in autolyse!  So, in contradiction to the recipe, I just mixed all the other ingredients, let the dough autolyse, and then added the salt after, as I finished kneading.  I really don’t know how much of a difference it makes, but do whatever you’re most comfortable with.

3.  I used active-dry yeast, and let my poolish sit for about 20 hours.  It was just about perfect.

4.  Instead of lifting the dough out of the bowl after the first hour of fermentation, I simply folded the dough over with a spatula, in the bowl, and kinda squished it down a little.

5.  I turned my oven temperature down to 450º, and they took about 20 minutes to cook.  Be sure not to remove them too early; you want a lovely brown color, not a pale golden.

6.  Because these loaves contain no fat, they won’t keep at room temperature for very long.  Eat them either the same day they’re baked, or wrap them in foil and stash in the freezer.  Rewarm in a 350º oven, for 10-20 minutes (depending on how thick and frozen they are).  My favorite trick is to cut a loaf into individual pieces and freeze them in a gallon ziploc.  While cooking dinner, just reheat them in the oven, or under a low broiler until thawed and warm.

Posted in Savory, Yeast Breads | 4 Comments

Sweet Potato Crackers

Week Five: Breads for Parties

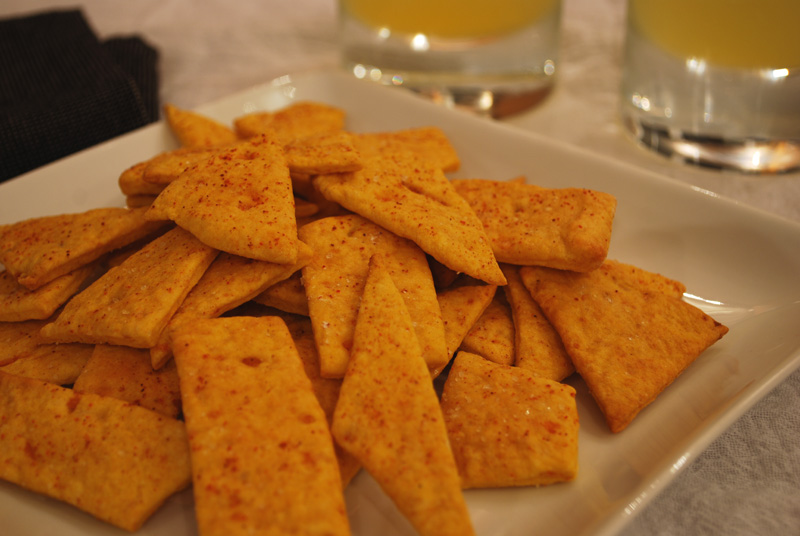
sweet potato crackers with cayenne

sweet potato crackers with cayenne

What would a party be without crackers?  They’re versatile enough to go with every cheese, spread, dip, and topping imaginable; and I for one have never heard someone say that they didn’t like crackers.  You can get them at any place that sells food – even gas stations!  They can sit out all night or all day, and never really go bad exactly, just maybe a little chewy.  They’re cheap to boot, and come in a million different shapes, flavors, colors, and forms.  So why on earth would anyone want to make crackers?  Because as easy and reliable as store-bought crackers are, sometimes they just can’t hold a candle to home-made.  Besides, when have you ever seen sweet potato crackers in a store?  I can’t even find them on the internet!

Crackers as we know them, those crispy and light things, first originated in the 19th century, right about the same time as baking soda and powder were discovered (surprise, surprise).  Before that, hard cracker-esque breads go all the way back to the most ancient peoples, probably originating in the Middle East.  Because of their transportability and long-keeping properties, they were mainly used for army rations, or on long ocean voyages.  Both reviled and reminisced upon fondly, such breads had to be eaten with some sort of liquid (like soup), since they were usually too hard to eat by themselves.  Oyster crackers, formerly larger than the dime-sized affairs we see nowadays, are an offshoot of this hardtack.  Coastal people who cooked food for sailors’ voyages started using the (much fresher and far more edible) crackers to enhance and stretch their soups, particularly chowders.  The advent of chemical leaveners in baking made these breads lighter and more delicious, and they soon became widely popular.

This recipe uses a biscuit method, by cutting butter into flour, then mixing in wet ingredients.  The amount of butter is relatively small, which means that the crackers won’t rise very much.  The butter, here, acts to shorten the strands of gluten that form when you roll the dough out, as much as to add lightness in texture, and add flavor.  You still want to move quickly when cutting the butter into the flour (if you’ve got a food processor, you may want to use it), but it’s not as crucial to keep everything cold, as you might with biscuits.

One shortcut you could definitely take (and one I aaalmost took) is to use canned plain pumpkin instead of bothering with the sweet potato.  But since one of the best “pumpkin” pies I’ve ever made used sweet potato instead of pumpkin, I figured I’d try the recipe as written.  I was also worried while making them that I was rolling them out too thin, overworking the gluten, and letting the butter in the dough get too warm, on the counter next to the hot oven.  I shouldn’t have worried one bit: they might even have been thinner (and therefore crispier), and they weren’t tough at all.  I decided to top all of them with kosher salt, and half of them with cayenne pepper also.  The cayenne was just wonderful with the sweet potato flavor, and I rather wish I had done all of them that way.

These crackers are just perfect for your next Cocktail Hour.  I can picture serving a plateful of these spicy, cayenne-topped lovelies alongside a wedge of creamy blue cheese to spread on top, while sipping on a classic Sidecar.  If you want a different flavor base to play with, try adding a pinch of cinnamon and the zest of an orange to the sweet potato purée, and substituting the salt on top with a coarse sanding sugar.  Serve that with warm brie and honey, and a Manhattan or a well-made Sazerac (which, if you’ve never had, is one of those things you must try before you die).  For a gathering outdoors, when the weather’s nicer (I can dream, can’t I?), try adding lime juice and zest to the purée, topping with salt and a light sprinkle of ground or crushed cumin, and toasting with a refreshing Margarita (on the rocks, please!).  Making your own crackers takes just a little extra time, but the amazing flavor and crunch are more than worth it; not to mention the personal satisfaction you’ll get from all the ooh’s and aah’s as your friends dig in!


Sweet Potato Crackers

1 1/2 cups all-purpose flour
2 1/2 tablespoons baking powder
1/2 teaspoon salt
3 tablespoons butter, cold and cut into 1/4-inch pieces
1 medium sweet potato, peeled and diced
1/4 cup milk (approximately)
1 egg, beaten with 1 tablespoon water to make an egg wash
Coarse salt for topping
Other seed, herb, or spice as desired for topping

1.  Preheat oven to 350º F.  Cook sweet potato in boiling water until very soft, about 15-20 minutes. Cool and smash with a fork or purée in food processor with milk to make a smooth mixture to equal 1 cup.

2.  Sift flour, baking powder, and salt together into a large bowl.  Add butter and cut into the flour mixture until it looks like a coarse meal texture.  Some bigger lumps are okay.

3.  Beat sweet potato puree into flour.  Turn out onto a floured surface, and knead only until smooth, adding just enough flour to keep dough from sticking.

4.  Divide dough into 4 pieces.  Roll each out to a very thin layer on a floured surface, keeping the remaining pieces covered.  Turn the dough a quarter turn between rolls to make sure it isn’t sticking to the surface.

5.  Cut into rounds, squares, or haphazard geometric shapes.  Brush with egg wash, and sprinkle with salt and other herbs, seeds, or spices.

6.  Bake at 350º F on an ungreased or parchment-lined sheet for 10-13 minutes, until bottoms are slightly browned.  Turn over and bake 3-4 minutes more.  Cool on rack before storing in an airtight container.


Notes:
1.  Sesame seeds or a light sprinkling of cayenne pepper are fabulous with the flavor of sweet potato.  Other suggestions: ground cumin, dried mint, paprika, thyme, etc.

2.  I think I may have pulled my crackers out a little early, as they were just barely golden, not browned.  But they had a pleasing chew to them, and will probably stand up to being frozen better that way, since they’re less brittle.  I figure I can freeze them as they are, slightly undercooked, then pull them out for guests and quickly crisp and thaw them at the same time.

3.  I didn’t try it, but you could dock these crackers with a fork to give them a more “crackerly” appearance.  I’m sure it would be lovely.  (The purpose of docking crackers is to help them bake more evenly, by releasing pockets of air that might form.  I didn’t have a problem with that, though.)

Posted in Quick Breads, Savory | 3 Comments

Black Olive Grissini

Week Five: Breads for Parties

One of the many personality traits I have inherited from my mom is a love of entertaining.  Unlike many of the others, though, this trait surfaced only recently; in fact, the very idea of having people in my home used to give me a fair amount of anxiety.  I mean, what will we all do?  What if they don’t like the food?  Oh god, what if no one shows up?  Not to mention the difference in the level of sophistication required to make the switch from throwing a house party of the sort I had been used to in college, to the far more Martha Stewart affairs I envisioned myself swanning around.  Fortunately, though, hosting a party is one of those things that gets easier the more you do it.  In the preparations of those first several nerve-wracking efforts, I would embolden myself by remembering that these were my friends that I was inviting into my house.  They weren’t there to watch me jump through hoops, they weren’t there for a free meal, they were there to spend time with me, because they were my friends.  They were there because of camaraderie and love, for passing a good time, as they say in Louisiana.

Now don’t get me wrong – I’m a foodie through and through.  Just because my friends are there for the fun doesn’t mean I’m going to neglect the food.  Indeed, I’m going to put on my chef hat and give it all I’ve got.  (Not literally.  It would mess up my hair.)  Having people over is an excuse for me to try out a new recipe, and to cook something a little fancy; and if it happens to be out-of-this-world delicious, so much the better, right?  So this week, I give you breads that are good for parties: parties of every kind, from a simple wine and cheese affair all the way to a formal sit-down dinner.  (The rest of the menu is up to you, though.)

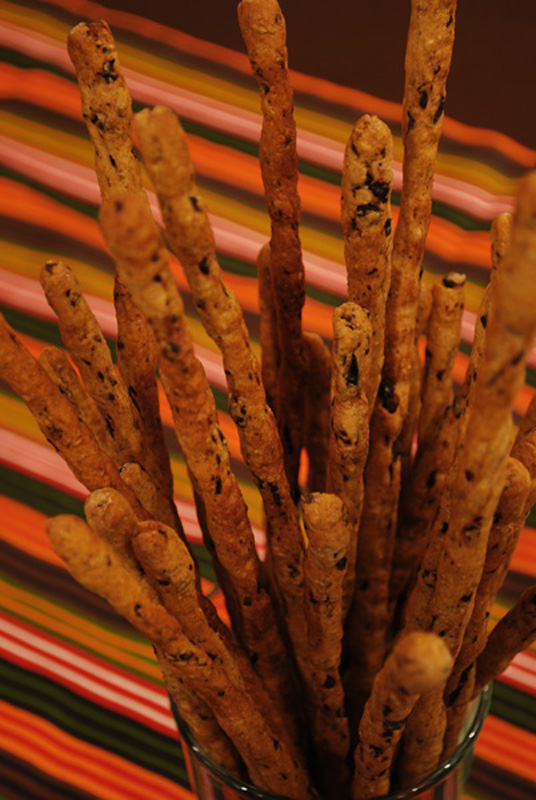
This first recipe is for grissini, a pencil-thick Italian breadstick.  In Italy, paper packages of these adorn nearly every restaurant table, as a little snack to stave off hunger before the antipasti and primi piatti arrive.  Usually plain, this version is dolled up a bit, with rye flour and massively-flavorful cured black olives.  Another pleasant difference in this recipe is the lack of yeast.  Grissini originated as simply a thinner, smaller breadstick, made with the same dough as the usual bread.  Thus, they are usually yeast-leavened; but I prefer this chemically-leavened version.  They’re so small, and go so quickly, that it seems hardly worth the time needed for yeast.  This recipe, though, comes together in hardly any time, and is kind of fun to make into the little sticks.  Did you ever make clay snakes when you were young? If you did, then you can make grissini.  (If you didn’t, I’m so very sorry.  You missed out.)

Grissini are a perfect accompaniment to wine and cheese.  You could certainly leave out the powerful olives, to have a more palate-cleansing snack; but I highly recommend trying this recipe as is at least once.  I doubt you’ll look back.  This recipe turns out wonderfully crunchy, tempting, and fragrant sticks, full of olive flavor, but not overwhelmingly so.  They are nearly irresistible, even after you brush your teeth (take it from one who knows). One traditional – and extremely delicious – preparation for grissini is to wrap each with a thin shaving of prosciutto, but I think you would die of over-consumption of salt if you tried that with these.  It’s best to save your prosciutto for wrapping around al dente asparagus spears, for wrapping around nut- or cheese-stuffed dates, or simply eating al crudo, all of which would beautifully accompany these grissini.  Another benefit to this recipe is that it produces very dry breads, which will stay good in an airtight container for many days.  You can make these far in advance of a gathering, call your friends, get some nice cheese, pour yourself a glass of cabernet, and enjoy the party.  Now what exactly was I so anxious about again?


Black Olive Grissini
From Gourmet Magazine

1/2 cup rye flour
3/4 cup all-purpose flour
1 teaspoon baking powder
1/2 teaspoon baking soda
1 teaspoon sugar
1/4 teaspoon salt
1/4 cup Kalamata or other brine-cured black olives (3 oz), pitted and finely chopped
1/2 cup well-shaken buttermilk
2 tablespoons unsalted butter, melted and cooled to room temperature
1 large egg beaten with 1 tablespoon water to make egg wash

1.  Put oven racks in upper and lower thirds of oven and preheat oven to 350°F. Line 2 large baking sheets with parchment.

2.  Whisk together flours, baking powder, baking soda, sugar, and salt in a large bowl, then stir in olives, buttermilk, and butter until a dough forms. Turn out onto a lightly floured surface and knead 5 or 6 times.

3.  Halve dough and form each half into a 12-inch log. Cut each log into 16 pieces. Roll each piece into a 10-inch-long rope and arrange 1/2 inch apart on lined baking sheets.

4.  Brush breadsticks lightly with some of egg wash. Bake, switching position of sheets halfway through baking, until golden and crisp, 25 to 30 minutes total. Cool on sheets on a rack 30 minutes.


Notes:
1.  Cured olives are full of strong flavor, so a little goes a long way.  They look a bit like a cross between olives and raisins, a little shriveled and wrinkly.  You can generally find them on any olive bar (at many grocery stores these days), and are sold bottled by at least one brand.  You could substitute regular olives, but the flavor won’t be as intense, and the extra liquid might affect the texture.  But whatever you do, please don’t use canned olives.

2.  Try forming the grissini into something other than straight lines, for something a little more fun.  You could make squiggles, or spirals.

3.  I baked mine until they were very brown, which took about 20-22 minutes.  But my oven was already very hot from cooking dinner (450º F), and I’m not sure it actually got down to 350º by the time I put them in.  Use your judgement, and know that they will cook fairly quickly, since they’re small.

4.  I imagine that you could substitute whole-wheat flour for the rye flour, but they might end up a little tougher (since rye flour produces no gluten, whereas whole-wheat flour does).  And since you roll these so much, it might make a difference.

5.  Again, if you don’t have buttermilk, just warm 1/2 cup milk in the microwave, about 30 seconds, and add a splash of vinegar.  After a few minutes, you’ll have ersatz buttermilk!

6.  If you plan on serving more than about 4 people, you may want to double the recipe.  I promise, they won’t hang around long.

Posted in Quick Breads, Savory | Leave a comment