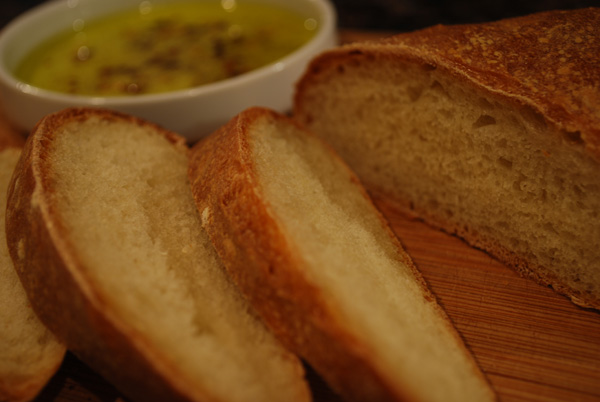
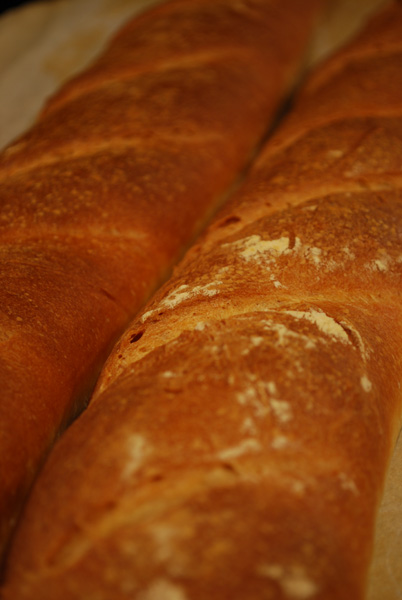
This is a fairly generic bread recipe that falls under the broad category of “French bread”. The term “French bread” can describe any number of moderately crusty, varyingly airy, white breads; but the main feature is that they are usually shaped like a baguette (a long, thin loaf). True baguettes are defined very specifically; according to French law, they must contain very specific ingredients, and proportions thereof. But, the French always were very hyper-protective of their cultural idiosyncrasies. In America, we tend to be more lax about such things. Thus, you can go into grocery stores across this country and pick up fifty different loaves of “French bread” and actually end up with fifty different kinds of bread. So, rather than discuss what makes this a better or worse French bread than any other recipe, I think I’ll discuss the bread-making process instead. Fair warning: this will get technical. If you’d just rather skip to a recipe for a nice little French bread, lightly flavored with butter, and slightly sweet with a touch of honey, then feel free. You won’t hurt my feelings one bit.
There are twelve basic steps involved in making a yeast-risen bread:
1. Scaling
2. Mixing
3. Fermentation
4. Punching
5. Scaling
6. Rounding
7. Bench Resting
8. Makeup & Panning
9. Proofing
10. Baking
11. Cooling
12. Storing
Scaling – This just refers to measuring out the ingredients. Since weighing is the most accurate way to measure flour and other dry ingredients, bakers refer to the use of a scale in this step; hence, scaling. Water, milk, eggs, and other wet ingredients should be measured through volume, not weight. Though it seems simple, this is a very important step. Precision can be tricky, since flour can absorb slightly different amounts of water depending on humidity and temperature. Water temperature is also of import here: too hot, and you kill your yeast; too cold, and it will take longer to rise. Yeast proofing is included in this step, while dough proofing is different and has its own step later on.
Mixing – Arguably the most crucial step in making a good bread. Mixing does three things:
1. Combines all ingredients into a smooth, uniform dough
2. Distributes the yeast evenly throughout the dough
3. Develops gluten (the tough, rubbery substance that is formed when wheat flour is mixed with water. I’m sure I’ll be discussing gluten a lot more over the course of this project, but that’s the basic idea.)
Gluten forms in long strands in the dough, and is created through kneading. Knead too little, and you will have under-produced gluten, which means your bread will be dense; knead too much and the over-produced gluten will make the bread tough. Luckily, it is virtually impossible to over-knead by hand. (Your KitchenAid mixer is another story.)
Fermentation – The easiest step yet, otherwise known as “rising”. You let the dough take a little nap, usually in a lightly-oiled bowl so it’s more easily removed, and usually covered with plastic wrap or a damp cloth to prevent the surface from drying out. What actually happens here is the yeast converts the sugar and starch in the dough into carbon dioxide (and alcohol, but there’s less of that). Gluten continues to develop, but it becomes smoother and forms longer strands.
Punching – No, you do not beat up your dough. Punching is a term for deflating your dough. Yes, at this point, you want to get rid of some of the carbon dioxide that your yeast worked so hard to produce. But in so doing, you also equalize the temperature in the dough, redistribute the yeast, and relax the gluten a little. And yes, the most common way of doing this is to gently push a floured hand (or fist) into the middle of the dough.
Scaling – What, again? Yes, again. This time, though, instead of ingredients, you’re weighing out equal measurements of dough, to be made into loaves or rolls. But for the purposes of home baking, you can usually skip this step, since a bread recipe usually only makes one loaf.
Rounding – Rounding means you form your dough into a ball and stretch a gluten-y skin around the outside, by stretching and tucking the sides underneath. This skin holds carbon dioxide (given off by the yeast) in the dough, making the finished product lighter and more airy. It also makes for a prettier end product.
Bench Resting – Cover the dough so it doesn’t dry out, and let it take another cat nap, usually about 10 or 20 minutes. By disturbing it in the previous step, the gluten has gotten all worked up, and this gives it a chance to relax again. Gluten can be awfully uptight sometimes.
Makeup & Panning – Here’s the most fun part (next to eating your finished bread, anyway)! Makeup means you shape your dough into whatever you want to end up with: a round loaf, an oval, a long baguette, a braid, etc., etc., etc. Panning means, um, you put it in or on the pan. Loaf pan, sheet tray, whatever you need.
Proofing – Basically, this is the second rise. The yeast continues to produce carbon dioxide, puffing up the dough, and the gluten continues to form, holding in those gases. If you let the bread sit too long at this point, the yeast will produce too much gas for the gluten to handle, and the dough will eventually collapse, making the finished product tough and flat. Bake it off too soon, though, and there won’t be enough little airy pockets in the bread, and it will be too dense. Luckily, there is a simple way to tell when it’s just right: gently poke one or two fingertips into the side of the dough. If the indentation springs back, the dough needs more time. When the indentation remains, it’s just right.
Baking – Pretty self-explanatory. But what exactly happens here? Water in the dough turns to steam and expands, but is held in by our old friend gluten. This is called “oven spring”, and will continue to happen until the outer layer of dough cooks and hardens enough to prevent it. The yeast finally give up the ghost at around 140 degrees F, so there’s no more action from them. Eventually, all the starches in the dough gelatinize and the sugars caramelize (seriously!), and your loaf is done when it’s nicely browned, and it sounds hollow when you tap the bottom.
Cooling – This is where you learn the virtue of patience. The scent of your fresh creation hangs in the air, you perhaps hear the crackle of the crust “singing” to you, and the golden curves of the loaf recline almost seductively on a cooling rack. Other than a burnt tongue, what harm could come from sneaking a quick slice? Plenty! Pick up that knife now, and all your hours of hard work could become undone in so many seconds. You remember the principle behind letting meat rest so the juices have time to redistribute, right? Well, the same theory applies here, except that it’s steam instead of juice. Cut into your bread before it’s ready, and all your steam escapes. This turns the entire loaf gummy, and lets it dry out faster than it normally would. So be patient, and go do something else for ten or fifteen minutes.
Storing – So you’ve waited like a good baker, and reaped the full reward of your efforts. And you couldn’t finish the whole loaf in one sitting, right? Now you have to put it away. If you intend to eat it all in the next several hours, it can just sit out, uncovered. Longer than 8 hours, though, and you should cover it, by putting it in a paper bag. Plastic bags and wraps are ok, but any hard crust will go soft. But wrapped or unwrapped, never put your bread in the refrigerator! Refrigerators are big machines that make bread go stale! If you don’t intend to finish the bread in a day or two, you should wrap it in plastic wrap and aluminum foil (for the most protection), and freeze it. Every bread I’ve ever made has frozen beautifully, and easily thaws in a 350 degree oven in minutes. To make things easy, I cut large loaves into single or double serving pieces. Just grab one from the freezer and pop in the oven. And sometimes, if I’m lazy, I’ll even just stick a frozen slice or roll under a hot broiler. Toaster ovens are perfect for reheating bread!
And now, for all your patience, here is a recipe for French bread. Unless, of course, you just first skipped to this part. I can’t say I blame you much!
Honey Butter French Bread
From Bon Appétit Magazine
2 cups warm water (105°F to 115°F)
1 teaspoon sugar
1 envelope dry yeast
2 tablespoons (1/4 stick) butter, melted
2 teaspoons salt
1 teaspoon honey
5 cups (about) unbleached all purpose flour (21 1/4 oz)
1. Mix 1/4 cup warm water and sugar in large bowl. Sprinkle yeast over; stir to dissolve. Let stand until foamy, about 8 minutes. Stir in remaining 1 3/4 cups warm water. Mix in butter, salt and honey. Using wooden spoon, stir in 4 cups flour (17 oz).
2. Turn dough out onto floured surface. Knead until smooth and elastic, adding more flour if sticky, about 8 minutes. Form dough into ball. Butter large bowl. Add dough, turning to coat. Cover bowl with plastic wrap, then with clean towel. Let dough rise in warm draft-free area until doubled, about 1 hour.
3. Punch down dough. Cover dough with plastic wrap and let rest 10 minutes. Divide dough in half; roll each dough piece between hands and work surface into 9-inch-long loaf. Transfer loaves to baking sheet. Cover with plastic, then with towel. Let dough rise in warm draft-free area until almost doubled, about 30 minutes.
4. Position rack in center of oven; preheat to 425°F. Make 5 diagonal slashes crosswise in surface of each loaf. Lightly brush water over tops and sides of loaves. Bake loaves 20 minutes, brushing occasionally with water. Continue baking until loaves are golden brown and tester inserted into center comes out clean, about 15 minutes. Transfer to rack; cool.
Notes:
1. Reviews of this recipe at Epicurious.com suggest that people have problems with the bread sticking to the pan. I always use a piece of parchment under bread when baking, and never have problems. In lieu of parchment, you could sprinkle some cornmeal on the pan before placing the shaped dough.
2. I only recently discovered that a sharp serrated knife is ideal for slashing proofed dough. The key is to move quickly, and absolutely do not press down on and flatten out the dough. Be fearless! Slash that bread!
3. I used bread flour instead of all-purpose. I figure, I’m making bread, why not use bread flour? I’m sure all-purpose is just as good. But beware! If you use bread flour, increase the amounts given in ounces! It does NOT weigh the same as all-purpose!
4 cups of bread flour = 19 oz.
5 cups of bread flour = 23 3/4 oz.
(Maybe I’ll get into discussing the difference between the flours at some point…)
4. I found that I needed just about all 5 cups of flour. But that could change if I made it tomorrow, or six months from now. Flour absorbs different amounts of water depending on humidity. For that reason, it’s a good practice to hold off some flour when first mixing ingredients together, adding more as needed.


