Cornmeal Crêpes, Take Two!

Week Fourteen: Take Two!

Okay, so there was nothing really particularly wrong with these crêpes the first time I made them.  But then again, they weren’t particularly amazing, either.  Oh, the flavor was lovely, don’t get me wrong.  But crêpes should be fork-tender and have a slight chewiness to them; these turned out a bit tough, and had rather hard edges.  A proper crêpe should yield instantly to a fork and knife; I felt like I needed a guillotine for the ones I produced.  I think my pan was too hot (I had the heat all the way to high), or maybe I let the batter sit too long.  (Is over 24 hours too long?  Not according to my sources.)  With all the uncertainty, I definitely wanted another try at these.

This time, thinking that the heat level was my main downfall, I kept the recipe exactly the same, which was a bit of a trick for me.  I also kept the method the same, which was also difficult (I just love modifications!).  But this time, I kept the heat firmly between medium and medium-high, but mostly tending towards medium heat.  I also cooked the batter off about 30 to 40 minutes after whizzing together in the blender, as opposed to two days later.

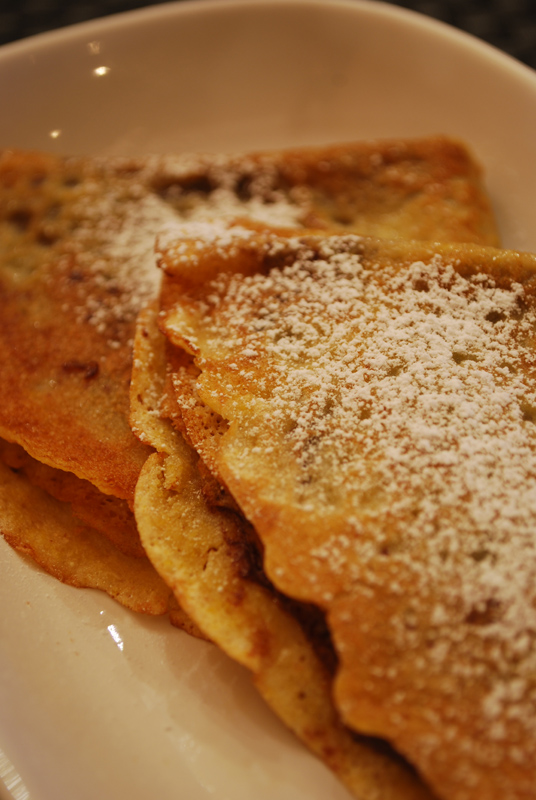
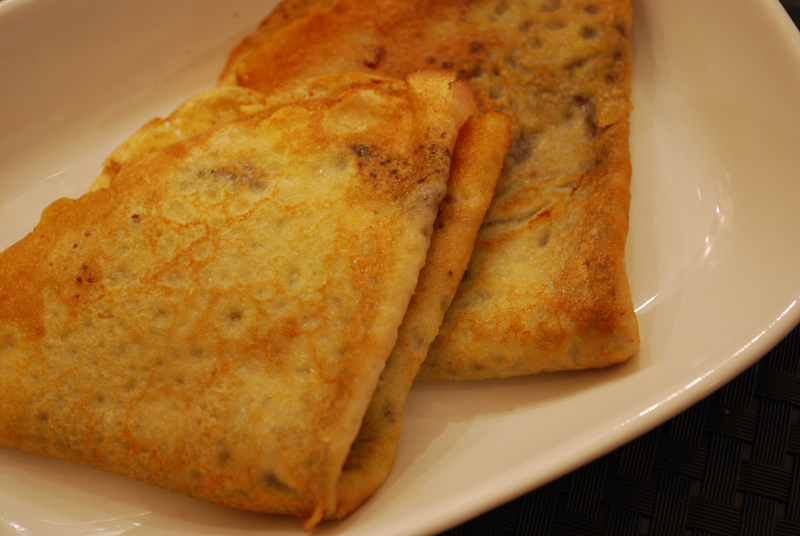
And do you know what?  It worked!  These crêpes were so much better this time around!  A little butter brushed on the pan, a little swirl of the batter to coat the bottom, and it couldn’t have been better.  They came out so perfectly soft, so lightly golden, I just didn’t know what to do with myself.  Well, actually, I did know what to do: I smeared them with Nutella, folded them in quarters, and heated them in a pan with some brandy.  Despite the savory character of the crêpes themselves, it worked just beautifully.  I highly recommend it, especially dusted with a little powdered sugar on top.  Could you add some sugar into the batter?  Yes, but I don’t really think you need it.  Any sweet filling (e.g. Nutella, jam, fruit, etc.) will provide ample sweetness, and the cornmeal in the batter has its own grainy sweetness to add.

Used in savory applications, though, they are also just wonderful.  The cornmeal brings not only a light, sweet flavor, but also a slight heartiness not found in the typical crêpe.  These lovelies are the ideal foil to any number of fillings, with any range of flavors.  I can see an Italian angle to these; think polenta, and fill them with a mixture of ricotta, basil, olive oil, and garnish with diced tomato.  For a Tex-Mex flair, think of tortillas, and add pulled pork, cumin, jalapeno, and avocado.  Or try for an Eastern take on the corn flavor, by filling with a mixture of scallions, cilantro, garlic, and diced chiles, and top with a nice mango chutney.  And, of course, they are superb with Nutella – but what isn’t made better with Nutella, I ask you?  These crêpes are so versatile, you may just never look for another recipe again!

sans powdered sugar. see? no dark brown!

Cornmeal Crêpes
Adapted from Gourmet Magazine
Makes about 12 crepes

1 1/4 cups all-purpose flour
3/4 cup yellow cornmeal
1/2 teaspoon salt
2 cups milk, at room temperature
3 large eggs, at room temperature
2 tablespoons unsalted butter, melted, plus additional for brushing skillet

1.  Blend flour, cornmeal, salt, milk, eggs, and 2 tablespoons butter in a blender until smooth. Let batter stand at room temperature 30 minutes.  If not making crêpes immediately, put batter in refrigerator.

2.  Lightly brush a 10-inch nonstick skillet with butter and heat over medium heat until moderately hot, but not smoking. Stir batter, then, holding skillet off heat, pour in 1/3 cup batter, immediately tilting and rotating skillet to coat bottom. (If batter sets before skillet is coated, reduce heat slightly for next crêpe.) Return skillet to heat and cook until just set and pale golden around edges, 10 to 15 seconds. Loosen edge of crêpe with a spatula, then flip crêpe over carefully with the spatula, or your fingertips. Cook until underside is set, about 20 seconds more, and transfer crêpe to a plate. Make additional crêpes in same manner, brushing skillet lightly with butter for each and stacking crêpes on plate as cooked.


Notes:
1.  Crêpes should only take about 40 to 60 seconds to cook completely, and they should be just barely golden brown.  If you see dark brown spots, you should reduce the heat.

Posted in Savory, Unleavened Breads | Leave a comment

Beer Bread, Take Two!

Week Fourteen: Take Two!


When I originally made beer bread, I basically made it to use up a… well, let’s say a lesser bottle of beer.  A generic, moderately-tasteless beer is perfect in this application, since a more subtley-flavored brew would find its nuances lost in the mix.  You’re not using beer so much for the flavor here, you’re using it more for its other characteristics, specifically the alcohol and the carbonation.  Well, I think you are.

Beer is sometimes referred to as “liquid bread”, since they both contain the same basic ingredients: grain, water, and yeast.  They are obviously handled very differently, producing very different end results, but there’s one ingredient that acts the same in both instances: the yeast.  Yeast eats sugar (from the grain) and produces alcohol and carbon dioxide.  In beer, this produces bubbles and the alcoholic content of the beverage.  In bread, this produces leavening (rising) of the dough and flavor.  Note that different strains of yeast are used in beer brewing and bread making; neither will accomplish the desired result in the other usage.

Making bread with beer seems only natural, given their similarities.  But what, exactly, does beer do when you make bread with it?  I’ll be perfectly honest – I don’t precisely know.  I know the carbonation aerates the bread a bit, but wouldn’t sparkling water then do the same thing?  And usually, beer is used in cooking for the flavor it adds.  But in my previous try at this bread, I used light lime-flavored beer and dry vermouth, for crying out loud.  You couldn’t taste any hint of it!  Not one bit!  So, then, is it the alcohol that makes the difference?  Maybe, except that any alcohol would (mostly) cook off in the heat of the oven.  Perhaps the beer’s alcohol mimics the milder alcohol given off by bread yeast?  I don’t know!  So many questions!

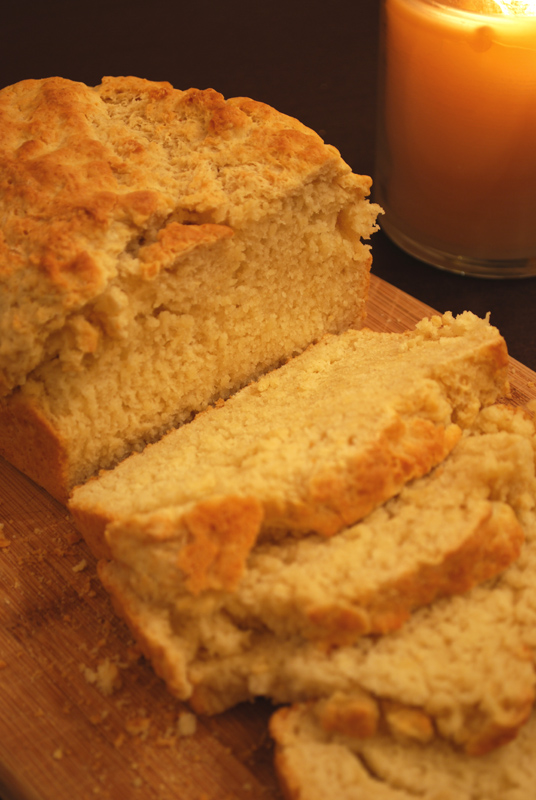
All I know is that this bread is ridiculously good.  Ridiculously.  I doubt you will ever find another bread recipe so easy, so quick, and so incredibly delicious.  Did I mention how addictive it is?  This bread is almost too good.  I personally have a hard time avoiding a nibble here and there if I know it’s in my kitchen, and I have never seen anyone turn a slice down.  It’s so perfectly sweetened (just barely!), but still savory; it’s mild enough to match any food you put it with, but flavorful enough to stand on its own.  I’m sure you could add any herbs or cheese you like to the batter; but I find it so tasty just plain on its own, I don’t even eat it with butter, jam, Nutella or anything else.  And if that isn’t a glowing enough remark, I don’t know what is.


Beer Bread
Makes one 9×5 inch loaf

3 cups + 2 teaspoons self-rising flour (see note 1 below)
3 tablespoons sugar
3 tablespoons butter, melted and cooled slightly
12 ounces beer, room temperature

1.  Preheat oven to 350º F.  Lightly grease a 9 x 5 inch loaf pan, and sprinkle with 2 teaspoons flour.  Shake the flour around until the whole interior is coated, then knock out the excess.

2.  In a medium bowl, whisk together the dry ingredients.  Add the butter and beer, and stir with a spoon or spatula until moist and just combined.  Pour into prepared loaf pan.

3.  Bake at 350º F for 40 to 45 minutes, or until golden brown on top.  Remove from pan.  Cool about 10 minutes on a rack before slicing.


Notes:
1.  If you don’t have self-rising flour, use the following instead: 3 cups all-purpose flour + 4 1/2 teaspoons baking powder + 3/8 teaspoons salt (or 1/2 teaspoons kosher salt).

2.  Any sort of beer will do, but light-style beers are ideal.  But any extremely delicious, expertly-crafted microbrew would be wasted in this.  Drink it instead; you’ll be happier.

3.  This recipe can easily be made into muffins instead of a whole loaf.  Grease and flour a muffin tin as directed, and fill each cup about halfway full.  Bake for about 30 minutes, or until golden brown.  Remove from tin and cool on a rack.

Posted in Quick Breads, Savory | Leave a comment

Chapatti, Take Two!

Week Fourteen: Take Two!

Chapattis, the second bread I made this year, were also notably the first bread of the project that I had never made before.  My forays into breadmaking until that point had been geared mostly towards my favorite type of bread, that holy grail of home baking: the Perfect Artisan Loaf, with its thin, crisp, shatter-y crust that concealed the most gossamer interior, chewy and just barely sour.  Flatbreads?  Well, they sell those in the store, right?

Yeah, they do; but they also sell pre-cut apples, and you certainly don’t see me tossing those abominations into my basket, do you?  And after the ease of making these simple, elemental flatbreads, I don’t know that I’ll buy those dry cardboard pitas again.  Besides, I have come to love Indian food so much in recent months, that I can’t imagine not having an appropriate (and easy) bread to serve alongside the curries and dals I’ve been turning out of late.

In researching that aforementioned Indian food, I inevitably read up on the breads as well.  And wouldn’t you know it, I learned something new!  Apparently, the best chapattis (what do I strive for, if not the best?) must be made with atta flour, a very finely-milled whole-wheat flour unique to India.  Typical American whole-wheat flour is simply too coarse to properly achieve the correct texture.  And man, are people ever devoted to their atta flour!  Cooks from here to Mumbai insist that one brand or the other is absolutely the only one you should ever use.  Ever.

But Indian atta flour can be tricky to find in the US, and can be expensive to order online, especially for the sake of one lone recipe.  Then, lo and behold, I saw one small note on one lonely webpage: a state-bound Indian cook, searching for the bread of her home soil, had tried King Arthur’s White Whole-Wheat flour (they sell it at my corner market!), a very finely milled whole wheat flour.  And this lady claimed that it not only worked, but she preferred it to her old favorite atta flour.  Ding!

In my research, I learned that atta flour typically has a high protein content, but I couldn’t find exactly what that percentage is.  (Remember, protein in flour produces gluten in your baked product.  More protein = more gluten = more toughness, which is sometimes good.  For reference, all-purpose flour has around 9%-11% protein, and bread flour has 12%-14%.  Generally speaking, flour substitutions rely mainly on this number – which is why you’ll never make a tender cake with bread flour, or a chewy bread with cake flour.)  So if atta flour has a high protein content, what is the protein content of King Arthur’s White Whole-Wheat flour?  I decided to contact King Arthur Flour, and see if they could shed any light on the issue.  A representative told me that their White Whole-Wheat flour has around 13.5% protein.  A ha!  This puts it well in the range of being described as “high protein”.  So this flour has a favorable protein count, and is finely milled; the two main characteristics of atta flour were there!

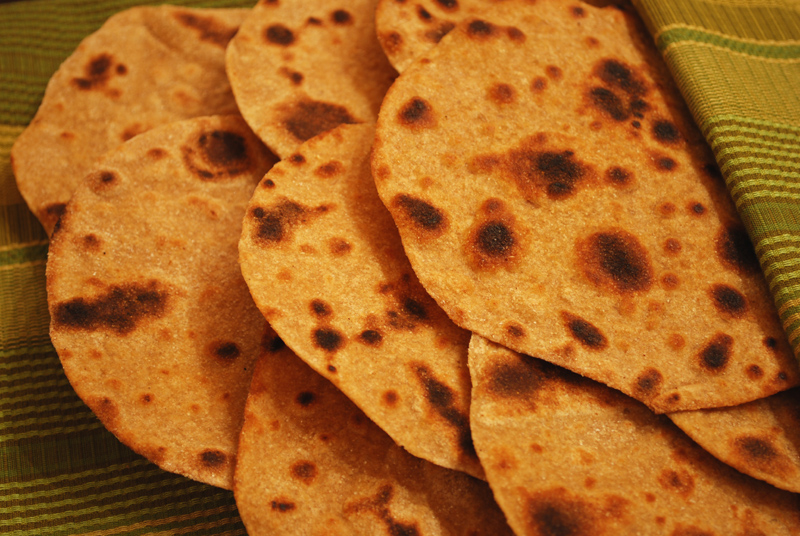
I, of course, had to try it.  Unfortunately, as much as I love Indian food, my experience with eating a well-made chapatti is… well, I don’t remember what they’re supposed to taste like.  Naan?  Yes.  Chapatti?  No.  But I can tell you this: these chapatti rolled out just beautifully, especially compared with my first go at this bread.  That may have been the result of a longer resting period (I let these go almost 2 hours, as opposed to a 30 minute nap the first time out); but the higher protein count in this flour gave the breads a fantastic chewiness when cooked.

And since they were so easy to roll out, I was able to roll them much more thinly, making them cook faster, and they ended up with a lovely crunchy outer edge, while the center remained more tender.  The finer grind of this flour also improved the texture, making it no less toothsome or nutritious, but simply more refined, more posh.  This recipe, with its modifications, is definitely going in my permanent recipe file; and you can be certain that I will not hesitate to pull it out the next time I feel a yen for some spicy green curry.  Hey, I do have that can of coconut milk in the pantry…


Whole Wheat Chapattis
Adapted from Sheenah Hamid, via Gourmet Magazine
Makes 12 six-inch rounds

1 3/4 cups (a bit shy of 7 1/2 ounces) King Arthur white whole-wheat flour, or Indian atta flour
1 teaspoon salt
3/4 cup lukewarm water
Oil for greasing skillet

1. Whisk together flour and salt in a bowl.  Make a well in the center, and pour in the water.  Mix with a fork until a shaggy dough forms.  Turn out onto a surface and knead until smooth and elastic, about 8 minutes, adding only enough flour to prevent sticking.  Transfer to a lightly-oiled bowl, cover with plastic wrap, and let rest at room temperature for at least 1 hour.  After this rest, the covered dough may be refrigerated for 12 to 24 hours before using.

2. Divide dough into 12 equal pieces and roll gently into balls.  Cover the ones you aren’t rolling out, with plastic wrap or a kitchen towel (not terry cloth).  On a floured surface, roll each into a thin round, about 5 to 6 inches across, rotating and turning the dough to keep from sticking.  They will be very thin.  Cover the rolled out chapattis (do not stack).  Repeat with remaining balls of dough.

3. Heat a griddle or skillet (cast iron is best, but whatever you have will work) over medium to medium-high heat.  Lightly grease the pan with a paper towel dipped in oil, place one chapatti in the skillet, and cook about 30 seconds, or until golden brown in spots.  Flip and cook for 30 seconds to 1 minute, or until well-browned in spots, pressing air bubbles out if necessary.  Flip again and cook another 30 seconds to 1 minute, or until fully cooked.  Bread may puff up, and should have an even distribution of brown spots.

4. Place on a clean plate or baking sheet and keep warm in a 250 degree oven.  Chapattis taste best served warm, but they are fine at room temperature also.


Notes:
1. If you can’t find either white whole-wheat flour, or atta flour, you can substitute regular whole-wheat flour; but be warned that the texture will be a bit different.

2. If you have leftover chapattis for some strange reason, you can cut them into wedges and crisp them in a 350 degree oven for a few minutes.  Serve with hummus, guacamole, salsa, or any other favorite dip.  (If you’re ambitious, you can brush them with olive oil or butter and sprinkle with a favorite herb or spice, before cutting.)

Posted in Quick Breads, Savory | 2 Comments

Knackebrod, Take Two!

Week Fourteen: Take Two!

The first time I made knackebrod for this project, it ended up being one of the greatest culinary failures I’ve created in recent memory.  Though I may strive for it, I don’t expect perfection from every dish I make.  But at this point, I feel that my prowess in the kitchen is such that I can at least expect something good, if not great, with every attempt.  That those crackers turned out so completely inedible was not only disappointing, but it actually wounded my pride a little.  Naturally, those little buggers were the first things I added to the list for this week.  Do I want another crack at them?  Do I ever!  Bring on the knackebrod!

If you’re not familiar with knackebrod, it’s a Swedish term for a flat, crisp bread, very hearty in nature.  Traditionally unleavened and made with rye flour, the crackers would keep very well through the long, Scandinavian winter.  Today, though, they are made with any number of various grains, and are more airy in nature.  You may recognize the brand names Ryvita, Wasa, and RyKrisp.  Oh, and they sell them at Ikea, too.

The recipes I used took two completely different approaches.  The first one – the one I had originally made – was more traditional, using rye flour exclusively, yeast for leavening, and using water as the liquid.  And as it turns out, there are several problems with that approach.  Long story short, rye flour needs some sort of acidic environment to work properly in most breads.  This can either come in the form of an acidic liquid (like buttermilk) or with the use of a sourdough starter.

I had assumed that since I was aiming for a cracker, rather than a traditional bread, that this would not be a problem.  I had assumed incorrectly.  Not to mention, the consistency of the dough was far too thick and stiff to roll out properly.  No good came of it, and I actually ended up throwing the lot out.  (Just so you know, I absolutely hate to throw food out.  It’s rather a last resort for me.)  Apparently, there’s some major industrial tricks they use when making pre-packaged crispbreads to get them so fluffy.  Unless your Swedish grandmother taught you how to make them right, it’d just be a guessing game as far as producing the right texture in my home kitchen.  I have neither the time nor the patience for that sort of thing.

So this time around, I decided to scrap that first recipe entirely, its authenticity notwithstanding, and take on a wholly different method.  Scouring my cookbooks, I found a recipe that used standard bread flour, oats, buttermilk, and baking powder for leavening.  That’s more like it!  This combination would produce a fluffier cracker, more like a hard biscuit in texture.  The only caveat was that I needed to not overwork the dough, which would make the crackers tough.

Substituting some whole-wheat flour gave the crackers a heartier texture, which I felt was more appropriate.  A hint of sugar lent a welcome sweetness, and a combination of rolled and steel-cut oats brought a toothy bite to the party.  The dough came together beautifully – no dry, hard lumps this time! – and rolled out with absolutely no problem.  Now, these do include some shortening, which certainly helps with the rolling out.  Again, if you can find un-hydrogenated shortening, please use that.  (If you have some really superlative dough-rolling skills, I suppose you can try using all butter; but as for us mortals, I’ll stick to my Jungle Shortening, thank you.)  The crackers then bake in a low oven for 30 minutes, more to dry them out, as opposed to just cooking them quickly.

And did they turn out better the second time around?  Oh, my, did they ever!  I actually can’t stop eating them.  They’re wonderfully crunchy, not too hard, not at all tough.  The two types of oatmeal have such a great texture together, and the hint of butter and sugar together are just right.  I think I’ll be enjoying these for my afternoon snack for as long as I can manage to keep them around!


Knackebrod
Adapted from Bo Friberg
Makes 2 big sheets, or about 6 dozen small crackers

2 ounces un-hydrogenated shortening (about 1/4 cup)
1 ounce unsalted butter (2 tablespoons), room temperature
1 ounce sugar (about 2 tablespoons)
1/4 cup rolled oats (not quick-cooking)
2 tablespoons steel-cut (pinhead) oats
8 ounces bread flour (about 1 3/4 cups)
2 1/2 ounces whole-wheat flour (about 1/2 cup + 1 tablespoon)
1/2 teaspoon salt
1/2 teaspoon baking soda
3/4 cup buttermilk

1.  Preheat the oven to 325º F.  Cream the shortening, butter, and sugar in the bowl of a stand mixer using the paddle attachment, until the mixture is light and fluffy, about 1 to 2 minutes.

2.  Whisk together the flours, oats, salt, and baking soda.

3.  On low speed, add the dry ingredients to the sugar mixture in 2 installments, alternating with the buttermilk.  Do not overmix.  The dough will look a bit sticky.  Add additional flour by teaspoons if necessary to be able to roll the dough out very thinly.  Keep in mind, though, that the softer the dough, the crisper the finished product.

4.  Divide the dough into two pieces.  Cover the one not being used.  (If you like, you can freeze the unrolled dough at this point for several weeks.)

5.  On a well-floured surface, and flouring the top of the dough and the rolling pin, roll each piece of dough out to a rectangle measuring about 12 x 14 inches.  It should be very thin.

6.  Line a baking sheet with parchment paper.  Drape the dough over the top of the rolling pin to help lift it, and transfer it gently to the prepared baking sheet.  Liberally dock the dough with a fork.  Using a bench scraper, or the back of a long knife, score the dough into the shape and size you want for your crackers.  Don’t cut all the way through the dough; it’s okay if you only press about halfway through.  Repeat steps 5 and 6 for the remaining piece of dough.

7.  Bake at 325º F for 30 minutes, or until the dough is completely dry and doesn’t feel soft in the middle when pressed lightly.  Let cool completely on the the pans.  When cool, break apart on the scored lines.  Store in airtight containers.


Notes:
1.  If you can’t find steel-cut oats, just substitute an equal amount of plain rolled oats.

2.  If you freeze the dough, let it thaw in the refrigerator overnight, then let it come to room temperature before rolling out.

3.  These crackers should keep for several weeks at room temperature, stored in an airtight container.

Posted in Quick Breads, Savory | Leave a comment

Spelt Crackers, Take Two!

Week Fourteen: Take Two!

Here we are, at week fourteen.  It’s the last week of March, and has therefore been three months since I began this project.  And I tell you what, it has really flown by!  It seems like just the other day that I uttered those fateful words, “What if I made a different bread, every day, for a year?”  But though not much time has passed, I have learned so, so much about breadmaking in these few months.  Yes, I went to culinary school for Baking and Pastry Arts, but bread was not really emphasized.  As long as we students could follow a recipe and produce an edible loaf, we got a pass.

But as it turns out, consistently producing good loaves of bread is a little harder than just following a recipe!  Understanding what the dough looks like, what the dough feels like, and how you handle it… well, you can’t learn that from any book.  You just have to roll up your sleeves, mix up some flour and water, and get your hands in that dough!

And that leads me to my theme for this week.  You see, one of the drawbacks to my original idea – make a different recipe of bread every day – is that it denied me the luxury of trying things again, of having another go at it to make it better the second (or third) time around.  I could see things that I had done wrong, but had no opportunity to try to correct myself.  So I decided that the last week of every quarter should be devoted to re-doing my mistakes.  I get to pick six recipes to have another chance at, and see if I can’t improve myself a bit.  Nice!

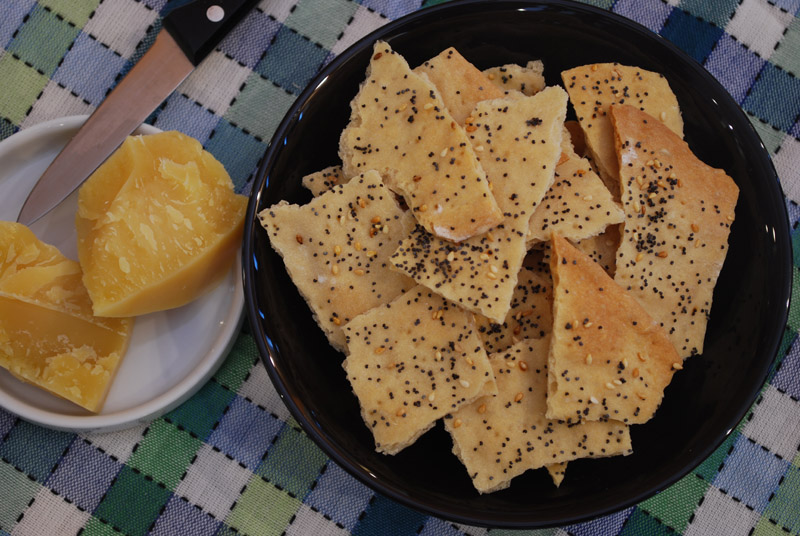
The first recipe for this week is one I was particularly disappointed at myself with: spelt crackers.  I had made that one in a hurry, when I was quite stressed.  I think that probably had a lot to do with how tough they came out; I handled that dough in a very unkind manner.  I remembered the flavor being nice enough, but the texture was just awful!  So tough!  I wanted to see if I could be a little nicer the second time around.

Anxious to avoid the over-rolling that had done me in the first time, I actually left these a little thick, and didn’t bake them quite long enough.  So they still ended up a little hard to eat, but only because they were thick and hard, not because they were tough.  A little success, but still a bit disappointing.  I was loath to use too much flour in rolling out, trying to avoid drying the crackers out, but that meant I could only roll so thin before the dough stuck resolutely to the rolling pin.  Next time, I think I would roll this dough out between two sheets of wax paper (not parchment, I think) to help with that.  Conversely, if you have a pasta machine, you could absolutely roll them out with that to a perfect thickness.

One thing I love about these crackers is that any seed or spice you top them with changes the flavor incredibly!  The first time, I used dried mint; but this time, I went with a favorite mixture of mine, poppy seeds with black and white sesame seeds.  Both were good, and I would love to try these with a dusting of ground cumin, or fennel seed.  If you’re serving these crackers with cheese, you don’t need any extra salt, but if you’re planning on eating them plain, I would recommend a light sprinkling of a good coarse salt.  So here, again, is the recipe for Spelt Crackers.  I hope you enjoy it the second time around as much as I do!


Spelt Crackers
Adapted from the Hungry Ghost, via the New York Times, via Smitten Kitchen
Makes 1 large cracker sheet

1/4 teaspoon salt
1 1/2 cups white spelt flour, plus more for flouring surface
Coarse sea salt and seeds of your choice

1. Preheat the oven to 350º F. Dissolve the salt in 1/2 cup of cold water. Stir in the spelt flour until combined. Knead the dough a few turns until a ball forms.

2. Flour an overturned 12-by-17-inch cookie sheet and roll out the dough on top of it, using as much flour as needed to prevent sticking, until the dough covers the sheet from edge to edge. Do your best to get them as thin as possible, because the thicker parts become quite hard when baked. Using a spray bottle filled with water, spray the dough to give it a glossy finish. Prick the dough all over with a fork. If you choose, sprinkle with sea salt or seeds. For neat crackers, score the dough into grids.

3. Bake until the dough is crisp and golden and snaps apart, 15 to 25 minutes. (Check after 10 minutes to make sure it does not overcook.) Break into pieces and serve.


Notes:
1.  White spelt flour can be found at Whole Foods, or your favorite local natural foods grocery. 

2.  Once again, don’t roll this dough out too thinly!  It will get tough!   But don’t leave it too thick either; it’ll be hard to bite through!  How much is just right?  I’m not sure, and I do apologize.  Try it a couple of different ways – it’s so easy to throw together, why not?

Posted in Savory, Unleavened Breads | Leave a comment

Steamed Buns (Char Siu Bao)

Week Thirteen: Filled Breads
steamed-buns

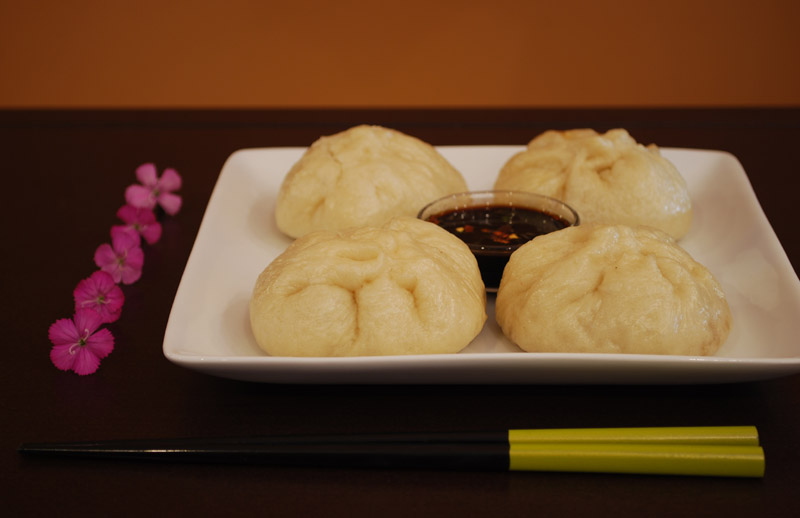
When I decided on the theme for this week, I knew this dish had to be included.  I love, love, love steamed buns!  They’re usually quite delicious; and they’re single, discrete units of food, which somehow appeals to me on a visceral level.  Steamed buns are similar to dumplings, but more bready.  When well-made, the dough is so perfectly sticky and mildly sweet, with the fluffiest texture you’ve seen since you blow-dried your kitten’s fur.

I had made steamed buns once before, but it had been years (how is there always something else new and interesting to cook?).  I remembered it being quite good, so I dug out my old recipe, and realized with a modicum of horror that the dough I had used to great success had in fact been nothing more than… canned biscuits.  Oh dear.  It was time for some research, and I own no Asian-themed cookbooks.  To the internets!

I quickly found that recipes for steamed buns fell into two camps: one with homemade dough that rarely turned out well, and one that used canned biscuits.  Apparently, that canned biscuit dough turns into a fairly decent – if a bit ersatz – steamed bun dough.  (My taste memory had not failed me, after all!  Vindication!)  And sure, if I was merely craving steamed buns, I would probably have resorted to that trick, making sure to bury the cardboard tube very well in the garbage before anyone saw.  But it’s called “A Bread A Day”, not “A Can Of Biscuits A Day”.  I had to find a good recipe.

Within the Homemade Dough camp, there were two basic factions: those who used yeast, and those who used baking powder.  Neither seemed to perfectly produce that unique, soft, spongy texture so characteristic of a good steamed bun.  Occasionally, though, I would run across a recipe that used both.  This is unique and interesting, because baking powder becomes activated and starts to raise a dough as soon as it gets wet; whereas yeast needs time and moisture to leaven dough.  (Side note: double-acting baking powder, which is what you probably have in your pantry, activates a second time when it is heated.  Neat!)  So how does that work?  Well, first, the dough is mixed with the yeast, and then the baking powder is kneaded in later.  This gives the dough a good flavor from the acids produced by the yeast, but takes advantage of the tiny bubbles produced by the chemical leavening of the baking powder.  You get the best of both worlds!

Another problem I noticed people running across quite a bit was that the dough cooked up tough, meaning the gluten was getting over-produced.  One solution to that is to handle the dough less; but it’s nearly impossible to handle these buns less.  You have to mix the dough, divide it, roll it out, fill it, and seal it.  That’s a lot for the poor little dough to handle!  So, then, the next solution is to reduce the protein count of the flour used.  The more protein a flour has, the more gluten it will produce.  That’s why you have bread flour (the highest protein at around 12%), all-purpose flour (moderate protein at about 10%), and cake flour (the lowest protein at about 9%).  So if all-purpose flour wasn’t cutting it, there was not choice but to go down to cake flour.

Okay, we’ve got our flour, and our two leavening agents.  But still, comments I read online said again and again how extremely difficult it is to get the proper texture.  People had tried time and time again, only to be disappointed at every turn.  This one was too tough, that one just didn’t taste right.  My confidence was shaken.  Maybe I should just pick something else?  Something simpler?  But no; I was determined.  Visions of glistening buns, fresh from my own pot, filled my head; and I persevered.

So, scared a bit from the tales of horror I had read, I carefully selected a recipe, and I began it one day when I knew I would be able to finish everything completely.  I had put so much effort into it already,  I wasn’t going to take any chances.  Geez, I had even made my own kimchi for the filling, since I just could not find any in the store.  (Incidentally, if you like kimchi as much as I do, I highly recommend making your own.  It’s really easy!  And it’s so, so good!)  Nothing was going to stand between me and steamed-bun-perfection.  I was not going anywhere until I had some steamed buns on my counter.  No way was I going to leave anything to chance.  I was not going to mess this up.  Do you see where this is going?

Yeah, I abused this dough.  I ended up running an errand after mixing the dough, so it went into the fridge.  The errand took too long, and I had no time to finish the buns that day.  So into the freezer went the dough, overnight.  In the morning, it was microwaved (on low) to defrost, then left to rise a bit, then filled, and refrigerated again.  When I finally lowered the poor things into the steamer, my hopes were not very high, but it was far too late to start anything over.  Fifteen minutes of steam later, taunting wisps of steam smelling of kimchi and pork wafting out from under the lid, I took my first peek.  Well, they didn’t look awful, but the proof would be in the tasting.

They felt properly sticky, they looked properly puffy, so I took a cautious bite.  My teeth sunk through that familiar soft skin, into the sweet interior.  Holy cow, it worked!  Despite all the improper handling, that familiar taste was there.  The slight stickiness, the pillowy texture, the sweetness, it was all spot on.  (And the spicy filling was just perfect, too!)  Success was mine!  Dipped into a mixture of soy sauce, hoisin sauce, rice vinegar, and scallions, they were just right.  And if that dough could take that much abuse and still turn out so well, I might never go back to canned biscuits again.  Now I just need to work on making the tops look prettier…


Steamed Buns (Char Siu Bao)
Adapted in part from David Chang, via Gourmet Magazine
Makes 16

For dough:
1 cup warm water (105º-115º F), divided
1/2 teaspoon active-dry yeast
3 tablespoons sugar, plus a pinch
2 tablespoons nonfat dried milk
15 ounces cake flour (about 3 1/2 cups), plus extra for dusting
1 1/2 teaspoons baking powder
White vinegar, for steaming

For filling:
1/2 pound ground pork
1 cup kimchi
1/3 cup sliced green onions (1 large or 2 small)
2 1/2 tablespoons hoisin sauce
1 tablespoon honey
1/2 teaspoon five-spice powder
1/4 teaspoon salt
1/4 teaspoon pepper

1.  To make dough: add a pinch of sugar to 1/3 cup of the warm water, and stir to dissolve.  Sprinkle yeast over, stir, and let stand until foamy, about 5 minutes.  Whisk dried milk into remaining water.

2.  Sift together flour and remaining sugar in a large bowl.  Stir in yeast mixture with a fork until a dough forms.  Do not add baking powder at this point.  Turn dough out onto a surface, and knead with your hands until all flour is incorporated.  Add additional cake flour only as needed to keep dough from sticking to hands or counter.  Knead until dough is smooth and elastic, about 5 minutes.

3.  Shape dough into a round ball.  Transfer to a lightly-oiled large bowl, and turn to coat all sides.  Cover with plastic wrap and let dough rise in a warm place until doubled in size, about 2 hours.

4.  Turn dough out onto a lightly-floured work surface, press gently to deflate, and flatten slightly into a round disc.  Sprinkle baking powder over the surface, then gather the edges of the dough in, and pinch to seal in baking powder.  Knead until baking powder is fully incorporated, about 5 minutes, using only enough flour to keep dough from sticking.  Return dough to bowl, cover with plastic wrap, and let stand 30 minutes.

5.  While dough is resting, make filling: finely chop kimchi and green onions.  Using a fork to prevent smushing the meat, mix pork, kimchi, green onions, and remaining filling ingredients together.  Set aside.

6.  Cut 16 squares of parchment or wax paper, each about 3 inches square.  Turn dough out onto a lightly-floured surface.  Divide into 16 equal pieces, quickly shape each into a roughly round shape, dust with flour, and set aside.  Covering pieces not being used, and flouring counter, rolling pin, and your hands, roll out each piece of dough into a circle.  Fill round with a scant 1/4 cup of filling.  Bring sides up around filling, and seal with your fingertips by pinching and giving a little twist.  Set each on a square of parchment paper, and set aside.  Cover loosely with plastic wrap to prevent drying out, and repeat with remaining dough and filling.  Set aside to let rise again for about 20 to 30 minutes.

7.  Set a steamer rack inside a large-enough pot or skillet, one with a tight-fitting lid.  Add enough water to come to within 1/2 inch of bottom of rack, and add about 1 tablespoon vinegar.  Bring to a boil.  Carefully place as many buns (still on the paper) as will fit on the steamer rack, being sure not to let them touch.  Cover tightly, reduce heat to keep water at a low boil, and steam until buns are puffed and set, about 15 minutes.  Add additional water and vinegar as needed.  Cool a few minutes before serving.


Notes:
1.  If you can’t find kimchi, you can use the following ingredients instead: 1 cup sliced napa cabbage, 1/3 additional cup green onions, 1 tablespoon fish sauce (nuoc mam), 2 tablespoons rice vinegar, 1 tablespoon soy sauce, 1 tablespoon minced fresh ginger, 2 large cloves minced garlic, 2 teaspoons crushed red pepper flakes.  Mix the ingredients together while dough is rising for the first time (after step 3), using your hands and squeezing the mixture to crush the cabbage a little, and let stand at room temperature while dough rises.

2.  Be sure to use cake flour any time flour is called for in this recipe, i.e., when dusting the work surface.  This dough absorbed a considerable amount of flour from the counter, and all-purpose flour would add too much protein to the dough (and therefore more gluten, resulting in toughness).

3.  You can freeze the filled, uncooked buns, for steaming at a later date.  You can either thaw them in the refrigerator before cooking, or steam them straight from the freezer, giving an additional 5 minutes or so cooking time.  Just be sure the filling is thoroughly cooked before serving by using an instant-read thermometer.  Ground meat of all types should be cooked to 155º F.

Posted in Savory, Yeast Breads | Leave a comment

Chorizo and Cheddar Fried Bread

Week Thirteen: Filled Breads

chorizo-cheddar

One thing about filled breads is that they tend to be a little over the top.  They’re a bit extravagant, a bit flamboyant.  I mean, if you’re going to eat anything, it ought to be good on its own, right?  So why bother rolling it into some dough; why not just cook them separately, save yourself some trouble, and be done with it?

Because we can, that’s why.  Because it makes bread and filling both a little more special.  Because sometimes, you just want something opulent and lavish, and a little showy.   And because sometimes, you have to pull out the big guns.

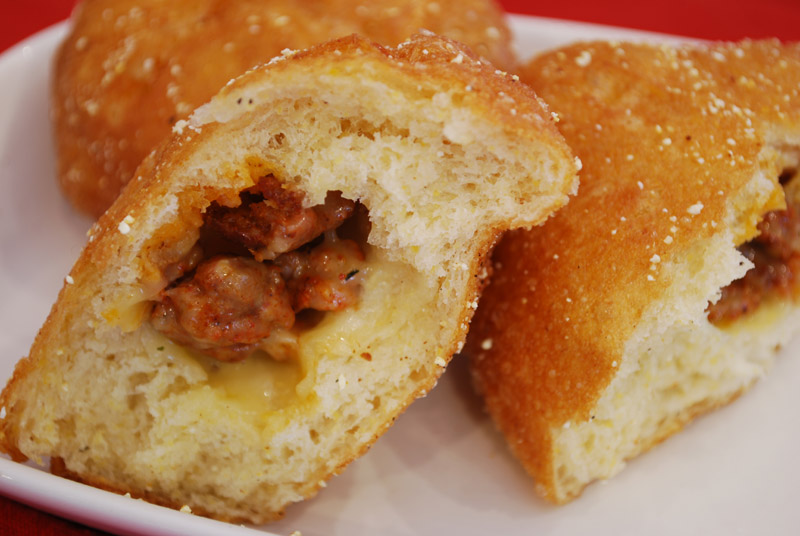
This bread is serious.  This bread ain’t messing around.  None of your precious croissant, or stately baguette here; this bread means business, so you’d better just forget about eating healthily for today.  Here we have yeast-risen rolls, filled with spicy sausage and cheese, and then fried to a gorgeous golden brown.  Oh my, yes.

You can use any number of highly-seasoned sausages in this application, but please don’t use anything mild; the flavor will just get lost.  You need something robust to match the sharp cheddar and the heartiness from the frying.  I used some very spicy chicken chorizo with aged white cheddar, but the combinations are endless: try andouille with cheddar, linguica with smoked gouda, merguez with feta, even a quality pepperoni with mozzarella would be delicious.

If you know me, you know that I’m not real big on heavy, rich foods.  I’m more of a vegetables and plain yogurt person.  (I think sushi is, generally speaking, the perfect food.)  But in retrospect, I wish I had stuffed as much cheese and sausage into these rolls as humanly possible.  I was a little concerned about the filling falling out during cooking; this worry was baseless.  When you slide these rolls into the oil, assuming it’s at the proper temperature, a lovely crust forms, containing anything that might try to escape.  Just make sure you pinch the seal together tightly, and you’ll have nothing to fear.  And after it was all cooked, I found that some of the rolls were a little understuffed, if anything.  Trust me, no one will be complaining that there is too much delicious sausage and melty cheese in their bread.  If you can manage to wrap the dough around it, it’s not too much filling.

These rolls have a bit of cornmeal in the dough, and are lightly dusted with more cornmeal before cooking, both of which lend the crust a wonderful crunch.  And if you haven’t over-worked the dough (don’t be too cautious, you do want some gluten), that crunch gives way to a soft interior, with a gooey heart full of massive flavors.  The Cajun seasoning sprinkled on the outside is almost like gilding the lily; except that this whole concept is basically like taking the lily, stuffing it with gilded cheese, rolling it in gilded dough, and deep-frying it in gilded oil.  As Bukowski said, if you’re going to go, go all the way.

Let me just wrap this up by saying: aged white cheddar.  Spicy chorizo.  Stuffed into bread.  Fried.

That is all.

chorizo-cheddar-2

not enough filling!

Chorizo and Cheddar Fried Bread
Adapted from Emeril Lagasse
Makes 24 breads

2 1/4 teaspoons active-dry yeast

1 1/2 tablespoons honey

2 tablespoons vegetable oil

2 cups warm water (105 – 110 degrees F)

24 ounces (a scant 6 cups) unbleached all-purpose flour

1/2 cup + 2 tablespoons cornmeal, plus extra for dusting

2 teaspoons salt

1/2 pound ground spicy sausage (such as chorizo, or similar)

1/2 pound white cheddar cheese, grated

Vegetable oil for frying

Cajun seasoning of choice (such as Tony Chachere’s, or Emeril’s Essence)


1.  Combine the water and honey in the bowl of a stand mixer, and whisk to combine.   Sprinkle the yeast over, stir, and let stand until foamy, about 5 minutes.  Add the oil.  Reserving a handful of the flour (1 to 2 ounces), add the remaining amount, the cornmeal, and the salt.


2.  With the mixer on low speed, beat the mixture with the dough hook until it begins to form a dough, then increase the speed to medium and beat until the mixture pulls away from the sides of the bowl, forms a ball, and climbs slightly up the dough hook.  Transfer the dough to a lightly-oiled bowl and turn it to coat all sides. Cover the bowl with plastic wrap, and let rise in a warm place until doubled in size, about 2 hours.  Conversely, you can refrigerate it overnight at this point (8 to 10 hours).


3.  While the dough rises, brown the sausage in a skillet over medium heat. Remove to a paper towel-lined plate to drain.  Set aside and let cool to room temperature.  If the dough was refrigerated, let it sit out at room temperature while you complete this step.


4.  Line a baking sheet with parchment paper and sprinkle it with cornmeal.  Turn the dough out onto a lightly floured surface, and press gently to deflate.  Divide the dough into 24 equal pieces.  With the palm of your hand, roll the portions on an un-floured surface to form small round rolls.  Cover the rolls not being used while you fill each one.  Using a sharp knife, make a quick “X” in the bottom of each roll.  Spread the dough open with your thumb and pointer finger to make a small cavity about 1 inch deep and 2 inches wide.  Fill with 2 teaspoons of cheese, then top with 2 teaspoons of sausage, pressing the mixture gently into the cavity.  Pull the dough around the filling, and pinch tightly together to close the cavity.  Place seam-side down on the prepared baking sheet.  Dust the tops with more cornmeal, and cover the rolls with plastic wrap.  Let rise in a warm place until doubled in size, about 30 minutes.


5.  Line another baking sheet with a folded-up paper shopping bag (to help absorb more oil), and lay at least a double thickness of paper towels atop that.  In a suitable pan, heat enough vegetable oil to come at least half-way up the sides of the rolls, to about 375 degrees F.  Gently sliding the rolls into the oil, fry them in batches for about 3 minutes, then turn each one over with a metal utensil and cook the other side until golden brown.  Remove from the oil and drain on the lined baking sheet.  Immediately season the breads with the Cajun seasoning.  Serve warm.


Notes:
1.  These don’t keep very well; but if you must, reheat them in a 375 degree F oven until crispy and heated through, about 10 minutes.


2.  Please be careful when adding the dough to the hot oil!  Burns from hot oil are nasty.


3.  For frying, I used my big stock pot (to cut down on splattering) and 1 quart of canola oil; but feel free to use your cast iron pan – that’s what it’s there for! – and whatever high smoke-point oil you like (that means no olive oil!).

Posted in Savory, Yeast Breads | 1 Comment

New Orleans-Style Barbecue Shrimp and Feta Bread

Week Thirteen: Filled Breads

shrimp-bread

barbecue shrimp as bread

Well, it’s that time of year again.  The days are suddenly longer, there’s the promise of warmth in the air, and trees and plants everywhere are starting to grow their leaves back.  Yes, it’s Spring, and that means one thing: it’s almost time for Crawfish Bread!

See, in New Orleans, the beginning of Spring heralds the fast approach of JazzFest, those two glorious weekends in late April and early May when you can get an abundance of food you simply can’t get any other time of year.  (Oh, and apparently there’s some fairly decent music, too.)  I’m talking Crawfish Monica, Cochon de Lait po-boys, the mysteriously-named Oyster Sack, Mango Freezes, and the King of JazzFest fare, that fantastically good Crawfish Bread.

For those of you not in the know, Crawfish Bread involves some extremely good bread, filled with crawfish tails, spices, and apparently all of the cheese.  It’s simple and a bit over the top, but tastes amazing.  It’s so rich and so delicious, it’s probably a good thing they only serve it once a year.  Like most Cajun and Creole food, you just know somebody’s been cooking all day to make it, and is thrilled to share it with you.  Until they run out, that is, which they seem to do every year.  If you’ve ever tried it, count yourself amongst the blessed.

So when I settled on filled breads this week, with Spring finally sprung, and JazzFest around the corner, it was a given that this native New Orleanian would make Crawfish Bread.  But you see, I don’t live in New Orleans now.  I live in Chicago.  And most Chicagoans wouldn’t know which way on a crawfish was up, even if they had one, bless ’em.  What I’m saying is that I couldn’t get my hands on any crawfish tails on short notice, and without great expense.  A little improvisation was in order.

I had my heart set on something authentically New Orleanian, but I was relegated to ingredients available in Chicago.  Shrimp are always readily available, but simply substituting shrimp for crawfish is like subbing water for chocolate.  I racked my brain (and my cookbooks) for a similarly full-flavored and traditional shrimp dish, when I finally hit on it.  Barbecue Shrimp!  Perfect!

And once again, if you’re unfamiliar with New Orleans-style barbecue shrimp, allow me to enlighten you.  Invented at the old-school Pascal’s Manale Restaurant, this dish contains no barbecue sauce, nor is it cooked on a grill.  If you ever order it, be prepared for a plate full of shell-on and head-on shrimp, almost literally swimming in a butter-rich and extremely flavorful sauce, full of garlic, lemon, and spice.  As for the name, you’re on your own.  I don’t know, and I don’t think anyone else really does either.  I think the origins have become more legend than truth anymore.  Notwithstanding, it is easily worth the messy arms and dry-cleaning bill you end up with after indulging.

The problem with filling a bread with such a sauce-y dish is just that: the sauce.  No way would it work.  And where was the cheese?  There had to be cheese!  I then remembered a fantastic recipe from Melissa Kronenthal’s amazingly-written and -styled blog, The Traveler’s Lunchbox,  which included shrimp, chiles, and feta.  I’d never had such a combination that I can recall, and it was every bit as good as she makes it out.  Feta it was, then.  As for the sauce, I simply reduced the leftover liquid in the pot, and thickened it with a little flour.

So now, I had the seafood, a rich pop of full flavors from the reduced sauce, and the cheese.  All that was left was to roll it into a batch of dough, and bake away.  Now, I wasn’t about to just make some Barbecue Shrimp, and toss the lot into some dough.  No, we ate nearly half of the shrimp for dinner, and had to stop ourselves eating more.  As you can see below, I served it over brown rice (which is certainly not traditional at all, but helped round it out into an entrée), with crusty bread and beer (which is practically mandatory).

I know what you’re thinking, looking at the recipe below.  You’re thinking there’s way too much seasoning.  You’re thinking there’s way too much garlic.  And you’re thinking there’s way too much butter.  I know, because that’s what I thought at first; but then I decided to trust my source, the illustrious and venerable Commander’s Palace.  Their cookbook has never, ever failed me; so I urge you to trust me in return.  It may not be for the very faint of palate, but that combination of flavors is just delectably perfect!  They know what they’re doing.

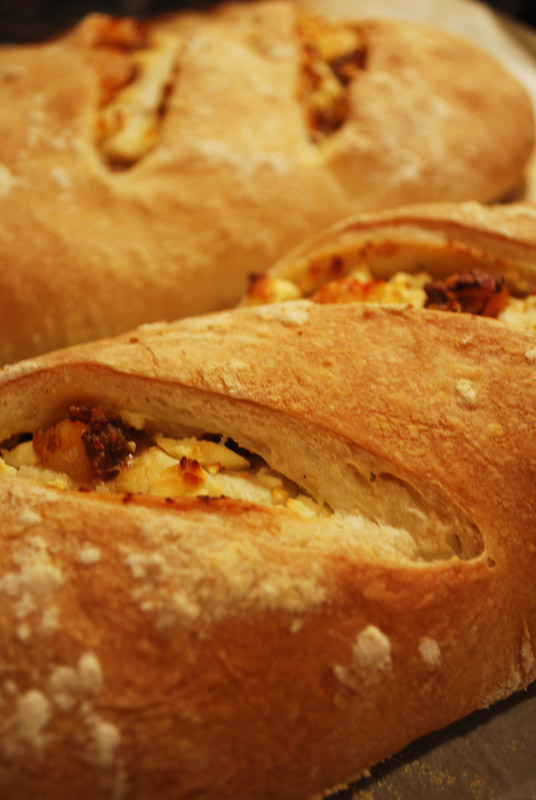
The aroma that filled the entire apartment was seductive and spicy, full of baking bread, rosemary, garlic, shrimp, and butter.  It smelled like a Cajun kitchen ought to.  I pulled the finished loaves from the oven, and little browned bits of shrimp and feta peered out at me through the slashes in the top like the bread was giving me a big snaggle-toothed grin.  Was it a fair amount of prep work?  Yes, it was.  But was it worth it?  Oh my, was it ever!  Just you try it for yourself – you’ll see!

how to serve barbecue shrimp
barbecue shrimp as entrée


New Orleans-Style Barbecue Shrimp and Feta Bread
Adapted in part from Commander’s Kitchen, by Ti Adelaide Martin and Jamie Shannon
Makes 2 loaves

For bread dough:
2 1/4 teaspoons active-dry yeast
2 1/2 teaspoons sugar
2 tablespoons olive oil
1 1/4 cup warm water (105º-115º F)
17 1/2 ounces all-purpose flour (about 3 1/2 cups + 3 tablespoons)
1 teaspoon salt 

For shrimp filling:
2 pounds large shrimp, shells on (preferably heads on, if you can find them)
2 tablespoons Creole or Cajun seasoning, divided
1 tablespoon olive oil
1 head garlic, peeled and minced
2 tablespoons chopped fresh rosemary
3 tablespoons Worcestershire sauce
3 tablespoons hot sauce
1 lemon, juiced, quartered (reserve juice and quartered rind)
1/3 cup beer
Salt and pepper to taste
1/3 cup minced parsley
4 tablespoons unsalted butter, room temperature
2-3 tablespoons all-purpose flour 
6 ounces feta, crumbled

1.  Make the dough: in the bowl of a stand mixer, combine the water and sugar, stirring until all the sugar is melted.  Sprinkle the yeast over, and stir to dissolve.  Let stand until foamy, about 5 minutes.  Add the oil.

2.  Reserving a handful of the flour, add the flour and salt to the mixture.  Combine at low speed with the dough hook until dough comes together, adding the reserved flour by tablespoons only as needed.  When dough no longer sticks to side of bowl, increase speed to medium and knead until a smooth, cohesive ball is formed.  Stop the mixer and scrape the bowl and hook as necessary.

3.  Transfer the dough to a lightly-oiled bowl, cover with plastic wrap, and let rise in a warm place for about 1 to 1 1/2 hours, or until doubled in size.

4.  While the dough rises, cook the shrimp: lightly toss the shrimp with 1 tablespoon of the Creole seasoning.  Preheat a large skillet or saucepan over high heat.  Add the oil, and let it begin to smoke.  Add the garlic and rosemary, and stir to lightly brown the garlic.  Be careful not to burn it.  Add the shrimp and stir.  Add the Worcestershire, hot sauce, lemon juice, and quartered lemon rind.  Let reduce slightly, 30 seconds to 1 minute.

5.  Add the beer, and deglaze the pan by stirring and shaking the pan.  Boil to reduce the mixture, and cook another 2 to 3 minutes until the shrimp are fully cooked (depending on size).  The liquid should have a saucy consistency.  Add the remaining tablespoon of Creole seasoning, pepper, salt, and parsley.  Reduce the heat to medium-high and add the butter a little bit at a time, shaking the pan or stirring until incorporated.  Adjust seasoning if needed, and remove lemon pieces.

6.  Remove about 2/3 of the shrimp to a bowl to cool, leaving the sauce in the pan.  (Eat the rest of the shrimp immediately, with a crusty baguette for soaking up the sauce, lemon wedges, and lots of paper towels; and enjoy!)

7.  When cool enough to handle, peel the remaining shrimp and chop roughly, into about 3-4 pieces per shrimp.  Reduce the remaining sauce in the pan by turning the heat to high, until thick and dark brown, but still a bit liquid.  Turn the heat to medium-high.  Add the flour by tablespoons, whisking to break up any lumps if necessary, and stir until a thick paste is formed.  Cook an additional minute or two, stirring constantly.  Turn off heat, and let cool in pan for a minute.  Add to the chopped shrimp, and set aside.

8.  Dust a baking sheet with cornmeal.  Turn the dough onto a floured surface, and divide in half.  Press each half into a rough circle, flour the top, and roll or press into an approximately 11 by 9 inch oval.  Evenly sprinkle the tops of each with the feta (3 ounces per piece of dough), and the shrimp mixture, leaving a 1/2 to 1 inch border.

9.  Starting with the longer side of the oval, carefully roll the dough up jelly-roll style, being careful not to let any filling escape.  Pinch the seam gently to seal, tuck the loose ends under, and transfer to the prepared baking sheet, seam side down.  Cover the loaves with plastic wrap and let rise at room temperature until doubled in size, about 1 1/4 hours.

10.  Twenty minutes or so before baking, preheat the oven to 400º F.  Remove the plastic wrap from the loaves, dust with flour, and make 3 quick, diagonal slashes in each loaf.  Bake until the loaves are a rich brown color, about 30 to 35 minutes.  Let cool slightly, before cutting and serving warm.


Notes:
1.  I accidentally used bread flour instead of all-purpose, and it did come out a little tough.  But otherwise, the flavor was spot on!

2.  Again, please don’t adjust the garlic or other seasonings in the shrimp recipe (unless you have a very good reason, like a deathly allergy, or something).  I know it seems like a lot, but just take a leap of faith with this one.

Posted in Savory, Yeast Breads | 1 Comment

Chocolate-Filled Multigrain Rolls

Week Thirteen: Filled Breads

chocolate-multigrain-bread

I remember the first time I ever tried chocolate and bread together.  Now, I’m not talking in a pastry here, like in a chocolate-filled croissant, or a chocolate-chip muffin; I’m talking deep, dark bittersweet chocolate paired up with a rustic, hearty, multi-grain bread.  It was, of course, in Europe, where the bitter flavor of the standard (and extremely good) chocolate shocked my American, Hershey’s-milk-chocolate-bred palate.  It took me a while to get used to the uncustomary flavor; but when I did, there was no turning back.  Once a die-hard milk chocolate fan, I quickly became a dark chocolate turncoat, devoted for life.  And the item that coaxed my tastes over to the dark side?  Nutella.  Of course.

Those unusual European hotel breakfasts, with their baskets of dinner-style bread (where were the bagels and muffins?), always featured little individually-wrapped packets of soft cheese and Nutella.  I couldn’t even fathom having chocolate for breakfast at first.  But then I tried it.  (And if you’ve not had Nutella, I suggest you never ever try it, because oh my goodness, is that stuff addictive.)  Suddenly, I understood.  My eyes were washed clean, and I could see clearly.  The soft spread, with its hit of hazelnut, was just light enough to tempt my unsophisticated taste buds, but dark enough to woo them towards a darker chocolate flavor.  And paired with the complementary nuttiness of whole-grain bread?  Just heavenly!

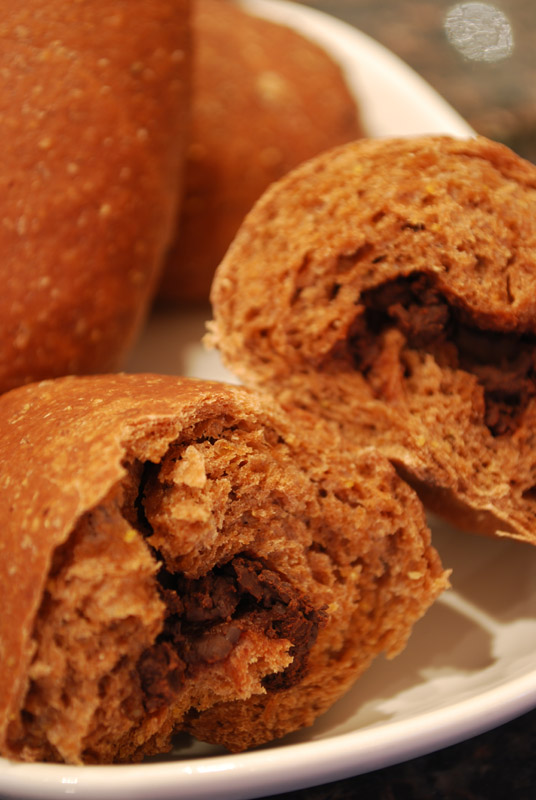
This filled bread, then, is my tribute to those first seductive bites.  But I’ve turned the chocolate factor a little deeper, with the use of a rich 70% chocolate, chopped and rolled into the dough.  I’ve also added a little unsweetened cocoa in with the flour, to boost the chocolate flavor a bit.  This is a true multi-grain bread, made with five (count ’em, five!) different flours; but it would be just as delicious made with only wheat flour.  I decided to use different flours, as opposed to adding in whole grains, because these rolls are fairly small, and I thought any seeds or larger particles would be a little overwhelming for the size.  Besides, I was going for something a little more chic today, something more reminiscent of those simple and elegant breakfasts I recall.  I wanted an espresso in a café, rather than a beer in a bar, if I may be permitted a metaphor.

The chocolate here is rolled into flattened-out portions of dough, which makes in theory for a more even distribution of chocolate within the bread.  I say “in theory”, because it didn’t exactly work out that way; but if you are more contentious than I, and roll them thinner, it probably would work out that way.  This also results in little oval rolls, which somehow seem more appealing than a simple round roll.

Crust-wise, they bake up soft and tender, with a slight heartiness from all the whole-grain flours.  The unsweetened cocoa deepened the flavor considerably, and lent a slightly bitter note.  For the liquid, I used a combination of milk (for a softer dough) and water, but I think coffee would be a nice substitute for the water.  It would lend a complementary note to the chocolate flavor, and make it a little richer.  I definitely would have used it, except I made these at night (and wanted to get some sleep), and had no leftover coffee on hand.

On tasting the bread, I was pleased, but not thrilled.  The texture was great, the chocolatey flavor was absolutely there, in abundance, as was the toothsome chew of a whole-grain bread; but it lacked some… zing.  And just as suddenly as I spotted the flaw, I realized the fix for it: salt!  I wish now that I had possessed the presence of mind to brush the uncooked rolls with a little egg wash (an egg white beaten with a little water), and sprinkle on some kosher salt.  It would be a lovely finish, and set off the deep flavor of the rolls beautifully.  And yes, I did afterwards lightly salt each bite of bread that I ate.  It worked!


Chocolate-Filled Multigrain Rolls
Makes 16-20

10 ounces unbleached bread flour (about 2 cups + 2 tablespoons), plus 2 ounces (about 1/2 cup)
1 1/2 ounces unsweetened cocoa powder (about 1/4 cup)
3 ounces whole-wheat flour (about 3/4 cup)
3 ounces rye or pumpernickel flour (about 3/4 cup)
1 ounce cornmeal (a scant 1/4 cup)
1 ounce spelt flour (about 1/4 cup)
1/2 ounce buckwheat flour (about 2 tablespoons)
2 teaspoons salt
2 tablespoons active-dry yeast
3 tablespoons honey
3/4 cup warm milk (105º-115ºF)
1/4 cup water (105º-115ºF)
2 tablespoons unsalted butter, melted
2 tablespoons olive oil
1 large egg
4 ounces good semisweet or bittersweet chocolate, chopped
1 egg white, lightly beaten with a little water to make an egg wash
Kosher salt, for topping rolls 

1.  In the bowl of a stand mixer, combine the water, milk, honey, and yeast.  Let stand until foamy, about 5 minutes.  Whisk in the egg.

2.  Sift together the first measure (10 1/2 ounces) of bread flour and the cocoa powder.  Whisk in the remaining flours and the salt.  Using the dough hook, mix the flours into the liquid mixture in the bowl, at the lowest speed, until well-combined.  Slowly drizzle in the melted butter and olive oil.  Add the remaining measure of bread flour (2 ounces) by tablespoons only as needed, until the dough is no longer sticky and clears the sides of the bowl.  Increase the speed of the mixer to medium and knead the dough for 10 minutes, or until soft and elastic.

3.  Turn the dough out onto a lightly-floured surface and knead 4 or 5 times, then stretch the outside down and around the bottom, to form a skin around a ball.  Transfer the dough into a lightly-oiled bowl, cover with plastic wrap, and let rise until doubled in size, about 1 hour.

4.  Line a baking sheet with parchment, or grease lightly.  Turn dough out onto a lightly-floured surface, and gently punch down.  Divide dough into 16 to 20 pieces (as desired, about 2 ounces each), and shape each into a rough circle, or round into a ball and flatten slightly.  Covering the pieces not being used, press or roll each piece into an oval.  Top with some of the chopped chocolate, and roll up starting with the short sides.  Pinch the seam to seal, and place seam-side down on prepared baking sheet.  Repeat with remaining dough.  Cover rolls with plastic wrap, and let rise until doubled in size, about 45 minutes.  Preheat oven to 375º F.

5.  Lightly brush each roll with egg wash, and dust with salt.  Bake for 15 minutes, or until dark brown on top.  Transfer to a wire rack to cool before serving.


Notes:
1.  If you don’t have the rye, spelt, or buckwheat flours, you can certainly replace them with plain whole-wheat flour.  You should end up with 7 1/2 ounces, or about 1 1/2 cups plus 2 tablespoons.

2.  If you prefer, you can substitute 4 1/2 teaspoons instant yeast for the active-dry yeast.  If doing so, add the yeast to the flour, rather than to the warm liquids.

Posted in Sweet, Yeast Breads | Leave a comment

Prosciutto Bread

Week Thirteen: Filled Breads

prosciutto-bread-2

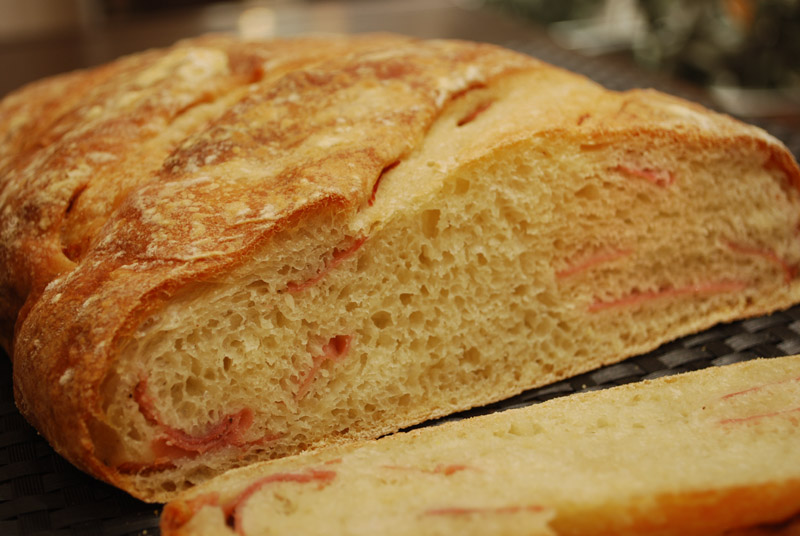
Okay, quick show of hands: who doesn’t like prosciutto?  No one?  That’s what I thought.  Prosciutto is one of the main reasons I pity vegetarians on occasion.  I don’t eat much meat generally speaking, but if you set a plate of prosciutto in front of me, you’d better not expect to have any leftovers.  Prosciutto can, like Cinderella’s Fairy Godmother, transform nearly any food into a more elegant and glamorous version of itself.  Think melon, scallops, asparagus, dates, and on and on; just wrapping a slice around anything makes it worlds better.

Prosciutto and bread are like frick and frack.  You can’t find a simpler and better appetizer to set in front of guests than a platter of sliced baguette and prosciutto.  Add some creamy brie to the mix, and you might not even have to bother cooking dinner.  So it’s only natural to add it into the bread, rather than just wrapping it around a breadstick, or layering on top of a slice.

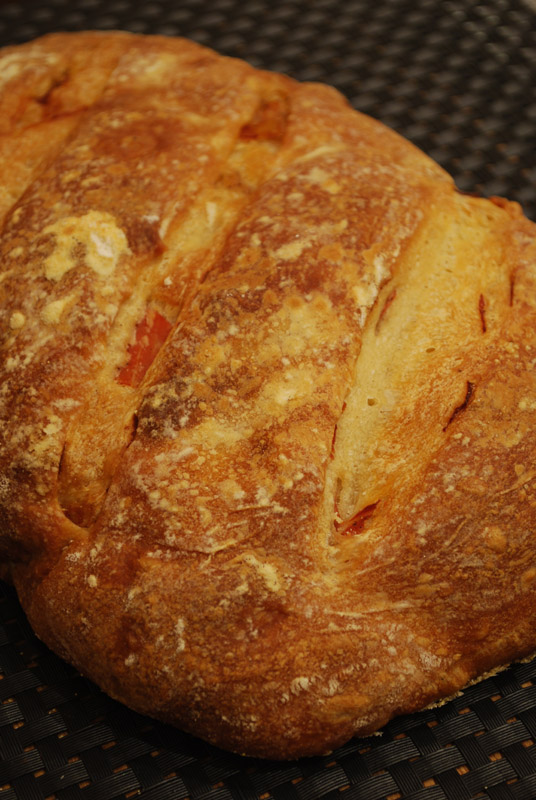
This bread has a fairly wet dough, much like a ciabatta.  This gives it a pleasantly chewy texture, and makes the finished loaf rather flat, since it tends to spread a bit during the final proofing.  I also think the two are an entirely apt pairing; you know, that whole “if it grows together, it goes together” bit?  It’s something like that.  These two quintessentially Italian foods, while extremely delicious in and of themselves, are just amazing together.  The prosciutto gets layered onto the rolled-out dough, then gently folded in, resulting in flavorful meaty streaks throughout the loaf.  And when you add a light dusting of black pepper into the dough, well, they just all go to eleven.

The bread cooks up soft and springy on the inside, with a beautiful brown crust that seems rather tough and hard on pulling out of the oven, but that softens up considerably after sitting a while.  You can, of course, substitute any type of charcuterie you like instead of prosciutto; but just make sure it’s sliced very thinly.  I think the more flavorful the meat is, though, the better in this application.  I just love those little bursts of savory umami within each bite.

One obvious use for this bread is to lightly toast slices under a broiler, and serve accompanying a cheese plate for a very elegant hors d’oeuvre.  Or, if you can’t bear to share it (I understand completely), could you possibly find a better bread to make grilled cheese with?  Spread some pesto, or unsalted almond butter (or a mixture!) on one side, and fill with your choice of lovely melting cheeses (perhaps the leftovers from your cheese plate?), and grill in olive oil.  Maybe add a tomato in there too, or a thin smattering of blueberry jam.  Hey, why am I suddenly hungry?

prosciutto-bread

Prosciutto Bread
Makes 1 loaf

1/2 cup warm water (105º-115º F)
1/2 cup warm milk (105º-115º F)
1 3/4 teaspoons active-dry yeast
8 ounces bread flour (about 2 cups), divided
4 ounces all-purpose flour (about 1 cup) 
1 teaspoon salt
2 ounces prosciutto (at least), thinly sliced and torn into bits
Freshly ground black pepper
Cornmeal, for dusting 

1.  In the bowl of a stand mixer, stir the yeast into a little of the warm milk.  Let sit until foamy, about 5 to 10 minutes.  Reserving a handful of the bread flour (about 1 ounce), combine the remaining amounts of the two flours.

2.  Add the remaining milk and water, the mixture of the two flours, and the salt.  Using the dough hook, mix at the lowest speed until the dough comes together, scraping down the bowl if necessary.  Add the reserved bread flour by tablespoons if needed; you’re looking for a fairly loose consistency, but the dough should mostly clear the sides of the bowl.  Knead 5 minutes.  Turn the mixer to the second-lowest speed, and knead an additional 1 minute.

3.  Transfer the dough to a large, lightly-oiled bowl, cover with lightly-oiled plastic wrap, and let rise until doubled in size, about 1 1/2 hours.

4.  Dust a baking sheet (lined with parchment, if you prefer) with cornmeal.  Turn the dough out onto a floured work surface.  Gently press and stretch (or roll out with a rolling pin, if you like) the dough into a rough 10 by 14 inch rectangle.  Lay the prosciutto evenly over the dough, and grind black pepper over the top to taste.

5.  Starting with the short sides, fold the dough in thirds, as you would fold a letter.  Press gently to flatten the dough a little.  Starting again with the short side, roll the dough up into a short, fat package.  Carefully transfer the dough to the prepared baking sheet, stretching a little to lengthen into a loaf shape.  (You can use gravity to help you stretch the dough.)  On the baking sheet, press the dough a little to flatten further.  Dust liberally with flour, cover with plastic wrap, and let rise again until doubled in size, about 1 1/2 hours.  30 minutes before baking, preheat oven to 400º F.

6.  When dough is fully proofed, uncover, and make 3 or 4 quick diagonal slashes in the top using a sharp serrated knife.  Spray with water, and put into the hot oven.  Bake 5 minutes, then spray again.  Bake another five minutes, quickly spray the loaf again, and continue baking for another 20 to 25 minutes, or until well-browned on top and sounding hollow when tapped on the bottom.  Remove to a wire rack and let cool before slicing.


Notes:
1.  If you have any sourdough starter from making this bread (you all are following along at home, right?), or from any other source, you should absolutely add it.  But then again, I’m a little sourdough crazy from last week still; so take that with a grain of salt.

2.  Speaking of salt, and depending on your tolerance for it, you may choose to decrease the amount of salt in this bread, to 1/2 teaspoon.  If you do, though, your bread will rise faster (since salt retards yeast activity), so either decrease the amount of yeast as well (to maybe 1 1/4 or 1 1/2 teaspoons), or just keep an eye on it.  I have not tried that out, so I can’t verify or guarantee those measurements; but that’s my educated guess.

3.  I absolutely heart prosciutto, so I think 2 ounces is a minimum here.  I would increase that amount next time, probably to 3 ounces, and also decrease the amount of salt (see note 2) – a good prosciutto is so salty, the under-salted bread is a good foil for it.  Otherwise, it can all be a little much on the palate after a few bites.  I think 4 ounces would be overkill, despite my love for all ingredients involved; besides, it would impede the rising of the dough.  I suppose, though, it all depends if you want Prosciutto with Bread, or Bread with Prosciutto.  Do whatever floats your boat.

Posted in Savory, Yeast Breads | Leave a comment