Pissaladière

Week Nineteen: French Breads

pissaladiere

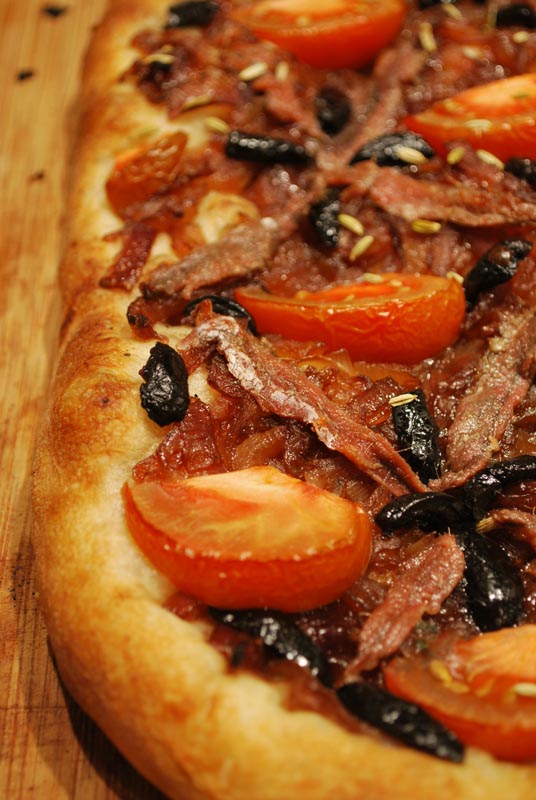
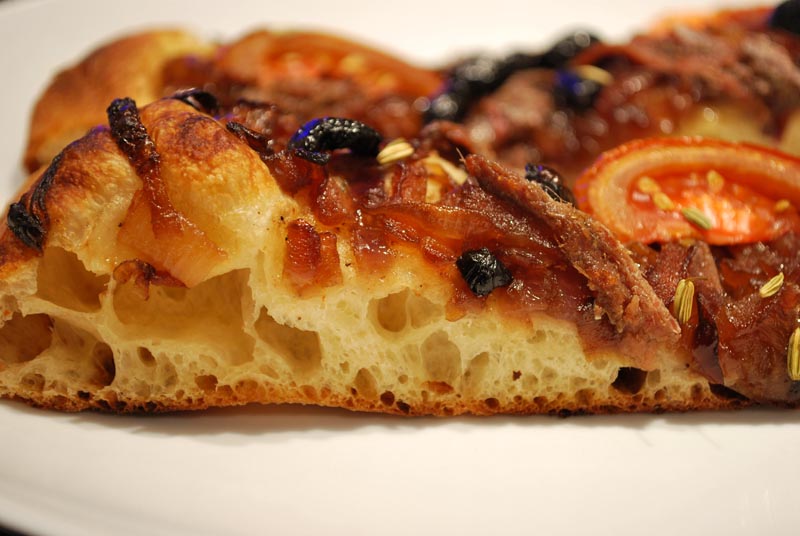
I know the name is unwieldy.  And yes, you could technically just call it a “French pizza”.  But a pissaladière (pees-ah-lah-dee-AIR) is so much more than just a French pizza!  It’s even almost a tart in many iterations, with a more crumbly crust; but this one just happens to have a chewy, airy crust (as you can see in the picture below).  And when was the last time you had a pizza without cheese or tomato sauce?

Don’t think for a minute that I’m turning my back on pizza with cheese; it’s incredibly delicious.  But there’s something so seductive about a pissaladière, with its caramelized onions, thyme, anchovies, and olives.  To add cheese would overwhelm and weigh down such a soignée tart, and any tomato sauce would be too brassy and bold for such perfectly balanced flavors.

The pissaladière also hails from Provence, like yesterday’s fougasse, a region known for its bounty of seafood and olives, due to its proximity to the sea and an otherwise rugged and rocky terrain.  By pairing the pungent saltiness of anchovies and olives with the subtlety and sweetness of caramelized onions, Provençal cooks not only made the most of the ingredients they had, they made them absolutely sing.  The name “pissaladière” in fact comes from a traditional condiment called “pissalat”, a mixture of puréed anchovies, thyme, bay leaf, cloves, pepper, and olive oil.

I know what some of you are thinking; that you’d never touch an anchovy with a ten-foot pole.  Years ago, after seeing (and smelling) a friend of my sister’s eating one on a saltine with mustard, I agreed for quite some time.  But, finally, I came across too many reputable sources that tried to convince me to use them, just one or two melted into a pasta sauce.  (And they rather do melt!)  When in balance, a good anchovy doesn’t lend a fishy flavor; it adds a complex salty note, rather like a strong olive.  And if you’re still not convinced, look at the source for this recipe.  I mean, if you can’t trust the French when it comes to food, who can you trust?

Though it’s not always included, I’ve added some tomato wedges to this pissaladière, as it’s not un-traditional, and they had the prettiest little tomatoes at the store when I went shopping.  I couldn’t resist!  But if you prefer, you won’t get any snooty looks for leaving them off.  I’ve also used a mixture of yellow and red onions, as I adore red onions, but wanted to cut their pungency a bit (though once they’re caramelized, you can’t really tell the difference).  The sprinkling of fennel seeds is not very traditional, but I love the slight, sweet, licorice astringency they bring.  And if you’re thinking it’s all a bit much of an effort for something you could have on your doorstep in under 30 minutes (or it’s free), you’ve obviously never had homemade pissaladière.

While the dough rises, you have ample time to caramelize onions, and drain anchovies.  One pissaladière bakes while you top the other.  In the end, you get to crunch into an airy crust, crisp on the bottom and chewy in the middle.  On top, the onions keep the dough perfectly moist, while the sporadic pops of flavor from the olives and anchovies play a salty counterpoint to the earthy sweetness of the onions.  Olive oil provides a bridge between all these flavors, and the floral note of thyme gives a welcome herbiness.  Trust me, if you aren’t drooling now, you will be once you smell it.  Give this “French pizza” a try, and I assure you won’t be missing the cheese one bit.  I know I didn’t!

pissaladiere-2


Pissaladière
Adapted from Cook’s Illustrated Magazine
Makes 2

For the dough:
11 ounces (about 2 cups) unbleached bread flour
1 teaspoon instant yeast
1 cup hot water (120 to 130 degrees)
1 teaspoon table salt
1 tablespoon olive oil

For the toppings:
2 tablespoons olive oil
1 large yellow or white onion, halved and sliced 1/4 inch thick
1 large red onion, halved and sliced 1/4 inch thick
1/2 teaspoon salt
1 teaspoon sugar
2 sprigs thyme
1 bay leaf
1 tablespoon balsamic vinegar
1 tablespoon water

Freshly ground black pepper, to taste
1/2 cup niçoise olives, or other black cured olives, pitted and halved or quartered
16-20 whole anchovy fillets, rinsed, and patted dry for garnish
2 small tomatoes, cut into wedges
2 teaspoons minced fresh thyme leaves
1 teaspoon fennel seeds

1. To make the dough, combine the flour and yeast in the bowl of a stand mixer.  Add the water and mix with the dough hook at low speed until all flour is moistened, and a rough dough forms.  Without removing bowl from the mixer, cover and let rest for 15 minutes.

2.  Uncover bowl, add the salt and olive oil, and knead on low speed until incorporated.  Increase speed to medium-low, and knead until the dough forms a cohesive ball, about 4 to 5 minutes.  Turn out onto a lightly floured surface, and knead a few times until the dough forms a ball with a “skin” around the outside.  Transfer the dough to a lightly oiled bowl, cover with plastic wrap, and let sit in a warm place until doubled in size, about 1 to 1 1/2 hours.

3.  While the dough is rising, prepare the toppings.  Heat the 2 tablespoons olive oil in large nonstick skillet over moderately high heat until shimmering, but not smoking.  Stir in the onions, salt, brown sugar, bay leaf, and thyme, and cook, stirring frequently, until the onions are free from their liquid and just begin to brown, about 10 minutes.  Add the balsamic vinegar, and season with black pepper.  Reduce heat to medium-low and cook, stirring frequently, until onions are medium golden brown, about 20 minutes longer.  Remove from the heat, and take the thyme sticks and bay leaf out.  Stir in the water, and set aside.  Adjust an oven rack to the lowest position, set a baking stone (if using) on rack, and preheat the oven to 500 degrees F.

4.  When the dough has doubled, turn out onto a lightly-floured surface.  Divide into 2 equal pieces, and roll each into a round ball.  Place seam-side down, flatten gently, and cover loosely with plastic wrap.  Let rest 5 to 10 minutes.  Line a large, un-rimmed baking sheet with parchment paper.

5.  Transfer one piece of dough to the baking sheet.  Using oiled hands, press and stretch the dough, lifting with the backs of your hands, into an oblong shape 14 x 8 inches.  Brush the dough with olive oil and season with black pepper.  Leaving a half-inch border around the edge, spread half of onions evenly over the surface.  Arrange 8-10 whole anchovy fillets over the top, and dot decoratively with the olives and tomato wedges.  Sprinkle half of the fennel seeds and thyme over the top.

6.  If using a baking stone, slide the parchment with the tart onto the heated stone.  Otherwise, place the baking sheet directly on the oven rack.  Bake at 500 degrees F until the crust is a deep golden brown, 13 to 15 minutes.  Shape and top the second pissaladière while the first is baking, using a second sheet of parchment.

7.  Remove the first pissaladière from the oven by pulling the parchment back onto the baking sheet or peel.  Slide onto a cutting board, pulling the parchment out from underneath.  Let cool briefly before slicing and serving.  Bake the second in the same manner as the first.


Notes:
1.  If you don’t have any thyme, but do have some Herbes de Provence, or simply prefer to, you can substitute that instead.

2.  The onions can be caramelized a day or two ahead and refrigerated.

3.  If it works out better for your schedule, you can reduce the amount of yeast in the dough to 1/2 teaspoon, mix as directed, then refrigerate the dough overnight (instead of the 1 1/2 hour rise).  Let come to room temperature 45 minutes before proceeding.

4.  Maybe it goes without saying, but don’t cheap out on the anchovies.  Trust me, it’s an extra dollar well-spent.

Posted in Savory, Yeast Breads | Leave a comment

Pistachio and Cheese Fougasse

Week Nineteen: French Breads

fougasse

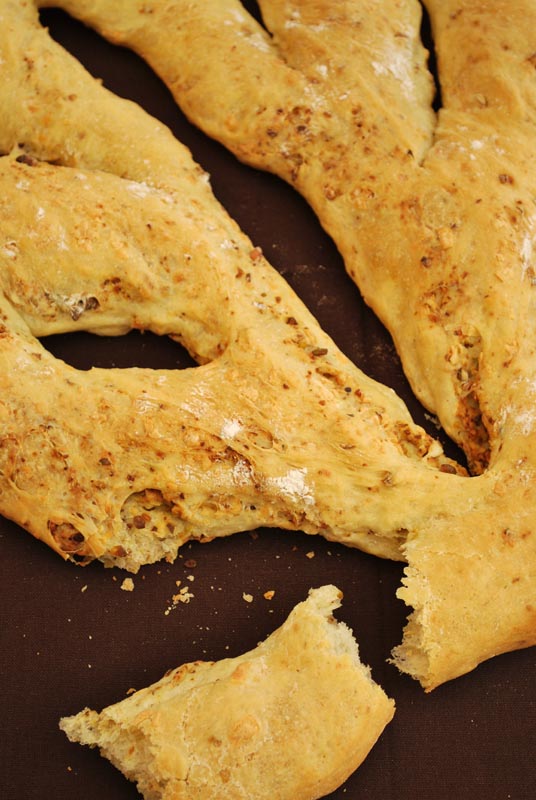
Fougasse, hailing from Provence in Southeastern France, is similar to the focaccia of nearby Italy.  But unlike the more familiar focaccia, with its short crumb due to the high percentage of olive oil in the dough, fougasse is more bready in texture.  Fougasse and focaccia actually share a common lineage, dating back to the Ancient Roman panis focacius, or “hearth bread”.  Over time, different variations resulted, all the way from thin, almost cracker-like versions, to the fluffiest, thickest types.

But all these different styles are usually topped with things, or have flavoring ingredients kneaded into the dough.  Focaccia, for example, is often seen topped with herbs, garlic, tomatoes, cheese, or all of the above.  Fougasse, on the other hand, is most often seen with nuts, olives, cheese, or anchovies – decidedly Provençal ingredients.  You’ll often see fougasse flavored with orange, as it is here, when it’s served as part of a traditional Christmas dinner.

The most obvious difference between these two cousins is, of course, the shape.  Focaccia is nearly always round in shape, with a dimpled top perfect for holding pools of olive oil.  Fougasse, in constrast, has a unique, airy shape, like a ladder or leaf, depending on how it’s cut.  This isn’t just decorative; the shape means the bread will cook faster.  In fact, fougasse was often used to test the temperature of an oven, and make sure it was properly hot or cool enough for the pain quotidien.

For my fougasse, I’ve used pistachios, orange flower water, and a Spanish cheese called Zamorano, which is similar to Manchego, but a bit more full-bodied.  Feel free to switch up the flavorings as you like; a little olive tapenade kneaded in would not be out of place here, nor would a splash of white wine in place of the orange flower water.  Kneading the nuts and cheese in can be a little messy, but just keep kneading, and it’ll sort itself out sooner or later.  Also, don’t be afraid to really open those cuts up – they’ll fill in a bit as the dough rises.  Enjoy!


Pistachio and Cheese Fougasse
Makes 1 large loaf

For starter:
4 1/2 ounces (1 cup) all-purpose flour
1/8 teaspoon instant yeast
3/4 cup water, room temperature

For dough:
1/3 cup water
1 tablespoon orange flour water
12 ounces (about 2 3/4 cups) all-purpose flour, divided
2 teaspoons instant yeast
1 teaspoon salt
3 tablespoons olive oil
4 ounces grated cheese
2 ounces (1/2 cup) pistachios, toasted and chopped

1.  To make the starter, whisk the flour and yeast together.  Add the water and stir until smooth.  Cover and let sit at room temperature for at least 5 hours, or until bubbly and risen, and up to 12 hours, or until fallen.

2.  To make the dough, combine the water, orange flour water, 8 ounces of the flour (a scant 2 cups), and all the starter in the bowl of a standing mixer.  Using the dough hook, mix at low speed until combined and all the flour is moistened.  Without removing the bowl from the mixer, cover and let rest for 20 minutes.

3.  Uncover the bowl, add the yeast, salt, and olive oil.  Knead at low speed until integrated (adding some of the extra flour will help the ingredients absorb into the dough).  Increase the speed to medium-low and knead until smooth and cohesive, about 5 to 6 minutes, adding the remaining flour only as necessary to achieve the proper consistency.  The dough should stick to the bowl a bit, but not be soupy.  Transfer the dough to a large, lightly-oiled bowl.  Cover with plastic wrap and let rest at room temperature for 45 minutes.

4.  Uncover the dough, and using a greased or nonstick spatula, fold the dough over itself in a trifold, like you might fold a business letter.  Cover and let rest for another 45 minutes.

5.  Turn the dough out onto a well-floured surface.  Flatten the dough gently with floured hands.  Top the dough with the chopped pistachios and grated cheese.  Fold the dough over the filling, and knead until the nuts and cheese are evenly integrated in the dough.  If they fall out, just keep kneading until they work themselves back into and throughout the dough.  Cover and let the dough rest for 5 minutes.

6.  Line a baking sheet with a piece of parchment paper, and flour it lightly.  Transfer the dough to the baking sheet, and stretch and press the dough into a large, flat oval, about 14 x 7 inches.  Using a knife or bench scraper, cut deep slits all the way through the dough, in whatever pattern you like.  Pull the dough apart until the slits are at least 1 1/2 or 2 inches wide.  Cover loosely with lightly-oiled plastic wrap, and let rise for 30 minutes.  Preheat the oven to 400º F.

7.  Bake at 400º F for 20 minutes, or until starting to brown.  Remove to a wire rack to cool.


Notes:
1.  You can certainly use whatever kind of cheese you like, but a robust flavor will be quite welcome here; something like a nutty, hard Manchego, or a softer smoked Gruyère would be most appropriate.

2.  If you don’t have orange flower water, simply leave it out.  If you’re using a particularly strong cheese, you may opt to leave it out anyway, as the delicate flavor can be easily overwhelmed.

3.  Fougasse is best eaten the same day it’s baked; if not finishing the same day, wrap and freeze for later.

Posted in Savory, Yeast Breads | Leave a comment

Pain Polka

Week Nineteen: French Breads

pain-polka

Here’s a quiz: can you guess where the name for this bread came from?  That’s right; it’s from a Czech word meaning “little half”!  Five points.

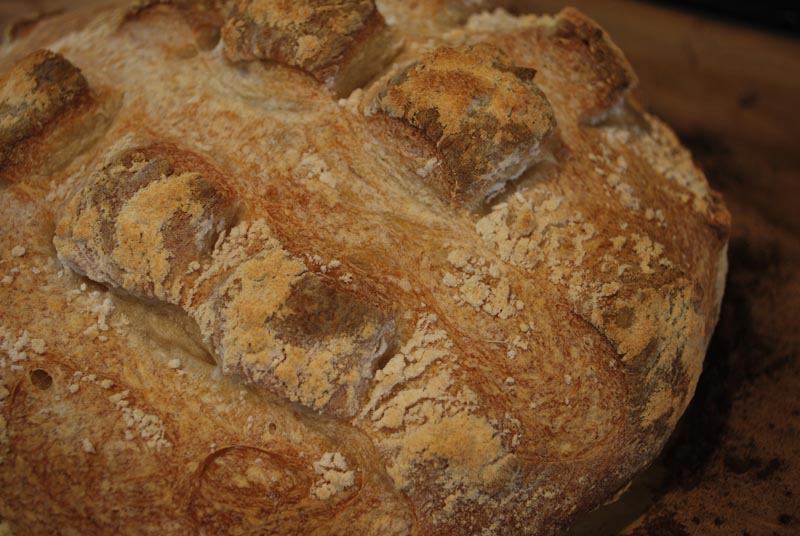
Actually, I’m serious.  Obviously, pain polka (or, polka bread) is so called because of the distinctive pattern on top, which resembles polka dots.  And polka dots, though ancient, came by their current name from a dance (the, um, polka) that happened to be in vogue at the same time as said pattern.  And the dance got its name from the short (little) half steps taken by the dancers.  So there you have it; from půlka to polka, from a Czech dance to delicious bread from Central France.

Interestingly, there’s no real recipe as such for polka bread.  Unlike other breads, such as rye or a croissant, this bread is defined as “pain polka” mainly because of the shape, rather than the ingredients.  Generally, though, it’s made with a crusty white bread, common in Central France.  The dough is enhanced with the use of a starter, giving the finished bread a much better texture and flavor than it would otherwise have.

When slashing this bread, don’t be shy.  The more cuts you make, the more the polka-dot appearance will show.  Make the cuts too far apart (like I did), and your bread will just look nubbly on top.  Don’t worry too much about deflating it, since the dough is given another 20 minutes of rising to recover a bit.  But no matter what, you’ll end up with a lovely centerpiece bread, crusty, airy, and flavorful.  Ten points.


Pain Polka
Makes 1 large round

For the starter:
1/2 teaspoon instant yeast
5 ounces (about 1 cup) unbleached bread flour
1 cup water, room temperature

For the dough:
1/2 teaspoon instant yeast
20 ounces (about 4 1/2 cups) unbleached bread flour, divided, plus additional for dusting
1 1/3 cups water, room temperature
1 tablespoon salt

1.  To make the starter, whisk the yeast into the flour.  Add the water and whisk until smooth.  Cover tightly with plastic wrap, and let sit at room temperature for about 4 to 5 hours.

2.  To make the final dough, set aside 3 to 4 ounces (a scant cup) of the flour.  In the bowl of  a stand mixer, whisk the yeast and remaining flour together.  Add the water, and mix with the dough hook until all the flour is moistened, and a stiff dough forms.  Without removing the dough hook, cover the bowl loosely with plastic wrap, and let sit for 15 minutes.

3.  Remove the plastic wrap, add the salt and all the starter, and knead on low speed until combined.  Increase the speed to medium-low and knead for another 5 to 6 minutes, adding only enough of the remaining flour as needed to achieve the right consistency.  The dough should form a cohesive ball, but still be a little slack, and not firm.  Transfer the dough to a large lightly-oiled bowl, cover tightly with plastic wrap, and let sit until doubled in size, about 1 1/2 hours.

4.  Line a baking sheet with parchment paper, and lightly flour.  Turn the dough out onto a lightly floured surface.  Punch down (deflate), and shape into a round loaf.  Transfer the dough seam-side down to the prepared baking sheet.  Loosely cover with lightly oiled plastic wrap, and let stand in a warm place until not quite doubled in size, about 1 hour.  About halfway through rising, preheat the oven to 450 degrees F.

5.  Dust the top of the dough liberally with flour.  Using a sharp serrated knife, make a series of quick slashes in the top of the dough, in a grid pattern.  Cut fairly deeply, but be quick; don’t press the knife into the dough, deflating it.  Cover loosely again, and let rest for 20 minutes.

6.  Spray or sprinkle the loaf with water.  Place in the oven, and bake for 10 minutes, opening the door and spraying with water every 2 or 3 minutes.  Bake an additional 15 minutes, or until the loaf is a dark golden brown.  Transfer to a wire rack to cool thoroughly before slicing.


Notes:
1.  If you don’t have time to wait for the starter, you can omit it; but the flavor is vastly improved with it.  In this case, double the yeast in the dough to 1 teaspoon, and increase the water to 1 1/2 cups.  Proceed as directed.

2.  On the other hand, if you can handle waiting a bit longer for the starter, or if it fits into your schedule, decrease the amount of yeast in the starter to 1/4 teaspoon.  Mix the starter as directed, but let it sit for at least 10 hours or so.  Proceed as directed.

Posted in Savory, Yeast Breads | 1 Comment

Corn Tortillas

Week Nineteen: French Breads Happy Cinco de Mayo!

corn-tortillas-2

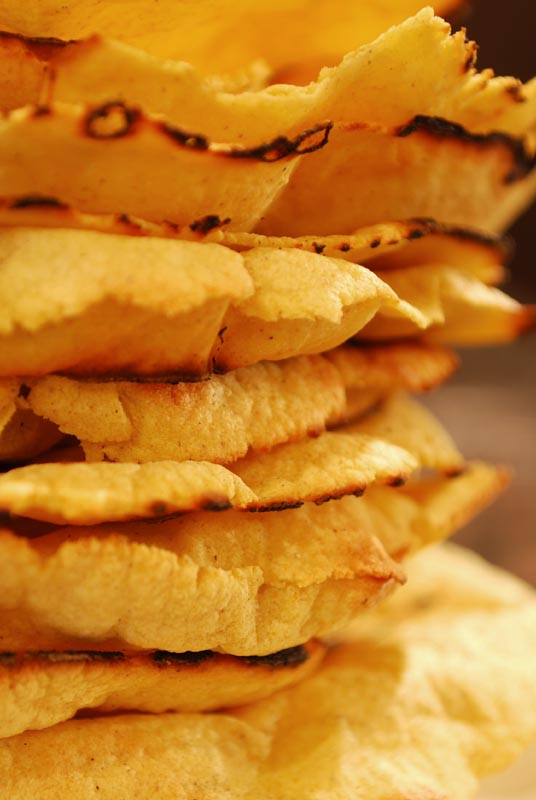
Just so we’re all clear, Cinco de Mayo is not Mexico’s Independence Day, or any other such equivalent.  It’s not even a national holiday in Mexico.  In fact, it’s not widely celebrated outside of the state of Puebla.  Until you get across that Northern border, that is.  For some reason, Americans just love any excuse to eat Tex Mex and drink Margaritas.  (By the way, Mexico’s Independence Day is 16 Septiembre.)

And lest you think I’m getting all preachy up in here, I will certainly be eating and drinking my share tonight at a friend’s party.  I mean, who can resist?  Soft tacos, pico de gallo, and a crisp, cold Margarita in hand?  Yes, please.  It’s a bit like Mardi Gras: no one knows what the holiday really means, but ever’body love a party!

If you’re throwing your own party, I’ll give you two things you can amaze your guests with.  One: that the reason you’re all gathered together is to celebrate the defeat of the French Army by the Mexican Army, at the Battle of Puebla in 1862.  The larger and more well-equipped French forces hadn’t been defeated in 50 years!  Unfortunately, the French were able to rally back the very next year, and occupied Mexico for the next five years.  The observance of Cinco de Mayo began in California during that time, as a way of showing support for Mexico.  And two: after you’ve wowed your guests with your brilliance, you can stun them with your incredible tortilla-making skills.

Corn tortillas have been made in the Americas (specifically South and Central America) for millenia.  There’s even evidence that Aztecs were eating tortillas (of a sort) as long ago as 10,000 B.C.!  One step central to making corn tortillas is called nixtamalization, which happens when corn kernels are treated with an alkaline solution, usually lime water.  This produces hominy (if you’re Southern, and know what that means), and the corn is then more easily ground into meal, makes a smoother dough, and crucially, becomes far more nutritious.  People whose diets consisted of cornmeal untreated in this manner generally ended up with a nasty little disease called pellagra.  Who knew.

Okay, so you can’t make proper corn tortillas with regular cornmeal.  Luckily, you’ll often see a bag labeled “Masa Harina” near the regular cornmeal, or maybe tucked away in the “International Foods” aisle.  This is cornmeal made from nixtamalized corn, all ready for you to mix it into tortilla dough.  And if you haven’t tuned me out completely by this point, let me just tell you how easy it is to make corn tortillas!

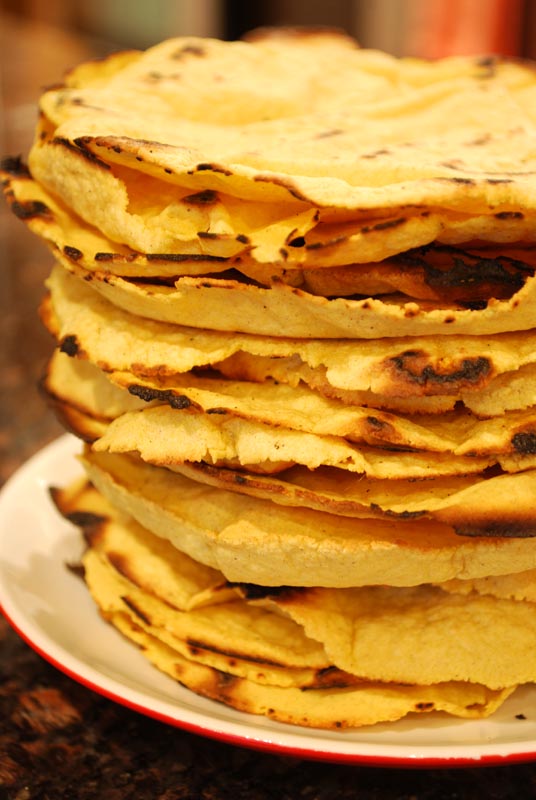
I know, the recipe is kind of long.  But it’s mostly just description of the best way to roll them out, which is far easier shown than written (why, oh why, didn’t I photograph that?).  Come on, it’s only got two ingredients!  And since corn doesn’t produce any gluten, you’ll never worry about overkneading, or over-rolling the dough, the bane of every flat wheat bread!  It seriously only took me about 1 hour, start to finish, to make 16 of some of the best tortillas I’ve ever had – no joke.

Have you ever tried fresh, homemade corn tortillas?  They’re so good!  Fresh out of the pan, they’re light years away from those dried-out things they sell in the grocery store, already halfway to being tortilla chips.  No wonder I never liked them before.  Oh, and another reason they always tasted so flat to me is because corn tortillas are traditionally made without salt.  This is because they’re usually paired with highly-seasoned and richly-flavored foods, and provide a nicely muted counterpoint to such flamboyance.  You can certainly add salt if you like, but the dough may dry out more rapidly.

Either way, salt or no, I urge you to try these sometime.  They’re really quite simple once you get into the rhythm of pressing, rolling, and flipping.  Trust me, once you’ve tried corn tortillas, fresh from your own pan, you’ll never go back to the store-bought kind again.  And there’s the added bonus of being so easy that you’ll have time to mix up another Margarita or two!  Happy Cinco de Mayo!

corn-tortillas


Corn Tortillas
Adapted from The Joy Of Cooking
Makes 16 five to six inch tortillas

 2 cups masa harina (do not use regular cornmeal)
1 1/4 cups + 1 tablespoon warm water, about 120 degrees F

1.  Mix the masa and water together in a bowl until it comes together.  Knead either in the bowl or on a surface until smooth and soft.  You may need to add additional water if the dough is crumbly, or additional masa if the dough is sticky.  Return to the bowl, and cover with a piece of plastic wrap placed directly on the surface of the dough.  Let rest for 30 minutes.

2.  Place two heavy pans on two burners of the stove.  Heat one over medium-low heat, and the other over medium-high heat.  Divide the dough into 16 equal pieces.  Roll each piece into a ball, keeping the unused pieces tightly covered (see note 1 below).

3.  Cut a gallon-sized plastic zip-top bag down two of the sides, leaving only one side attached.  (Conversely, you can use two sheets of any other similar plastic material, but this is perhaps the easiest and most effective method.)  Place one ball of dough between the pieces of plastic, and press with a flat surface (another pan, or a flat-bottomed plate) until flattened out.  Using a rolling pin, roll until the dough is as thin as desired, or the disc is 5 or 6 inches across.  If you happen to have a tortilla press, use that instead of the plastic bag.

4.  Peel the plastic from the dough.  Transfer the rolled-out dough to the cooler of the two pans on the stove.  Cook for 20 seconds, then flip over into the hotter pan.  (If the edges of the tortilla start to curl within 20 seconds, turn the heat a little lower.)  Cook in the hotter pan until lightly browned in spots, about 20 to 30 seconds.  Flip over again, still in the hotter pan, and cook until the other side browns in spots, another 20 to 30 seconds.  The tortilla will probably puff up.

5.  Transfer the cooked tortilla to a clean kitchen towel (not terry cloth), and cover while cooking the remaining tortillas.  When cooked, stack each tortilla on top of the others, and cover with the towel to keep warm.  Serve warm, or wrap and freeze.  Tortillas will reheat beautifully in a warm oven, wrapped in aluminum foil; or in a microwave, wrapped in wax paper.


Notes:
1.  This dough will dry out easily.  If it becomes too crumbly, sprinkle with a little water, and knead until smooth again.  Overkneading is not a problem with this recipe.

Posted in Savory, Unleavened Breads | 2 Comments

Sourdough Baguettes

Week Nineteen: French Breads

 baguettes

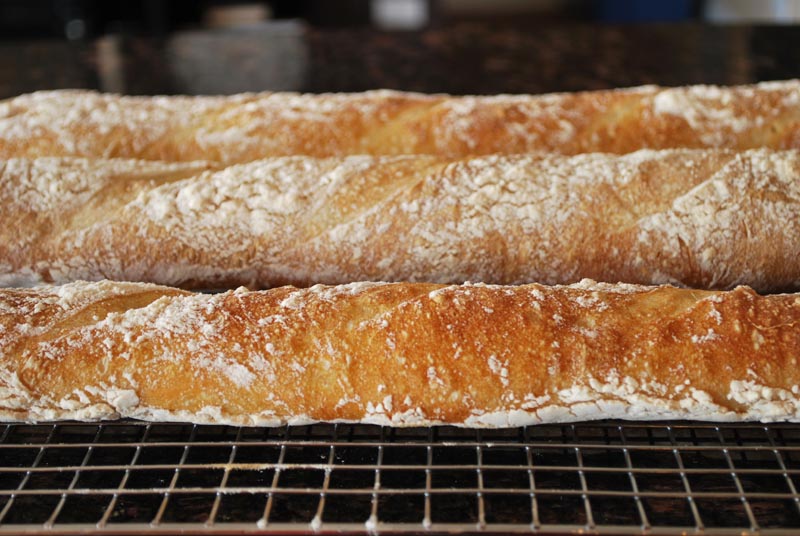
I know what you’re thinking: didn’t I already make baguettes?  Yes, I did.  But this is a different recipe!  This makes use of a sourdough starter, which you might just have in your refrigerator already, if you care enough to be pursuing a good baguette.  And man, this is one good baguette.

This recipe manages to avoid any strongly sour flavor, normally associated with many so-called “sourdough” breads.  Rather, the flavor is very clean, and yet very complex, tasting mild enough to allow any toppings to shine, but rich and well-balanced enough to stand on its own.  The sourdough starter also contributes important acids and enzymes that you simply can’t achieve without good old-fashioned time and patience.  Those enzymes and acids improve the texture immensely, as well as deepening the flavor of the bread.

And of course, there’s no shortcut here.  Oh yes, good baguettes take their sweet little time.  Start to finish, you won’t get through this in less than 29 hours; or you can break it up into two evenings and a morning of work.  But before you throw up your hands and exclaim that it’s simply too much, let me assure you that it is most certainly worth every patient hour.

This bread was described by a very kind guest as having “the perfect ratio of crust to chewy, almost wet, interior”.  Taking that into consideration, plus the fact that the four of us managed to do in two whole loaves over the course of a single (albeit, rather delightfully extended) brunch, I’d say that’s compliment enough.  But try it for yourself, and see what you think.  If you have any leftovers, you can send them over to me!


Sourdough Baguettes
Makes 3 baguettes

For starter:
4 3/4 ounces (about 1 cup) unbleached bread flour
1/2 teaspoon instant yeast
1 cup filtered or spring water, room temperature

For dough:
1 1/2 cups + 2 tablespoons (13 ounces) cold water
12 ounces (about 2 2/3 cups) unbleached bread flour, plus extra for dusting
6 1/2 ounces (about 1 1/2 cups) cake flour
2 teaspoons salt
1 teaspoon instant yeast
1/2 cup starter

1.  To make the starter: whisk together the flour and the yeast.  Add the water, and whisk until well combined and smooth.  You should have a batter consistency.  Cover loosely, and let sit at room temperature for 24 hours.  After this, you can use it immediately, or refrigerate it for up to 3 weeks (see note 1 below).  The longer it sits, the tangier it will taste.

2.  To make the dough: reserving a handful of either (or both) flours, whisk together the remaining flour and the salt in the bowl of a stand mixer.  Add the water.  Using the dough hook, mix until just smooth, about 1 to 2 minutes, scraping the bowl down if necessary.  Scrape down any errant pieces of dough stuck to the side of the bowl, and cover with plastic wrap, leaving it on the mixer.  Let rest for 15 to 20 minutes.

3.  Add the starter and the yeast to the mixture in the bowl.  Knead for 4 to 6 minutes at medium-low speed, adding the reserved flour as needed to prevent sticking and achieve the proper consistency.  The dough should form a cohesive ball, but should not be too firm.

4.  Transfer the dough to a lightly-oiled bowl, cover with plastic wrap, and let rise for 1 1/2 hours, or refrigerate overnight.  If refrigerating, bring to room temperature for 1 hour before proceeding.

5.  Line a baking sheet with aluminum foil, then parchment paper atop that, flouring the parchment well.  Turn the dough out onto a well-floured surface.  Do not knead the dough.  Divide the dough into 3 equal pieces.  Pressing on the dough to deflate it, form the pieces into long ropes by lifting and stretching the dough, and rolling it under your palms.  If the dough resists, cover and let rest for 15 or 20 minutes.  Baguettes are classically 30 inches long, but don’t go crazy over being exact.

6.  Transfer the loaves to the prepared baking sheet, and form a couche (see note 2 below).  Dust the loaves well with flour, cover loosely with lightly oiled plastic wrap, and let rise until just doubled in size, about 1 1/2 to 2 hours.  Preheat the oven to 450º F one hour before baking, using a baking stone if you have one.  Place a heavy pan or rimmed baking sheet on the floor or lowest rack of the oven.

7.  Uncover the dough, and pull the parchment paper flat without disturbing the bread, and slide the foil out from underneath (see note 2 below).  Using a sharp serrated knife or razor blade, make five quick slashes in each loaf, evenly spaced, and at a 45º angle.

8.  Quickly slide the loaves (still on the parchment) onto the heated baking stone, if using.  If not, just place the baking sheet in the oven.  Immediately throw 3 or 4 ice cubes into the preheated pan in the oven.  Bake at 450º F with for 10 minutes, adding additional ice cubes as they melt.

9.  Remove the “ice cube” pan at this time, and continue baking the bread an additional 10 minutes or until deep golden brown.  Transfer the bread to a wire rack to cool, taking care not to slice it until cooled to room temperature.  Wrap and freeze any bread not being eaten that day.


Notes:
1.  If you’d like to save the remaining starter, it will keep very well in a lidded container in the refrigerator for as long as you care to keep feeding it.  Each time you take some to use in a recipe, “feed” the remaining starter with 1/2 cup bread flour and 1/2 cup filtered or spring water (not tap water, as there’s too much chlorine in it for the yeast).  Whisk well to combine, and let stand at room temperature until bubbly, usually just a few hours.  Cover and refrigerate.  If the starter separates, and a liquid rises to the top, just whisk it back in.

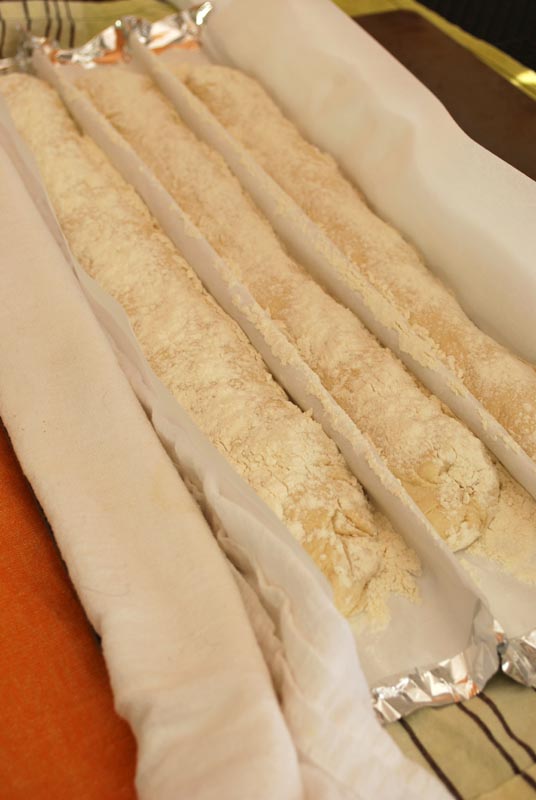
2.  If you happen to have a couche, congratulations.  If not, you can make one by placing a sheet of aluminum foil on a large baking sheet.  Top the aluminum foil with a sheet of parchment.  Flour the parchment well, and place the dough on it lengthwise, leaving about 4 inches between loaves.  Grab the short edges of the aluminum foil and parchment together, between the pieces of dough, one edge in each hand.  Lift up, and the foil and parchment should “tent” between the pieces of dough.  Without disturbing the dough, you should be able to squeeze the loaves closer together, nestling them in their new couche.  You may need to use rolled up kitchen towels to provide support for the outermost edges (as shown in the picture).  To bake the bread, remove the towels, and pull on the parchment and foil until flat.  Slide the foil out from underneath, and bake as directed.

baguettes-en-couche

Posted in Savory, Yeast Breads | 2 Comments

100% Whole Wheat Olive Oil Bread

Week Eighteen: 100% Whole Grain Breads Hot Browns!

ww-olive-oil-bread-2

Research pays off.  Don’t let anyone tell you any different.  I know this for a fact, because this week, I have made the best whole grain breads I’ve ever attempted.  This was not the result of a happy accident, no.  I studied, I pored over books and websites, I thought long and hard.  And when I finally mixed, baked, and tasted the fruits of my labors, I was over the moon.

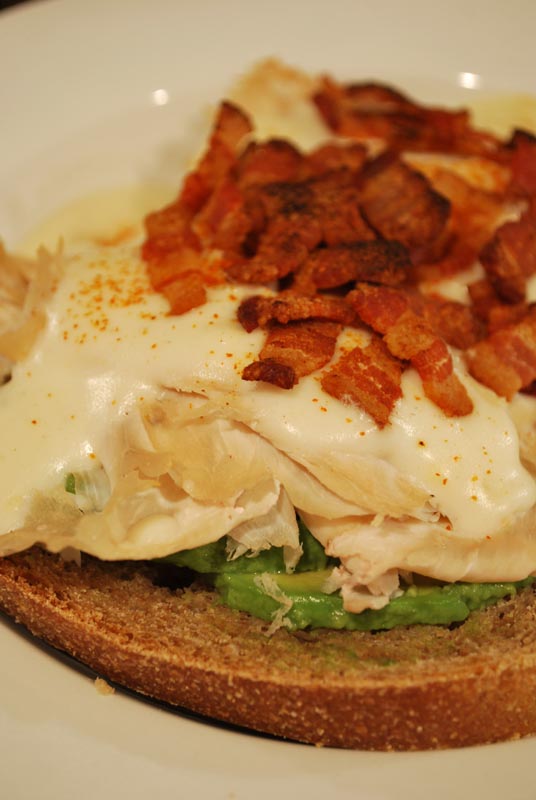
I have saved the best for last; for today is Derby Day!  As all my dear friends and family in Kentucky know (and dread, for the ones in the service industry in Louisville), today is the 135th Run For The Roses, the most exciting 2 minutes in sports.  I’m not going to let this by without comment, so I’m showcasing today’s absolutely delicious bread as the base for a most Kentuckian food, the Hot Brown.

A hot brown, for those who aren’t familiar, is an open-faced sandwich, topped with thinly sliced turkey, topped with a parmesan Mornay sauce, broiled until bubbly and warm, and garnished with bacon.  You will find people that argue for and against the inclusion of tomato, but I think that’s a personal preference.  Me, some days I like them, some days I don’t.  Some people also include mushrooms on their hot browns, which I find delicious, but a bit non-traditional; so I’m on the fence with that one.  If you have sharp eyes, you may notice in the above picture that I included avocado with mine today, a decidedly inauthentic ingredient, but a most delicious one.  It’s a sandwich; let’s not get all huffy about details here.

The hot brown was first made around 1923 at the Brown Hotel, which is still open today in Louisville.  The sandwich became an instant hit, and soon spread all across the state.  Today, you will find many variations, including a “Veggie Brown” for vegetarians, and one called a “Not Brown”, made with crab, shrimp, and fried green tomatoes, from one of the Brown Hotel’s head chefs, John Castro.  But no matter what variation you end up with, they all depend on the same base: a good slice of sandwich bread.

No crusty baguette will do here, since the dish requires the use of a knife and fork, and such a hard crust would just be difficult to cut with a standard table knife.  No, you need a soft crust here, but on a bread that won’t simply squish and dissolve under the toppings.  You’ll find most hot brown recipes call for white bread, but I think the sturdiness of a piece of wheat bread is most welcome here.  But no typically sawdusty grocery store bread will do; for the base of a great sandwich, you need a great bread.

And this bread is not only great, it might just be the best whole wheat bread I’ve ever made.  They key (aside from grinding your own flour from store-bought wheatberries; which I did not do, not having a wheat grinder) is mainly to not let the bread rise too much.  As opposed to a standard white flour bread, where one lets the bread at least double in size, here you don’t want it to rise over 1 1/2 times in size.  This is because of the bran in the wheat flour – remember, it acts like tiny scissors in the dough – which will actually destroy the gluten as it forms.  Rather un-intuitively, by keeping the level of rising down, you preserve gluten, which in turn makes for a fluffier bread later (since it’s the gluten that holds in air released by the yeast).  I know, it seems like you need to let it rise more, but just trust me on this one.

Oh, and the other main trick to this bread is the use of vital wheat gluten.  Made from running water over wheat flour, the carbohydrates are washed away, and only the protein-rich gluten remains (magically).  Adding this to whole wheat bread enhances the gluten formation, usually somewhat lacking (because of the aforementioned bran).  Between the limited rising and the vital wheat gluten, you end up with something as fluffy and light as the best store-bought bread; but you also end up with something far more nutritious, due to the lack of dough conditioners, preservatives, and what-have-you.

I know, it seems like quite a lot of trouble for a loaf of bread you can “get down at the corner store”.  But if you can find a loaf of 100% whole wheat bread as moist, airy, and flavorful as this one down at your corner store, then you’ll have to let me know where the heck you shop.  This is a truly special bread, and one that I’m proud to serve as the base of my Old Kentucky Hot Browns.  Enjoy!

ww-olive-oil-bread


100% Whole Wheat Olive Oil Bread
Adapted from Rose Levy Beranbaum
Makes one 9 x 5 loaf

1 3/4 cups water, at room temperature
2 tablespoons honey
16 1/2 ounces (about 3 1/2 cups) whole wheat flour, divided
2 tablespoons + 2 teaspoons vital wheat gluten
1/3 cup olive oil
1 teaspoon instant yeast, divided
2 scant teaspoons kosher salt

1.  In the bowl of a stand mixer, combine the water, honey, 10 ounces of the flour (about 2 cups), and half the yeast.  Using the whisk attachment, mix for about 3 minutes, or until very smooth, scraping the bowl as necessary.  Remove the bowl from the mixer.

2.  Whisk together the remaining flour, the vital wheat gluten, and the remaining yeast.  Sprinkle it over the mixture in the mixing bowl, forming a thick coating of flour.  Cover tightly with plastic wrap, and let stand at room temperature at least 1 hour, and up to 4 hours.  The sponge should start breaking through the flour covering after about 1 1/2 hours.

3.  Using the dough hook, mix on low speed until a shaggy dough forms, about 1 minute.  Scrape down any errant pieces of dough on the sides of the bowl.  Cover with plastic wrap, and let rest for 15 to 20 minutes.

4.  Mixing at low speed, add the oil in a slow drizzle, letting it absorb before adding more.  When the oil is mostly integrated, add the salt (which will help any excess oil absorb into the dough).  Knead the dough for a total of 7 to 8 minutes.  The dough will be fairly sticky, and will not form a cohesive ball.

5.  Transfer the dough to a lightly-oiled bowl.  Lightly spray or brush the top of the dough with additional oil.  Cover tightly with plastic wrap, and allow the dough to rise at room temperature for about 1 hour, or until 1 1/2 times bigger in size (no more, or the gluten will tear).

6.  Scrape the dough out onto a floured surface, and dust the top with flour.  Press the dough into a flat shape, deflating it.  Tri-fold the dough, as you would a letter, and return it to the bowl, seam-side down.  Brush or spray the top with oil again, cover with plastic wrap, and let rise another 45 minutes, or until 1 1/2 times bigger in size.

7.  Butter or oil a 9 x 5 loaf pan.  Turn the dough out onto a lightly floured surface, and press gently with floured hands to flatten it a little.  Roll and press the dough into a loaf shape, using as little flour as necessary to prevent sticking, and transfer carefully to the prepared pan, seam-side down.  Cover with lightly oiled plastic wrap, and let rise at room temperature for about 45 minutes.  The dough is ready when pressed gently on the edge with a fingertip, the depression fills in very slowly.  Preheat the oven to 450° F.

8.  Spray or sprinkle the risen loaf with water, quickly place in the hot oven, and reduce the temperature to 400° F.  Bake for about 45 minutes, or until golden brown and baked through (an instant-read thermometer should register about 200° F when inserted into the middle).  Remove from the pan and let cool completely on a rack.


Notes:
1.  After folding the dough in step 6, you can refrigerate it overnight if you like.  Bring the dough to room temperature (for about 1 hour) before proceeding with the recipe.


Bonus Recipe: Hot Browns!
Makes 4 servings

For mornay sauce:
3 tablespoons butter
5 tablespoons all purpose flour
1 cup milk
1/2 cup grated Parmesan cheese
1/8 teaspoon freshly grated nutmeg
1/4 teaspoon white pepper
1/2 teaspoon salt (or to taste)

For sandwiches:
3/4 pound thinly sliced turkey
1/2 pound bacon, cooked (chopped, or in whole slices)
8 slices Whole Wheat Olive Oil Bread (recipe above)
Paprika, or cayenne pepper 

1.  Make mornay sauce: melt butter over medium heat in a small saucepan.  When melted, add the flour, and stir until fully coated.  Continue stirring over medium heat until the mixture begins to brown, and a nutty smell emanates.

2.  Add 1/3 of the milk, whisking to prevent lumps.  When smooth, whisk in the remaining milk.  Cook over medium heat until slightly thickened, adding more milk if necessary to thin.

3.  Add the grated parmesan cheese, and stir until melted and smooth.  Stir in the nutmeg, white pepper, and salt to taste.  Adjust seasoning as necessary.  Let cool slightly.  Preheat the broiler to high.

4.  In each of 4 oven-safe plates, place two slices of bread.  Top each with an even amount of sliced turkey.  Spoon mornay sauce to taste over each, and top with a dusting of paprika or cayenne pepper.

5.  Place plates about 4 inches from broiler and cook until bubbly, about 1 to 2 minutes.  Remove from oven, top with bacon (place in the traditional “X” if using whole slices), and serve warm.


Notes:
1.  If you like, you can top the sliced turkey (in step 4) with sliced tomatoes, sautéed mushrooms, sliced avocado, or what have you.  Top with mornay sauce, and proceed as directed.

2.  A mint julep would not be out of place next to this sandwich, but a lovely rosé would be just as nice, as would a good beer.

Posted in Savory, Yeast Breads | 2 Comments

Fluffy 100% Whole Wheat Pancakes

Week Eighteen: 100% Whole Grain Breads

whole-wheat-pancake

Mitch Hedberg had it right about pancakes: they’re great at first, but by the end, you’re sick of ’em.  It can indeed be a struggle to finish a whole stack of plate-sized pancakes.  So much starch, and so sugary!  That’s why I love these little whole grain darlings; they’re just the right size, and lack the heaviness so many fluffy pancakes seem to take on towards the end of the meal.

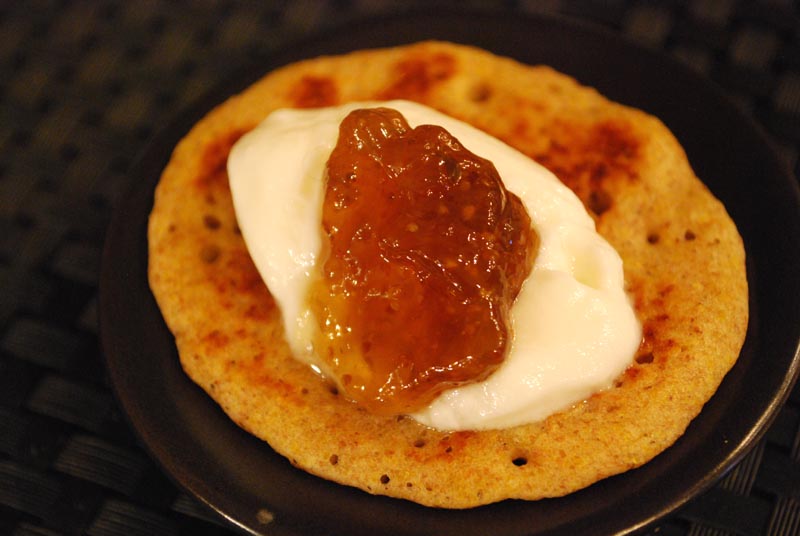
You could either serve a few of these with a heaping side of fresh fruit salad and soft scrambled eggs for a charming brunch; or use them at your next cocktail party, topped with a soft cheese (or yogurt, as above) and a nice bit of jam for a quick hors d’oeuvre.  They could even cross over into dessert territory, spread with (what else?) Nutella, and drizzled with a tart raspberry coulis.

But versatility aside, I love these tiny pancakes because they’re totally whole wheat.  I’m sure you’ve tried whole wheat pancakes before that were tasteless and dry, right?  These are nothing of the sort!  They’re so soft and fluffy, like a white flour pancake might be, but with that fabulous nutty flavor of whole grains.  The cornmeal in the batter adds a slight complexity to the flavor, and the olive oil brings a hint of fruitiness to the game.  The overall flavor is mild, but intriguing, and all but begs for an equally interesting topping.  Use your imagination – there’s no wrong answer here!

Of course, this batter will certainly make larger pancakes if you prefer, but I find them irresistible when they’re so small.  Keeping them small is a sort of built-in portion control, helping to ensure that at the end of the stack, you’ll only be left wanting more!


Fluffy 100% Whole Wheat Pancakes
Adapted from Gourmet Magazine
Makes about 50 two inch pancakes

1 1/4 cups whole wheat flour
1/3 cup cornmeal
1 tablespoon sugar
2 teaspoons baking powder
3/4 teaspoon baking soda
1 teaspoon kosher salt
1 cup buttermilk
1/2 cup water
2 large eggs
4 tablespoons olive oil

1.  Whisk together the dry ingredients in a medium bowl.  Combine all the wet ingredients, and add to the dry mixture.  Whisk until smooth, the let stand for 5 minutes.

2.  Heat a nonstick pan or griddle over medium-high heat until hot but not smoking.  Reduce the heat to medium, and lightly oil the pan.

3.  Pour one scant tablespoon of batter per pancake into the hot pan, cooking 3 or 4 at a time.  Cook until bubbles appear on the surface and edges look set, about 45 to 60 seconds.  Flip over, and cook the underside until golden brown, about 45 seconds more.  If the pancakes brown too much before fully cooked, reduce the heat to medium-low.  Transfer pancakes to a rack to cool, if not serving immediately.  If serving immediately, transfer to a 200 degree F oven to keep warm until all pancakes are cooked.


Notes:
1.  If you’re like me, and never have buttermilk on hand, you can substitute 1 cup of milk, warmed for 30 seconds in the microwave, stirred with 1 teaspoon white vinegar.  Let stand for 5 to 10 minutes, or until slightly curdled.  Use as directed in the recipe.

Posted in Quick Breads, Savory | Leave a comment

Anadama Bread

Week Eighteen: 100% Whole Grain Breads

anadama-bread

Once upon a time, there was a man who lived near Boston, MA.  I think he was a fisherman.  No, wait, a sea captain!  This man had a wife named Anna.  Anna was sweet, but unfortunately, she was very lazy.  Well, actually, she wasn’t lazy at all, just very shrewish and not nice to her husband.  She was so lazy (or ill-tempered) that all she would feed her husband for dinner was cornmeal mush and molasses.  Or maybe she went out for a bit, and that’s all she left him to eat.

Well, whatever the case, her husband got fed up with all that nonsense.  He took it upon himself to mix together a bread of his own devising, stirring flour and yeast into the cornmeal mush, adding the molasses for flavor.  But then again, he may have gotten so angry at Anna that he lobbed a sack of flour at her, which ended up in the cornmeal mush instead.  At any rate, he then uttered the timeless phrase, “Anna, damn her!”, and the bread was so delicious, their neighbors all started baking the bread, and the hapless name stuck.

And that’s the true story of how Anadama Bread came to be called so.

Oh, unless Anna was actually very sweet, and would bake that delicious and long-keeping bread for her seafaring husband and his crew, who would affectionately refer to her as “Anna, damn her!”, in which case that’s the true (if less-repeated) story.

What I’m getting at here is that no one is certain where this bread got its name.  Food historians look as these tales with a rightfully dubious eye, though they can offer up no more convincing nomenclature.  All we know for certain is that the name originated near Boston.  But cornmeal and molasses have long been staples of the New England pantry; and in fact, the use of these ingredients in breadmaking has a far longer history than the name “Anadama”.

Such early staples of the Northeastern US as johnny cakes and Indian bread both relied on the combination of wheat flour, cornmeal, and molasses, as early as a 1796 appearance in a cookbook.  So the bread itself was nothing new by the time a patent for “Anadama Brand Bread” came along in 1850, as the earliest recorded reference to the name.

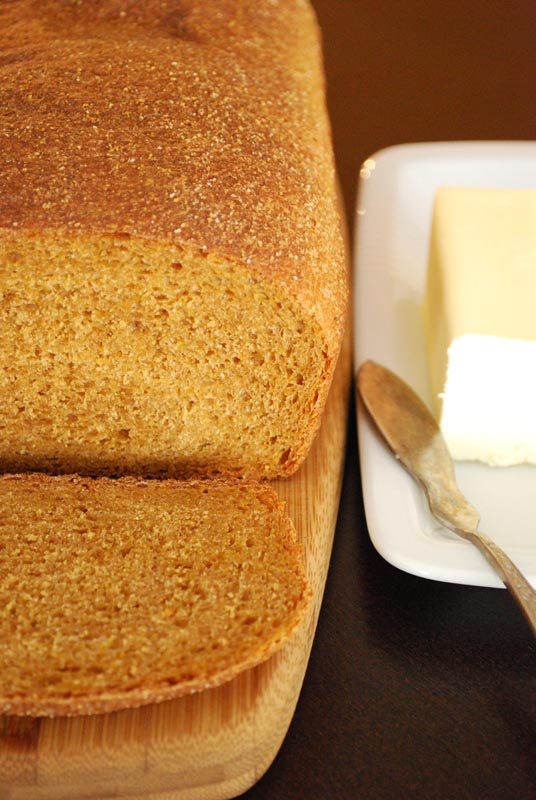
But wherever the name came from, or whatever you call it, the bread has stuck around because it is a darn good bread.  Made with whole-grain flour and cornmeal, rich and dark with molasses, it’s a wonderful change instead of a typical sandwich bread, or morning toast with butter.  The bread bakes up nice and dark, with a slightly firm crust, and a tight crumb inside.  There’s a lovely texture from the cornmeal, but it isn’t at all hard or crumbly, as it gets softened with boiling water before getting mixed into the dough.  You may think the dough is a bit too wet while mixing, but it will firm up a little as it rises and more gluten forms.  Enjoy!


Anadama Bread
Adapted from King Arthur Flour
Makes 2 loaves

1 1/2 cups whole cornmeal (not degerminated)
2 teaspoons salt
4 tablespoons unsalted butter, cut into pieces
1/3 cup molasses
2 cups boiling water
4 teaspoons instant yeast
1/2 cup warm water
1 pound, 8 ounces white whole wheat flour (about 5 1/2 cups), divided

1.  In the bowl of a stand mixer, or any other heat-safe bowl, combine the cornmeal, salt, butter, and molasses.  Pour the boiling water over the mixture, and stir until the butter is melted and everything is combined.  Cover with plastic wrap and let rest for 45 minutes.

2.  Reserve 3 ounces (about 3/4 cup) of the flour; set aside.  Add the yeast and the 1/2 cup water to the cornmeal mixture in the bowl.  Add the remaining flour slowly, while mixing with the dough hook at low speed, until incorporated.  Increase the speed to medium or medium-low, and knead for 8 to 10 minutes, adding the reserved flour as needed to achieve the proper consistency.  The dough should be sticky, but should clear the sides of the bowl.

3.  Turn the dough out onto a lightly floured surface.  Knead a few times, until the dough forms a skin around the outside, and shape into a round.  Transfer to a lightly oiled bowl, turning to coat the dough.  Cover with plastic wrap, and let rise until nearly doubled, about 50 to 60 minutes.

4.  Butter or oil two 9 x 5 loaf pans.  Turn the dough out onto a lightly floured surface.  Divide the dough into two equal pieces.  Press and roll the dough into loaf shapes, pressing to seal the seam.  Place the pieces, seam side down, in the prepared loaf pans.  Cover with lightly oiled plastic wrap, and let sit at room temperature until nearly doubled, about 35 to 45 minutes.  Preheat the oven to 375º F.

5.  Bake the loaves at 375º F for 30 minutes, or until an instant read thermometer registers 190º F when inserted into the middle.  Remove from the pans, and let cool on a rack thoroughly before slicing.


Notes:
1.  If you’re using active-dry yeast instead of instant, use two whole packets.  Stir it into the 1/2 cup warm water, and let sit about 5 minutes to make sure the yeast is thoroughly dissolved.

Posted in Savory, Sweet, Yeast Breads | Leave a comment

100% Whole Wheat and Rye Flaxseed Bread

Week Eighteen: 100% Whole Grain Bread

rye-and-flax-bread

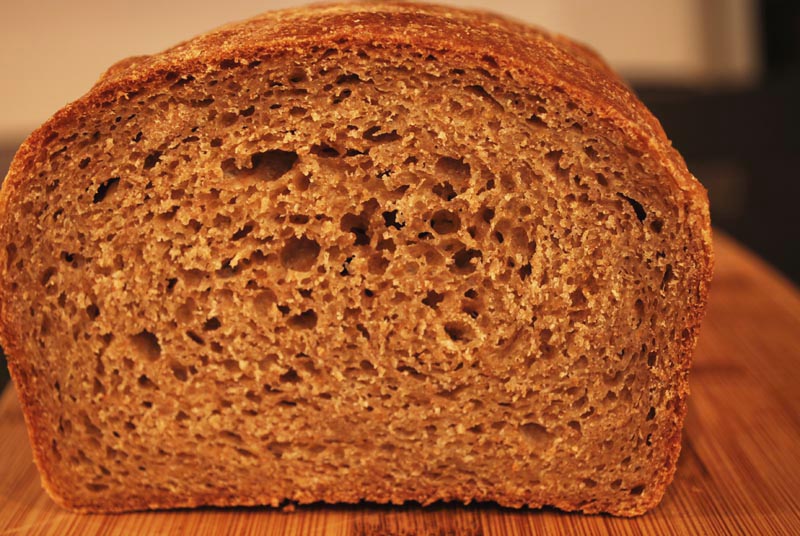
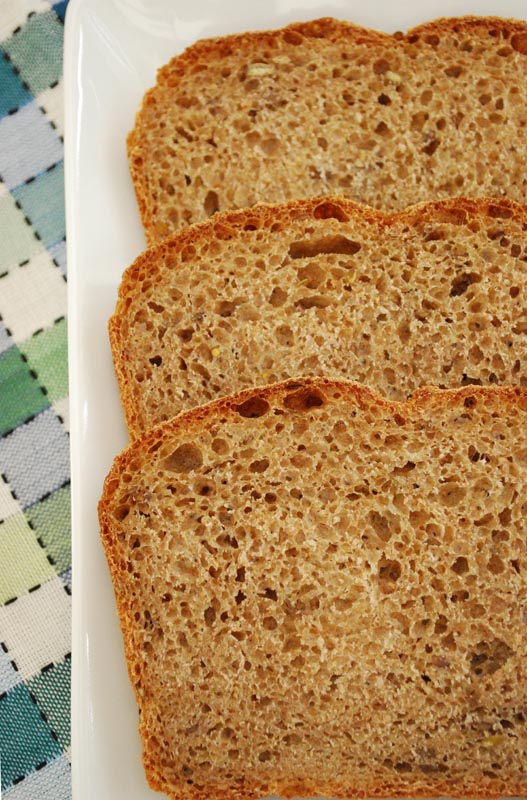
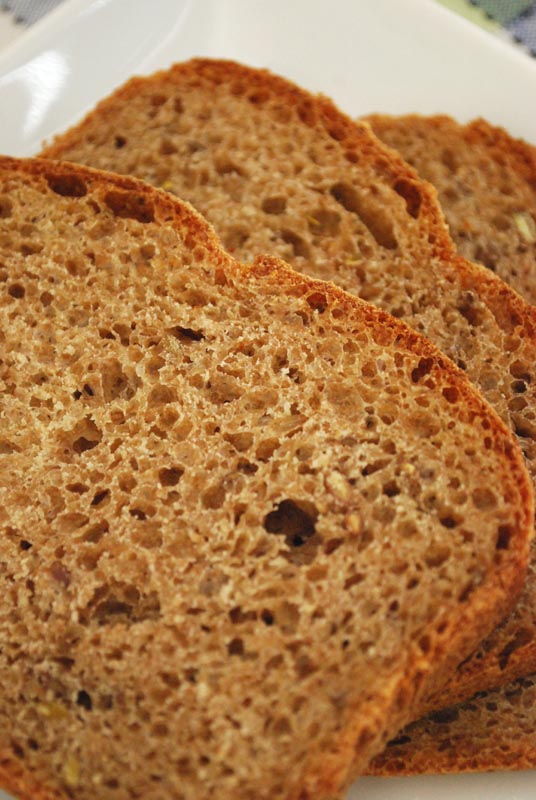
I cannot say enough good things about this bread.  Can you believe those holes?  From a 100% whole wheat bread?  Awesome!  And the flavor!  So complex, and chewy to boot!  It’s just incredible – I’ve never made a whole grain bread like this one.

So what’s the secret, you ask?  Pre-moistening.  Or soaking, or delayed fermentation, whatever you want to call it.  This technique is discussed in depth in Peter Reinhart’s book, Whole Grain Breads.  It sounds very technical – and what is accomplished by using these methods in fact is very technical – but in all honesty, it couldn’t be simpler to accomplish.  Can you stir flour and water together?  Then you can manage this with no problem.

This recipe makes use of what is called a “biga”, or a thick, relatively dry starter.  This isn’t very unusual in breadmaking; I’ve featured a few breads that use a biga, or something similar.  Nor is the “soaking mixture” in this recipe unusual; it’s basically a long autolyse, which has also been featured in a recipe or two on this site.  But what is unusual is that the flour used in the biga and the soaking mixture comprise nearly all of the flour in the dough.

Generally, starters make up a large percentage of the total amount of dough, but it stays at just that: a percentage.  I don’t know that I’ve ever seen another bread recipe (in my humble experience) that uses pre-ferments in such a high percentage.  (Note: I’m leaving the ubiquitous No-Knead Bread and similar recipes out of this, since the entirety of the dough is mixed, then fermented at length; as opposed to parts of the dough being fermented, then mixed together.)

Technically speaking, the long fermentation of the two pre-ferments allows various acids and enzymes to begin developing, all of which contribute to improved texture and much better flavor.  During this time, the gluten also begins to form, slowly enough that the bran doesn’t have an opportunity to cut it, nor does the germ get in the way of the formation.  The remaining handful of flour mixed in at the end is mainly there to equalize the hydration level of the final dough, as well as to provide a vehicle for the salt, yeast, and sugar to more easily incorporate into the two starters.  But enough with the tech-speak; how does it turn out?

While mixing the dough, I couldn’t stop from expressing my glee at how gluteny the dough was.  I’ve gotten less pretty gluten in many white breads!  It was amazing!  And unlike many whole grain doughs, it felt soft and smooth under my hands.  It baked into a gorgeous loaf, perfect for toasting and slathering with butter and cinnamon.  The flavor of rye deepened the taste of the whole wheat, and the flaxseed added a welcome nuttiness.  The crust was hard at first, then softened a little upon standing, and would not be too hard at all for a sandwich.  And did you see those holes?  I know it’s no ciabatta; but I was dead pleased with myself for this one. 

(And again, please don’t refrigerate bread like this!  It’ll just destroy it.  Eat it in a couple of days – this one should last at least two or three at room temperature, from all the excellent and long fermentation – or else freeze it.  Enjoy!)

rye-and-flax-bread-2

100% Whole Wheat and Rye Flaxseed Bread
Adapted from Peter Reinhart
Makes one 9×5 loaf

For the biga:
8 ounces (about 1 3/4 cups) whole wheat flour
1/4 teaspoon instant yeast
3/4 cup water, at room temperature

For the soaking mixture:
6 1/2 ounces (about 1 1/2 cups) whole wheat flour
1 ounce (1/4 cup) rye flour
2 tablespoons flaxseeds (or other seeds suitable for sprouting)
1 teaspoon salt
7 ounces (3/4 cup + 2 tablespoons) water

For the dough:
2 ounces (about 1/2 cup) whole wheat flour
1 1/2 teaspoons salt
2 1/4 teaspoons instant yeast (1 packet)
3 tablespoons sugar
1 tablespoon olive oil
Unsalted butter, for finishing

1.  Make the biga: in a medium bowl, mix the ingredients together until a shaggy dough is formed.  Turn the biga out onto a work surface, and knead for about 2 minutes, or until the dough is smooth.  Transfer the biga to a bowl, cover tightly with plastic wrap, and refrigerate for at least 8 hours and up to 3 days.

2.  Make the soaking mixture: stir all ingredients together until smooth.  Cover tightly with plastic wrap, and let sit at room temperature for 12 to 24 hours.

3.  Make the dough: remove the biga from the refrigerator and let sit, covered, at room temperature for about 2 hours before mixing the final dough.

4.  Divide the biga and the soaking mixture each into 10 or 12 pieces.  Combine the pieces in the bowl of a stand mixer, along with the other remaining ingredients.  Using the dough hook, mix at low speed until the dough comes together, and all the ingredients are evenly incorporated, about 4 to 5 minutes.  Increase the speed to medium-low, and knead for another 4 to 5 minutes, or until the dough clears the sides of the bowl and forms a cohesive ball.

5.  Without removing the bowl or the dough hook from the mixer, cover the bowl loosely with plastic wrap, and let rest for 5 minutes.

6.  Remove the plastic wrap, and knead at medium-low speed for 1 minute more, to develop the gluten further.

7.  Transfer the dough to a lightly oiled bowl.  Cover with plastic wrap, and let rise until 1 1/2 times bigger in size, about 45 to 60 minutes.

8.  Lightly oil a 9 x 5 inch loaf pan.  Turn the dough out onto a lightly-floured surface.  Press and roll the dough into a loaf shape, deflating it a little, and pressing on the seam to seal.  Tucking the ends under, transfer the dough carefully to the prepared pan.  Cover with lightly oiled plastic wrap, and let sit at room temperature for 45 to 60 minutes, or until 1 1/2 times bigger in size.  Preheat the oven to 425º F.

9.  If the dough has risen over the edge of the pan (it should have), quickly slash the top with a sharp serrated knife.  Lower the oven temperature to 350º F.  Bake at 350º F for 20 minutes.  Rotate the pan if necessary to avoid over-browning on one side, and bake another 20 to 30 minutes, or until baked through (an instant-read thermometer should register 195º F.

10.  Remove the bread from the pan.  Rub or brush the top of the loaf with the unsalted butter.  Place on a rack to cool thoroughly before slicing, about 1 hour.  Store leftovers at room temperature for up to 2 days; otherwise, wrap tightly and freeze.


Notes:
1.  I was able to find a blend of seeds specifically for sprouting in the bulk spice section of my local Whole Foods, so I used that.  But if you only find flaxseed, that’s just as good too.

2.  You can use whatever grain flour you like in place of the rye flour (including plain wheat, oat, or rice bran).  I opted for rye because I like the depth of flavor it gives a wheat bread.

3.  When shaping the dough in step 8, try to use as little flour as possible.  The more you add, the tougher and denser the bread will turn out.  The fairly loose dough may stick, but I say it’s better to clean your counter and hands than give up excellent texture!  A bench scraper will go a long way towards helping you move and shape such a slack dough.

Posted in Savory, Yeast Breads | 2 Comments

100% Whole Wheat Sandwich Bread

Week Eighteen: 100% Whole Grain Breads

ww-sammich-bread

Just so you know, it’s not easy finding recipes for 100% whole grain bread, let alone good recipes.  See, it’s not just a matter of switching whole wheat flour for white flour in your favorite recipe.  If you’ve ever tried that, I know how disappointed you were!  Your bread ended up flat, heavy, and dry, with a sawdusty texture, right?  What gives?!

To figure out what happens to bread when you use whole grain flour, you have to understand the grain itself.  Lets use wheat as an example, since it’s the most common in breadmaking, and pretty representative of many grains as far as this discussion is concerned.  The wheat kernel (also known as a wheat berry) is made up of three parts: the bran, the germ, and the endosperm.  The bran is the outer covering, and provides fiber and B vitamins.  The germ is the part of the grain that grows into a new wheat plant, and contains the only fat in the kernel, along with vitamins and minerals.  The endosperm is the remaining 85% of the grain, and provides carbohydrates and protein.  Here is a good diagram of what it all looks like put together.

In milling whole wheat flour, the whole wheatberry is ground up together.  But for white flour, the bran and germ are removed, leaving only the endosperm.  Yes, this means that it’s less nutritious, since most of the vitamins and fiber are taken out; but in the end, it makes for a fluffier bread.  This is because the bran is sharp, and acts a bit like little knife blades in a dough.  When you form gluten (the tough, rubbery substance created when wheat flour is mixed with water) in a whole wheat dough, the bran actually cuts it, and the germ simply gets in the way of it forming at all.  Without a good gluten structure, your dough has no way to trap the gases produced by the yeast, and therefore has a poor texture.

And not only that, but the bran and germ (as I mentioned yesterday) both absorb more water than the endosperm alone, meaning a whole wheat dough will be drier than a white dough, if mixed in the same proportions.  You can solve this problem by making a wetter dough, and letting it sit longer, therefore giving the brand and germ a chance to fully hydrate.  But then, if it rises too much, the gluten will become overdeveloped (more on that later in the week!), and that bread will also have a poor texture.  So what can be done?  Luckily, there’s a few simple ways to overcome the hurdles presented by a 100% whole grain bread.  I’ll discuss some additional ways in the next few days, and focus on this one for today: if you can’t beat ’em, join ’em.

So you’ll never make a perfectly airy baguette with only whole wheat flour.  Let’s aim a little differently, and go for a great American-style sandwich bread instead.  Try working with what whole wheat flour gives you, instead of forcing it to do something it never will.  When making a good sandwich, one doesn’t want giant holes in a slice of bread, since your ingredients will fall out.  Whole wheat bread will never make giant holes!  Perfect!  Additionally, while a hard crust makes for a fabulous bread to eat on its own, it becomes a difficult obstacle to navigate in a sandwich.  And how do we get a soft crust?  By adding milk and butter to the dough, of course!  Both of these ingredients contain fat, a.k.a. “shortening”, because it shortens gluten strands.  This, in turn, means that we don’t have to worry so much about the bran cutting the gluten strands, since we’re trying to do that anyway.  Win!

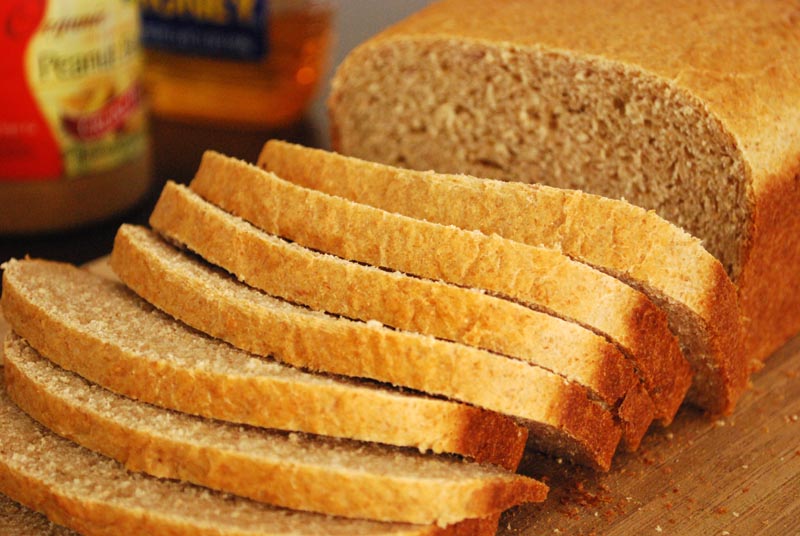
This dough bakes into a tender, close-crumbed loaf, absolutely ideal for making sandwiches.  You’ll never worry about errant bits of lettuce or mayonnaise falling out of big (but otherwise lovely) holes in your bread; nor will you have to fret about choosing flavor over nutrition – you get both with this one!

One last thing: obviously, this bread contains none of the preservatives included in your average grocery-store sandwich bread.  This is great for your body, but if you don’t plan on eating it within a day or two, I strongly recommend pre-slicing and freezing it.  It will only take a minute to toast and thaw if prepared that way.  But please, please, please, don’t refrigerate it!  A refrigerator is just a big bread-staling machine!  Commercially-produced breads can stand up to it, due to all their added dough conditioners and enhancers; but this wholesome little guy just has no defense.  Treat your bread properly – it’s there to nourish you!


100% Whole Wheat Sandwich Bread
Adapted from King Arthur Flour
Makes 1 loaf

2 1/4 teaspoons instant yeast (1 package)
1 1/2 teaspoons salt
3 tablespoons brown sugar
3/4 cup instant mashed potato flakes
16 ounces (about 3 3/4 cups) whole wheat flour, divided
1 cup hot milk (120º to 130º F)
1/2 cup orange juice 
5 tablespoons unsalted butter, melted

1.  In the bowl of a stand mixer, whisk together the yeast, salt, sugar, potato flakes, and 14 ounces (about 3 1/4 cups) of the flour, setting the remaining flour aside.  Add the milk, orange juice, and butter.  Using the dough hook and scraping the bowl as necessary, mix at low speed until the dough forms a cohesive ball, about 6 or 7 minutes.  Add the reserved 2 ounces flour as needed to achieve the proper consistency (the dough should be slightly sticky, but not at all liquidy; see note 1 below).  Increase the speed to medium-low and mix for 1 minute more, until some gluten strands begin to form.

2.  Turn the dough out onto a floured surface, and knead a few times until it forms a smooth round.  Transfer the dough to a lightly-oiled bowl, cover, and let rest in a warm place about 45 minutes.  The dough should not quite double in size.

3.  Lightly oil a 9 x 5 inch loaf pan.  Without punching down, turn the dough out onto a lightly floured surface.  Gently press and roll the dough into a loaf shape (it will deflate a little; this is okay), pressing the seam to seal.  Tuck the ends under, and set the dough in the prepared pan, seam side down.  Cover loosely with oiled plastic wrap, and let rise another 45 to 60 minutes, or until not quite doubled in size.  Preheat the oven to 350º F.

4.  Bake the bread at 350º F for 10 minutes.  Loosely tent the bread with aluminum foil, and bake for an additional 30 minutes, or until golden brown and an instant-read thermometer registers 190º F in the middle of the loaf.  Remove from the pan and let cool on a rack thoroughly before slicing.


Notes:
1.  If your weather is very dry, you may not need to add any of the reserved flour; but if your weather is humid, you may need to add all of it.

2.  You can rub the finished loaf, hot from the oven, with a bit of butter to ensure a soft crust and pretty shine, if you like.

3.  FYI, the orange juice is in there to reduce bitterness produced by a less-than-perfectly-immaculate whole wheat flour, and doesn’t impart any flavor of its own.  If you have a pristine, ground-that-morning whole wheat flour, you should substitute water instead; otherwise, I recommend using it.

4.  This bread should be eaten within a day or two, stored at room temperature; otherwise, it should be sliced and frozen, wrapped tightly.

Posted in Savory, Yeast Breads | 4 Comments