Crumpets

Week Thirty-Six: Breads of the United Kingdom

crumpety

In picking weekly themes, I’ve tried to select a good mix.  I have attempted to avoid too-similar themes from one week to the next, keeping things from getting too much in a rut.  But after consulting my calendar this weekend, I realized that I’m getting down to the wire.  I have only 15 more themes to select, and there’s probably going to be some that get left out.

An easy theme to research and find recipes for is “Breads of Such-And-Such Nation Or Region”, as every country in the world has some sort of bread tradition, and they’re all still somehow unique.  I still have at least 10 of those on my “to-theme” list, and they all fascinate me.  Ergo, there will henceforth be occasional back-to-back National Theme Weeks, starting today, when I follow up East Asian Bread week with Breads of the United Kingdom.  I hope you will find it in your hearts to forgive.

It seems at first like a massive shift in consciousness, to go from discussion of the Far East, with all its mystique and relative unfamiliarity, to talk of the United Kingdom, comfortable and easy as a stroll through an English garden.  But it’s not so far-fetched as it appears, as the conversation at hand is about bread.  Bread of East Asia was brought there by Western colonialism, which was practically turned into an art form by the British.  (Perhaps a sadistic art form, lest you think I condone such things; but an art form nonetheless.)  I find it somehow fitting, then, to begin this week with the crumpet, a bread thoroughly associated with tea, part of the reason for that colonialism in the first place.

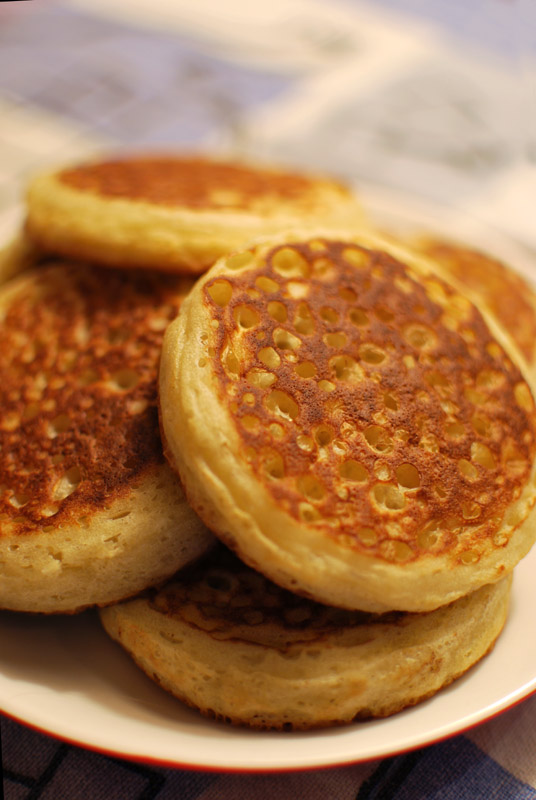
If you’re unfamiliar with a crumpet, it’s an airy and tender bread, cooked in metal rings on a hot griddle.  Some compare it to an English muffin, which is cooked on a griddle as well; but the two could hardly be more different.  Crumpets are made with a relatively thin batter, while English muffins are made from a much stiffer dough.

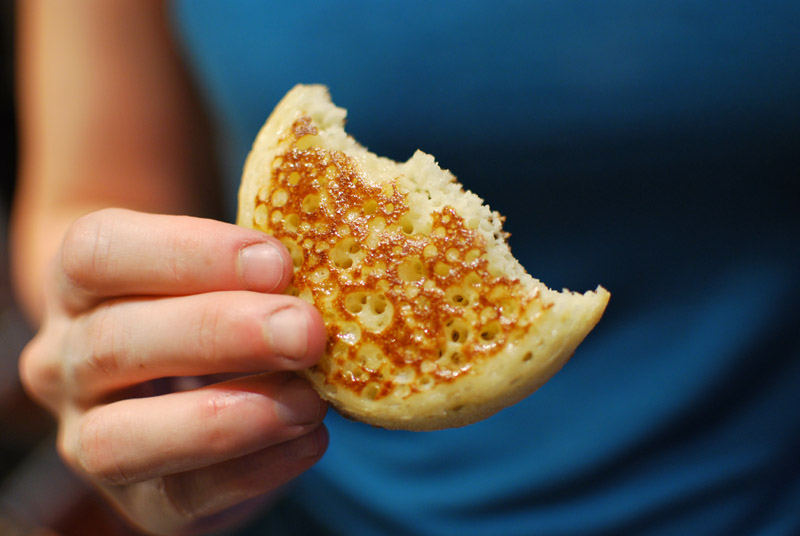
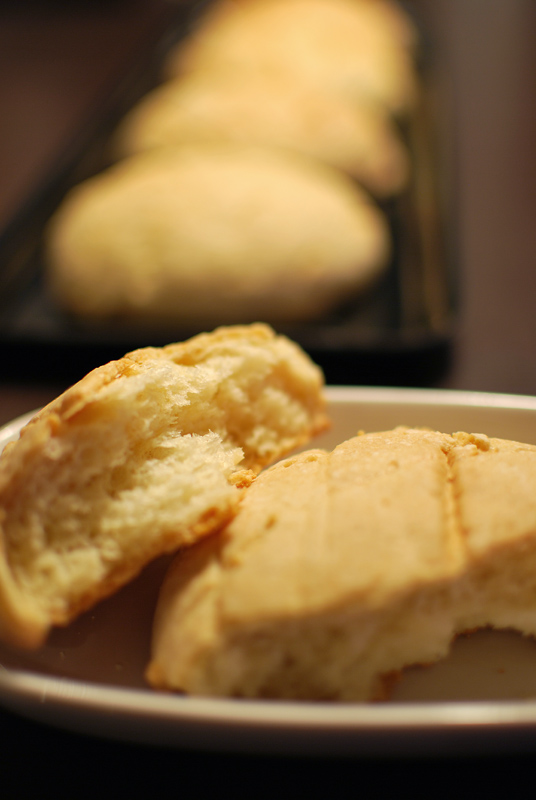
This batter is leavened with yeast and (usually) baking soda, resulting in a deeply flavorful and very light bread.  The thinness of the batter means that air bubbles form much more easily while cooking, and give the crumpet its characteristic cratered surface.  Because of the additional moisture, crumpets end up a bit softer, almost cake-like, in the crumb than English muffins, which can taste a bit dry.

Crumpets are typically served toasted, like English muffins, but are left whole, whereas English muffins are split horizontally, and become crisp when toasted, while English muffins turn crunchy.  Both are equally delicious served with butter and jam, however, and both make an ideal accompaniment for an afternoon cuppa.  To pick a favorite would be like picking children.

I’m not entirely certain why English muffins are so much more popular than crumpets in the USA, but it’s undeniably true, and rather a shame.  As much as I love a good English muffin, I definitely prefer crumpets; the complex flavor of a wet, yeast-leavened dough, cooked quickly until crisp, and topped with a pat of creamy butter that melts happily into the tender crumb is much more my preference.  Add a dollop of a well-made preserve and a lazily-steaming cup of tea, and it’s nothing short of exquisite.

While cooking crumpets, do not be tempted to overfill the rings.  They may not look as tall as the ones you find in stores, but they won’t cook evenly if there is too much batter.  The top of the batter should be set before flipping them over; otherwise, the cratered top will be ruined.  And without those deep air pockets in the bread, how will you catch the rivulets of melting butter, the best part of eating a crumpet?  You’d have to split it open then, in which case you might as well be eating an English muffin.

crumpety-crumpety


Crumpets
Makes about 20

1 cup milk, at room temperature, plus extra as needed
1 egg, at room temperature
1 tablespoon unsalted butter, melted and cooled slightly
4 ounces (about 1 cup) cake flour
1 tablespoon sugar
3/4 teaspoon kosher salt
2 teaspoons instant yeast
3 ounces (about 2/3 cup) unbleached bread flour
1/2 teaspoon baking soda
Additional unsalted butter, melted and cooled, for brushing

1.  In a medium bowl, whisk together the milk, egg, and butter.  Add the cake flour, sugar, salt, and yeast; whisk until smooth.  Whisk in enough of the bread flour to create a batter about the consistency of buttermilk pancake batter.  Cover tightly with plastic wrap, and let stand at room temperature until very bubbly and nearly doubled in size, about 1 hour.

2.  When ready, whisk in the baking soda.  If the batter looks too thick, add a little extra milk to thin it.  Heat a nonstick pan or griddle over medium to medium-low heat until hot but not smoking.  Brush liberally with melted butter the insides of as many 3-inch crumpet rings as will sit flat on your cooking surface (see note 1 below).

3.  Place one ring on the heated cooking surface, and test the batter by filling the ring with 2 to 3 tablespoons of batter.  The batter should bubble within 1 minute, and the top should set after 2 to 3 minutes; the bottom should be a deep golden brown.  If the batter does not bubble within 1 minute, your pan may not be hot enough, or your batter is too thick (thin with additional milk).  If the bottom is too dark before the top has set, the pan is too hot.  When the batter is the correct consistency and the pan the correct temperature, proceed with the remaining crumpet rings and batter.

4.  Fill each well-buttered ring with 2 to 3 tablespoons of batter.  When the top of the batter has set (it will look dry), remove the ring and flip the crumpet over. 

not done yet

looks wet; not ready yet

now it's done

looks dry; ready to flip

Cook for an additional 60 seconds, or until the top is just golden brown.  Remove to a wire rack to cool while cooking the remaining batter.

5.  To serve, toast the crumpets under a hot broiler until crisp.  Serve with butter and jam (and clotted cream if you’re feeling truly posh).


Notes:
1.  Crumpet rings can be found at specialty gourmet stores, if you really have a burning desire to have a matched set.  I found that tin cans opened at both ends did a beautiful job, releasing perfectly every time from the batter, whereas my biscuit cutter stuck to the batter.  I found that water chestnut cans were the perfect size, and actually open on both ends (unlike the much-touted tuna cans).

2.  This batter, once whisked together, could certainly be put in the refrigerator overnight, in order to have crumpets first thing in the morning.

3.  Crumpets may be frozen, wrapped well in plastic and aluminum foil, then heated unthawed under a moderately-hot broiler before serving.

Posted in Savory, Yeast Breads | Leave a comment

Panda Bread

Week Thirty-Five: East Asian Breads

panda-bread

To finish out East Asian Bread Week, I’ve chosen a bread that could have come from nowhere but Japan.  I know it’s made the bloggy rounds, but the moment I saw it, I knew I had to have my own try at making Panda Bread.

Yeast bread was essentially unheard of in Japan (aside from that made by a small Portuguese population, since the 1500’s) until the mid-1800’s, when the nation, isolated by the Sea of Japan, began to reach out more to the Western world that had infused much of Asia with money.  Trade with the West brought businessmen, who of course brought their customary cuisine with them.  Government encouragement to embrace all things Western helped seal the deal, and the Japanese found a new love: white bread.

That gleamingly-pale, soft-crusted, fluffy-crumbed stuff, white bread is perhaps even more popular in Japan than it is in America, Home of Wonder Bread.  It certainly comprises the largest percentage of type of bread sold in Japan today.  I mention this because when you get right down to it, today’s bread is a very average white bread, despite the coloring.  It’s not very exciting in flavor or texture; in fact there’s hardly anything remarkable about it at all.

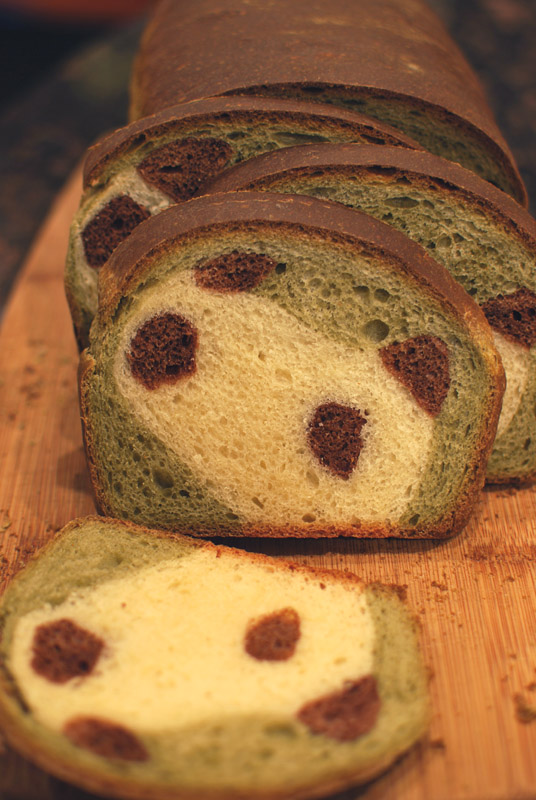
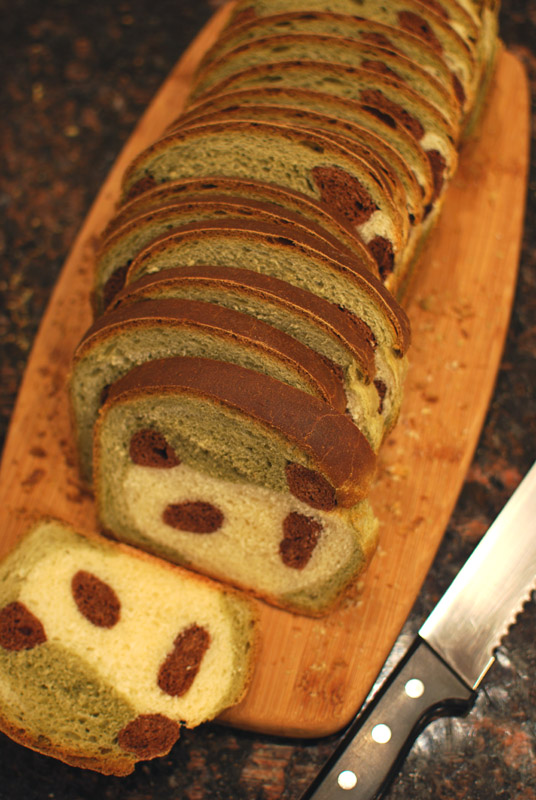
Well, except for the panda face.  Did I mention the flippin’ panda face, baked right into the dough?  There’s a face!  Of a panda!  Pandas, of course, are only found naturally in China, so there’s the one non-Japanese thing about it.  But I understand that Japan has been known to appreciate the odd bit of cuteness now and then, and panda faces are undeniably cute; so we’ll have to indulge this one tiny lapse.

Considering all this in light of the rich and fascinating tradition of decorative food in Japan – sushi, anyone? – you understand why today’s bread is nothing but Japansese.  This extremely delightful and wholly unnecessary artistry is accomplished by some clever and easy dough shaping, which I’ve illustrated below with copious photos.  I think it’s all made pretty clear, but I’m happy to answer any questions that may arise.

The base dough is, as previously mentioned, a fairly standard white bread, lightly sweetened and enriched with a touch of butter.  Coloring is added to this dough with cocoa powder, producing the dark colored bits, and with green tea powder, producing the green colored bits.  That’s right, there’s no dodgy food colorings here; it’s totally natural.  In case you think it strange to use tea as food coloring, green tea powder (aka: matcha) is often used to color food in Japan; you may have seen it used in ice cream at a sushi restaurant.

Though this bread won’t win any blind taste tests, there’s no denying its appeal, especially for the young (or the young-minded).  The sandwich I made with it may have tasted a little dry, but I’d be lying if I said there wasn’t a smile on my face the whole time I was eating it.  You just can’t be sad when you’re nibbling on panda ears for lunch.

Kawaii desu ne!*

panda-bread-2


Panda Bread
Adapted from Taro Taro
Makes one 9 x 5 inch loaf

15 ounces (about 3 1/3 cups) unbleached all-purpose flour
1 ounce (2 1/2 tablespoons) granulated sugar
1 teaspoon kosher salt
1/2 teaspoon instant yeast
7 ounces milk, at room temperature
1 egg, lightly beaten, at room temperature
1 tablespoon green tea powder (matcha, see note 1 below), dissolved in 1 tablespoon hot water
1 tablespoon cocoa powder, dissolved in 2 teaspoons hot water

1.  In the bowl of a stand mixer, whisk together the flour, sugar, salt, and yeast.  Add the milk and egg.  Using the dough hook, mix on low speed until a rough dough forms, 1 to 2 minutes.  Increase the speed to medium-low, and knead for 6 to 7 minutes.  The dough should clear the sides of the bowl, and should be smooth and just a little sticky to the touch.  Add a little extra flour or water during the kneading process, if necessary to achieve the proper consistency.

2.  Turn the dough out onto a work surface, dusting with flour only if necessary to prevent sticking.  Divide the dough into three parts: 2 1/2 ounces (75 g) for the cocoa, 7 1/2 ounces (210 g) left plain, and the remainder (about 10 ounces, or 280 g) for the green tea.  In each of the following steps, keep the unused pieces of dough covered with plastic wrap while working, and only use just enough flour to prevent sticking.

3.  Add the dissolved cocoa paste to the 2 1/2 ounce piece of dough.  Knead until the color is even and no streaks remain.  Shape into a round ball, set aside, and cover with plastic wrap.  Add the dissolved green tea to the 10 ounce piece of dough, and knead until the color is even and no streaks remain.  Shape into a round ball, set aside, and cover with plastic wrap.  This step may take several minutes.  Let all dough rest on the work surface, covered, until doubled in size, about 1 hour.  Butter a 9 x 5 inch loaf pan, set aside.

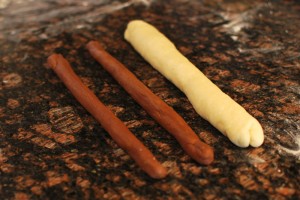
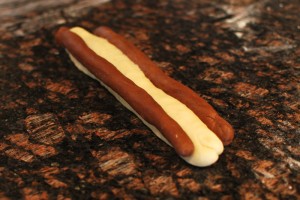
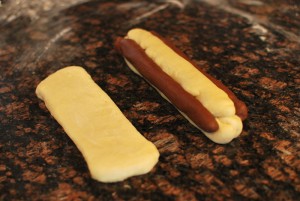
4.  Press air out of all pieces of dough until well deflated.  Cut off a 3 ounce (90 g) piece of plain dough for the face, and 2 pieces of 1 ounce each (30 g) of the chocolate dough for the eyes.  Roll each piece into a rope, making sure all pieces are the same length. 

panda-1

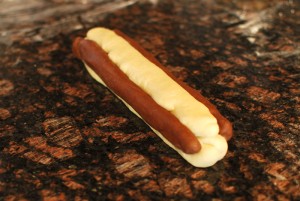
Place the two pieces of chocolate dough lengthwise on top and slightly on the side of the plain dough.  If the dough doesn’t stick, spray it lightly with water.

panda-2

5.  Cut off a 1 ounce (30 g) piece of plain dough.  Roll it out to the same length as the pre-shaped face and the eyes.  Flatten slightly, and place in between the eyes to fill in the gap.

panda-3

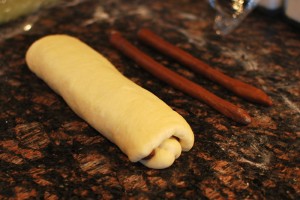
6.  Roll out the remaining plain dough into a flat rectangle, as long as the pre-shaped dough.

panda-4

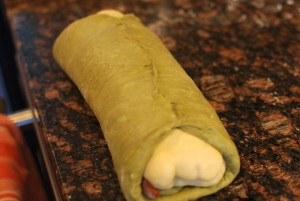
If the dough resists, cover and let rest for 5 to 10 minutes before trying again.  Wrap the plain dough around the face and eyes, pressing to seal around the bottom edges.  The loaf should look a bit like a log.

panda-5

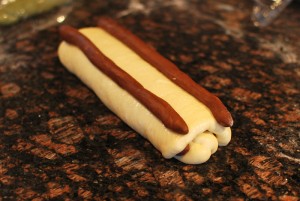
7.  Cut off two pieces of the remaining chocolate dough, 1/2 ounce (17 g) each, for the ears.  (You may have some chocolate dough left over; either discard or shape into a tiny roll to bake separately.)  Roll the dough into two ropes, each as long as the log of pre-shaped dough.  Place the ropes lengthwise on top and slightly on the side of the log, spraying with a little water if the dough doesn’t stick.

panda-6

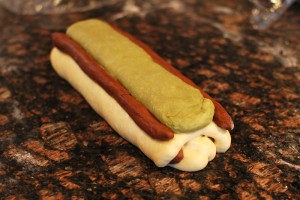
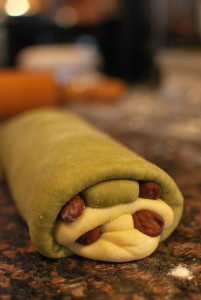
8.  Cut off a 2 1/2 ounce (70 g) piece of the green tea dough, and roll into a rope as long as the pre-shaped dough.  Flatten slightly, and place in between the ears to fill in the gap.

panda-8

9.  Roll the remaining green tea dough into a flat rectangle, as long as the pre-shaped dough, and big enough to wrap fully around it.  If the dough resists, cover and let rest for 5 to 10 minutes before trying again.

panda-10

Wrap the green tea dough around the pre-shaped dough, pinching to seal on the bottom.

panda-11

Carefully transfer the dough, seam side down, to the prepared loaf pan.  Take care to ensure that the face is sitting in the center of the pan, not off to one side, and is oriented properly, not rotated or tilted to one direction or another.

panda-12

Cover loosely with lightly-oiled plastic wrap, and let sit at room temperature until doubled in size, about 1 hour.  Thirty minutes before baking, preheat the oven to 375º F.

10.  When fully risen, bake the loaf at 375º F for 25 to 30 minutes, or until well-browned.  An instant-read thermometer should register about 205º F when inserted into the center (but one of your slices will have a long hole through the face if you do this).  Let cool in the pan briefly before transferring to a rack to cool completely before slicing.


Notes:
1.  Matcha, or green tea powder, can be found at many Asian markets, particularly ones that specialize in Japanese foods.  If you can’t find any, or if you don’t like the slightly bitter and grassy flavor of green tea, you can use a drop of green food coloring, or use any other similar coloring agent.  Some people find the green color off-putting, so try other colors if you like.  You can make a paste with flour and pomegranate juice for a pink background, or use blueberry juice for an indigo blue background.

2.  I found the easiest way to incorporate the coloring (the green tea paste and the cocoa paste) into the dough was to make a very wet paste with the green tea and the cocoa, then add enough flour to make a dough of the same consistency as the bread dough.  It was a simple matter of kneading them together by hand after that.  Feel free to use whatever method works best for you.

3.  Be sure to let this bread cool completely before slicing; otherwise, the structure of the bread will not have set fully, and by cutting too early, the panda face pattern will be spoiled.


* – It’s so cute, isn’t it!

Posted in Savory, Yeast Breads | Leave a comment

Pan de Sal

Week Thirty-Five: East Asian Breads

pan-de-sal-6

One of my great pleasures in writing this blog is to discover a totally new bread, one that I’ve never even remotely heard of before.  It’s kind of amazing, when I think that surely I’ve made every type of bread imaginable, to come across one that still manages to surprise me.

Occasionally, in researching my weekly themes, I’ll notice a word I’ve never seen before, a fleeting reference to some bread as yet unknown to me.  Upon further study, I more often than not turn up a small but devoted group of people, creating versions of and discussing these rare loaves.  Sometimes, these discussions are even in English.

This was exactly the case when I stumbled upon today’s bread, pan de sal.  This Filipino bread has stirred up more nostalgic passion, ire, and frustration than any other I can recall.  Never personally having been to the Philippines, I can’t speak with real authority here, but word on the street is they just don’t make ’em like they used to!

I’ve heard the same argument for other items, bagels in particular, but it doesn’t seem to be quite the same problem.  For although sub-par bagels have certainly infested the grocery stores and breakfast shops across this nation, it is still possible to find excellent bagels if you know where to look.  And besides, old-school bagels have champions fighting for their cause from Atlantic to Pacific, and beyond.

Classical pan de sal, on the other hand, seems to be a dying breed.  Modern versions are softer, sweeter, and the individual rolls are much smaller than their forefathers, which were more baguette-style in texture.  Many Filipinos seem to blame this denigration (notably the decrease in size) on price controls, which result in less bread for your money, but certainly the declining quality and increasing cost over the years of available wheat flour is also to blame.  It is unclear who is fighting for the fondly-remembered pan de sal of the 50’s and 60’s; but sadly, there don’t seem to be very many among their ranks.

The name of this bread, like the bread itself, finds its origins in the long-time Spanish occupation of the Philippines.  “Pan de sal” literally means “salt bread” in Spanish, though the flavor is not actually salty.  It apparently refers to the use of any salt in the dough, and is perhaps the most popular yeast bread in the whole nation.  It’s most commonly eaten for breakfast, though appearances at lunch or snack time are by no means rare.  The rolls are not usually served plain, but are often topped or filled with anything you can think of, from butter to sausage to fruit and everything in between.

Traditionally, the texture of pan de sal is tender and moderately airy, but not cotton-soft, as they have become in modern times.  The crust, soft these days from the increased use of sugar, dairy, and eggs, was formerly hard, in the style of many artisanal Spanish breads.

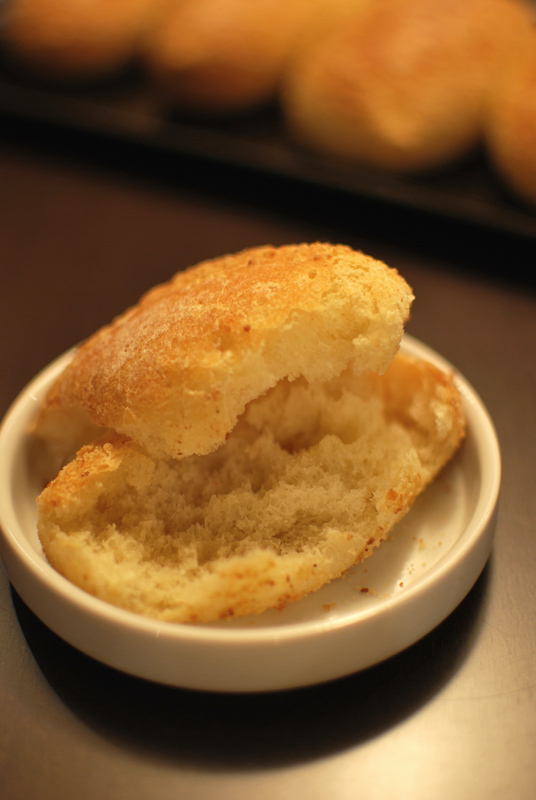
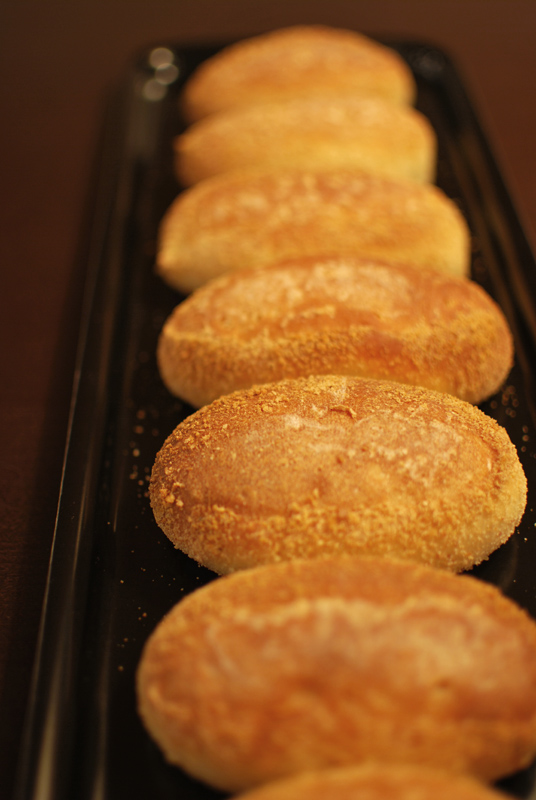
But the main defining characteristics, which have endured despite all the other changes, are the coating of bread crumbs, and the special method of shaping the rolls, which I’ve shown pictured in the recipe.  Typically, plain bread crumbs are used, but I’ve used seasoned bread crumbs, to make them more visible in the photographs.  Use whatever type you like, homemade if at all possible.

I’ve also used a non-traditional method that requires at least an overnight (and up to 3 days) rest in the refrigerator, which produces some truly excellent, complex flavors.  However, if you need your bread a little sooner, I’ve also given instruction for that.

This bread ended up with a crisp, golden-brown crust that had a hint of crunchiness from the bread crumb coating.  The interior was tender and open, but had a definite pull to it; this is certainly no rich, overly-sweet roll.  The sugar here is kept to a minimum, giving only a faint sweetness, but feel free to increase it if you prefer.

I know I’ve never tried pan de sal before, either modern-style or traditional, but given the fond recollections I’ve seen discussed online, I imagine I’ve come pretty close to a classical pan de sal here, and I’m hooked.  No matter what the state of affairs in its homeland, pan de sal will always have a champion on this side of the ocean, in my kitchen.

pan-de-sal-5


Pan de Sal
Adapted from Market Manila and Apple Pie, Patis, & Pâté
Makes 18 to 24 rolls

19 ounces (4 cups) unbleached bread flour, plus extra as needed
1 1/2 teaspoons instant yeast
2 teaspoons salt
1 to 2 tablespoons sugar, depending on sweetness level desired
1 egg, lightly beaten
1 tablespoon vegetable oil
1 1/3 cups cold water, about 40º F (see note 1 below)
1/4 cup bread crumbs (approximately)

1.  In the bowl of a stand mixer, whisk together the flour, yeast, salt, and sugar.  Add the egg, oil, and water.  Using the dough hook, mix on low speed until all the flour is moistened, about 1 minute.  Increase the speed to medium-low, and knead for 5 to 6 minutes.  The dough should clear the sides of the bowl, and should be smooth and just a little sticky to the touch.  Add a little extra flour or water during the kneading process, if necessary to achieve the proper consistency.

2.  Transfer the dough into a lightly oiled bowl.  Cover tightly with plastic wrap, and refrigerate immediately.  Chill the dough overnight (or up to 3 days), checking periodically and pressing it down if it starts to rise.  Two to three hours before shaping, take the bowl out of the refrigerator, and let come to room temperature before proceeding.  If the dough starts to rise more than double its original size, press it down to deflate, and proceed with the recipe.

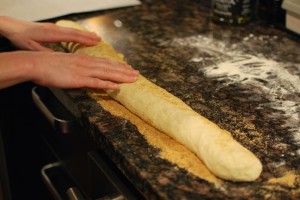
3.  Turn the dough out onto a lightly floured surface.  Gently press the dough into a flat oval.  Starting with one long side, roll up into a long cylinder, pressing to seal the dough as you roll.  Rolling underneath your palms, and pulling gently as needed, lengthen the cylinder into a long, thin rope, 1 to 2 inches in diameter, depending on the size of rolls desired.

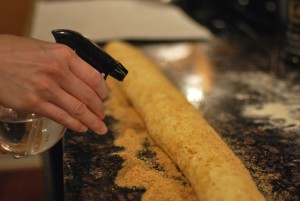
4.  Scatter the bread crumbs across the work surface.  Gently roll the dough in the bread crumbs until completely coated.

pan-de-sal-1

If the crumbs do not stick, spray the dough with a little water, then coat again.

pan-de-sal-2

Cover loosely, and let rest for 5 to 10 minutes.  Lightly grease a large baking sheet, or line with parchment paper.

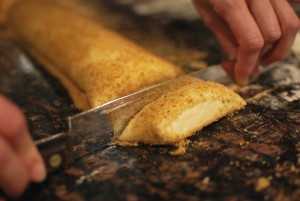
5.  Using a wooden bench scraper (not metal), or the dull back side of a knife, cut the rope of dough into 1 inch pieces.

pan-de-sal-3

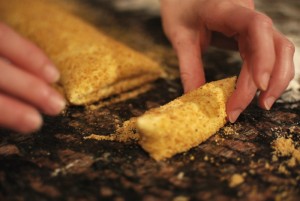
Transfer each piece to the prepared baking sheet, cut side up.

pan-de-sal-4

Leave around 1 inch of space between each piece.  Cover loosely with lightly oiled plastic wrap, and let sit at room temperature until doubled in size, about 1 hour.  The rolls should touch each other as they rise.  Thirty minutes before baking, preheat the oven to 425º F.

6.  When fully risen, bake the rolls at 425º F for 10 minutes, then rotate the pan 180º.  Continue baking for an additional 5 to 10 minutes, or until well browned.  Transfer to a rack to cool thoroughly.


Notes:
1.  If you prefer to have your pan de sal the same day you make the dough, use room temperature water, and do not refrigerate the kneaded dough.  Simply let it sit, covered, at room temperature until doubled in size, about 1 hour.  Proceed with the recipe.

2.  In step 5, you can use whatever device you prefer to cut the individual rolls.  The only caveat is to choose something extremely dull, as even a metal bench scraper will make too clean a cut.  The goal is to pinch the dough a bit as you cut it, making it stick a little and not open too much as it rises.  Wood is ideal, but whatever you have around will surely do the trick.  The back of a knife worked well for me, but please be extremely careful when handling a knife thusly – it’s easy to slip!

Posted in Savory, Yeast Breads | 4 Comments

Banh Mi Bread

Week Thirty-Five: East Asian Breads

banh-mi-3

Whenever I find a new food that strikes my fancy, I immediately begin to crave it.  Incessantly.  Unflinchingly.  Unapologetically.  It’s all I want to eat, for every meal if possible.  When it comes to new cuisines that impress me, I want to learn – with my tongue – as much as possible about that cuisine.  This means that I’ve led my family and friends through some very, shall we say, interesting culinary experiments over the years.

Such was my state of mind when I discovered Vietnamese food for the first time.  A friend led me to a charming hole in the wall, replete with slightly sticky chairs, paper lanterns, and fluorescent lights, the kind of place you know has either the best food or the absolute worst.  (Luckily for me, it was the former.)  It’s where I discovered my beloved Sriracha, that blazing wonder of the condiment world.  The monster bowls of brothy phở enchanted me, full of new and unfamiliar flavors, and the sticky, stretchy skin of gỏi cuốn (spring rolls) began to haunt me whenever I hungered.

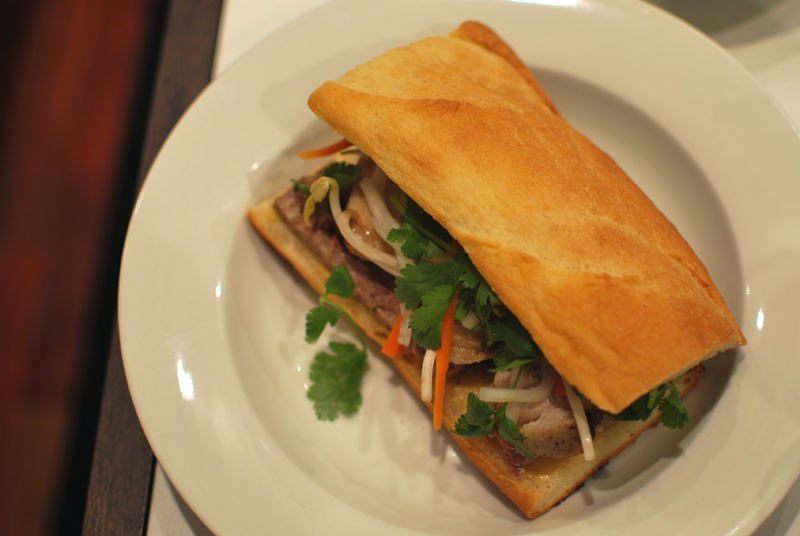
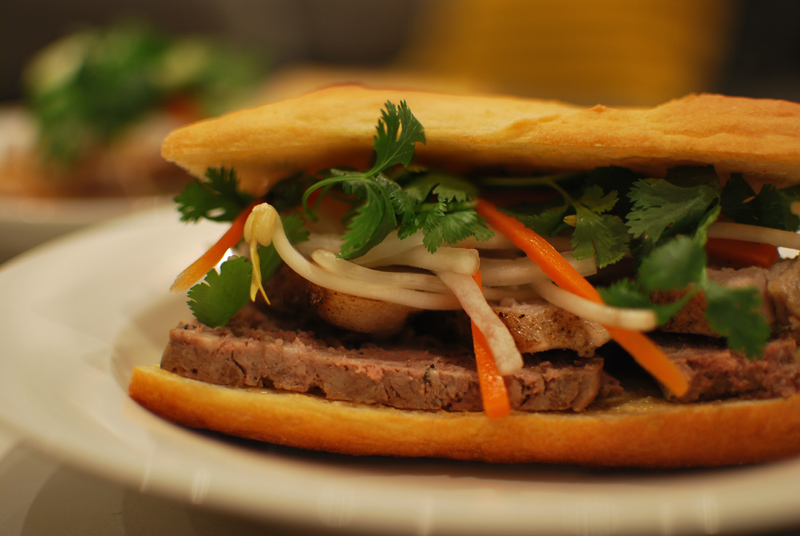
From this gateway, I eventually learned about bánh mì [bun mee], that ubiquitous gem on every Vietnamese restaurant’s menu.  A culinary relic from the period of French occupation, a banh mi is a sandwich that combines the French – baguette, pâté, mayonnaise – with the Vietnamese – cilantro, fish sauce, pickled carrot and daikon radish.

The result is far more than the sum of its parts.  By turns meaty, crunchy, crisp, herbal, spicy, and pungent, it’s difficult to describe the total effect contained in each bite; it is surely one of the world’s great sandwiches.  The standard banh mi is made with pork and pork liver pâté, but many equally tasty variations exist.

Banh mi ga is a common example, made with chicken and chicken liver pâté, while other versions made with meatballs, beef, tofu, and egg are seen just as often.  All are typically garnished with mayonnaise, fish sauce, cilantro, jalapeño, and pickled carrots and daikon radish.  Part of the charm is the wide variety of delicious flavors, but another main attraction is the inevitably cheap price tag; it’s rare to see a banh mi go for more than $4, in my experience.

Most of the time, recipes for banh mi call for “a crusty French baguette”.  This is not quite accurate, however, as a proper banh mi is made with a Vietnamese baguette.  The difference, though seemingly insignificant, lies in the flour.  Vietnamese baguettes use a percentage of rice flour in addition to the wheat flour.  This was undoubtedly due originally to economy and availability, but the effect is unique and lovely.  The rice flour gives the otherwise airy and crusty baguette a bit of stickiness, a characteristic chewiness beyond the familiar pull of wheat gluten.

Many Vietnamese restaurants in America have unfortunately begun to use more readily available (and most likely cheaper) all-wheat, commercially-made “baguettes”, bread that removes part of the soul of a banh mi sandwich.  Happily, there are enough Vietnamese bakeries around that quality rice flour baguettes are in no danger of extinction, and many restaurants pride themselves in the support of their own community by using them.

banh-mi

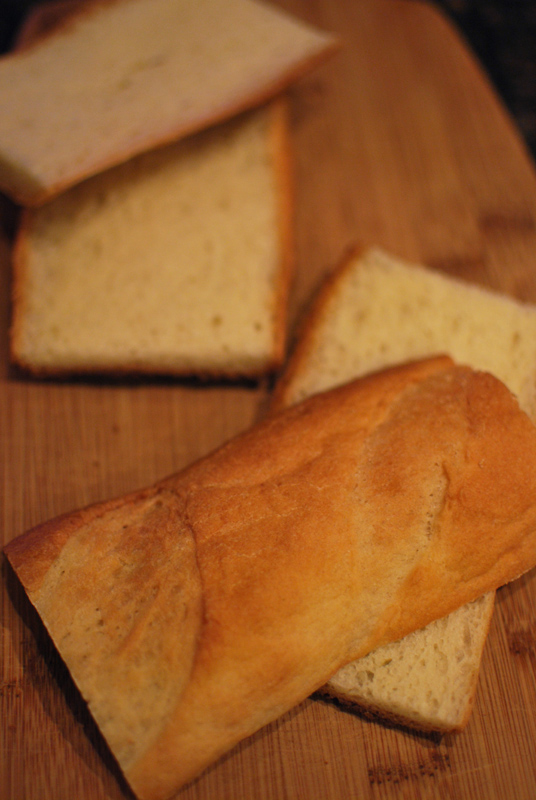
As for my own rice flour baguettes, they were not very successful.  Dreams of airy and freshly-made banh mi dancing in my head, I became distracted, and accidentally let the dough over-proof.  Twice.  Yes, somehow I forgot about it during both rises.  This resulted in a couple of sad, flat baguettes emerging from my oven, not the round and cheerful ones I had imagined.  The texture was even but not ideal, and I think the relatively high percentage of rice flour wasn’t helping matters either; I want to give this recipe another more careful try, with a slightly reduced amount of rice flour, before I make a final judgement as to its success or failure.

But otherwise, the sandwiches were nothing short of exquisite.  Delightfully sticky, these thin baguettes happily cradled the chosen fillings of pork, peppercorn pork liver pâté, quickly-made carrot and daikon pickles, and the other requisite accoutrements, which I’ve detailed below.  To integrate the fish sauce and Sriracha more evenly, I mixed them into the mayonnaise, an application that worked flawlessly.  I would certainly use that spicy, robust “banh mi-onnaise” in many other applications; curried chicken salad with raisins comes instantly to mind.

Overall, these were perhaps not the most intensely amazing banh mi I’ve ever had, but it was purely the fault of the bread itself, and therefore my own.  I don’t think there’s any such thing as a bad banh mi, assuming the ingredients are chosen with a modicum of sense and an eye for freshness.  Will I be eating banh mi again tonight, with the same bread, using the fillings leftover from yesterday?  Oh my, yes; and I’ll be enjoying every last little mote as though it were the first time.

banh-mi-2


Banh Mi Bread
Adapted from The Foppish Baker and Rice and Wheat
Makes 2 regular-size baguettes

9 ounces (2 cups) unbleached all-purpose flour, divided, plus extra as needed
5 ounces (1 scant cup) very fine rice flour
2 teaspoons yeast
2 teaspoons sugar
1 1/2 teaspoons salt
1 cup water, at room temperature
2 tablespoons unsalted butter, at room temperature

1.  In the bowl of a stand mixer, whisk together 1 cup of the all-purpose flour, all of the rice flour, yeast, sugar, and salt.  Add the water.  Using the paddle attachment, mix at low speed until thoroughly blended, about 1 to 2 minutes.

2.  Switch to the dough hook, and continue mixing at low speed.  Add enough of the remaining all-purpose flour until a moderately stiff dough forms; you may need more or less than the reserved 1 cup.  The dough should clear the sides of the bowl, but not be too stiff.  Increase the speed to medium-low, and continue kneading for 7 to 8 minutes, or until the dough is smooth and elastic.  Decrease the speed to low, and add the softened butter in small pieces.  Let each piece incorporate before adding the next.

3.  Transfer the dough to a large, lightly-oiled bowl.  Cover tightly with plastic wrap, and let sit at room temperature until doubled in size, about 45 to 60 minutes.

4.  Turn the dough out onto a lightly floured surface, and divide into two equal pieces.  Shape each into an round ball, then into an oblong loaf shape.  Cover again, and let rest for about 10 minutes.  Lightly grease a large baking sheet, or line with parchment paper.

5.  Working with one piece at a time, and keeping the other covered, gently press each piece into a flat oval.  Starting with a long side, roll up into a long cylinder.  Set aside, covered, while shaping the other piece.

6.  Rolling underneath flat palms, or pulling gently as needed, lengthen each piece into a long, thin rope, about 18 to 20 inches long.  Transfer carefully to the prepared baking sheet.  Cover loosely with lightly oiled plastic wrap, and let rise for 45 to 60 minutes, or until doubled in size.  Thirty minutes before baking, preheat the oven to 450º F, and place another baking sheet or oven-safe pan on a rack in the bottom third of the oven.  Or, if you have a baking stone, use it instead, heating it with the oven.

7.  Using a sharp serrated knife or clean razor blade, make 3 or 4 decisive slashes in the top of each loaf at a 45º angle, evenly spaced.  If it deflates, let it recover for an additional 10 to 15 minutes.  Spray or sprinkle the bread with water, and transfer the bread to the oven (or baking stone, if using).  Bake for 5 minutes, spraying the dough with water every minute or two.

8.  After 5 minutes, reduce the temperature to 400º F, and continue baking for an additional 10 to 15 minutes, or until deeply golden brown and fully baked.  An instant-read thermometer should register about 205º to 210º F when inserted into the center.  Remove the bread to a wire rack to cool fully before slicing.


Banh Mi (Vietnamese Pork Sandwiches)
Makes 3 to 4 sandwiches

1 loaf banh mi bread, recipe above
Banh mi-onnaise, recipe below
Pickled carrots and daikon radish, recipe below
8 ounces pork loin, cooked and sliced
4 to 6 ounces pork liver pâté, sliced
Bean sprouts, about 1 cup
1 jalapeño, sliced thinly
Cilantro leaves, to taste
Salt and black pepper, to taste
Extra fish sauce and Sriracha, to taste
Lime wedges, for squeezing

1.  Slice the loaf of bread in half horizontally.  Toast briefly under a hot broiler until lightly crispy.

2.  Spread both cut sides of the bread with banh mi-onnaise.  Top bottom half with (in order) slices of pork loin, slices of pâté, pickled carrot and daikon, bean sprouts, jalapeño, and cilantro.  Add salt, pepper, sriracha, fish sauce, and lime juice to taste.  Top with other half of bread, cut into 3 or 4 pieces, and serve.


Banh Mi-onnaise
Makes about 1/4 cup

4 tablespoons mayonnaise
1/2 teaspoon fish sauce
1/2 teaspoon Sriracha
1/4 teaspoon soy sauce

1.  Mix all ingredients together until smooth.  Refrigerate until needed.


Pickled Carrots and Daikon Radish
Adapted from Viet World Kitchen
Makes about 2 cups

For the brine:
1/2 cup sugar
1 1/4 cups distilled white vinegar
1 cup water
1/2 teaspoon whole black peppercorns
1 bay leaf

For the vegetables:
1 large carrot, peeled and cut into thin matchsticks
1/2 pound daikon radish, each no larger than 2 inches in diameter, peeled and cut into thin matchsticks
2 teaspoons sugar
1 teaspoon salt

1.  Combine all the brine ingredients in a pan over medium-high heat.  Heat, stirring, until all the sugar is dissolved.  Remove from heat, and let steep while preparing the vegetables.

2.  Place the cut carrot and daikon in a non-reactive bowl, and sprinkle with the salt and sugar.  Using your hands, squeeze and knead the vegetables for about 3 minutes.  They will release liquid and begin to soften.  Stop kneading when you can bend a piece of daikon so that the ends touch, but does not break.  Drain and rinse the vegetables with cold water in a colander.  Gently squeeze excess liquid off.

3.  Return the vegetables to the bowl, or place in a clean jar for longer storage.  Pour the brine over the vegetables.  The brine should totally cover the vegetables; if not, add extra water until covered.  Place a piece of parchment paper on the surface of the brine to keep the vegetables moistened, and cover with plastic wrap, or a lid.

4.  Let the vegetables sit for at least 1 hour before eating.  If eating immediately, the curing action will happen faster at room temperature.  If eating within a day or two, they should be refrigerated.  They will keep, refrigerated, for up to 4 weeks.


Notes:
1.  For the bread dough, be sure to use the finest-milled rice flour you can find.  Bob’s Red Mill is a good and widely-avaliable choice; Arrowhead Mills is a bit coarser.  Any Asian market should have at least one option.

2.  It’s not necessary to use the pickled vegetables, and the banh mi-onnaise can just as well be switched for regular mayonnaise.  But they do lend a bit of authenticity to the flavor; proceed at your discretion.

Posted in Savory, Yeast Breads | 2 Comments

Chinese Scallion Pancakes

Week Thirty-Five: East Asian Breads

scallion-1

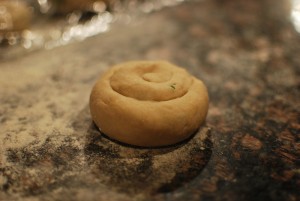
You and your countertop are covered with flour.  Fat spirals of jade-studded dough sit in contemplation under a blanket of plastic wrap, waiting for their turn under the transformative weight of your rolling pin.  They emerge as thin rounds, to be cast into hot oil sputtering in a nearby pan.

Moments later, you pull them from that phoenix-fire, spotted with brown and glistening.  As they cool, the promising smell of cooked scallions wafts upwards, making you wonder if the certain burn on your tongue would be worth the immediate gratification of biting in at once.  It almost convinces you.

If you’ve ever enjoyed good scallion pancakes at a Chinese restaurant, you know what I mean.  A sadly less-than-common inclusion on dim sum and appetizer menus, scallion pancakes are deceptively simple, especially considering how excellent they can be.  Unleavened dough is filled with green onion and brushed with sesame oil, and is quickly pan-fried.  Tender, flavorful, and fast, they appeal to all but the very pickiest of diners.  They’re often cut in wedges and served with a soy-based dipping sauce, but we didn’t have time for any of those shenanigans, as you can see above.

Like yesterday’s bao bing, these pancakes come to us from China.  They’re a flatbread as well, but unlike the rice-flour based bao bing, are made entirely with wheat flour.  Though it’s difficult to pinpoint the exact origins of this bread, that characteristic implies that it originated in the North of China, where wheat is far more plentiful than in the South.

The method involved in creating scallion pancakes also provides a clue to their roots, as they are made in a very similar fashion to parathas, those flaky Indian flatbreads.  Taking the ingredients and method into account, it seems most likely that they originated in Shanghai, a Northeastern city that boasted a large population of foreigners (who brought a demand for their familiar wheat flour), notably a sizeable percentage from India.  But whatever the pedigree, there’s no denying the broad appeal of these savory delights.  Similar breads have become part of the culinary tradition of other parts of Asia, such as Japan’s negiyaki, or Korea’s pajeon.

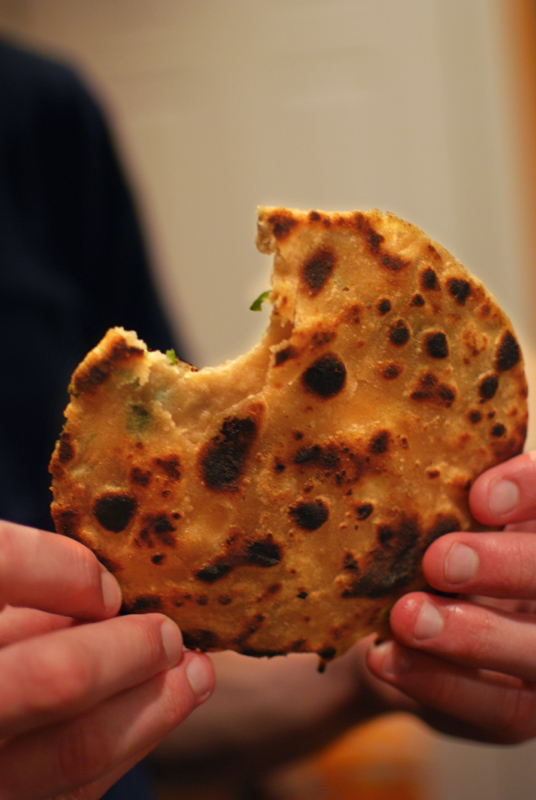
When you finally do get take a bite of your freshly-made pancakes, you taste the funky, unmistakable essence of sesame oil, but it sits calmly in the background, letting the sweet pungency of the green onions take center stage.  The scallion bits that tried to escape the clutches of the dough are chided for their efforts by being charred in the cooking process, and they lend a pleasant smoky flavor.

The crunchy exterior gives way to a chewy and soft interior that pulls apart in layers.  The middle remains slightly undercooked if (in my opinion) you’ve done it properly.  Personally, I have a weak spot for under-done baked goods, and the doughy interior of these pancakes panders admirably to that love.  Feel free to cook these at a lower temperature for a longer time, if you prefer your bread well done.

The recipe may seem long and involved, but it’s really quite easy, and goes quickly once you get the hang of it.  I’ve included copious pictures to help.  Scallion pancakes are often pan-fried in a shallow pool of oil, but I’ve reduced the amount of oil used to just a thin coating; I think it makes them less greasy.  Again, if you prefer yours cooked in more oil, don’t let me stop you.

However you cook them, though, you’re sure to win hearts with this one.  Just make sure to let them cool off a bit before giving into temptation and digging in; your tongue will thank you.


Chinese Scallion Pancakes
Adapted from Ming Tsai
Makes 8

4 1/2 ounces (1 cup) unbleached all-purpose flour
4 1/2 ounces (1 cup) white whole wheat flour
1/2 teaspoon salt
1 cup boiling water
1/2 cup thinly sliced scallions (about 3)
1 tablespoon sesame oil
Vegetable oil (such as canola) as needed for pan-frying

1.  In a heat-safe bowl, whisk together the flours and the salt.  Add the boiling water gradually, stirring until a dough forms.  When cool enough to handle, knead until smooth, dusting with flour if needed to prevent sticking.  Cover well with plastic wrap, and let rest at room temperature for 30 to 45 minutes.

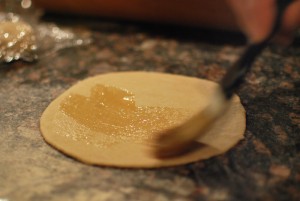
2.  Divide the dough into 8 even pieces, and roll each into a round ball.  Using a rolling pin, on a floured surface roll each piece out into a flat round, about 5 to 6 inches in diameter.  Keep the unused pieces covered while working.  Brush each with a little of the sesame oil.

scallion-2

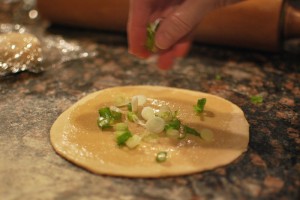
Sprinkle evenly with scallions.

scallion-3

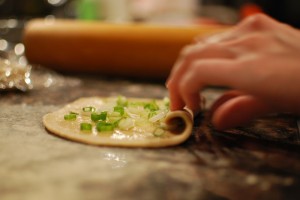
3.  Gently roll the dough up, jelly-roll style, into a long cylinder.

scallion-4

Tighten the cylinder by rolling underneath your palms.

scallion-5

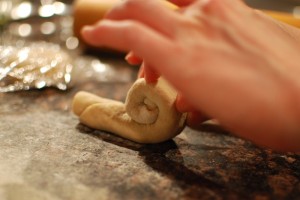
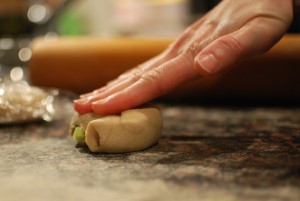
Then, starting at one end, roll the cylinder up into a tight spiral.

scallion-6

Gently pinch the seam to seal, and press to flatten the spiral slightly.

scallion-7

Keep covered while shaping the other pieces; let finished spirals rest for 10 to 15 minutes, covered.

scallion-8

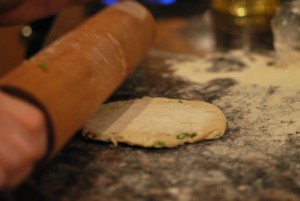
4.  On a floured surface, roll each spiral out to a flat disc, about 4 to 5 inches in diameter. 

scallion-9

Heat a non-stick pan over medium-high heat.

5.  Brush the bottom of the pan with vegetable oil, or pour in just enough to lightly coat the bottom of the pan, about 1 to 2 teaspoons.  Place one pancake in the hot pan, and cook for 1 to 2 minutes, or until deeply browned in places.  Flip over, and cook the other side for 1 minute, or until similarly colored.  Transfer to a plate, and continue cooking remaining pancakes.  Serve warm.


Notes:
1.  You can substitute additional all-purpose flour instead of the white whole wheat flour, if you prefer.

2.  These pancakes are best served as soon as possible, but are just fine at room temperature.  The uncooked, shaped dough may be wrapped well and frozen, and cooked as directed, unthawed.

Posted in Savory, Unleavened Breads | Leave a comment

Bao Bing (Chinese Crêpes)

Week Thirty-Five: East Asian Breads

bao-bing-1

First, I’d like to clear up a little confusion.  I am making báo bǐng today, not bàobīng.  All clear?  Great.

For those of you who don’t speak more than one dialect of Mandarin, let me explain.  There are two foods in Eastern Asia that go by the moniker “bao bing”.  One is translated as “crushed ice”, and is a Taiwanese dessert that can be sweet or savory, and can involve any number of different fruits, toppings (such as condensed milk or syrups), and gelatins.  Some variations are even served hot (sans ice, of course).

The other bao bing, the one I’ll be discussing today, translates as “thin pancake”.  It’s very similar to a traditional French crêpe in shape, size, and cooking method, but is generally made with a high percentage of rice flour mixed with the wheat flour.  Another name for this bread is “mù xū bǐng”, which may sound more familiar when I mention Moo Shu Pork.  You remember that thin wrapper you swaddle the pork in, right?  That’s the mù xū (or, phonetically, moo shu), also known as bao bing.

Variations of bao bing exist all across East and Southeast Asia.  In Vietnam, they’re known as bò bía, which becomes popiah in Taiwan, Singapore, and Malaysia.  Filipinos would recognize them as lumpia, but most Americans would probably call them “spring rolls”.

bao-bing-2

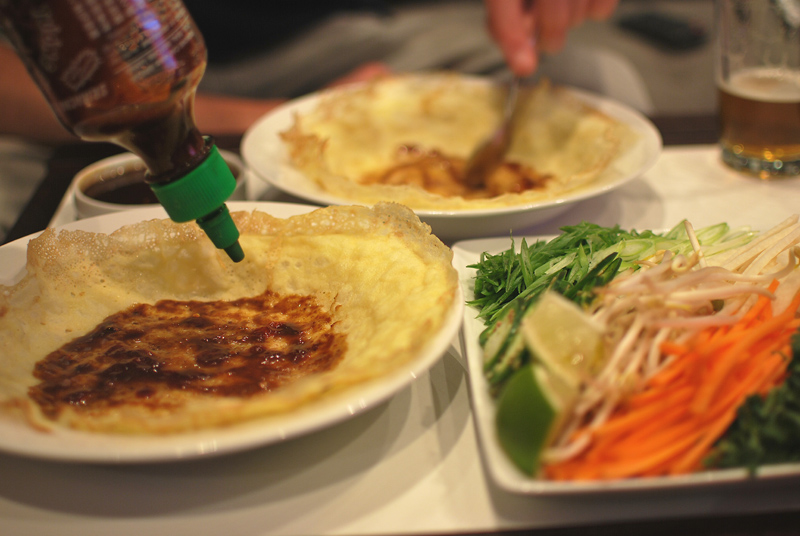
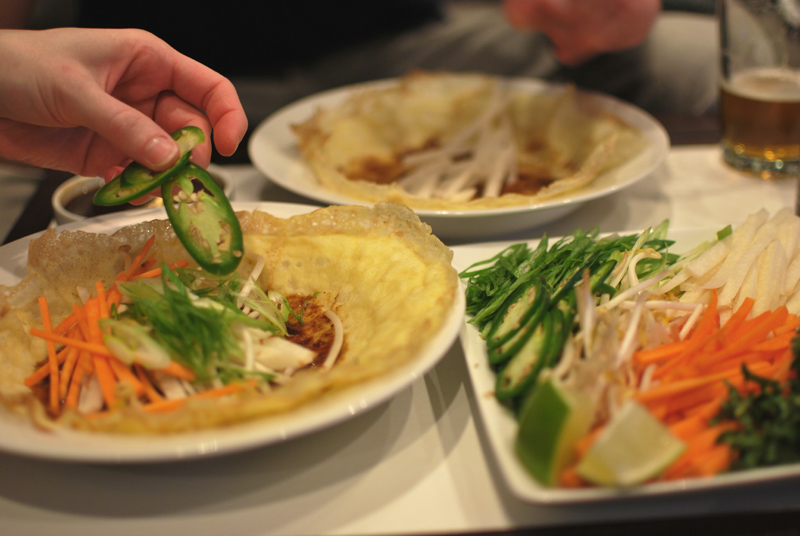
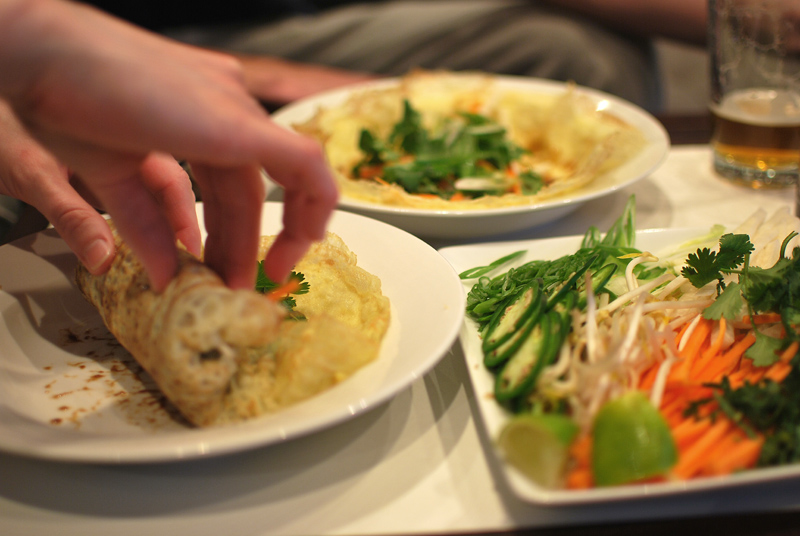
Bao bing can be fried, by typically are not, and are often served with a sweeter sauce, like fermented bean sauce, hoisin sauce, or a sweetened hot sauce.  Like their foreign counterparts, the crêpe and the tortilla, they can be filled with a huge variety of different foods.  You might see any combination of bean sprouts, jicama, carrots, lettuce, garlic, shallots, herbs, noodles, rice, cooked egg, peanuts, sausage, tofu, pork, shrimp, and on and on.  As you can see, you are only limited by the chef’s imagination.

The cooking method for bao bing, as I mentioned earlier, is nearly identical to that of the French crêpe.  A thin batter is quickly whisked together, then left to relax in the refrigerator for at least an hour.  After resting, the batter is swirled across the bottom of a hot pan with that singular spin of the wrist that becomes so natural and deft after cooking a batch or two.

This batter, in contrast to the French one, is much thinner, quite watery even.  But where the crêpe relies mainly on gluten from wheat flour to hold it together, bao bing relies on egg protein to provide structure.  Most of the flour here is rice flour, which contains no gluten.  There is a touch of wheat flour, but the amount is so little that it hardly seems to do anything at all.

bao-bing-3

Bao bing end up with a pliant texture that will easily hold any filling, but that won’t resist to the pressure of teeth biting easily through it.  The high percentage of rice flour gives a characteristic flavor, which is enriched by the flavor of egg yolk throughout.  It’s mild and almost dull when eaten alone, but that simply means it adapts seamlessly to any flavor you choose to fill it with.

It’s best to fill and eat these as soon as possible after making them, so it’s ideal to have a friendly sous chef prepare the fillings while you cook the wrappers (or vice versa).  I’ve given some ideas for fillings below, which are some of my particular favorites.  Feel free, though, to omit, substitute, or swap anything you like.  Use whatever you have on hand, or whatever strikes your fancy.


bao-bing-filling

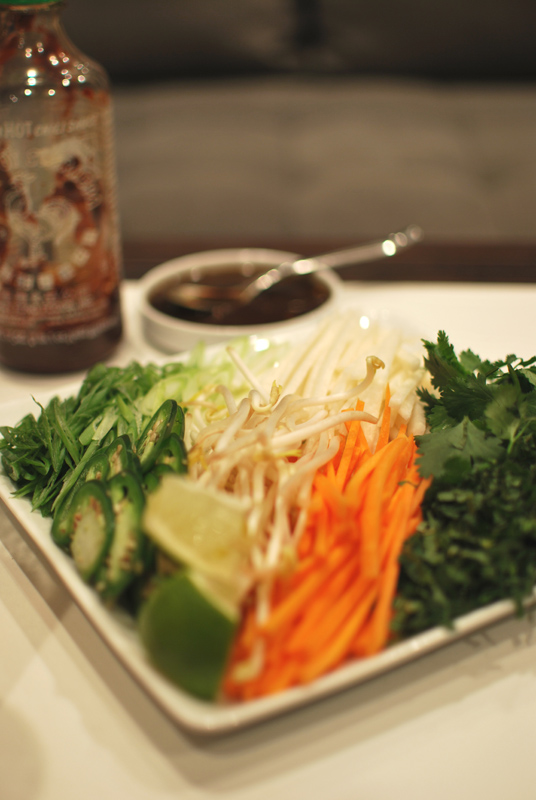
sriracha, hoisin sauce, scallions, jalapeño, limes, bean sprouts, jicama, carrots, mint, and cilantro


Bao Bing (Chinese Crêpes)
Adapted from Spice, by Christine Manfield, Charlie Trotter, and Ashley Barber
Makes about 20 wrappers

For wrappers:
5 ounces (about 1 1/4 cups) fine rice flour
1 ounce (about 1/4 cup) unbleached all-purpose or cake flour
1/2 teaspoon kosher salt
4 large eggs, beaten until smooth
1 teaspoon vegetable oil
1 1/2 cups water, at room temperature

For filling (as needed):
Bean sprouts
Carrots, peeled and cut into matchstick-size pieces
Jicama, peeled and cut into matchstick-size pieces
Scallions, sliced thinly
Fresh cilantro
Fresh mint, minced
Jalapeño, sliced very thinly
Hoisin sauce
Sriracha sauce (or other hot sauce)
Fresh limes, cut in wedges for squeezing at the table

1.  Whisk together the flours and the salt in a medium bowl.  Add the eggs, oil, and water, and whisk until smooth (see note 1 below).  Cover with plastic wrap, and refrigerate for at least one hour.

2.  Heat a 10 inch nonstick skillet over medium to medium-high heat.  Brush lightly with oil.  Pour in enough batter to coat the bottom of the pan, about 1/4 to 1/3 cup.  Quickly swirl the batter around the pan, making as thin and even a layer as possible.

3.  When the batter is set, and before the underside has browned at all, remove the wrapper to a plate to cool.  Do not cook the top side.  Continue cooking the remaining batter, stacking the finished wrappers on top of one another.  Keep cooked wrappers covered with a cloth until ready to serve.

4.  To serve, fill with desired ingredients and sauces.  Roll up as you would a burrito, by folding two short ends over the fillings, then turning 90°, and rolling up fully into a cylinder.


Notes:
1.  Alternatively, you can process the batter in a blender or food processor, rather than whisking.  Continue as directed.

2.  Bao bing are best when freshly-made; they may be frozen if necessary, but do not refrigerate.

3.  If your wrappers end up with air bubbles or other holes in them, simply place a lettuce leaf on the wrapper before filling and rolling.  This will keep anything from coming through or tearing the wrapper.

Posted in Savory, Unleavened Breads | 3 Comments

Melon Pan (Japanese Melon Bread)

Week Thirty-Five: East Asian Breads

melonpan-2

The theme for this week, East Asian breads, has been slightly troublesome for me.  It’s difficult to pick recipes, you see, because most parts of Asia don’t have a bread-making tradition.  The exception to this rule, of course, is Southwest Asia, comprising India, Pakistan, Nepal, Afghanistan, and other nearby nations, which have a rich variety of mostly flatbreads in the cuisine.

The reason behind this panary lack is, simply, climate.  Wheat just doesn’t grow well in most of Southeast Asia, whereas rice grows plentifully.  Because of the lack of gluten, rice makes rather miserable bread, but it makes excellent noodles.  Rice, and noodles made from rice and many other starches, have historically taken the dietary and culinary place of bread in this part of the world.

But as the Western world crept into Asia through the Spice Trade and other monetary ventures, along with the occasional war, they brought their food with them.  Asian businessmen who lived abroad in Western countries returned home with favorite new foodstuffs and methods, and breads of the Western world eventually gained a firm foothold in the various cuisines of Southern Asia.

Finding recipes for specifically Southeast Asian breads is challenging because there really aren’t that many.  For example, many of Japan’s most popular breads are nearly identical to breads found in Western Europe and America, particularly enriched, soft, white breads.  It didn’t make a lot of sense to post a recipe for “Japanese White Bread” when it’s exactly the same as “American White Bread“.  I’ve tried to pick recipes that are either unique to the region, or are rarely seen in these United States; you’ll have to let me know how well I did at the end of the week.

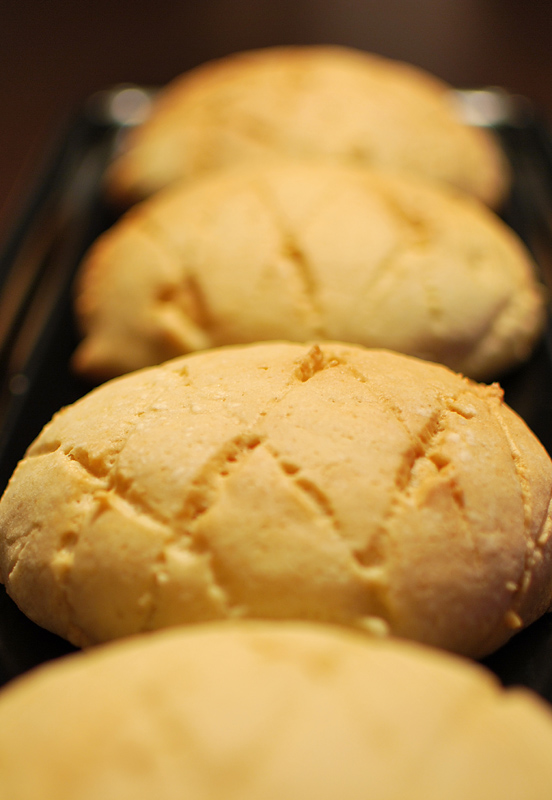
To kick things off this week, I’m featuring a bread that is purely Japanese.  Called Melon Pan (“pan” being Japanese for “bread”), it consists of a soft, rich roll topped with a sugar cookie (oh, yes).  And there’s no melon.  No melon chunks, no melon purée, no melon flavoring, absolutely nothing of the sort.  So why the name?

The sugar cookie topping is usually scored in a crosshatch pattern, which is meant to look like a melon.  Now, most people on teh interwebs will say it’s supposed to look like the skin of a melon, but I’ve never in my life seen a melon with crosshatched skin.  If you have, please take a picture and send it to me; it sounds gorgeous.

What I have seen, though, is a thoroughly Japansese presentation of a melon wedge, cut into a crosshatch pattern, and bent backwards for serving.  It’s a chic and simple way to serve melon, and one that avoids much mess in eating.  If that isn’t Japanese, I don’t know what is.  I propose that this is what melon pan is intended to imitate, rather than an entire melon.
melonpan-1

As for why you’d want to replicate a melon in the first place, it’s important to remember Japan’s custom of gifting extremely expensive fruit.  While standard supermarket melons rarely cross the five-dollar threshold, certain gift melons – such as the famed Yubari melons – can easily command prices of $100.  Each.  The all-time record price, set in 2008, was 2 million yen for two melons.  That’s $21,000.

And that is why you’d want to replicate a melon in bread.

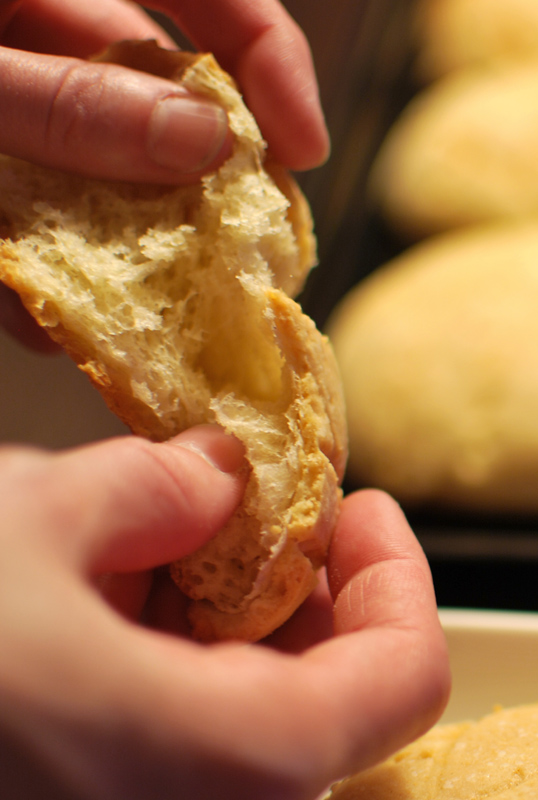
But the sugar cookie?  I don’t even know.  I can only assume it relates to the Japanese love of sweets; other than that, I got nothin’.  What the sugar cookie does provide, however it came to be there, is a delightful crunch on top of an otherwise cottontail-soft bread.  It creates a crisp crust that the tender bread alone could never achieve, and the overall effect is joyous.

The bread itself is reminiscent of brioche, enriched as it is with butter and egg, and has a fluffy, open texture with an appropriate hint of chewiness.  Together with the cookie topping, it reminded me of nothing quite so much as king cake, which you might or might not be familiar with, depending on how far South you grew up.  With the suggestion of vanilla in the cookie, and the buttery taste of the bread below, wrapped up in that incomparable texture, it’s easy to see why this bread is so popular in its native land.

I did have a little problem with scoring the cookie dough after it was placed on top of the risen bread dough, as it dried out just enough to become difficult; I ended up deflating one or two of the rolls a bit when crosshatching the cookie.  This was mitigated by spritzing with a little water, but in the future, I think I would score the cookie dough before placing it on the rolls.  I’ve reflected this change in the recipe, but use whatever method you like best.

melonpan-3


Melon Pan (Japanese Melon Bread)
Adapted from The Fresh Loaf and Wild Yeast
Makes 8 breads

For bread dough:
8 ounces (about 1 3/4 cups) unbleached all-purpose flour, plus extra as needed
1 tablespoon nonfat dried milk powder
1 teaspoon instant yeast
1/2 teaspoon salt
1/3 cup cold water
1 large egg, beaten
1 tablespoon granulated sugar
2 tablespoons unsalted butter, at room temperature

For cookie dough:
6 ounces (about 1 1/3 cups) unbleached all-purpose flour
3/4 teaspoon baking powder
1 three-fingered pinch salt
5 tablespoons unsalted butter, at room temperature
1/3 cup sugar
1 large egg
1/4 teaspoon vanilla extract

1.  To make the bread dough, whisk together the flour, powdered milk, yeast, and salt in the bowl of a stand mixer.  Beat the egg and cold water together until thoroughly blended.  Add to the flour mixture in the bowl.

2.  Using the dough hook, mix at low speed until a rough dough forms.  Increase the speed, and mix at medium speed for about 4 minutes.  The dough should have a rather stiff consistency.

3.  Decrease the speed to low, and slowly add the sugar.  Mix until the sugar is fully incorporated.  The dough should soften a little at this point.  Increase the speed to medium, and knead for about 10 minutes, or until the dough becomes supple and elastic.

4.  Again decrease the speed to low, and add the softened butter.  Knead until mixed in, 2 or 3 minutes.  You may need to add a little additional flour to help it fully incorporate; do so by spoonfuls.  Increase the speed to medium and continue kneading for about 5 to 6 minutes, or until the gluten is well-developed.

5.  Transfer the dough to a lightly-oiled bowl, and cover tightly with plastic wrap.  Let sit at room temperature until doubled in size, about 1 hour.

6.  Lightly grease a large baking sheet, or line with parchment paper.  Turn the dough out onto a lightly floured surface, and gently deflate.  Divide the dough evenly into 8 pieces.  Keeping the unused pieces covered, round each piece into a ball, and transfer to the prepared baking sheet.  Cover the dough loosely with lightly-oiled plastic wrap, and let sit at room temperature until doubled in size, about 1 hour.

7.  While the dough proofs, make the cookie dough.  Whisk together the flour, baking powder, and salt; set aside.  In the bowl of a stand mixer, using the paddle attachment, cream together the butter and sugar at medium-high speed until fluffy, about 2 minutes, scraping the bowl as necessary.  Add the egg and vanilla, and beat until combined.

8.  Add the flour mixture to the butter and sugar mixture, mixing at low speed just until combined.  Wrap the dough tightly in plastic wrap, and refrigerate while waiting for the dough to finish its rise.  Preheat the oven to 350° F.

9.  Unwrap the cookie dough, and divide it into 8 even pieces.  Roll each into a ball, keeping unused pieces covered.  Using as little flour as possible, roll each ball into a flat round, about 3 1/2 inches in diameter.

10.  With a sharp paring knife, score each round with a crosshatch (or diamond) pattern.  Drape each piece of cookie dough over the risen bread dough, being careful not to deflate them.  The cookie dough should encase the top and sides, but not the bottom, of each roll.

11.  Bake at 350° F for 20 to 25 minutes, or until barely golden brown on top.  Transfer to a wire rack to cool thoroughly.


Notes:
1.  You may prefer to make this bread dough by hand, as the volume of dough is quite small for a mixer.  If you do, however, be careful to avoid the temptation to add excess flour when kneading.  The dough is quite sticky, but over-flouring will lead to a tough bread.
2.  Because the volume of the bread dough is so small, it’s easy for proportions of ingredients to go off.  Use your intuition, and if the dough looks too slack or even a bit runny, don’t be afraid to add extra flour.  Be sure to do so by small spoonfuls, though, avoiding an imbalance in the other direction.  If the dough looks too stiff, add a little extra butter or sugar, again in small amounts.

3.  This bread will keep in an air-tight container at room temperature for several days.  Alternatively, it can be frozen and reheated in a 350° F oven, for about 5 to 7 minutes, or until heated through.

Posted in Sweet, Yeast Breads | 1 Comment

High-Altitude Plain Ol’ Bread, Version Two

Week Thirty-Four: High-Altitude Week

yeast-h-a-2

I know yesterday, I was discussing bread at sea-level again.  But today, I’m back at high-altitude, finishing the conversation on yeast bread.  Behold, the Magic Of Teh Internets.

One important thing to realize, when baking yeast bread at high-altitude, is that yeast will act more quickly.  This is due to the lower air pressure, meaning that there is less resistance pushing back the air bubbles produced by the yeast.  Therefore, the bubbles expand more easily as they’re formed, making your bread rise more quickly than it will at sea level.

yeast-h-a

Now, if you’re interested in getting bread on the table faster, this is a good thing.  But if you’re interested in getting a good bread on the table, this is a bad thing.  Good-tasting bread, you recall, requires time to develop enzymes and acids that dramatically improve the flavor of the dough.  Speed, therefore, is then enemy of flavorful yeast breads.
There’s a few ways to combat this: you can use less yeast, generally about 25% less than you would at sea level, though that requires math; or as the dough rises, you can punch it down (deflate it) multiple times, though that requires a bit more of a time investment; or you can simply refrigerate the dough.  This last solution not only improves the flavor of your dough immensely, but it also buys you up to several days of time.  You can make the dough in the morning, go about your day, and finish it that night, or even the next night, for dinner.

The only problem with that method is the waiting for the dough to come back to room temperature (the yeast remain fairly dormant until then).  And if, like me, you use a glass bowl, which holds temperatures quite well, then you’ll be waiting a long time.  If you do use a glass bowl to refrigerate the dough, try transferring it to a room-temperature bowl while waiting for it to warm up.  You’ll thank me later.

Because my dough was still rather chilly even 3 hours after removing it from the refrigerator, the rise on this loaf was not as tall as the previous high-altitude loaf, or the original sea-level loaf.  But all said and done, this loaf was the clear winner as far as overall flavor goes.  Everyone agreed.

yeast-h-a-4

elwood

Due to the long, cold rise, this bread had a very complex flavor, though it did have a more compact crumb.  The crust was comparable to the other two loaves, unsurprisingly, but was the hands-down favorite when a (very informal) side-by-side-by-side comparison was done.  And yes, sea-level bakers, this refrigeration-for-better-flavor method works just as well in the lowlands.

The moral of the story is this: like baking bread at sea-level, baking bread at high altitudes is a matter of practice.  You try recipes, work with dough until you know what it should look like, adjust based on your personal preferences and atmospheric conditions, and stick with what works for you.  There are no hard and fast rules, though it’s nice to have helpful suggestions every now and then.   The only way to learn is by doing, and I’m thrilled to have been able to do this experiment.  Thanks again to my lovely family for putting up with my insistance on baking, and for being my taste-testing guinea pigs.  I hope I’ve been able to help some of you high-altitude bakers out there this week.  Happy mile-high baking!

yeast-h-a-3

jake


High-Altitude Plain Ol’ Bread, Version Two
Makes 1 loaf

18 ounces (4 cups) unbleached all-purpose flour, plus extra as needed
2 1/4 teaspoons (1 package) instant yeast
1 3/4 cups water
2 tablespoons olive oil
1 1/2 teaspoons salt

1.  In the bowl of a stand mixer, whisk together the flour and yeast.  Add the water and olive oil.  Mix with the dough hook at low speed until a rough dough forms, about 1 to 2 minutes.  Turn the mixer off, and without removing the bowl or the hook, cover the bowl loosely with plastic wrap.  Let stand for at least 15 to 20 minutes, or up to 45 minutes.

2.  Remove the plastic wrap, and add the salt.  Continue kneading the dough, at medium-low speed.  Knead for 6 to 8 minutes, or until the dough forms a cohesive ball that clears the sides of the bowl, and becomes elastic.  If the dough does not clear the sides of the bowl, add additional flour until the proper consistency is achieved.  The dough should not be stiff, but should not be soupy.

3.  Transfer the dough to a lightly oiled bowl.  Cover tightly with plastic wrap and refrigerate at least overnight, or up to three days.

4.  Remove dough from the refrigerator, and let stand at room temperature for at least 1 hour before proceeding.  Using a nonstick spatula, gently deflate and fold the dough over itself in a tri-fold (as though you were folding a letter).  Cover and let rise again for 1 to 1 1/2 hours, or until doubled in size.

5. Line a baking sheet with parchment paper.  Gently deflate the dough, and turn out onto a lightly floured surface.  Flatten the dough into a slight rectangle or oval shape.  Fold the two corners furthest away from you into the center of the dough, as though you were beginning to fold a paper airplane.  Starting with that point, roll the dough up into a cylinder, pressing gently to seal as you roll.  Press the final seam to seal.  Transfer the dough to the prepared baking sheet, seam-side down.  Tuck the ends under if desired, to make a more attractive loaf.  Cover loosely with lightly-oiled plastic wrap, and let rise until doubled in size, about 1 hour.  Thirty minutes before baking, preheat the oven to 450º F.

5.  Bake at 450º F for 10 minutes.  After 10 minutes, reduce the temperature to 400º F, and bake the loaf for an additional 15 to 25 minutes, or until golden brown.  Remove the bread to a wire rack to cool before slicing.


Notes:
1.  This bread will keep, wrapped in plastic, for a day or two at room temperature.  It can also be frozen, wrapped in plastic and aluminum foil, then reheated in a 350º F oven until warmed through.

Posted in Savory, Yeast Breads | Leave a comment

Sea-Level Olive Oil Quick Bread

Week Thirty-Four: High-Altitude Week

As you may recall, the original intention for this week’s theme was to make a control loaf of bread at sea level (or nearly so) in Chicago, bake a second loaf at a mile high in Denver to see what would go wrong, and then correct the recipe to be appropriate for high-altitude baking.  I was going to bake the two most basic types of bread: one chemically-leavened quick bread, and one yeast-risen bread.

And, as you may also recall, the quick bread half of the experiment didn’t go exactly as planned.  For those that don’t remember, or who haven’t scrolled down to that post yet, the unaltered high-altitude version came out better than the original sea-level version.  Go figure.  So today, I’ll be amending the original recipe to turn out better at low altitudes.  The experiment is basically the same, just turned around a little.

As previously discussed, the main reason that translation is needed when baking at high altitudes is because of the decreased air pressure.  Lower air pressure means your leavening works faster, which means you need to trap it more quickly to get the same rise.  Therefore, to adapt a high-altitude recipe to sea level, you have to work backwards.

Instead of needing extra acidity, extra moisture, and decreased sugar, all of which help to set the gluten structure of the bread before the chemical leaveners give off all their gases (crucial in high altitudes), here we need the reverse.  We need neutralized acid, less moisture, and increased sugar.  To that end, I’ve added baking soda to neutralize the acidity, slightly reduced the amount of honey (but kept some in for the flavor), and added granulated sugar.

The flour level here actually needs to increase, despite the previous discussion that suggested the opposite, because there isn’t enough of a decrease in moisture to offset the dry ingredients.  The original version was too dense from too much moisture, a characteristic that worked successfully in Denver, where the drier flour soaked up much of the excess.  In the more humid Chicago, however, the flour simply couldn’t handle absorbing all that moisture.

This time around, back at sea level, the bread was far more successful.  The fluffy texture from the high-altitude loaf made a welcome reappearance.  The tender bread crumbled slightly as it was cut into slices, whereas the previous sea-level version cut as cleanly as a solid pound cake.  The increase in sugar didn’t affect the flavor much, it was only a touch sweeter; but the change in texture was apparent.

The only mystery about this second loaf was the dark shadow in the crumb, running throughout the bottom and edge of the bread.  Nothing like that has ever happened to a bread of mine before, but I’m assuming it had overbaked where it touched the pan, as I had elected not to adjust the cooking temperature.  I’ve corrected the temperature in the recipe below; but for reference, know that temperatures should be increased 15° to 25° F when baking at high altitudes, to help set the crust of the bread earlier (and vice versa when adjusting recipes to low altitudes).

Aside from the presumed overbaking, though, the elegant and understated flavors of lemon first and olive oil second were in delightful balance, and the crust took on a slight crunch from the added sugar, though that faded away after standing.  All in all, this recipe is much improved from the original version, and it’s a variation that I will certainly make again.

olive-oil-chicago-version-2

Sea-Level Olive Oil Quick Bread
Adapted from Epicurious.com
Makes one 9 x 5 inch loaf

12 1/2 ounces (about 2 3/4 cups) unbleached all-purpose flour
1/4 cup granulated sugar
2 teaspoons baking powder
1 teaspoon baking soda
3/4 teaspoon salt
Finely grated zest of 1 lemon
1/4 cup honey
2 eggs, lightly beaten
3/4 cup milk
1/2 cup extra-virgin olive oil

1.  Preheat oven to 325° F.  Lightly butter a 9 x 5 inch loaf pan, sprinkle with flour, and turn upside down and knock on the bottom to remove excess.  In a medium bowl, whisk together the flour, sugar, baking powder, baking soda, salt, and lemon zest; set aside.

2.  In a large mixing bowl, whisk together the honey, eggs, milk, and olive oil.  Add the flour mixture, stirring until just combined, being careful not to overmix.  Transfer the batter into the prepared loaf pan, and smooth the top.

3.  Bake at 325° F for 50 to 60 minutes, or until a skewer inserted in the center comes out clean.  Allow to cool in the pan for about 5 minutes before removing to a wire rack to cool fully before slicing.  Serve slightly warm or reheated.


Notes:
1.  This bread will keep, wrapped in plastic, at room temperature for 1 to 2 days; alternatively, it will freeze beautifully wrapped well in plastic and aluminum foil.

Posted in Quick Breads, Savory, Sweet | Leave a comment

High-Altitude Plain Ol’ Bread

Week Thirty-Four: High-Altitude Week

yeast-h-a-version-2

Having established that my experiment with quick breads at high altitudes was a mild scientific disaster (but a surprise culinary success nonetheless), we now move on to the yeast-leavened bread.  The control loaf made in Chicago was nothing special; it had a good and complex flavor, and a moderately open crumb, but had a mediocre crust.  If I’m honest, the crust alone ruined an otherwise acceptable bread for me.  If it had been crisper, I would have been more satisfied; but I figure I’m allowed a little bread snobbery these days.

While making the control yeast bread in Chicago, I attempted to mimic the anticipated baking conditions in my sister’s Denver kitchen as much as possible.  I didn’t use my baking stone (she doesn’t have one), I didn’t use a spray bottle to create steam in baking (she doesn’t have one), and I used all-purpose flour (not sure if she’d have bread flour around).  But I overlooked one major technique in all this: I weighed out my flour, like I always do.  My sister doesn’t have a food scale.  Foiled!

I was stuck measuring out my flour by volume, a major faux pas in the sort of bread-making I’ve become accustomed to.  Not only that, but there’s a reason I long ago bought that food scale: I’m notoriously bad at measuring out dry ingredients by volume consistently.  Do I scoop and level?  Do I spoon the flour into the cup, then level?  Do I scoop and shake to level?  I think I do all three, depending on my mood.  You may see my conundrum.

So measuring by weight wasn’t an option.  I did my (ahem) level best to measure consistently, but there were four whole cups of flour in that recipe.  I had to measure exactly the same amount, exactly the same way, four times.  Ridiculous.  I don’t know how you people do it.

And!  Her brand of flour was different, to boot.  It would certainly weigh differently than my brand; perhaps that cup of flour wasn’t really 4 1/2 ounces, like mine, a fact which would obviously throw off the hydration level.  How on earth was I supposed to re-create this recipe at all?

After measuring the flour as best I could, I added the prescribed amount of water and mixed.  The flour didn’t all moisten; in fact, there was a veritable flour desert in the bottom of the bowl.  It was so dry, I added nearly an entire extra cup of water before it came together.

Now, part of this trouble was from my own hands, and my stupefying lack of ability to measure by volume.  But part of it was also due to complications of high-altitude baking, namely faster water evaporation.  Because water evaporates much more quickly at high altitudes, flour tends to be drier and will soak up more water than at sea level.

It’s hard to tell how much water your flour will absorb until you start mixing, but a good general rule is that at higher altitudes, you should assume that you need more liquid in your dough.  This is partly why you always want to hold back a handful (or three) of your flour when mixing bread dough, no matter the altitude; it’s far easier to add flour to a wet dough than to add water to a dry dough.

Other than the issues with mixing, however, this bread turned out relatively similar to the control loaf.  It was a little airier than the original, because yeast actually works faster at high altitudes than it does at sea level (I’ll be discussing that in more depth in Saturday’s post).

The crust was still less than crisp and wasn’t much darker, but happily had a much less chewy bite.  (The oven may or may not have been hotter than mine at home; my oven has a digital temperature control, wheras my sister’s oven has a less-than-precise and forty-year-old dial control.)  The crumb was pleasingly open, and had a moderately complex overall flavor.  This loaf was not necessarily better than the original, but neither was it a lesser bread.

I’m writing this recipe as I made it, extra water and all.  You may or may not need to add extra flour, depending on your volume-measuring abilities.  This experience continues to be fascinating for me, and I hope all of you out there reading this are enjoying it too.  Tune in Saturday, when I’ll be talking about a second high-altitude variation of this yeast bread!


High-Altitude Plain Ol’ Bread
Makes 1 loaf

18 ounces (4 cups) unbleached all-purpose flour, plus extra as needed
2 1/4 teaspoons (1 package) instant yeast
1 3/4 cups water
2 tablespoons olive oil
1 1/2 teaspoons salt

1.  In the bowl of a stand mixer, whisk together the flour and yeast.  Add the water and olive oil.  Mix with the dough hook at low speed until a rough dough forms, about 1 to 2 minutes.  Turn the mixer off, and without removing the bowl or the hook, cover the bowl loosely with plastic wrap.  Let stand for at least 15 to 20 minutes, or up to 45 minutes.

2.  Remove the plastic wrap, and add the salt.  Continue kneading the dough, at medium-low speed.  Knead for 6 to 8 minutes, or until the dough forms a cohesive ball that clears the sides of the bowl, and becomes elastic.  If the dough does not clear the sides of the bowl, add additional flour until the proper consistency is achieved.  The dough should not be stiff, but should not be soupy.

3.  Transfer the dough to a lightly oiled bowl.  Cover with plastic wrap and let rise in a warm place until doubled in size, about 45 to 60 minutes.

4.  Using a nonstick spatula, gently deflate and fold the dough over itself in a tri-fold (as though you were folding a letter).  Cover and let rise again for 45 to 60 minutes, or until doubled in size.

5. Line a baking sheet with parchment paper.  Gently deflate the dough, and turn out onto a lightly floured surface.  Flatten the dough into a slight rectangle or oval shape.  Fold the two corners furthest away from you into the center of the dough, as though you were beginning to fold a paper airplane.  Starting with that point, roll the dough up into a cylinder, pressing gently to seal as you roll.  Press the final seam to seal.  Transfer the dough to the prepared baking sheet, seam-side down.  Tuck the ends under if desired, to make a more attractive loaf.  Cover loosely with lightly-oiled plastic wrap, and let rise until doubled in size, about 1 hour.  Thirty minutes before baking, preheat the oven to 450º F.

5.  Bake at 450º F for 10 minutes.  After 10 minutes, reduce the temperature to 400º F, and bake the loaf for an additional 15 to 25 minutes, or until golden brown.  Remove the bread to a wire rack to cool before slicing.


Notes:
1.  This bread will keep, wrapped in plastic, for a day or two at room temperature.  It can also be frozen, wrapped in plastic and aluminum foil, then reheated in a 350º F oven until warmed through.

Posted in Savory, Yeast Breads | Leave a comment