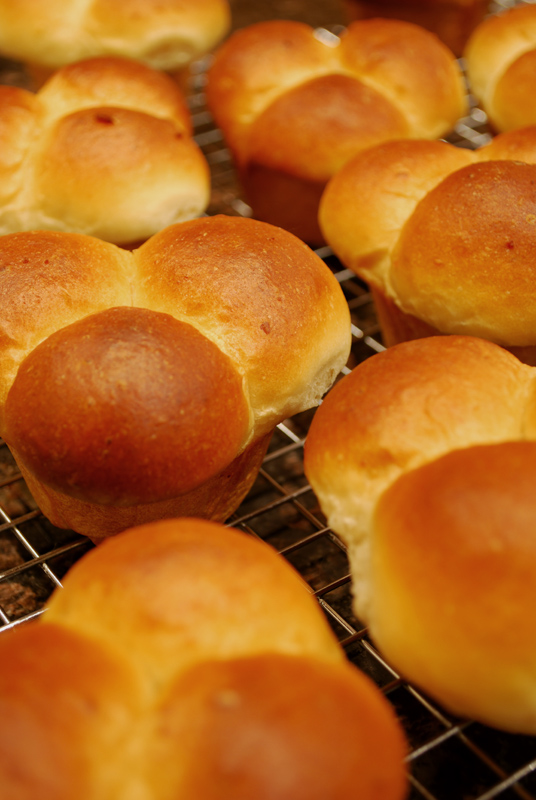
Week Ten: Dinner Rolls
I think everyone in America must have their own memory of cloverleaf rolls. Maybe you had them every Thanksgiving beside the turkey and cranberry sauce, maybe your grandmother made them for Sunday dinner. Me, I remember them from any and every cafeteria-style restaurant I ever went to. When I was little, I happily eschewed every other bread in favor of these lovely, soft rolls. Forget cornbread and biscuits, those cheerful tri-formed shapes beckoned to me. The butter liberally and invariably brushed over the tops coated my hands as I pulled them apart. They always tasted the same, too; soft-crusted, mildly sweet, buttery, and wonderful. Was there just the one factory somewhere producing them all? Or did the recipe just get passed around that much?
In recent years, I have acquired a palate for more toothsome breads, ones with a hard crust and airy crumb, or a more nutritious whole-grain bread. But I suppose I still have a soft spot in my heart for the cloverleaf roll – I don’t remember ever turning one down! But I have discovered one little secret about cloverleaf rolls: there isn’t exactly a recipe for them. They fall into a group of about three or four other breads, generally made from the same dough, and simply formed into different shapes. Other breads like this include fantans, butterflake rolls, Parker House rolls, and a simple milk roll. This just means that if you have a recipe for any one of these, you can make the others.
This recipe was adapted from a recipe for pull-apart dinner rolls, and includes mashed potato flakes. Though it’s not standard in these sorts of breads, it contributes texture, a little flavor, and helps hold in moisture, keeping the bread nice and soft. I figured I’d give it a shot, and I was not disappointed. These came out beautifully, as cheerful and buttery as in my memory. Pulling one apart, still warm from the oven, I knew I’d always carry a little love in my heart for these little darlings.
Cloverleaf Rolls
Adapted from King Arthur Flour
2 1/2 teaspoons active dry yeast; or 2 1/2 teaspoons instant yeast
7/8 to 1 1/8 cups lukewarm water*
3 cups all-purpose flour, 1 handful set aside
1 1/4 teaspoons salt
3 tablespoons sugar
6 tablespoons unsalted butter, melted and cooled, plus extra for brushing on rolls
1/4 cup nonfat dry milk
1/2 cup instant mashed potato flakes
*Use the lesser amount in summer (or in a humid environment), the greater amount in winter (or in a dry climate), and somewhere in between the rest of the year, or if your house is climate controlled.
1. If you’re using active dry yeast, dissolve it with a pinch of sugar in 2 tablespoons of the lukewarm water. Let the yeast and water sit at room temperature for 15 minutes, until the mixture has bubbled and expanded. If you’re using instant yeast, you can skip this step.
2. Combine the dissolved yeast (or instant yeast) with the remainder of the ingredients, reserving the handful of flour. Mix and knead everything together—by hand, mixer or bread machine set on the dough cycle—till you’ve made a smooth dough. Add the extra handful of flour only if needed. If you’re kneading in a stand mixer, it should take 5 to 7 minutes at second speed, and the dough should barely clean the sides of the bowl, perhaps sticking a bit at the bottom. In a bread machine (or by hand), it should form a smooth ball.
3. Place the dough in a lightly greased bowl. Cover the bowl, and allow the dough to rise, at room temperature, until it’s nearly doubled in bulk, about 1 hour. Rising may take longer, especially if you’ve kneaded by hand. Give it enough time to become quite puffy.
4. While the dough is rising, lightly grease one 12-cup muffin tin.
5. Gently deflate the dough, and transfer it to a lightly greased work surface. Divide it into 12 pieces. Divide each piece into three equal-sized pieces.
6. Covering the remaining pieces, shape each piece into a rough ball by pulling the dough into a very small knot at the bottom, then rolling it under the palm of your hand into a smooth ball.
7. Place three balls in each of the muffin tin cups.
8. Cover the pan with lightly greased plastic wrap, and allow the rolls to rise till they’re very puffy, about 1 hour. While the rolls are rising, preheat the oven to 350°F.
9. Bake the rolls until they’re a deep golden brown on top, about 25 minutes.
10. Remove the rolls from the oven, and brush with melted butter. After 2 or 3 minutes, carefully transfer them to a rack. They’ll be hot and delicate, so be careful. Serve warm, or at room temperature.
Notes:
1. I ran out of all-purpose flour while making this recipe, so I had to make up the remainder with bread flour. The higher protein content resulted in more gluten, so they ended up being a little tough. But the taste was still good!


I used this recipe for thanksgiving dinner rolls. They were so good and really easy! I follow your blog, I love all the basic and not so basic bread recipes all in one place!
Thanks!
HollowPeas: I’m glad you liked them! Those are indeed easy to make, and I think they’re fun, too, especially if you have some kids around to help roll the balls of dough. Thanks for reading, and happy baking!