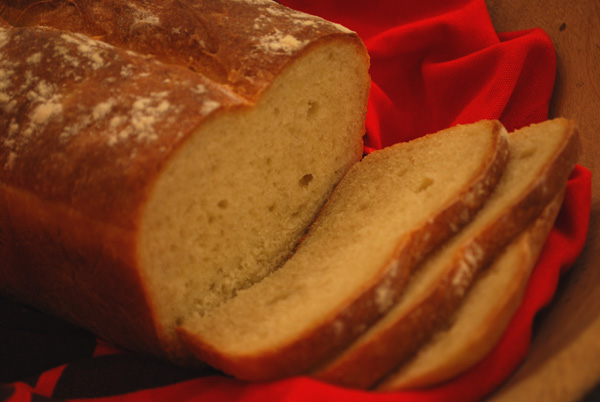
The third loaf in this series has nearly the same ingredients as the previous two: flour, water, salt, and yeast. But where the French bread had honey and butter for additional flavor, this uses only a splash of milk. And, not to leave one out, the Cottage Loaf relied solely on the virtues of its basic ingredients. One big difference, of course, is that this bread is baked in a loaf pan instead of on a sheet pan. (The name of this recipe refers to its British roots: they say “tin” instead of “pan”.) It’s basically a standard white bread, perfect for sandwiches, characterized by a deep crack cut into the length of the loaf before baking.
Another difference in this recipe is the use of a very basic “sponge”. To make a sponge, the yeast is dissolved in the water, then mixed with around half of the flour to make a thick batter. The sponge is then left to proof, and is later mixed with the remaining ingredients. I use the word “basic” only because sponges are usually mixed separately from the rest of the flour, and usually left longer than the twenty minutes stated in this recipe. Why longer? By letting the yeast work longer, unhindered by other ingredients like eggs and fat, they produce a much better flavor and texture in the finished product. Twenty minutes is the about the least amount of time needed for a useful sponge; but they can, and generally do, sit for longer – anywhere from 2 to 5 hours. Try it with this recipe if you like; it can only improve the flavor!
A little warning, though: if you let the sponge sit longer than 4 or 5 hours, you should reduce the amount of yeast, adding the remainder when you add the other ingredients. The reason for this is that over time, the yeast may work too much, and over-ferment the dough, leading to off flavors and textures. Think of it like this: many hands make short work. Add a lot of yeast, and the rising will be done very quickly. Add a little yeast, and it takes longer to do the same job. Better flavors and textures tend to result from a long fermentation, which is why you’ll see recipes that call for 12 or 24 hour fermentations, but only 1/4 teaspoon of yeast. These recipes also tend to have a higher percentage of water. Wetter doughs are hard, if not impossible, to knead by hand; but luckily, time and the rising action of the yeast forms the gluten in lovely, long, silky strands. (This is the principle behind the NY Times’ famous No-Knead Bread recipe, in case you’ve seen that one.)
Phew! I think it’s time to wrap that up. Here’s the recipe for Split Tin Bread that I mentioned about thirty paragraphs ago! I stirred all this together in a big bowl with a wooden spoon, but if you have a mixer with a dough hook, that would work too. I think doing this by hand is the best way to make the sponge, and after that, I just couldn’t be bothered to wash my mixer. Enjoy!
Split Tin Bread
Adapted from Bread by Christine Ingram and Jennie Shapter
Makes 1 loaf
1 1/4 Lb unbleached white bread flour (about 5 cups), plus extra for dusting
2 teaspoons salt
1 1/2 teaspoons active-dry yeast
1 1/4 cups lukewarm water (105 – 110 degrees F)
4 tablespoons lukewarm milk (105 – 110 degrees F)
1. Lightly grease a 2-pound loaf tin (about 7 x 4 inches, more or less).
2. Mix the yeast with half the water until dissolved. Let stand 5 or 10 minutes, or until foamy.
3. Sift or whisk the flour and salt together in a large bowl, and make a well in the center. Pour yeast mixture and remaining water into center of the flour, and using your fingers, mix in a little flour. Gradually mix in more of the flour from around the edge of the bowl to form a thick, smooth batter.
4. Sprinkle a little more four from around the edge over the batter and leave in a warm place to “sponge”. Bubbles will appear in the batter after about 20 minutes. Add the milk and mix in the remaining flour from around the edge. Mix to a firm dough.
5. Knead on a lightly floured surface for 10 minutes or until smooth and elastic. Place in a lightly oiled bowl, cover with lightly oiled plastic wrap, and leave to rise in a warm place for 1 or 1 1/4 hours, or until doubled in size.
6. Turn out onto a lightly floured surface. Gently press dough into a rectangle the length of the tin. Roll up lengthways, tuck the ends under, and place seam-side down in the prepared tin. Cover and leave to rise in a warm place for about 20-30 minutes, or until nearly doubled in size.
7. Using a sharp knife, make one deep slash lengthwise down the center of the dough. Dust with flour, recover, and let rest for 10-15 minutes.
8. Meanwhile, preheat the oven to 450 degrees F. Bake for 15 minutes, then reduce the oven temperature to 400 degrees F. Bake for 20-25 minutes more, or until golden brown, and sounding hollow when tapped on the bottom. Turn out of tin onto a wire rack to cool.
Notes:
1. My bread hadn’t risen above the edge of the pan when time came to slash it, making the process a bit awkward. It may work better for you to let it rise the full 30-45 minutes, then slash it. Better yet, split the dough in two pieces, and pan them side by side, lengthwise in the tin. They will join together while rising and baking, but retain the namesake “split”.

