Week Nineteen: French Breads
I know what you’re thinking: didn’t I already make baguettes? Yes, I did. But this is a different recipe! This makes use of a sourdough starter, which you might just have in your refrigerator already, if you care enough to be pursuing a good baguette. And man, this is one good baguette.
This recipe manages to avoid any strongly sour flavor, normally associated with many so-called “sourdough” breads. Rather, the flavor is very clean, and yet very complex, tasting mild enough to allow any toppings to shine, but rich and well-balanced enough to stand on its own. The sourdough starter also contributes important acids and enzymes that you simply can’t achieve without good old-fashioned time and patience. Those enzymes and acids improve the texture immensely, as well as deepening the flavor of the bread.
And of course, there’s no shortcut here. Oh yes, good baguettes take their sweet little time. Start to finish, you won’t get through this in less than 29 hours; or you can break it up into two evenings and a morning of work. But before you throw up your hands and exclaim that it’s simply too much, let me assure you that it is most certainly worth every patient hour.
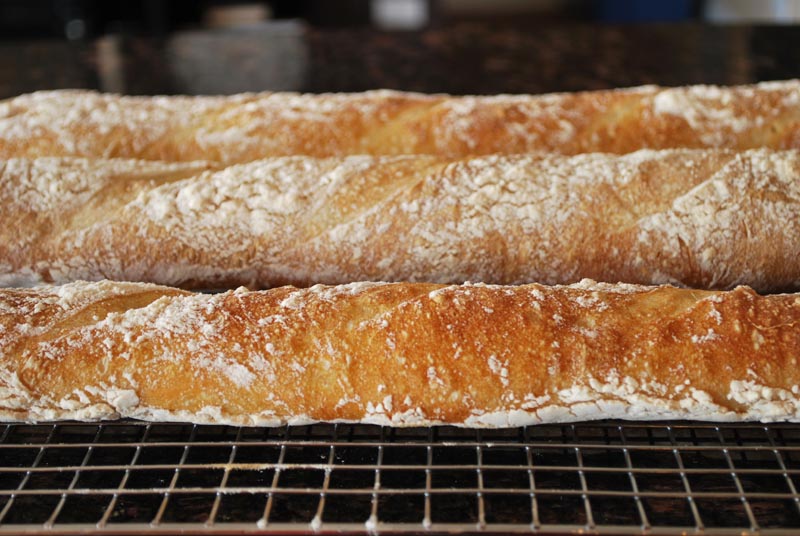
This bread was described by a very kind guest as having “the perfect ratio of crust to chewy, almost wet, interior”. Taking that into consideration, plus the fact that the four of us managed to do in two whole loaves over the course of a single (albeit, rather delightfully extended) brunch, I’d say that’s compliment enough. But try it for yourself, and see what you think. If you have any leftovers, you can send them over to me!
Sourdough Baguettes
Makes 3 baguettes
For starter:
4 3/4 ounces (about 1 cup) unbleached bread flour
1/2 teaspoon instant yeast
1 cup filtered or spring water, room temperature
For dough:
1 1/2 cups + 2 tablespoons (13 ounces) cold water
12 ounces (about 2 2/3 cups) unbleached bread flour, plus extra for dusting
6 1/2 ounces (about 1 1/2 cups) cake flour
2 teaspoons salt
1 teaspoon instant yeast
1/2 cup starter
1. To make the starter: whisk together the flour and the yeast. Add the water, and whisk until well combined and smooth. You should have a batter consistency. Cover loosely, and let sit at room temperature for 24 hours. After this, you can use it immediately, or refrigerate it for up to 3 weeks (see note 1 below). The longer it sits, the tangier it will taste.
2. To make the dough: reserving a handful of either (or both) flours, whisk together the remaining flour and the salt in the bowl of a stand mixer. Add the water. Using the dough hook, mix until just smooth, about 1 to 2 minutes, scraping the bowl down if necessary. Scrape down any errant pieces of dough stuck to the side of the bowl, and cover with plastic wrap, leaving it on the mixer. Let rest for 15 to 20 minutes.
3. Add the starter and the yeast to the mixture in the bowl. Knead for 4 to 6 minutes at medium-low speed, adding the reserved flour as needed to prevent sticking and achieve the proper consistency. The dough should form a cohesive ball, but should not be too firm.
4. Transfer the dough to a lightly-oiled bowl, cover with plastic wrap, and let rise for 1 1/2 hours, or refrigerate overnight. If refrigerating, bring to room temperature for 1 hour before proceeding.
5. Line a baking sheet with aluminum foil, then parchment paper atop that, flouring the parchment well. Turn the dough out onto a well-floured surface. Do not knead the dough. Divide the dough into 3 equal pieces. Pressing on the dough to deflate it, form the pieces into long ropes by lifting and stretching the dough, and rolling it under your palms. If the dough resists, cover and let rest for 15 or 20 minutes. Baguettes are classically 30 inches long, but don’t go crazy over being exact.
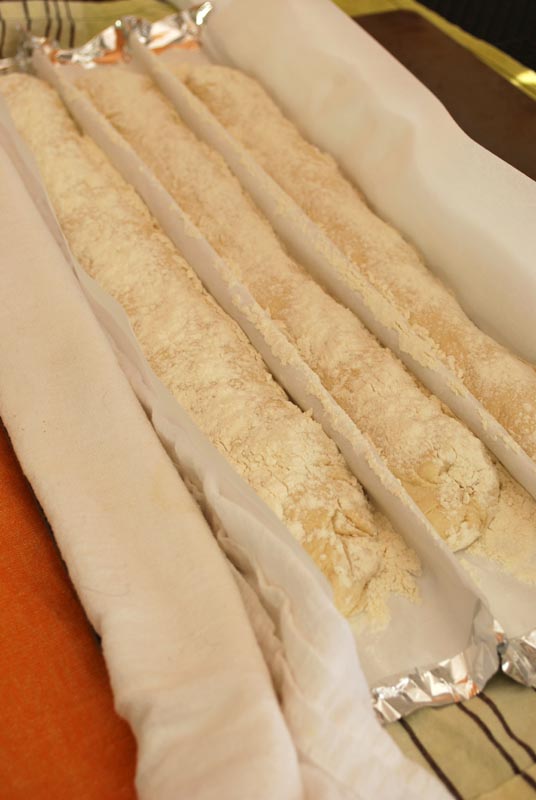
6. Transfer the loaves to the prepared baking sheet, and form a couche (see note 2 below). Dust the loaves well with flour, cover loosely with lightly oiled plastic wrap, and let rise until just doubled in size, about 1 1/2 to 2 hours. Preheat the oven to 450º F one hour before baking, using a baking stone if you have one. Place a heavy pan or rimmed baking sheet on the floor or lowest rack of the oven.
7. Uncover the dough, and pull the parchment paper flat without disturbing the bread, and slide the foil out from underneath (see note 2 below). Using a sharp serrated knife or razor blade, make five quick slashes in each loaf, evenly spaced, and at a 45º angle.
8. Quickly slide the loaves (still on the parchment) onto the heated baking stone, if using. If not, just place the baking sheet in the oven. Immediately throw 3 or 4 ice cubes into the preheated pan in the oven. Bake at 450º F with for 10 minutes, adding additional ice cubes as they melt.
9. Remove the “ice cube” pan at this time, and continue baking the bread an additional 10 minutes or until deep golden brown. Transfer the bread to a wire rack to cool, taking care not to slice it until cooled to room temperature. Wrap and freeze any bread not being eaten that day.
Notes:
1. If you’d like to save the remaining starter, it will keep very well in a lidded container in the refrigerator for as long as you care to keep feeding it. Each time you take some to use in a recipe, “feed” the remaining starter with 1/2 cup bread flour and 1/2 cup filtered or spring water (not tap water, as there’s too much chlorine in it for the yeast). Whisk well to combine, and let stand at room temperature until bubbly, usually just a few hours. Cover and refrigerate. If the starter separates, and a liquid rises to the top, just whisk it back in.
2. If you happen to have a couche, congratulations. If not, you can make one by placing a sheet of aluminum foil on a large baking sheet. Top the aluminum foil with a sheet of parchment. Flour the parchment well, and place the dough on it lengthwise, leaving about 4 inches between loaves. Grab the short edges of the aluminum foil and parchment together, between the pieces of dough, one edge in each hand. Lift up, and the foil and parchment should “tent” between the pieces of dough. Without disturbing the dough, you should be able to squeeze the loaves closer together, nestling them in their new couche. You may need to use rolled up kitchen towels to provide support for the outermost edges (as shown in the picture). To bake the bread, remove the towels, and pull on the parchment and foil until flat. Slide the foil out from underneath, and bake as directed.


I actually couldn’t decide what I wanted for dinner last night because all I could think about was that bread. Which means, next weekend I’ll have to endeavor to make some myself. So thanks for sharing the recipe; I’ve never made a starter before, so we’ll see how it goes. I’ll let you know!
Awesome! Such a huge compliment! Starters are super easy, and the best way to get better texture and flavor from your bread. And you know if you have any questions, or need any help, you know where to find me! Good luck!