Mediterranean Olive Bread

Week Four: Savory Quick Breads

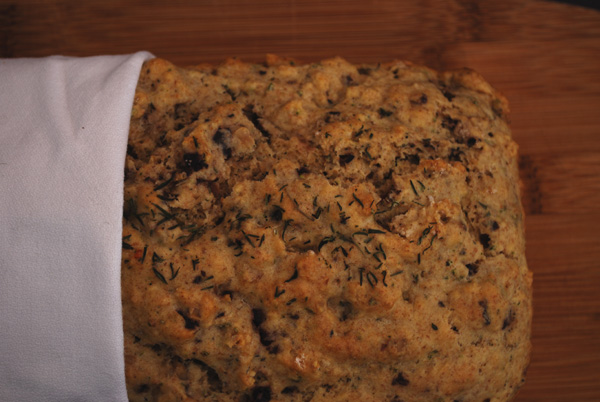
mediterranean olive bread

mediterranean olive bread

Originally, I had planned to make a different recipe, one for Spoon Bread.  Spoon bread is another Southern specialty, more often seen in the Low Country area of the South than anywhere else, alongside Hoppin’ John, Frogmore stew, and other traditional dishes.  I knew it was similar to cornbread, but as I looked at the recipe, I decided it was a little too similar.  Yes, it’s more like a soufflé than a bread, but the basic ingredients are just about the same as for cornbread.  It most certainly is a savory quick bread, but the clincher was that the method is just not a quick-bread method.  Spoon bread is made with a hot cornmeal mush and whipped eggs, rather than simply stirring dry and wet ingredients together.  So I began the search for a different bread I could make then and there, with only the ingredients I had on hand – I refused on principle to run to the store for one ingredient when it was 3 degrees outside.

Many of my cookbooks don’t even mention bread, except in a token loaf or two, so my search was already narrowed somewhat.  Nearly every other cookbook that contains a bread section, though, include no savory quick breads, or only ones that I had already made.  So I went for the sure thing: the Quick Breads section of  The Joy of Cooking, that venerable tome.  I flipped quickly past biscuits and scones, past soda breads and banana breads, past muffins and muffins and muffins. I was starting to wonder if I could finagle something savory out of the apples in the refrigerator, or the chopped onions in the freezer, when my eye fell upon a recipe entitled Mediterranean Olive Bread.  And lo and behold, we had just hosted a dinner party earlier in the week, which meant there were leftover kalamata and herbed green olives still hanging around.  Fortune smiled upon me!

The text accompanying the recipe describes it as “easy-to-make”, good with fresh mozzarella or soft goat cheese, and that it “stays moist for 2-3 days and makes good toast”.  Perfect!  I could imagine what I would serve for dinner in the next few days: mixed greens, dressed with oil and vinegar, topped with toasted walnuts, diced pear, generous wodges of the brie also left over from the aforementioned dinner party, and crunchy cubes of this olive bread, crisped in an oven to make croutons.  Picturing a steamed filet of fish with herbs and yogurt alongside, with a glass of wine, and I could almost taste it.

The bread turned out wonderfully, very easy to make, as promised, and full-flavored without being overwhelming.  There are definitely olives in this bread, but they don’t punch you in the tastebuds.  It is bread first, then with a healthy olive flavor.  The herbs are just right, not taking over the olive flavor, but enhancing it.  This bread was a hit as a post-dinner, mid-card-game snack for impromptu guests, and was light enough to enjoy first thing in the morning for breakfast too.  If you don’t manage to finish a loaf before it goes a bit stale (though I’m not sure how it could possibly go uneaten that long), I could easily see crumbling this bread onto a sheet pan, drying it out in a low oven, and running through a food processor for the most flavorful bread crumbs ever.  It would be absolutely delicious used as a crumb topping over a mild fish, like trout, grouper, or halibut; and just superb mixed with grainy mustard, olive oil, and fresh mint, and pressed onto lamb rib chops.  Keep a loaf of this in the freezer, and you’ll never be at a loss for unexpected hosting duties.


Mediterranean Olive Bread
From The Joy of Cooking

1 1/2 cups all-purpose flour
3/4 cup whole-wheat flour
2 1/2 teaspoons baking powder
3/4 teaspoon dried rosemary, or 1 teaspoon chopped fresh
1/2 teaspoon salt
2 large eggs
1 cup milk
1/4 cup olive oil
1/3 cup finely chopped walnuts
1/3 cup chopped pitted imported olives

1.  Position a rack in the lower third of the oven.  Preheat the oven to 350º F.  Grease an 8×4 (6 cup) loaf pan.  

2.  Whisk both flours, baking powder, rosemary, and salt together.  Mix eggs, milk, and olive oil together to blend, in a large bowl.  Add the flour mixture, and fold until about three-quarters of the dry ingredients are moistened.  Add the walnuts and olives, and fold just until the pieces are distributed and the dry ingredients are moistened; the batter will be stiff.

3.  Scrape the batter into the pan and spread evenly.  Bake until a toothpick inserted in the center comes out clean, 40 to 45 minutes.  Let cool in the pan on a rack for 5 to 10 minutes before unmolding to cool completely on the rack.


Notes:
1.  I used a mixture of dried rosemary, sage, and thyme (no parsley, I’m afraid), since I love the blend of flavors.
2.  My bread felt done after 40 minutes, but took another 4 or 5 to get golden brown on top.

Posted in Quick Breads, Savory | Leave a comment

Northern-Style Cornbread

Week Four: Savory Quick Breads

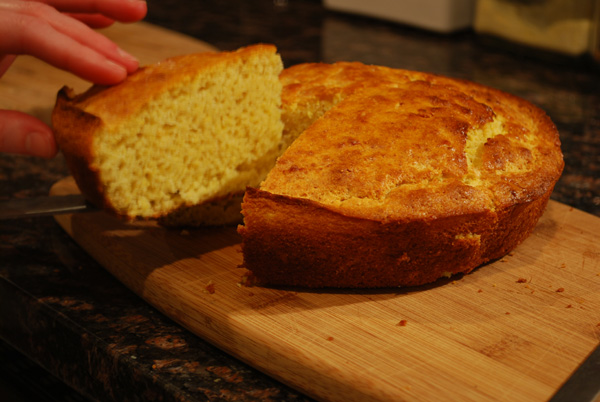
northern cornbread

northern cornbread

Cornbread is a decidedly American bread.  And, like another Southern favorite, the biscuit, there are two major schools of thought concerning the end product.  But while the biscuit is split (no pun intended) into factions that concern texture, i.e. flaky vs. fluffy; the differences in types of cornbread mostly concern flavor.  Cornbread comes in two basic breeds: Northern and Southern.  Northern cornbread is sweeter, tends to be a little more cake-like, and generally uses yellow cornmeal; whereas Southern cornbread is definitely savory and saltier, uses white cornmeal, and can even end up looking like a pancake.  Picking one kind can be like picking children, but if you can get a table full of foodies arguing about what and who makes better cornbread, you’ll see that the difference is no trifle.  (Yes, I am deliberately leaving out Tex-Mex style jalapeño cornbread, and any other sort that has little things added.  We’re talking basics here, people.)

Despite having grown up in the South, I have finally come to terms with the fact that, yes, I prefer Northern Cornbread.  I know, blasphemy.  And it’s funny; usually I don’t like things with a whole lot of sugar in them.  But to me, cornbread without sugar just tastes kind of… flat.  Maybe it comes from growing up on Jiffy Cornbread Mix.  Have you ever had it?  It’s so good!  And cheap!  But being the discerning and health-minded cook that I am, I like to make things from scratch as much as possible.  So there came a time to put away childish boxes of mix, and begin the search for a Good Cornbread Recipe.

I began mixing and baking, tasting, and freezing uneaten portions.  This one was too dry, that one not sweet enough.  That other one calls for sour cream?  Gross.  I turned out loaf after loaf of uninspired, dense, gooey, heavy, dull cornbreads.  None matched up to the fluffy sweetness of the bygone Jiffy Mix.  None was as gently crumbly.  None were the proverbial “just right”.  Until, that is, I picked up a copy of Cook’s Illustrated’s The Best Recipe (and if there was ever a more enticing name for a cookbook, I haven’t seen it).  There, in the bread section, was not one, but two recipes for cornbread: one Northern, one Southern.  I had made enough cornbread at this point to know I was going for the Northern style, and quickly gathered the ingredients.

The batter didn’t look all that different from any other cornbread batter, but it tasted intriguing – not too sweet, not too grainy, not too tangy.  And when I pulled it out of the oven, its cheerfully cracked top smiling at me with a golden, toothy grin, I could tell I was on to something.  Five minutes later, as I tasted my first crumbly slice, I knew I had found it.  I had my cornbread recipe!  The years of searching were over!  And yes, I have modified it the tiniest bit, but only so slightly.  The basics are all there, so feel free to add flavorings as you see fit.  Jalapeños?  Grated cheddar or Monterey Jack?  Corn kernels?  All of the above?  Throw ’em in!  Just be careful of added moisture, since it can throw your cornbread’s texture a little off.

So here I give you the Best Cornbread Recipe I Have Found Yet.  Now, if you’ve got a cast iron pan, you’d better get it out and get it cranked up, because it’s really going to help you out here.  I know the recipe says to use a square metal pan; but come on, it’s cornbread.  Why else do you have that small cast iron pan?  I know you aren’t frying chicken in it.  (Also, I don’t even have a square metal pan.)  Just don’t preheat it first, like you might for Southern-style cornbread; the extra heat will just overcook the outside and make the crust tough.  As for serving, cornbread goes well with any number of foods, but I think there’s no better match in the world for cornbread than a pot of white beans.  Either in the form of soup, white chili, or just plain over rice, cornbread and white beans are like basil and tomatoes, like blue cheese and port, like caramel and salt.  One of my favorite winter dishes is to simmer white beans all day, with rosemary and thyme, serve over brown rice, with a warm and toasty wedge of this fluffy cornbread on the top.  It just doesn’t get any better than that.

Golden Northern Cornbread
Adapted from Cook’s Illustrated The Best Recipe
Makes 9 servings

1 cup yellow cornmeal, preferably stone-ground
1 cup (4 1/2 ounces) unbleached all-purpose flour
2 teaspoons baking powder
1/2 teaspoon baking soda
3 tablespoons sugar
1/2 teaspoon salt
2 large eggs
2/3 cup buttermilk
2/3 cup milk
2 tablespoons unsalted butter, melted, plus extra for greasing pan

1.  Adjust oven rack to center position and heat oven to 425º F.  Grease a 9-inch square metal pan.

2.  Whisk cornmeal, flour, baking powder, baking soda, sugar, and salt together in large bowl.  Push dry ingredients up side of bowl to make a well.

3.  Crack eggs into well and stir lightly with wooden spoon, then add buttermilk and milk.  Stir wet and dry ingredients quickly until almost combined.  Add melted butter; stir until ingredients are just combined.

4.  Pour batter into greased pan.  Bake until top is golden brown and lightly cracked and edges have pulled away from side of pan, about 25 minutes.

5.  Transfer pan to wire rack to cool slightly, 5 to 10 minutes.  Cut cornbread into squares and serve warm.  (Pan can be wrapped in foil up to 1 day.  Reheat cornbread in a 350º F oven for 10 to 15 minutes.)

Notes:

1.  If you don’t have a square metal pan, use a round metal cake pan, or a small, unheated cast iron pan.  Glass will get too hot, and make the crust too tough and overdone.
2.  No buttermilk?  Warm 2/3 cup of milk in the microwave for 30 seconds, then add a splash of white vinegar.  Let it sit for five minutes, then use as directed.
3.  I have increased the amount of sugar in this recipe, to make it what I consider the perfect level of sweetness.  The original recipe only called for 4 teaspoons, so if you prefer it a little less sweet, go right ahead.
4.  Again, mix quickly!  The more you stir it, the tougher it will get.  And get that pan in the oven quickly, since the baking powder starts acting as soon as it touches liquid.

Posted in Quick Breads, Savory | 8 Comments

Pear-Bacon-Cheddar-Walnut Bread

Week Four: Savory Quick Breads

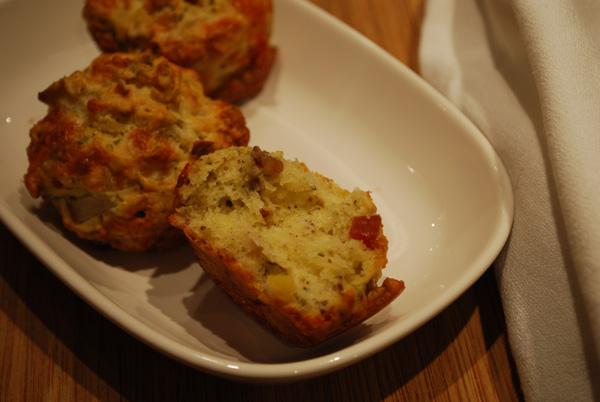
a pear bacon cheddar walnut muffin

a pear bacon cheddar walnut muffin

For the last three months, the wonderful Dorie Greenspan, a longtime contributor to Bon Appétit Magazine, has been running a series of articles, collectively titled “The Baker”.  I’ve ripped out and saved all three recipes, but the first one piqued the most interest.  A dried fruit tart and a spiced bundt cake just don’t have the same thrill as “Bacon Cheddar Quick Bread with Dried Pears”, now do they?  I held on to this recipe, occasionally remembering it in the back of my mind, as I will; and this week was finally the perfect time to make it.

As a side note, I keep printed-out recipes in those clear plastic sheet protectors, an old culinary school trick.  Sometimes, I’ll stack several pages in one holder, to remind myself to soon make something that sounds intriguing, or out of laziness in putting them away properly.  This quick bread recipe was on the back side of another recipe I was making a few nights ago.  As another side note, there is an unfortunate but small gap between the backsplash of the kitchen counter and the wall, from where the old building has settled.  I tend to lean my recipes up against the wall, held precariously in place with the magnetic-racked-knives.  You may see where this is going; but for those who don’t, I lost my recipe behind the kitchen cabinets.  It’s there, stuck behind the dishwasher, probably to be found only when they renovate in thirty years.  Luckily, the internet comes to the rescue!  I found the recipe easily at Epicurious.com, Bon Appétit’s online recipe repository.

Then, oh, and then, I found them: the Reviews.  (dum dum dummm!)  As it turns out, people found this bread to be dry, lacking in flavor, and all in all not really worth the effort.  Horror!  But it’s got bacon!  And cheese!  And pear!  How could it possibly go wrong?  I decided to play around with this recipe, and if it turned out badly, I could just blame the recipe.  If it turned out well, of course, then I would get all the credit.  I can’t lose!

The two most common complaints were that the bread was dry and bland.  Many reviewers found that it cooked about ten minutes (!) faster than the recipe indicated, and one said that the crusty outside was the best part.  Most increased or substituted the flavoring ingredients (cheese, bacon, herbs), and one switched olive oil for butter.  That’s not quite my style, though; I’d much rather make healthier food that tastes good, than just load everything up with butter and bacon.  I feel better when I eat that way, and I’m not going to advise anyone to do any different, especially not for the sake of a quick blog post.  So my mission became this: to make this bread work, without making it any more fat- or calorie-laden.

Thinking to kill two birds with one stone, I replaced the original dried pears with a diced fresh pear.  The fresh one would obviously impart more liquid into the batter, helping with the dryness, and adding flavor along the way.  The bacon, I left alone, because bacon is meat candy and it is delicious.  But I didn’t add any more, either.  I actually decreased the amount of cheese, but that was because I bought one nice block of cheddar for two recipes, and that was all I could safely allot without affecting the other recipe.  I also decreased the amount of olive oil, since I feel that adding a lot of fat is a bit of a crutch for many recipes.  I made up for the lost liquid by adding more milk, to which I added white vinegar, to make buttermilk; which gave it another layer of flavor.  And lastly, I included two tablespoons of ground flaxseed, because it actually adds moisture in addition to a nice nutty flavor.  I baked the very sticky and very chunky dough in muffin cups, hoping to get more of the lovely crust spoken so highly of.  I had done my best, and there was nothing to do now but wait.

One other thing the reviewers noted was the heavenly smell given off by this bread.  Well, duh; it’s got bacon in it.  Of course it’s going to smell great.  But behind the bacony smell was melting cheese, sweet pears dissolving into the batter, crisp nuts, and fragrant sage.  It really was a gorgeous combination of scents.  Surely something that smelled so good had to taste good, too!  But remembering the warnings of those who had reviewed before me, I held my optimism in check.

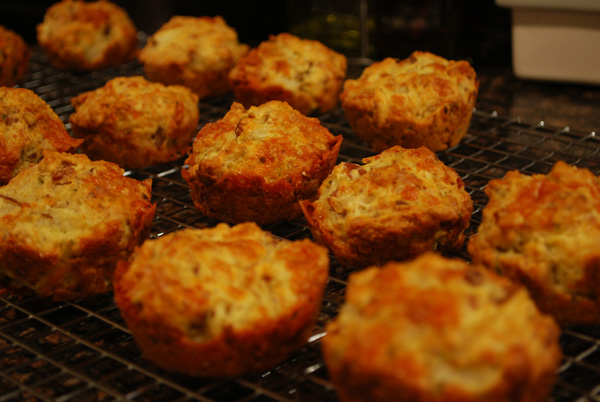
Thirty-five minutes later, I pulled the lumpy little things out of their tins, snapped a few quick pictures, and gave one a less-than-hopeful taste.  Hmm, lovely crusty outside, check; but what of the taste?  The meaty flavor of bacon gave way to sweet pear, all flavor, the texture having cooked away into the bread.  The cheddar might have been a little sharper, but I liked that it didn’t overwhelm.  It was just a little dry, if I’m honest, but I think that wouldn’t have been a problem if I had replaced the decrease in oil with applesauce, or a mashed overripe pear.  These were definitely savory, but also had a surprising sweetness from the fresh pear.  While they would be fine for breakfast, they would make a perfect little snack, or accompaniment for tea.  You know, for those of you who have tea parties.

Dorie Greenspan suggests playing around with the flavorings, replacing any and all with your favorites.  Many online reviewers had success with stronger flavors, like kalamata olives, capers, sun-dried tomatoes, apples, gruyere, rosemary, even sautéed onions and garlic.  If you make it into a loaf, you can take Ms. Greenspan’s excellent suggestion of cubing it, toasting it, and using as croutons in a salad, or to top a bowl of soup.  Depending on the ingredients, it would be a lovely pair with wine.  Try a blue cheese instead of cheddar, sticking with fresh pear and walnuts, and serve with port!


all the little muffins

all the little muffins


Pear-Bacon-Cheddar-Walnut Bread
Adapted from Dorie Greenspan
Makes 1 loaf or about 20 muffins

5 bacon slices, chopped
5 ounces sharp cheddar cheese, divided: 3 1/2 ounces shredded, 1 1/2 ounces diced into small quarter-inch cubes
1 pear, diced into small pieces, or about 3/4 cup
1/3 cup walnuts, toasted and chopped
1 tablespoon minced fresh sage
1 3/4 cups all-purpose flour
2 tablespoons ground flaxseed
1 tablespoon baking powder
1/2 teaspoon salt
1/4 teaspoon ground black pepper
3 large eggs
1/4 cup olive oil
1 tablespoon white vinegar or lemon juice
About 1/3 cup milk

1.  Position rack in center of oven and preheat to 350°F. Generously butter 8×4 inch metal loaf pan, or use nonstick muffin tins. 

2.  Cook bacon in large skillet over medium heat until crisp. Transfer bacon to paper towels to drain.

3.  Measure olive oil in glass measuring cup, add vinegar, and enough milk to measure up to 2/3 cup total liquid.  Let sit about five minutes, then whisk in eggs to blend. 

4.  Combine bacon, all cheese, diced pear, walnuts, and sage in medium bowl.  Whisk flour, flaxseed, baking powder, salt, and black pepper in large bowl to blend. 

5.  Pour egg mixture over flour mixture and stir just until dry ingredients are moistened. Add bacon-cheese mixture and stir until incorporated (dough will be very sticky). Distribute dough evenly among muffin tins; or transfer to prepared loaf pan and spread evenly.

6.  Bake bread until golden on top and slender knife inserted into center of bread comes out clean, about 30-35 minutes for muffins, or 40-45 minutes for loaf. Remove muffins as soon as possible to a cooling rack.  If using loaf pan, cool bread in pan 5 minutes, then turn out onto rack and cool completely. 


Notes:

1.  This bread can be made 1 day ahead. Wrap in plastic, then foil, and store at room temperature.
2.  Be sure not to overmix the dough when adding the cheese, pears, and etc.!  It is very easy to do, since it’s so thick and sticky.
3.  Again, it’s best if all your ingredients are at room temperature.  They’ll mix more easily, and produce a better result.  Eggs and milk, I’m looking at you!

Posted in Quick Breads, Savory | 2 Comments

Quick Whole-Wheat Molasses Bread

Week Four: Savory Quick Breads

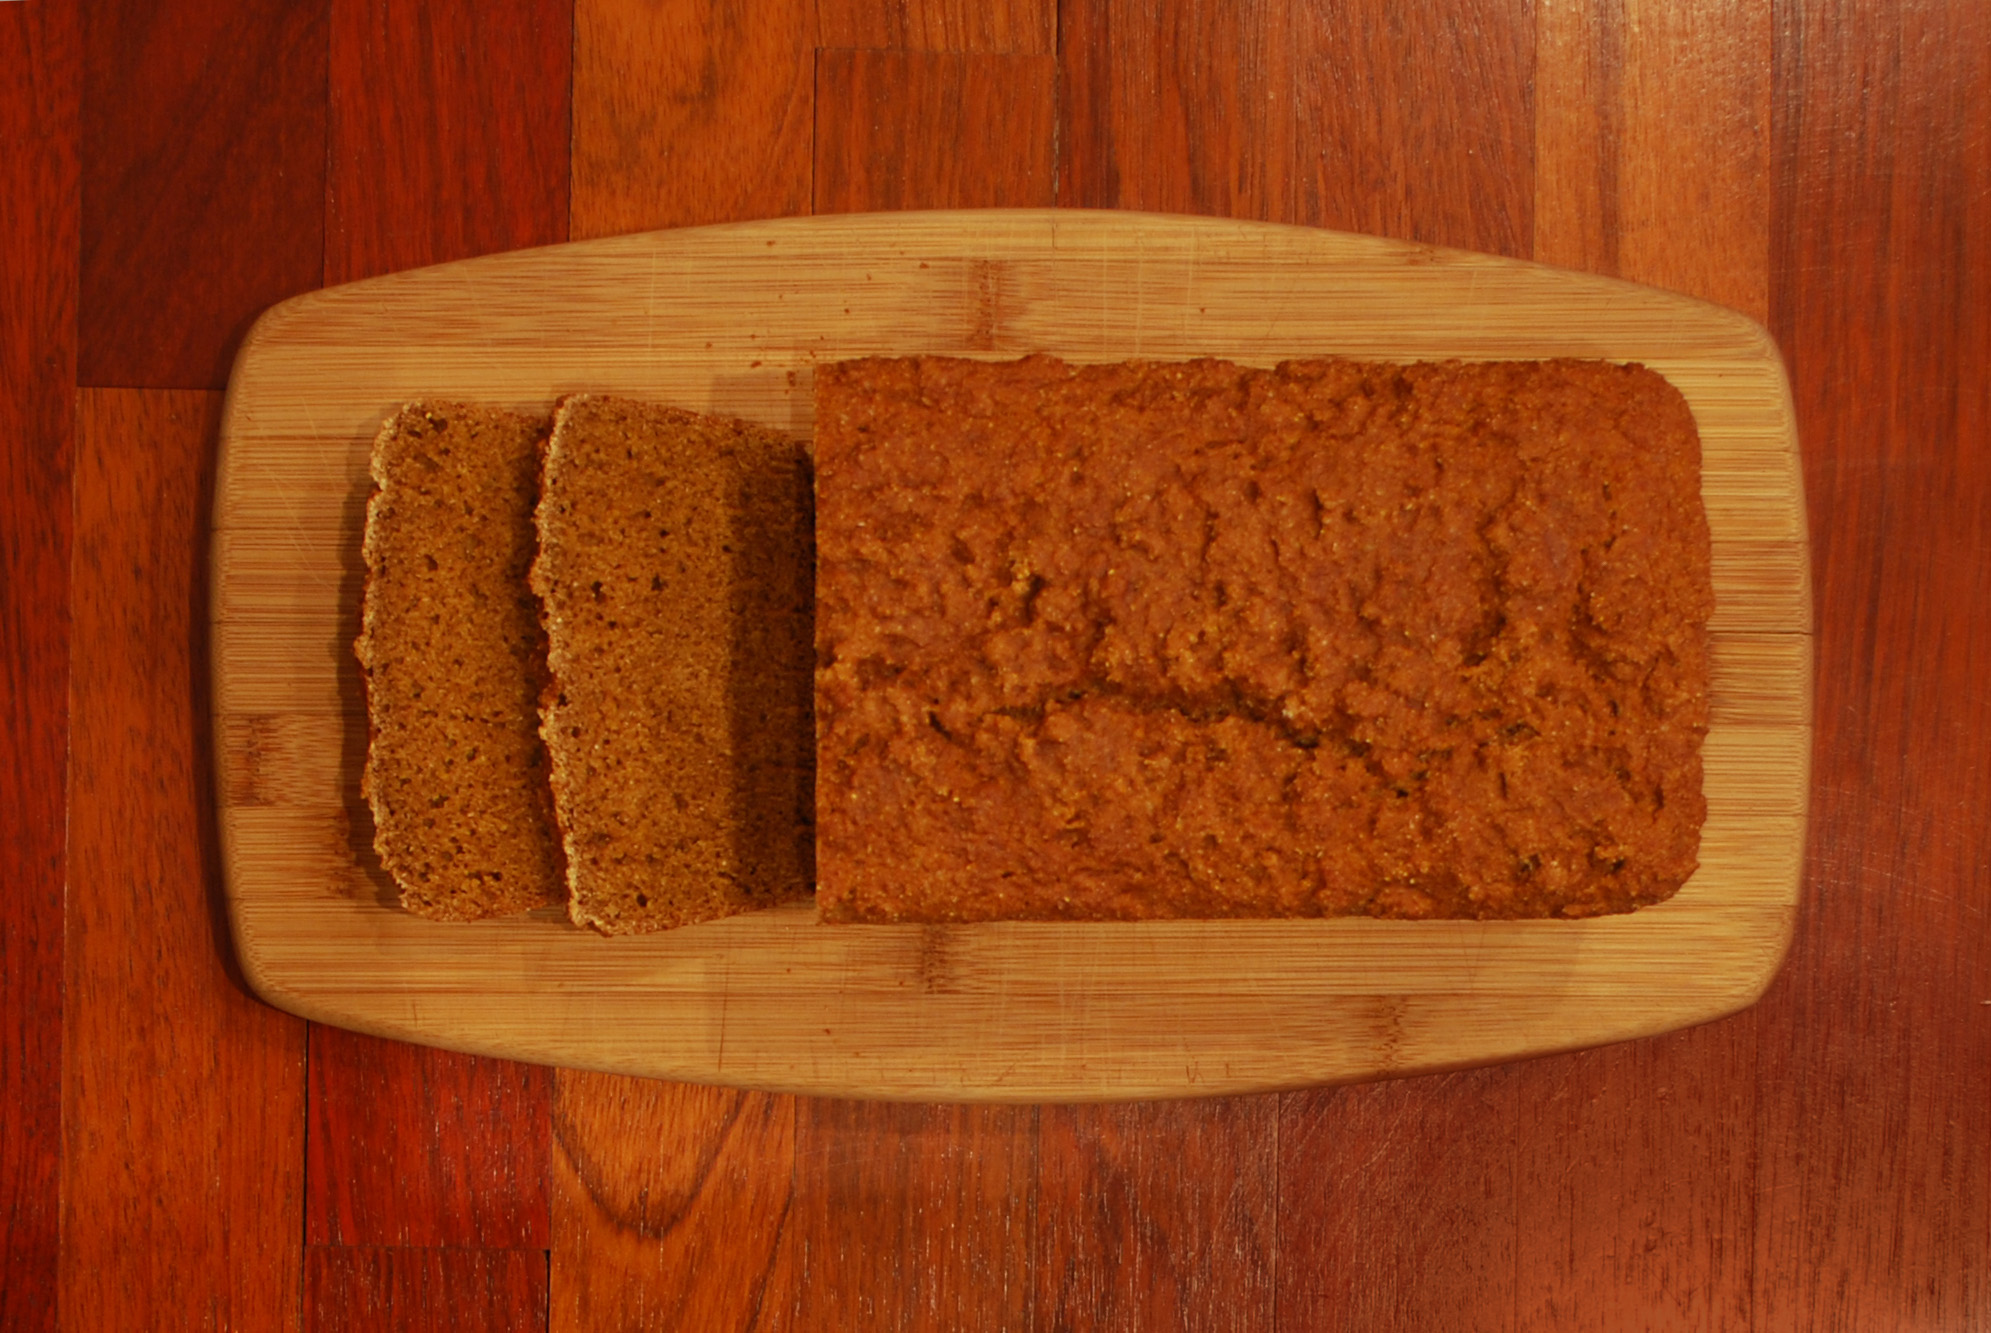
molasses bread

molasses bread

This bread is a textbook example of a savory quick bread.  It is a little sweeter than most “savory” breads, but it’s still decidedly in the savory camp.  Full of whole-wheat flour and cornmeal, it’s nothing but whole grains.  Much of the time, a whole-grain bread can be very dense and brick-like, but this is nothing of the sort.  I wouldn’t go so far as to call it fluffy, but it’s definitely not dense.  It comes together in absolutely no time, and has a rich flavor that belies its rapid creation.

I think this bread is a faster, more grainy take on Anadama bread, a relatively obscure New England specialty.  Anadama bread is usually made with white flour, cornmeal, and molasses, and is yeast-leavened.  This bread, because of all the whole-wheat flour, needs a fair amount of rising power, provided by the relatively high proportion of buttermilk and baking soda.  The buttermilk also gives it a wonderful tangy flavor that cuts the sweetness of the molasses, and mellows the taste into a nice balance.  Paired with a backdrop of nutty whole-wheat flour, set off with the slightly-sweeter cornmeal, it’s a fantastic combination.

The smell is mesmerizing, with a hint of gingerbread from the molasses, and that great “I just baked bread, and you didn’t” scent that will drive everyone else in your condo building nuts.  This rustic loaf would go very well with a lighter meal, a brothy soup, or chicken prepared simply; it’s a little too full-flavored to go really well with heartier fare.  As with most quick breads, it’s made all the better by slicing and toasting quickly under a hot broiler; and you can always gild the lily by adding a pat of butter.  If you’re up for something a little more adventurous, though, top a toasted slice with bits of good dark chocolate – it’s delicious!  If you like it well enough, next time throw in a half-cup of mini chocolate chips, and have a dessert that you can feel pretty good about eating.  (Yes, bread can be dessert!)  The whole grains are certainly good for you, there’s no added fat if you use skim buttermilk or yogurt, and molasses (though very sugary) has vitamins and minerals from here to next week.  (I’m not saying you should eat the whole thing; but come on, it’s certainly better for you than chocolate cake.)

Again, play with the versatility of this bread!  You can play up the sweetness by adding things like orange zest, cloves, or the aforementioned chocolate chips; or you can stay on the savory side by adding a pinch of cayenne pepper, chopped toasted pine nuts or walnuts, or some grated Parmesan or sharp cheddar.  You could even decrease the molasses a bit, though I would add more liquid to make up for it.  Have fun with it!  It’s so fast and easy, there’s no reason not to!


molasses bread

molasses bread


Quick Whole Wheat and Molasses Bread
From The New York Times

Oil or butter for greasing pan
1 2/3 cups buttermilk or plain yogurt, or 1 1/2 cups milk and 2 tablespoons vinegar (see step 2)
2 1/2 cups (about 12 ounces) whole wheat flour
1/2 cup cornmeal
1 teaspoon salt
1 teaspoon baking soda
1/2 cup molasses

1.  Heat oven to 325 degrees.  Grease an 8×4 or 9×5 inch loaf pan, preferably nonstick.

2.  If using buttermilk or yogurt, ignore this step.  Make soured milk: warm milk gently – 1 minute in the microwave is sufficient, just enough to take the chill off – and add vinegar.  Set aside.

3.  Mix together dry ingredients.  Stir molasses into buttermilk, yogurt, or soured milk.  Stir liquid into dry ingredients (just enough to combine) then pour into loaf pan.  Bake until firm and a toothpick inserted into center comes out clean, 45 minutes to 1 hour.  Cool on a rack for 15 minutes before removing from pan.


Notes:
1.  My bread was baked at just over 45 minutes.  Because of the dark color from the molasses, its hard to tell if it’s done just by looking.  You can always remove it from the tin and tap the bottom to see if it sounds hollow, but I find that a little tricky with a hot pan.  I press on the top of the loaf, in the middle, and check the resistance.  If it feels a bit squishy, it needs more time.  If it feels firm (like the outer edges should), then it’s done.

2.  Use unsulphured molasses if possible.

3.  The milk-and-vinegar trick in step 2 works like a charm!  I rarely buy buttermilk anymore, and just do this.  I never seem to be able to use up all the buttermilk before it goes bad, and the same with the last 2 cups of a gallon of milk.  (Though you can use soured milk in place of buttermilk, I don’t really recommend using old buttermilk, unless you’re making cheese.)

Posted in Quick Breads, Savory | Leave a comment

Popovers

Week Four: Savory Quick Breads

popovers

popovers

Now may be a good time to discuss exactly what I mean when I say “savory quick bread”.  Obviously, savory is the opposite (well, basically) of sweet, so there’s that.  The term “quick bread” is defined by Merriam-Webster as “bread made with a leavening agent (as baking powder or baking soda) that permits immediate baking of the dough or batter mixture.”  Typically, quick breads use chemical leavening; that is, they rise due to chemical reactions that produce gases.  They are usually soft-crumbed, and therefore little gluten development is wanted; which means that you, the cook, had better not over-mix that batter, and you’d better move quickly before all those chemical reactions happen.  But there are also quick breads that are physically leavened, which means they rise due only to steam expansion, from any and all liquid in the dough.

Technically speaking, there are actually three methods for making quick breads: the creaming method, the biscuit method, and the quick-bread method.  You may recognize the creaming method from making cakes or cookies – fat and sugar are “creamed” together, then eggs are added, then other liquid flavorings, and lastly the dry ingredients.  This method was used in the Poppy Seed Bread recipe last week.  The biscuit method involves cutting cold fat into flour, then adding just enough liquid to make it come together.  This method is used in scones, pie crusts, and, uh, biscuits.  The quick-bread method mixes the wet and dry ingredients separately, then quickly combines the two.  This is the method I’ll be focusing on all week, since I figure it’s the strictest interpretation of the term “quick bread”.  Not to mention that it’s very easy to find savory breads that use the biscuit method, and nearly (if not completely) impossible for the creaming method, since it really requires sugar.

Having said that, today I’ll be talking about a recipe that kinda-sorta takes liberties with the quick-bread method: popovers.  Usually, you want little to no gluten in a quick bread, which means you mix the ingredients very quickly, just until they’re moist.  Lumps of flour are perfectly fine; in fact, if you don’t have lumps of flour, you’ve probably over-mixed.  WIth the popover, however, a little gluten is just what the chef ordered, and holds in the steam that gives them their characteristic rise.  Alton Brown’s recipe, in fact, uses a blender to mix them up, which creates lots of tiny bubbles that contribute to a taller popover.  A blender!  For a quick bread!  I’d be horrified, if he wasn’t absolutely right.  (The illustrious Mr. Brown did an entire show on popovers, incidentally, which was quite good.)

Popovers are an unjustly obscure baked good.  Based on a Yorkshire Pudding, and rather similar, they are purely American in origin.  They used to be baked with meat drippings rather than butter, which sounds completely awesome to me.  Fast, easy, delicious, and impressive, why have they slipped of the culinary radar?  Who can say?  My best guess is the myth that they must be baked in a very special popover pan.  The absolutely tallest popover does require the use of a popover pan, true; but I sure don’t have room for one.  They do just fine in my muffin tins, and I dare say are much easier to remove from the pan.

If you’ve never had a popover, you’re missing out.  Imagine a warm, mushroom-shaped bun.  The crispy exterior gives way easily to a nearly hollow inside, webbed a little with a soft, doughy structure.  A hint of butter fills your nose and dances over your tongue, if I may be a little twee.  I could probably go on and on about popovers.  I just love them.  Crunchy yet squishy, ethereal yet substantial, simple yet soigné.  They’re the perfect balance.

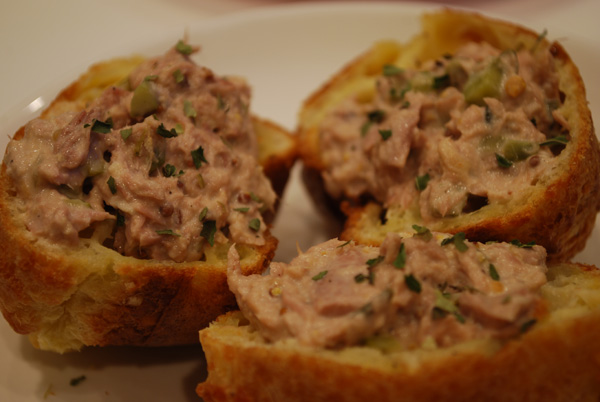
The room for variation is nearly unlimited.  This recipe uses a lemon-pepper combination that is versatile with a wide range of foods, but is especially good with seafood.  I could easily see one of these with the top removed and filled with a good tuna salad.  Served with a side of mixed greens, it’s a perfect light, quick, and special lunch!  Of course, any minced herb, fresh or dried, would be excellent.  Add cloves, cumin, allspice, nutmeg, Creole seasoning, or whatever your favorite spice is!  Blend some up: lemon zest with thyme, rosemary with lavender, cayenne with smoked paprika.  Go nuts!  (Hey, literally… add a tiny bit of finely chopped walnuts or pecans, why not?)  You could even add some sugar, and serve them with a fruit salad inside.  Grate some cheese into the batter, and serve with tomato soup.  You could even tear a plain one in half, spread it with Nutella, and have yourself an ersatz eclair!  Oh, good lord.  I’m so glad I have some of these left over!


popovers filled with my favorite tuna salad

popovers filled with my favorite tuna salad


Lemon-Pepper Popovers
From Gourmet Magazine

3/4 cup whole milk
1/4 cup water
2 large eggs
1 teaspoon grated lemon zest
1 tablespoon unsalted butter, melted, plus more for the pan
3/4 cup plus 2 tablespoons all-purpose flour
1/2 teaspoon salt
1/2 teaspoon black pepper

1.  Preheat oven to 375°F with rack in lower third. Generously butter 6 cups of a popover pan.

2.  Whisk together milk, water, eggs, and zest in a bowl, then whisk in butter. Add flour, salt, and pepper and whisk until batter is combined well but still slightly lumpy.

3.  Divide batter among popover cups and sprinkle tops with additional pepper as garnish. Bake until puffed and golden, about 40 minutes. Cut a slit about 1/2-inch long in top of each popover with a small sharp knife, then bake 5 minutes more.


Notes:
1.  Popovers can be made in 9 buttered (1/2-cup) muffin cups; bake about 30 minutes before cutting slits.

2.  For the highest-rising popovers, make sure all your ingredients are at room temperature, and heat your (ungreased) pan in the oven.  If you’re really detail-oriented, preheat the oven to 400 degrees, then drop it to 375 when you put the popovers in.

3.  I used olive oil instead of butter for greasing the pan, and it turned out just beautifully.

4.  I have not tried Alton Brown’s method of blending all the ingredients up together, but his methods have never failed me, and I’m sure it would work just fine with this recipe.  A whisk worked just fine for me, but who knows?  They may have risen more.

5.  Cutting the slits is a very important step!  If you don’t, the steam will get trapped inside and make them gummy, and then they’ll deflate; and then you won’t have popovers, you’ll have sad little pancakes.  Awww.

Posted in Quick Breads, Savory | Leave a comment

Irish Soda Bread

Week Four: Savory Quick Breads

After the sugar rush of this weekend (poppy seed bread and cinnamon rolls!), I need something savory.  And, if I’m honest, my schedule this week really doesn’t permit me to spend the time needed for a good yeast bread.  I need something fast, that I can just throw together without even thinking about it.  I need a savory quick bread.

A quick google for “savory quick bread” turns up… a whole lot of nothing but random recipes from untested, untrusted sources.  A glance at Food Network’s website and Epicurious.com reveals a few savory bread puddings, but not a whole lot else.  But surely, in all of human history, there must have been some hurried cook with no sugar, who just had to throw together some sort of non-sweet bread, and fast.  Not to mention that just from my own experience, I know there’s some recipes out there.  Thanks for nothing, internets; it’s up to me to fill in the gap.  Thinking for a moment on the subject, I quickly recall not only a few types of bread, but several favorite recipes, given places of honor in my culinary repertoire.  Cornbread is a classic example of a savory quick bread, despite the Northern tendency to add a bit of sugar to the batter.  (Full disclosure: I actually prefer Northern-style cornbread, fluffy and just sweet enough to bring out the flavor of the cornmeal, over the flatter, much more savory Southern cornbread.)  Another favorite is a popover, more air than bread, really, but incomparably delicious.  But noticing the chill outside, the perfect bread for today is Irish Soda Bread.

Apparently, many Americans have an idea of soda bread that includes an ultra-rich dough with sugar and eggs, caraway seeds, raisins, and nuts.  But I’ve truthfully never run across such a thing; or, if I have, it was called something else.  And if you really want to nit-pick, that is not Irish Soda Bread.  If it’s got raisins, it’s called Spotted Dick, or Spotted Dog.  If it’s got sugar, etc., then it’s a cake.  True Irish Soda Bread, the kind I’m more accustomed to, is made of nothing but flour, baking soda, salt, and buttermilk.  (This recipe takes some liberty with that restrictive list, but the result is just wonderful.)

Soda bread first originated in Ireland with the introduction of (wait for it…) baking soda.  Amazing, I know.  But the timing of its arrival is what cemented its, um, popularity: it showed up around 1840.  What else happened in the early 1840s?  Yes, the Great Potato Famine.  Their main source of food gone, the Irish made do with what they could: flour, baking soda, salt, and soured milk, all cheap foods, all somewhat available.  So the bread didn’t exactly become popular because of its own virtues, but those virtues have certainly helped it stand the test of time.  Thick-crusted, but not impossibly so, crunchy and soft at the same time, crumbly yet slice-able, the mild flavor just enough to accompany any food, yet not overwhelm.

I usually like to make whole-wheat soda bread, which is called Brown or Wheaten Bread in various parts of Ireland.  I think the rustic shape of the loaf is perfectly complemented by the grainy texture of whole-wheat flour, and it tends to stand on its own a little better, whereas white soda bread is best eaten with something.  And thinking about it, I don’t remember ever having made white soda bread before, so I thought I’d give it a go.  I think my dough was a little wet, because it was very sticky to work with, and ended up just a bit too dense for my taste.  But the flavor was spot on, with that lovely slight tanginess from the buttermilk, and the crust was crunchy and thick.  I think I still prefer a brown soda bread; but toast a few wedges of this and serve it with a hearty soup, and it just doesn’t get much better on these frigid winter nights.  Though it takes a while to bake and cool, his bread comes together so quickly (the quicker, the better, actually) that you can throw it in the oven, make your main dish, and they’ll be ready to eat at about the same time.  A classic pairing would be Beef and Guinness stew, but why not put it with your favorite chili recipe?  Lentil soup would be a natural, as would a simple (but so good!) Potato and Leek soup.  As for leftovers, I can easily see cubes of this bread crisped in an oven and served as croutons in a salad.  Or if, like me, you’re already brainstorming for next Thanksgiving (what?), crumble half a stale loaf into your favorite cornbread dressing, and have everyone guessing at what you added that made it so good!  It’s super versatile, super savory, and super delicious – you can’t go wrong.


Classic Irish Soda Bread
From Cook’s Illustrated The Best Recipe
3 cups low-protein all-purpose flour, such as Pillsbury, plus more for work surface
1 cup cake flour
2 tablespoons sugar
1 1/2 teaspoons baking soda
1 1/2 teaspoons cream of tartar
1 1/2 teaspoons salt
2 tablespoons unsalted butter, softened, plus 1 tablespoon melted butter for brushing on crust
1 1/2 cups buttermilk

1.  Adjust oven rack to upper-middle position and heat oven to 400 degrees.  Whisk flours, sugar, baking soda, cream of tartar, and salt together in large bowl.  Work softened butter into dry ingredients with fork or fingertips until texture resembles coarse crumbs.

2.  Add buttermilk and stir with a fork just until dough begins to come together.  Turn out onto flour-coated work surface; knead until dough just becomes cohesive and bumpy, 12 to 14 turns.  Do not knead until dough is smooth, or bread will be tough.

3.  Pat dough into a round about 6 inches in diameter and 2 inches high; place on greased or parchment-lined baking sheet.  Score dough by cutting cross shape on  top of loaf.

4.  Bake until golden brown and a skewer inserted into center of loaf comes out clean or internal temperature reaches 180 degrees, 40 to 45 minutes.  Remove from oven and brush with melted butter; cool to room temperature, 30 to 40 minutes.


Notes:
1.  As with all quick breads, speed is the key.  The more quickly you can get it in the oven, the better.  Also, the less you stir or otherwise handle the bread, the less tough it will be.
2.  Feel free to add herbs to this as you like.  Rosemary or sage would be wonderful.

Posted in Quick Breads, Savory | Leave a comment

Cinnamon Rolls

Week Three: Breakfast Breads

I know how easy it is, on those slow weekend mornings.  You could just sleep in and take your time, because that refrigerated can of cinnamon rolls is an awfully tempting car ride away.  But if I could just try to convince you, it really, truly, honestly is worth it to go through the effort to make them from scratch.  Yes, it takes a while.  Yes, you’ll probably be very hungry by the time they’re done.  Eat a banana; they’re worth the work.  Besides, what would a group of breakfast bread recipes be without that crowning glory, the cinnamon roll?  Not much, I’ll tell you right now.


The cinnamon roll is actually a very venerable old pastry.  Well, ok, perhaps not as such; but the tradition of a sweetened dough with cinnamon certainly goes back at least to Medieval times (and possibly back to ancient Rome and Egypt!), when the rare and expensive spice was very highly revered.  That close relation, the sticky bun, was probably more widely known then, but the cinnamon roll likely came from Northern Europe, which certainly seems logical (can you imagine the Italians or Spanish eating cinnamon rolls?).  British and German immigrants brought the confection across the Atlantic to the East coast of the US, notably to Philadelphia.  And I can’t be sure, but I guess that’s where the marriage of the cinnamon roll to cream cheese icing first happened.  Nowadays, it seems you can’t throw a rock in an airport anymore without hitting a Cinnabon.  (And getting arrested probably, but that’s a different blog.)

Now, I’m not actually suggesting you make these every weekend.  They are time-consuming, I’ll give you that.  And I can hardly imagine wanting a cinnamon roll when it’s above 60 degrees outside.  But if you’ve got overnight guests, what better way to gently coax them out of bed than with the smell of fresh cinnamon rolls?  I’m reminded of the (sadly late) comedian Mitch Hedberg’s joke: “I wish they made a cinnamon roll incense because I don’t always have time to make a pan. Perhaps I’d rather light a stick and then have my roommates wake up with false hopes.”  Bless.

But there is a shortcut, my friends!  What, you think I’m actually suggesting you set an alarm on Saturday morning, just for cinnamon rolls?  Please!  Before you go out on Friday night, take twenty minutes and get the dough together, then just stick it in the refrigerator.  Leave the washing up for the morning, and Bob’s your uncle – you’re most of the way there.  When you drag out of bed in the morning, pull the dough out and set it on the counter.  Now go brush your teeth, feed the cat, whatever.  Make coffee, and get the filling together.  After about twenty minutes, it should be warm enough to roll out.  Fill the dough, roll it, cut it, and let it rise.  This is when I take my shower.  Pop them in the oven, and let the heavenly scent carry everyone out of bed and into the kitchen.  As they’re cooling, make the icing, and dig in when you just can’t wait anymore (but fair warning – the hot sugar filling is like napalm if you get into it too quickly).

If the smell hasn’t already convinced you that you’ve made the right choice, one taste will make you swear never to even look at a can of cinnamon rolls again.  Just so slightly crunchy on the outside, with a softly chewy crumb that pulls apart into those familiar curls of dough, dark on one side, dripping icing down the other side.  Buttery, rich, and full of cinnamon, they’re everything a cinnamon roll should be.  Channel your inner Martha Stewart, and give them a shot.  You’ll wish you could make these every weekend.


Cinnamon Rolls with Cream Cheese Icing
From Molly Wizenberg, via Bon Appétit Magazine

Dough:
1 cup whole milk
3 tablespoons unsalted butter
3 1/2 cups (or more) unbleached all purpose flour, divided
1/2 cup sugar
1 large egg
2 1/4 teaspoons rapid-rise yeast (from 2 envelopes yeast)
1 teaspoon salt
Nonstick vegetable oil spray

Filling:
3/4 cup (packed) golden brown sugar
2 tablespoons ground cinnamon
1/4 cup (1/2 stick) unsalted butter, room temperature

Glaze:
4 ounces cream cheese, room temperature
1 cup powdered sugar
1/4 cup (1/2 stick) unsalted butter, room temperature
1/2 teaspoon vanilla extract

For dough:
Combine milk and butter in glass measuring cup. Microwave on high until butter melts and mixture is just warmed to 120°F to 130°F, 30 to 45 seconds. Pour into bowl of stand mixer fitted with paddle attachment. Add 1 cup flour, sugar, egg, yeast, and salt. Beat on low speed 3 minutes, stopping occasionally to scrape down sides of bowl. Add 2 1/2 cups flour. Beat on low until flour is absorbed and dough is sticky, scraping down sides of bowl. If dough is very sticky, add more flour by tablespoonfuls until dough begins to form ball and pulls away from sides of bowl. Turn dough out onto lightly floured work surface. Knead until smooth and elastic, adding more flour if sticky, about 8 minutes. Form into ball.

Lightly oil large bowl with nonstick spray. Transfer dough to bowl, turning to coat. Cover bowl with plastic wrap, then kitchen towel. Let dough rise in warm draft-free area until doubled in volume, about 2 hours.

For filling:
Mix brown sugar and cinnamon in medium bowl.

Punch down dough. Transfer to floured work surface. Roll out to 15×11-inch rectangle. Spread butter over dough, leaving 1/2-inch border. Sprinkle cinnamon sugar evenly over butter. Starting at 1 long side, roll dough into log, pinching gently to keep it rolled up. With seam side down, cut dough crosswise with thin sharp knife into 18 equal slices (each about 1/2 to 3/4 inch wide).

Spray two 9-inch square glass baking dishes with nonstick spray. Divide rolls between baking dishes, arranging cut side up (there will be almost no space between rolls). Cover baking dishes with plastic wrap, then kitchen towel. Let dough rise in warm draft-free area until almost doubled in volume, 40 to 45 minutes.

Position rack in center of oven and preheat to 375°F. Bake rolls until tops are golden, about 20 minutes. Remove from oven and invert immediately onto rack. Cool 10 minutes. Turn rolls right side up.

For glaze:
Combine cream cheese, powdered sugar, butter, and vanilla in medium bowl. Using electric mixer, beat until smooth. Spread glaze on rolls. Serve warm or at room temperature.


Notes:
1.  If it becomes hard to roll the dough out (the dough starts pulling back when you roll it out), cover it with plastic wrap and give it a five minute nap.  The gluten will relax, and it’ll be easy as pie.
2.  The thinner you can roll the dough, the more evenly the cinnamon filling will be distributed through the roll.  Also, the softer the butter is, the better it will spread on the dough.  Don’t be tempted to mix the butter in with the sugar; it works better the way it’s written.
3.  Just because I’m a cinnamon fanatic, I added some to the dough as well.
4.   If you roll the dough up too tightly, the centers of the rolls will pop up when baked.  It’s perfect, if a little hard to handle in slices, when it’s a little loose.
5.  I didn’t have any cream cheese, and I’m not really a fan of cream cheese icing anyway; so I substituted an even mix of sour cream and plain yogurt, and omitted the butter.  It tasted wonderful!  Add 3 or 4 drops of almond extract, if you’ve got it; that gives it a certain je-ne-sais-quoi that I love in quick icings like this.

Posted in Sweet, Yeast Breads | Leave a comment

Flaky Biscuits

Week Three: Breakfast Breads

Could there be a more Southern food than the humble biscuit?  You’ll find it on tables from West Virginia to Texas, from Waffle House to the Ritz Carlton.  True, it’s mainly a breakfast food, but you’ll usually find a plateful next to your fried chicken dinner.  I’ve heard it said that one of the highest compliments one Southern cook can give another is that he or she “makes good biscuits”.  Any houseguest South of the Mason-Dixon line can place a fairly safe bet on a breakfast of a pile of biscuits smothered with red-eye or white sausage gravy.

You know, I don’t think there’s a man, woman, or child in this country that doesn’t love a good biscuit.  The only problem is everyone has their own idea of what exactly a “good” biscuit is.  My personal preference (and the recipe below) is for a tall, flaky one, that you can split apart into perfect halves, and sandwich with sausage or ham.  But I’m certainly not about to turn down a soft, fluffy biscuit, topped with butter and honey.

Quick to make, easy to hold, substantial, and ridiculously delicious when done right, it’s no wonder the fast food chains have taken the biscuit and run nation-wide with it.  Unfortunately.  You know that nasty sort of floury film you get in your mouth after you eat a fast food biscuit?  That’s shortening.  (Full disclosure: I think hydrogenated shortening is one of the most disgusting things ever.  It looks gross and tastes like nothing.  It’s not food.  It’s not going to kill you immediately if you eat it, but neither will a penny.  Neither one is food, though.  End of rant.)  Shortening has a higher melting point than your body temperature, which means that it will just sit there on your palate, grossing up your mouth.  Butter, on the other hand, has a very low melting point.  It melts immediately in your mouth, leaving only a sweet flavor and a pleasant memory.

What does that have to do with biscuits, you ask?  Everything!  What are biscuits, if not about texture?  Whether you like fluffy or flaky, the type of fat you use and the way you handle the dough are both crucial elements in a good biscuit.  Every biscuit recipe out there calls for cold fat.  It has to be cold because if the fat warms and mixes with the flour, it forms a gooey paste and develops the gluten in the flour, making the biscuit flat and tough.  Overdeveloped gluten will of course toughen the dough, but why does a gooey flour/fat paste make a biscuit flat?  Biscuits rise because cold pockets of fat melt in the oven, and the space is taken over by steam and gas from the baking powder.  The air expands and pushes the dough up.  If the fat is mixed into the flour, there’s no little pockets for the gases to go into, so they dissipate out of the biscuit, making them dense and squat.  The more evenly the fat is distributed throughout the dough, the more evenly they’ll rise.

Ok, but what about shortening vs. butter?  Well, your goal is to create tiny pockets of fat, right?  If you’re mixing the dough with your hands, the warmth from your hands will melt the butter, resulting in the dreaded gooey paste.  But they’ll taste good.  Shortening, on the other hand, will remain in little discrete units of unmelted fat for quite some time, resulting in a much better texture, but combined with a terrible flavor.  (This is why mass-produced biscuits, made on rough machines, are full of shortening.)  So the way to get the best of both worlds is to combine the two fats in the dough.  Unfortunately.

Yes, we must use shortening.  Because flaky biscuits are handled so much in the mixing, rolling, and cutting, they need that little extra help from my culinary nemesis, shortening.  (Fluffy biscuits are another matter.  You don’t have to roll them; in fact, it’s best not to.  All butter, all the time over here.)  Thankfully, the relatively small amount of shortening means little to no film on your tongue.  My recommendation is to use a natural non-hydrogenated shortening, if you can.  Whole Foods sells one called Jungle Shortening, made from coconut oil.  It has a nice smooth texture, a lower melting point than Crisco, and is organic; so I consider it a lesser evil.  My favorite way to prepare the fat is to cut it into as tiny pieces as you can, put it on a plate, and stick it in the freezer while you gather the remaining ingredients.

As for the mixing process, that’s a little trickier.  If you have a big food processor, you’re in luck: you’re already halfway to making great biscuits.  If not, it will probably take you a little practice to get the technique down pat.  The goal is to handle the dough as little as possible, so you don’t melt the butter.  Use your fingertips only, since your hand is too hot, and very quickly pinch the little bits of cold fat into slightly smaller and flatter bits.  Use a big bowl for this, since things tend to fly all over if you’re doing it right.  Toss the flour quickly to get the un-pinched pieces off the bottom.  You want to end up with something that looks like cornmeal, or oatmeal (or any other favorite meal, I guess).  If you’ve got some larger bits, it’s ok.  If you’re using a food processor (lucky dog), just pulse the dry ingredients with the cold fat a few times until it looks right.  Remember, practice makes perfect.  I went through culinary school (for baking!), and took me a few years since to get pretty good at it; but then, I often used canned biscuits as a crutch.  Don’t tell anyone.

Speaking of canned biscuits, it’s no wonder they’re so popular.  Just pop the can open, and bake away!  With all the nuance of the ingredients, the precautions you must take, and their short shelf life, from-scratch biscuits really are kind of a pain.  Until, that is, you finally get it.  You finally create, with your own hands, a biscuit that would make your grandmother proud.  It’s just slightly crunchy on the outside, but soft and pillowy inside.  The flavor of butter clings to your tongue, but no nasty film of shortening.  And it might have taken a few tries first, but that only makes the reward that much sweeter.  Well, that, and the honey that’s dripping off the melting butter onto your hand.


Flaky Biscuits
From Cook’s Illustrated’s The Best Recipe
Makes 16 biscuits

After stirring in milk, dough will be very soft and moist, but you should be able to hold it briefly between lightly floured hands without its sticking.  If it turns out wet and sticky, return it to the bowl and sprinkle it with 2-4 T more flour on all sides, gently patting in the flour with your palm.  Let the dough rest another half-minute before removing it to your work surface.  It is best to discard the dough that is left over from the second cutting, as biscuits made with thrice-recycled dough tend to be tough and flat.  If you don’t want to use a biscuit cutter, form the dough into a neat 8-inch square and cut it into squares or triangles with a knife.  This eliminates all scraps and thus all the problems of re-rolling.  No matter how they are cut, these biscuits are best served at once, though leftovers may be wrapped an refrigerated for a day, then reheated for a few minutes in a 350 degree oven.

2 cups high-protein all-purpose flour, such as King Arthur, or 1 cup low-protein
all-purpose flour, such as Pillsbury, and 1 cup bread flour
1 tablespoon baking powder
3/4 teaspoon salt
5 tablespoons unsalted butter, chilled and cut into 1/4 inch cubes, plus 2
tablespoons melted for brushing tops
3 tablespoons vegetable shortening or lard, chilled
3/4 cups cold milk

1.  Adjust oven rack to middle position and heat oven to 450 degrees.
2.  Mix flour, baking powder, and salt in a large bowl or the workbowl of a food processor fitted with steel blade.  Add butter; with your fingertips, a pastry blender, 2 knives, or steel blade of a food processor, mix, cut, or process butter and shortening into dry ingredients, until the mixture resembles dry oatmeal.  (Transfer food processor mixture to a large bowl.)
3.  Stir in milk with a rubber spatula or fork until dry ingredients are just moistened.  Let dough rest for 1 minute, then transfer it to a well-floured surface.
4.  Roll dough into rough 6×10 inch rectangle.  With long edge of dough facing you, fold in both short ends of dough so that they meet in center; then fold dough in half by width, forming  a package of dough four layers thick.  Once again, roll the dough into a 6×10 inch rectangle, about 1/2 inch thick.
5.  Using a lightly greased and floured 2 inch cutter, stamp, with one decisive punch per round, 4 rows of 3 dough rounds, cutting them close together to generate as few scraps a s possible.  Dip cutter into flour before each new cut.  Push the scraps of dough together so that their edges join; firmly pinch the edges with fingertips to make a partial seal.  Pat the dough into a small rectangle, fold it as before, and re-roll until 1/2 inch thick.  Cut out 3 or 4 more biscuits.
6.  Place dough rounds 1 1/2 inches apart on an ungreased baking sheet; brush dough tops with melted butter.  (May be covered with plastic wrap and refrigerated up to 3 hours.)
7.  Bake until biscuits are lightly browned, 10 to 12 minutes.  Serve immediately.


Notes:
1.  It’s important to bake these in middle of oven so they brown evenly.  If they’re too close to the oven floor, the bottoms will get overdone.  If they’re too close to the oven ceiling, the tops may burn.
2.  The mixed flour seems like an unnecessary step, but if you can hit that protein percentage spot on, you’ll end up with the best possible biscuit.  I used King Arthur, but I love their flour anyway.  It’s not chemically treated like most name-brand flours, and it actually has a good flavor, not a chalky taste.  Since breads are mostly made of flour, why would you want to use one that tastes a little off?
3.  I didn’t brush mine with butter, and they turned out just fine.  But they would’ve looked prettier and had a little more crunch on top if I had.
4.  After folding and rolling out again, I cut off the ragged edge of the dough, and smushed those into two “nasty biscuits”, as my mom always called those made with scraps.  The others, I cut into rectangles, since I don’t have a small round cutter.  A bench scraper worked fine, as would a knife.  But whatever you use, just be sure to punch decisively.  And don’t twist those round cutters!
5.  My dough seemed very wet for a biscuit dough, but with plenty of flour on the work surface, it was easy enough to work with.  And since these biscuits turned out better than any batch I’ve made previously, I think it’s a keeper.
6.  Most Southern recipes I’ve seen for biscuits generally include sugar, anywhere from  1 tablespoon to 1/4 cup.  I was about to add some (out of habit?), when I held my hand out of fear of changing the texture.  I guess you could add some if you like, but these were so good without it that I wouldn’t bother.
7.  Sixteen biscuits?  Really?  I had to put my mind to it to get 14 small ones.  These editors obviously aren’t Southern.

Posted in Quick Breads, Savory, Sweet | Leave a comment

Poppy Seed Bread

Week Three: Breakfast Breads


I remember when I was little, and my mom used to bake this recipe into gift-sized loaves.  My dad would dutifully troop into the permanently-sweltering attic, no matter what time of year (it was New Orleans, after all), and come backing down the rickety stairs with a certain box.  Full of cleaned and de-labeled tin cans, once full of god-knows-what and opened on one end only, they would all have to be washed and dried.  I have no idea how many there were (and probably still are), but it seemed like a hundred to me.  That job fell to such little hands as mine and my sister’s that could reach down into the bottoms of the cans.  The mixing of the batter was always taken care of only by Mom, whose practiced hands knew how to stir the ingredients so that they were mixed, but also so the loaves would not turn out tough.

The procedure was always the same: grease and fill the cans, bake directly on the oven racks, set on the stove until you could handle them enough to wedge a knife down the side and pull out the soft bread inside, to set on the tiny cooling racks until room temperature.  Wrapped in plastic wrap and tied with a huge bow, they were always a hit with the giftee; but we retained something wonderful in the loaves’ absence: the smell!  It would float tauntingly in the air, drifting through the house for a day or so, like the Ghost of Bread Past.

Our freezer usually held five or ten of these loaves, or alternatively date nut bread made by the same method, to be brought out for houseguests, special Saturday mornings, or as emergency gifts.  I’m sure I remember guest appearances on the Christmas Eve cookie platter that accompanied egg nog and gift-opening.  Branded with the same ribbing as the cylinder of cranberry sauce at Thanksgiving (it was probably the same can), a three-band-slice was perfect to toast in the oven, or even just to warm in the microwave.  With a pat of butter, it made a perfect and indulgent little breakfast cookie.

Due to the lack of storage space in my current home, I’ve had to relinquish my collection of various tin cans.  So, until I move to somewhere far roomier, those charming little round loaves will have to stay relegated to my memories, and to infrequent trips home to New Orleans, where there always seems to be some far more thrilling culinary exploit to be had.  Fortunately, this recipe works just as well baked in a standard loaf pan or two, depending on how big they are.  If you like the crispy crust, they are ideal as muffins, but only if you have metal muffin tins (silicone just won’t crisp the edges as well).

I hadn’t made this recipe in years.  In fact, I don’t know that I’d ever made it by myself.  But as I mixed the ingredients together with my trained hand, it all seemed so familiar.  The viscous batter, the glut of poppy seeds that always looked like far too many, but never were, the smell of the toasted nuts a harbinger of things to come… I could almost hear the hollow clunk of tin cans.  Baked in a large loaf pan, it domed happily in the middle, making that characteristic split down the middle, revealing a pale interior.  And when I pulled that bread from the oven, there it was: that smell, that wonderful, nutty, baked-good, smells-like-my-childhood smell.  I knew it was right.  After letting it cool for some minutes, I cut a few slices.  They almost didn’t hold together, threatening to buckle under the weight of gravity.  And then, just one taste took me back.  It was a bright Saturday morning in New Orleans, and I was standing at the kitchen counter, surrounded by tin cans.  Wonderful!  But I think my boyfriend said it best, gazing at the slice in his hand with a wide-eyed, somehow almost concerned look on his face, “It’s SO good!”


My Mom’s Poppy Seed Bread

2 cups sugar
1 1/2 cups salad oil
4 eggs
1 teaspoon vanilla
1/2 teaspoon salt
1/2 teaspoon baking powder
3 cups flour
1 cup evaporated milk
2 1/2 ounces poppy seeds (1 bottle)
1 cup chopped nuts

1.  Cream sugar and oil until smooth.  Add eggs and vanilla; beat slightly.
2.  Alternate adding milk and flour (to which salt and baking powder have been added and sifted).  Add seeds and nuts.
3.  Bake in well-greased pan at 325 degrees F, for 1 hour.  Bake bread pans for 40-45 minutes, muffins for approximately 25 minutes.

Makes two 4×8 pans, four 3×7 pans, and 36 muffins.


Notes:
1. I wrote this recipe exactly as I have it.  Salad oil, if you’re not Southern, is just plain vegetable oil.  I actually used olive oil, since I keep it around, and I thought it would go well with the flavor of poppy seeds.  I was absolutely right!  And you know, a little orange zest wouldn’t be out of place either….
2. This recipe can be halved and doubled beautifully.  In fact, I halved it when I made it this time, since I only had half a bottle of poppy seeds, and couldn’t find any at my little corner grocery store.  The batter fit in a 9×5 loaf pan with room to spare, but I think I like mine a little smaller than that (the slices hold together more easily for toasting).  I’m certain my mom has doubled this recipe many times.
3. You can use any nut you like, but I used walnuts.  Pecans would also be lovely, or a mix of the two.  Just be sure to toast and cool the nuts before adding them in.
4. After the ingredients are all incorporated, the mixture will be a thick batter.  As with all quick breads, be sure not to overmix when adding the flour, since stirring creates gluten, which is the enemy here.  Developing gluten makes the bread tough, and we’re going for tender.

Posted in Quick Breads, Sweet | 4 Comments

Bagels

Week Three: Breakfast Breads

Oh, the bagel.  Where would our nation-wide breakfast buffets be without you?  Sliced in half, arranged in neat rows between the heavy-yet-somehow-insubstantial blueberry muffins and the icing-coated flat danishes of various coagulated fillings.  If you’re lucky, there may be a toaster conveniently nearby, maybe next to the iced-down bowls of single-serving cream cheese and the always inadequate plastic knives.  Even if they’ve gone a bit stale, you’re still best off with the bagel.  This is part of the reason I don’t like breakfast buffets.  (The other part: they’re so early!)

The name bagel is from the Yiddish word “beygl”, from Old High German “boug”, which means “ring”.  Once a firm stalwart only of the New York (and surrounding areas, why not) culinary scene, bagel emporiums have sprung up across the nation.  You can find not only good bagels, but great bagels in just about every large American city.  This emigration from NYC occurred in the 60’s, when a bagel mass-production machine was finally perfected by Daniel Thompson.  Coupled with Harry Lender’s new frozen bagel business, they took America by storm.

You may, however notice a difference between these mass-produced, frozen bagels and the ones produced at your local bagelry.  The frozen ones are softer, and lack the characteristic chewy crust.  This is because mass-produced bagels are steamed, not boiled, before baking.  Heresy!  Heresy, I say!  Some bagel company or another used as its slogan the phrase: “If it ain’t boiled, it’s just a roll with a hole.”  And boy, is that ever true.  Boiling the doughnut-shaped dough isn’t just for kicks, it “reduces starch, which, in combination with the high-gluten flour and absence of fat, gives bagels their characteristic chewy texture”, says Bo Friberg, author of our recipe.  It also gives bagels that wonderful glossy sheen, often enhanced with an egg wash before baking.  New York style bagels are boiled in plain water, whereas Montreal style bagels are boiled in water sweetened with honey or sugar, and usually contain egg.  Today’s recipe is a blend of the two: no egg in the dough, and boiled in sweet water.  Bagels also often contain malt, but I didn’t have any, so I had to find a recipe that didn’t use it.  Apologies for historical inaccuracy.  But, then, if we’re getting into technicalities, you don’t actually boil the dough; you poach it.  So there.

But no matter how you boil it, steam it, or slice it, bagels are now just about as American as apple pie.  Try having a bagel-making brunch party: make the dough the night before, stick in the refrigerator overnight, and let people shape and top their own the next day.  The recipe will double if you want people to take leftovers as a party favor.  Set out bowls of cream cheese (at least reduced-fat, please – that nonfat rubbery stuff would be an affront to your hard work) and butter, get someone to bring smoked salmon and champagne for mimosas, and have a blast!  Can you even imagine a better way to spend a cold winter’s Sunday?


Bagels
Makes 16 bagels
From The Professional Pastry Chef by Bo Friberg

1/2 ounce active dry yeast
2 cups warm water
1 1/2 tablespoons honey
1 ounce sugar
1 tablespoon salt
2 pounds 2 ounces bread flour
Poaching liquid (recipe follows)
Egg wash
Poppy, sesame, or caraway seeds, kosher salt, or chopped onion (see note)

1.  Dissolve the yeast in the warm water.  Mixing with the dough hook, add the honey, sugar, salt, and enough of the flour to make a stiff, smooth dough.
2.  Cover tightly to prevent a skin from forming, then let the dough rest in a warm place for about an hour.
3.  Punch down and divide the dough into 3 equal pieces, approximately 1 pound 2 ounces each.  Roll each piece into an 8-inch rope.  Do not use any flour while forming the ropes.  The dough should be stiff and elastic enough to form without flour.
4.  Cut 6 equal pieces from each rope.  Form and roll each of the smaller pieces into ropes about 9 inches long.  Overlap the ends of the ropes about 1/2 inch and press them together firmly against the table, rocking the dough back and forth with your palm to seal the edges together.  Try to make the rings a uniform thickness throughout.
5.  Place the bagels on a sheet pan lined with cloth; canvas is ideal.  Let the bagels rise until they have slightly less than doubled in volume.
6.  Bring the poaching liquid to a boil, reduce the heat to a simmer, then carefully drop the bagels into the liquid and poach for about 2 minutes.  They will sink in the liquid and then slowly rise to the surface.  Once the bagels float to the top, remove them with a slotted spoon or skimmer.  Place them 1 1/2 inches apart on sheet pans lined with baking paper.  If desired, brush with egg wash and top with poppy, sesame, or caraway seeds; kosher salt; or chopped onion.
7.  Bake at 450 degrees F until the bagels are light brown, approximately 12 minutes.  Flip the bagels over and continue baking about 10 minutes longer, until baked through and browned on the second side.

Poaching Liquid for Bagels

1 gallon water
1 1/2 cups or 1 pound 2 ounces honey

1.  Combine the water and honey in a large pan and bring to a boil.
2.  Reduce the heat to a simmer to use for poaching.


Notes:
1. I found it easiest to seal the edges together with a few drops of water, when forming the rings.
2. I mistakenly added way too much yeast, which meant that while I was shaping the bagels, and boiling the water, they overproofed.  Long story short, they didn’t sink in the water (too much air in the dough) when poaching.  But I flipped them over after 1 minute on each side, and they came out just fine.
3. I proofed my bagels on parchment, not cloth.  It worked beautifully.
4. An egg wash is just a little egg (white, yolk, or both), beaten with a little water to thin it out.
5. From Bo Friberg, about the onion topping: Chop the onion finely, blanch in boiling water for about 1 minute, then pat dry with paper towels before topping bagel.
6. As a variation, you can replace 1/3 of the flour with whole-wheat or rye flour.  I used whole-wheat, and ended up with a little extra flour left over.  Caraway seeds would be a perfect topping if you use rye flour.
7. It does get a little tricky to shape the dough into rings as specified in the recipe, so if you have problems with it, it’s perfectly fine to shape the pieces into little balls, then poke holes through the middles.  Just know that the crust won’t come out quite as smooth, nor will it be very thick.
8. For the poaching liquid, I didn’t have that much honey.  Who does?  And I didn’t measure the amount of water, but I just filled up my biggest stockpot, and added about 1 1/2 cups of granulated sugar.  They turned out a little sweet in the crust, but not unpleasantly so.  Next time, I might reduce the amount of sugar a bit, or even just use plain water.  And yes, you do need about that much water.  Otherwise, the bagels waiting their turn will overproof.   You can store and re-use it if you think you’ll be making that many bagels; in which case, I’m coming over for breakfast.

Posted in Savory, Yeast Breads | Leave a comment