Olive Oil Crackers

Week Eight: Crackers

olive-oil-crackers

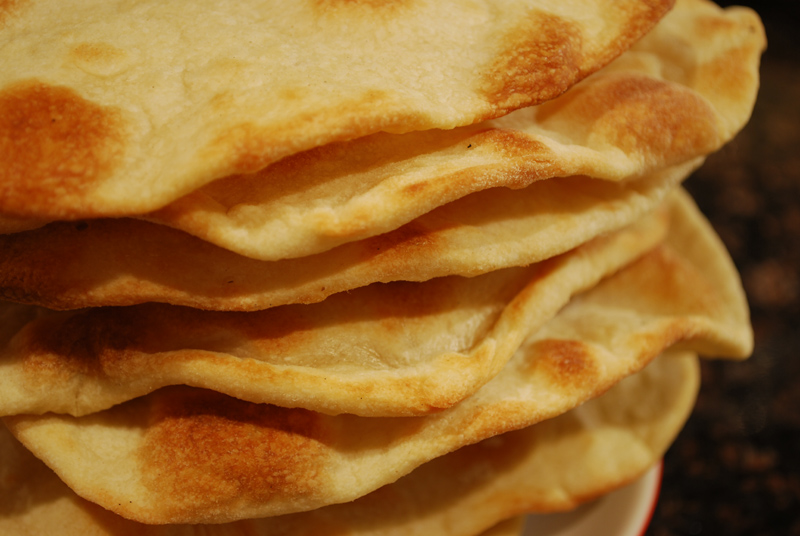
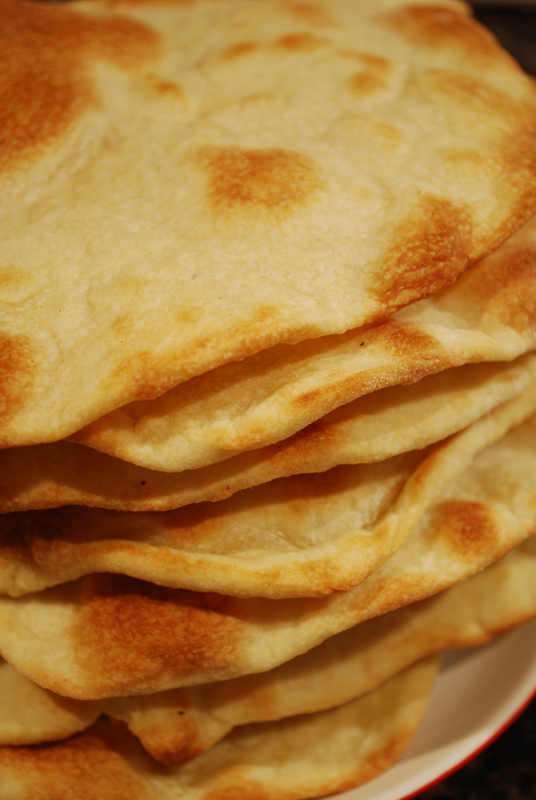
I decided to do crackers this week since they’re hardly ever made at home.  But really, there’s no reason for that.  Yes, I know they’re far easier to just buy at the store, and I have certainly bought my share.  But there’s simply no comparing the flavor of homemade crackers to something you pull out of a box.  Even when they’re plain, crackers from your own kitchen just taste more wholesome, somehow.

But that’s not even taking into account the almost literally endless variations you can get into when making your own crackers.  Want lemon zest with your cracked pepper crackers?  Throw it in!  Don’t like poppy seeds?  Leave them out!  Who wants sweet potato crackers?  And you can even switch up the flavors mid-batch, if you suddenly remember that jar of smoked paprika that would be just perfect with your cumin seeded crackers.  Heck, you can even change flavors after they’re done, by brushing on some olive oil (try flavored oil!), dusting with any herb or spice, and re-crisping in a warm oven.  Forget flavor variation with store-bought crackers, you’re stuck with that box of pungent and stale garlic-herb things until you cave in and throw them out.

You can roll out your own crackers as thin or as thick as you like, to boot.  If you like your crackers hearty enough to pile dips on, leave them a little thicker.  If you like your crackers airy and delicately crisp, roll them thinner.  And if there was ever a reason to get a pasta machine (aside from that gorgeous texture and flavor of homemade pasta), it’s so you can whip up a batch of crackers faster than your guests can arrive.

By the way, did I mention how easy some crackers are to make?  True, there are many recipes that use a pie crust method (when you quickly cut cold fat into flour), which can be a little tricky to do by hand; but if you have a food processor, it couldn’t be easier.  There are, however, cracker recipes out there that are almost laughably easy.  The recipe below, for Olive Oil Crackers, is one of these.  Can you knead dough?  Then you can make these.

This recipe does call for semolina flour, which gives the crackers a great nutty flavor, and also makes the dough a bit easier to roll out.  If you can’t find it, you can certainly use another type of flour (whole wheat, white, white-whole-wheat, rye, etc.), but the results will obviously be a little different.  Certainly not bad, though!  I think they benefitted from an extra dusting of kosher salt rolled into the unbaked dough, but if you’re serving them with salty cured meats, or with cheeses that require a more neutral flavor, then of course leave that off.  The flavor of your olive oil will come through here; a nice fruity one will be apparent, but they are also great with a more inexpensive and more modestly-flavored one.  Any way you choose to make these, I can hardly imagine a more impressive offering next to wine and cheese than a plate of these rustic crackers.  


Olive Oil Crackers
Adapted from 101 Cookbooks

1 1/2 cups semolina flour
3/4 cup whole wheat flour
3/4 cup all-purpose flour
1 heaped teaspoon kosher salt
1 cup warm water
1/3 cup extra virgin olive oil
special optional equipment: pasta machine

1.  Whisk together the flours and salt in the bowl of an electric mixer, or in a large bowl. Add the water and olive oil. If using a mixer, mix with the dough hook attachment at medium speed for about 5 to 7 minutes. If mixing by hand, blend dough together, then turn out onto a floured surface and knead until smooth. The dough should be just a bit tacky – not too dry, not too sticky to work with. If you need to add a bit more water (or flour), then do so.

2.  On a lightly floured surface, shape the dough into a large ball. Cut into twelve equal-sized pieces, and round into a small ball. Gently rub each piece with a bit of olive oil, cover with a clean dishtowel or plastic wrap, and let rest at room temperature for 30 to 60 minutes.

3.  While the dough is resting, preheat your oven to 450º F. If you have a baking stone, heat it up with the oven.

4.  When the dough is done resting, flatten one dough ball. Using a rolling pin or a pasta machine, shape into a flat strip of dough.  Before rolling out to the thinnest thickness, sprinkle on any desired toppings, and roll into the dough.  Pull the dough out a bit thinner by hand if you like, in the way you might stretch pizza dough. Gently lift dough onto a parchment-lined baking sheet, and dock each cracker with the tines of a fork to prevent puffing.

5.  Slide into the oven onto the baking stone, if you have one.  If not, just put the baking sheet into the oven. Repeat the process for the remaining dough balls, baking in small batches of three or four pieces of dough at a time. Bake until deeply golden, and let cool before eating.


Notes:
1.  I was able to roll my dough out at the #5 setting on a (borrowed) pasta machine (out of 6 settings), which resulted in a nice and wonderfully thin cracker.  However, out of fear of rolling too thin, I rolled most of them out at the #4 setting.  Both worked just as well as the other.

2.  Feel free to let loose with toppings on these: any spice, any spice blend, flavored salts, flavored oils, grated cheese, cornmeal, seeds, and on and on.

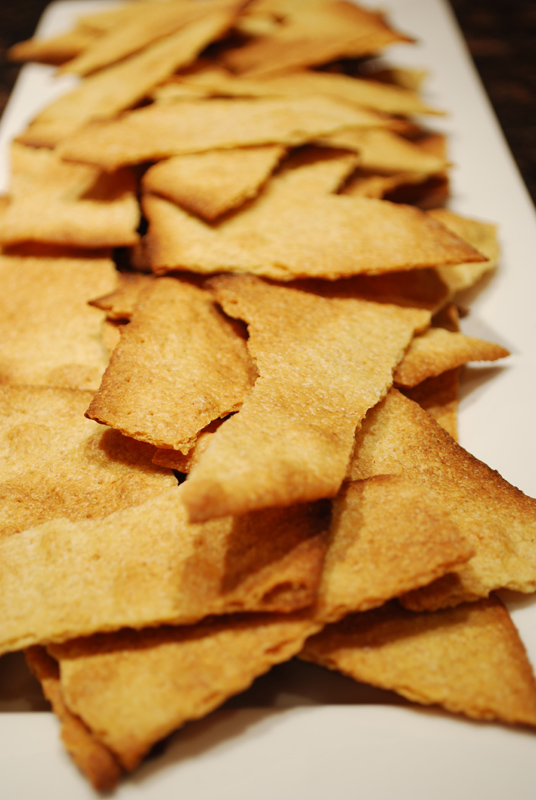
3.  You can leave the crackers in big sheets and let your guests break bits off, or you can break them apart into rustic and variable pieces yourself.  Conversely, you can also cut them into neat and orderly (or not!) pieces with a pizza wheel before baking.

Posted in Savory, Unleavened Breads | Leave a comment

Graham Crackers

Week Eight: Crackers

graham-crackers

I love crackers.  They’ll keep in your pantry just about forever, waiting for you to have unexpected guests.  Procure a wedge of half-decent cheese (or ask your guests to bring one!), plate with a drizzle of honey and a nice pile of crackers, maybe with some grapes if you have them, and you’re halfway to being Martha Stewart.  They’re a hostess’ secret weapon, and I have yet to try a cracker I didn’t like (well, except for maybe those charcoal crackers; they tend to stick in your teeth a bit, but I just can’t resist how pretty they look!).  So I’m devoting this week to crackers of all sorts, from sweet to savory, plain to fancy.

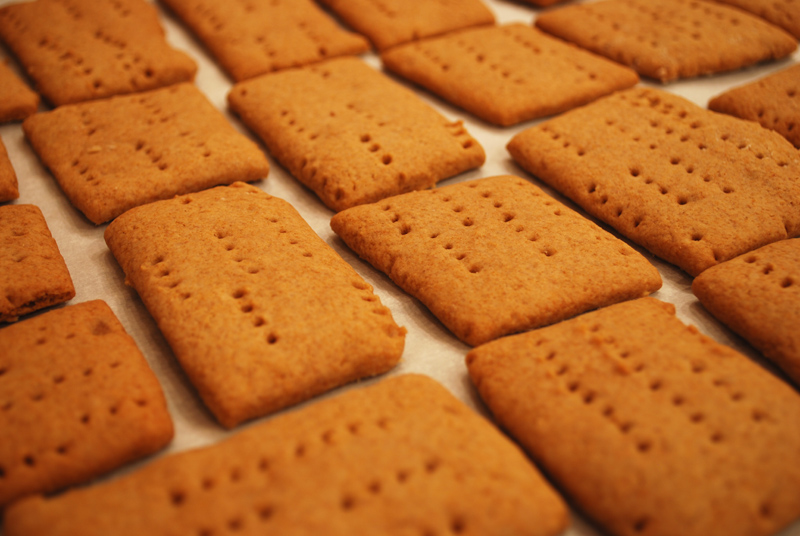
Graham crackers seemed like an appropriate starting place, since I ended last week with white sandwich bread.  They just seem to go together, for some reason.  I never really thought about making my own graham crackers, especially since they’re so readily available in the store.  But when I saw this recipe, and its promise (albeit to the professional pastry chef) that it would only take 30 minutes out of your schedule, I just had to try it.  And it really is just that simple: mix it all together, roll it, prick it (I guess you could even mark it with a “B”), and bake until done.

It could hardly be easier; and holy cow, are they good!  Soft and chewy when warm, they’ll cool into a crisp cracker that’s just absolutely full of flavor.  The smell that fills your house is so incredible and full of warmth; you’d swear there was cinnamon or cloves in the dough, but there’s not a spice to be found in this recipe.  It does advise the use of a stand mixer, which I strongly suggest.  This dough is very sticky, and would be very difficult to knead together by hand.  Any extra flour used in rolling the hand-mixed dough out would make the dough too tough.  So if you’ve got a stand mixer, bust it out.  I imagine a food processor would also do the trick, but in that case, you should substitute all-purpose flour for the bread flour called for in the recipe (the difference in protein levels will make for a more tender cracker).

Now, about that rumor you’ve perhaps heard about graham crackers: yes, it’s true.  The Reverend Sylvester Graham, that dietary zealot, invented graham crackers as part of his Graham Diet that he claimed would cure you of lustful thoughts, and therefore any number of evils, including epilepsy, spinal diseases, and insanity, to name a few.  Unfortunately, the graham crackers we know today bear little resemblance to the Graham Bread he advocated.  Graham Bread was made with unsifted, coarsely-ground whole wheat flour (henceforth called graham flour, in his name), and contained no honey.  Graham crackers, as popularized originally in the 1890’s by the Honey Maid brand from Nabisco, contain a fair amount of both white flour and, of course, honey.

While Rev. Graham may have had some misguided ideas about human (ahem) nature, he was certainly on the right track about many of his dietary advocations.  I’m sure he’d be rolling in his grave if he could see the popularity of the adulterated crackers that today bear his name.  But as much as I enjoy a healthy diet filled with whole grains, fruits, and vegetables, such as he promoted, I still think there’s room for a s’more here and there.  And if you’re unwilling to try one made with crispy homemade graham crackers and gooey homemade marshmallows… well, you might outlive me, but I’m sure I’ll have a much bigger smile on my face at the end of it all.


Graham Crackers
From The Professional Pastry Chefby Bo Friberg
Makes 70 crackers, 2 x 2 inches each

6 ounces bread flour (about 1 1/4 cups)
6 ounces cake flour (about 1 2/3 cups + 1 tablespoon)
2 ounces whole wheat flour (about a scant 1/2 cup)
2 ounces dark brown sugar (about a generous 1/4 cup)
1 teaspoon baking soda
1 teaspoon salt
3 ounces unsalted butter, at room temperature (6 tablespoons)
1/2 cup honey
1 teaspoon vanilla extract
1/3 cup water

1.  Preheat the oven to 325º F.  Thoroughly combine the flours, sugar, baking soda, and salt in the bowl of an electric mixer.

2.  Using the dough hook, incorporate the butter, honey, vanilla, and water.  Mix until a smooth and pliable dough has formed, adding additional water if necessary.  Do not overmix.

3.  Roll the dough out to a rectangle, 10 x 14 inches, using flour to prevent it from sticking.  Dock (mark) the dough with the tines of a fork.

4.  Cut the rectangle into 2-inch squares.  Transfer the squares to a sheet pan lined with parchment paper.

5.  Bake at 325º F for approximately 15 minutes, or until dry.  Store in an airtight container.


Notes:
1.  The dough will look very sticky when you remove it from the mixer; this is just fine.  The extra flour added in rolling the dough out will even it all out.

2.  The crackers may still feel soft after 15 minutes of baking.  They will firm up as they cool.  Be careful not to let them get too brown, since they will be very hard and difficult to eat.

3.  If you don’t have cake and bread flour, you can substitute an equal amount of all-purpose flour (or about 2 2/3 cups).  You may need more or less water in that case (also depending on your level of humidity).

Posted in Sweet, Unleavened Breads | Leave a comment

White Sandwich Bread

Week Seven: American Breads

white-bread

What would a discussion of American Breads be without white bread?  Possibly the most American of American bread, white bread conjures up visions of squeaky-clean, smiling nuclear families, all technicolor and perfect.  This imagery may strike you as good or bad; personally, I vacillate between the two opinions a bit.  While I dearly love a grainy, hearty, so-obviously-good-for-you whole wheat bread, there’s also nothing quite like a white bread sandwich filled with only mayonnaise and the thickest slice of fresh tomato you can manage.  And though I tend to make grilled cheese sandwiches with whole wheat bread, it’s really only because I don’t keep white bread on hand; and you know they just aren’t quite the same.

White bread, as I’m sure most of you know, is made with flour that has the nutritious bran and germ of the wheat kernel removed.  This results in a bread that’s not as good for your health, but one with a finer and silkier texture.  You see, the bran and germ act like sharp little things that get in the way of and interrupt the gluten structure of the wheat flour.  This makes it difficult to make a 100% whole wheat bread, without adding a little white flour to help the structure along.

When people first started separating the bran and germ from their wheat flour, it was very labor intensive, and therefore made the flour more expensive.  Hence, white bread (and other refined products such as white sugar) became the food of the wealthy.  It was many centuries before the nutritive properties of whole wheat flour was discovered, but by then the prestige of white bread was firmly in place.  Additionally, when mass-production of bread became commonplace, white bread was favored, as it keeps longer than does whole wheat bread.  Why?  Well, the germ and bran of the wheat kernel are the only parts that contain any fat.  At room temperature, fat will eventually go rancid, turning the flour – and bread made with it – bad.  (Yes, this means that unless you’re making a whole lot of whole wheat bread, you should probably keep your whole wheat flour in the fridge, or even the freezer.  No, rancid flour won’t kill you; but if your flour smells a little off when you open the bag, it’s best to throw it out, since whatever you’re making will have those same off flavors.)

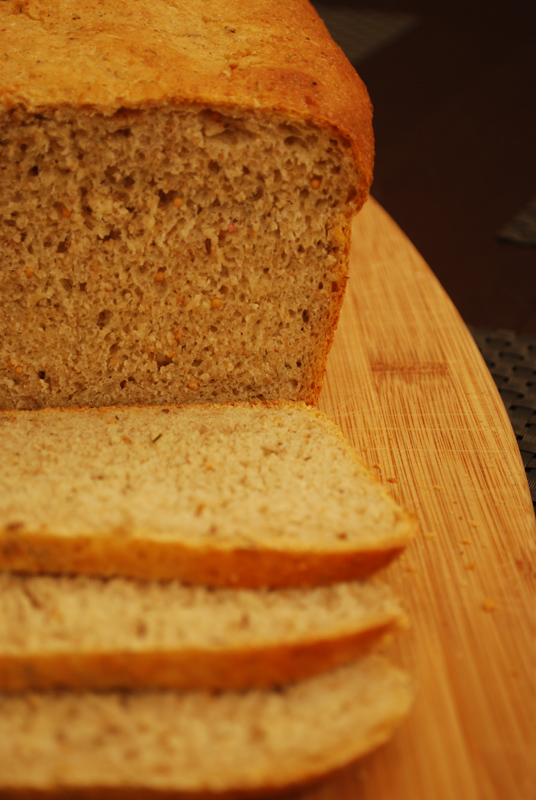
But you don’t really have to worry about that with this bread: this bread is whiter than white, pure as the driven snow, and could give Wonder Bread a run for its money.  Actually, I’d put my money on this recipe – it’s pillow-soft on the inside, but just barely crusty enough on the outside to let you know it’s homemade.  The flavor is sweet and complex, far more so than you’d ever find wrapped up in a plastic bag.  And that’s not even mentioning the total lack of chemicals, dough conditioners, high fructose corn evil, preservatives, and artificial everythings in this bread.  Have you looked at the ingredient list for most white breads?  It’s crazy what they put in there!  This is a bread you can feel good about giving to a child: it may look like pure Donna Reed, but it’s got a heavy shot of Whole Foods sensibility to it.

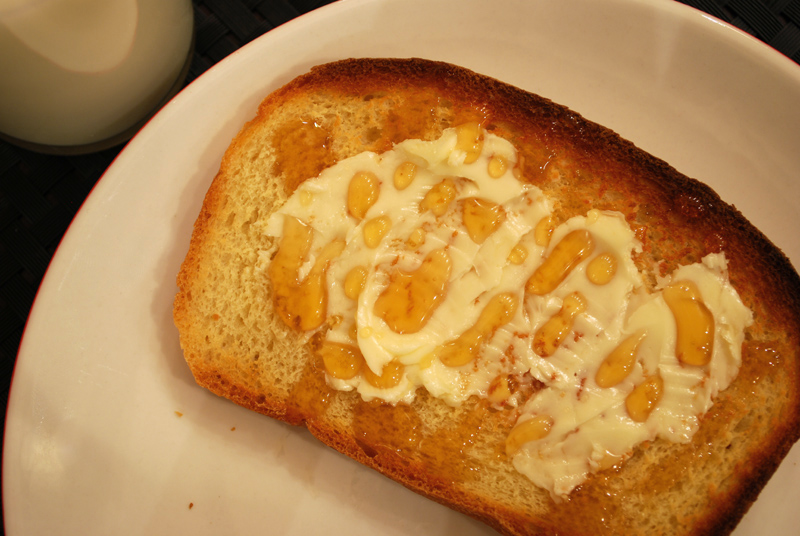
Don’t get me wrong; whole wheat bread is still the healthiest way to go, and I’m not about to give mine up.  But can you really have cinnamon toast with anything but white bread?  And there’s not much that can match a piece of warm white bread with melty and gooey honey and butter, is there?  And sometimes, you find that perfect heirloom tomato at the farmer’s market.  Juicy and plump, it’d be a crime to cook it, and you just don’t have any fresh mozzarella or basil.  Sometimes, you just have to give a tomato the star treatment, on a crunchy piece of your very own toasted homemade white bread.


White Sandwich Bread
From The Best Recipe by Cooks Illustrated
Makes 1 loaf

3 1/2 cups bread flour, plus extra for dusting
2 teaspoons salt
1 cup warm milk (110º F)
1/3 cup warm water (110º F)
2 tablespoons butter, melted
3 tablespoons honey
2 1/4 teaspoons rapid-rise yeast (1 package)

1.  Adjust oven rack to low position and heat oven to 200ºF.  Once oven reaches temperature, maintain heat 10 minutes, then turn off oven.

2.  Mix flour and salt in bowl of standing mixer fitted with dough hook.  Mix milk, water, butter, honey, and yeast in a liquid measuring cup.  Turn machine on and slowly add liquid.  When dough comes together, increase speed to medium and mix until dough is smooth and satiny, about 10 minutes, stopping machine 2 or 3 times to scrape dough from hook if necessary.  Turn dough onto lightly floured work surface; knead to form smooth, round ball, about 15 seconds.

3.  Place dough in a very lightly oiled container or bowl, rubbing dough around bowl to lightly coat.  Cover with plastic wrap; place in warm oven until dough doubles in size, 40 to 50 minutes.

4.  Gently press dough into rectangle 1 inch thick and no longer than the length of your loaf pan.  With a long side facing you, roll dough firmly into cylinder, pressing with your fingers to make sure dough sticks to itself.  Turn dough seam side up and pinch it closed.  Place dough in greased 9x5x3-inch loaf pan and press it gently so it touches all four sides of pan.

5.  Cover with plastic wrap and set aside in a warm spot until dough almost doubles in size, 20 to 30 minutes.  Heat oven to 350º F and place an empty loaf pan on bottom rack.  Bring 2 cups water to boil.

6.  Remove plastic wrap, and place loaf pan with dough into oven.  Immediately pour heated water into empty loaf pan; close oven door.  Bake until instant-read thermometer inserted at an angle from short end just above pan rim into center of loaf reads 195º F, about 40 to 50 minutes.  Remove bread from pan, transfer to a wire rack, and cool to room temperature.  Slice and serve.


Notes:
1.  If, like me, you don’t have rapid-rise yeast on hand, substitute an equal amount of active dry yeast.  Let the dough rise at room temperature, instead of in the warm oven, until almost double (about 2 hours for the first rise and 45 to 60 minutes for the second rise).

2.  This bread will brown more easily due to the milk and honey in the dough.  If it looks like it’s getting too dark, you can loosely tent the loaf with aluminum foil to prevent over-browning.

Posted in Savory, Yeast Breads | Leave a comment

Jewish Rye Bread

Week Seven: American Breads

 jewish-rye


It can hardly be said that there is a more closely-linked bread to any environment than a good rye bread is with the Jewish delicatessens of New York City.  What on earth else would you ever eat pastrami on?  So it is in this spirit that I bring you rye bread today.  But can this particular recipe be called a traditional Jewish Rye, though?  I guess that depends on your definition.


Jewish Rye generally refers to a light rye bread that contains caraway seeds.  Dark, unseeded rye bread is typically called pumpernickel, and you’ll often see the two marbled together.  These two breads are very similar in texture, and somewhat similar in flavor, though pumpernickel is darker.  These types of bread both have a firm tradition in the culinary history of Jews from Poland and nearby areas.  There is another kind of pumpernickel, but it is much more dense and heavy, and is usually called Westphalian pumpernickel.  This bread seems to have origins in Russia, where the milling practices were very different, and produced a far darker flour.  All of these breads, despite their variations, are made mainly with rye flour; so how can three breads made with the same grain turn out so differently?


(Fair warning: this is about to get technical.)  By far the most prevalent grain in Northeastern Europe and in Eastern Bloc countries, rye is genetically very similar to wheat (so similar that they can interbreed).  But unlike wheat, rye flour produces very little gluten on its own, which means that it will have very little structure.  Not only this, but rye has more powerful amylases (they turn starch into sugar) than does wheat, which turn the frail structure into sugars.  Think of it like a building: the weak gluten in rye will make very thin walls that don’t go very tall.  The powerful amylases in rye are like little bugs, munching away at the walls, until they just won’t hold the bread up anymore.  In wheat, however, the gluten makes very strong, thick walls.  The amylase bugs just aren’t able to break that structure down.


So if you make a bread with just rye flour, you’re not going to get much rise out of it, if any.  This is why Westphalian pumpernickel is so dense.  But if you mix rye flour and wheat flour, then you get the flavor of rye combined with the structure of wheat.  This is what your standard deli rye and pumpernickels are made with.  (Deli pumpernickel, though, to replicate the dark flavor of Westphalian pumpernickel, uses additional darkening agents, like molasses and unsweetened cocoa.  More on that later in the year!)


But what if you want your bread even lighter and fluffier?  Well, since the amylases can’t act in an acidic environment, one way to counteract them is to use a sourdough starter.  This will give the bread a fantastic tanginess that really complements the flavor of rye and the standard caraway seed.  What’s that?  You don’t want to wait a week for a sourdough starter?  No problem!  Just use another acid.  But you want it to taste good too, right?  And that’s where the secret ingredient in today’s recipe comes in: it’s pickle juice.


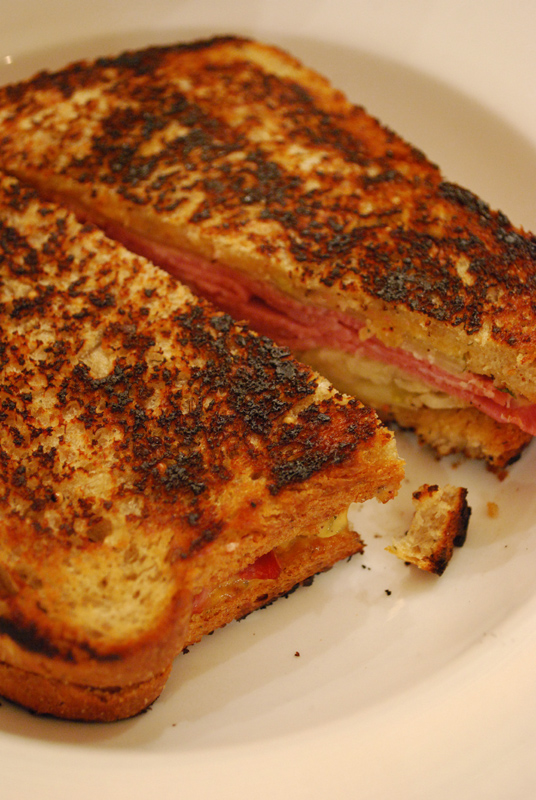
Wait, don’t leave!  Come back!  Yes, I know, this recipe calls for a considerable amount of pickle juice.  It sounds a little strange.  But it makes total sense if you think about it: it’s acidic, so it will keep the little amylase bugs from destroying the structure of your rye; it’s salty, so it will retard the yeast activity, making it have a longer rise and therefore a better bready flavor; and it’s got loads of flavor from the pickles that were soaking in it, which will go beautifully with the flavors of rye and caraway!  Think about it, what do you use rye bread for?  A Reuben Sandwich!  What goes on a Reuben?  Sauerkraut!  What is sauerkraut?  Pickled cabbage!  It all fits! 


This bread bakes up fluffy and full of texture.  The pickle juice is reduced to a very pleasant background tang, and the crust is just perfectly balanced between soft and crisp.  It’s ideal for sandwiches, as the crumb holds together gorgeously, which means you can slice it ultra-thin if you like.  Does the use of pickle juice (a decidedly unusual ingredient) disqualify this bread from being a textbook Jewish Rye?  I say it doesn’t, because it contains caraway seeds, which is usually the litmus test.  But if you’re a purist, then it’s certainly within your rights to disqualify it.  I’ll just be over here, enjoying my delicious corned beef sandwiches all week, while you’re waiting for your starter.  But you can come over and have some while you wait!


reuben

a reuben!


Jewish Rye Bread

From King Arthur Flour


1 tablespoon active dry yeast; or 2 1/2 teaspoons instant yeast

2/3 cup to 7/8 cup lukewarm water*

1/4 cup vegetable oil

3/4 cup dill pickle juice

1 1/2 teaspoons salt

1 tablespoon sugar

1 1/4 teaspoons caraway seeds

1 1/4 teaspoons dill seeds

1 tablespoon yellow mustard seeds; or 1 tablespoon prepared Dijon mustard

3/4 cup instant mashed potato flakes

2 1/2 cups King Arthur Unbleached Bread Flour (10 ½ ounces)

1 1/3 cups pumpernickel flour (or white or medium rye flour) (4 7/8 ounces)

*Use the lesser amount in summer (or in a humid environment), the greater amount in winter (or in a dry climate), and somewhere in between the rest of the year, or if your house is climate controlled.


1.  Dissolve the yeast in 2 tablespoons of the lukewarm water with a pinch of sugar. Allow it to rest for 15 minutes, till it becomes puffy. If you’re using instant yeast, you can skip this step.


2.  Combine the dissolved yeast (or instant yeast) with the remaining ingredients, and mix till clumps form; the dough may seem dry at this point. Let it rest for 20 minutes, for the flour to start to absorb the liquid.


3.  Knead the dough—by mixer or bread machine set on the dough cycle—to make a stiff, but fairly smooth dough. It’ll take about 7 minutes in a stand mixer at second speed, using the dough hook. The dough should clean the sides of the bowl; if it doesn’t sprinkle in a bit more all-purpose flour. We don’t recommend kneading this dough by hand, as it’s hard to develop the gluten sufficiently. If you DO knead by hand, realize that the dough will take longer to rise, and won’t rise as high.


4.  Place the dough in a lightly greased bowl, cover the bowl, and let the dough rise till it’s puffy, about 1 to 2 hours. It may or may not have doubled in bulk, but it definitely will have expanded.


5.  Gently deflate the dough, and shape it into a log. Place the log in a lightly greased 8 1/2″ x 4 1/2″ loaf pan (for a stiffer dough), or 9″ x 5″ loaf pan (for a slacker dough). Press it to the edges of the pan, and flatten the top.


6.  Tent the pan with greased plastic wrap, and allow the loaf to rise till it’s crowned about 1″ to 1 1/2″ over the edge of the pan, about 1 to 1 1/2 hours. Towards the end of the rising time, preheat the oven to 350°F.


7.  Bake the bread for 20 minutes. Tent it lightly with foil, and bake for an additional 20 minutes. When done the bread will be golden brown, and its internal temperature will register 190°F on an instant-read thermometer.


8.  Remove the bread from the oven, wait 5 minutes, remove it from the pan, and allow it to cool completely on a rack before slicing. Store for up to a week at cool room temperature.


Notes:
1.  (From KA Flour) This bread has a sensitive liquid-flour ratio. The finished dough should be smooth and easy to handle; it shouldn’t be sticky. If it’s sticky, understand that the rising times may be shorter; a slacker (stickier) dough usually rises faster than one that’s stiffer.


2.  I used an 8 1/2″ x 4 1/2″ loaf pan, and it worked just fine.  KA Flour recommends a 9″ x 5″ loaf pan if your dough is at all sticky, but either should work just as well as the other.


3.  This recipe calls for dill and mustard seeds, which are just fabulous in with the caraway seeds.  I love seeds in bread, though; if you’re not into the whole “getting tiny bits caught in the teeth” thing, feel free to use dill weed and prepared mustard.  You can also certainly omit the caraway seeds, but then it wouldn’t technically be Jewish rye, an you wouldn’t get that wonderful flavor!  (Oh yeah, I didn’t have any dill seeds.  I used dill weed, and liked it very much.)

Posted in Savory, Yeast Breads | 7 Comments

Flour Tortillas

Week Seven: American Breads

flour-tortillas-2

When I mentioned to a coworker that I was planning on making flour tortillas as part of my American-Bread-themed week, he gave me a strange look.  “Are tortillas American?” he asked.  And it gave me pause – I had simply added them to the list, and not given it a second thought.  Weren’t they actually Mexican?  Well, yes and no.  Thinking on it, I realized that not only were flour tortillas American, they’re just about up there with apple pie.  (Keep in mind that I’m only referring to flour tortillas; corn tortillas are a bit of a different beast.)

First, as the world’s leading exporter of wheat, we have a lot of flour on hand to deal with.  Mexico, on the other hand, grows considerably more corn than flour, which gives America the edge on claiming the flour tortilla as its own.  Second, there is not really a history of flatbreads as made by American Indian tribes in the plains region of the USA (where wheat now grows best).  Their sustenance came more from ready-to-eat (as it were) plants and animals, since most of these tribes were nomadic hunters, and were never in one place long enough to cultivate wheat properly.  So while the idea of a flatbread did originate in South and Central America and spread North, those regions used corn almost exclusively in making those flatbreads.  A flour tortilla didn’t become widespread until wheat production and Mexican cooking crossed paths, in the Southwest US, near the North Mexican border, where it is now inextricably linked with the cuisine.  Third, there can hardly be another bread quite as prevalent in American grocery stores as the flour tortilla.  In every region, you’ll certainly find a package or two in the refrigerated section.  And with the recent popularity of wrap sandwiches, they’re still more available, and in every imaginable different size, shape, and flavor.

So yes, Virginia, flour tortillas really are American.  Anyone who tells you any different is selling something.  And boy, they sure couldn’t be easier to make.  Do you have thirty minutes and a hot oven?  Then you’re all set!  There is one strange ingredient in the short list, however; and it’s one that inspires all sorts of fear in the hearts of health-conscious Americans: lard.  Yes, lard.  Lard, lard, lard.

Let me be one of the first to tell you (assuming you’re under the age of 65 or so) that lard is not bad for you!  Did you know it has much less saturated fat than butter, and far more of the good fat (monounsaturated)?  I’m not saying you should go eat a bucket of it, but it’s actually better for you than butter!  And have you ever tasted chicken fried in lard?  Heaven!  A word of caution, though: don’t just go and pick up that one-pound container from the shelf of that little Hispanic grocery store.  Yes, it is lard, but that stuff at room temperature is very hydrogenated, and is just as bad as Crisco.  If you’re up for rendering your own, that’s the best route, since un-hydrogenated lard is quite rarely sold in this country.  If you can’t be bothered (I certainly couldn’t, this time around!), use the more readily available vegetable shortening.  I found an organic, un-hydrogenated shortening at Whole Foods that works very well in these applications.  Substituting butter won’t really work; you’ll end up with tough tortillas.  All the rolling and shaping requires the ductility of shortening.

So now you know.  Lard is good.  Flour tortillas are definitely American.  And yes, you can buy these in the grocery store; but just try making them once.  The dough is very simple to make, and they roll out very easily.  And just wait until you try them – they’re so subtle and good, you’ll hardly believe that they came out of your own oven!  They’re warm, and chewy, and a little crispy, and just wonderful.  Pick up a rotisserie chicken, some good guacamole, and some tomatoes and cilantro, and you’ve got dinner covered!  Now get out there and make some soft tacos!

flour-tortillas

Flour Tortillas
From The Joy of Cooking
Makes eight 6-8 inch tortillas

2 cups bread flour
1 teaspoon salt
1/4 cup vegetable shortening or lard
3/4 cup warm water (105º – 115º F)

1.  Mix all ingredients by hand or in an electric mixer on low speed until the dough comes together.  Knead on a lightly floured surface, or with the mixer’s dough hook, until smooth, about 4 to 6 minutes.

2.  Divide the dough equally into 8 pieces, and roll them into balls.  Cover and let rest for 10 minutes.

3.  Place a baking stone or an inverted baking sheet in the oven and preheat to 450º F.  Roll out each ball of dough into a 6 to 8 inch round.  If the dough is resistant, move to the next piece and return later to finish rolling.

4.  Place as many dough rounds as will fit directly on the baking stone and bake for about 3 minutes.  When the tortilla puffs or balloons, remove it to a rack to cool.  For crisp tortillas, flip them over and bake on the second side as well.


Notes:
1.  Feel free to mix in any herbs or other flavorings you like.  Try mixing in some cinnamon, and use them in sweet or savory applications like these: fill with pork and slices of grilled (or broiled) peaches; spread with Nutella and just roll and eat; or serve with grilled chicken and a good mole sauce.

2.  I was a little worried at first about the mixing order in step 1 – the recipe just says to mix it all together, with no rhyme or reason!  Don’t worry about it; the warm water helps melt the shortening a little, so it disperses pretty evenly throughout the dough.  If you’re doing it by hand, though, I do suggest either adding the water or the fat first, then the other; it’ll blend into the flour more easily that way.

Posted in Savory, Unleavened Breads | 2 Comments

Parker House Rolls

Week Seven: American Breads

parker-house-rolls

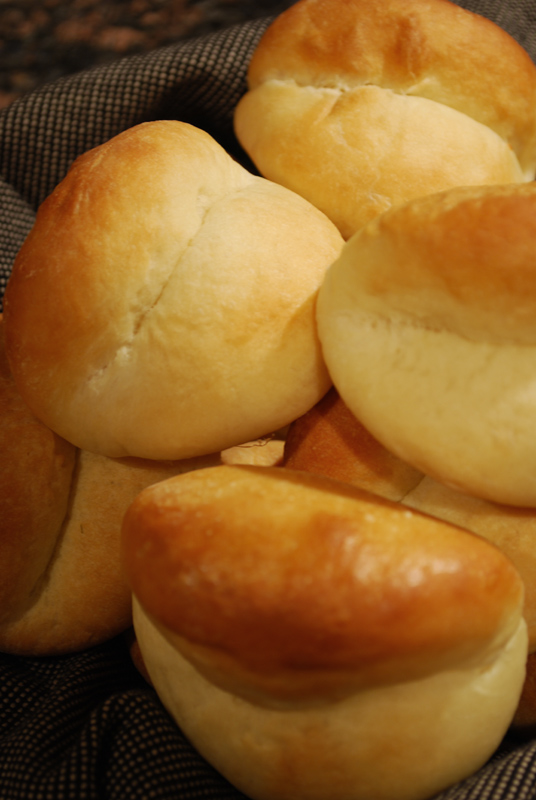
Americans seem to have a sick sort of love affair with soft-crusted, lightly-sweetened, rich-dough white bread.  Personally, I’ll take that crusty baguette any day; but there is a reason breads like these Parker House Rolls became so popular – they’re pretty darn good, when they’re done right.

To refresh your culinary history memory: for a long stretch of time in early America, there was very little flour available to cook with; and what little there was had a high price tag, due to the trouble and expense of shipping it over from Europe.  Resourceful cooks learned how best to handle the most abundant grain, corn, by playing to its strengths and turning it into various quick breads.
Yeast breads were more uncommon, and didn’t have a resurgence until wheat agriculture took off. 

But the American palate had by then become accustomed to a softer bread; and in fact wouldn’t recover a taste for a harder crust until the recent artisan food movement, kicked off by Alice Waters in the 1970’s.  Hence, soft and pillowy dinner rolls have been de rigeur on American tables for about as long as America itself has been around.  Parker House rolls themselves appeared in the 1870’s, at the posh Parker House Hotel in Boston.  They are one of those rare foods whose origins can be traced to a specific time and place.  The story of its creation has (of course) been lost to time, but tales generally involve an angry chef grabbing handfuls of made-up rolls, and slamming them into a hot oven.  With no time to make more, he was forced to serve them, and they were a hit.  (Me, I can’t exactly see any chef worth his apron literally throwing anything into an oven and then serving it, but it does make for a good story.)

The unique shape is what sets these rolls apart: they are rounded, or cut out of a thick sheet of dough, then flattened in the middle, and folded over to make a sort of clamshell shape.  As they rise and bake, they puff and open up a little, making for more surface area to turn into a lovely crust.  The dough usually contains milk and butter, and is slightly sweetened.  When made correctly, it tastes rich and light at the same time, soft and gently chewy, and just plain good.

So, yes; generally speaking, I prefer a crisp crust on my bread, with a leaner dough underneath.  But that sort of dough just won’t work well in this make-up.  To handle all the rolling and folding and crimping, you need a soft bread that can take that abuse, and not get its gluten all in knots.  And when you pull those little darlings out of the oven, all golden brown, and almost literally smiling at you… well, even I wouldn’t be able to turn one down.  Could you?


Parker House Rolls
From The Joy of Cooking
Makes 18 rolls

2 1/4 teaspoons active dry yeast (1 package)
3 tablespoons warm water (105º – 115º F)
1 cup warm milk (105º – 115º F)
5 tablespoons melted unsalted butter
3 tablespoons sugar
1 large egg
1 teaspoon salt
2 cups bread flour
1 1/2 – 2 cups all-purpose flour
Melted butter or milk for brushing on rolls

1.  Combine yeast and warm water in a large bowl or in the bowl of an electric mixer and let stand until the yeast is dissolved, about 5 minutes.

2.  Add the warm milk, melted butter, sugar, egg, and salt.  Mix by hand, or on low speed, for 1 minute.

3.  Gradually stir in the bread flour, and then add the all-purpose flour until the dough is moist but not sticky.  Knead for about 10 minutes by hand or with the dough hook of your mixer on low to medium speed, until the dough is smooth and elastic.

4.  Transfer the dough to an oiled bowl and turn it over once to coat with oil. Cover loosely with plastic wrap and let rise in a warm place until doubled in volume, 1 to 1 1/2 hours.

5.  Divide the dough equally into 18 pieces (just over 1 ounce each).  On an unfloured surface, roll the dough pieces into balls, covering the remaining dough.  Loosely cover the balls with plastic wrap and let rest for 10 minutes.

6.  Grease a large baking sheet, or line with parchment paper.  With a rolling pin, roll just the center of each round to create an oval (do not roll over the edge as the edges should be slightly thicker than the center).

7.  Brush the tops lightly with melted butter and fold the ovals in half so the two elongated ends meet.  Place the rolls in rows 2 inches apart on the baking sheet.  Cover with oiled plastic wrap and let rise in a warm place until doubled in volume, about 1 hour.

8.  Preheat the oven to 425º F.  Brush the tops of the rolls with melted butter or milk.  Bake until golden brown, about 15 minutes.


Notes:
1.  I used olive oil instead of butter for brushing on the tops of the rolls.  It worked just fine.  I did, however, use milk on the tops.

2.  I don’t think I rolled mine out flat enough, since they all opened up while rising.  I think these rolls are supposed to be fairly clamshell-shaped, and mine turned out looking a bit like wax lips.  But whatever floats your boat, right?

Posted in Savory, Yeast Breads | Leave a comment

Spoonbread

Week Seven: American Breads

spoonbread-and-salad

There’s a major trend in the culinary world right now, one that involves taking formerly-uncool or home-style foods, and elevating them to fine-dining standards.  Think s’mores to follow your duck à l’orange, macaroni and cheese with cave-aged gruyere and house-made pasta, or hamburgers topped with foie gras.  Need I even mention the revival of fondue?  In this same vein, the once lowly spoonbread has been making a welcome resurgence, at least in fine Southern restaurants.

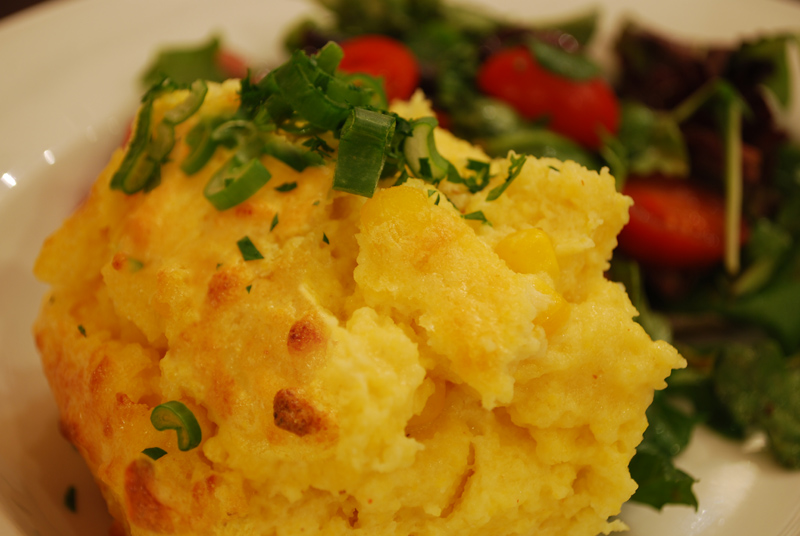
There was once a time when you would only find spoonbread in the occasional Southern kitchen, far less often than you would see its simpler cousin, cornbread.  Spoonbread is a sort of cross between cornbread, polenta, a soufflé, and corn pudding.  Properly made, it has an almost custardy interior, a crunchy crust, and is wonderfully soft and fluffy throughout.  It is leavened with whipped egg whites, which is why it takes a little more work than a standard cornbread.

Certainly, this unusual blend of qualities is part of what has enticed such Southern toques as Frank Stitt to include the humble spoonbread on their menus.  After all, when you’re turning out the most heavenly plates of Carolina quail with wild mushroom and hominy stuffing, or impeccable Gulf shrimp over local stone-ground grits, what’s whipping up a little spoonbread on the side?  Another part of the reason for its renaissance is that these chefs, raised on bacon grease and biscuits, could no longer overlook the odd gap between what they ate at home and what they cooked at work.  Who’s to say that a good spoonbread can’t stand up to the most perfect savory French soufflé?  No one, that’s who.  Both light and fluffy, picking one over the other would be like picking children.

Spoonbread once was actually far more popular than cornbread, because of this lightness.  Fluffy cornbread relies on baking powder for its lift; without it, it is a dense, grainy thing.  But since baking powder wasn’t around before the mid-1800s, cooks had to rely on eggs to provide lift in corn-based breads.  And since wheat agriculture had yet to really take off in America, corn was basically it for grain.  So, rather than choke down pancake after pancake of flat johnnycakes, many cooks opted to mix a cooked cornmeal mash with whipped eggs, producing a soft and light bread, one that you could even eat with (oh, yes) a spoon.  But with the advent of baking powder, a better cornbread could be made far more quickly than eggs could be whipped.  Spoonbread fell to the wayside, a culinary relic brought out for special occasions, often dressed up with cheese and whole corn kernels.  But thanks to those Southern chefs who are bringing the food of their mommas (and their momma’s mommas) to some of the finest tables in the nation, you may just see some spoonbread on a menu soon.

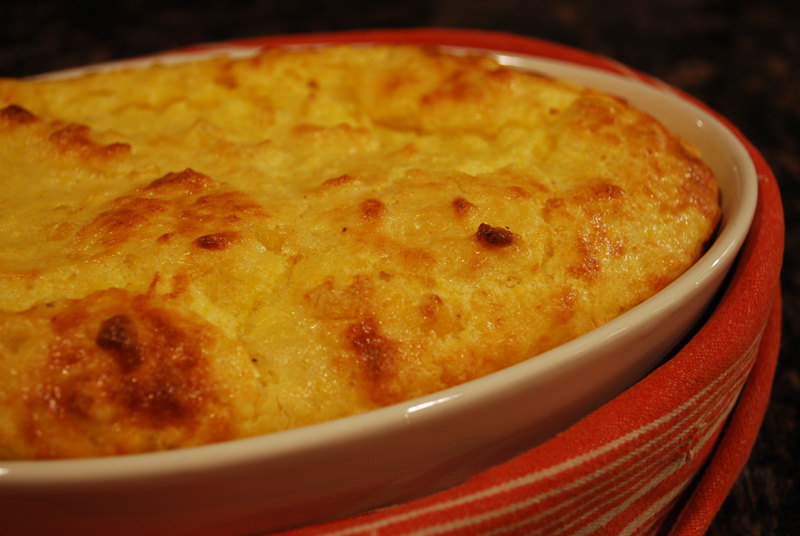
So, is this even a bread?  Is it a soufflé?  Is it a pudding?  But really, does it matter?  The way I figure, it’s a kissing cousin to cornbread, which itself is definitely a bread; plus it even says the word “bread” in its name.  It’s starchy and baked and fabulously good, and that’s close enough for me.  I hope you’ll agree!

spoonbread

Spoonbread
Makes 6-8 servings 

2 1/2 cups milk
2 tablespoons unsalted butter
1 teaspoon salt
1 cup cornmeal
3 large eggs, separated
1/8 teaspoon cream of tartar (optional)
1/2 cup cream
3-5 dashes hot sauce
1 large pinch cayenne
1/2 cup grated sharp cheddar cheese
3/4 cup corn kernels (optional)

1.  Position a rack in the center of the oven.  Preheat the oven to 375ºF.  Grease an 8×8 inch baking pan, or a large soufflé dish.

2.  In a large, heavy saucepan, bring the milk, butter, and salt to a simmer over medium heat.  Reduce the heat to low, and add the cornmeal in a slow, steady stream, whisking constantly to prevent lumps.

3.  Increase the heat to medium and cook, stirring constantly until the mixture is thick and shiny, 3 to 4 minutes.  Remove from the heat and set aside to cool for 3 or 4 minutes.

4.  Whisk egg yolks and cream together.  Add cheese, hot sauce, and cayenne.  Stir gradually into the cornmeal mixture.  Add corn kernels.

5.  Beat egg whites and cream of tartar in a mixer on medium speed until the peaks are slightly stiff but not dry.  Fold one-third of the egg whites into the cornmeal mixture to lighten it, then gently fold in the remaining whites.

6.  Scrape the batter into the prepared baking dish and spread evenly.  Bake until the bread has risen like a soufflé, with a golden brown surface, and a knife inserted in the center comes out clean, 25 to 35 minutes.  Serve immediately.


Notes:
1.  If you like, you can add some chopped green onions at the same time as the corn kernels.  Corn and scallions are so good together!

2.  You can use either fresh, frozen, or canned corn kernels.  If you have them frozen, add them to the still-hot cooked cornmeal mixture to thaw them a little.

3.  This recipe can apparently take to any amount of ingredient-tweaking.  I found recipes for spoonbread that varied wildly in the amount of milk, corn meal, and eggs used.  Some used buttermilk, others added cheese, some omitted both.  The recipe I’ve given above will produce a fairly loose end product; if you like it a little thicker (more bready), try omitting the cream added to the egg yolks (step 4).  If you like it a little more soufflé-like, add more eggs.  Don’t expect to be able to serve a slice like a piece of bread, though; spoonbread should be too soft to eat with your hands.

4.  Traditionally, spoonbread never has sugar in it.  If your spoonbread includes sugar, you’d best be calling it “corn pudding”!

Posted in Quick Breads, Savory | Leave a comment

Greenfield Village Hobo Bread

Week Seven: American Breads

a-bread-a-day-hobo-bread

America has a far different history of bread than does Italy, or France, or any other “old world” country.  Why, you ask?  Well, you have to look at agriculture to answer that.  There is a long, rich history of wheat growing and baking in Europe, even going back to Ancient Roman times.  Over centuries, people developed and perfected recipes for that wheat, and also for rye, barley, oat, and any other grain available to them.  When those people came to America, bringing their beloved recipes with them, they were befuddled by the grain they found growing most plentifully: corn.  

Unlike wheat flour, corn flour produces no gluten, which is basically the most important part of a good wheat bread.  So essentially, bakers had to scrap everything they knew about making bread, and start over.  Corn flour, though it won’t ever produce a baguette, does work very well in making quick breads; that is to say, breads where gluten formation is undesirable.  Early European-American cooks learned quickly how to stir together cornbread, johnnycakes, hoe cakes, and any number of corn-based breads.  For quite a long time, wheat was imported across the Atlantic at great cost, and was treasured highly.  Corn was looked down upon as a food for the poor, or for the Savages.  (Racism, I know! Shocking!)

And when they finally managed to grow wheat, into those proverbial amber waves of grain, they adapted it into their quick bread repertoire, and drew on the memory of those old European recipes, producing biscuits, pancakes, soft rolls, and various tea breads, such as this Hobo Bread from Michigan.  (Yes, I’m rather glossing over the culinary contributions of the native Americans; but the tradition of bread in American Indian tribes, and in Mexican culture, is mostly limited to various flatbreads.  And I will discuss that later in the week; for now, I’m keeping myself more in the European vein of things.)  Americans, it seems, have been very slow to jump on the hard-crust, slow-risen, artisan-style bread wagon.  But quick breads?  We’ve got them in spades.  So I thought it appropriate to start out with a particularly delicious one.

I first heard about this bread from a friend of mine who hails from Detroit.  “You have to try Greenfield Village Hobo Bread!,” she told me.  “It’s so good!”  Personally, I had never seen or heard of it, but the way her smile burst onto her face, the way her eyes rolled back with the memory, the excitement in her voice, all told me that I had better darn well try to find it.  A quick internet search turned up a recipe, entitled exactly as she’d said, “Greenfield Village Hobo Bread”.  The bread is a very popular best-seller at Greenfield Village and the Henry Ford Museum, in Dearborn, Michigan.  The recipe had apparently appeared in the Bellwether, a weekly newspaper for the staff, and got spread around.  And after making it, I can definitely see why.

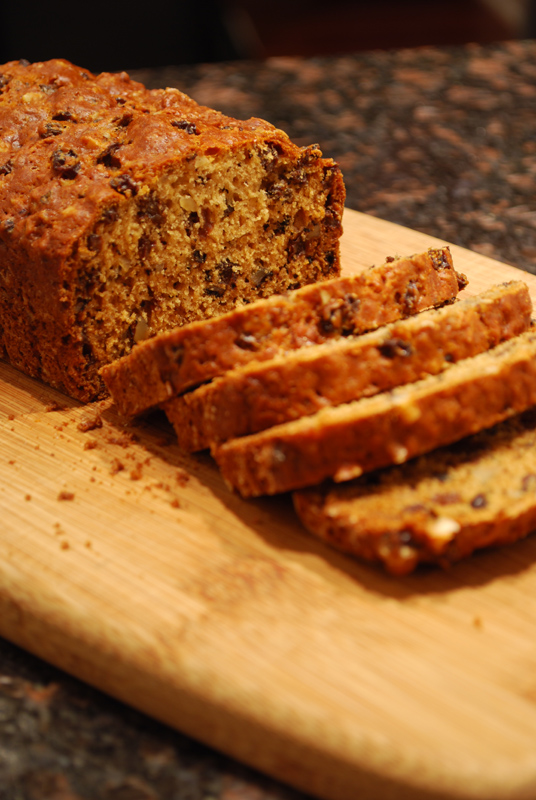
This bread is so good!  It’s incredibly moist for how little fat is in it, the flavors of the currants, sugars, and walnuts together are superb, and is super-easy to make.  Yes, ok, for those of you in the know, this Hobo Bread doesn’t usually have currants.  It usually has raisins; but I’m actually not that big a fan of raisins.  I find currants lovely, though, so I generally use them instead.  Feel free to use raisins for greater authenticity.  Another little tweak I gave the recipe was to switch some of the water for brandy. The original recipe calls for soaking the currants (or raisins) in water, but what does water taste like?  Nothin’, is what.  And currants and brandy are best friends, so I gave it a go.  It was delicious!  Try bourbon or spiced rum for a variation, if you like.

This is a thoroughly American bread, all the way from its quick bread nature, to the ingredients used, to the name and the way it’s made (hobo cooking, as such, originated during the Great Depression, and generally involves cooking in tin cans, or aluminum foil packets tossed into a fire).  Not to mention that hoboes themselves are pretty American – show me any other country that has them!  Now, I’m not sure if you’d find many hoboes cooking with currants and brandy, but I do know there’s not a soul who would turn down a slice of this bread.  So the next time you’re, you know, riding the rails, pack some of this in your bindle – you’ll probably make a lifelong friend if you share it. 


Greenfield Village Hobo Bread

1 cup currants (or raisins)
1/2 cup boiling water
1/4 cup brandy
2 teaspoons baking soda 
1/2 teaspoon salt
8 1/2 ounces all-purpose flour (about 2 cups)
2 tablespoons butter, melted and cooled
1/4 cup milk
1 teaspoon vanilla
1 egg at room temperature
1/4 cup granulated sugar 
1/4 cup brown sugar 
3/4 cup walnuts, toasted and chopped

1.  Grease and flour 3 or 4 empty and clean soup cans, or two small loaf pans, or one large loaf pan.  Preheat oven to 350º F.

2.  Pour boiling water over currants.  Add brandy, and let cool. 

3.  Whisk together baking soda, salt, and flour; set aside.  In a large bowl, mix together butter, milk, vanilla, egg, and the sugars.  Add the currants and all the liquid.

4.  Gently mix in flour mixture and walnuts, until just blended.  It’s ok if there are lumps or some streaks of flour.

5.  Fill the soup cans to half full, or divide evenly between loaf pans.  Bake for 40 minutes to an hour. Cool 5 minutes in cans or pans before removing to a rack to cool completely.


Notes:
1.  The egg should be at room temperature; otherwise, the melted butter will solidify when the two are combined.  You could certainly substitute oil for the butter, but the flavor will be different.

2.  Of course, I totally understand wanting a non-alcoholic version; so if you prefer that route, try using apple juice or orange juice instead of the alcohol.

3.  This recipe will double beautifully, and freeze well if necessary.

Posted in Everything Else | 3 Comments

Tarallini al Peperoncino

Week Six: Italian Breads

a-bread-a-day-tarallini

I can picture it: you’re navigating the intimate aisles of that little Italian market, browsing around the fifty different brands of olive oil, the mysterious tins of sardines that you’re sure must be delicious (if only you knew what in the world to do with them), the thickly seductive smells of prosciutto and Parmigiano permanently infused in the store fixtures.  Then, perhaps among the grissini or the amaretti, you notice a bag of ring-shaped things, looking a bit like dried tortellini.  Interesting, but since the text on the package is all Italian, there’s no way to know exactly what they are.  Are they sweet or savory?  Are you supposed to use them to make something else, like you use savoiardi to make tiramisú?  Are they cookies or crackers?  Do you just set them out?  Frustrated, you put them back, and maybe make a mental note to try them later, but you probably never will.

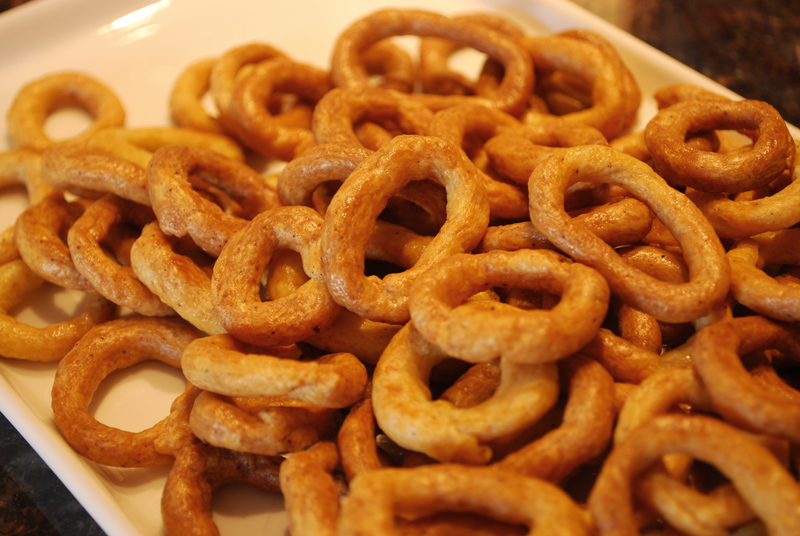
Well, wonder about them no longer!  Those little rings are called Taralli, and they are absolutely fabulous.  Most common in Southern Italy, they are a favorite street-food-snack.  They can be sweet or savory, but it’s generally easy to tell which is which.  Sweet taralli are often glazed with sugar, while the ones that look plain are typically savory.  They can be flavored with any number of things, but fennel seed (taralli ai finocchio), red pepper (taralli al peperoncino), and rosemary (taralli al rosmarino) are the most common.  Whether sweet or savory, they are often served with and dunked into wine.  In the USA, they can be found at the occasional Italian bakery, or otherwise made by your local Nonna in her kitchen.

They can be as big as a bracelet, or small enough to fit only on your fingertip (then sometimes called tarallini), but they always have the same unique, glorious texture: not quite crunchy, not quite soft, maybe a little crumbly, but not crumb-y.  They are boiled, like bagels or pretzels, and I have seen recipes that call them Italian Pretzels.  The dough is made with semolina (pasta flour) and that answer to all your Italian baking problems, 00 flour (a soft wheat flour that is very finely milled), enriched with olive oil, and flavored with white wine.  

Okay.  In all honesty, I’ve never had store-bought, pre-packaged taralli.  And in fact, until I made them, I’d only had them one other time in my life that I can remember, from a bakery, and very long ago.  So I can’t really tell you how homemade taralli stack up against mass-produced ones; but based on my experience with other homemade-vs.-storebought breads, I feel fairly confident in saying that it’s probably worth the effort to make them.  And yes, it is an effort.  These taralli are small, which is wonderful for little bites to go with antipasti or wine, but which also means you have to work a little more to make them.  But once you get into the groove of it, it’s a rather calming, zen sort of activity.  Just let your mind wander, and settle in for a little while.  Or get a friend to help – it’s a perfect activity for chatting over!

One slightly disconcerting thing about this recipe is the propensity for the olive oil to leach out of the dough.  So I recommend rolling the ropes of dough out on a cutting board, or another wooden surface that will absorb it.  Anyway, I’m sure your cutting board is getting a little dry, right?  I know mine was!  If you try it on your counter, though, just be prepared to wipe it off every so often with a paper towel – it gets too slick to roll anything on it after a while.  Or, I suppose you could reduce the amount of olive oil in the recipe.

You can also make these any size you want, but the directions here make a shockingly large number of very small tarallini – one hundred!  But when they’re baked, they don’t seem like that many.  And they’re absolutely addictive, so don’t be surprised if your hard work disappears in less time than it took you to make them.  Don’t let it get you down, though – I bet you’ll find them just as irresistible as anyone else!  Dig in and enjoy!


Tarallini al Peperoncino
Makes 100 small biscuits

3/4 cups all-purpose flour
1/2 cup cake flour
1/3 cup semolina
1 teaspoon sugar
3/4 teaspoon freshly ground black pepper
1/4 teaspoon crushed red pepper flakes
1 pinch cayenne pepper
2 1/2 teaspoons kosher salt, divided
1/3 cup dry white wine
1/3 cup extra-virgin olive oil

1.  Whisk together the flours, semolina, sugar, peppers, and 1 1/2 heaped teaspoons salt, then stir in wine and oil. Turn out onto a lightly floured surface and knead with lightly floured hands until smooth and elastic, about 2 minutes.

2.  Put dough in a bowl and cover with plastic wrap. Let stand at room temperature 1 hour.

3.  Halve dough, then cut each half into 10 pieces. Keeping remaining dough covered, roll 1 piece of dough into a 20-inch-long rope on an unfloured surface. Cut rope into 5 pieces, then roll each piece into a 4-inch-long rope, connecting ends of each to form a ring. Repeat with remaining dough, keeping all other dough covered.

4.  Bring 5 cups (more or less) water to a boil with remaining teaspoon salt in a medium pot.  Meanwhile, preheat oven to 350°F with racks in upper and lower thirds. Oil or line with parchment paper 2 large baking sheets.

5.  Boil rings in 4 batches just until they float, about 2 minutes per batch. Transfer with a slotted spoon to prepared baking sheets, arranging rings 1/2 inch apart.

6.  Bake, switching position of sheets halfway through baking, until golden, 30 to 40 minutes (depending on size). Transfer to racks to cool completely.

Notes:
1.  Tarallini will keep in an airtight container for about 2 weeks – but they certainly won’t last that long!

2.  The original recipe called for type “00” flour, a finely-milled Italian flour.  It can be hard to come across, so I substituted the cake and all-purpose flour mixture.  If you have it, though, by all means use it instead.

3.  If you’re not a fan of pepper, you can certainly leave it out.  For another flavor variation, try crushed toasted fennel seeds (maybe 2-3 teaspoons), or some rosemary.  Other less traditional flavorings could include poppy seeds, any finely-chopped nuts or ground nut meal (almond, walnut, pistachio, etc.), thyme, oregano, cumin, mint, etc. etc. etc.  Add a little more sugar to the dough (maybe 1-2 tablespoons), and coat them after they’ve cooled in a milk/powdered sugar/lemon zest glaze.  Serve with coffee or tea, and call it a day!

Posted in Savory, Unleavened Breads | 2 Comments

Piadine

Week Six: Italian Breads

Today, I give you a very obscure Italian bread: the piadina.  I don’t actually even recall seeing this bread in the times I’ve traveled to Italy; it’s only been in textbooks and anecdotal recountings that I’ve even heard of such a thing.  It’s a true Italian flatbread: rustic, simple, and so very delicious.  Piadine (the plural form) originated in the Romagna region of Italy, in the central-North area of the country.  It was originally a peasant’s food, as it is unleavened, and made of a few simple ingredients.

Yes, it is very similar to the Mexican or Central American flour tortilla, both in composition and in form.  They both utilize a medium-protein flour, salt, water, and some form of shortening.  The tortilla traditionally uses lard, however, while the piadina generally uses olive oil.  Both are rolled to the same approximate size and thickness; but the tortilla is far more common than the piadina.  Tortillas are served with every imaginable food, and are often used in lieu of utensils.  On the other hand, piadina are more often served with lighter fare, such as salads, or slivers of cured meats and cheeses.  A recent addition to the piadina’s repertoire is a thin spread of that heavenly gift to the palates of the world, Nutella.

Another main difference between the ubiquitous tortilla and the obscure piadina is just that: the variance in popularity.  And why?  They are equally as indigenous to the culinary culture as one another, and each is just as ancient as the other; but despite the nearly-identical makeups, the tortilla is far more easily associated with salsa and cilantro than the piadina is with pesto and parsley.  My best hypothesis is that we (in the US) are geographically closer to the home cooking of the Mexican and Central American kitchen – and both of these breads are typically more of a home-cooked item than an accompaniment for a fine dining dish.  Additionally, Italians have far more experience with many other wheat-based breads; while the Mexicans and Central Americans were long relegated solely to the use of corn-based breads, which adapt well and easily to the flatbread format.

Both breads are common street-vendor foods; but again, the piadina is most often seen at those sorts of carts, or in a home kitchen; while the tortilla may now be found in nearly every kitchen, from the lowliest to the most haute.  I say, it’s time to give the piadina its due!  Made so super quickly, from ingredients you probably have in your kitchen right now, they are a great accompaniment to anything you want to eat bread with.  They have the soft texture and fruity olive-oil-flavor of many other Mediterranean breads, but also the speed and ease of a typical flatbread.

Since these breads can bake up soft or crisp, depending on how long you cook them (or reheat in an oven), you can be the decider on texture – not always the case with good bread!  As another suggestion, Michael Chiarello recently introduced these breads to the Food Network crowd, and spread the dough with an olive oil/garlic/crushed red pepper paste, which looks absolutely fantastic.  Try mixing cayenne into the dough itself, or maybe just some dried basil or oregano.  Of course, the more you mix into/add to the basic dough, the further you get away from the authentic (and rare!) piadina experience.  But if the Italians have taught me anything, it’s to follow the passion of the moment, and just go with what you’re feeling.  Capisce?  I know you do!


Piadine
From Bread by Christine Ingram and Jennie Shapter
Makes four 7-inch rounds

6 ounces unbleached white flour (about 1 1/2 cups)
1 teaspoon salt
1 tablespoon olive oil
7 tablespoons lukewarm water

1.  Sift the flour and salt together into a large bowl; make a well in the center.

2.  Add the oil and water to the flour and gradually mix to form a dough.  Knead on a lightly-floured surface for 4-5 minutes until smooth and elastic.  Place in a lightly-oiled bowl, cover with plastic wrap, and let rest for 20 minutes.

3.  Heat a griddle or a heavy pan over medium heat.  Divide the dough into four equal pieces and roll each into a 7 inch round.  Cover until ready to cook.

4.  Lightly oil the hot griddle, add one or two piadine, and cook for about 2 mintues, or until they are starting to brown.  Turn the piadine over and cook for a further 1 – 1 1/2 minutes.  Serve warm.


Notes:
1.  My piadine seemed to keep fairly well in a Ziploc bag in the refrigerator; but when I reheated them in the oven a couple of days later, they were rather tough.  I highly recommend eating them as soon as possible after baking.

2.  If your pan is too hot, the piadine will develop burnt spots where the air bubbles form.  If you don’t mind, this is not necessarily a problem.

3.  I recommend using all-purpose rather than bread flour.  Long story short, the protein content of all-purpose flour works better in this application.

Posted in Savory, Unleavened Breads | Leave a comment