Sourdough Calzones

Week Thirteen: Filled Breads

calzone-2

What is it about bread that makes us want to wrap it around things, to cut and fill it, to stuff it with any and everything imaginable?  Why do we serve bread as a side, and not as the main dish?  Certainly, nutrition plays a part; man cannot live on bread alone, and all that.  But personally, I think we mostly do it because it just tastes so darn good.  A thoughtfully-crafted sandwich is a thing of beauty, and is far more than the sum of its parts (BLT, anyone?).

But this week, I’m offering up some filled breads.  These are breads that can stand alone on a dinner plate, no longer relegated to the wicker confines of a bread basket.  Add a quick salad on the side, and you can call it a day.  I’ve taken care to choose recipes that are legitimately filled and baked, not just recipes that have things kneaded or stirred into the dough, or baked before slicing and filling.  And it wasn’t terribly easy, I have to say!  What I’ve ended up with are breads that run the gamut, as far as types of filling, flavor combinations, cooking methods, and origins.  These breads will take you from appetizer to dessert, focusing mostly on entrée-able recipes.

I’m kicking things off this week with a classic: the calzone.  In order to make a good calzone (or pizza), you need to start with a good crust.  You can use the prettiest mushrooms, the spiciest pepperoni, or the creamiest mozzarella in the world, and it’ll still taste like cardboard if you put it on one of those pre-made crusts you see at the grocery store, hanging in their plastic cells like so many condemned men.  (Or, god forbid, the crust that comes in a refrigerated vacuum-packed cardboard tube.  Have you seen the ingredient list on those things?)

No, for a proper calzone, you need a good dough.  You can buy some very nice doughs from many gourmet groceries, or even from your favorite pizza joint if you ask nicely.  (I have heard a rumor that Domino’s dough makes a darn good pizza, when treated properly; but I am unable to verify or deny such a rumor.)  But if you have the time, you should definitely make your own dough.  I think it’s more fun, and it certainly tastes better than most anything you can have delivered.

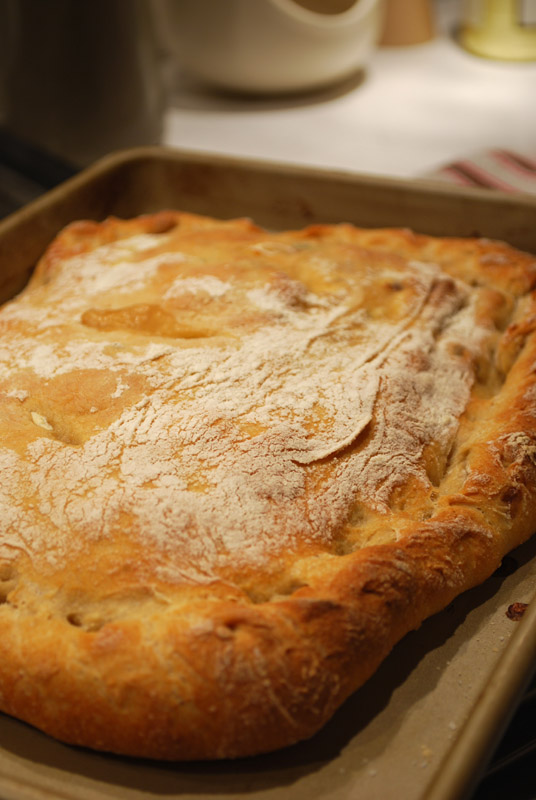
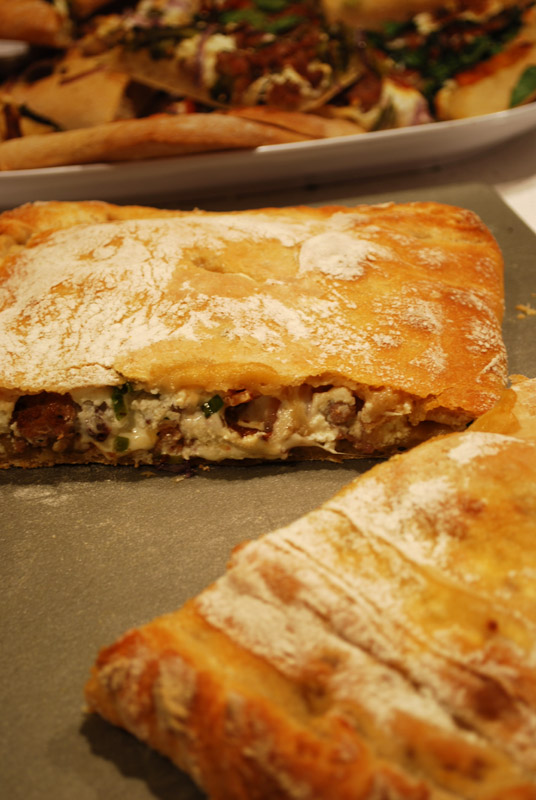
This dough does take a while to make, but it could hardly be easier.   It’s one of those wet-dough, very hands-off recipes (assuming you have a mixer) that needs time and love, more than handling.  Easily, the most time-consuming part of this recipe is preparing any filings.  And speaking of fillings, we did this one up right.  We filled our calzone with turkey sausage, crumbled bacon, scallions, red onions, mozzarella, ricotta, and goat cheese.  So delicious!

If you prefer, you can of course make pizza with this dough instead; but this dough will easily stretch thin, which I like a little better in such an application.  Thick crust is one thing on a pizza, but when you’re essentially eating two pieces in one go, I like mine a little thinner.  This bread cooks up crusty and chewy, brown on the outside, but still soft and moist in the middle of the calzone (or pizza), like a proper crust should.  And the flavor from the sourdough starter just sets everything off perfectly, with a hint of tanginess.

One interesting thing I’ve learned about homemade pizza crust lately is that you should always use all-purpose flour.  True, pizza restaurants often use the higher-protein bread flour, but their ovens are far hotter (up to 1200° F!) than a typical home oven.  Without getting too technical on you, our home ovens just aren’t hot enough to cook the thin bread before the gluten becomes tough, when bread flour is used.  All-purpose flour, with its lower protein level, makes for a properly chewy texture, while not toughening too much.  Interesting!

calzone

Sourdough Calzones
Makes 4

1 1/2 cups warm water (105°F to 115°F)
1 envelope instant (rapid-rise) yeast (2 1/4 teaspoons)
2 tablespoons olive oil
1 1/2 teaspoons salt
8 ounces (about 2 cups) white whole wheat flour
9 ounces (about 2 cups + 2 tablespoons) all purpose flour, divided, plus extra for rolling out dough
1 cup sourdough starter (see note 1 below)

1.  Pour 1 1/2 cups warm water into bowl of a stand mixer.  Mix the flours together.  Add 14 ounces (3 3/4 cups) of the flour mixture, and combine with the dough hook until all the flour is moistened and you have a shaggy dough.  Turn the mixer off, and without removing the dough hook, cover the bowl loosely with plastic wrap.  Let the dough rest for 15 to 20 minutes.

2.  Remove the plastic wrap, and add the yeast, oil, salt, remaining 3 ounces flour, and starter.  Mix on the lowest speed until all ingredients are combined.  If the dough looks very wet, add more flour by tablespoons only as needed.  Once desired consistency has been reached, continue mixing until dough has been kneaded for a total of 5 to 6 minutes.  Increase mixer speed to medium-low speed, and knead for 1 minute.  Turn dough out into a large lightly-oiled bowl.  Cover with plastic wrap.  Let rise in a warm place for 1 hour.

3.  After 1 hour, remove plastic wrap.  Slide a large spatula under one side of the dough, and gently fold it over the center.  Do the same for the opposite side (imagine you’re folding a letter into thirds).  Then, turn the bowl 90º, and fold the dough in half over itself (as though you’re folding the letter in half).  Cover bowl with plastic wrap, and let rise until doubled, about another 45 minutes or so.

4.  Position 1 rack in top third and 1 rack in bottom third of oven and preheat to 500°F. Dust 2 large baking sheets with flour.

5.  Scrape dough out of bowl onto a well-floured surface.  Divide dough into 4 sections, covering the pieces not being used.  Depending on the consistency of your dough, you may or may not be able to roll these crusts out.  If you can, form dough into balls, and roll each out on lightly floured surface to a 9 inch circle.  If your dough is too loose and sticky to roll, simply press and stretch each piece into a rough 9 inch circle.  Either way is fine.  Carefully transfer dough rounds onto prepared baking sheets.

6.  Spread desired toppings over half of each round, leaving 3/4-inch border. Fold plain dough halves over filling, forming half circles. Fold and pinch edges of dough firmly together to seal.  Pierce tops in a few places with a small knife, to release steam.

7.  Bake calzones 15 minutes, or until well-browned.  Let cool slightly before cutting and serving.


Notes:
1.  For the sourdough starter, I used this recipe.  But if you have one of your own already, absolutely use that.  Just be sure to adjust the amount of flour you add, depending on the moisture level of your starter (mine was very liquidy).

2.  You can obviously use whatever toppings you like, but just make sure things such as bacon, sausage, etc. are fully cooked.

Posted in Savory, Yeast Breads | Leave a comment

Pain de Campagne

Week Twelve: Pre-Fermented Breads

pain-de-campagne-rustique

The last bread on the schedule for this week takes the longest to make of any bread I’ve discussed so far.  It’s a reasonably authentic French pain de campagne, or, literally, “country bread”.  Pain de campagne is basically what the people of France made for centuries, far more so than any other type of bread.  (Did you know the baguette wasn’t really invented until the early 1900’s?  Seriously!)

Pain de campagne has an American cousin, called sourdough.  Perhaps you’ve heard of it.  Sourdough, however, has a far tangier flavor, whereas the flavor of pain de campagne is more subdued; it tends to have more of a tangy finish, rather than a blast of sour flavor from the moment it hits your tongue, like American sourdough does.

The one thing these two bread have in common, though, is the yeast.  Wait, what?  Don’t all yeasted breads have yeast in common?  Well, true sourdough breads like these don’t use common baker’s yeast (i.e, anything you can buy in the store, in any form); rather, they rely on airborne yeast, which is a different strain than what’s sold in those foil packets.  This yeast is captured by means of the starter, in this case a simple mixture of only flour and water.

Incidentally, the yeast that ends up leavening your bread isn’t just found floating around in the air, it’s pretty much everywhere: on the counter, in your bowl (unless you’ve just bleached it), and most importantly, in the water and flour itself.  When you mix the flour and water, (long story short) you’re creating an environment that is ideal for those little yeasts to multiply and grow, which is a good thing.  But since there are so few of them, compared to how many you can just dump in when using baker’s yeast, it takes a much longer time for them to create a big enough population to raise a loaf of bread.  That’s why you need to let true sourdough starters sit out for days on end.

pdcr-starter

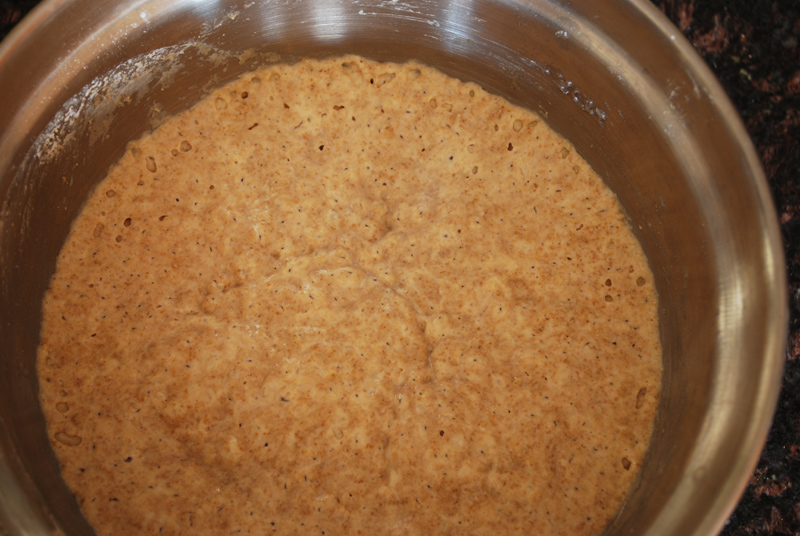
Look, ma! Airborne yeast!

So why even bother, you may be asking? Sure, people used to have to cultivate their own yeast like that, but we’ve advanced since then!  If we can just add all the store-bought yeast we need, why would we go through all the trouble to catch our own out of thin air?  Well, remember that store-bought yeast is a different strain than the kind we’re working with here.  That airborne yeast doesn’t like being packaged up in foil very much, but it sure does produce some tasty flavors.  Additionally, the kinds of acid this yeast produces do a much better job of keeping bread moist and fresh, and make the finished bread more resistant to mold and bacteria.  You can keep a loaf of true sourdough sitting out, uncut, for days before anything happens to it.  A baguette, for comparison, will be dry and unpalatable within a day.

In the case of the pain de campagne recipe below, the starter is technically known as a chef or levain.  This means that when you mix the final dough together, you don’t add any additional yeast.  All of it comes from the starter.  Your finished loaf, therefore, will be fairly resistant to just about anything that comes at it from the air.  Historically, this was extremely important to people who had no refrigeration, and also no oven. You see, before people had ovens in their homes, they had to use one big community oven.  The longer they could go without having to run some dough down to the oven, the more convenient it was.  So the bigger the loaf, the better, and the longer it kept, the better.  Fortunately for them, large loaves of bread have (for various technical reasons) much better texture and keeping abilities than do smaller loaves.

I have to say, while this bread is a bit of work (mostly hands-off, however), if you can stand to wait those four or five days it takes, your efforts will be well-rewarded.  Previously, before starting this project, I had rather shrugged off such “investment breads” in lieu of more rapid, if not instant, gratification.  How much better could it possibly be?

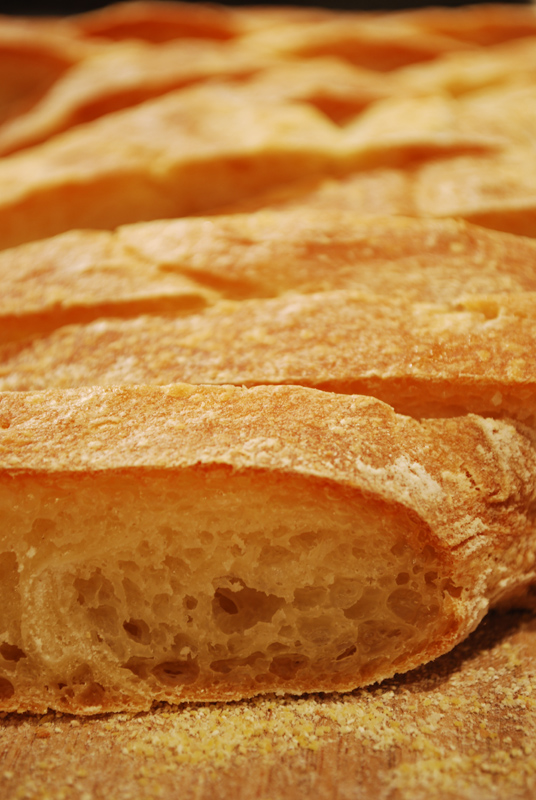
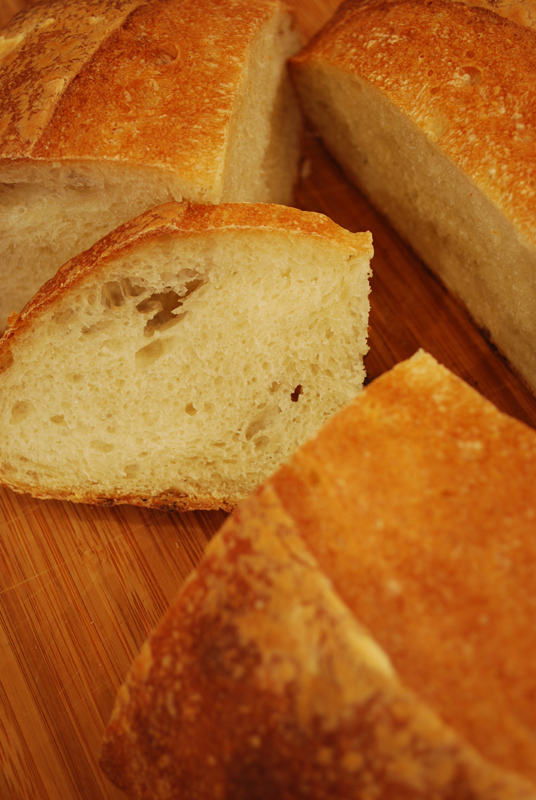
Plenty!  I thought I knew a thing or two about making a very good bread, but this one pretty much takes the cake.  I think my hydration levels need some tweaking, and the handling of the dough certainly wasn’t perfect (see note 3 below), but I nonetheless ended up with possibly the best crumb I’ve ever achieved in a bread.  So many lovely, large holes in it!  And a chewy texture I’ve only come close to before!  Seriously, if you like a good, toothsome, artisan bread, try this for yourself!  Give yourself the four or five days needed, and give it a whirl.  You’ve got nothing to lose, and much to gain.  Even if it doesn’t come out bang-on perfect, you’ve still learned what to do next time, right?  Plus, you only have to make the starter the first time.  So go on!  Make some sourdough!


pain-de-campagne-rustique-2


Pain de Campagne
Adapted from Bread by Christine Ingram and Jennie Shapter
Makes 1 large loaf 

For the starter:
2 ounces (about 1/2 cup) whole-wheat flour
3 tablespoons warm filtered or spring water

For the first refreshment:
3 ounces (about 3/4 cup) whole-wheat flour
4 tablespoons warm filtered or spring water

For the second refreshment:
4 ounces (1 scant cup) unbleached white bread flour
1 ounce (about 1/4 cup) whole-wheat flour
1/2 cup warm filtered or spring water 

For the dough:
3/4 cup warm filtered or spring water
12 ounces (about 3 cups) unbleached white bread flour
2 teaspoons salt

1.  To make the starter, place the flour in a small bowl, add the water, and knead until a smooth dough is formed, about 3 minutes.  Cover with plastic wrap and leave in a warm place for 2 days.

2.  For the first refreshment, pull any hardened crust off of the starter, and remove 2 tablespoons of the soft interior.  Discard the remainder.  Place the starter in a large bowl and gradually mix in the water (4 tablespoons).  Some lumps may remain; this is fine.  Gradually mix in the flour (3/4 cup whole-wheat) and knead to form a smooth dough, about 3 minutes.  Cover with plastic wrap and leave in a warm spot for 1 day.

3.  For the second refreshment, pull any crust from the starter and discard.  Gradually mix in the water (1/2 cup), then gradually mix in the two flours (4 oz bread + 1 oz whole-wheat) a little at a time, until a firm dough is formed.  Cover with plastic wrap and leave in a warm place for at least 10 hours.

4.  For the final dough, add the flour (12 oz bread) and the water (3/4 cup) into the bowl of a stand mixer.  Mix with the dough hook until a rough dough is formed, about 3 minutes.  Turn the mixer off, and without removing the dough hook, cover the bowl loosely with plastic wrap, and let rest for the autolyse for 15 to 20 minutes.

5.  After the autolyse, add the starter to the bowl, along with the salt.  Mix on low speed for 5-7 minutes, adding flour a tablespoon at a time only if needed (if the dough is sticking to the sides).  The dough should form a cohesive mass, but stick to the bottom of the bowl.  Stop the mixer and scrape the bowl if necessary.  After five minutes, increase the speed to the next-lowest level, and knead for 1 minute.

6.  Remove the dough to a large, lightly-oiled bowl, cover with plastic wrap, and let rise in a warm place for 1 1/2 to 2 hours, or until doubled in bulk.  (If needed, dough can be put in fridge and left to rise overnight at this point.  Bring to room temperature before proceeding, and make sure dough is doubled in size.)

7.  Punch down the dough, and cut off about 4 ounces, or 1/2 cup, of dough, to reserve for the next loaf (see note #2 below).

8.  Line a shallow bowl (about 4 inches high by 9 inches wide) with a kitchen towel (not terry cloth), and dust very heavily with flour (when in doubt, use more).  Scrape the dough into the prepared bowl, cover with plastic wrap, and let rise in a warm place until almost doubled in bulk, about 2 to 3 hours.  Preheat the oven to 500º F.

9.  Remove the plastic wrap from the dough, and sprinkle the dough liberally with cornmeal.  Cover the top of the bowl with a piece of parchment paper, and invert a sheet pan on top of that.  Pressing the sheet pan and the bowl firmly together, slowly invert everything.  The dough should gently fall onto the parchment.  Remove the bowl, and gently peel off the cloth.  If the dough sticks to the cloth, use the backside of a knife to carefully scrape it off.

10.  Dust the loaf with flour, and using a serrated knife, make 4 quick cuts in the top of the dough, at right angles, to form a square pattern.  Spray the dough with water, and bake for 5 minutes.  Quickly spray the loaf again, and bake an additional 5 minutes.  Quickly spray the loaf a third time, then reduce the temperature to 425º F.  Bake an additional 15 to 20 minutes, or until well-browned and sounding hollow when tapped on the bottom.  Or, more accurately, bake until an instant-read thermometer reads 205º – 210º F when inserted into the middle.  Transfer to a wire rack to cool completely before cutting.


Notes:
1.  You will need to start making this at least 4 days before you plan on eating it: 2 days for the starter, 1 day for the first refreshment, 10-24 hours for the second refreshment, and finally 5 to 6 hours for the day of baking.

2.  To make another loaf using the reserved piece of dough (see step 7 above), keep the piece of reserved dough in the refrigerator for up to 3 days.  Use this as the starter dough, starting with the second refreshment in step 3 above.  Continue as directed.

3.  In step 8, I warn you to use as much flour as you think you need in coating the cloth, and then use some more.  My dough was fairly wet in consistency, and therefore absorbed most of the (generous dusting of) flour used in dusting the cloth.  I spent about 4 or 5 minutes scraping dough off of my cloth after inverting it, deflating the dough the whole time, and it spread out very flat.  In a perfect world, I would’ve let it sit until it had risen a bit again; but that might have taken another hour, so I just went ahead and baked it off.  The texture was still very amazing, so I can only imagine what it might have been like done properly.

Posted in Savory, Yeast Breads | Leave a comment

Made-Up Bread

Week Twelve: Pre-Fermented Breads

made-up-bread

Today’s the day I get to brag.  Today’s the day I get to proudly run to the Internets, hold up my work like a happy first-grader, and shout, “Look what I did!”  You see, today I get to talk about the First Bread I Ever Made Without A Recipe.  Oh yeah!

I was flying solo on this one, people.  No cookbooks, no internet, just my own expertise (such as it is).  Here’s the story: back when I made pizza crust, I invited some friends over for dinner to help me eat it.  I was expecting five people, but one person dropped out at the last minute, after I had already divided the dough up.  Rather than toss the dough out (unthinkable!), I hastily stashed it in a ziploc bag, and put it in the refrigerator.  To do what with?  I wasn’t sure, but one smallish portion of pizza dough wasn’t really going to go far in the usual dinner preparations for two.

I had some recollection that one could use old bits of dough in new bread for better flavor, but I hadn’t really studied it recently as such.  I knew, though, from my repeated making of G’Bread over the last few years that something about the same consistency could be used as a starter.  So a couple of days later, when the poor little bit of pizza dough had started to bubble up in its plastic home, I decided to just have a go at it.  How much could I possibly screw it up?  If it didn’t work out, no harm, no foul; if it did, then I could write about it later.  Win!

Using the method I recalled from G’Bread, but firmly refusing to even glance at the recipe for help, I began by combining fresh flour and water in my mixer.  Knowing that I had 4 ounces of leftover pizza dough, I started with 12 ounces total of flour.  It added up to a pound total, which seemed like a fine place to start, if a little arbitrary.  I mixed in the yeast and enough water so that it looked about right (measuring the whole time!), and then gave it a little 15 minute autolyse (or, catnap).  I then added the pizza dough and salt, and mixed until it looked right.  From then, I just followed the technique I remembered.

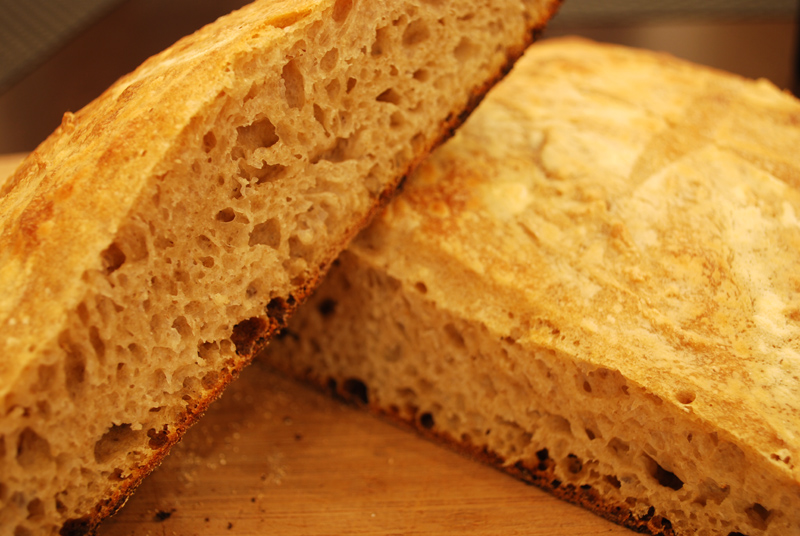
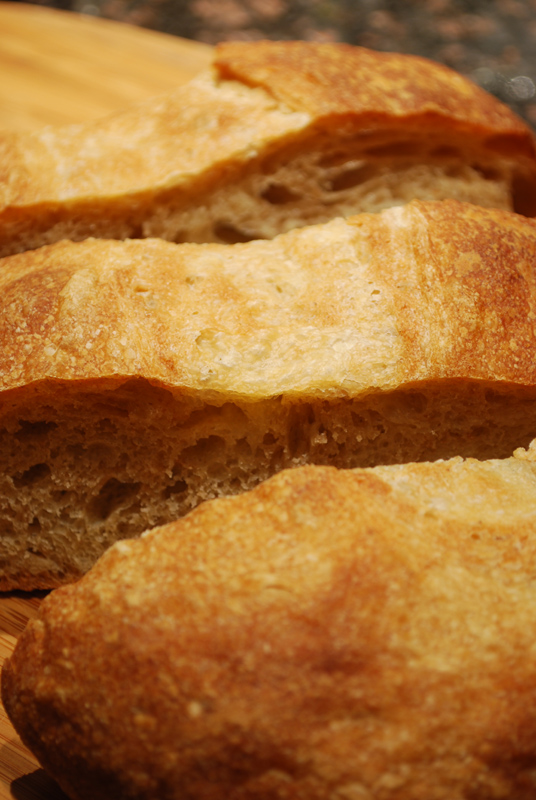
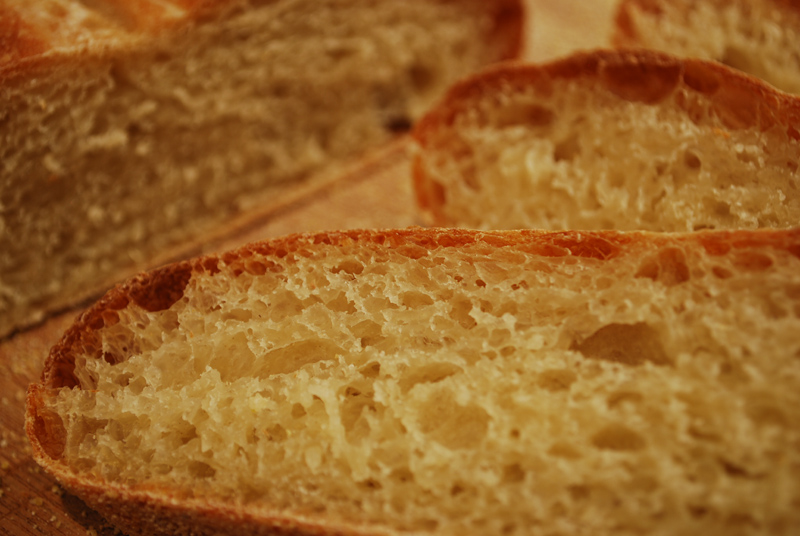
It rose properly, it looked right, and when I finally baked it off, I knew I had done things right.  It came out so well!  It was nicely browned on the outside, soft and flavorful inside, airy, well-crusted; in short, a darn good bread!  I had finally done it – I had made my very own bread, that no one else could claim!  Was this the pinnacle of my baking career?  Okay, perhaps not, but it was definitely a high point.  I was so proud!  I mean, do you see those lovely holes in the crumb?  Awesome!

The technique of using a piece of old dough to improve the texture and flavor of a newly-made dough is nearly as ancient as breadmaking itself.  Though I did come up with this recipe (as such) on my own, I am certainly not claiming to have thought up the technique.  It is one of the very well established methods of using a pre-ferment, and you can use any sort of dough you care to.  Generally speaking, though, an old dough will incorporate best into a new dough of a similar or firmer consistency.

I suppose the moral of this story is not to toot my own horn, but rather to show that breadmaking need not depend on a quality recipe.  It’s more about technique, learning what a proper bread should look like at all stages, instead of dogmatically following a recipe that may or may not be appropriate for your circumstances, or may even be written with mistakes.  If you can learn a few visual cues, and some basic timing, you too can absolutely make your very own recipe-less bread.  Don’t be scared; I know you can do it!


Made-Up Bread
Makes 1 loaf

4 ounces of this dough (about 1/5 of the recipe)
8 ounces bread flour (about 2 cup)
3 ounces whole-wheat flour (about 1/3 cup)
1/4 teaspoon active-dry yeast
1 1/2 cups room temperature water
1 teaspoon salt

1.  Let old dough sit in the refrigerator for at least two days, to develop the flavor.

2.  Remove old dough from fridge and let sit at room temperature while you make the rest of the dough.  Mix flours and yeast together.  Combine in the bowl of a stand mixer with the water, and mix with the dough hook until a rough dough forms.  Adjust levels of flour or water if necessary; it should look a little lumpy and kind of rough around the edges, but all the flour should be moistened.  Turn mixer off, and without removing dough hook, cover bowl loosely with plastic wrap, and let sit 20 minutes.

3.  Remove plastic wrap, add old dough and salt to the mixture, and continue to mix on lowest speed until all the ingredients are incorporated and a dough is formed (the dough should clear the sides of the bowl but stick to very bottom), about 4 minutes.  Increase speed to low and continue to knead until dough forms a more cohesive ball, about 1 minute.  Transfer dough to large bowl (at least 3 times dough’s size) and cover tightly with plastic wrap.  Let dough rise in cool, draft-free spot away from direct sunlight, until slightly risen and puffy, about 1 hour.

3.  Remove plastic wrap and, using a broad nonstick spatula, fold the dough over itself, as though you were folding a letter: 1/3 over the center, then the opposite 1/3 over that.  Lastly, fold dough in half again, perpendicular to the first folds (like you’re folding the letter in half).  Dough should end up being roughly a square.

4.  Replace plastic wrap, let dough rise 1 hour.  Turn dough again, following above procedure, then replace plastic wrap and let dough rise 1 hour more.

5.  Dust work surface liberally with flour.  Gently scrape and invert dough out of bowl onto work surface (side of dough that was against bowl should now be facing up).  Dust dough and hands liberally with flour, and using minimal pressure, push dough into rough 8 by 10 inch square.  Gently roll up dough, using long edge, and pressing seam to seal as you roll.  Tansfer dough to a large sheet of parchment paper.  Dust loaf liberally with flour and cover loosely with plastic wrap; let loaf rise until doubled in size, about 1 hour more.  Meanwhile, adjust oven rack to lower-middle position, place baking stone on rack, and heat oven to 500º F.

6.  Using a sharp serrated knife, cut a slit 1/2-inch deep lengthwise along top of loaf.  Spray loaf lightly with water.  Slide parchment sheet with loaf onto baker’s peel or upside-down baking sheet, then slide parchment with loaf onto hot baking stone in oven.  Bake 10 minutes, then reduce oven temperature to 400º F, and quickly spin loaf around.  Continue to bake until deep golden brown, and a thermometer inserted into center of loaf reads 210º F, about 35 minutes longer.  Transfer to rack, discard parchment, and cool loaf to room temperature, about 2 hours.


Notes:
1.  I like the slightly rustic flavor given by the whole-wheat flour, but you can certainly use all white flour if you like.

2.  I’ve written the recipe exactly as I made it, but things might obviously be a little different for you.  Depending on how wet your old dough is, you will have to add a little more or a little less flour to the new dough.  But for the rustic, ciabatta-style bread I was aiming for, I kept the consistency fairly loose.  Certainly, if you’re looking for a more sandwich-bread-style loaf, you can increase the amount of flour (or decrease the amount of water).  It’s up to you!

Posted in Savory, Yeast Breads | Leave a comment

Rustic Sourdough

Week Twelve: Pre-Fermented Breads

 rustic-sourdough

This is called a “sourdough”; but technically, it’s not a true sourdough bread.  A true sourdough will use a starter to capture wild air-borne yeasts, rather than using a standard baker’s yeast.  The starter is fermented for several days, allowing those wonderful lactic and acetic acids I mentioned on Monday to develop strongly.  This is what gives sourdough its notable tangy flavor.  Technically speaking, the recipe below uses a sort of “poolish”, which is a type of French starter.

A poolish is a very liquid starter, one that uses about an equal proportion of flour to water, and has some baker’s yeast added to the mix.  It’s left to sit anywhere from 30 minutes to a day or so, then used or refrigerated.  Generally speaking, the longer it sits out, the tangier it gets.  You can certainly use a poolish in the manner you might use a sourdough starter; that is to say, rather than use it all at once, you can take some of it to use in your bread, refresh the starter, and continue to hold onto it for future use.  Typically, though, a poolish is used completely in whatever bread you’re making; so this recipe is a bit of a hybrid.

As for the name “poolish”, the French dubbed it thusly, as it was brought into France by Polish bakers, who had devised the technique in the mid 1800’s.  I’ve seen disagreement as to whether that’s actually from a French word for “Polish”, or if it was a mispronunciation of the English word “Polish”.  But personally, I don’t know where the Englishmen come from in this situation, so I think that’s probably the less likely origin.  Oh, and the word is pronounced “pool-EESH”, with the accent on the second syllable.  Now you can sound like a professional, too!  (Just don’t pronounce it like “foolish”… you might sound it!  ba-dum-tsh!)

One strange ingredient in this bread is a crushed-up vitamin C pill.  I’m sure you’re wondering what in the world that’s for, and are probably thinking you can just leave it out.  But don’t you dare!  That little bit of ascorbic acid (aka: vitamin C) is an important dough enhancer.  It creates an acidic environment that the yeast prefers, and helps it to grow faster and longer, and create all those other acids (lactic and acetic!) that make your bread ultra-delicious.  Another function of the ascorbic acid is to retard growth of any undesired bacteria and mold, and that’s very important!

This bread needs to be started at least a day before you want to eat it, and then takes an additional 5 hours after that.  But you actually don’t knead it at all, since the stand mixer does all that work for you.  This dough is too wet to handle, so if you don’t have a mixer, you run the risk of adding too much flour if you try to make it by hand.  And yes, it does take quite a while to make; but each step is almost ridiculously easy, and takes hardly any effort.  And, unlike many other artisan-style breads, there is quite a bit of wiggle room in the schedule.  Started it yesterday, but don’t feel like making it tonight?  The starter will keep for days!  Mixed the dough together, but have a sudden emergency (of any kind you like)?  Stick it in the fridge, and finish it later!

As for flavor, you just can’t beat it.  It’s absolutely delicious!  I made this bread in the shortest amount of time allowable (which is to say, letting the starter sit for only one day), so it wasn’t as tangy as a so-called “sourdough” usually is.  The longer you let the starter sit, the tangier it will be.  If you’re just looking for an extremely tasty, artisan loaf, use the starter as soon as you can.  If you want a more traditional sourdough flavor, let it sit (in the fridge!) for about a week.  Either way, you’ll end up with a perfectly-crusted, wonderfully airy bread that will make you the envy of your friends.  And it’s a good thing you’ll have extra starter – people will be begging you to make it again! 

 rustic-sourdough-2

Rustic Sourdough
Adapted from Alton Brown
Makes 2 loaves

For starter:
1 2/3 cups bread flour
1 teaspoon instant or rapid-rise yeast
1/2 500 mg vitamin C pill (not chewable), crushed
2 cups warm water (105º – 115º F)

1.  Sift first 4 ingredients into a medium bowl.  Place water in a large sealable container.  Add dry ingredients and whisk vigorously to combine.  Cover container with lid slightly ajar.  Let stand in warm draft-free area 24 hours.

2.  At this point, you can use this pre-ferment in a recipe.  Or you can develop the flavor by adding a cup each of water and bread flour, letting it stand uncovered at room temperature until foamy (about 2 hours).  You can then refrigerate it for at least 3 weeks.  A liquid will rise to the surface every few days; just whisk it back in.  Feed the dough every time you take some to use it in a recipe.  For every cup taken, add a cup each of bread flour and water, let foam, and return to the fridge.

For bread:
1 cup warm water (105º – 115º F)
3/4 cup starter (from recipe above)
1/4 cup plain yogurt (not Greek-style)
3/4 teaspoon instant or rapid-rise yeast
3 1/3 cups (or more) bread flour, divided
2 teaspoons salt

1.  Mix first 4 ingredients in bowl of a stand mixer.  Add only 2 cups flour; stir to blend.  Loosely cover bowl with plastic wrap and let rise in a warm location until doubled in size, about 1 1/2 hours.

2.  Using dough hook, mix in 1 1/3 cups flour and salt using lowest speed.  Increase speed slightly; knead dough 5 minutes, adding more flour by tablespoons if dough sticks to side of bowl.  Let dough rest 15 minutes.  Knead again on low speed for 5 minutes.  Transfer dough to a large, lightly-oiled bowl, cover with plastic wrap, and let rise until doubled in volume, about 1 hour.

3.  Turn dough out onto a floured surface and fold over on itself several times to flatten.  Divide dough in half.  Gently shape by patting, and lifting up and stretching corners, each one to a 4×8 inch rectangle.  Using a sharp serrated knife, quickly and gently make 1 shallow slash lengthwise down each loaf.

4.  Sprinkle a large rimmed baking sheet with cornmeal. Space loaves on sheet at least 3 inches apart.  Dust tops with flour, and cover with plastic wrap.  Let rise in a warm place until doubled in volume, about 1 hour more.

5.  30 minutes before baking, preheat oven to 500º F, positioning a rack at the lowest possible setting (just above the floor of the oven, or your baking stone if you have one).  When bread is fully risen, uncover and spray loaves with water.  Bake 5 minutes, quickly open door and spray again.  Reduce oven temperature to 425º F.  Bake for an additional 20 minutes, or until loaves are puffed and golden.  Transfer to rack, and cool at least 15 minutes.  Serve warm or at room temperature.


Notes:
1.  I needed to use a bit more than the total given amount of flour (maybe 1-2 tablespoons more); but the idea here is to keep the dough as moist as reasonably possible, so use restraint.

2.  You can replace about 1/3 cup of the bread flour with whole-wheat flour if you prefer a more rustic characteristic.

3.  I do recommend using instant yeast in this application (long story short), but if you need to substitute active-dry yeast, increase the amount to 1 1/4 teaspoons for the starter, and 1 teaspoon for the dough.

4.  After the starter is refrigerated, it can be kept pretty much indefinitely (I’m talking years here), as long as you continue to use it and feed it regularly.  If you use and feed it daily, it can even be kept at room temperature; but for those of us who aren’t Nancy Silverton, I urge you to refrigerate it, for food safety’s sake (ascorbic acid or no). 

 5.  Yes, I know the measurements are given by volume, not by weight, my firm preference.  I know.  That is all.

Posted in Savory, Yeast Breads | Leave a comment

Epi Baguettes

Week Twelve: Pre-Fermented Breads

epi-baguettes

The bread for today uses a pre-ferment known as a pâte fermentée, or “fermented dough” in French.  This technique uses a piece of dough from a previous batch of bread as the pre-ferment, introducing flavor and texture from the acids developed by the yeast’s activity.  Yes, this means that salt and any other ingredients are present in this “old dough”.

Now, wait, you may be saying.  Didn’t I say yesterday that one shouldn’t add salt or anything other than flour, water, and yeast to a pre-ferment?  Well, yes, I did.  And in most cases, you shouldn’t.  But let’s say you’re a peasant in the 16th century.  You don’t have a whole lot of flavor-boosting options open to you; but you do know that your bread tastes a whole lot better if you save some of the dough from the previous day’s bread to add to today’s bread.  This is an ancient technique, and it just so happens to work.  Ideally, yes, you would not add salt to a pre-ferment.  But for home baking (a couple of loaves at a time), the scale is too small to affect things very noticeably.  So there you go.

This technique of using an old dough is so widely recognized and appreciated that these days, professional bakers will purposely make a batch of dough just for this use.  This allows them to control the fermentation and the percentages of flour, water, and yeast in the pâte fermentée.  You can use, in this recipe, any dough that you have made previously; but the result will be unpredictable.  It takes a little more time, but I recommend using the recipe for the pâte fermentée given.

So I’ll admit it: I didn’t have very high hopes for this bread, once I had started making it.  You see, I used a recipe from a book called The Professional Pastry Chef, which gives recipes in quantities for (you guessed it) professional pastry chefs, not for home bakers.  This book has never let me down before.  But usually when I use this book, I scale the recipes down by at least half.  But for some reason, I decided to go ahead and make the full recipe.  This was a mistake.

The pre-ferment was not a problem to make, but when I combined it with the remaining ingredients, it made so much dough that my poor KitchenAid was struggling so hard that I could smell the motor burning.  I’ve never heard it whining so much.  The problem is where you’re supposed to mix the dough, and then finally add the crucial salt and crushed vitamin C pills (explanation forthcoming).  I couldn’t possibly ask my poor, groaning mixer to finish the job.  I eventually pulled the dough out, cut it in half, and mixed the salt and vitamin C in as equal parts as I could with the mixer.

But again, there was a problem: the whole batch of dough was too big, but half the batch was too little to mix properly in the mixer.  What to do?!  In the end, I mixed about 3/4 of the dough with the salt and vitamin C in the mixer, then added the remaining dough to that by hand, kneading it all together on the counter.  I’m sure I over-kneaded much of the dough, and under-kneaded the rest of it.  Neither is a good thing.

This method was not perfect by any means.  I watched my own actions as though from afar, saying, “This will never work.”  But if there’s one thing breadmaking has taught me, it’s that my intuition is not always right.  I ended up with five baguettes; and while they weren’t all perfect, they all turned out pretty well.  Some were lumpy on one end or another, true; but the flavor was amazing!

So the moral of the story is this: unless you have a professional-grade and -size stand mixer, you may want to halve this recipe.  If you don’t, however, don’t expect to win awards with this bread; but you may just impress some friends with this recipe.  I assure you, no one else will go to such effort, just for bread.  And man, oh man, is the flavor spot on!  The texture I will not vouch for one way or another; I certainly did it no favors.  I’m sure the fault lies with me, not the recipe.  But even with all the abuse I heaped upon this dough, it still turned out with a lovely crust and soft interior.  And have I mentioned the flavor?  It’s so good!  Just amazing!  I will definitely make this bread again after this year is up (and that’s saying a lot!).

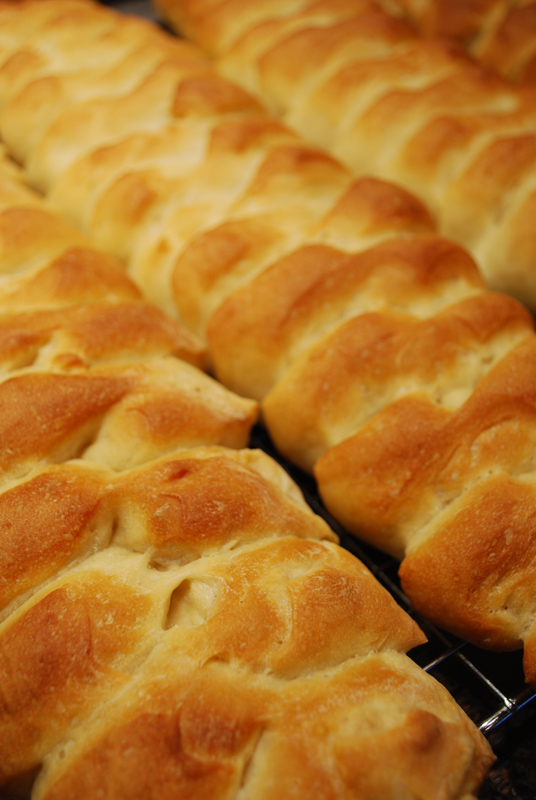
And what about the name?  Well, “epi” means “wheat” in French.  These loaves are meant to look like sheaves of wheat.  I found them surprisingly hard to form (and I’ve decorated wedding cakes!), especially considering the ease the dough seems to have at first; but please don’t let that deter you.  You may be more talented at this than I was.  You just need a clean pair of kitchen shears, and the instruction that you start at the bottom of the sheaf pattern.  Other than that, it’s up to you to sort out.  But don’t worry about it much; you will have plenty of practice with the five loaves this recipe produces.  And I assure you, the flavor will seduce everyone long after the shape is gone and forgotten!  You can always just cut the loaves into even pieces with a bench scraper, and make little dinner rolls.  I assure you, they will be delicious!


Epi Baguettes
Adapted from The Professional Pastry Chef by Bo Friberg
Makes 5 loaves

For the pre-ferment:
1/2 teaspoon active-dry yeast
3/4 cup warm water (105º – 115º F)
10 ounces bread flour

For the dough:
2 1/2 cups cold water
1 recipe pre-ferment (above)
2 pounds + 6 ounces bread flour (8.48 cups)
4 1/2 teaspoons instant yeast
1 tablespoon + 2 teaspoons salt
4 grams vitamin C (eight 500 mg tablets, crushed) 

For the pre-ferment:
1.  Dissolve the yeast in the water  Add the flour and mix utnil smooth.

2.  Cover with plastic film and refrigerate overnight.

For the dough:
1.  Combine the pre-ferment (or old dough, if using instead), water, yeast, and all but a handful of the flour in a stand mixer.  Knead with the dough hook on low speed for 8 minutes, adjusting the consistency if necessary by adding the remaining bread flour.  The dough should be soft but not sticky.

2.  Incorporate the salt and vitamin C.  Knead 4 minutes longer on low speed.

3.  Cover the dough and let it rest in a warm place for 30 minutes.

4.  Divide the dough into 5 equal parts, reserving one (1 pound amount) to use in the next batch if desired.

5.  Form the pieces into long ropes, about 16 inches in length, using heel of hand to deflate any air bubbles.  Place on sheet pans lined with parchment paper.  Don’t place more than 3 loaves per large sheet pan.

6.  Holding scissors at a 45º angle, cut a wheat sheaf (or “epi”) design into the loaves, alternating left and right.  Start at the bottom of the sheaf pattern for the best result.  Cut well into the loaves; they will rise and join together.  Preheat the oven to 425º F.

7.  Let the loaves rise until doubled in size, about 1 hour.  When fully risen, spray the dough with water, and bake for 5 minutes.  Open the oven and very quickly spray the loaves again.  Bake for another 5 minutes.  Open the oven door to let out any residual steam, close it again, and bake for an additional 10 to 15 minutes, or until the loaves are done and sound hollow when tapped on the bottom.  Remove to a cooling rack and let cool until room temperature.


Notes:
1.  I know, you’re wondering why I gave the whole recipe here when I obviously had so many problems making it in my own kitchen.  Well, I might’ve just halved the recipe, but (again, long story short), that wouldn’t exactly work.  And I did try to determine the correct percentages to make a smaller recipe, but it was very late when I wrote this, and numbers just weren’t working out properly.  So I thought I’d give you the best shot at what I created, and reproduce the recipe that I used.  I do apologize if any of you happen to burn out the motors on your KitchenAid mixers.

2.  If you happen to have one pound of old bread dough on hand, you could absolutely use that in place of the recipe given for the pre-ferment.

Posted in Savory, Yeast Breads | 1 Comment

Brown Soda Bread

Week Twelve: Pre-Fermented Breads Brown Soda Bread!

 brown-soda-bread

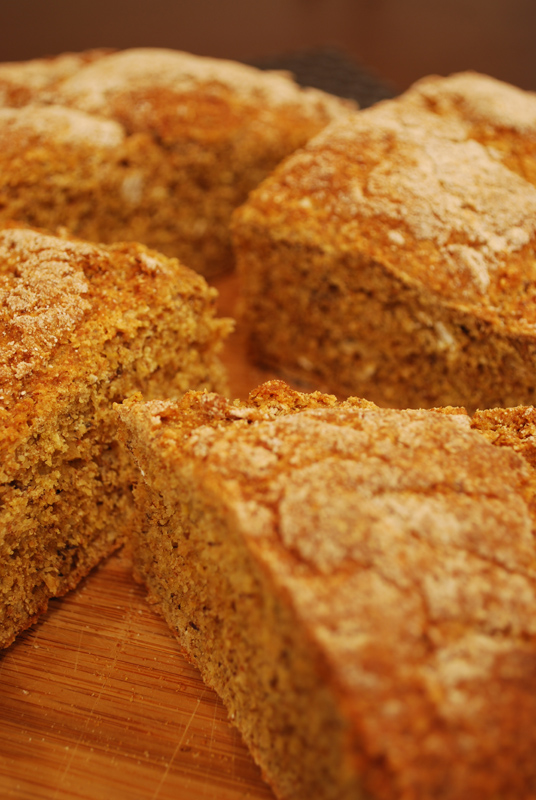
Well, today is St. Patrick’s Day, and if you thought I’d let it go without mentioning it, you’ve got another thing coming.  If there’s one bread anyone in America makes in honor of this day, it’s soda bread.  Today, I’m making a (mostly) traditional Irish Brown Soda Bread in celebration!

Oh, but didn’t I already make soda bread?  Well, yes; but, no (but yeah, but no).  See, I made a white flour soda bread.  That’s not exactly the same; nor is it really traditional as I previously thought.  Since I made that bread, I realized that white soda bread, made with the more precious and more refined white flour, was historically reserved for special occasions.  So obviously, I had to have a go at my (preferred) brown soda bread, made with whole-wheat flour, as was historically more common in Ireland.

Once again, Americans; may I remind you that traditional Irish Soda Bread contains no currants or caraway seed!  It may be delicious, but if it contains such ingredients, it is called “Spotted Dick” instead.  It it certainly not soda bread!  So, okay; this isn’t exactly a 100% true soda bread either, seeing as it has some non-traditional grains (oatmeal, wheat germ, wheat bran, etc.) added to the whole-wheat flour.  But little extras like that are what put your individual mark on your bread; no one else will likely make it exactly like you will.  I just love that!

When I made this, I perhaps didn’t add quite enough dry ingredients, since my dough came out very wet and was very tricky to move.  But it turned out extremely moist and delicious, so take that with a grain of salt.  The crust turned out perfectly thick and crunchy, giving way to the soft, almost biscuity interior.  The complex flavors from the various grains was the proverbial icing on the cake, and gave it a quite pleasant toothiness.  And did I mention how quick and easy it was to make?  This bread would be the perfect match to any St. Patrick’s Day feast, whether it be corned beef and cabbage, beef and Guinness stew, or just a bowl of colcannon.  But please… lay off the green beer.  Go for the whiskey instead.


Brown Soda Bread
Adapted from Noreen Kinney
Makes 1 loaf 

1 3/4 cups white whole wheat flour
1 cup whole wheat flour, plus more for shaping
3 tablespoons cold unsalted butter, cut into 1/4 inch sized pieces
2 teaspoons baking soda
1 3/4 teaspoons salt
2 tablespoons granulated sugar
1/4 cup wheat bran
1/4 cup wheat germ
1/4 cup rolled oats (regular oats)
2 tablespoons steel-cut oats
1/4 cup ground flaxseed
1 large egg
About 1 3/4 cups buttermilk

1.  Adjust an oven rack to the center position and preheat the oven to 425°F.  Line a heavy baking sheet with parchment paper or aluminum foil.

2.  In a large bowl, stir the two flours together. Add the butter and work it into the dry ingredients with your fingertips until the fat particles are very fine (small lumps are okay). Stir in the baking soda, salt, sugar, wheat bran, wheat germ, oats, and flaxseed.

3.  Beat the egg lightly with a fork in a 2-cup glass measure. Add enough buttermilk to come to the 2-cup line and stir with the fork to combine well. Add the liquid to the dry ingredients and stir with a wooden spoon or rubber spatula until the dough gathers into a thick, wet-looking mass.

4.  Sprinkle your work surface liberally with whole wheat flour and scrape the dough onto it. Dust the dough with a bit more whole wheat flour. Pat the dough into a circular shape about 7 inches across and 2 inches high and transfer it to the prepared baking sheet. Don’t worry about getting it perfect, it should look a little rustic. Using a bench scraper or the dull side of a chef’s knife, gently make a cross-shaped indentation on top of the loaf going right to the edges. Don’t actually cut the dough.

5.  Bake the bread for about 40 minutes, until it is well browned and sounds hollow when rapped on the bottom. An instant-read thermometer inserted into the center of the loaf should register 195° to 200°F. Cool the loaf on a wire cooling rack, and serve warm or at room temperature with butter. Cut into quarters (or “farls”) and slice each quarter with a sharp serrated knife to serve.


Notes:
1.  Soda bread keeps well at room temperature, wrapped in plastic, for 2 to 3 days. The entire loaf or quarters of it can also be frozen, when completely cool, for up to 2 weeks.  Refresh the bread in a preheated 300°F oven for 10 minutes if thawed, or about 20 minutes if still frozen.

2.  You should absolutely feel free to switch up the additional grains (wheat germ, bran, oats, etc.) to suit your tastes or your fancy.  Use the proportions given as a basic guideline, and vary the grain additions as you like, adding from 4 to 5 ounces total by weight for each loaf.

3.  I used white whole wheat flour in this recipe, but you can substitute all-purpose if you like, or additional whole-wheat.  I like white whole wheat in this instance, since it has the nutritional benefits and nutty flavor of whole-wheat flour, but acts a little more like white flour as far as texture goes.  If you can’t find it, I recommend using all-purpose instead, since it may come out too dense for many people if you use all whole-wheat.  All-purpose will give you a more fluffy, lighter bread.

Posted in Quick Breads, Savory | Leave a comment

G’Bread

Week Twelve: Pre-Fermented Breads

gbread

This week, I’ll be discussing breads that use a simple and ancient way to improve the flavor and texture of your finished loaf.  All these breads will use what’s called a “pre-ferment”, which just means that you make a little bit of dough in advance, and add it to the remaining ingredients to make the final dough.  You may recognize the technique as called a “starter”, like when you make sourdough.

Before yeast was really understood, using a bit of dough from a previous batch of bread was a common way to introduce the yeast into a bread.  But not only does a pre-ferment help with yeast production, it also vastly improves the flavor of your bread.  In order to understand why, you have to understand fermentation a little.

Fermentation, also known as the first rise, is when the yeast cells start to feed and reproduce.  When they feed, they create organic acids, called acetic acid and lactic acid.  These acids are important flavor compounds, as well as strong dough conditioners that help strengthen the gluten and form it properly.  So these acids are good here; we want them to develop, and that takes time.

But if you let a standard dough sit too long, the yeast multiplies too much, releases too many gases, and will eventually break the gluten structure, just like blowing up a balloon until it pops.  Therefore, we want to slow them little yeasties down.  This is why a pre-ferment generally has very little yeast added, and/or is put in the refrigerator (cold will retard yeast activity, but still allow for the acids to develop).

So, then, why don’t you just make any type of dough, stick it in the refrigerator, and call it a day?  Well, long story short, any other ingredient will get in the way of the yeast doing its thing, and making those acids.  That means don’t add any salt, sugar, milk, butter, or anything else; just water, flour, and yeast.  The yeast knows what it’s doing, don’t let anything else interfere!

Now, there are many different types of pre-ferments, and I’ll hit on the basic types throughout the week, but I certainly won’t be able to hit them all.  The main difference between them all is the amount of water compared to the amount of flour (aka: level of hydration).  Generally speaking, the more water in a pre-ferment, the faster the yeast will multiply; therefore, you treat them all a little differently, based on how fast or slow you want the yeast to grow.  The bread today uses a pre-ferment called a “biga”.  This is an Italian starter, and is usually fairly firm (about 50% hydration).  This one is best when fermented over long time in cool environment (like a refrigerator).  Bigas tend to be more stable and keep longer at their peak than do other, more liquid pre-ferments.

This recipe, from Cook’s Illustrated, is one of my treasures, and marked a clear change in the quality of bread I bake.  When I started making bread, there was a sharp distinction between the homely, somehow soft and dense loaves I produced and the airy, crisp-crusted beauties I had seen in stores.  This recipe changed all that.  Because of this recipe, I can now produce bread that I am quite happy to admit that I made with my own two hands.

The article accompanying the recipe beautifully and thoroughly delved into the science behind a great loaf, and helped me understand what I was actually doing when I mixed flour and water.  But wasn’t it all a bit… daunting?  Yes, every step was clearly explained, and seemed simple enough; but who could spend 6 hours of the day waiting on this bread, when one could just try any number of other, faster recipes?  But the promise of an authentically rustic Italian loaf made me hold onto the ripped-out pages, waiting for the right time.  I was tempted, plain and simple.

Finally one weekend, I went out and bought my now-invaluable scale* to weigh the ingredients properly, as the amounts were given in ounces, not cups.  I began the time-consuming chore, counting exactly the hours in between tasks, taking care with every step, being certain not to disrupt the satiny dough.  I patiently and a bit nervously performed the necessary steps as directed.  This was not the bread I was used to making.  But when I pulled those first beautiful loaves from the oven, I was sure I was onto something good.  

After allowing time for them to cool (always the cruelest part), I grabbed a serrated knife.  Slicing through the crust made it shatter onto the counter in tiny shards.  My previous attempts at bread had never done such a thing.  A faint wisp of steam carried the scent of the warm interior to my face.  It smelled perfect.  Inspecting the cross-section revealed the airy holes and soft webbing of a properly-made bread.  Dipping my creation into a dish of olive oil, I tasted it.  Had I really made this?  It tasted like it was from the best bakery in town!  Crunching through the crust into the chewy interior, I knew I’d never be satisfied with making a lesser bread ever again.  Success!  

So what’s with the name?  My brother-in-law came to like this bread so much, that he would ask me to make it as often as I could manage.  Not sure what to call it (its given name, “Rustic Italian Bread”, being a bit unwieldy), he started requesting “that good bread”.  Which then became “Good Bread”, which was then further shortened to “G’Bread”.  And now you know.

Yes, it’s time-consuming, but each step is fairly simple.  And boy, is it worth it.

* – As I may have mentioned previously, I find a scale crucial in baking.  You can measure a cup of flour ten times and get ten different amounts, but one ounce is always one ounce.  And it certainly doesn’t have to be expensive or fancy; I think mine was around ten dollars, and is a tiny plastic thing.


G’Bread
From Cook’s Illustrated
Makes 1 giant loaf

Biga:
11 ounces (about 2 cups) bread flour 
1/4 teaspoon instant yeast
1 cup water, room temperature

Dough:
16.5 ounces (about 3 cups) bread flour, plus extra for dusting 
1 teaspoon instant yeast
1 1/3 cups water, room temperature
2 teaspoons salt

For the biga:
1.  Combine flour, yeast, and water in bowl of standing mixer fitted with dough hook.  Knead on lowest speed until it forms a shaggy dough, 2 to 3 minutes.  Transfer biga to a medium bowl, cover tightly with plastic wrap, and let stand at room temperature until begining to bubble and rise, about 3 hours.  Refrigerate biga at least 8 hours, and up to 24 hours.

For the dough:
1.  Remove biga from refrigerator and let stand at room temperature while making dough.  Combine flour, yeast, and water in bowl of a standing mixer fitted with the dough hook; knead on lowest speed until rough dough is formed, about 3 minutes.  Turn mixer off, and without removing dough hook or bowl from mixer, cover bowl loosely with plastic wrap; let dough rest 20 minutes.

2.  Remove plastic wrap, add biga and salt to bowl, and continue to knead on lowest speed until ingredients are incorporated and dough is formed (dough should clear the sides of the bowl but stick to very bottom), about 4 minutes.  Increase speed to low and continue to mknead until dough forms a more cohesive ball, about 1 minute.  Transfer dough to large bowl (at least 3 times dough’s size) and cover tightly with plastic wrap.  Let dough rise in cool, draft-free spot away from direct sunlight, until slightly risen and puffy, about 1 hour.

3.  Remove plastic wrap and, using a broad nonstick spatula, fold the dough over itself, as though you were folding a letter: 1/3 over the center, then the opposite 1/3 over that.  Lastly, fold dough in half again, perpendicular to the first folds (like you’re folding the letter in half).  Dough should end up being roughly a square.

4.  Replace plastic wrap, let dough rise 1 hour.  Turn dough again, following above procedure, then replace plastic wrap and let dough rise 1 hour more.

5.  Dust work surface liberally with flour.  Gently scrape and invert dough out of bowl onto work surface (side of dough that was against bowl should now be facing up).  Dust dough and hands liberally with flour, and using minimal pressure, push dough into rough 8 by 10 inch square.  Gently roll up dough, using long edge, and pressing seam to seal as you roll.  Tansfer dough to a large sheet of parchment paper.  Dust loaf liberally with flour and cover loosely with plastic wrap; let loaf rise until doubled in size, about 1 hour more.  Meanwhile, adjust oven rack to lower-middle position, place baking stone on rack, and heat oven to 500º F.

6.  Using a sharp serrated knife, cut a slit 1/2-inch deep lengthwise along top of loaf.  Spray loaf lightly with water.  Slide parchment sheet with loaf onto baker’s peel or upside-down baking sheet, then slide parchment with loaf onto hot baking stone in oven.  Bake 10 minutes, then reduce oven temperature to 400º F, and quickly spin loaf around.  Continue to bake until deep golden brown, and a thermometer inserted into center of loaf reads 210º F, about 35 minutes longer.  Transfer to rack, discard parchment, and cool loaf to room temperature, about 2 hours.


Notes:
1. I made G’Bread this time into one big loaf, as the orginal recipe instructs.  But typically, I cut the dough into 3 or 4 smaller loaves (even into little dinner rolls sometimes), and it works just beautifully; in fact, I think it works better.  You end up with a more airy crumb in the bread, and there’s not as much danger of overcooking the exterior before the inside is completely done.  I think maybe the mass of the whole recipe of dough is a little much for the yeast to raise, compared to a smaller loaf.

2.  If you don’t have a baking stone, turn a baking sheet upside down, and let it heat up with the oven.  You get a much better crust that way!

3.  I’ve never tried making this by hand; nor do I recommend it.  The dough is a little too wet to handle on its own, and you would run the risk of adding too much flour if kneading by hand.  I hate to say it, but this one really does require a stand mixer.

Posted in Savory, Yeast Breads | Leave a comment

Bean Parathas

Week Eleven: Savory Pancakes

bean-parathas

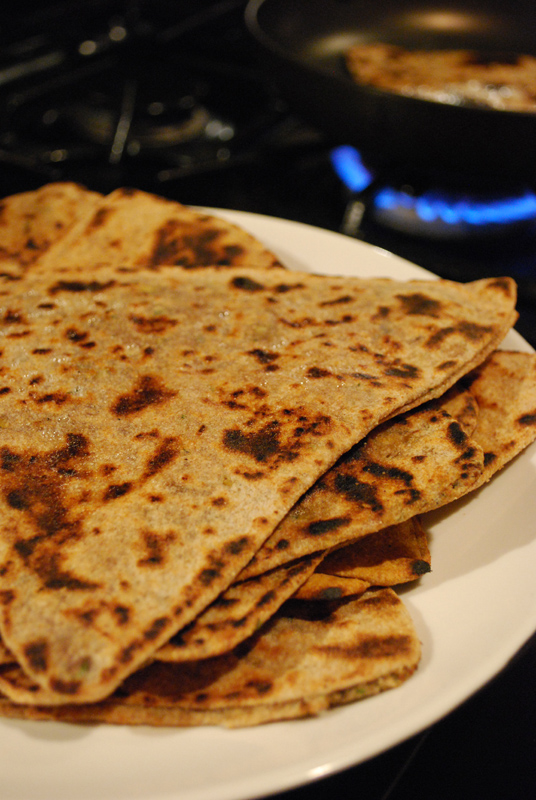
Here I go again, with my Indian food kick.  I just couldn’t pass up this recipe, even though it’s not exactly a pancake as such.  It is definitely a griddle-cooked flatbread, though; so I say it’s fair game.

Parathas are similar to rotis, but are usually stuffed.  Wait, what now?  Well, a roti is an unleavened flatbread from India, typically made with atta flour (a finely stone-ground whole-wheat flour).  If you take that dough, and stuff it with something, you end up with a paratha.  There are different ways to stuff a paratha, though: by mixing the “stuffing” into the dough, then rolling out; by making a ball of dough filled with the stuffing, then rolling out, folding, and rolling more; or by layering two pieces of dough with the stuffing in the middle, and then rolling out.

Parathas originated in the Punjab region, near the India-Pakistan border.  They quickly spread, though, and are now ubiquitous throughout India, and well into Southeast Asia.  They can be, and are, filled with anything imaginable, including eggs, peppers, meat, greens, fruits, poultry, peas, beans, sugar, et cetera.  Anything that can be turned into a fairly dry filling (wet fillings tend to tear the dough) can be stuffed into a paratha.

While a roti is considered a “daily bread”, because of its ease and simplicity, a paratha is seen as more of a special occasion bread, because of the relative expense involved in the stuffings, and the time involved in creating them.  Though honestly, I don’t know when I’ve made a more complicated-tasting bread in so little time.  Made only with the aforementioned atta, ghee (clarified butter), and water, the dough takes hardly any time to come together, and can sit in the fridge for a day or two.

Additionally, while rotis are usually served with heartier foods, like curries and dals, parathas are often a little more substantial, and so are served with lighter fare.  They are frequently dipped into or served with yogurt, and are a perfect match for a cool mango lassi.

In this recipe, I suggest the use of a white whole wheat flour (I use King Arthur brand) in place of the traditional atta flour, or the more Americanized whole-wheat flour.  Atta flour is more finely milled than traditional whole-wheat flour, and has a higher protein count, which makes it very well suited to all the rolling out that shapes the bread.  I think that particular white whole wheat flour would work just as well, and is certainly easier to track down than is a good atta flour.  [Technical side note: According to King Arthur, their white whole wheat flour has a 13.2% protein count, whereas their traditional whole wheat has 14% protein.  I was unable to determine the protein level in wheat atta, but it must be somewhere around those levels, considering its typical usage.  For reference, all-purpose flour tends to be around 10-12%, and tender cake flour around 6-8%.]

For the filling, you can of course substitute anything you like , but this filling is absolutely outstanding as written.  I actually happen to have some black salt on hand, as called for in the recipe; and I highly recommend you try whatever gourmet salt you might be able to run across.  Please just don’t use table salt.  I know it seems snobby and very inconsequential, but it really does make a difference here, amazingly so.  If you can’t find garam masala, you can make your own blend of whatever spices you like of the following: coriander, clove, fennel, cumin, peppercorn, cardamom, allspice, bay leaf, nutmeg, mace, cinnamon, and star anise.  I highly recommend investing $15 in a half-decent coffee grinder (only used for this purpose!), and buying whole spices to grind yourself whenever possible.  This usage here is one such ideal application.  Pre-ground spices just aren’t the same!  Trust me – once you’ve ground your own, you’ll never be able to go back!


Bean Parathas
Adapted from Gourmet.com
Makes 8 breads

For Parathas:
2 cups white whole-wheat flour, plus additional for rolling out dough
1/2 teaspoon salt
3 tablespoons unsalted butter, melted, plus an additional 3 or 4 tablespoons for brushing
1/2 cup plus 1 to 2 tablespoons water

For bean filling:
1/4 cup canned chickpeas, rinsed and drained
1/4 cup canned black beans, rinsed and drained
1/4 cup canned kidney beans, rinsed and drained
1/4 cup chopped cilantro leaves
2 tablespoons chopped mint leaves
1/2 tablespoon fresh lemon juice
1 teaspoon minced fresh ginger
1 teaspoon garam masala
1/2 teaspoon sugar
1/2 teaspoon black salt
1 to 2 teaspoons minced peeled green chile with seeds

For bean filling:
1.  Mash beans in a bowl with a fork or potato masher.  Stir in remaining ingredients.

For parathas:
1.  Stir together flour and salt in a bowl. Add 3 tablespoons melted butter and mix with a fork until evenly distributed. Add 1/2 cup water and mix with a fork until incorporated. Add just enough additional water (1 to 2 tablespoons) to form a dough. Knead until smooth and elastic, about 10 minutes. Place dough in a lightly-oiled bowl, turning to coat, and cover with plastic wrap.  Let stand at room temperature 1 to 3 hours, or refrigerate at this point.

2.  Divide dough into 8 equal portions and roll each into a ball. Keeping the remaining balls covered with a dampened kitchen towel, push your thumbs into center of each ball to make a depression and fill with 1 tablespoon bean filling, closing dough around it, and pinching to seal. Flatten ball into a disk and roll out into a 6-inch round on a lightly floured surface with a lightly floured rolling pin.

3.  Brush with some of remaining butter and fold in half. Brush half-circle with butter and fold in half again to form a quarter-circle.  Roll out into a triangle with roughly 6-inch sides on a lightly floured surface with lightly floured rolling pin. Put paratha on a baking sheet and cover with another dampened kitchen towel (not terry cloth). Repeat with remaining dough. Do not overlap parathas, or they will stick together.

4.  Heat a dry 10- to 12-inch nonstick pan, cast-iron skillet, or griddle over medium-high heat until hot, then cook parathas until bubbles form and undersides are browned in spots, about 1 minute.  Brush top with the additional melted butter and turn paratha over.  Brush cooked side with butter and cook until dough is cooked through and underside is browned in spots, 30 seconds to 1 minute more.  Serve warm.

Notes:
1.  If needed, you can make the dough one day ahead and keep covered in the fridge. Just make sure to let it sit until at room temperature before proceeding (it took mine about an hour).

2.  I found it necessary to firmly pinch the dough together, so that the filling didn’t come through the dough while rolling out.  Even so, it wasn’t always successful.  Once the filling starts poking through, start the folding procedure.  Remember, it’s better to roll the dough a little bit many times, than it is to roll it all at once.  Just do what you can with each piece, set it aside, and move on to the next piece.

Posted in Savory, Unleavened Breads | Leave a comment

Wild Rice Pancakes

Week Eleven: Savory Pancakes

wild-rice-pancakes

I just love wild rice.  It’s very similar to brown rice, but with a deeper, richer flavor, and an even heartier texture.  Did you know that it’s not actually a true rice?  Yes, it grows in paddies like rice, and shares many nearly-identical culinary characteristics, but it’s technically a marsh grass.  In fact, until the mid-1960’s, most wild rice in this country was grown in natural streams and lakes, and still cultivated mainly by hand.  Because of this lack of commercial development (due to the unique properties of the plant), wild rice still remains quite expensive, compared to other true rice.

Wild rice is most often sold in packages mixed with long-grain white rice, to make it more affordable, and to mitigate the coarse texture of the thicker hull.  I’ve seen varieties of mixes that included brown rice, fragrant basmati rice, and even a muti-grain mixture from Trader Joe’s that included black barley and daikon radish seeds (which is absolutely delicious!).  You can find 100% wild rice online, but I’m more of an brick-and-mortar girl; I want to see what I’m buying.  Though I have not specifically checked the bulk bins at Whole Foods, I suspect they’d be the best bet.

Generally speaking, you can cook wild rice like you would brown rice.  And here’s a little secret: I am horrible at cooking rice.  Just terrible.  It either comes out soupy and limp, or underdone and burnt.  Or, somehow, all of the above.  But I have found a go-to, never-ever-fails, perfect-every-time recipe for brown rice, by the inimitable Alton Brown.  It worked perfectly with the wild rice blend that I used.  Yes, it takes an hour; but if there’s one thing breadmaking has taught me, it’s patience.  Patience, and advance planning.  Sometimes, I’ll just whip up a batch of brown or wild rice one night, just to have on hand for a fast dinner.  (Did you know rice freezes and thaws beautifully in the microwave?  If it’s good enough for Masaharu Morimoto, it’s good enough for me.)

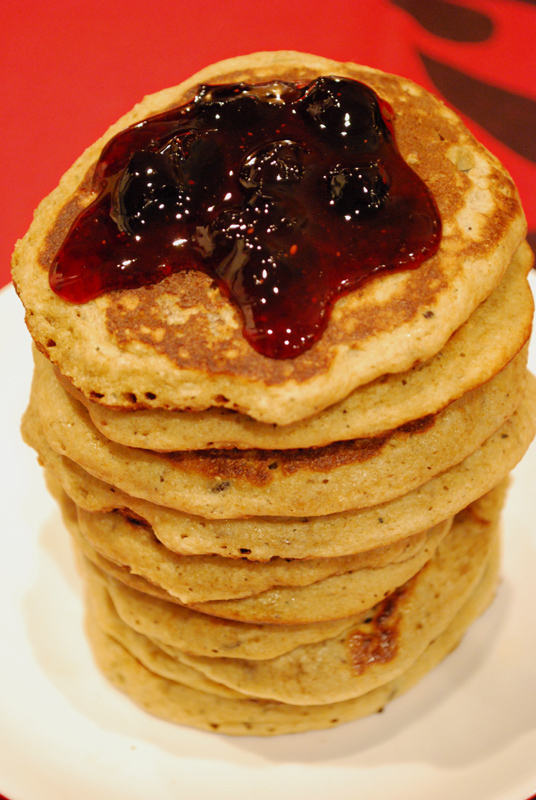
I don’t know what it is about the standard pancake base (whether or not it has sugar added to it) that makes it demand a sweet topping.  Maybe it’s just a Pavlovian reaction, but it just seems like a natural requirement to me.  These pancakes were pretty good served with a nice maple syrup, but they were heavenly when paired with a friend’s homemade blueberry preserves.  Wild rice and blueberries have a natural affinity for one another, as well as for another delicacy: duck.  I’m dying to serve a sliced seared duck breast, all crisp-skinned and rosy-red inside, atop one of these pancakes, with a blueberry gastrique drizzled over the whole thing.  My mouth is watering!


Wild Rice Pancakes
Makes about 24 pancakes

1 1/2 cup cooked wild rice
3/4 cup milk
3/4 cup buttermilk
1/3 cup plain yogurt
2 large eggs
1 1/2 cup white-whole-wheat flour
1 teaspoon baking soda
1/2 teaspoon salt
1/4 teaspoon black pepper
1/2 teaspoon dried thyme
Butter or oil for greasing griddle 

1.  In a large bowl, mash the wild rice with a potato masher or fork for a minute or two, just enough to make it a little sticky.  Add the milk, buttermilk, yogurt, and eggs, and whisk until combined.

2.  In a separate bowl, whisk together the flour, baking soda, salt, pepper, and thyme.  Stir the dry ingredients into the rice mixture, until just combined.  Preheat the oven to 200º F, and leave a sheet pan on one rack.

3.  Heat a nonstick pan or griddle over medium heat until hot but not smoking.  Brush or drizzle the surface with melted butter or oil.  Working in batches, scoop the batter onto the hot griddle or pan in 1/4 cup measures.  Cook for 2 to 3 minutes on each side, or until golden brown on the bottom.  Transfer the pancakes to the sheet pan in the oven to keep warm until ready to serve.


Notes:
1.  Depending on your ingredients, your batter may be a little thicker or a little runnier.  If you need to thin the batter, add a little more milk.  If it’s too runny, add a little more flour.

2.  I used the specialty white-whole-wheat flour here, which I thought lent a nice, nutty, whole-grain flavor to complement the wild rice, but retained some of the nicer texture of a standard white flour.  Feel free to use whatever sort of flour you like; regular whole-wheat will make for a very hearty pancake, whereas regular all-purpose will make a softer end product.  An even combination of the two would be a nice compromise.

3.  These could conceivably be made into a gluten-free version, as wild rice produces no gluten.  I’m not experienced in converting recipes thusly, but I imagine you’d simply have to replace the wheat flour with a gluten-free flour, such as buckwheat, potato, corn, or even almond.

Posted in Quick Breads, Savory | Leave a comment

Spicy Sausage Pancakes

Week Eleven: Savory Pancakes

spicy-sausage-pancakes

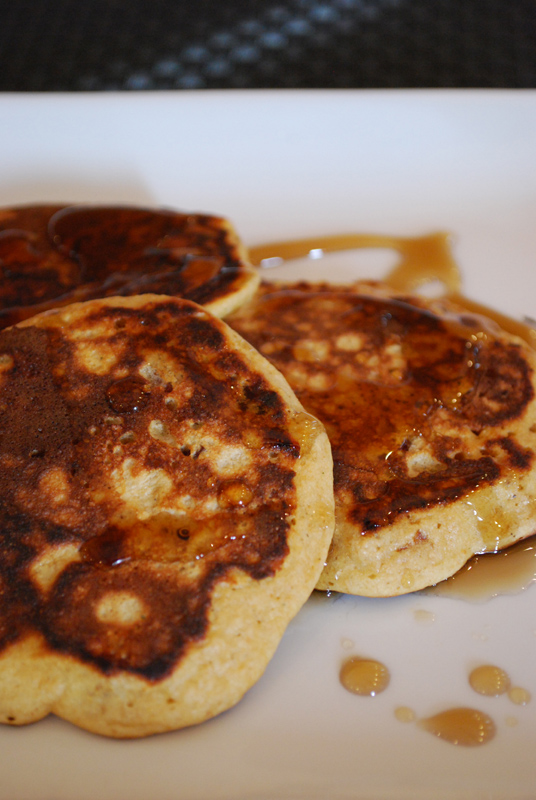
I remember the first time I tried sausage with syrup.  It was at my cousins’ cousins’ house.  Yes, you heard that right; and yes, it was in Kentucky.  We were all enjoying a delectable pancake breakfast, probably after another memorable sleepover involving video games, NKOTB, and possibly a makeover, but more likely just too much sugar.  As a side note, I had always been fairly meticulous with my plate as a child; every food should be kept in its own separate place, never mixing with anything else, and God Forbid anything get stacked on anything else (unless it was red beans on rice, or some similarly exempt food).

So there I was, enjoying my pancakes, a sausage link carefully pushed to one side, so as not to intrude.  But then – oh then! – I saw it.  In my youthful zeal, I had overdone it with the Mrs. Butterworth’s (as you will at that age), causing a veritable syrupalanche that coated the whole plate to the rim.  The sausage never really had a chance.

I was also rather shy as a child, hardly daring even to ask things of close relatives for fear of seeming impolite.  So rather than do the unthinkable – admit that I had spoiled a prized piece of sausage, and beg for another pristine one – I steeled myself, and took a tentative bite, determined to choke it down as best I could.  And lo and behold, my eyes were opened, I saw the truth, and I saw that it was good.  Syrup and sausage are incredibly awesome together!  I think I poured on still more syrup for the remaining piece of sausage.

In my more recent, more sophisticated-palate years, I have developed a great fondness for a bit of good cured-meat charcuterie.  Salami, prosciutto, Spanish chorizo, soppressata, boudin, breasola, you name it, I’ll eat it happily.  So when I came across a recipe for Sausage Pancakes, I thought it would be a perfect addition to this week’s recipes.  But to my surprise, the sausage referred to was a raw sausage, rather than my favored and assumed cured sausage.  Of course I modified it, substituting a spicy cured pork sausage instead, but keeping the otherwise-typical pancake base.  Just make sure to get a good-quality sausage; what’s the point otherwise?

There is no added sugar in the batter, all the ingredients are certainly savory in nature; but somehow, the familiar pancake format leaves these begging for at least a drizzle of syrup, if not a bath of the stuff.  And if you’ve never tried syrup with sausage, just wait until you try these.  Forget stabbing together a bite of pancake with a bite of sausage; here, it’s all built in.  Convenient!  Heck, these would even make a good (if slightly indulgent) to-go breakfast; freeze a batch, pop one in the toaster while you’re getting dressed, and eat it while you’re running out the door.  Of course, they’re absolutely perfect for a lazy Sunday brunch, too.  Add a little fruit salad on the side, top off with a Mimosa or two, and you can call it a day!


Spicy Sausage Pancakes
Makes about 18 pancakes 

1 teaspoon olive oil
1/2 cup diced onion
5 to 6 ounces cured hot sausage (1 link), chopped into a small dice
1 1/4 cups white whole-wheat flour
1 teaspoon baking powder
1/4 teaspoon baking soda
1/4 teaspoon salt
1 1/4 cups buttermilk
2 tablespoons applesauce
2 large eggs

1.  Heat oil in a large nonstick skillet over medium heat. Add onion and cook until soft, about 5 minutes, stirring frequently. Add sausage to pan and cook until some fat renders out, stirring frequently, about 4 to 5 minutes. Remove sausage mixture to a plate lined with paper towels, to drain some fat off.  Set aside.

2.  Whisk together the flour, baking powder, baking soda, and salt in a large bowl. Combine buttermilk, applesauce, and eggs, and add to the flour mixture, stirring just until smooth. Add in the sausage mixture.  Preheat oven to 200º F.

3.  Heat nonstick pan or griddle over medium heat until hot but not smoking.  Using about 1/4 cup batter per pancake, pour or spoon batter onto the hot surface. Turn pancakes when the tops are covered with bubbles and the edges look cooked.  Remove pancakes to a sheet pan in the oven to keep warm until serving.


Notes:
1.  You can add some herbs or spices to these if you like.  Thyme is always good with sausage of any sort, but may want to customize the flavoring to the type of meat you use.  A pinch of cinnamon or clove would be excellent with pork sausage, or with a chicken-apple sausage.  Try a hint of rosemary with turkey sausage; or match cumin to the fennel in Italian sausage for a sweet-smoky note.  I recommend using only a pinch or two, to keep the sausage as the star of the show.

2.  I used a cured pork sausage (similar to chorizo), which is ready-to-eat out of the package; but you can use any type of sausage you like.  Just make sure to cook it thoroughly if you use a raw one!

Posted in Quick Breads, Savory | Leave a comment