High-Altitude Olive Oil Quick Bread

Week Thirty-Four: High-Altitude Week

olive-oil-h-a

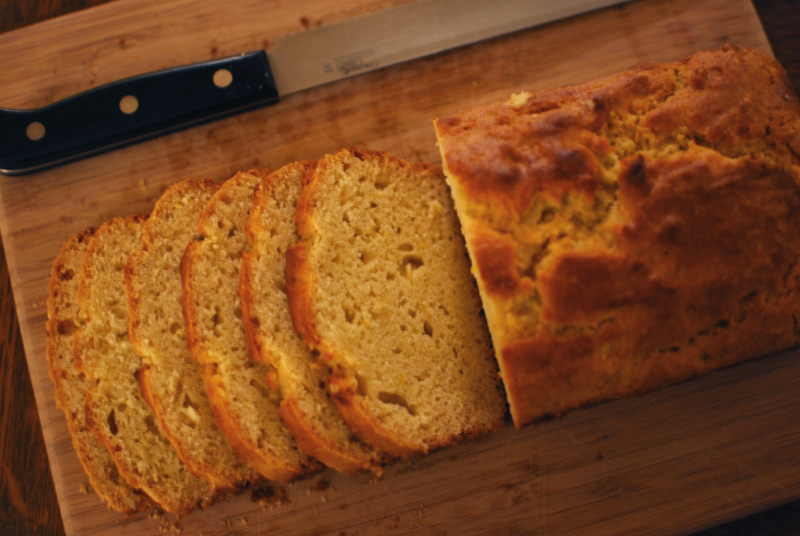
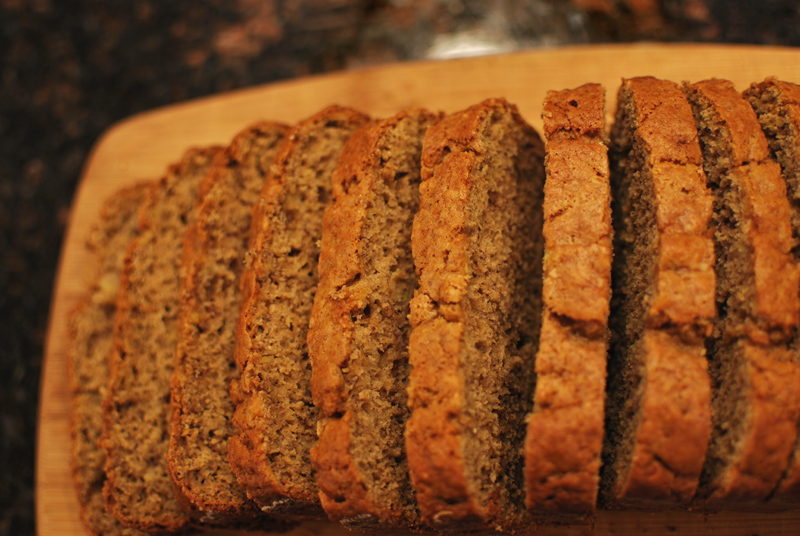
Now this is interesting.  Here I am in Denver, looking at my two loaves of Olive Oil Bread, one baked in Chicago as a control loaf, and the other just pulled from the charmingly windowless oven here in my sister’s kitchen.  No adjustments have been made to the recipe, as I wanted to see what exactly would go wrong when baking at altitude.

I’ve heard the usual horror stories of how beloved and sea-level-tested foods transform when baked on mountain tops.  They deflate completely after baking, burn black on the outside and stay half-raw in the middle, stick to pans beyond all hope, and everything in between.  I was prepared for just about anything, and warned my family that this would probably not be edible in the slightest.  I steeled myself for the moment when I would certainly know my efforts had all been in vain.

The high-altitude version of this bread turned out better than the control version.

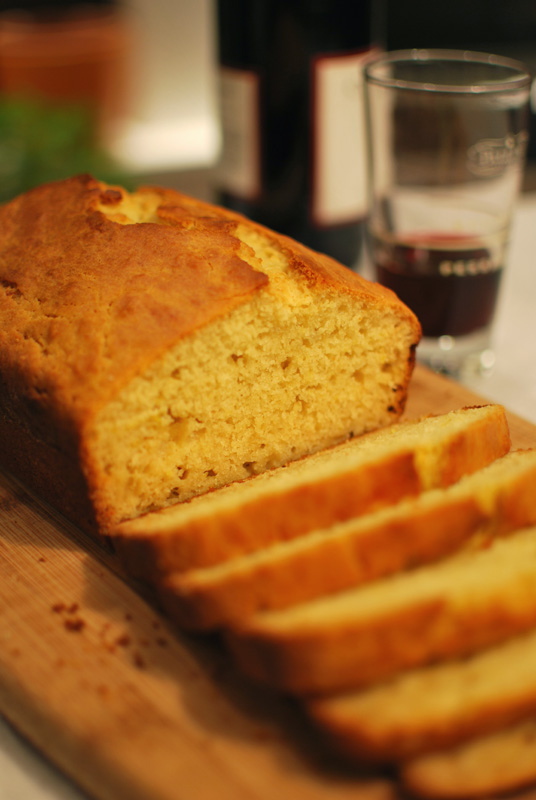
Yes, this version, which I assumed would remain doughy in the center, slightly burnt on top, over-risen and sinking in the middle… it came out better.  Where the original was rich, a bit dense, and redolent with the flavor of olive oil, this high-altitude version was fluffy, lightly crumbly, and was flavored more with lemon, leaving the green fruit of olive oil to provide instead a tasteful and elegant backdrop.  This was not what I was expecting.

What happened?

It’s best now to explain a little of the science behind high-altitude baking.  For quick breads, the most important thing here is air pressure.  Since air pressure is lower at higher altitudes, leavening happens more quickly.  Note that it’s not more active, but faster.  This means that all your chemical leaveners (i.e., baking powder and soda) give up the ghost in one mighty blow, and are done for afterwards.

In order to trap the gases given off by these leaveners, you need to set the structure of your breads faster than at sea level.  This means you need more flour (to provide a gluten structure), and higher temperatures to set it in place faster.  Sugar is often reduced as well, to help with a more stable structure.

In turn, more flour means a drier product, and higher temperatures mean the outside will cook faster than at low altitudes, and the cooking time will be less.  To combat these two issues, it’s customary to add more liquid, especially an acidic one such as buttermilk or yogurt, as an acidic batter gives a better rise (long, technical story short).  Additionally, higher moisture content will help carry flavors that may become muted, due to lack of water molecules (resulting from faster evaporation) that carry scents to the nose.

That’s all well and good; but why did my high-altitude bread turn out better?  In the original recipe, I had replaced the sugar with a lesser amount of honey, which is an acidic liquid.  Yes, Gentle Reader, I had inadvertently perfected the recipe for high altitudes without even intending to, and didn’t even realize it.  Silly me.

Because of the increased moisture, my Chicago-made loaf was denser than it would have otherwise been; but this made for an ideal recipe at Denver’s altitude.  Also, the lack of baking soda – which neutralizes acidity – in the recipe only helped matters at the higher altitude.

As it turned out, this bread that I thought a bit uninteresting at home ended up rather soignée when baked at a mile high.  The flavor of olive oil, so showy in the original, calmed down and let the brightness of lemon shine instead.  (This also may have resulted from the required use of my sister’s standard-issue zester, which produces larger pieces of lemon zest, as opposed to my own Microplane which issues forth a mountain of diaphanous zest-bunnies.)  The texture was much lighter and more airy, which was better suited to the nature of the bread; the original was rather pound-cakey in comparison.

And so, my original experiment – wherein I bake a control loaf at sea level, bake a second loaf at high altitude to see what goes wrong, then bake a third loaf at high altitude with necessary adjustments made – is now thrown completely off track.  I simply did not plan for the possibility of a better result at a higher altitude.  There’s nothing to do now except go back down to sea level and adjust the recipe to fit that; I’ll be posting that variation on Friday.

I’m re-posting this recipe as it was originally written, but have changed the name to reflect the best method of baking it.  Stay tuned for more high-altitude adventures!


High-Altitude Olive Oil Quick Bread
Adapted from Epicurious.com
Makes one 9 x 5 inch loaf

11 ounces (about 2 1/2 cups) unbleached all-purpose flour
2 teaspoons baking powder
3/4 teaspoon salt
Finely grated zest of 1 lemon
1/3 cup honey
2 eggs, lightly beaten
3/4 cup milk
1/2 cup extra-virgin olive oil

1.  Preheat oven to 350° F.  Lightly butter a 9 x 5 inch loaf pan, sprinkle with flour, and turn upside down and knock on the bottom to remove excess.  In a medium bowl, whisk together the flour, baking powder, salt, and lemon zest; set aside.

2.  In a large mixing bowl, whisk together the honey, eggs, milk, and olive oil.  Add the flour mixture, stirring until just combined, being careful not to overmix.  Transfer the batter into the prepared loaf pan, and smooth the top.

3.  Bake at 350° F for 50 to 60 minutes, or until a skewer inserted in the center comes out clean.  Allow to cool in the pan for about 5 minutes before removing to a wire rack to cool fully before slicing.  Serve slightly warm or reheated.


Notes:
1.  This bread will keep, wrapped in plastic, at room temperature for 1 to 2 days; alternatively, it will freeze beautifully wrapped well in plastic and aluminum foil.

2.  For extra non-stick protection, line the bottom of the floured loaf pan with a piece of greased parchment paper.

3.  This bread is best baked at around 5,280 feet above sea level.

Posted in Quick Breads, Savory, Sweet | Leave a comment

Plain Ol’ Bread

Week Thirty-Four: High-Altitude Week

yeast-chicago

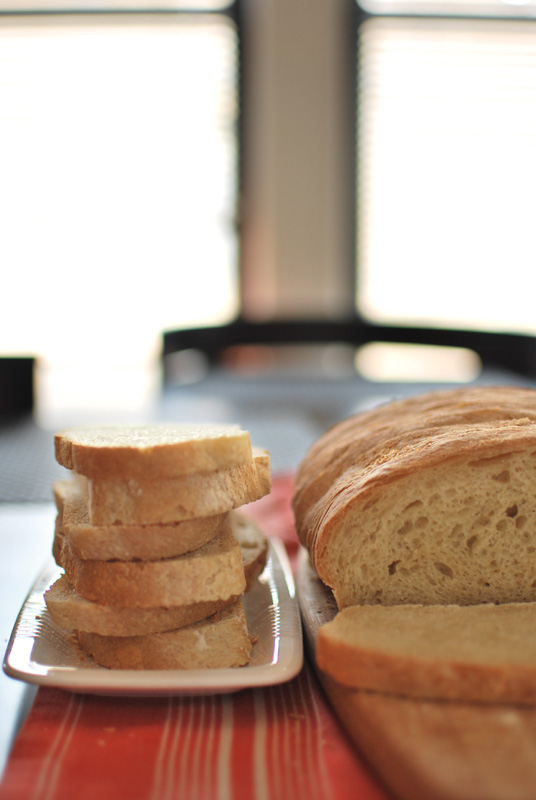
Today’s bread is the second “control” loaf that I baked in Chicago before arriving in Denver to conduct my grand high-altitude experiment.  Yesterday’s bread was a quick bread, or one that is chemically leavened.  Today’s bread, on the other hand, is yeast leavened.

As I understand it – and this is learned purely through recent research, not through any experience of my own – quick breads are more greatly affected by changes in altitude.  Yeast breads, not so much.  So theoretically, I should be able to replicate this Chicago-made bread pretty exactly in Denver.  Theoretically.

Considering that I’m still not sure what sort of equipment I’ll have access to (aside from a stand mixer), I’m going for the most low-tech, least-equipment method possible.  I’ll be bringing parchment paper with me, as I find it necessary and irreplaceable, but that’s it.  I refuse to fly with flour; it’s unnecessary on so many levels, even though I seriously almost want to (I’m quite particular about my flour).

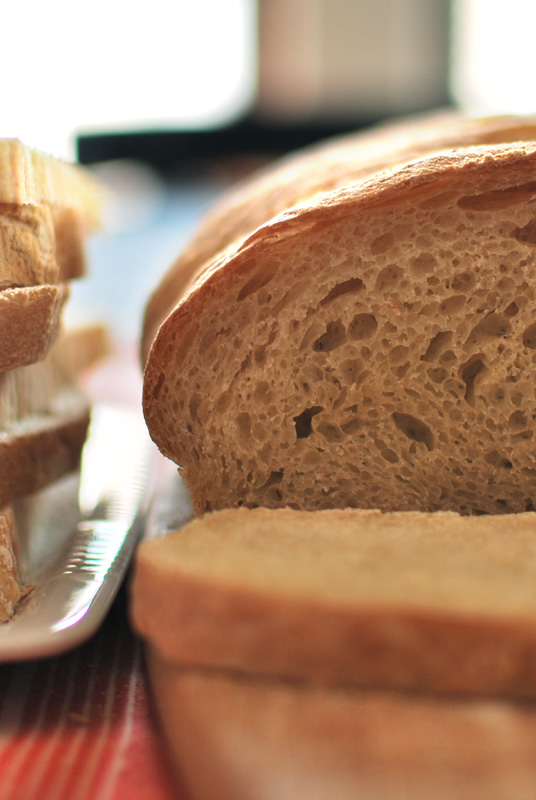
This bread is a very basic white bread (hence the name), one with a slightly wet dough that would, in an ideal baking situation, create a nicely crisp crust.  This result usually requires the use of a baking stone and a spray bottle of water (to create steam), neither of which I will have.  Let’s just say I don’t have terribly high hopes for this one.  (No pun intended.)

I have, however, used the one trick up my sleeve that makes any bread taste worlds better: autolyse.  As demonstrated previously, this 15 or 20 minute cat nap is perhaps the fastest and easiest way to improve a bread’s flavor and texture.  Having no other specialty equipment (even a spray bottle!), this technique would have to suffice.

This is a fast-rising dough, as I’ve used the discrete unit of one package of yeast.  This amount is more than I would typically like to use in a loaf, but I’m just making things easy for travel-baking.  What I’ve ended up with is a bread with a nicely complex flavor, but rather chewy crust – a mildly disappointing characteristic, if I’m honest.

Overall, it’s a pretty good bread.  It’s not the greatest bread I’ve ever made, but that’s not really what I’m going for here.  The aim is to make a simple white bread, one that has a texture and flavor that I can attempt to re-create in high altitudes, and one that I wouldn’t mind eating.  In this, I have succeeded.

Tune in tomorrow for the high-altitude version of yesterday’s Olive Oil Bread, and on Thursday for the high-altitude version of today’s bread!  Exciting!

yeast-chicago-2

Plain Ol’ Bread
Makes 1 loaf

18 ounces (4 cups) unbleached all-purpose flour
2 1/4 teaspoons (1 package) instant yeast
1 1/4 cups water
2 tablespoons olive oil
1 1/2 teaspoons salt

1.  In the bowl of a stand mixer, whisk together all but a handful of the flour and all the yeast.  Add the water and olive oil.  Mix with the dough hook at low speed until a rough dough forms, about 1 to 2 minutes.  Turn the mixer off, and without removing the bowl or the hook, cover the bowl loosely with plastic wrap.  Let stand for at least 15 to 20 minutes, or up to 45 minutes.

2.  Remove the plastic wrap, and add the salt.  Continue kneading the dough, at medium-low speed.  Knead for 6 to 8 minutes, or until the dough forms a cohesive ball that clears the sides of the bowl, and becomes elastic.  If the dough does not clear the sides of the bowl, add the reserved flour until the proper consistency is achieved.  The dough should not be stiff, but should not be soupy.

3.  Transfer the dough to a lightly oiled bowl.  Cover with plastic wrap and let rise in a warm place until doubled in size, about 45 to 60 minutes.

4.  Using a nonstick spatula, gently deflate and fold the dough over itself in a tri-fold (as though you were folding a letter).  Cover and let rise again for 45 to 60 minutes, or until doubled in size.

5. Line a baking sheet with parchment paper.  Gently deflate the dough, and turn out onto a lightly floured surface.  Flatten the dough into a slight rectangle or oval shape.  Fold the two corners furthest away from you into the center of the dough, as though you were beginning to fold a paper airplane.  Starting with that point, roll the dough up into a cylinder, pressing gently to seal as you roll.  Press the final seam to seal.  Transfer the dough to the prepared baking sheet, seam-side down.  Tuck the ends under if desired, to make a more attractive loaf.  Cover loosely with lightly-oiled plastic wrap, and let rise until doubled in size, about 1 hour.  Thirty minutes before baking, preheat the oven to 450º F.

5.  Bake at 450º F for 10 minutes.  After 10 minutes, reduce the temperature to 400º F, and bake the loaf for an additional 15 to 25 minutes, or until golden brown.  Remove the bread to a wire rack to cool before slicing.


Notes:
1.  This bread will keep, wrapped in plastic, for a day or two at room temperature.  It can also be frozen, wrapped in plastic and aluminum foil, then reheated in a 350º F oven until warmed through.

Posted in Savory, Yeast Breads | 1 Comment

Olive Oil Quick Bread

Week Thirty-Four: High-Altitude Week

olive-oil-chicago

In the interest of Science, A Bread A Day will be coming to you this week from The Mile-High City, Denver, Colorado.  That’s right, this week we’ll be discussing high-altitude bread baking!  This is very exciting for me (yes, seriously), since I’ve only ever baked around sea level or slightly above.  Here’s a new baking challenge, one that can only come about by hopping on a plane and flying across the country!  I love it!

This week, I’ll be trading in my own kitchen – delightfully equipped to my personal specifications, where I know the precise location of every single utensil at any given moment, and where all the bread equipment is ready to go at a moment’s notice – for my incredibly game and tolerant sister’s kitchen – one that I’ve never even seen before, hasn’t been updated since the mid 1960’s, and where there may not even exist loaf pans.

I’m not joking; this is her oven:

oven

Note the lack of a window.  Niiiiice.

Yes, in the interest of Science, I have devised a system of experimentation.  Having never baked at high altitudes before, I didn’t want to try new and untested recipes; but neither did I want to re-make old recipes, as the theme of this blog is to bake a new recipe every day.  What I have decided upon is a series of two breads, one quick bread (chemically leavened) and one yeast bread.

I’ll bake one of each in my Chicago-based home kitchen, as “control” loaves, then bake them exactly the same in Denver, at 5,280 feet above sea level.  After this first high-altitude batch, I’ll contrast and compare with the control bread (which I’ll bring with me, in the interest of Science), then adjust recipes as needed, and see what happens when I bake each recipe a third time.
Technically, yes, I’m only baking two different bread recipes this week.  But they should end up very differently, as I’ll be baking them in very different circumstances.  It counts!  I know I’m a massive food-geek, but this is actually quite exciting and intriguing for me.  I hope you’ll find it interesting and informative as well!

The first bread I’ll be making this week is a savory quick bread, one redolent with olive oil and a touch of lemon.  It’s very simple, and doesn’t call for any more exotic ingredients than the aforementioned; something important when baking in a strange kitchen where one has no idea where the grocery stores even are, let alone where to find the good epicurean stuff.

I’ve adjusted the original source recipe, which called for sugar, to use honey instead.  I love the combination of olive oil and honey; it’s one that I think is often not even considered, but is very tasty nonetheless.

The end result is a mild-flavored bread, one that can be enjoyed toasted with jam or honey for breakfast, as well as served plainly with certain dinner entrées (anything you might eat a biscuit with).  The flavor is simple, tasty, and lends itself to endless variations if you so choose.  Add some herbs or spices for a more savory version (it almost begs for black pepper!), or add dried fruit for a sweeter option (currants or golden raisins would be ideal).  The texture is close-crumbed, easy to slice, and has a tender bite throughout.

I do recommend you use a quality olive oil here – not your finest and greenest extra-virgin, but certainly not the cheapest sludge on the shelf either – as the flavor really shines in this application.  It’s not a very exciting bread, but it is charmingly straightforward, and lends itself well to any number of flavor additions, either added to the batter, or spread on top of a slice.

This version, the one from my own kitchen, was one that I would keep in my permanent recipe file; but perhaps I would never make it as plain again.  There’s just too much room for delicious variation!  I’m excited to see what the high-altitude version will end up like; how different could it possibly be?

Olive Oil Quick Bread
Adapted from Epicurious.com
Makes one 9 x 5 inch loaf

11 ounces (about 2 1/2 cups) unbleached all-purpose flour
2 teaspoons baking powder
3/4 teaspoon salt
Finely grated zest of 1 lemon
1/3 cup honey
2 eggs, lightly beaten
3/4 cup milk
1/2 cup extra-virgin olive oil

1.  Preheat oven to 350° F.  Lightly butter a 9 x 5 inch loaf pan, sprinkle with flour, and turn upside down and knock on the bottom to remove excess.  In a medium bowl, whisk together the flour, baking powder, salt, and lemon zest; set aside.

2.  In a large mixing bowl, whisk together the honey, eggs, milk, and olive oil.  Add the flour mixture, stirring until just combined, being careful not to overmix.

3.  Transfer the batter into the prepared loaf pan, and smooth the top.  Bake at 350° F for 50 to 60 minutes, or until a skewer inserted in the center comes out clean.  Allow to cool in the pan for about 5 minutes before removing to a wire rack to cool fully before slicing.  Serve slightly warm or reheated.

Notes:
1.  This bread will keep, wrapped in plastic, at room temperature for 1 to 2 days; alternatively, it can be frozen beautifully.

Posted in Quick Breads, Savory, Sweet | Leave a comment

Cakey Banana Bread

Week Thirty-Three: Banana Bread Week

cakey

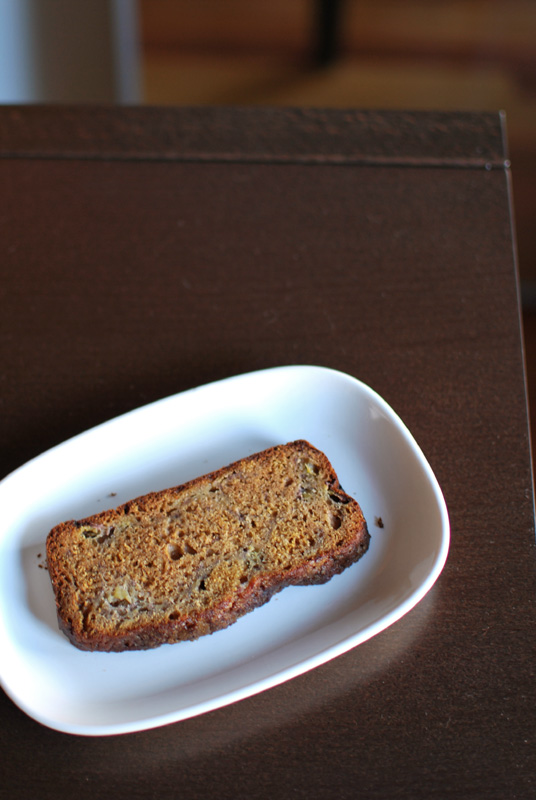
The final banana bread for this week comes originally from that venerable tome, The Joy of Cooking.  It promised a more “cakey texture” than the standard banana bread, due to a slightly unusual mixing method.  This was a claim I decided to test to its very limits.

Typically, banana bread (and other quick breads) are made by mixing dry ingredients together, mixing wet ingredients together, then gently blending the two together; this is generally the method I’ve been using all week, with slight variation here and there.  This method is known as the “muffin method”, since it’s mainly used to make muffins.  Obvious.

The newer method, as proposed in The Joy of Cooking, is called the “creaming method”, as you “cream” the fat (usually butter) and sugar together.  No, I don’t know why it’s called that; I’m certain there’s some fascinating etymology there, but I don’t know what it is.  Frustrating!  Long story short, the creaming method produces lots of tiny air bubbles in the fat, which leads to a lighter end product.

In addition to creaming the sugar and fat together (mildly unusual in and of itself), this recipe directs you next to add the flour, then the eggs, then the banana.  So unusual!  This method would at first appear to overmix the flour, resulting in a tough quick bread.  But not necessarily so; sometimes you want to produce a bit of that tough gluten, to provide a chewier structure in the final product.  So the theory goes, anyway.

Me, I wasn’t totally convinced.  Despite the fact that I know the recipes in The Joy of Cooking have been tested and retested to perfection, I decided that I knew better.  I decided that there was just too much sugar, so I reduced the amount.  But since sugar provides moisture in a quick bread, I replaced half of the reduced sugar with moisture-rich and condensed-sweetness honey, thus keeping the sweet flavor level the same, while providing extra moisture.  Or something like that.

What I failed to realize, in my quick re-engineering of the recipe, was that honey doesn’t cream like sugar does.  In fact, I don’t believe honey creams at all.  To properly cream, one needs the hard crystalline structure of granulated sugar, not the liquid invert-sugar quality of honey.  I realized this only after I put everything in the mixer: the precious room-temperature butter, specifically.  There was really nothing left but to continue on, and see what resulted.

As it turned out, I didn’t get the lovely cakey texture promised.  I ended up with a fairly standard and moist banana bread; though it was strangely orange in color, except where the pale (and occasionally purple!) bananas marbled through.  Why?!  I’ve no clue!  I did let the smashed bananas sit for a little while, and they turned brown on me; I’m assuming that’s the reason, but I’ve never had a banana bread turn purple before.  So strange!

The top crust, sprinkled liberally with coarse turbinado sugar before baking, ended up with a delightful crunch.  I will definitely use this method in other applications, perhaps blending the sugar with finely chopped raw nuts for extra flavor and texture.  The side and bottom crusts, though, ended up looking very dark, and were full of burnt-caramel flavor.  This was not unpleasant, even though I’m usually not a fan of burnt flavors.

Overall, this was not exactly what I expected from the recipe; but I can’t complain, as I changed it fundamentally.  But I did get a very nice banana bread.  In fact, that’s the biggest lesson I’ve learned this week: there’s no such thing as a bad banana bread.  Banana bread is extremely forgiving.  You can smash up two or three very ripe bananas (remember, the blacker, the better!), mix in some flour, some milk and eggs and spices, use some fat and sugar, and you’ll probably end up with something delicious.

Yes, to get the best banana bread for your palate, you will have to tinker with recipes, perhaps adding a little cinnamon here, reducing a little sugar there, but ending up always with something uniquely yours.  None of these recipes are very different on paper, but they turn out very different results.  I urge you to play around with them, tinker away as you will.  Even a slight adjustment in method or amount of ingredients will change the result greatly.

If you’re still looking for your signature banana bread – and every cook should have one! – just start baking.  Eventually, you’ll find just the right combination for you; I know I have!  And if you end up with something you don’t love, it’s no hardship to taste test to make darn sure.  Besides, I know there’s always someone you can gift any test batches to; it just might be the best banana bread they’ve ever tasted.  Every recipe is a winner in someone’s eyes!

cakey-2

orange and purple - why?!

Cakey Banana Bread
Adapted from The Joy of Cooking
Makes one 9 x 5 inch loaf

6 ounces (about 1 1/3 cups) unbleached all-purpose flour
3/4 teaspoon salt
3/4 teaspoon baking soda
3/4 teaspoon baking powder
1/3 cup unsalted butter, at room temperature
1/4 cup sugar
1/4 cup honey
2 large eggs, beaten lightly
1 cup (2 to 3 whole) very ripe bananas, smashed
1 to 2 tablespoons turbinado sugar, for finishing

1.  Preheat the oven to 350° F.  Lightly butter a 9 x 5 inch loaf pan, sprinkle with flour, and turn upside down and knock on the bottom to remove excess.  In a medium bowl, whisk the flour, salt, baking soda, and baking powder together; set aside.

2.  Using an electric mixer, beat the butter, sugar, and honey together until lighter in color, about 3 minutes.  Add the flour mixture and mix at low speed until incorporated.  The mixture will look crumbly and dry, like brown sugar.  Add the eggs and beat in slowly until incorporated.

3.  Fold in the smashed bananas by hand, taking care not to overmix.  Transfer the batter to the prepared loaf pan, smoothing the top.  Sprinkle the turbinado evenly over the top of the batter.

3.  Bake at 350° F for 50 to 60 minutes, or until golden brown and fully baked.  A skewer inserted into the center should come out clean when done.  Remove the bread from the oven and allow it to cool in the pan briefly before turning it out onto a rack to cool completely.  Serve warm.

Notes:
1.   This bread will keep for a day or two wrapped in plastic at room temperature, or can be frozen beautifully.

Posted in Quick Breads, Sweet | Leave a comment

Chocolate Chip Ginger Banana Bread

Week Thirty-Three: Banana Bread Week

chocolate

Today’s banana bread variation is what I like to call “It’s Not Really Even Banana Bread Anymore Banana Bread”.  Yes, there’s a banana flavor, but it really takes a back seat here.  Drawing inspiration from a glorious description by Molly Wizenberg of Orangette, I’ve put together a version featuring chocolate, ginger, and coffee in an incredibly moist quick bread.  It’s a combination that makes the you-can-taste-it-in-everything over-ripe banana flavor seem subtle.

Yes, that is a glass of bourbon you see up there.  (Ten points if you can guess the brand.)  This bread didn’t just suggest the pairing, it demanded it.  If it had little arms and legs, and could move on its own, I think it might’ve doused itself in the stuff, just to save everyone the trouble of finding a glass.  If you don’t drink bourbon… well, I’m so very, very sorry.  And can I have yours?

In case you couldn’t guess, this bread is awfully rich.  Can you think of another bread that would warrant a side of bourbon?  Yeah, I can’t either.  It ends up a bit more “coffee cake” than “bread”, but is so delicious, I don’t really care.  So you may only eat it for dessert; so what?  (Not that there’s anything wrong with having it for breakfast, either, but hey.)

I’ve added a shot of espresso to this bread, which doesn’t lend a coffee flavor exactly; rather, it deepens the chocolate flavor considerably, and brings just the faintest bitterness to help cut the sweetness a little.  Need I mention how well the spice of candied ginger goes with that?  I didn’t think so.

This bread is, again, one of those why-can’t-I-cut-the-silly-thing breads, one that gives way under slight pressure from knife or hand, due to its incredibly moist and tender qualities.  If you can manage to hold it together long enough to cut an actual slice, I’m sure it would be most excellent toasted; but use a broiler, and don’t dare stick it in an upright toaster – you’d never get it out again.

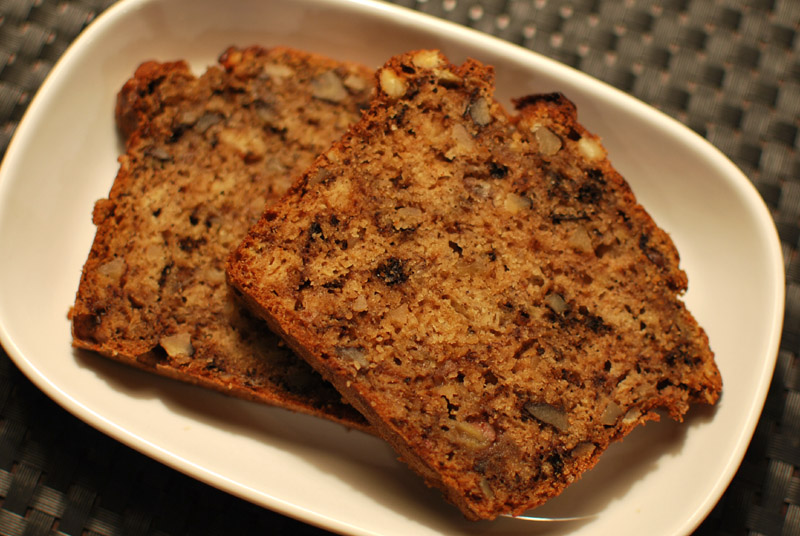
Here, you end up with an amazingly soft bread, with one of those crusts that gets delightfully sticky after sitting for a day.  Each slice offers chewy jolts of candied ginger that keep your palate from getting lazy and coasting through the bites of deep, rich chocolate, accentuated with a mere backdrop of banana.  This may not be a traditional banana bread, or even really have that much banana flavor at all, but it’s certainly one recipe you’ll want to keep in your permanent file!


Chocolate Chip Ginger Banana Bread
Adapted from Orangette
Makes one 9 x 5 inch loaf

9 ounces (2 cups) unbleached all-purpose flour
3/4 teaspoon baking powder
3/4 teaspoon baking soda
3/4 teaspoon salt
1 cup sugar
1 large egg
1/3 cup olive oil
1 cup (2 to 3 whole) very ripe bananas, smashed
1/4 cup buttermilk
1/4 cup plain yogurt
1 ounce (2 tablespoons) espresso or very strong coffee
3/4 cup mini chocolate chips
1/2 cup candied ginger, cut into small pieces

1.  Preheat oven to 350° F.  Lightly butter a 9 x 5 inch loaf pan, sprinkle with flour, and turn upside down and knock on the bottom to remove excess.  In a medium bowl, whisk together the flour, baking powder, baking soda, and salt; set aside.

2.  In a large mixing bowl, whisk together the sugar, egg, and olive oil.  Add the smashed bananas, buttermilk, yogurt, and espresso, and stir until combined.

3.  Add the flour mixture, stirring until mostly combined.  Gently fold in the chocolate chips and ginger until incorporated, being careful not to overmix.

4.  Transfer the batter into the prepared loaf pan, and smooth the top.  Bake at 350° F for 1 hour, or until a skewer inserted in the center comes out clean.  Allow to cool in the pan for about 5 minutes before removing to a wire rack to cool fully before slicing.  Serve slightly warm or reheated.


Notes:
1.  Be sure to let the bread cool nearly completely before slicing, to give the bread itself and the melted chocolate time to set a little.  Cut too early, and it will end up gummy.

Posted in Quick Breads, Sweet | Leave a comment

100% Whole Wheat Banana Bread

Week Thirty-Three: Banana Bread Week

whole-wheat

After the relative excesses of the last two banana breads (so much butter! so much sugar!), I needed something a little healthier, something a little less… refined.  This 100% whole wheat bread seemed to fit the bill perfectly, despite the stick of butter in the original recipe.

I modified it by reducing the amount of butter, but left the sugar level alone.  In retrospect, I should have reduced that too; it didn’t taste overly-sweet, but still left a little of that sticky sugar residue on my teeth after tasting.  (I hate that.  I think that’s my major issue with cakes.)

In an attempt to make the bread a little lighter, I substituted half of the whole wheat flour for white whole wheat flour, a finer grind that acts more like all-purpose flour.  But to preserve a little of its hearty nature, I added in some wheat germ and my personal favorite, ground flaxseed.  To compensate for the extra dry ingredients and slightly-reduced fat level, I intended to add 3 or 4 tablespoons of plain yogurt.  Note the use of the word “intended”.

Yes, I totally forgot to add the yogurt.  The bread turned out just a smidge on the dry side, but it wasn’t unpleasant.  Had I remembered, I think it would’ve been better, though.  I’ve written that addition into the recipe, so you won’t experience the same less-than-ideally-moist fate as I.

Otherwise, this bread had a nicely-balanced flavor, not too banana-y, not too whole-grainy; it had a soft crust and was tender inside; it cut easily into pretty slices.  It was nice enough, but it was simply not the best variation of the week.  If I don’t sound very excited about this bread, it’s no fault of its own; can you really blame me after the heady, butter-fueled rush of the last two days?

This bread tasted pretty good, and would probably be quite delicious if tested on its own, not compared to such shining stars as I’ve made this week.  But all the same, I think I’ll stick to my tried and true low-fat banana bread instead.  I’ve made that one my own over the years, and anything else would have to really impress me to take its place!


100% Whole Wheat Banana Bread
Adapted from Whole Grain Baking, by King Arthur Flour
Makes one 9 x 5 inch loaf

4 1/2 ounces (about 1 cup) whole wheat flour
4 1/2 ounces (about 1 cup) white whole wheat flour
1/4 cup wheat germ
1/4 cup ground flaxseed
6 tablespoons salted butter, room temperature
1/2 cup packed light or dark brown sugar
3/4 teaspoon baking soda
Pinch of salt
1/2 teaspoon ground cinnamon
1/4 teaspoon ground nutmeg
1 1/2 cups mashed ripe banana (3 to 4 whole)
1/4 cup honey
3 to 4 tablespoons plain yogurt or buttermilk
2 large eggs
1 teaspoon vanilla extract

1.  Preheat the oven to 325° F.  Lightly butter a 9 x 5 inch loaf pan, sprinkle with flour, and turn upside down and knock on the bottom to remove excess.  In a medium bowl, whisk the flours, wheat germ, and flaxseed together; set aside.

2.  Using an electric mixer, beat the butter and sugar together until smooth.  Add the baking soda, salt, cinnamon, and nutmeg; mix until incorporated.  Add the smashed bananas, honey, eggs, and vanilla, beating until smooth.  Add the flour mixture, stirring just until all flour is moistened.  Do not overmix.  Transfer the batter to the prepared pan, and let it rest at room temperature, uncovered, for 10 minutes.

3.  Bake at 350° F for 50 minutes; then tent gently with a piece of foil.  Continue baking until a skewer inserted into the center comes out clean, about 10 to 15 minutes more.  Remove the bread from the oven and allow it to cool in the pan briefly before turning it out onto a rack to cool completely.  Serve warm.


Notes:
1.  This bread will keep for a day or two wrapped in plastic at room temperature, or can be frozen beautifully.

Posted in Quick Breads, Sweet | Leave a comment

Elise’s Friend Heidi’s Friend Mrs. Hockmeyer’s Banana Bread, As Jacked Up by Deb, Then Readjusted By Beth

Week Thirty-Three: Banana Bread Week

jacked-up

I have a recurring problem in the kitchen.  I see a recipe, and I can’t help modifying it.  I’ll start out with the best intentions, following a recipe down to the very letter; but halfway through, I’ll remember that unusual spice mixture in the cupboard, or that half-used can of coconut milk in the fridge.  It feels like a spark of genius, in that moment, and I’ll declare my brilliance to anyone who can stand to listen: “I’m so smart!”  The result may or may not turn out well, but at least I tried.  Right?

I don’t know why, but I even do this with recipes from trusted sources.  You know, someone like Julia Child.  I don’t think she’d mind; and I take an inordinate amount of pride in the fact that no one, not even myself, will likely be able to replicate most of my dishes ever again.  I especially take pride in modifying baked goods, since there seems to be some odd notion going around that OMG you can’t modify baked goods at all, or the universe will explode.

So after seeing this recipe on Smitten Kitchen, I just couldn’t resist.  That name!  It was just begging for me to fiddle with!  What started out as arguably the simplest banana bread recipe I’ve ever seen (only one bowl!) has now, by my unrestrained and baroque hand (and Deb’s, from SK), become a tricked-out monstrosity.  The ingredient list has nearly doubled, and it has gotten tarted up with spices, lemon zest, and booze.  This simple and relatively rustic bread has turned into a mere shadow of its former self, none of it necessary in the slightest.

Excellent.

I say none of the changes are necessary, and they aren’t, exactly; but that doesn’t mean they aren’t good.  In fact – and take this with a grain of salt, because I have yet to try the original version – I think these changes are just what the doctor ordered.  This bread is quite moist and very delicious, almost to the point where I may have a challenger on my hands for My All-Time Favorite Banana Bread Recipe (currently this one).  It’s so good!

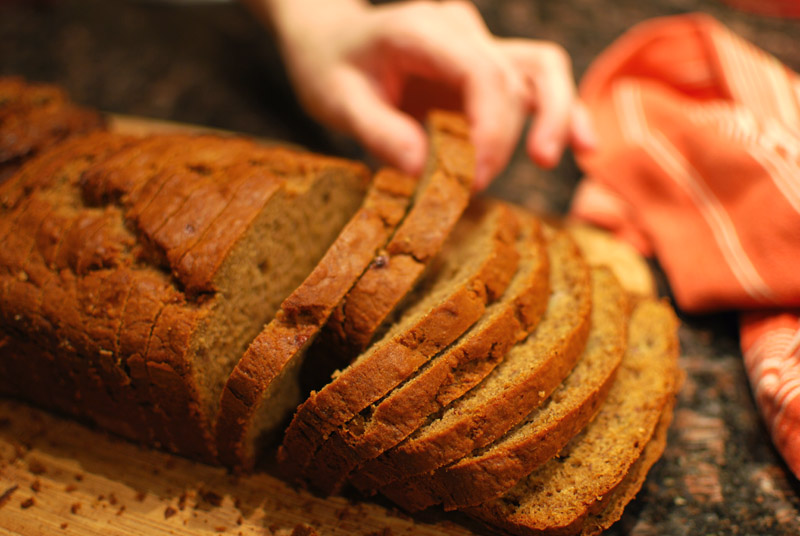
This was one of those quick breads that’s actually a bit tricky to slice, as it’s so wonderfully tender that the slices simply crumble under the weight of the knife.  This isn’t exactly a tragedy, since I personally think the bits that you eat off the cutting board just taste better.  But if you can manage a slice, you’ll be rewarded with a pretty, slightly dark bread, dotted with white rhomboids of walnut.  And even though I didn’t add a sugar topping, one seems to have magically appeared, giving each bite of top crust a fantastic crisp-sugar crunch.  Thanks, oven fairies!

Some people have hard and fast rules for banana bread, mostly regarding the inclusion or omission of nuts, which can sometimes border on hysteric dogma.  Personally, I don’t care if there are or aren’t nuts (both are good!), but I demand cinnamon in my banana bread.  Preferably lots.  So feel free to take liberties with this recipe, as I did, and make it your own.  Who knows?  You may come up with something you like even better than the original!


Elise’s Friend Heidi’s Friend Mrs. Hockmeyer’s Banana Bread, As Jacked Up by Deb, Then Readjusted By Beth
Adapted from Smitten Kitchen
Makes one 8 x 4 inch loaf

6 1/2 ounces (1 1/2 cups) unbleached all-purpose flour
1 teaspoon cinnamon
1/2 teaspoon nutmeg
1/8 teaspoon ground allspice
1/8 teaspoon ground cloves
3 to 4 ripe bananas, smashed
1/3 cup melted salted butter
2/3 to 3/4 cup light brown sugar (see note 2 below)
1 egg, beaten
1 teaspoon finely grated lemon zest
1 teaspoon vanilla
2 tablespoons bourbon (optional, see note 3 below)
1 teaspoon baking soda
Pinch of salt
4 ounces (about 1 cup) walnuts, toasted, cooled, and chopped

1.  Preheat the oven to 350° F.  Butter and flour an 8 x 4 inch loaf pan, knocking to coat fully and remove excess flour; set aside.  Whisk or sift the flour and spices together, and set aside.

2.  With a wooden spoon, smash the bananas in a large mixing bowl.  Stir in the melted butter.  Add the sugar, egg, lemon zest, vanilla, and bourbon, and stir to combine.  Sprinkle the baking soda and salt over the mixture, and mix in. Add the flour mixture, and gently mix until mostly incorporated.  Add the walnuts, and fold until incorporated and all flour is just moistened.  Be careful not to overmix.

3.  Pour the batter into the prepared loaf pan. Bake at 350° F for 50 to 60 minutes, or until a skewer inserted in the center comes out clean.  Cool in the pan on a rack briefly, then remove from the pan to cool fully on a rack.  Best served warm.


Notes:
1.  To toast walnuts, spread in a single layer on a sheet pan.  Bake at 350° F for about 10 minutes, or until fragrant and lightly browned.  Cool thoroughly before using.

2.  If your bananas are very ripe or almost black, use the lesser amount of sugar.  If your bananas are under-ripe or just spotted with brown, you may want to use the greater amount of sugar.

3.  Feel free to substitute another liquor or liqueur for the bourbon if you like.  Kaluha, brandy, rum, Nocello, amaretto, crème de cacao, or crème de banane would all be excellent choices.  It can also be omitted if you prefer.

Posted in Quick Breads, Sweet | 1 Comment

Cream Cheese Banana Bread

 Week Thirty-Three: Banana Bread Week

cream-cheese

Yesterday, I made my favorite everyday banana bread, a low-fat, lightly sweetened version that uses plenty of whole grains.  Today’s version is basically the complete opposite: all white flour, plenty of butter, lots of sugar, even a block of cream cheese.  Oh, and just in case there wasn’t enough going on, there’s four different and wholly unneccessary toppings you can choose between.  There’s absolutely no call for that much going on in something calling itself “bread”.  In fact, it’s probably more apt to call it “banana cake” instead.

But oh man, is it good!  If I need to win someone over, I know I can give a loaf of this bread, and they’re putty in my hands.  Putty, I tells ya.  This bread is a rare treat, but for those times where I simply need the absolutely best-tasting quick bread in the world, this is the one I reach for.  When I make this recipe, though, I usually reduce the sugar and add a pinch of cinnamon (banana bread just needs cinnamon!).  Both these changes are shown in the recipe below.  Yes, that is the reduced amount of sugar.

I’ve made the batter into muffins this time, mostly because my loaf pans were all otherwise in use.  This bread makes fabulous muffins, since the batter is so full of hygroscopic sugar and moisture-lending butter, there’s no way they’ll ever dry out.  Additionally, I’ve chosen to show them just plain, as a sort of blank canvas for your imagination, but I highly recommend trying one of the toppings.

The four topping variations shown below the recipe are each just as delicious and lily-gilding as the next, so I’ve elected to leave them as they were originally written.  I thought about leaving them out, in the interest of not trampling on anyone’s copyright, but I just didn’t have the heart.  It wouldn’t be the same!  So forgiveness, please!

I originally came by this recipe from my mother’s very good friend, Mrs. Frances, who found it in Southern Living some years ago.  As I recall, she brought us a loaf of it, swearing up and down that it was the best banana bread recipe she’d ever tried.  The smell alone might have convinced us; but one bite, and we were begging her for the recipe.  She happily obliged, and the rest is history.  In our family, anyway.

This is one of those recipes that gets fondly reminisced over.  On occasion, someone will say, “Do you remember that banana bread Mrs. Frances brought us that time?  That one with cream cheese?”  Eyes wide and rolling upwards, we nod, an involuntary “Mmmm” escaping our spreading smiles.  Someone may furrow a brow, prompting further explanation: “You remember, it had some sort of orange glaze on it?”  Memory triggered, we all agree that we should make it sometime. 

But we never do; there’s always something a little healthier that we should have instead.  There’s always something a little less fussy to whip up, or the bananas aren’t quite ripe enough.  There’s always something.  And with a thing that makes us all smile so much, a thing that evokes such fondness in each of our minds, isn’t that a shame, to relegate it to obscure memory only?

So here’s to throwing caution to the wind on occasion.  Here’s to the most cake-like, ridiculous, over-the-top banana bread I’ve ever seen, and the four nearly-senseless toppings that go with it.  It’s fattening and sugary and can hardly be called bread at all; but once in a great while, you should bake something ludicrous just like this.  Make enough to share with everyone, though; you’ll definitely want to have someone to join you in reminiscing about it.


Cream Cheese Banana Bread
Adapted from Willie Monroe, via Southern Living Magazine
Makes two 8 x 4 inch loaves, or 24 muffins

3/4 cup butter, softened
1 (8-ounce) package cream cheese, softened
1 1/2 cups sugar
2 large eggs
13 1/2 ounces (3 cups) unbleached all-purpose flour
3/4 teaspoon baking powder
3/4 teaspoon baking soda
1/2 teaspoon salt
1/4 teaspoon ground cinnamon
1 1/2 cups mashed bananas (1 1/4 pounds unpeeled bananas, about 4 medium)
1 teaspoon vanilla extract

1.  Preheat the oven to 350° F, and position a rack in the middle.  Grease and flour two 8 x 4 inch loaf pans, knocking around to remove excess.  Alternatively, line 24 standard muffin cups with paper liners.  Set aside.

2.  Using an electric mixer fitted with the paddle attachment, beat the butter and cream cheese at medium speed until smooth and creamy.  Gradually add sugar, beating until light and fluffy.  Add eggs one at a time, beating just until blended after each addition.

3.  Whisk together the flour and next 4 ingredients.  Slowly add to butter mixture, beating at low speed just until blended.  Stir in bananas and vanilla. Spoon batter evenly into the prepared loaf pans or muffin cups, and lightly smooth the tops.

4.  Bake at 350° F, 1 hour for loaves or 25 minutes for muffins, or until golden brown and a skewer inserted into the center comes out clean.  You may need to shield loaves with aluminum foil during the last 15 minutes of baking to prevent over-browning.  Cool bread in the pans for about 10 minutes before removing to a wire rack to cool further before slicing.

Variations:

Orange-Pecan-Topped Cream Cheese-Banana Bread:
Prepare bread batter as directed, and spoon into desired pans.  Sprinkle 1 cup coarsely chopped, toasted pecans evenly over batter in pans.  Bake as directed.  Cool bread or muffins in pans 10 minutes; remove from pans to wire racks.  Stir together 1 cup powdered sugar, 3 tablespoons fresh orange juice, and 1 teaspoon grated orange rind until blended.  Drizzle evenly over warm bread or muffins, and cool 30 minutes on wire racks.

Toasted Coconut-Topped Cream Cheese-Banana Bread:
Prepare and bake bread or muffins in desired pans.  While bread is baking, stir together 1/4 cup butter, 1/4 cup granulated sugar, 1/4 cup firmly packed brown sugar, and 1/4 cup milk in a small saucepan over medium-high heat; bring to a boil, stirring constantly.  Remove from heat.  Stir in 1 cup sweetened flaked coconut; 1 cup chopped, toasted pecans; and 2 teaspoons vanilla extract.  Remove baked bread or muffins from oven, and immediately spread tops with coconut mixture.  Broil 5 1/2 inches from heat 2 to 3 minutes or just until topping starts to lightly brown.  Cool in pans on wire racks 20 minutes.  Remove from pans, and cool 30 minutes on wire racks before slicing.

Cinnamon Crisp-Topped Cream Cheese-Banana Bread:
Prepare bread batter as directed, and spoon into desired pans.  Stir together 1/2 cup firmly packed brown sugar; 1/2 cup chopped, toasted pecans; 1 tablespoon all-purpose flour; 1 tablespoon melted butter; and 1/8 teaspoon ground cinnamon.  Sprinkle mixture evenly over batter.  Bake and cool as directed.

Peanut Butter Streusel-Topped Cream Cheese-Banana Bread:
Prepare bread batter as directed, and spoon into desired pans.  Combine 1/2 cup plus 1 tablespoon all-purpose flour and 1/2 cup firmly packed brown sugar in a small bowl.  Cut in 1/4 cup butter and 3 tablespoons creamy peanut butter with a pastry blender or fork until mixture resembles small peas.  Sprinkle mixture evenly over batter in pans.  Bake and cool as directed.


Notes:
1.  If you like, you can add 1 cup of toasted and chopped pecans or walnuts (or a mixture) to the batter.  It lends a great texture, but isn’t exactly necessary.

Posted in Quick Breads, Sweet | Leave a comment

Low-Fat Banana Bread

Week Thirty-Three: Banana Bread Week

low-fat

Maybe you haven’t noticed, but I haven’t made banana bread yet this year.  I’m not sure what it is about banana bread, but it seems everyone has their own favorite recipe for it.  There’s simply too many versions out there to pick just one or two, so I’ve decided to dedicate an entire week to it!  I’ve got a countertop full of blackened and half-rotten bananas, all ready to go!

First up this week is my favorite go-to banana bread recipe.  It was published ages ago in Bon Appétit Magazine, and I’ve tweaked it to perfection over the years.  I can practically make it with my eyes closed anymore.  The main selling point of this bread is that it’s low-fat – only 1 tablespoon of oil! – but you’d never be able to tell.

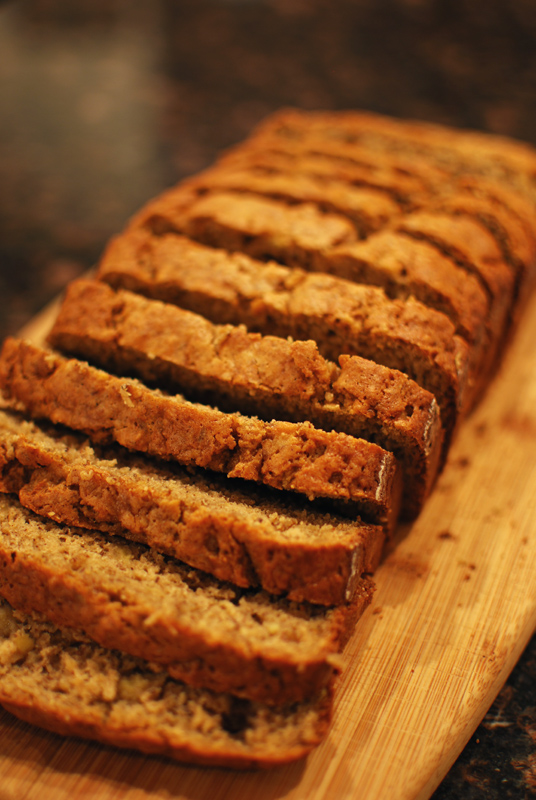
Somehow, this bread remains moist and tender, all without the mountain of fat that goes into so many quick breads.  It’s not greasy at all, and is just full of banana flavor.  It slices easily, and is fantastic toasted.  I usually make this in a loaf, as it tends to be slightly dry when made into muffins; but that’s nothing a spot of butter wouldn’t fix!

I’ve added some ground flaxseed into the batter, as it lends a pleasantly nutty flavor, without having to worry about toasting nuts (something I somehow always forget to do).  If you don’t have any flaxseed around, you can just leave it out; but I do suggest trying it.  It’s delicious!

And just in case you were ever wondering, overly-ripe bananas make the best banana bread because the complex sugars in them have had time to fully develop.  Ripe bananas, ones that are perfect for eating out of hand, will hardly add any flavor to your bread; and I think I might cry a little if you use green bananas.  Put those under-ripe bananas in a paper bag, and let them ripen for a couple of days.

Yes, for the best banana bread, with the most banana-y flavor, you need really ripe bananas.  Not speckled with brown dots, either; I’m talking black, soft, disgusting things that peel themselves when you lift them by the stem.  Those are juuuust right.  And if you can’t get around to making bread when your bananas are ready, just stick them, unpeeled, in the freezer.  They thaw pretty quickly, and will just smush out of the skins when you’re ready for them.  Easy!

low-fat-2


Low-Fat Banana Bread
Adapted from Bon Appétit Magazine
Makes one 9 x 5 inch loaf

2 large eggs
3/4 cup sugar
1 cup smashed ripe bananas (about 3 medium)
1/3 cup buttermilk
1 tablespoon vegetable oil
1 tablespoon vanilla extract
1 cup unbleached all-purpose flour
2/3 cup whole wheat flour
1/4 cup ground flaxseed
2 teaspoons baking powder
1/2 teaspoon baking soda
1/2 teaspoon salt
1/2 teaspoon ground cinnamon
1/4 teaspoon ground cloves
1/4 teaspoon ground ginger

1.  Preheat the oven to 325° F.  Lightly butter a 9 x 5 inch loaf pan, sprinkle with flour, and turn upside down and knock on the bottom to remove excess.

2.  Using an electric mixer, beat the eggs and sugar together in large bowl until thick and light, about 5 minutes.  In a liquid measuring cup, smash bananas until smooth.  Add buttermilk, oil, and vanilla; stir until combined.  Sift together the flours, flaxseed, baking powder, baking soda, salt, and spices; set aside.

3.   Add the banana mixture to the egg mixture, and beat until blended.  Add the flour mixture, and stir together just until the flour is moistened; do not overmix.  Transfer batter to the prepared pan.

4.  Bake at 325° F until golden brown on top and a tester inserted into the center comes out clean, about 1 hour.  Let cool briefly in the pan before removing to a rack to cool.  Serve warm.


Notes:
1.  This bread will keep for a day or two wrapped in plastic at room temperature, or can be frozen beautifully.

Posted in Quick Breads, Sweet | Leave a comment

100% Whole Wheat Sandwich Bread

Week Thirty-Two: Sandwich Breads

100-percent-ww

Originally, I wanted to end the week with a whole wheat sourdough bread.  I just love the tangy and rich flavors of sourdough, and combining that with the nutty rusticity of whole grains just makes it all the better.  But of course, the week got away from me, and when I finally had time to make it, I only had one day.

All my dreams of complex flavor and weeks of tangy sourdough sandwiches went out the window.  Not to mention, even after I widened my search beyond sourdough, all my cookbooks offered up only whole wheat recipes that would take at least two days, if not longer.  I needed something much faster.

Somewhat distraught, I began putting away the groceries.  And what to my wondering eyes should apppear, but on the back of the bag of King Arthur whole wheat flour was a recipe!  A recipe for whole wheat sandwich bread!  And it only took a few hours!  Salvation!

Funnily enough, this bread turned out far better than the Six Grain Bread I made the day before, one I had much higher hopes for.  This bread is really, really good!  I love that it’s 100% whole wheat, and the flavor is just lovely.  I added some vital wheat gluten to improve the texture, but feel free to leave it out if you don’t have any on hand.  If you bake a lot of whole grain breads, however, it’s a good thing to keep around, as it will make a major difference in the airiness of your bread (long, technical story short).

I also added some flaxseed for extra nutrition and flavor, and tossed in a handful of millet, as I love the texture it gives.  Millet also looks quite pretty in a slice, little round bits of mustard-yellow.  You can certainly leave it out, but I quite like it.

This wraps up Sandwich Bread week; and I promise this upcoming week will be back on track with the normal posting schedule!  Thanks so much for your patience and understanding!


100% Whole Wheat Sandwich Bread
Adapted from King Arthur Flour
Makes one 9 x 5 inch loaf

14 ounces (3 1/2 cups) whole wheat flour, plus extra for dusting
1 ounce (1/4 cup) nonfat dried milk
1 tablespoon vital wheat gluten (see note 2 below)
1 1/2 teaspoons kosher salt
2 1/2 teaspoons instant yeast
1 1/3 cups water, at room temperature
1/4 cup olive oil
2 tablespoons honey
2 tablespoons molasses
2 tablespoons millet
2 tablespoons ground flaxseed

1.  In the bowl of a stand mixer, whisk together the flour, dried milk, salt, and yeast.  Add the water, olive oil, honey, and molasses.  Using the dough hook, mix at low speed until a rough dough forms.  Increase the speed to medium and continue kneading for 6 to 8 minutes, or until the dough becomes smooth and elastic.  Add additional flour by tablespoons if needed to achieve the proper consistency.  Add the millet and flaxseed, and mix until fully incorporated.

2.  Transfer the dough to a lightly oiled bowl.  Cover tightly with plastic wrap and let sit at room temperature until not quite doubled in size, about 50 to 60 minutes.

3.  Lightly butter a 9 x 5 inch loaf pan.  Turn the dough out onto a lightly floured work surface.  Gently press to deflate slightly, and shape the dough into a 9 inch roll or cylinder.  Transfer the roll to the prepared pan, cover loosely with lightly greased plastic wrap, and let rise at room temperature until doubled in size, about 1 hour.  Preheat the oven to 350° F.

4.  Bake at 350° F for about 40 minutes, or until golden brown and fully baked.  When done, an instant-read thermometer should register 190° F when inserted into the center.  Remove the bread from the pans, and let cool on a wire rack before slicing. 


Notes:
1.  This bread can be stored in a plastic bag at room temperature, or frozen.  Do not refrigerate it!

2.  The vital wheat gluten is optional, but it will do wonders for the texture of your bread, as it will with most whole grain breads.  You should be able to find it at most natural food stores.

Posted in Savory, Yeast Breads | Leave a comment