Week Thirty-Two: Sandwich Breads
I’ll be honest. I’m running awfully behind this week, and haven’t had a minute to catch up on the writing, so this will be brief.
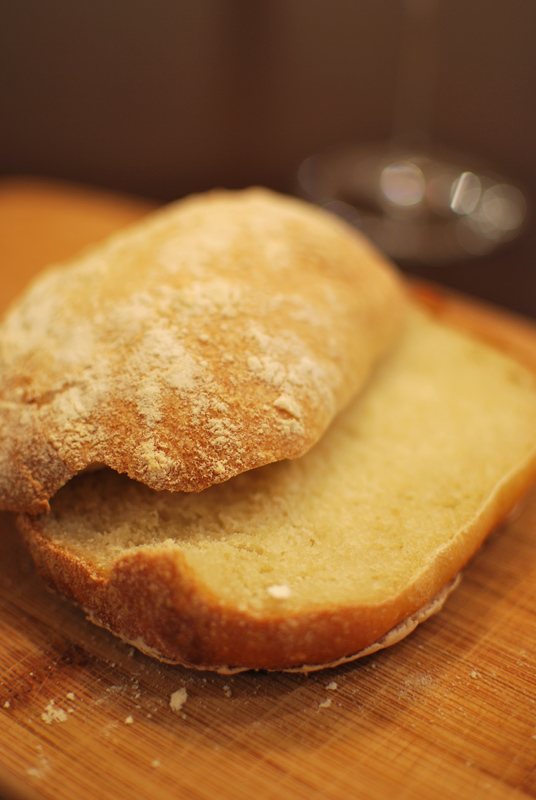
I was originally going for a ciabatta-type roll, considering how popular they are in sandwich shops. This bread, while quite good, didn’t exactly produce what I was going for. Instead of somewhat flat, airy, and square rolls, I ended up with close-crumbed and rather puffy rolls. The crust has a pleasant crispness, not too soft and not too hard, just right for any sandwich filling, even something requiring a more hardy casing (such as roast beef au jus). It’s still soft enough, however, to be used in a panini, if you happen to have one of those machines.
There’s a good chew to the texture, but not too much for a sandwich, meaning that you won’t throw half your sandwich across the room in the effort of taking a bite. Due to the use of a biga starter, the flavor has a delightful depth, and the use of honey lends just a touch of sweetness. This is a nice, all-purpose crusty roll, one that would be just at home in a bread basket as it is on a sandwich.
Italian Sandwich Rolls
Adapted from Wild Yeast
Makes 8 large rolls
For the biga:
8 ounces water, room temperature
8 ounces (1 2/3 cups) unbleached bread flour
1/8 teaspoon instant yeast
For the final dough:
15 ounces (3 1/4 cups) unbleached bread flour
2 teaspoons salt
1 teaspoon instant yeast
1 tablespoon honey
1 tablespoon olive oil
5 ounces (1/2 cup plus 2 tablespoons) water, room temperature
1. To make the biga, mix all ingredients together in a medium bowl until smooth. Cover tightly with plastic wrap, and let ferment at room temperature overnight, or at least 8 and up to 24 hours.
2. To make the final dough, in the bowl of a stand mixer, whisk together all but a handful (1 ounce) of the flour, and all of the salt and yeast. Add the olive oil, honey, water, and all of the biga. Using the dough at low speed, mix until all the flour is moistened. Turn the mixer off, and cover the bowl loosely with plastic wrap. Let rest in place for 15 to 20 minutes.
3. Remove the plastic wrap, and continue kneading with the dough hook at medium-low speed. Adjust the consistency by adding small amounts of flour as needed. The dough should be very slack, but should clear the sides of the bowl.
4. Transfer the dough to a large, lightly-oiled bowl. Cover tightly with plastic wrap, and let stand at room temperature until doubled in size, about 1 hour.
5. Lightly oil a large baking sheet, or line with parchment paper. Turn the dough out onto a lightly floured work surface. Divide it into 8 even pieces, and shape each piece into a round. Cover loosely with plastic wrap, and let rest for 20 minutes.
6. Working with one piece at a time and keeping the others covered, form each round into a long torpedo shape. Transfer to the prepared baking sheet, dust well with additional flour, and cover loosely with plastic wrap. Let sit at room temperature until doubled in size, about 50 to 60 minutes. Preheat the oven to 500º F. Position a rack in the lowest part of the oven, with a baking stone, if using.
7. Spray or sprinkle the dough with water. Transfer the loaves to the baking stone, if using, or place the baking sheet on the oven rack. Immediately turn the temperature down to 450º F and bake for 15 minutes, or until browned. An instant-read thermometer should register about 205º F when inserted into the center of a roll. Remove to a rack to cool thoroughly before serving.


A lot of times my breads don’t look like they are supposed to either, but they also work great for toast or sandwiches. Even not perfect homemade bread beats store-bought bread any day 🙂
Ben,
Thanks for the encouraging comment! I’d say about 30% of the time, my breads end up different from my vision of them; but that’s part of why I love baking bread. It’s always a little surprise! And I totally agree, at the end of the day, I’d absolutely rather have an ugly loaf of homemade bread than a picture-perfect loaf of store-bought. Hands down.
Happy baking!