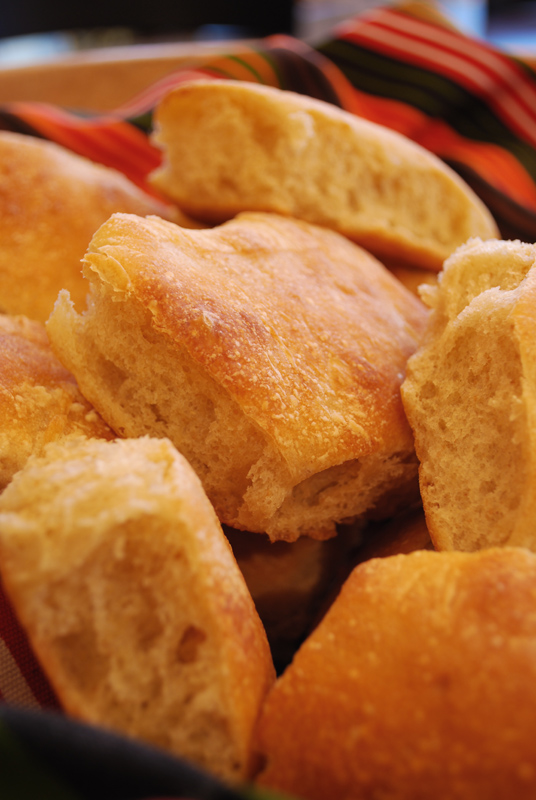
Week Ten: Dinner Rolls
This recipe has the adjective “rustic” in the title, which is basically culinary shorthand for “it doesn’t have to look pretty, and probably won’t, but it will be charming nonetheless”. These rolls are my favorite type of bread: crusty, chewy, airy, and with a slight and wonderfully sour flavor. They aren’t the most handsome rolls you’ll ever make, but they taste so good, no one will care.
There is a slightly unusual step here, one that you don’t see very often, but one that can improve the texture and flavor of just about any bread. It’s called “autolyse”, and it’s basically a cat-nap for your dough. Right after you mix the ingredients together, except for the salt, you let it rest for 20 or 30 minutes. This gives the flour time to absorb the liquid, and lets the strands of gluten start to form into a nice, neat, little structure. It makes the dough much easier to work with, and you don’t have to knead it as much to get a proper chewy texture.
Why don’t you add the salt in? Long story short, it gets in the way. You will get the best autolyse without salt, but many’s the time that I’ve mindlessly thrown it in with everything else. It seems to turn out ok, but it is best done properly. (Some will also tell you not to add the yeast before an autolyse period, but I don’t know about that one.)
Additionally, there’s a folding procedure in the middle of the rising time. This is a sort of kneading and punching down all in one, but it’s far gentler. It helps redistribute the yeast in the dough, deflates some of the gas that might otherwise over-stretch the gluten, and also helps develop the gluten properly. It might seem trivial, but it’s a very important step.
The best breads I’ve ever made have used both of these techniques, and you can’t really get the same result any other way. Yes, it takes a little more time to make bread this way than with a standard straight-dough method; but if there’s one thing that breadmaking will teach you, it’s patience. Good bread takes time; and if it all tastes this good, I for one am very happy to give it all the time it needs.
Rustic Dinner Rolls
Makes 16 rolls
1 1/2 cups plus 1 tablespoon water, room temperature
1 1/2 teaspoons instant yeast, or 2 teaspoons active-dry yeast
2 teaspoons honey
16 1/2 ounces bread flour, plus extra for dusting
3 tablespoons whole wheat flour (about 1 ounce)
1/2 teaspoon salt
1. Whisk water, yeast, and honey in bowl of stand mixer until well combined, making sure no honey sticks to bottom of bowl. Add flours and mix on low speed with dough hook until a rough dough is formed, about 3 minutes. Cover bowl with plastic wrap and let sit at room temperature 30 minutes.
2. Remove plastic wrap and evenly sprinkle salt over dough. Knead on low speed for 5 minutes. If dough creeps up attachment, stop mixer and scrape. Increase speed to medium and continue to knead until dough is smooth and slightly tacky, about 1 minute. If dough is very sticky, add 1 to 2 tablespoons flour and continue mixing 1 minute. Transfer dough to a lightly-oiled large bowl and cover with plastic wrap. Let rise until doubled in size, about 1 hour.
3. Fold dough over itself in bowl, rotate bowl one quarter turn, and fold again. Rotate bowl again, and fold once more. Re-cover with plastic wrap and let rise 30 minutes. Repeat folding procedure, replace plastic wrap, and let dough rise until doubled in volume, about 30 minutes more. Oil two 9-inch round cake pans and set aside.
4. Transfer dough to floured work surface, sprinkle top with more flour. Cut dough in half with a bench scraper or knife, and gently stretch each half into 16-inch cylinders. Divide each cylinder into 8 pieces (you should have 16 pieces total), and dust top of each piece with more flour. With floured hands, gently pick up each piece and roll in palms to coat with flour, shaking off excess, and place 8 in each prepared pan, cut sides up. Loosely cover cake pans with plastic wrap and let rolls rise until doubled in size, about 30 minutes (dough is ready when it springs back slowly when pressed lightly with finger). Adjust oven rack to middle position and preheat oven to 500 degrees F.
5. Remove plastic wrap from cake pans, spray rolls lightly with water, and place in oven. Bake 10 minutes until tops of rolls are brown; remove from oven. Reduce oven temperature to 400 degrees. Using kitchen towels or oven mitts, invert rolls from both cake pans onto rimmed baking sheet. When rolls are cool enough to handle, turn right-side up, pull apart, and space evenly on baking sheet. Continue to bake until rolls develop deep golden brown crust and sound hollow when tapped on bottom, 10 to 15 minutes; rotating baking sheet halfway through baking time. Transfer rolls to wire rack and cool to room temperature, about 1 hour.
Notes:
1. Make sure you turn your oven on at least 30 minutes before baking, to make sure it’s properly hot.

