Week Thirty-Seven: Viennoiserie
I don’t know if it qualifies as a classic Viennoiserie, but for me, pâte à choux (or, choux paste) has always fallen into that same netherworld, not quite bread and not quite pastry. Undeniably, most of the items made withpâte à choux are pastries – éclairs, cream puffs, profiteroles, and the like– but the dough itself is quite bready.
Pâte à choux has a reputation for being extremely fussy, finicky, and generally difficult. And considering the multiple recipes needed for most choux-based items (for éclairs, you need pâte à choux, pastry cream, and ganache?!), it’s certainly easy to understand why the association has been made.
But once you get it down, pâte à choux is actually a simple and straightforward creature. It’s a pussycat; treat it right, and it’ll all but purr at you. Don’t get me wrong, my first batches of pâte à choux turned out as flat as pancakes. Maybe flatter. But then, I was going off a couple of recipes that offered very little in the way of real instruction, assuming a certain level of expertise that no amount of my headstrong confidence could mimic. And there certainly weren’t pictures.
I am certain that anyone (yes, even you) can make pâte à choux, if shown how to do it properly. This is my goal for today, because a freshly made choux pastry is like nothing else in the world, and most bakeries just don’t step up. Better to eat no choux than bad, stale, flat, or soggy choux. And really, a choux-less life is hardly worth living.
Once you conquer pâte à choux, you’re just a whipped cream or a ganache away from some truly excellent homemade pastries, ones that suddenly won’t seem quite so out of reach of us mere mortals anymore. But for starters, I’m giving you a recipe that needs nothing more than a sprinkling of sugar to be complete – but you’ll be shocked at how good that can be.
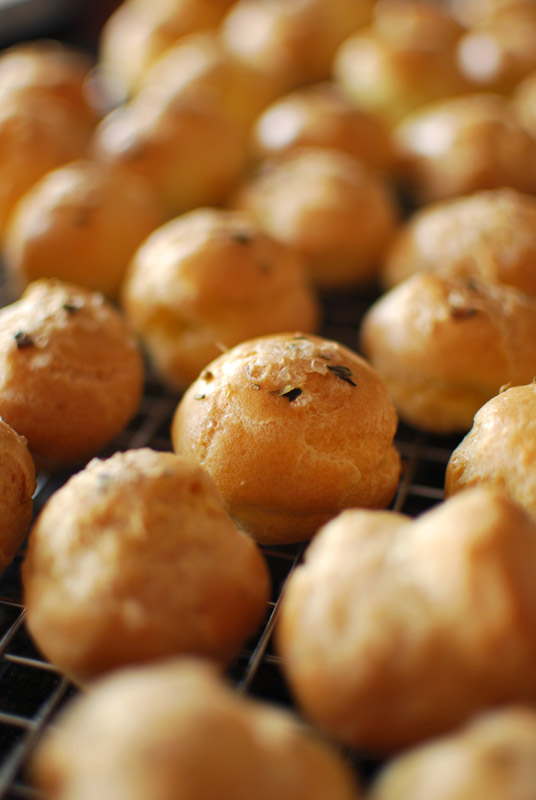
They’re called chouquettes, and are apparently common in French pâtisseries, but sadly are all but unheard of stateside. Simple and quite addicitive, they’re nothing but bite-sized puffs of pâte à choux, topped with coarse pearl sugar or miniature chocolate chips. Crunchy on the outside, tender and airy inside, they’re an ideal afternoon snack, as they’re most commonly eaten in France. If you can resist popping one or two (or ten) in your mouth, you’re a better man than I am.
My savory palate decided that the sweet faction was generally over-represented within this week’s theme, so I topped half of this batch instead with coarse salt and dried herbs, a choice that proved just as good as the pearl sugar, if a little less than authentic. The only reason chocolate chips don’t make an appearance here is because I was out of them. Still kicking myself for that one.
I do hope you attempt this recipe. The only caveat is that a stand mixer is practically required, unless you have bionic arms. I have attempted pâte à choux by hand, but it’s never quite as good. This recipe is quite long, but with something like this, the more information, the better; every step I’ve taken the time to write has a purpose, trust me. I even made a little animated movie for you; that’s how much I care! As always, I am thrilled to answer any questions anyone might have about the process.
No time like the present, so let’s get on with it!
Chouquettes; Or, Pâte à Choux (Choux Paste) For Dummies
Adapted from The Professional Pastry Chef, by Bo Friberg
Makes about 100, about 1 inch in diameter
4 ounces (about 1 cup) cake flour
5½ ounces (about 1 cup plus 2 tablespoons) unbleached bread flour
2 cups water, at room temperature
12 tablespoons unsalted butter (1½ sticks)
1/2 teaspoon salt
2 cups eggs (about 8 or 10 large), lightly beaten, preferably at room temperature
Coarse pearl sugar, miniature chocolate chips, or coarse salt, for topping
1. Preheat the oven to 425º F, and position a rack in the middle. Have all other ingredients measured out and ready to go. It is most useful to have the eggs in a measuring cup with a pour spout. Whisk the flours together, then sift to remove lumps.
2. In a medium saucepan over high heat, bring the water, butter, and salt to a full rolling boil, so that the fat is not just floating on the top but is dispersed throughout the liquid.
3. With a sturdy wooden spoon, stir the flour into the liquid, adding it as quickly as it can be absorbed. However, don’t add all the flour at once, as this can make the paste lumpy.
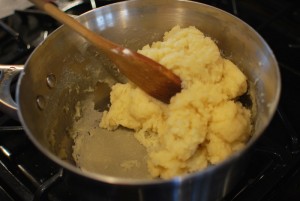
4. Reduce the heat to medium. Cook the mixture (now called a “panada”), stirring constantly and breaking up any (usually inevitable) lumps of flour by smashing them against the side of the pan with the spoon. Be sure to break the mixture up with the spoon, cooking the interior of the panada as well as the outside. Continue until the mixture forms a mass and pulls away from the sides of the pan, about 2 to 3 minutes. The goal here is to cook the starch in the flour a little, so it won’t have a floury taste, and will absorb the eggs better in the next steps. The panada will leave a coating on the inside of the pan (which is easily cleaned off by soaking in hot water for about 10 minutes). Do not scrape this coating off into the rest of the panada; it will make tough bits in the finished paste. At this point, it should look like smooth and yellow mashed potatoes.
5. Transfer the paste to the bowl of a stand mixer. Using the paddle attachment, beat at medium speed until cooled to 140º F, about 1 or 2 minutes. Try to be as exact as you can about this; you don’t want the eggs to cook when you add them (which they won’t at or under 140º F), but the warmer it is the better they will absorb. If you don’t have an instant-read thermometer, it should feel warmer than lukewarm, but not yet hot. It should not be steaming.
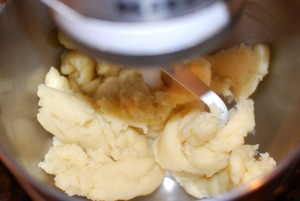
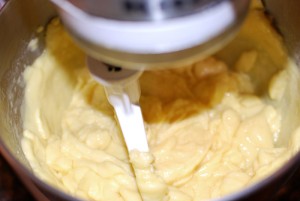
6. Turn the speed down to low. As soon the panada has cooled enough, add the eggs, about 2 at a time (or 1/4 cup). The mixture will look curdled at first, like lumpy scrambled eggs…
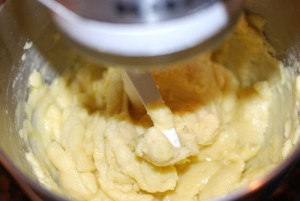
…but will come back together after beating for a few seconds.
You can increase the speed to help them incorporate more quickly; always decrease to low speed when adding the eggs, though.
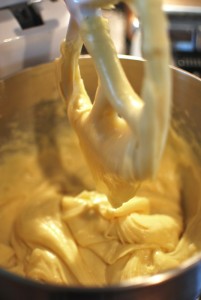
Keep adding eggs like this, until the paste has absorbed as many eggs as possible and still hold its shape.
It can be a bit runny, but should not be liquid-y. It will firm up a little after it has cooled more, but not a whole lot. When in doubt, don’t add that last egg or half-an-egg; as long as you get most of them in there, you’re okay.
7. After adding the eggs, beat the paste on high speed for a minute or two. It will cool and become shiny and glossy.
At this point, you can relax a little. The paste will keep with no problems for a bit at room temperature, or up to a day refrigerated. If you do delay in piping it out, however, make sure to have no part of the paste exposed to air (put it in a plastic zip-top bag, or leave in the bowl and press plastic wrap directly onto the surface), as an unwelcome skin will form on the top.
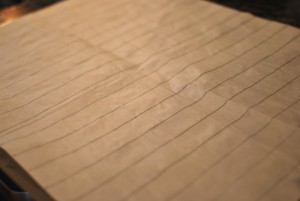
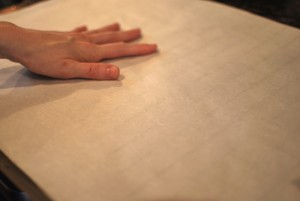
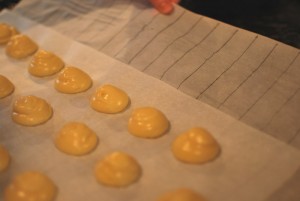
8. To shape chouquettes, or any other pâte à choux item, a piping bag is the easiest and cleanest method. If you don’t have a proper piping bag with tips, you can use a sturdy gallon zip-top bag with the corner cut off, or simply portion and shape with two spoons, or a tiny ice cream scoop. For the most even portioning, draw an even grid on a sheet of parchment as big as your baking sheet, using permanent marker or heavy pencil.
Place this your baking sheet, preferably a large one. Put a second sheet of parchment on top of the gridded one; this is what you will pipe onto. You should be able to see the grid through the top sheet.
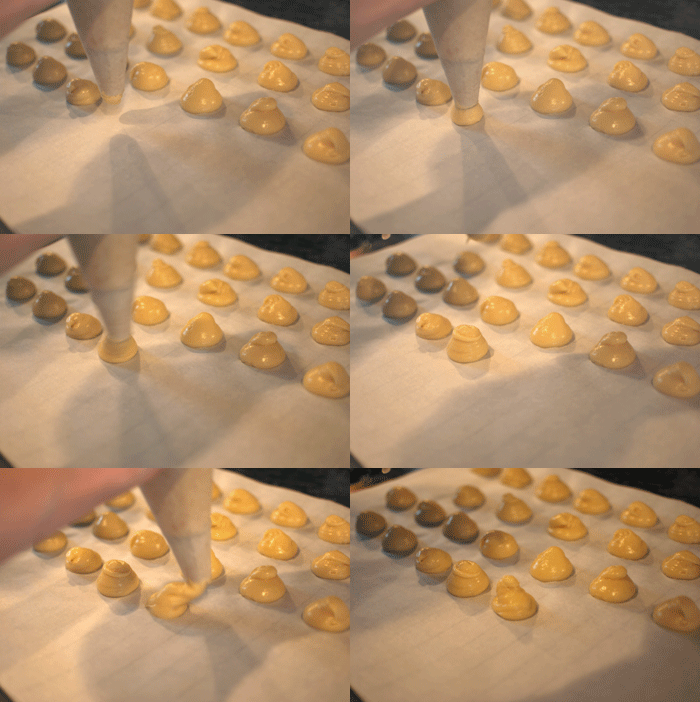
9. Transfer the paste into the piping bag, if using. Pipe the paste into little rounds, about 1 inch wide. You should need to use light pressure to make the paste come out of the bag; it shouldn’t run. When piping, make sure to hold the bag vertically, not at an angle; piping at an angle will make your choux puff unevenly. Lift the bag straight up as you pipe, to get the tallest mound possible (and therefore the best puff). Release the pressure with your hands, stopping the flow. If you’re feeling confident, give the tip a little swirl around the top of the mound, preventing the nearly-inevitable “ice cream cone” tips. You can see, in this video, the correct piping technique. The first one came out beautifully (I’m so proud!), while the second one went a little wonky. This is okay! You can fix it later.
If you have paste left over after piping (you will), just leave it in the piping bag. Don’t pipe any more out until the first batch is done, as they’ll get a skin while sitting around.
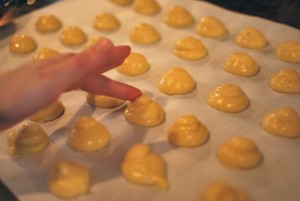
10. With a moistened fingertip, gently straighten any mounds that may have slumped over, and poke down any points sticking up (as they will burn otherwise). If you’ve used spoons to portion the paste out, you will have to poke down a fair amount of points. Do not squish the mounds down; the taller they are, the rounder and less-flat your puffs will be.
11. Slide the lined piece of parchment out from underneath, and reserve for the next batch or batches.
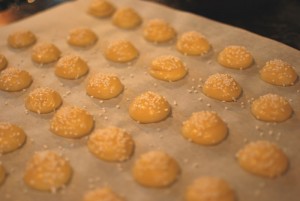
Sprinkle the tops of each mound with the pearl sugar, chocolate chips, or salt. You can press these gently into the paste, but I don’t find it necessary.
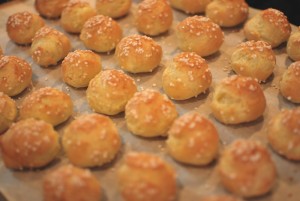
12. Bake immediately at 425º F for about 10 minutes, or until they puff up a bit, and are just beginning to turn golden. Without opening the door, reduce the temperature to 375º F, and continue baking for at least 10 to 15 minutes more. While baking, do not open the oven door at any time, for any reason! This will make them collapse, and go all flat. After baking for 20 to 25 minutes total, though, they should be okay to check on. If they look well golden-brown, they’re probably okay to proceed.
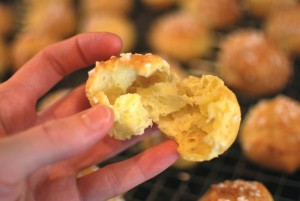
If they just look pale golden, bake them for another 5 minutes. To be sure they’re ready, pull one from the oven, and tear it open. If it looks shiny and wet, they’re not ready. If it looks dry or barely moist, it’s fine.
13. Remove the chouquettes from the oven, and quickly pierce the side of each one with a sharp knife, to release steam. At this point, for security, I usually bake them at 375º F for an additional 5 minutes; but it’s not wholly necessary. Don’t worry about overbaking pâte à choux, it’s almost impossible to do. The concern here is underbaking, as the puffs will deflate if not totally set. When in doubt, you can turn the oven off and leave them for up to an hour.
14. When done, transfer to a wire rack to cool thoroughly, or as long as you can stand. Stand back and admire your handiwork; you’ve just made pâte à choux!
Notes:
1. These will keep for several days at room temperature, in an airtight container. They will soften when stored like this, but will recrisp beautifully in a 350º F oven for 3 to 4 minutes. Alternatively, they can also be frozen and reheated for about 5 minutes.
2. You can use 9½ ounces of all-purpose flour (about 2 cups plus 2 tablespoons), if you don’t have cake and bread flour; I prefer to use the combination.
3. For a richer pâte à choux, you can use milk instead of water, or an even mixture of the two.
4. Pearl sugar can be found at some Ikea stores (seriously, I got mine there!), Amazon, King Arthur Flour, or many other gourmet shops.

