Week Forty: One More Time
The first time I made banh mi bread, I must have been some kind of busy. I don’t remember exactly what I was doing, but whatever it was, it was enough to make me forget about my rising dough not once, but twice. This is especially surprising, given my long and deeply abiding love for this particular sandwich. I must have been crazy busy.
The resultant over-fermented and over-proofed loaves were flat, dense, and generally made me cry a little. I still made sandwiches with the bread, though, which were nevertheless quite good. It was this sandwichy glory that my boyfriend referenced when he asked me, “Wait, you’re making banh mi again? I thought you were only remaking failures.” (Some men just know how to make a girl smile.) Yes, the sandwiches were a success, but I was unsatisfied with the bread; besides, any excuse I have to make banh mi again is good enough for me.
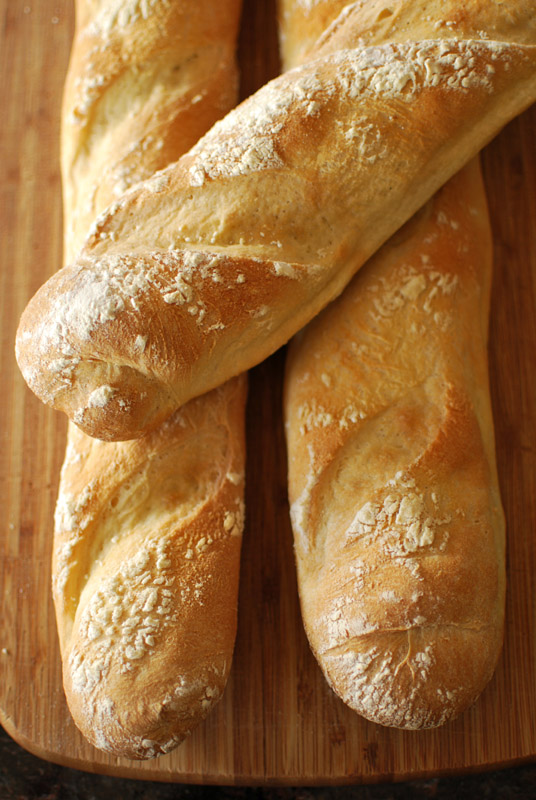
I reduced the percentage of rice flour this time, making for a less sticky bread, and also helping increase the gluten structure for an airier crumb. This batch also makes three baguettes, instead of the previous attempt’s two. You won’t complain about having extra bread to make more of these sandwiches, I can assure you.
This second try produced loaves that browned more attractively, had a more crisp crust, and rose far better (though I made darn sure to pay attention this time around while the dough was rising). This try was unmistakably better than the first time, and the overall taste was excellent, but I found the rice flavor a bit muted. If you prefer a more rice-y taste, feel free to increase the proportion of rice flour to wheat flour. I advise you not to go over one-third, though (i.e., 1 part rice flour to 2 parts wheat flour), as the gluten-free nature of rice flour will negatively affect the texture of your bread otherwise.
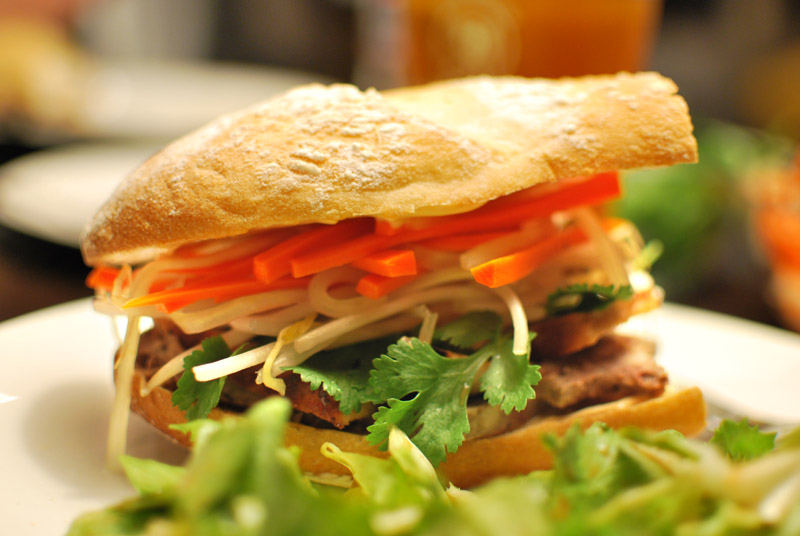
So, if the banh mi was so good on sub-par bread, how good was it on much-improved bread? Though I can’t recall the exact quotes of my dinner guests (last-minute dinner guests, even!) who joined me at the banh mi table, I do recall the words “ridiculous”, “awesome”, and “oh my God” being bandied about.
Some men just know how to make a girl smile.
Banh Mi Bread, One More Time
Adapted from The Foppish Baker and Rice and Wheat
Makes 3 baguettes
18 ounces (4 cups) unbleached all-purpose flour, divided, plus extra as needed
5 ounces (1 cup) very fine rice flour
1 tablespoon instant yeast
1 tablespoon sugar
2 1/2 teaspoons salt (1 tablespoon kosher salt)
1 3/4 cups water, at room temperature
2 tablespoons unsalted butter, melted and cooled slightly
1. In the bowl of a stand mixer, whisk together 2 cups of the all-purpose flour, all of the rice flour, yeast, sugar, and salt. Add the water and butter. Using the paddle attachment, mix at low speed until thoroughly blended, about 1 to 2 minutes.
2. Switch to the dough hook, and continue mixing at low speed. Add enough of the remaining all-purpose flour until a moderately stiff dough forms; you may need more or less than the reserved 2 cup. The dough should clear the sides of the bowl, but not be too stiff. Increase the speed to medium-low, and continue kneading for 7 to 8 minutes, or until the dough is smooth and elastic.
3. Transfer the dough to a large, lightly-oiled bowl. Cover tightly with plastic wrap, and let sit at room temperature until doubled in size, about 45 to 60 minutes.
4. Turn the dough out onto a lightly floured surface, and divide into three equal pieces. Shape each into an round ball, then into an oblong loaf shape. Cover again, and let rest for about 10 minutes. Lightly grease a large baking sheet, or line with parchment paper.
5. Working with one piece at a time, and keeping the other covered, gently press each piece into a flat oval. Starting with a long side, roll up into a long cylinder. Set aside, covered, while shaping the other piece.
6. Rolling underneath flat palms, or pulling gently as needed, lengthen each piece into a long, thin rope, about 18 to 20 inches long. Transfer carefully to the prepared baking sheet. Cover loosely with lightly oiled plastic wrap, and let rise for 45 to 60 minutes, or until doubled in size. Thirty minutes before baking, preheat the oven to 450º F, and place another baking sheet or oven-safe pan on a rack in the bottom third of the oven. Or, if you have a baking stone, use it instead, heating it with the oven.
7. Using a sharp serrated knife or clean razor blade, make 3 or 4 gentle but decisive slashes in the top of each loaf at a 45º angle, evenly spaced. Don’t press into the dough, just let the weight and sharpness of the blade cut into the dough as you pull it across the surface. If the dough deflates, let it recover for an additional 10 to 15 minutes. Spray or sprinkle the bread with water, and transfer the bread to the oven (or baking stone, if using). Bake for 5 minutes, spraying the dough with water every minute or two.
8. After 5 minutes, reduce the temperature to 400º F, and continue baking for an additional 10 to 15 minutes, or until deeply golden brown and fully baked. An instant-read thermometer should register about 205º to 210º F when inserted into the center. Remove the bread to a wire rack to cool fully before slicing.
Banh Mi (Vietnamese Pork Sandwiches)
Makes 3 to 4 sandwiches
1 loaf banh mi bread, recipe above
Banh mi-onnaise, recipe below
Pickled carrots and daikon radish, recipe below
8 ounces pork loin, cooked and sliced
4 to 6 ounces pork liver pâté, sliced
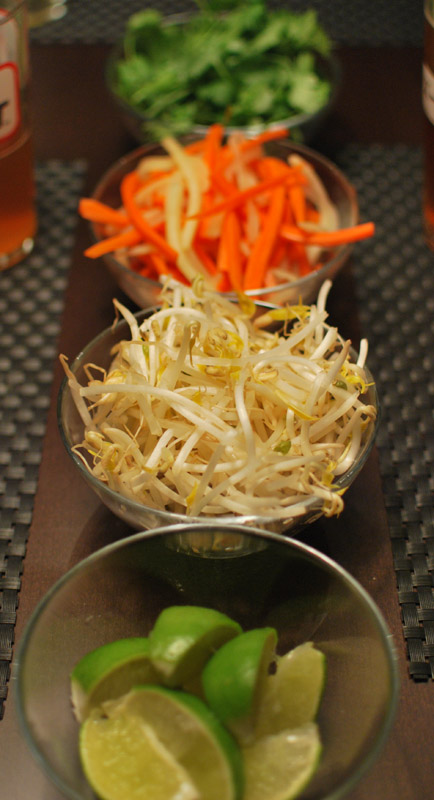
Bean sprouts, about 1 cup
1 jalapeño, sliced thinly
Cilantro leaves, to taste
Salt and black pepper, to taste
Extra fish sauce and Sriracha, to taste
Lime wedges, for squeezing
1. Slice the loaf of bread in half horizontally. Toast briefly under a hot broiler until lightly crispy.
2. Spread both cut sides of the bread with banh mi-onnaise. Top bottom half with (in order) slices of pork loin, slices of pâté, pickled carrot and daikon, bean sprouts, jalapeño, and cilantro. Add salt, pepper, sriracha, fish sauce, and lime juice to taste. Top with other half of bread, cut into 3 or 4 pieces, and serve.
Banh Mi-onnaise
Makes about 1/4 cup
4 tablespoons mayonnaise
1/2 teaspoon fish sauce
1/2 teaspoon Sriracha
1/4 teaspoon soy sauce
1. Mix all ingredients together until smooth. Refrigerate until needed.
Pickled Carrots and Daikon Radish
Adapted from Viet World Kitchen
Makes about 2 cups
For the brine:
1/2 cup sugar
1 1/4 cups distilled white vinegar
1 cup water
1/2 teaspoon whole black peppercorns
1 bay leaf
For the vegetables:
1 large carrot, peeled and cut into thin matchsticks
1/2 pound daikon radish, each no larger than 2 inches in diameter, peeled and cut into thin matchsticks
2 teaspoons sugar
1 teaspoon salt
1. Combine all the brine ingredients in a pan over medium-high heat. Heat, stirring, until all the sugar is dissolved. Remove from heat, and let steep while preparing the vegetables.
2. Place the cut carrot and daikon in a non-reactive bowl, and sprinkle with the salt and sugar. Using your hands, squeeze and knead the vegetables for about 3 minutes. They will release liquid and begin to soften. Stop kneading when you can bend a piece of daikon so that the ends touch, but does not break. Drain and rinse the vegetables with cold water in a colander. Gently squeeze excess liquid off.
3. Return the vegetables to the bowl, or place in a clean jar for longer storage. Pour the brine over the vegetables. The brine should totally cover the vegetables; if not, add extra water until covered. Place a piece of parchment paper on the surface of the brine to keep the vegetables moistened, and cover with plastic wrap, or a lid.
4. Let the vegetables sit for at least 1 hour before eating. If eating immediately, the curing action will happen faster at room temperature. If eating within a day or two, they should be refrigerated. They will keep, refrigerated, for up to 4 weeks.
Notes:
1. For the bread dough, be sure to use the finest-milled rice flour you can find. Bob’s Red Mill is a good and widely-avaliable choice; Arrowhead Mills is a bit coarser. Any Asian market should have at least one option.
2. It’s not necessary to use the pickled vegetables, and the banh mi-onnaise can just as well be switched for regular mayonnaise. But they do lend a bit of authenticity to the flavor; proceed at your discretion.


