Week Thirty-Two: Sandwich Breads
I have a confession to make. More of an admission, actually, since there’s no real shame involved, but up until yesterday, I’ve been operating with only one bread-centric cookbook. That’s right, I don’t own anything by Rose Levy Berenbaum, Dan Lepard, Michael Suas, or even Nancy Silverton. I still don’t know the supposed glory of artisinal bread with only 5 minutes work each day. But what I do now have is Maggie Glezer’s much vaunted book, and Peter Reinhart’s magnum opus.
You guys, how did I go so long without them?! I stayed up far too late last night reading those books, getting excited about bread all over again, itching to try out new recipes, being frustrated at my mortal limitations (can’t I bake everything at once?), and remembering why I started this project in the first place.
One of the most exciting things I read was from Peter Reinhart, in his discussion of the Pain à l’Ancienne technique pioneered by Philippe Gosselin (no relation). Not so much recipe as method, it involves making the dough with ice cold water, rather than warm or hot. Now, this sounds like it might kill the yeast, but I know those little guys can survive in my freezer at 0° F, so 40° F is just fine.
One word of advice, though: Chef Reinhart and I both use instant yeast, which is a bit more hardy than active-dry, and much more resiliant than fresh yeast. It also takes more time to activate and start growing than does active-dry, but is faster to grow once it does start, both of which attributes are extremely desirable in this application. I think active-dry would work well enough, but the best results would be from instant; for this recipe, I highly recommend picking up some instant yeast.
What this technique accomplishes is that it retards the yeast activity (they basically stay dormant in such cold temperatures), allowing the water to activate production of enzymes in the flour. These enzymes act as powerful and natural dough conditioners, making your dough easier to work with, and making the final bread taste much better and have much better texture than it would otherwise. Essentially, it’s a very long autolyse, without having to worry about the dough over-fermenting. It’s genius.
And while I can’t yet speak for its effect on baguettes or other such artisanal bread, I can tell you that it worked amazingly well on these pitas. This pita recipe is one I’ve been dying to try since I saw it featured on Smitten Kitchen, originally from Rose Levy Berenbaum’s The Bread Bible. Having already made whole wheat pitas, I wanted to try my hand at something a little softer and less hearty.
Yes, this is a lot of effort. But it’s absolutely worth it. The difference between these homemade pitas and store-bought ones is like the difference between a real French butter croissant and a cardboard box. There’s simply no comparison. Not having tried the original recipe as written, I can’t very well vouch for that quality, but with this pain à l’ancienne technique, they were stunning.
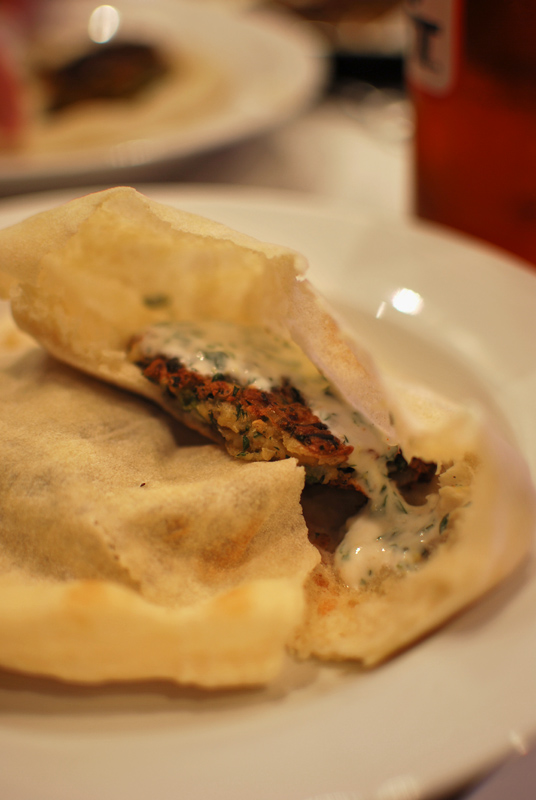
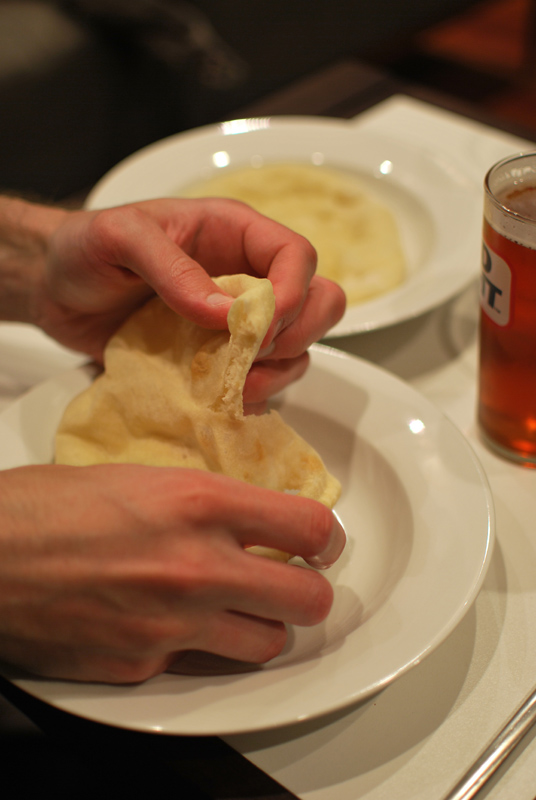
Beautiful pale cream in color, soft, but with enough of a pull to let you know the gluten is there, these breads will happily cradle or be rolled around any sandwich filling you like. Be careful not to roll these too thinly (as I did), as the thinnest parts won’t puff properly, but will instead simply crisp in the high heat. Many of mine remained firmly flat in the middle because of this. Despite this, they were absolutely some of the best pitas I’ve ever had, certainly good enough to rival those of many Middle Eastern restaurants I’ve eaten in.
To accompany these pitas, I made that delicious classic, falafel, but have used a somewhat non-traditional baked version here. They were just wonderful, stuffed inside those tender pockets, topped with a generous spoonful of cold yogurt-mint sauce. I hope you enjoy them as much as I did!
Pita Bread
Adapted from The Bread Bible, by Rose Levy Berenbaum, via Smitten Kitchen
Makes 8 to 12 pitas
16 ounces (3 cups plus a scant 1/4 cup) unbleached all-purpose flour
2 teaspoons salt
2 teaspoons instant yeast
2 tablespoons olive oil
1 1/4 cups water, ice cold (40° F, see note 1 below)
1. In the bowl of a stand mixer, whisk together the flour, salt, and yeast. Add the remaining ingredients. Using the dough hook, mix on low speed until all the flour is moistened, about 1 minute. Increase the speed to medium, and knead for 7 to 8 minutes. The dough should clear the sides of the bowl, and should be very soft, smooth, and just a little sticky to the touch. Add a little extra flour or water if necessary, during the kneading process.
2. Using an oiled or nonstick spatula, scrape the dough into a large bowl, lightly greased with cooking spray or oil. Press the dough down and lightly spray or oil the top of it. Cover tightly with plastic wrap, and refrigerate immediately. Chill the dough overnight (or up to 3 days), checking periodically and pressing it down if it starts to rise. Two hours before shaping, take the bowl out of the refrigerator, and let come to room temperature before proceeding. If the dough starts to rise more than double its original size, punch down and proceed.
3. Preheat the oven to 475° F one hour before baking. Position an oven rack at the lowest level, and place a baking stone, cast-iron skillet, or baking sheet on it before preheating.
4. Turn the dough out onto a lightly floured surface. Divide the dough into 8 to 12 even pieces. Working with one piece at a time, keeping the rest covered, shape each piece with lightly floured hands into a ball, and then flatten slightly into a disk. Cover the dough with oiled plastic and allow to rest 20 minutes at room temperature.
5. After the dough has reseted, roll each disk into a circle just under 1/4 inch thick. Allow them to rest again, uncovered, for 10 minutes before baking.
6. Quickly place 1 piece of dough directly on the preheated baking stone, skillet, or baking sheet, and bake for 3 minutes. The pita should be completely puffed, but not beginning to brown. The dough will not puff well if it is not moist enough. See how the pita puffs, then, if necessary, spray each remaining piece with water and allow to rest 2 to 3 minutes before baking. If the pitas still don’t puff, spritz each piece again and knead until smooth and moist. Flatten each piece into a disk, and allow to rest 10 minutes before re-rolling and resting again, as in Step 5.
7. Proceed with the remaining dough, baking 3 or 4 pieces at a time if using a stone or baking sheet. Transfer the baked pita breads to a clean towel, and wrap loosely to help them stay soft and warm. Between batches, allow the oven to reheat for 5 minutes. The pitas can be reheated for about 30 seconds in a hot oven before serving.
Bonus recipe!
Baked Falafel
Makes 10 large or 20 small falafel
Adapted from Chow Vegan
For falafel:
1 (15 ounce) can chick peas
1/2 medium yellow onion, finely chopped
3 green onions, chopped
3 garlic cloves, minced
3 tablespoons fresh parsley, minced
3 tablespoon fresh mint, minced
3 to 4 tablespoons olive oil
1 teaspoon lemon juice
1 teaspoon coriander seeds, crushed or ground
1 teaspoon cumin seeds, crushed or ground
1/2 teaspoon cayenne pepper, or to taste
2 tablespoons all-purpose flour
1 teaspoon baking powder
Salt and pepper to taste
For yogurt sauce:
1 cup plain yogurt
Zest from 1 lemon
1 tablespoon fresh mint, minced
Salt and pepper to taste
1. Preheat oven to 375º F. Drain and rinse the chick peas. Put in a large bowl and smash with a fork. Add the remaining falafel ingredients and mix well. The mixture will be loose. Form into balls, packing tightly, and flatten slightly. Place on an oiled or parchment-lined sheet pan.
2. Bake at 375º F for 10 to 15 minutes on each side, until nicely browned. Alternatively, the falafel can be cooked in a nonstick pan on the stovetop, over medium-high heat. Use a little extra olive oil to promote crisp, brown edges. Drain on paper towels before serving. This method is a bit faster, and can be done while the pitas bake.
3. For the yogurt sauce, mix all ingredients together and chill until ready to serve with falafel and pitas.
Notes:
1. To chill the water for the dough, add 5 or 6 ice cubes to the water, and let stand for at least 2 minutes. Remove the ice cubes, and make sure the measurement is still accurate.
2. For a whole wheat version, it’s recommended to use white whole wheat flour in place of all the all-purpose flour. In this case, you should add an extra 1/4 cup water (1 1/2 cups total). If you can’t find white whole wheat, you can use regular whole wheat, but only substituting for half of the all-purpose flour. The best results in this case will come from finely grinding the whole wheat flour for abour 5 minutes in a food processor before using.
3. The pitas can be cooked on a stove top, though it’s faster in the oven. To cook the pitas on the stove, preheat a griddle or cast-iron skillet over medium-high heat. Lightly grease the surface and cook the pitas one at a time. Cook for about 20 seconds, then turn the dough over and cook for 1 minute, or until big bubbles appear. Turn the dough again and cook until the dough puffs up. If the dough begins to brown, lower the heat. The entire cooking process for each pita should be about 3 minutes.


